Archives give you real-time insight into every interaction and action. They also provide valuable data about your visitors and guide you on what adjustments you need to make to increase the efficiency of your chatbots.
You can access your Archives from the left-side panel in the ChatBot dashboard.
Search your archives
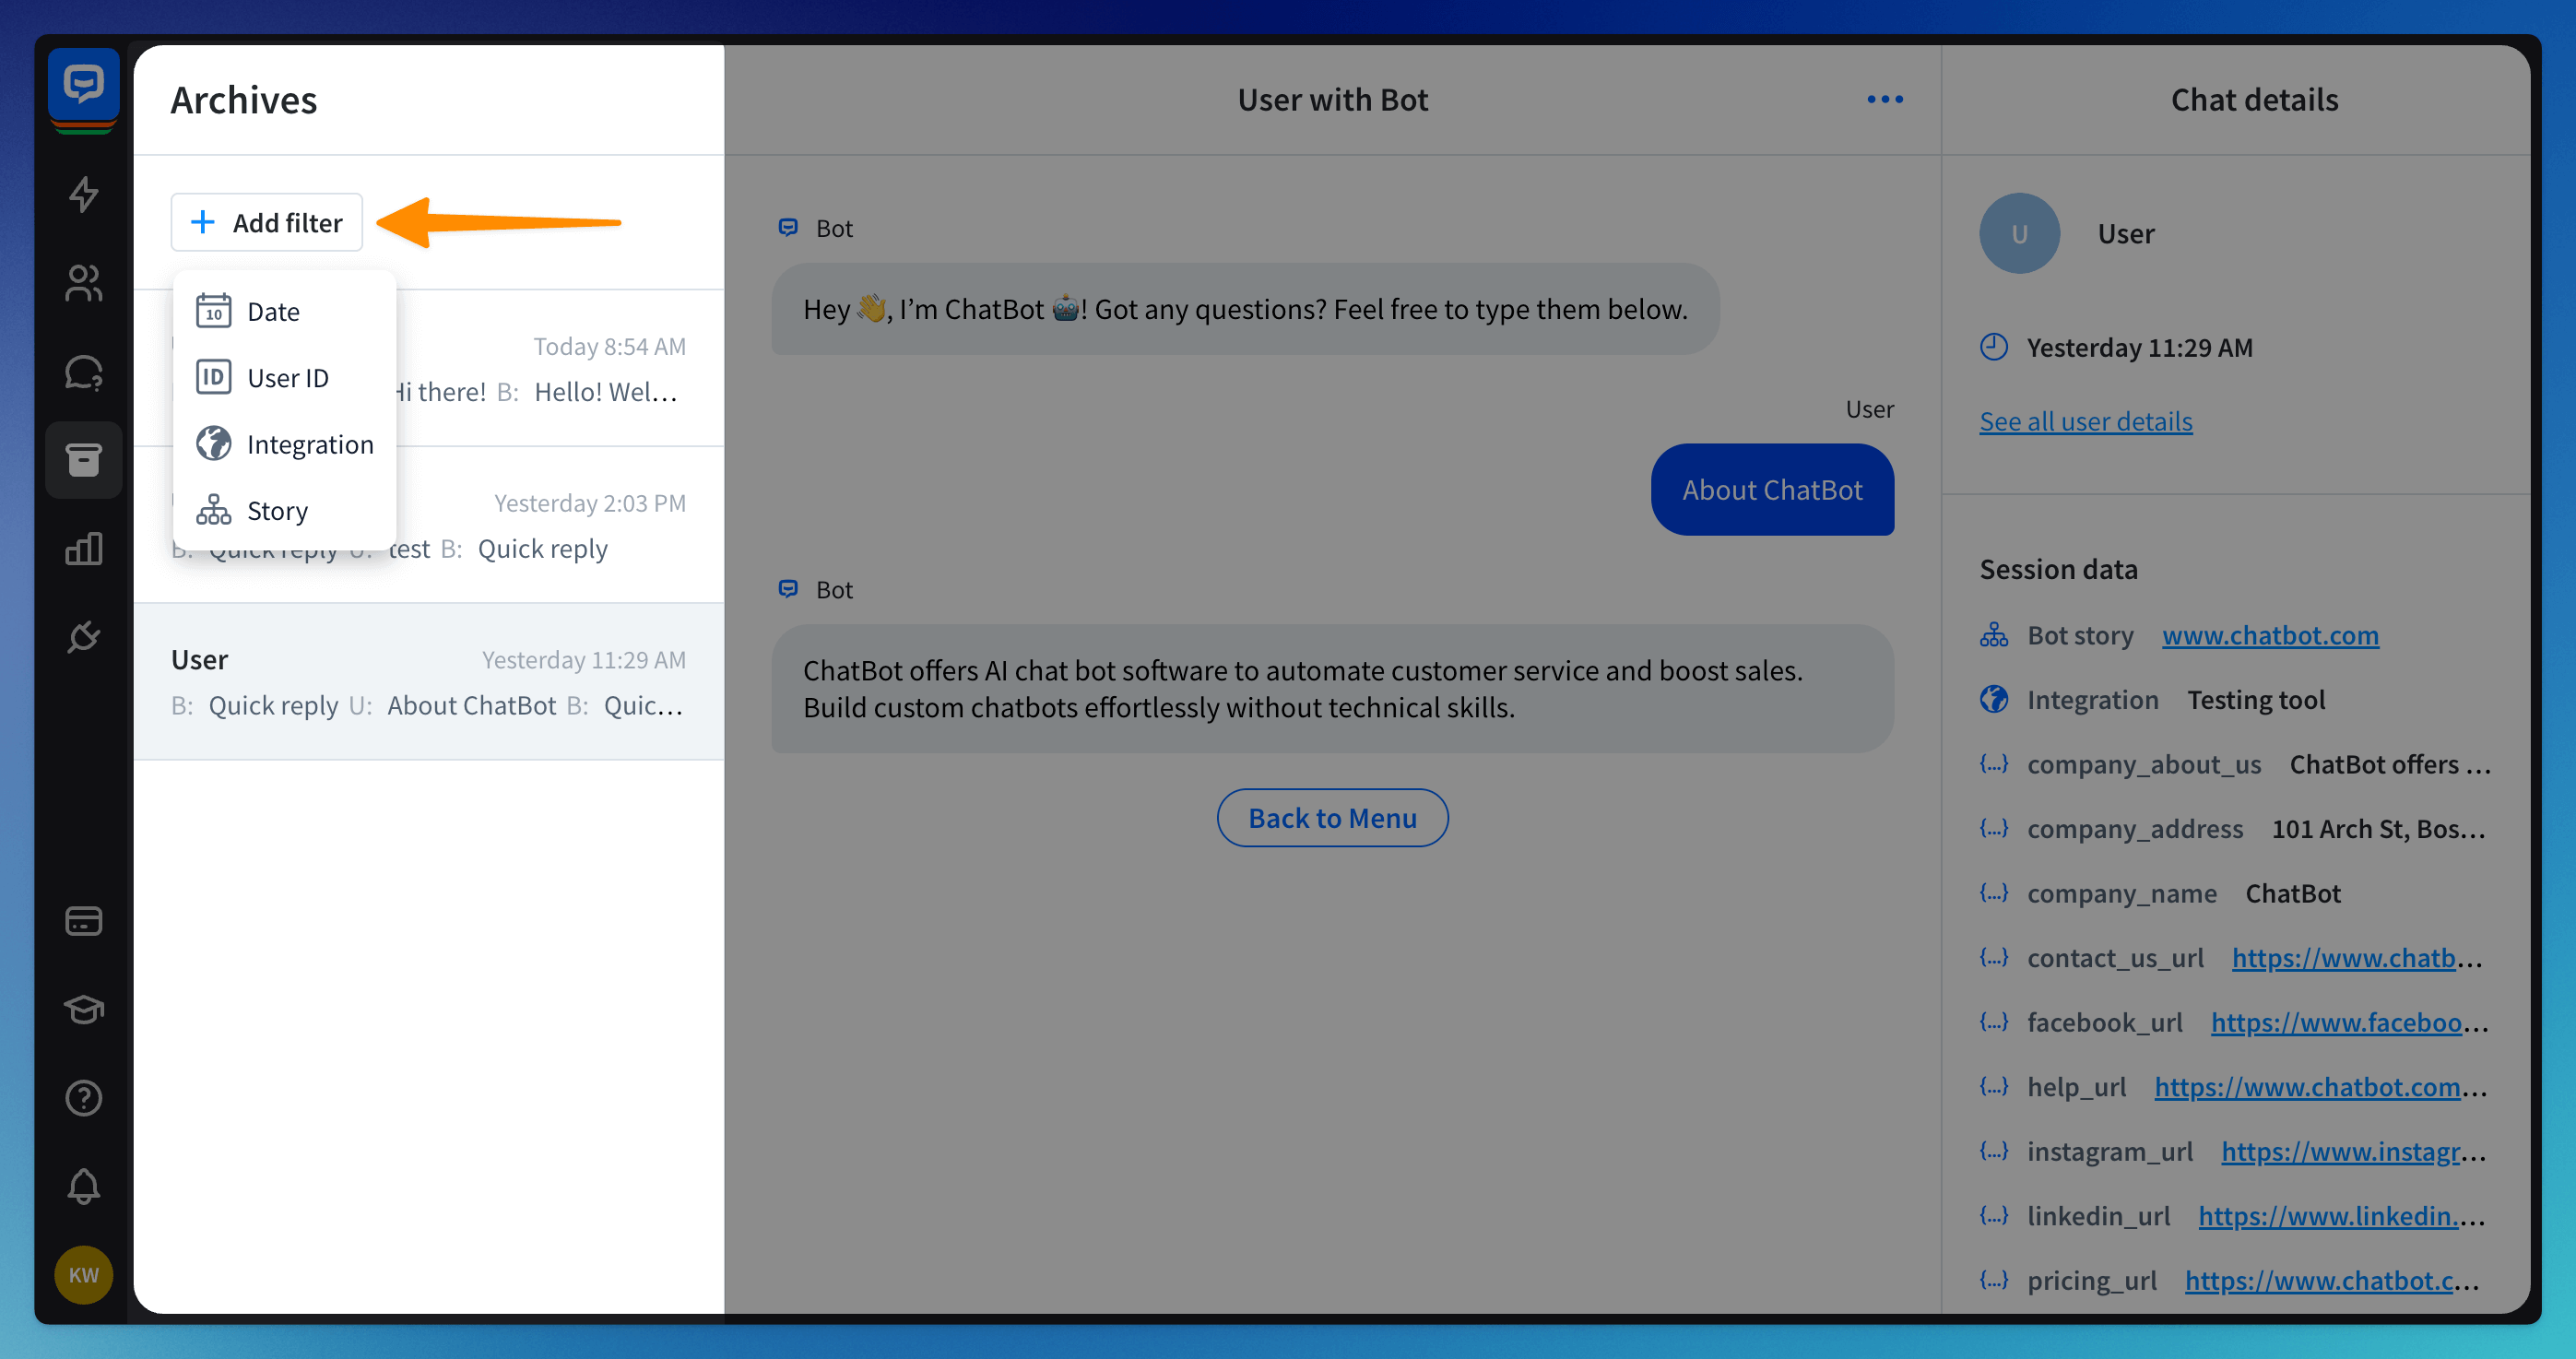
In Archives, all chats are sorted chronologically. If you want to find specific information, use filters.
-
Date — Find all chats within a specific time frame.
-
User ID — Find all past chats with a user with a specified user ID.
-
Session ID — Find a specific chat based on its session ID.
-
Story — Find all chats that occurred with a selected chatbot.
-
Integration — View all chats that occurred with a chosen integration.
Archives show all chats by default. Click on the + Add filter to customize the view. Choose from the available filters and combine conditions to display all relevant chats.
Chats preview
Besides the full content of the original chat, you can preview:
-
collected attributes
-
which interactions and actions were triggered during the chat (you need to enable the Debug mode for this)
-
the chat parameters in the JSON format
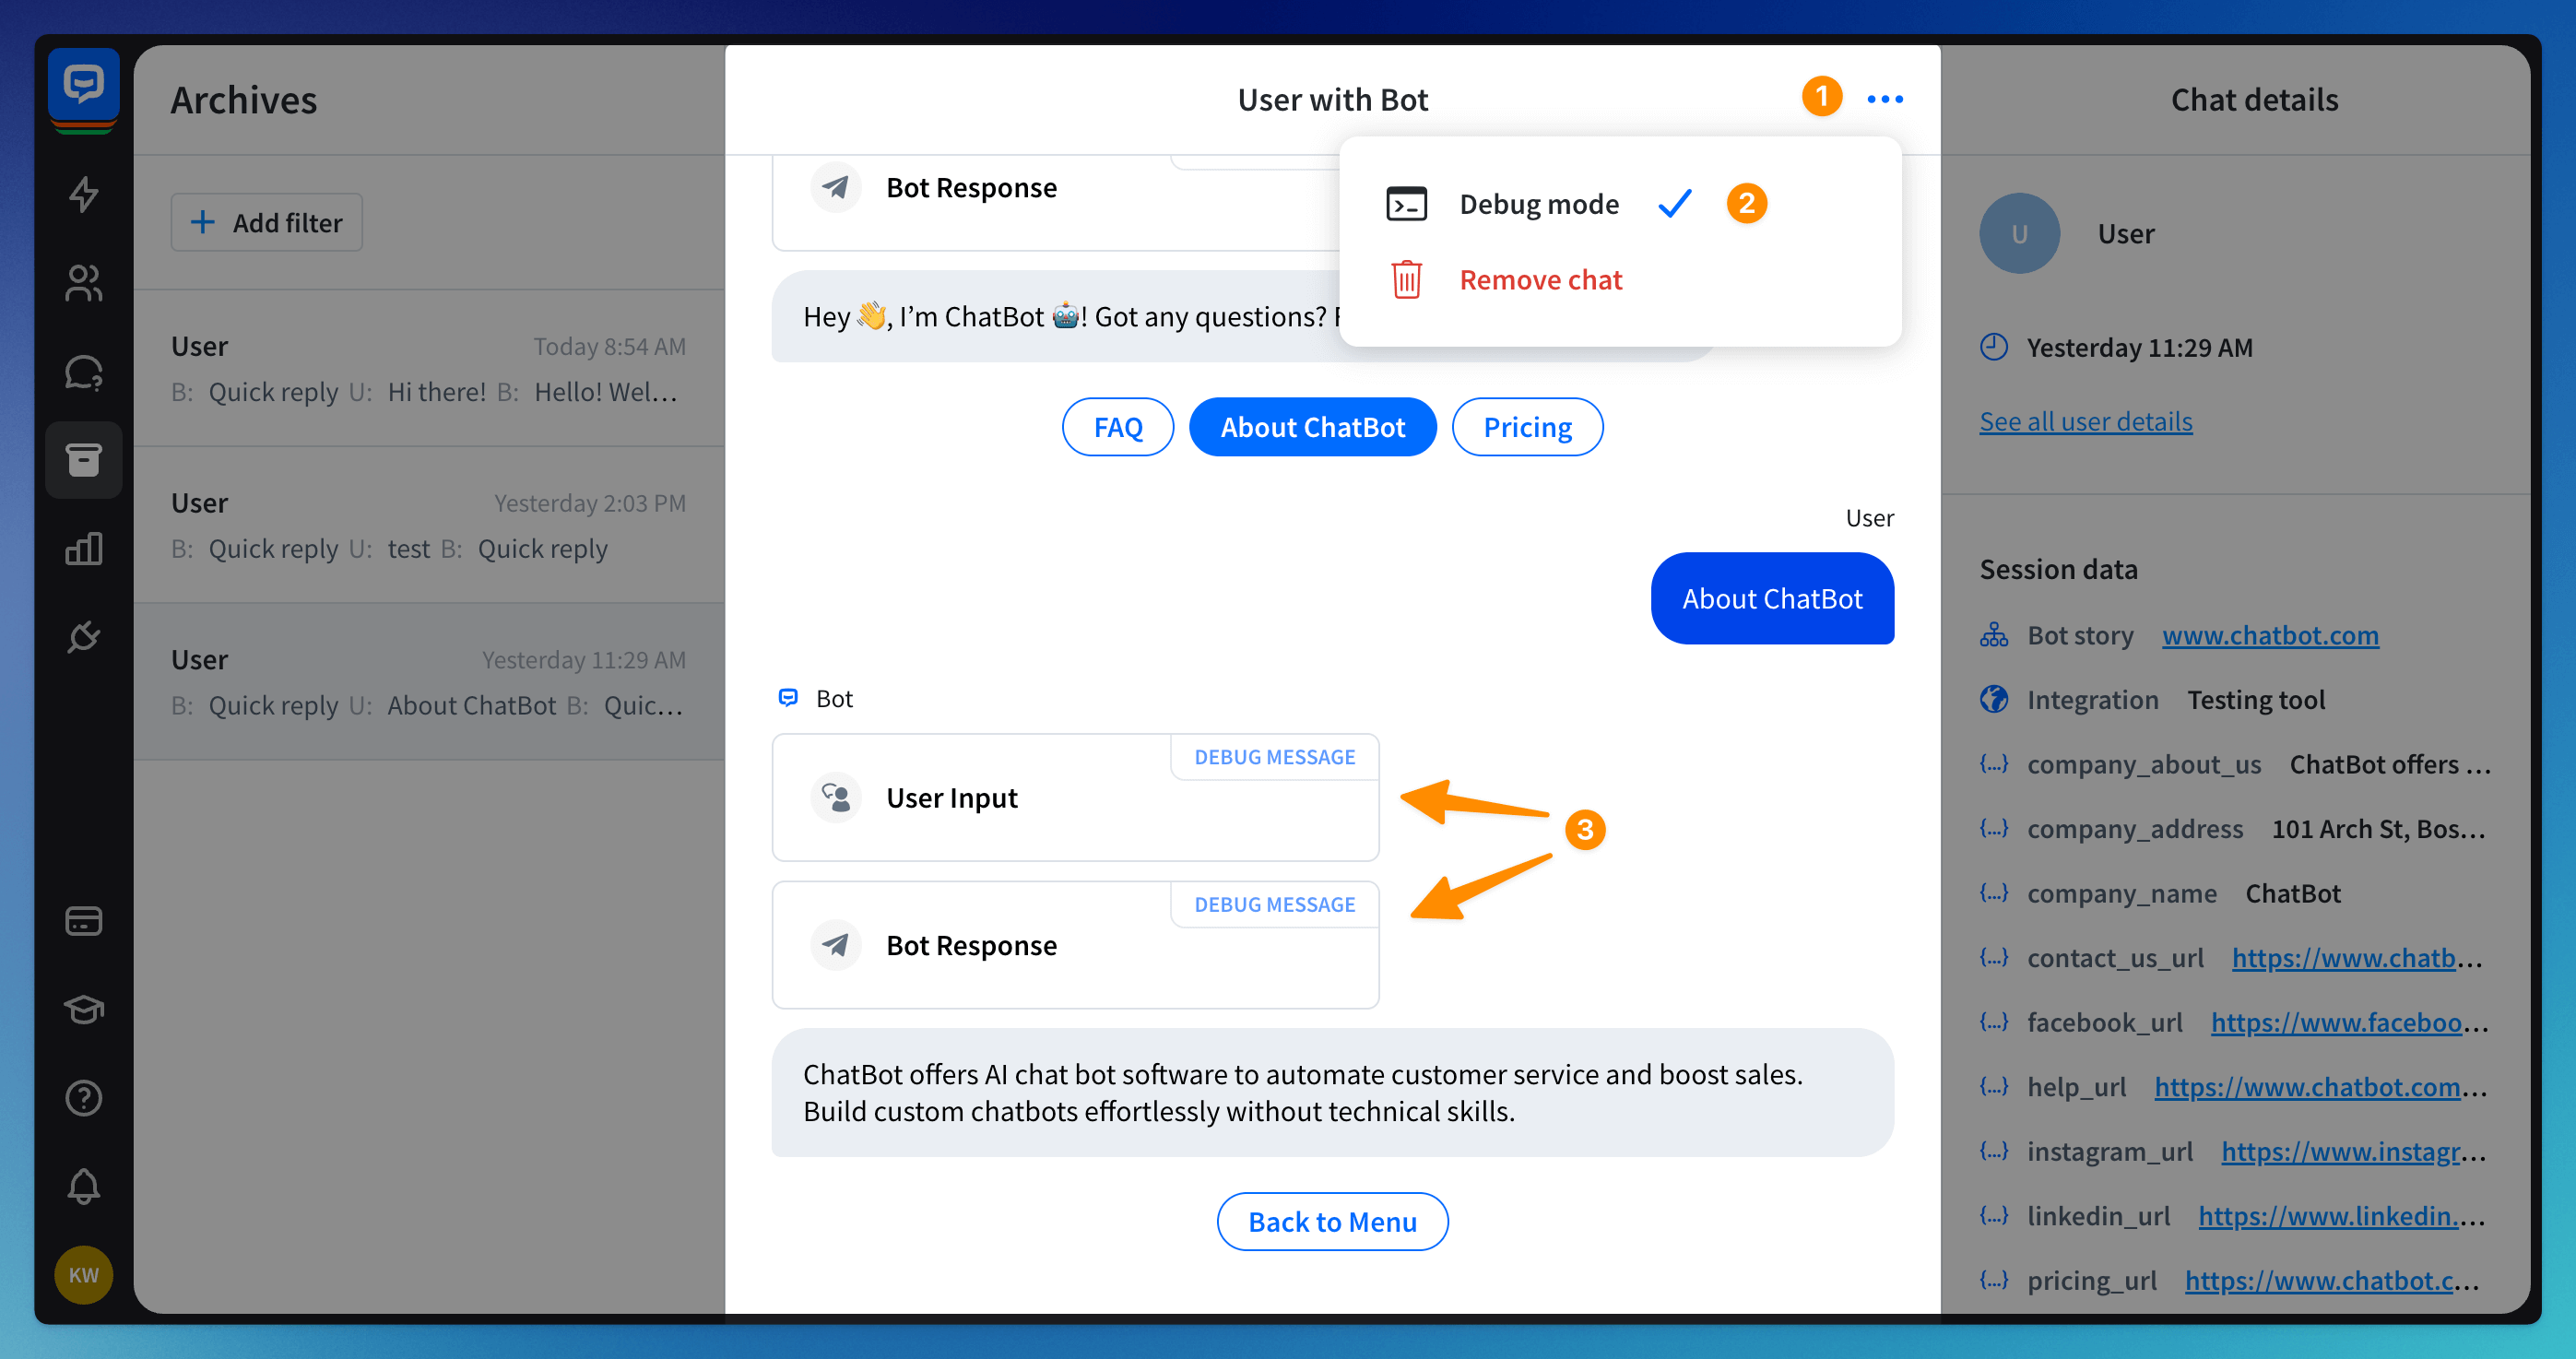
Ensure all the fields within actions are filled correctly, and the user can fill in all the necessary information while chatting with your chatbot. If not, a red DEBUG MESSAGE will be displayed.
The bot will return an error message when it is missing the configuration or user data to perform the action. If you view the chat parameters in JSON format, you can see more details about the error.
Interactions
In the Debug mode, you can see all interactions your bot triggered during the chat. Available to use are:
-
Basic interactions: Start Flow, User input, Bot response, Fallback
-
Filter blocks
-
Attachment input blocks along with the type of attachment. The file is accessible under a URL address.
-
Flow blocks
Actions
In the Debug mode, you can see all actions your bot triggered during the chat. Some actions might be followed by the Success or Failure statuses, which indicate if the action was performed correctly.
ChatBot native actions available to use are:
-
actions used to navigate the bot flow: Go to step, A/B Test, Backtracking along with the chosen option, Close chat
-
contextual FAQ
-
Add to segment, Delete from segment along with the name of the segment
-
Webhook with the webhook’s name
-
Set attribute shows the attribute with the assigned value
-
Question with the Success or Failure status
-
AI Assist indicates the response was provided by the AI model
-
Zapier represents passing information to the destination app via Zapier
LiveChat actions
-
Create ticket for LiveChat shows the LiveChat ticket details: Subject and the user’s e-mail address
-
Transfer chat shows whether the chat was transferred within the same LiveChat group or to another group in LiveChat. The transfer status is displayed below - Success or Failure.
-
Mark goal shows the goal ID that has been achieved.
-
Tag chat shows the tag’s name applied to the chat.
-
Send transcript shows the e-mail address that the chat transcript is forwarded to.
Shopify actions
-
Show products along with the gallery of products
-
Product availability displays the matched items’: ID, title, price, product status, image, and product URL. The action status is displayed below - Success or Failure.
-
Order status displays about the order: ID, fulfillment status, financial status, postal code, and order URL
Freshdesk actions
-
Create ticket for Freshdesk shows: ticket subject, user’s e-mail address, priority, description - the user’s message
-
Add contact for Freshdesk shows: contact name, and the e-mail address
Zendesk action
Create ticket for Zendesk shows the Zendesk ticket details: subject, user’s e-mail address, priority, and description
HelpDesk action
Create ticket for HelpDesk shows the HelpDesk ticket details: subject, requester name, user’s e-mail address, tags, priority, and description
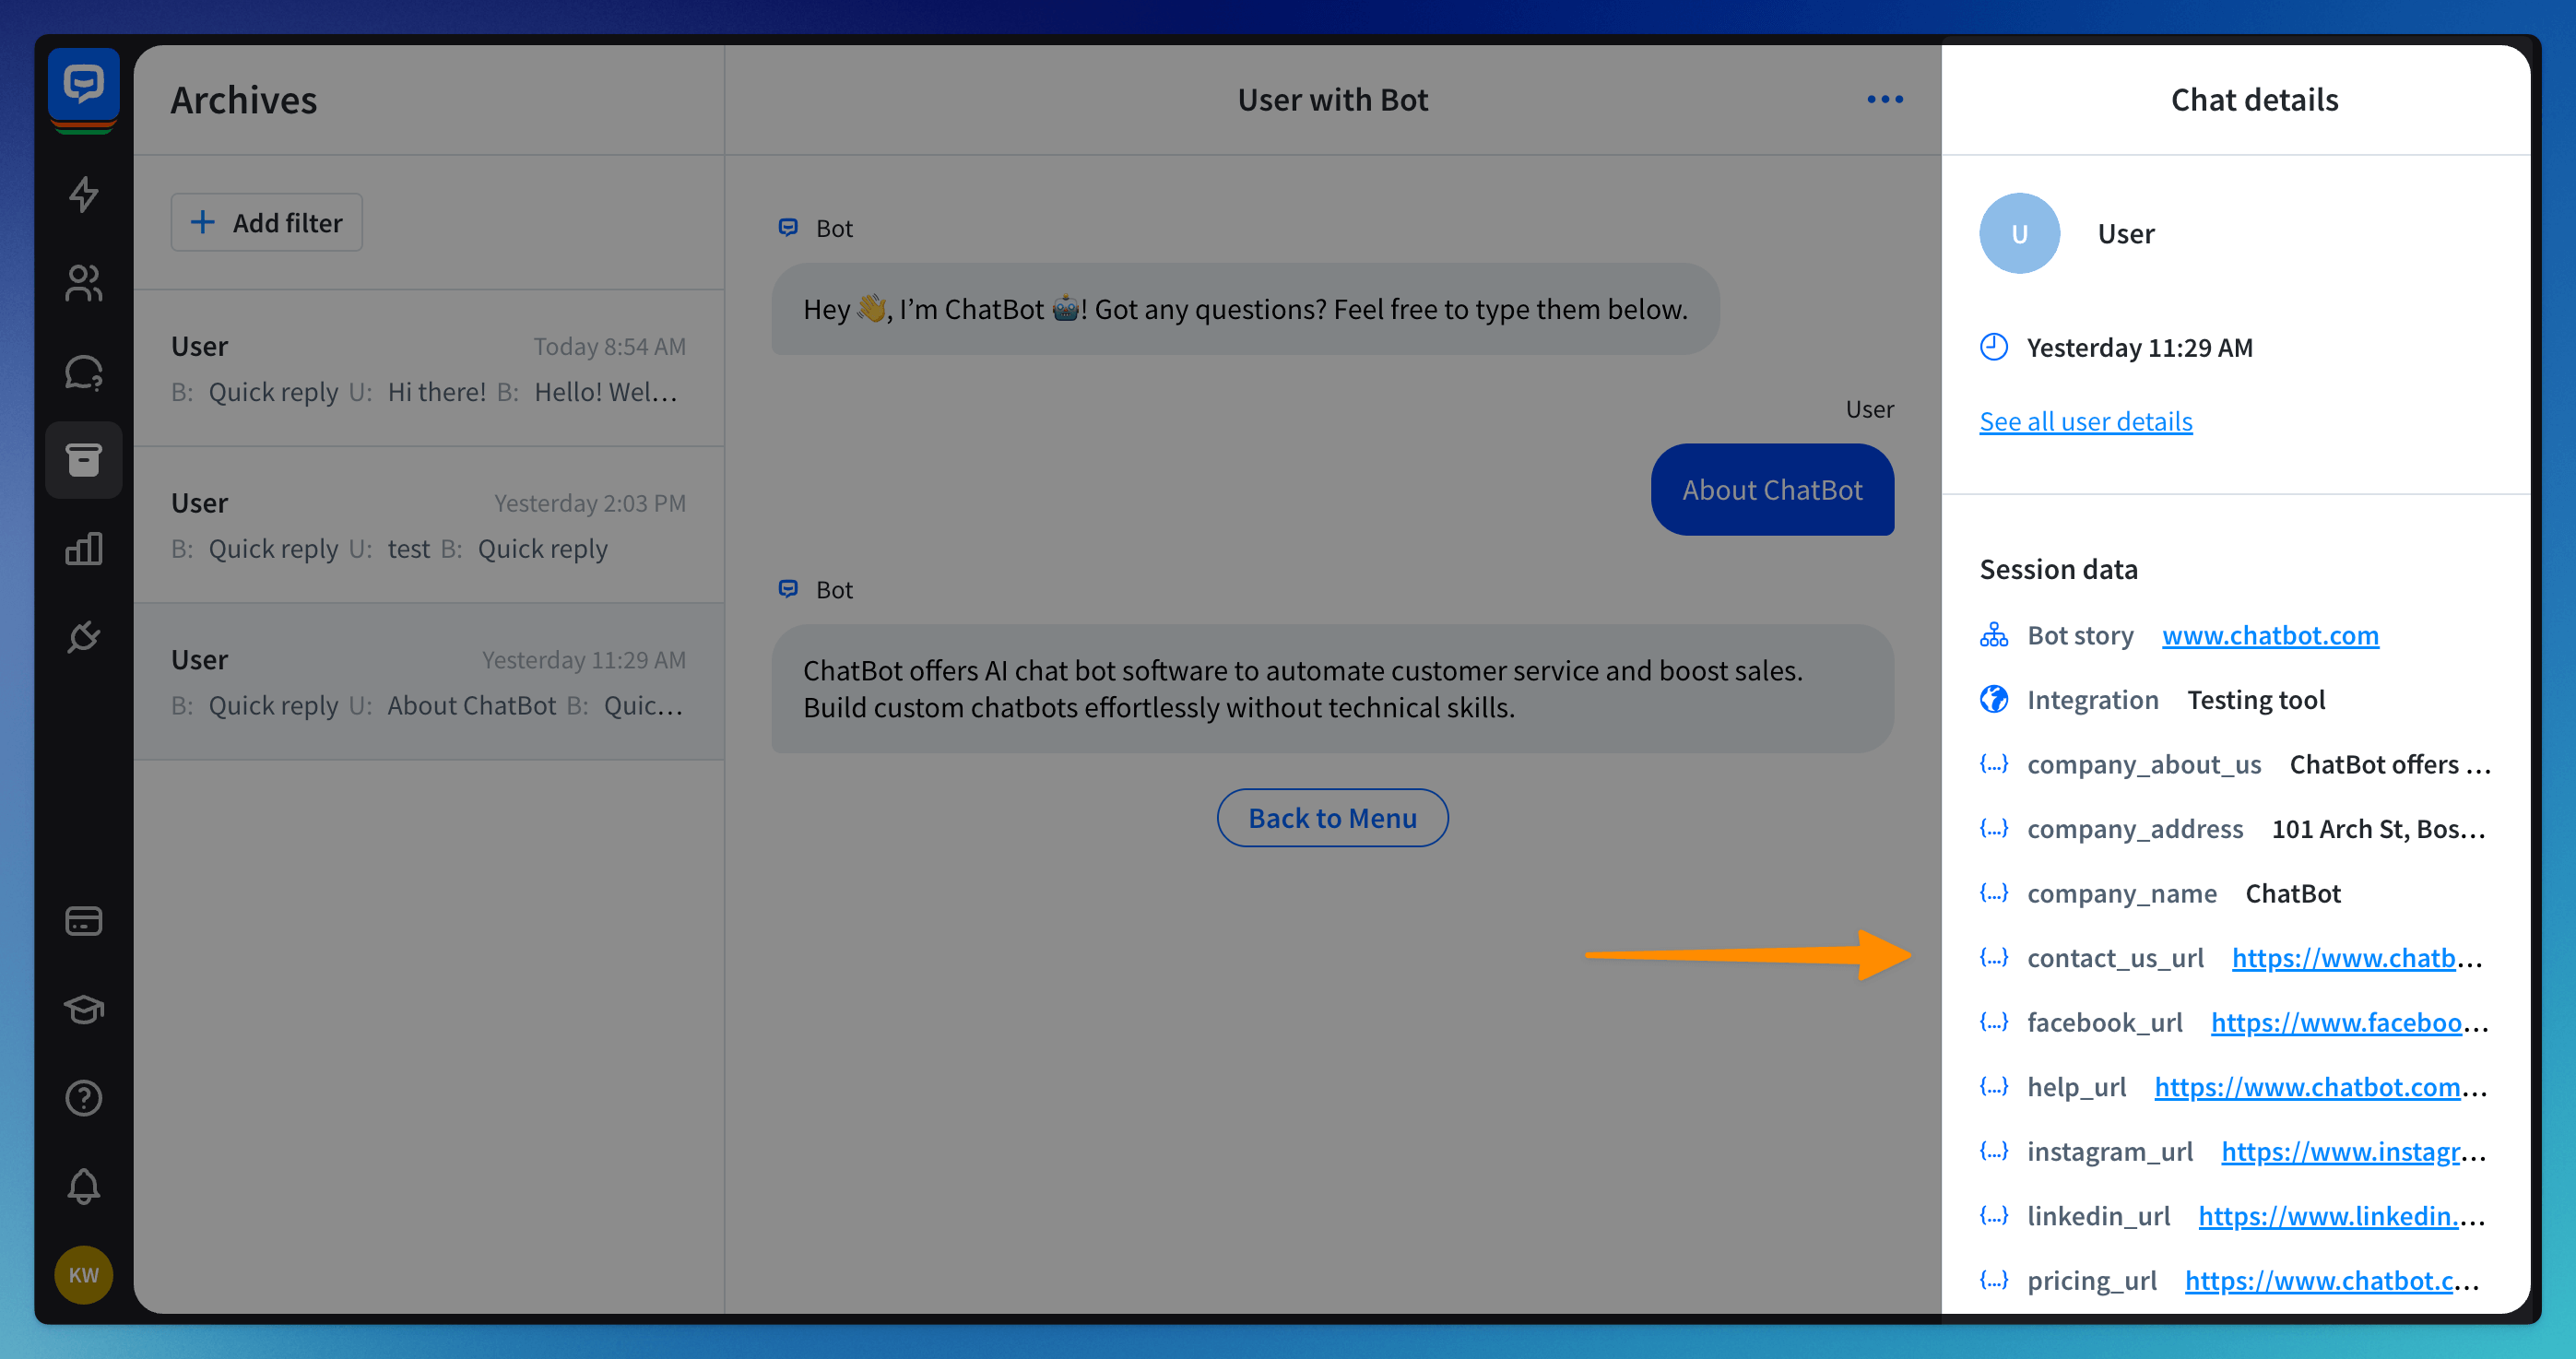
Chat details
On the right panel, you can see the chat details. That includes information about the user and the date and time of the chat. You can go directly to the user details in the Users tab by clicking See all user details.
The Session data section shows information gathered when the chat started, along with the details collected from the user during the chat.
Read more:
