The native ChatBot integration for Zendesk allows your customers to create Zendesk tickets while conversing with your chatbots.
Zendesk is an email-based ticketing application that helps businesses manage ticket communication. The software gathers customer requests submitted through multiple channels, including email, live chat, social networks, and chatbots, and allows you to answer them efficiently from one place.
How to integrate ChatBot and Zendesk
-
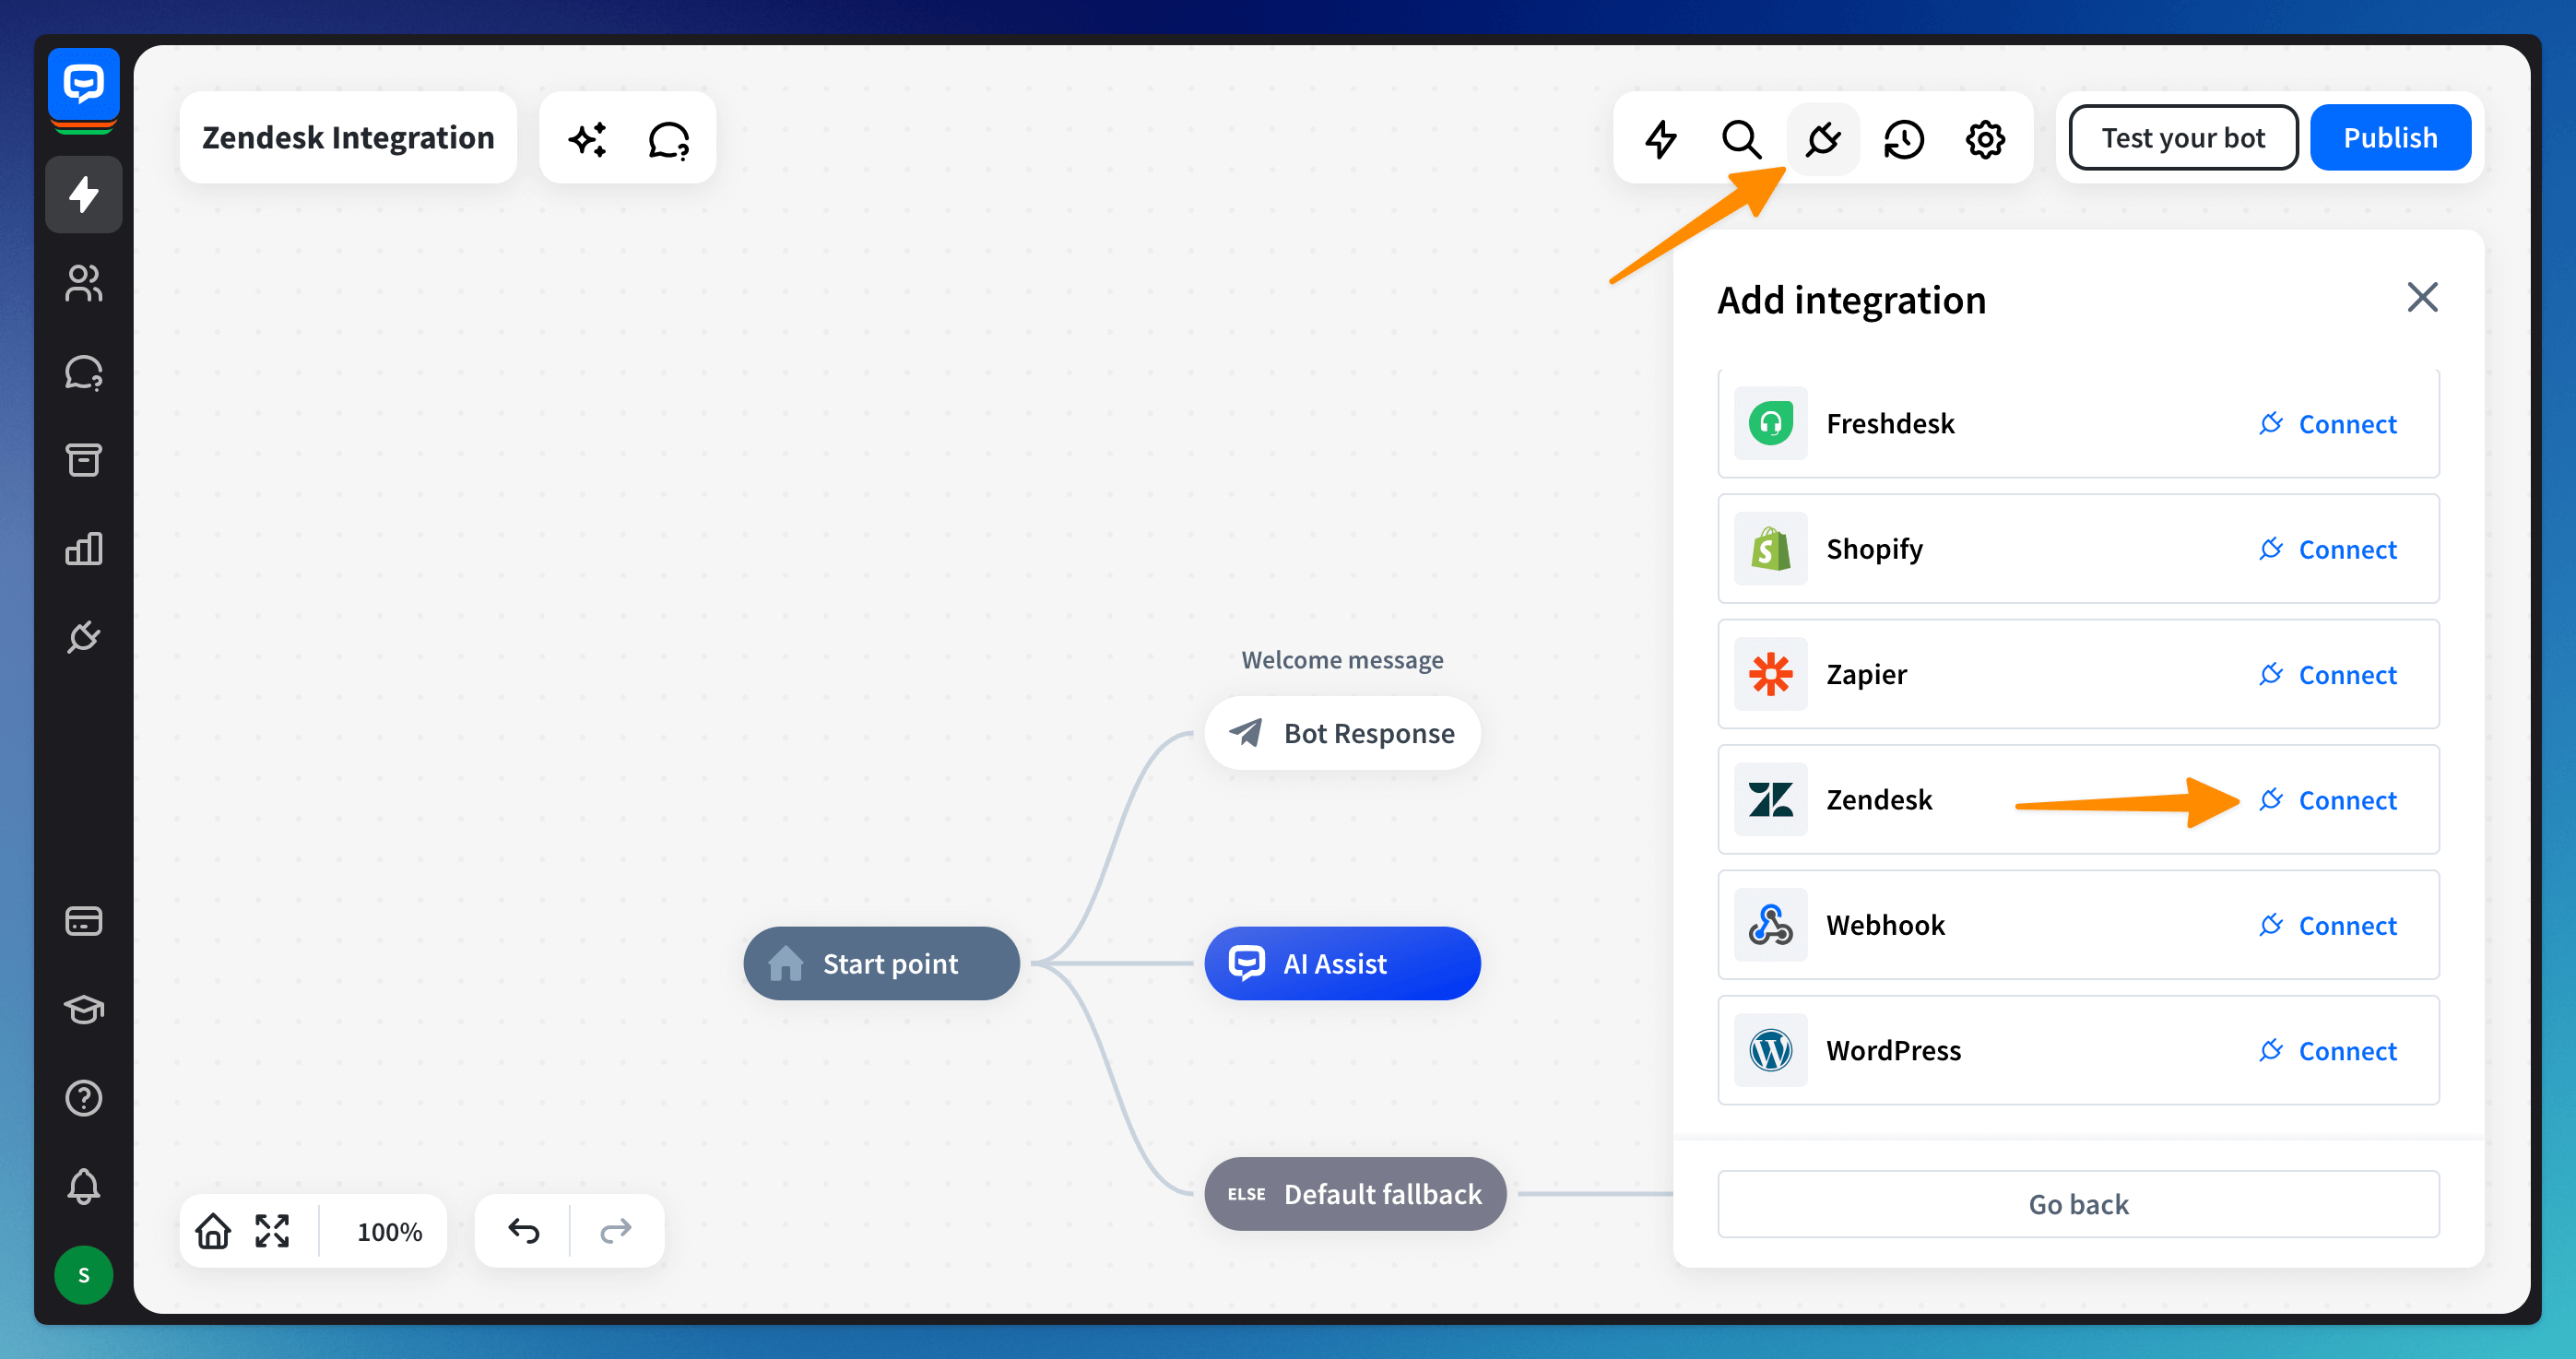
Go to your bot and open the Integration menu. Choose the Zendesk integration with the Connect button.
-
Enter your Zendesk account name and click the Connect with Zendesk button. A new active connection will appear on the list.
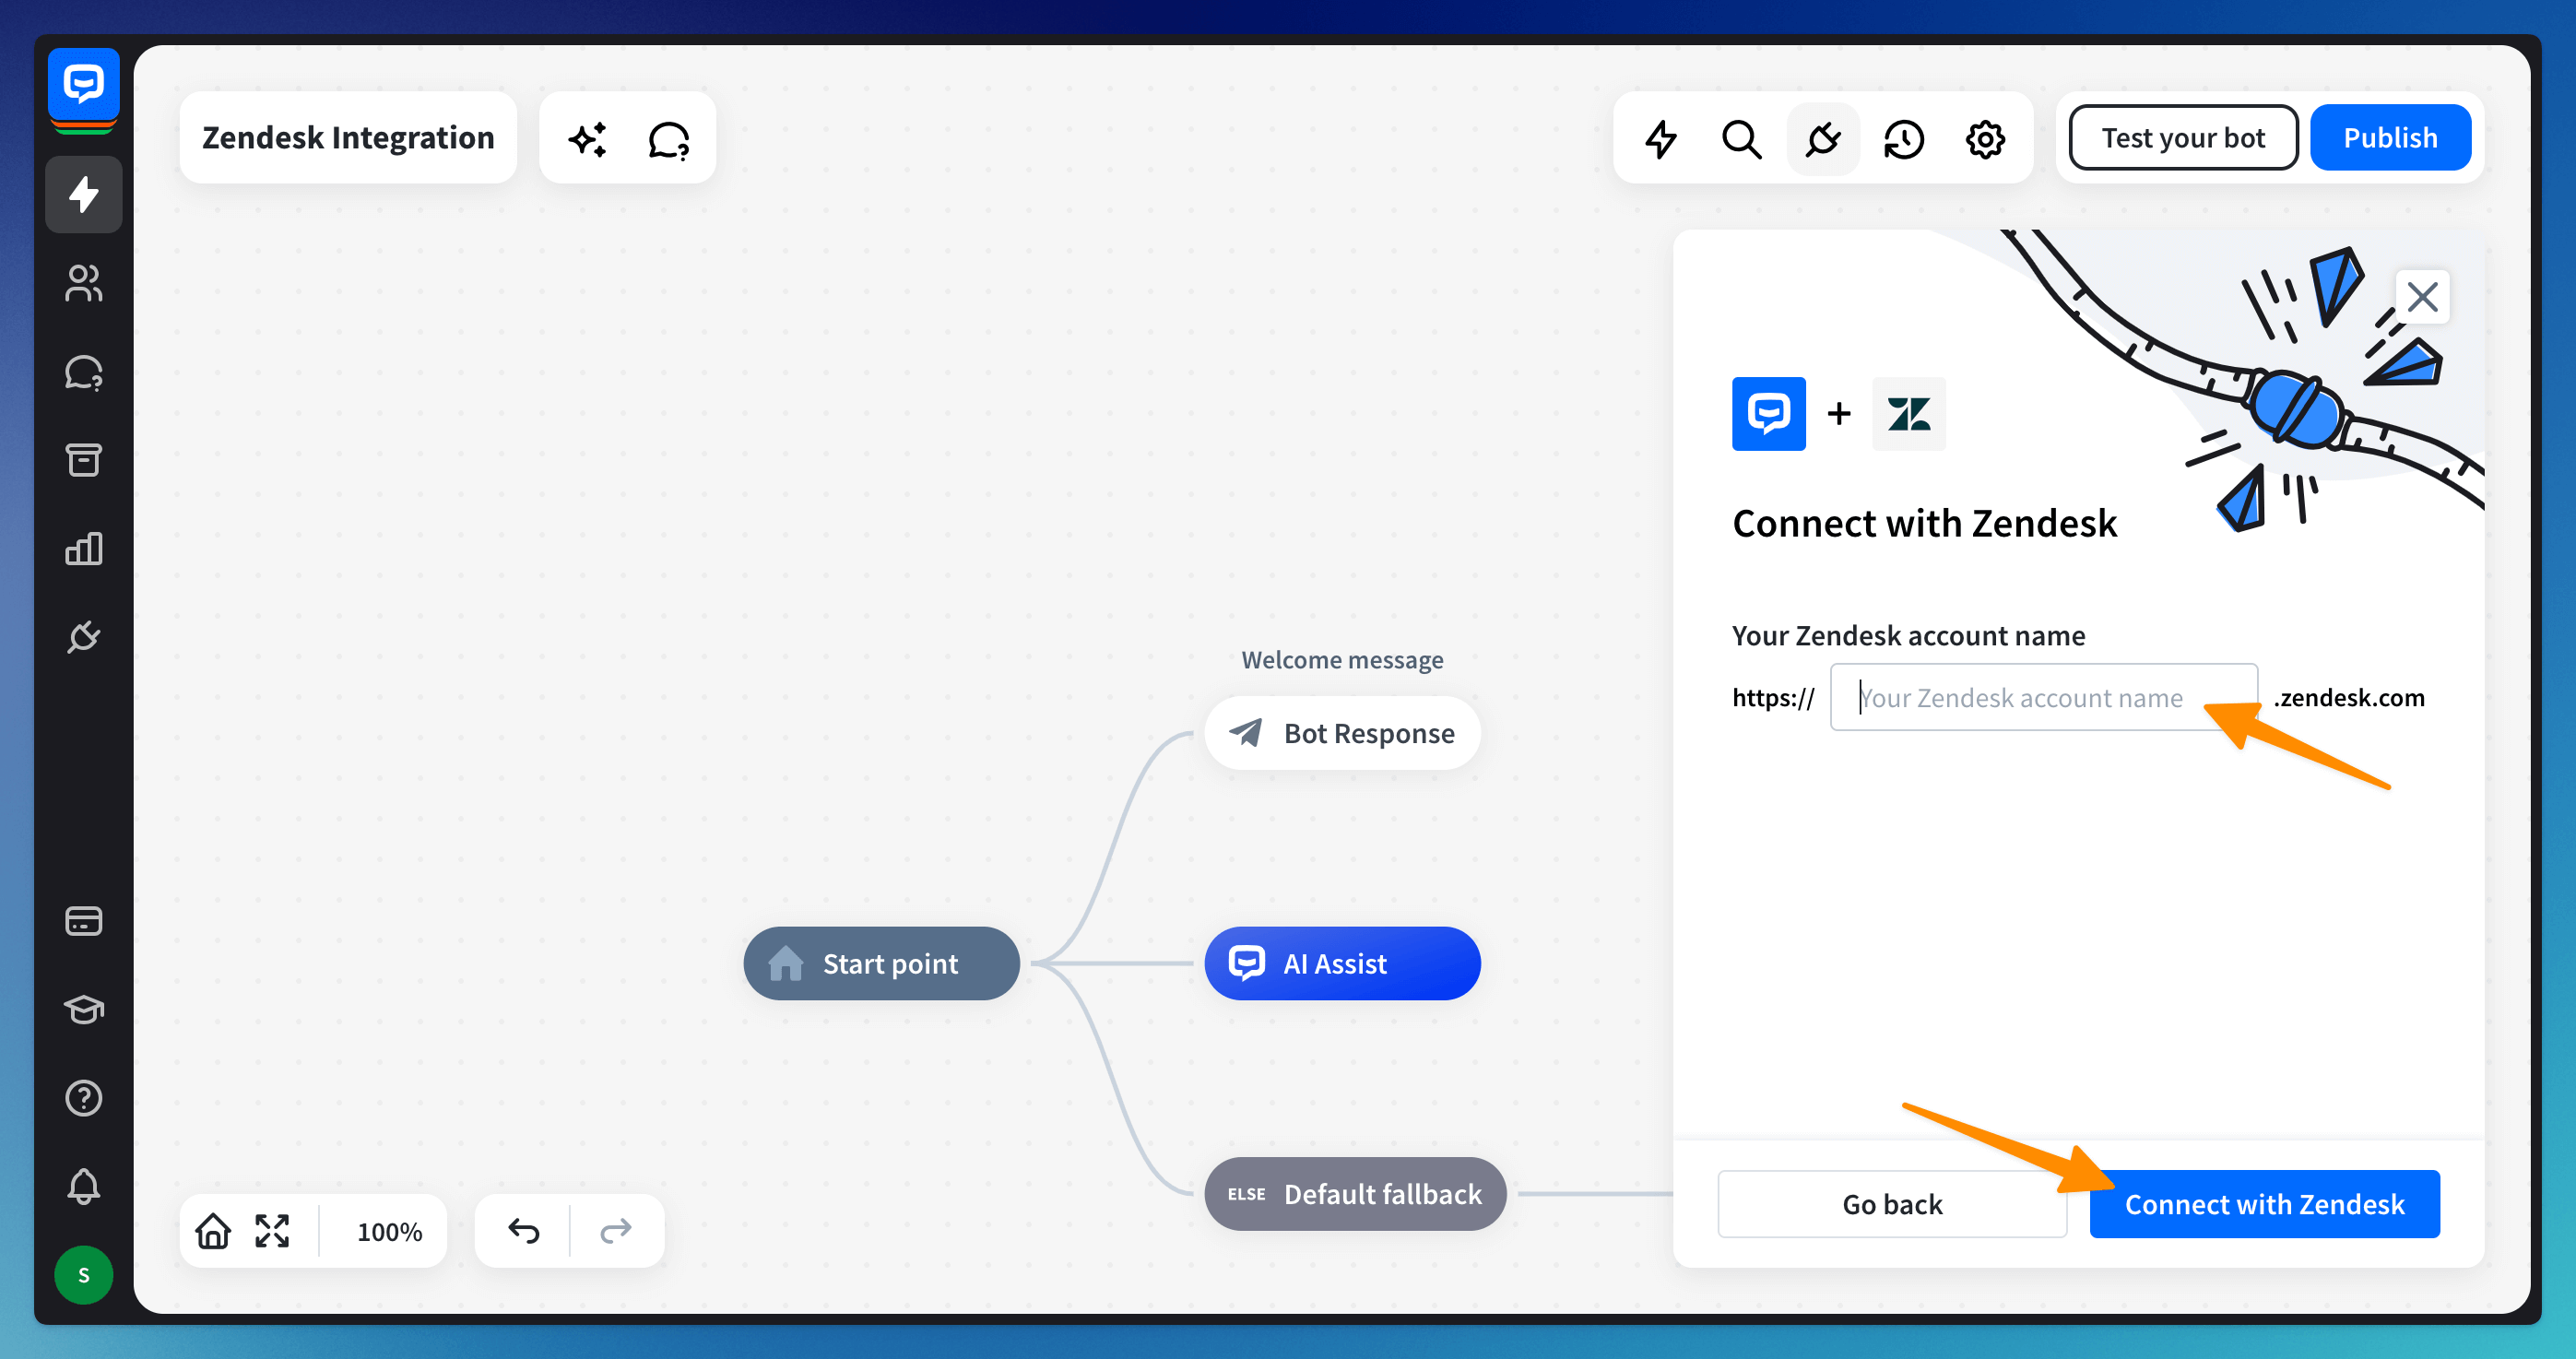 The Zendesk account name is the first part of the account URL address.
How to use the Create ticket action for Zendesk
The Create ticket action for Zendesk lets you create tickets from your customers’ chats with your chatbot. You must first connect your Zendesk account to ChatBot to use this action.
-
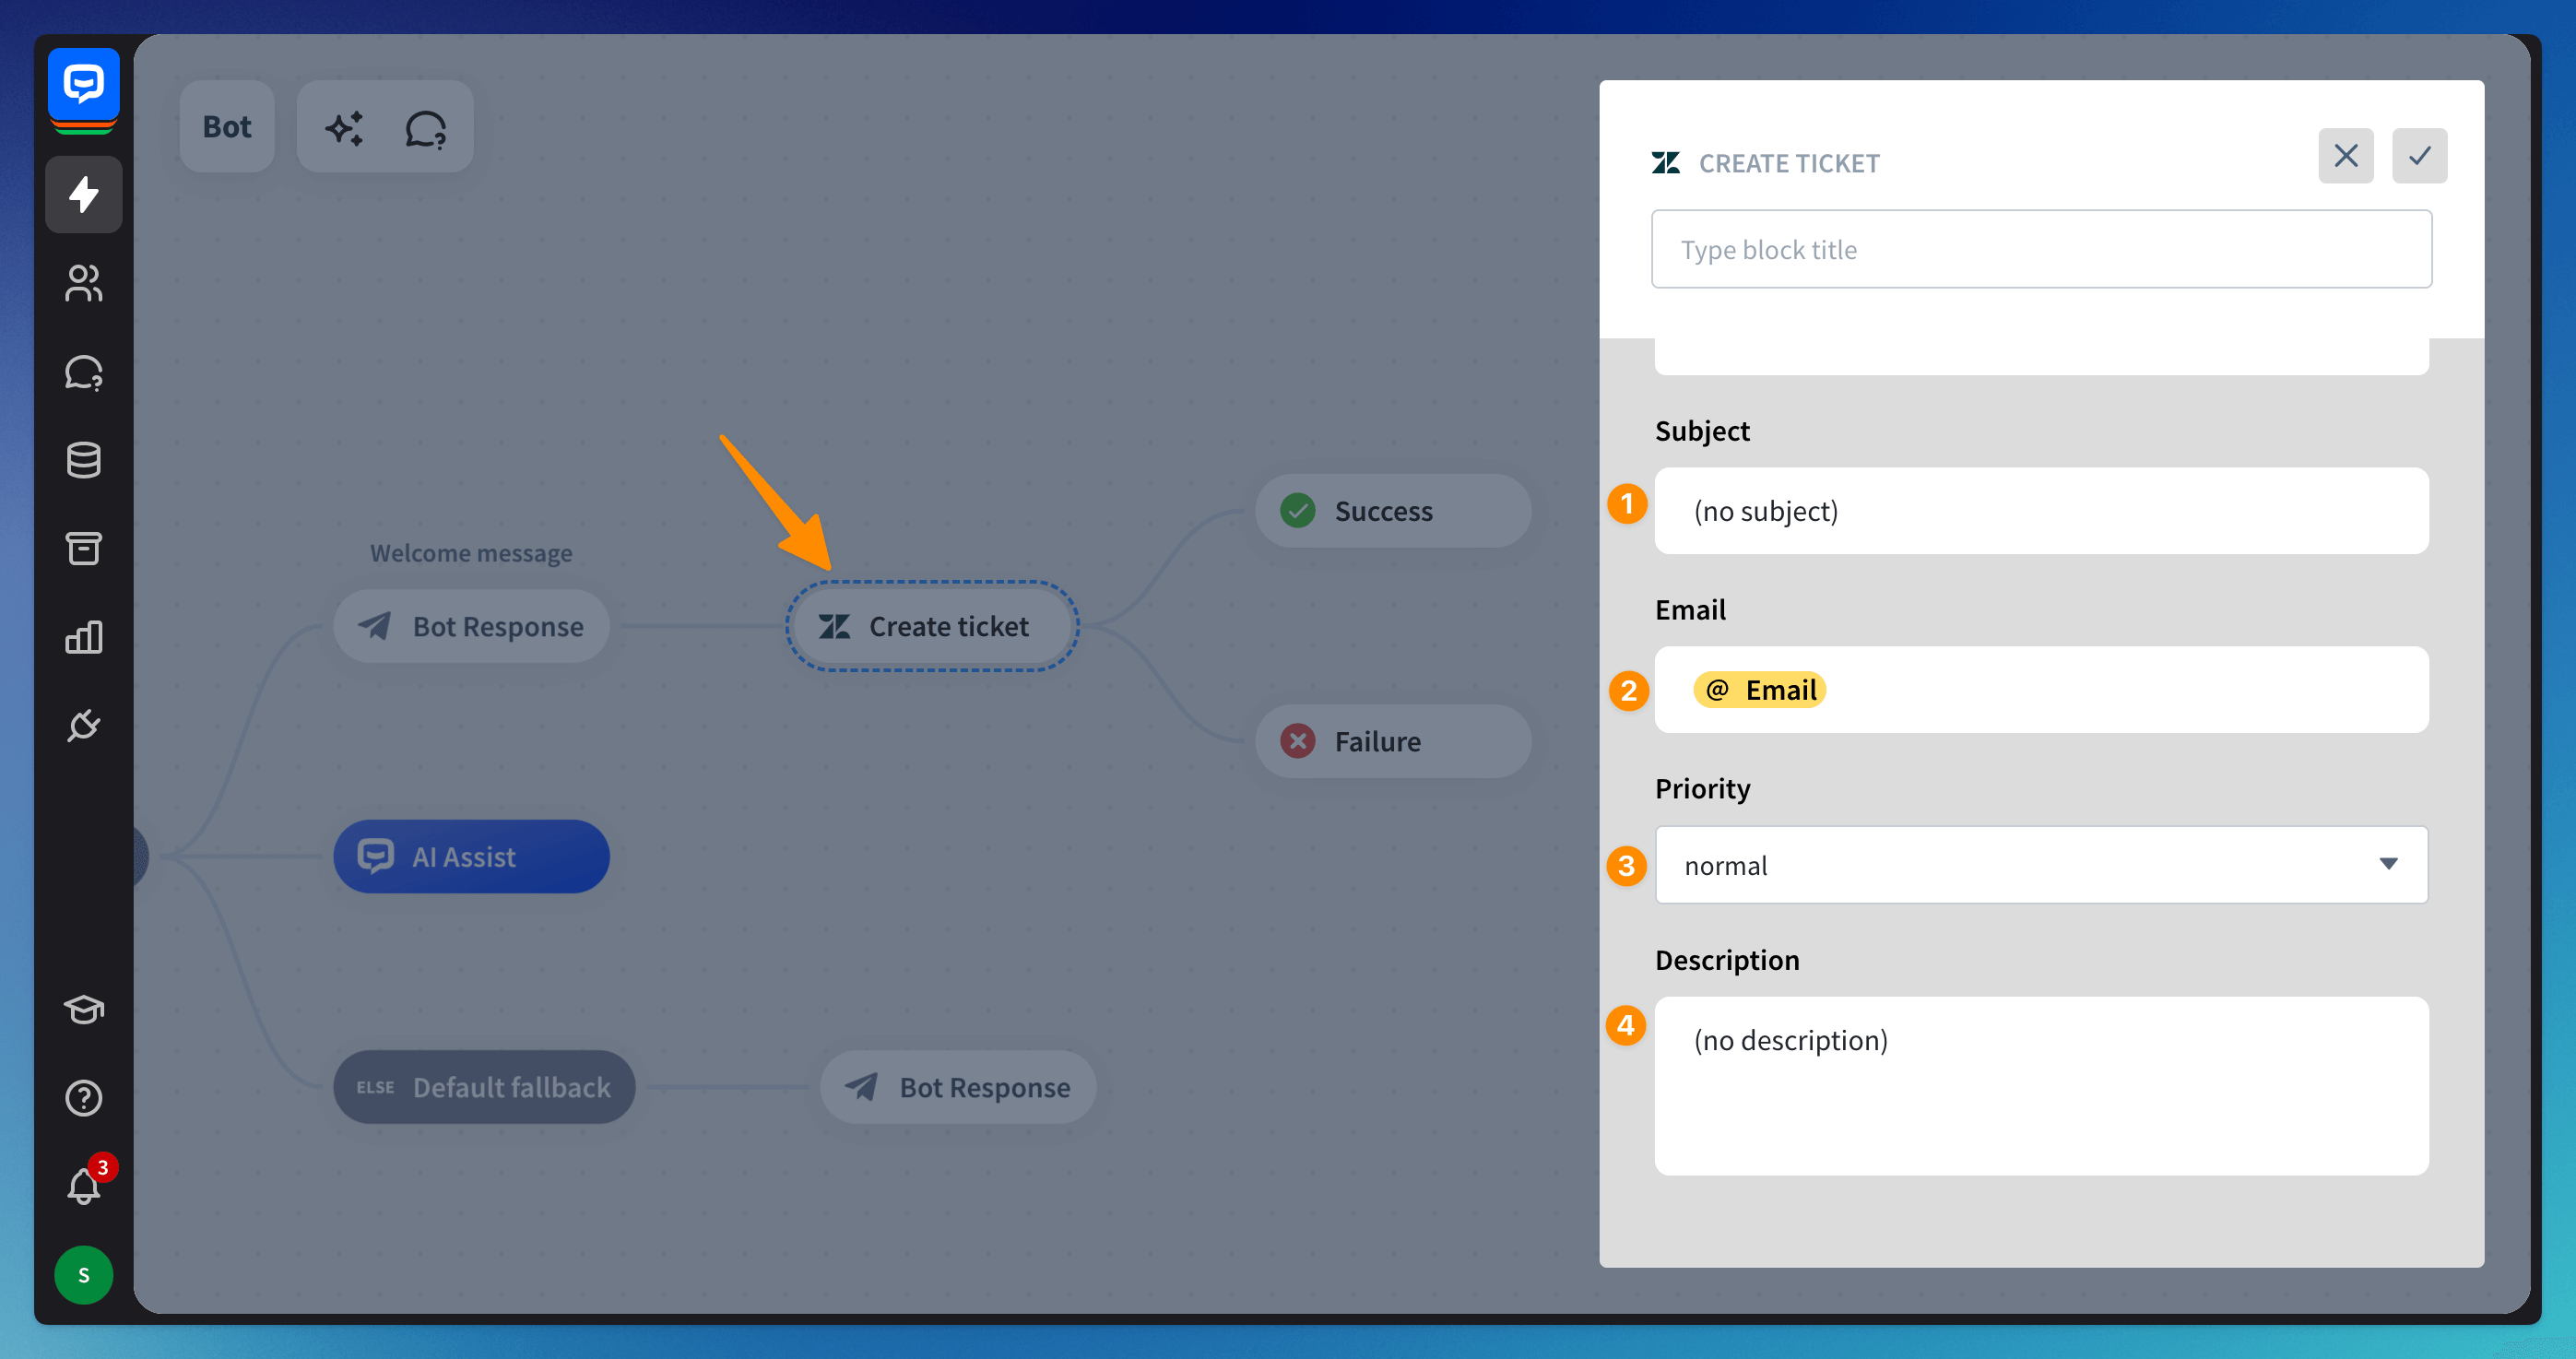
Drag the action and add the block to the bot flow. Click on the block to edit it.
-
We pre-defined the ticket fields for you. You can leave them as they are or change them:
- change the Subject is the ticket title you see in the Zendesk app
- Email field has the default Email attribute you need to collect before the action in the bot flow. You can use this attribute or create your custom attribute. The response to the customer’s query will be sent to this collected email address.
- set up the ticket Priority - This will help your team verify which tickets need to be handled first. Remember that you can always change ticket priority later.
- fill in the Description field - it contains the content of a created ticket. To configure this field, use the default or custom attributes you collected earlier in the bot flow.
-
Test the integration using the Testing tool.
-
Open the Tickets section in Zendesk to check out the tickets created by a chatbot.
Read more
