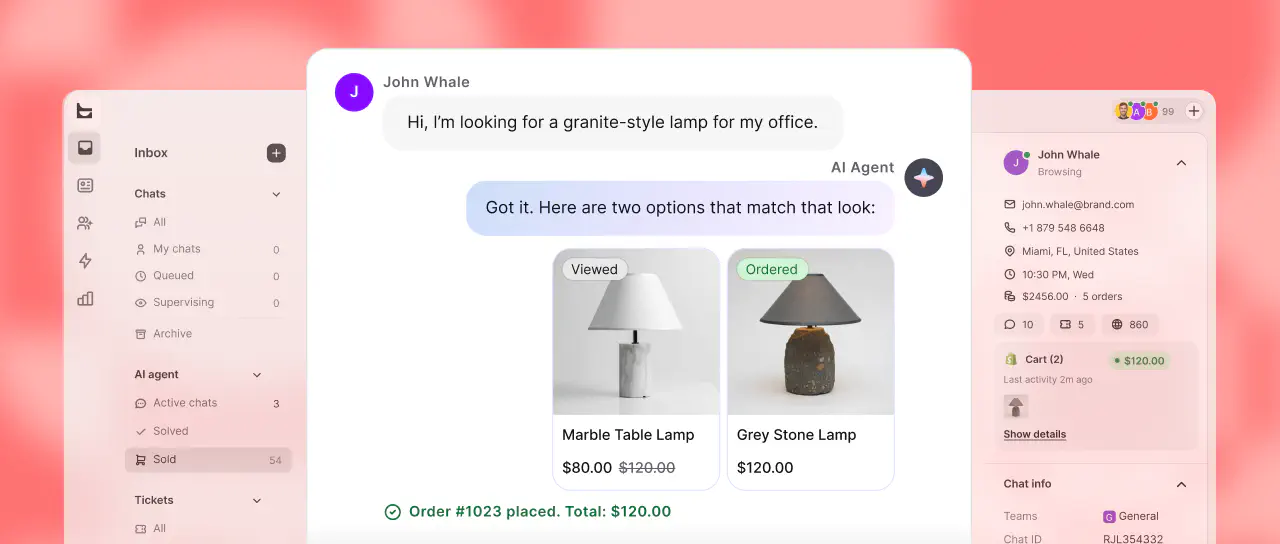
Platforms like ChatBot let you build conversational bots across many communication channels without writing a line of code. Doesn’t that sound exciting?
This tutorial will show you, step by step, how to build a bot to collect user’s email addresses for sending newsletters using the ChatBot platform. You’ll learn how to test your brand-new bot and find out how to easily add it to your website.
How to build a bot flow from scratch
You can build a bot flow in a few simple steps. You have full control over the messages the bot sends and the information it understands. You need a set of bot responses and example user queries to build the bot.
To provide the user queries, you need to use our matching systems. You can configure it all before the testing phase and adjust it on the go when the bot is developed.
You have a set of Actions and Interactions, along with a set of Integrations, at your disposal.
-
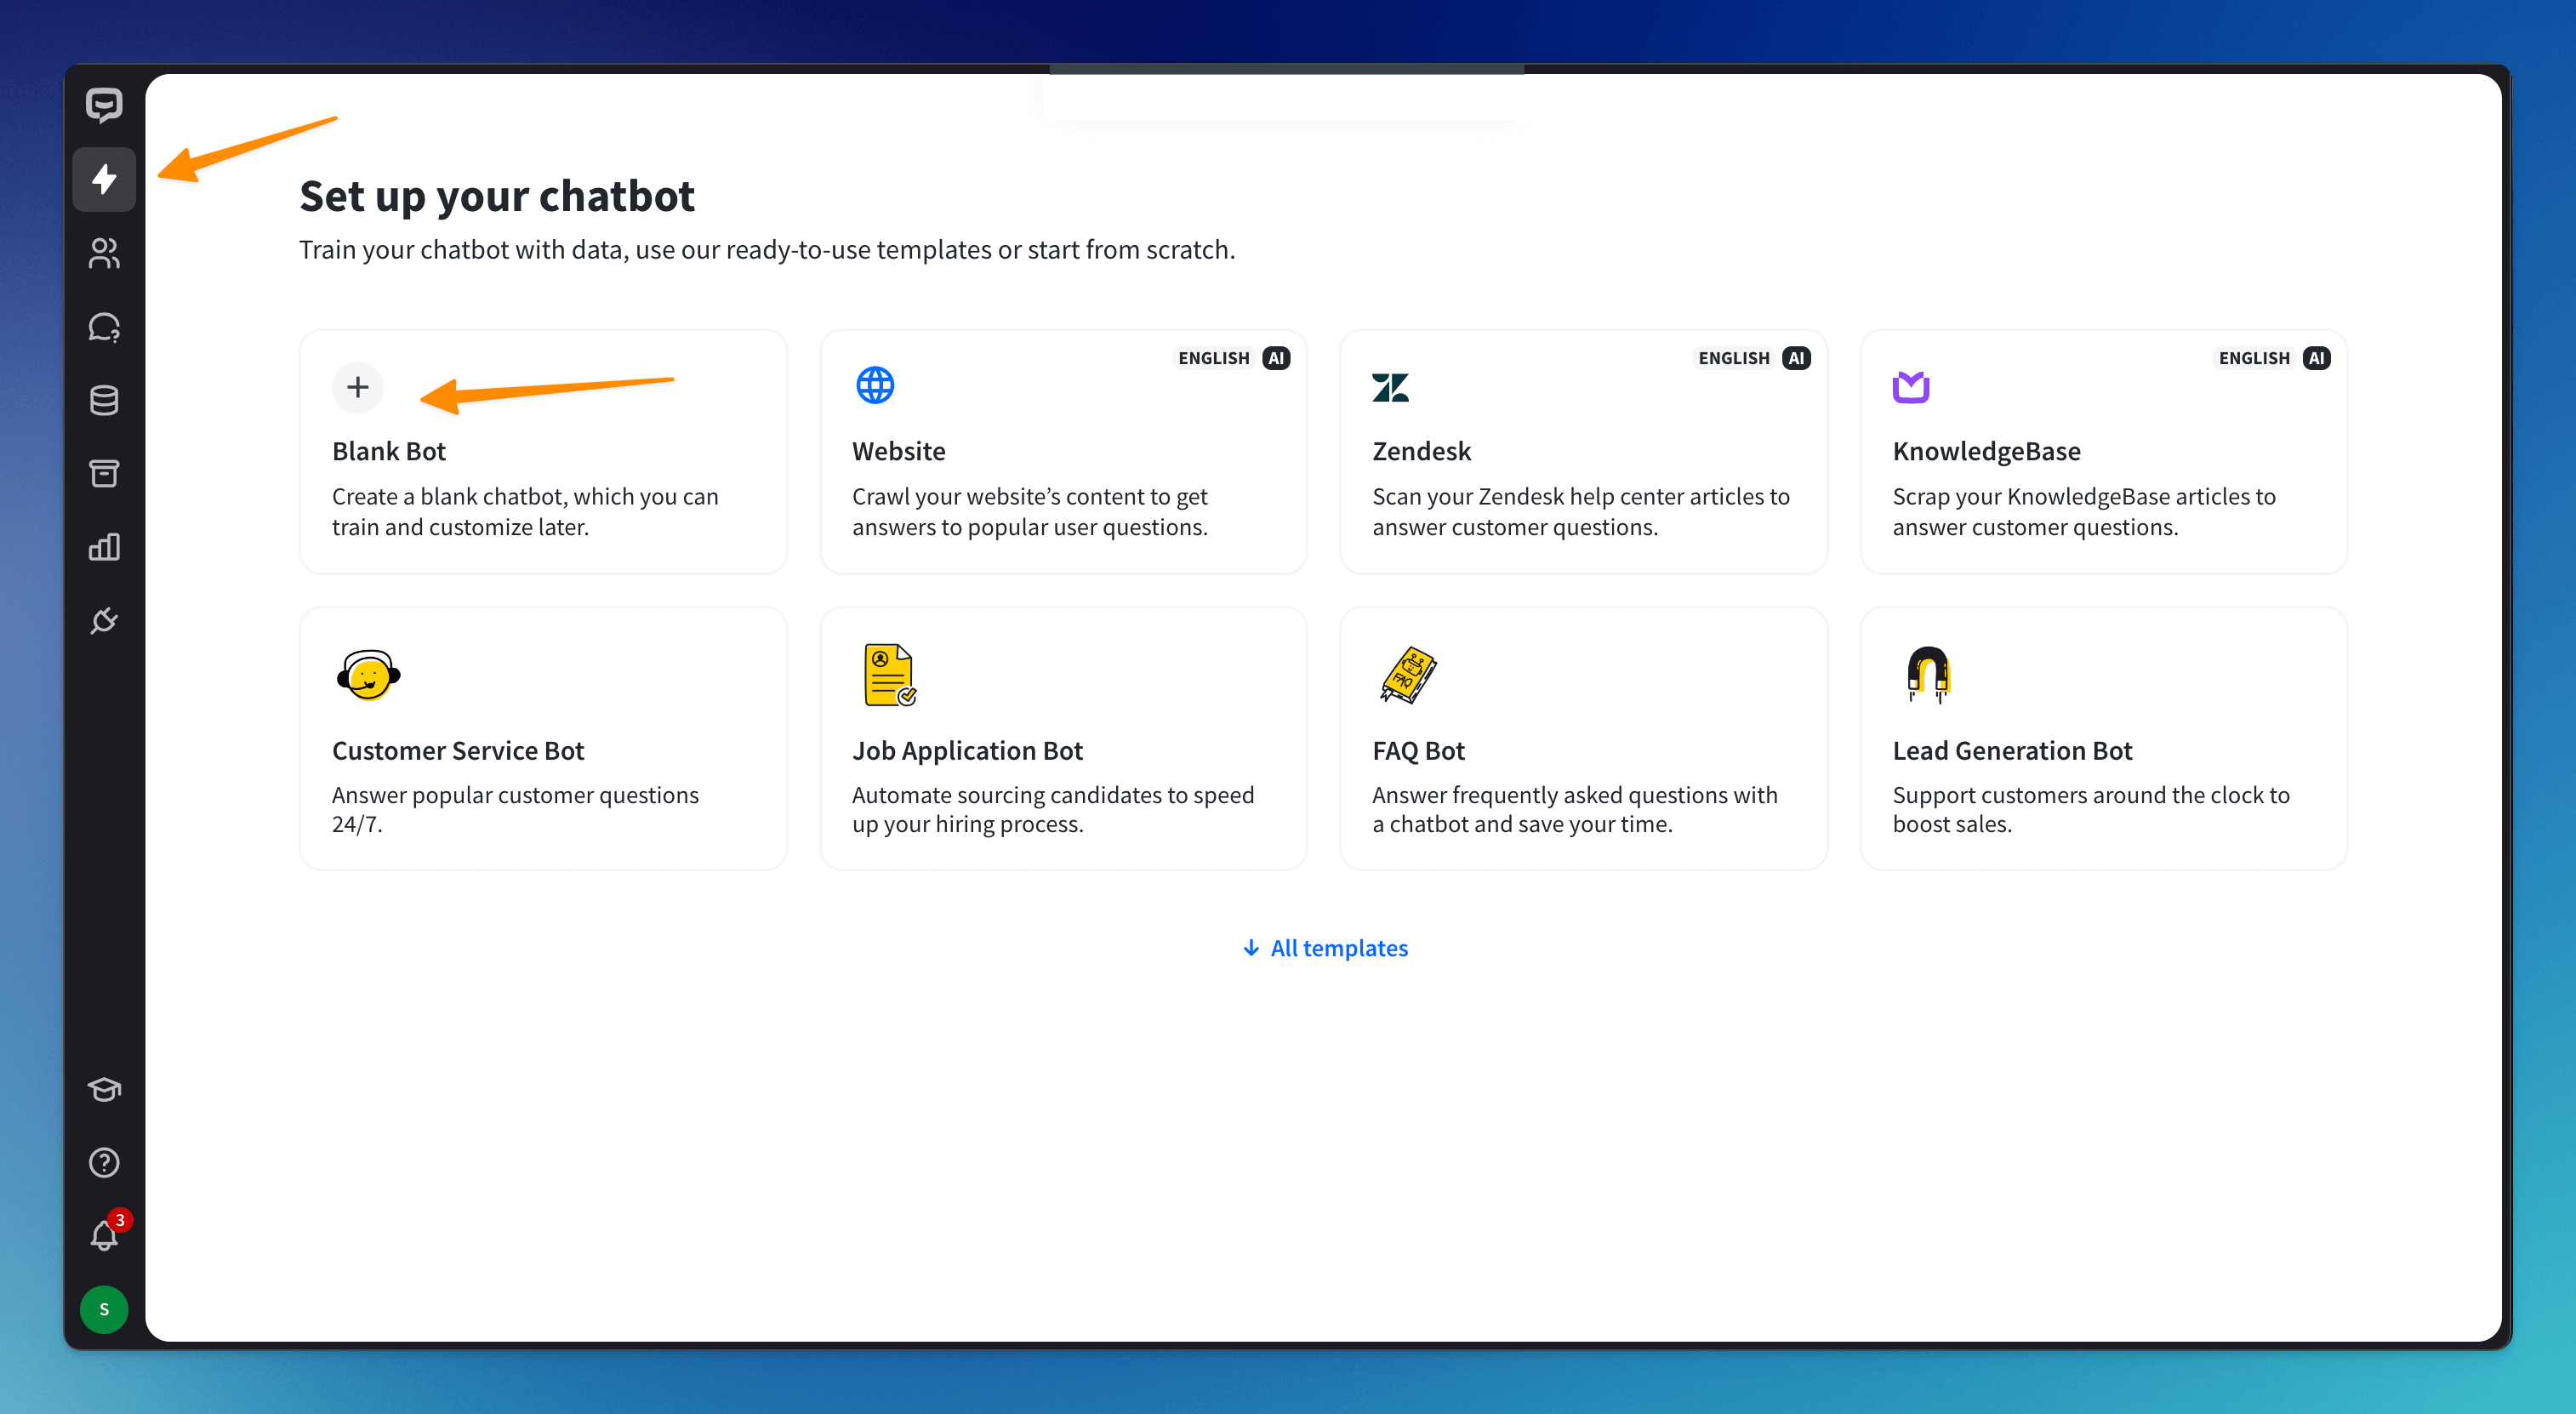
You can create the bot in the Chatbots section of the Dashboard. Click on the Add chatbot button and choose the Blank Bot.
-
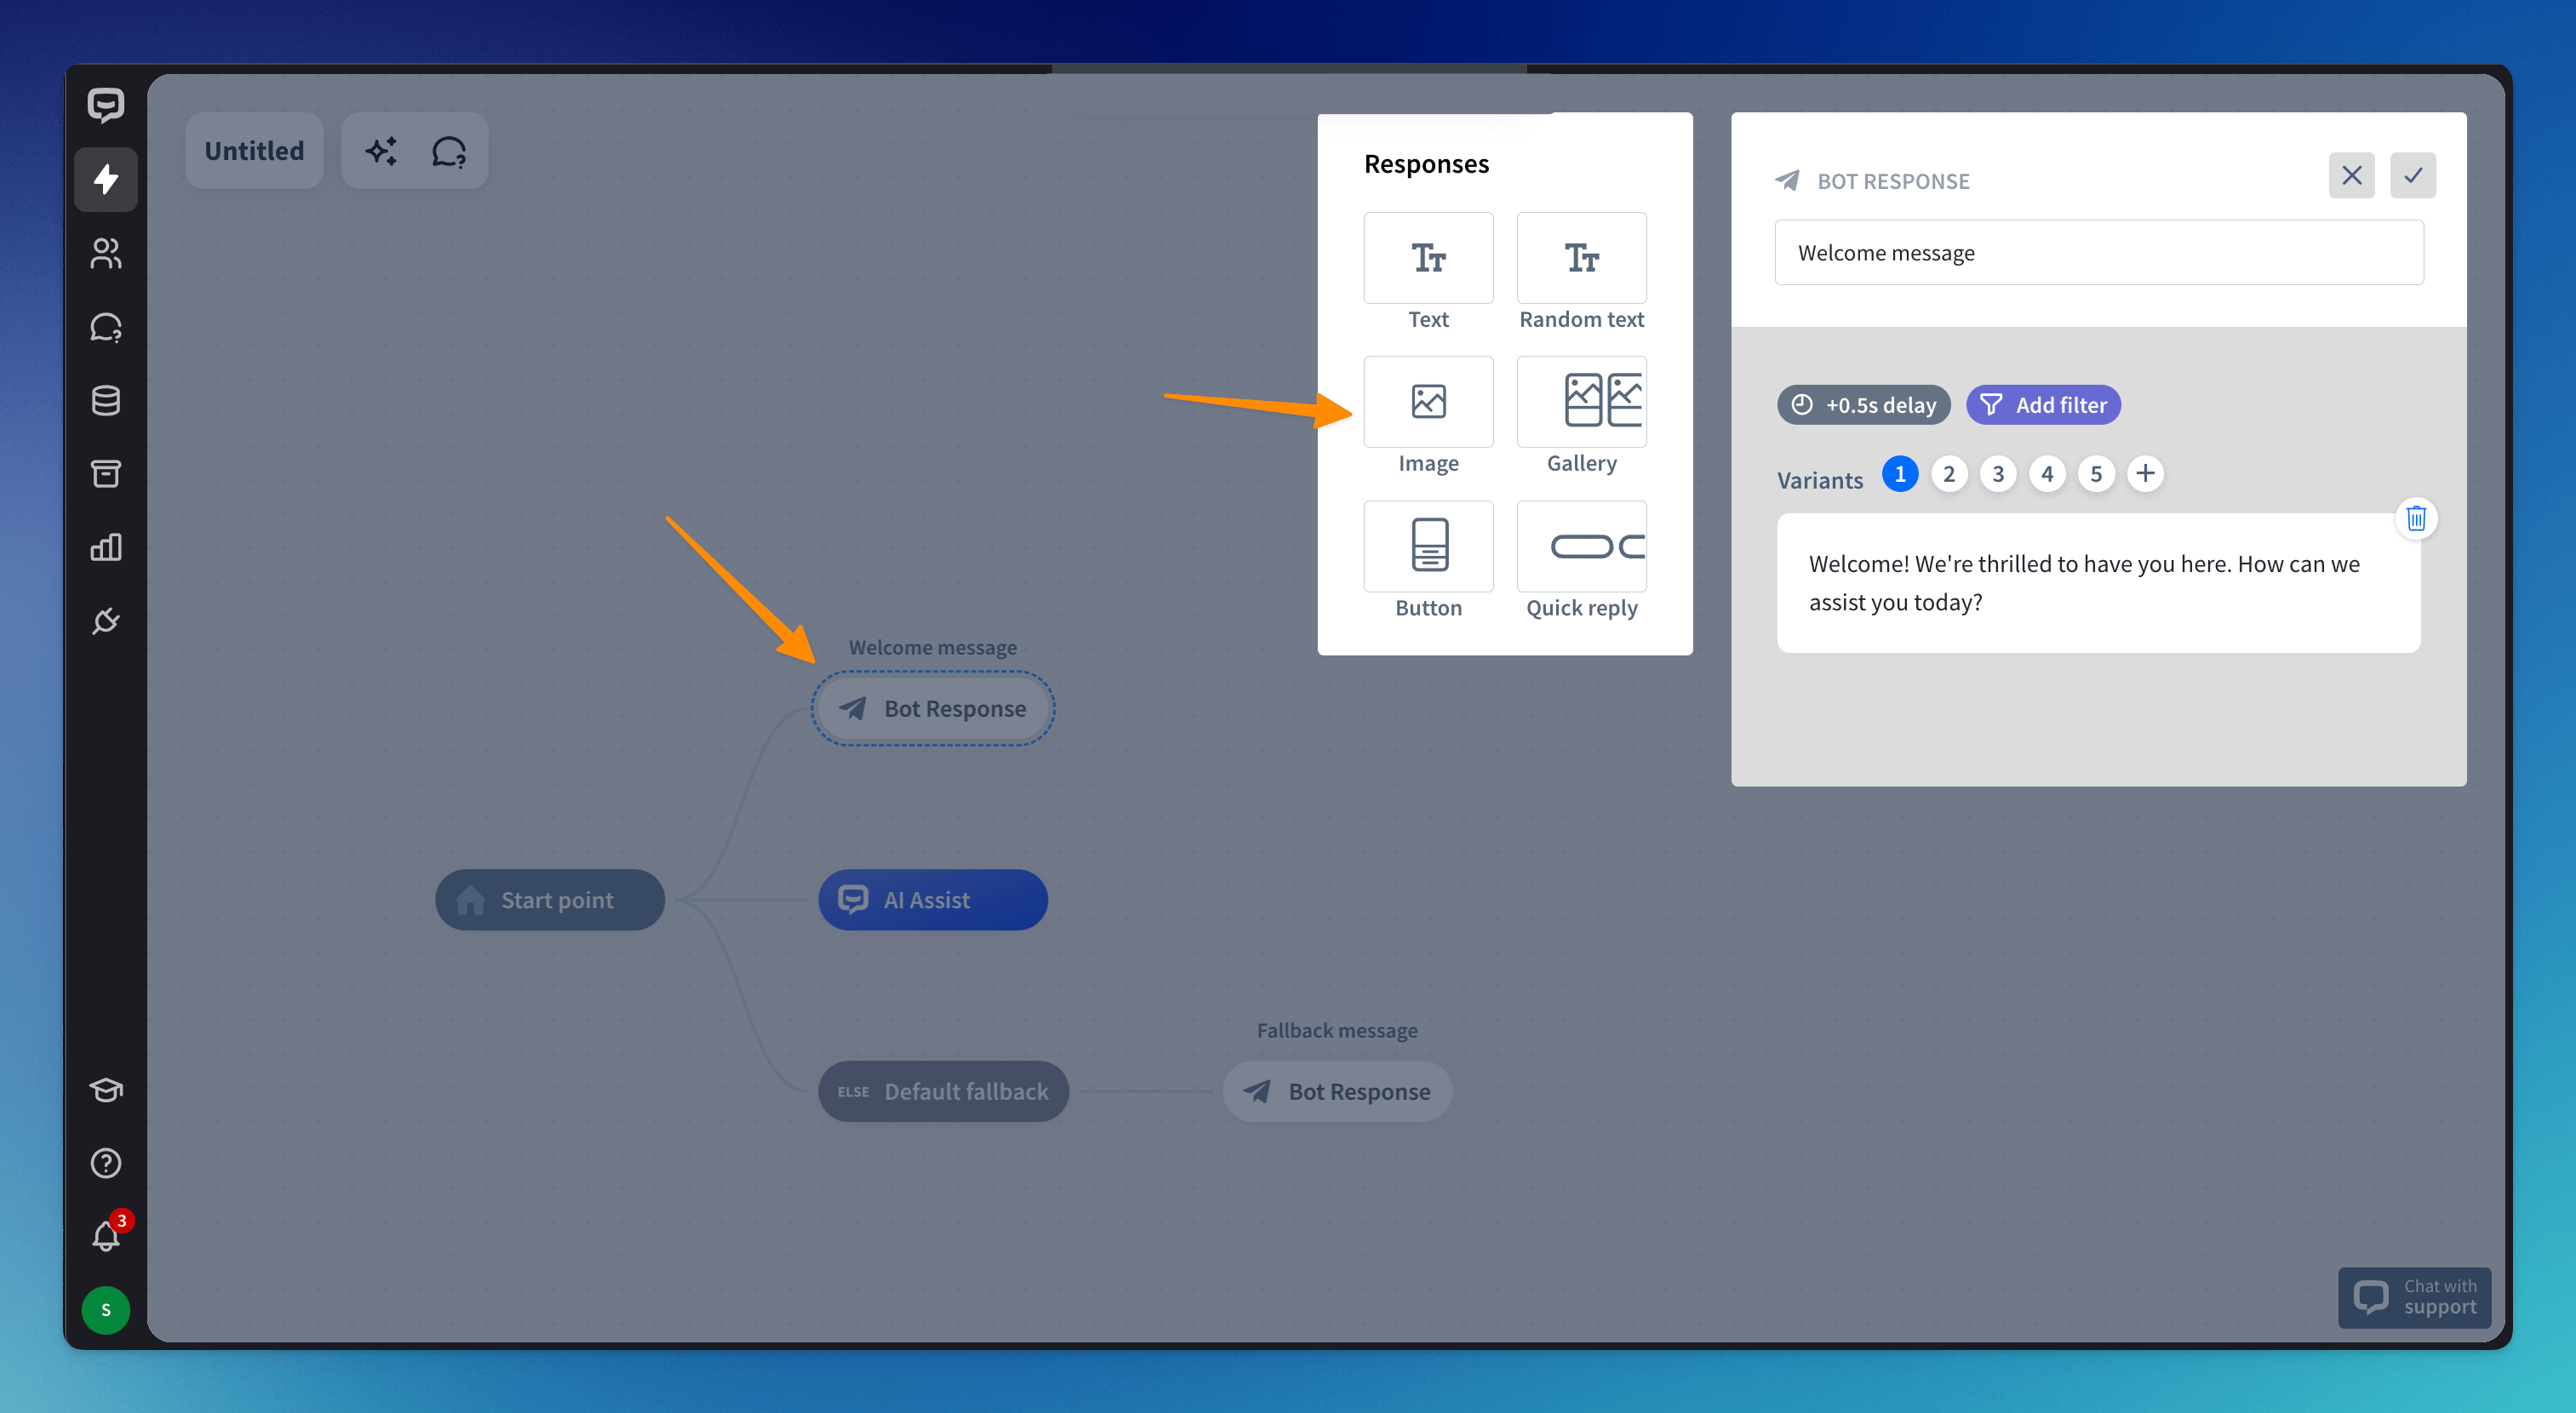
You will be taken to a basic bot flow. Click on the Bot response block and edit default welcome messages. Choose an Image response and upload an image.
-
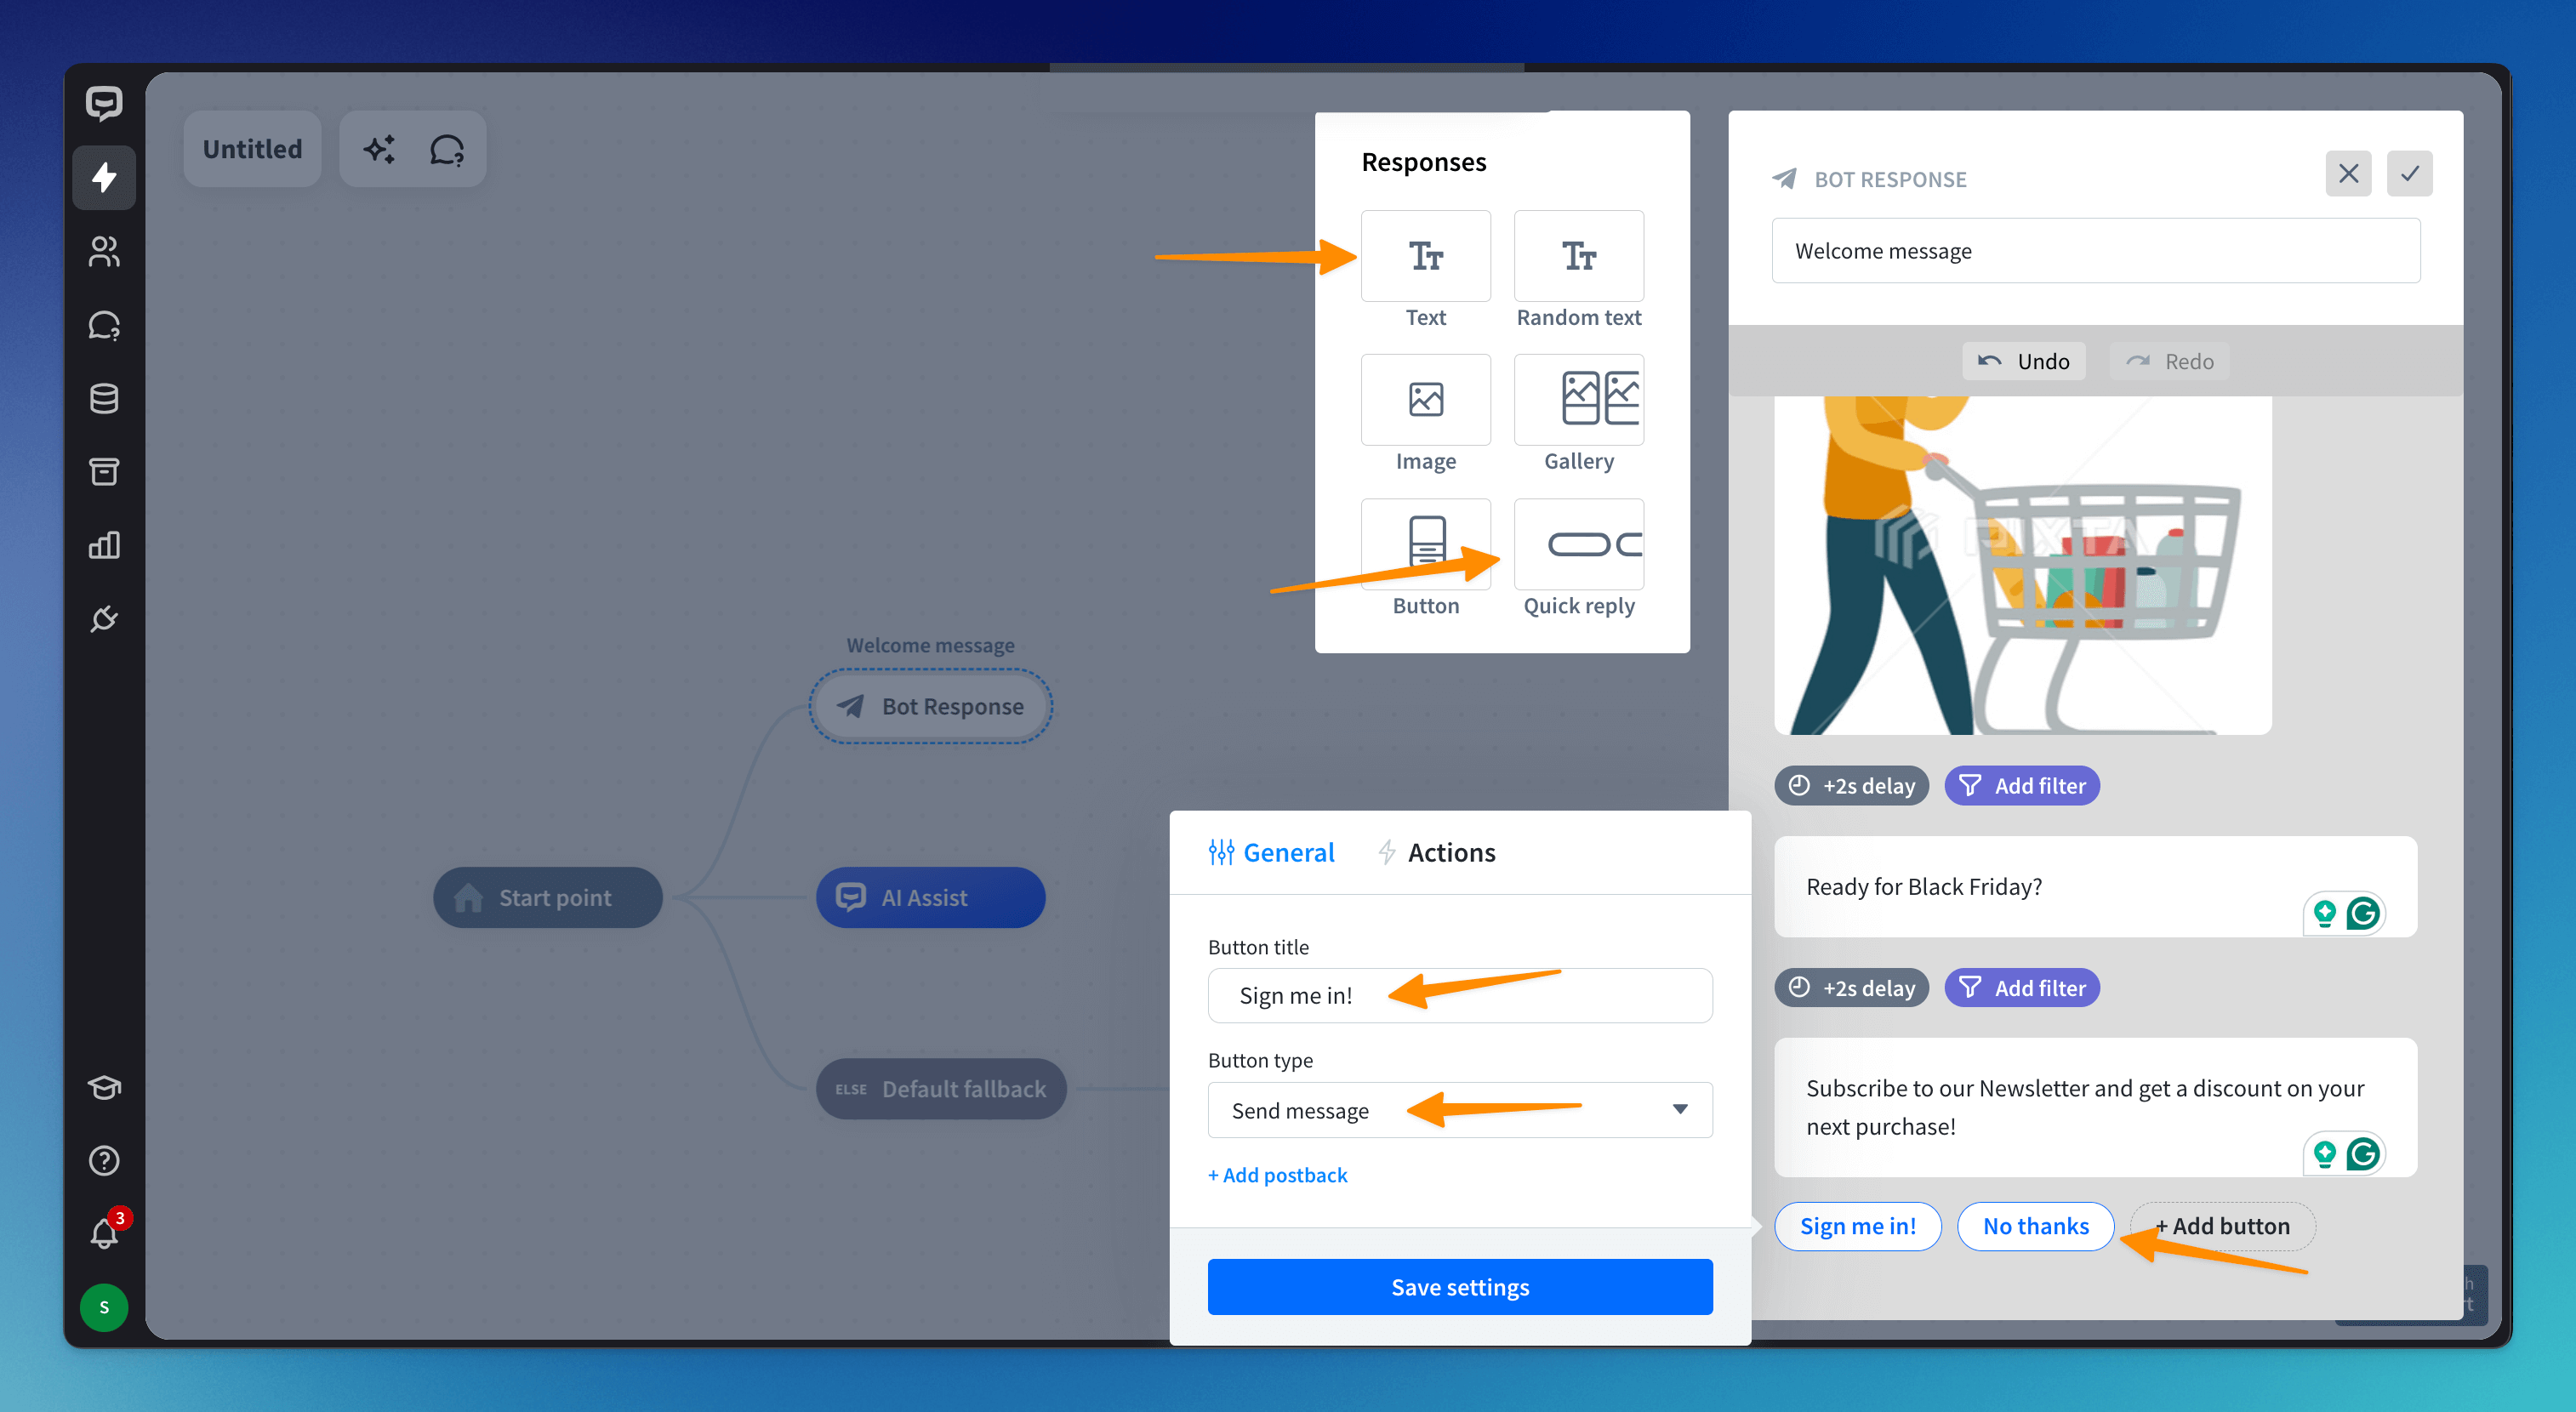
Add a Text response and enter a message. Add a Quick reply response and ask the user whether they want to sign up for your newsletter. Create two buttons—type the buttons’ names and set their types.
-
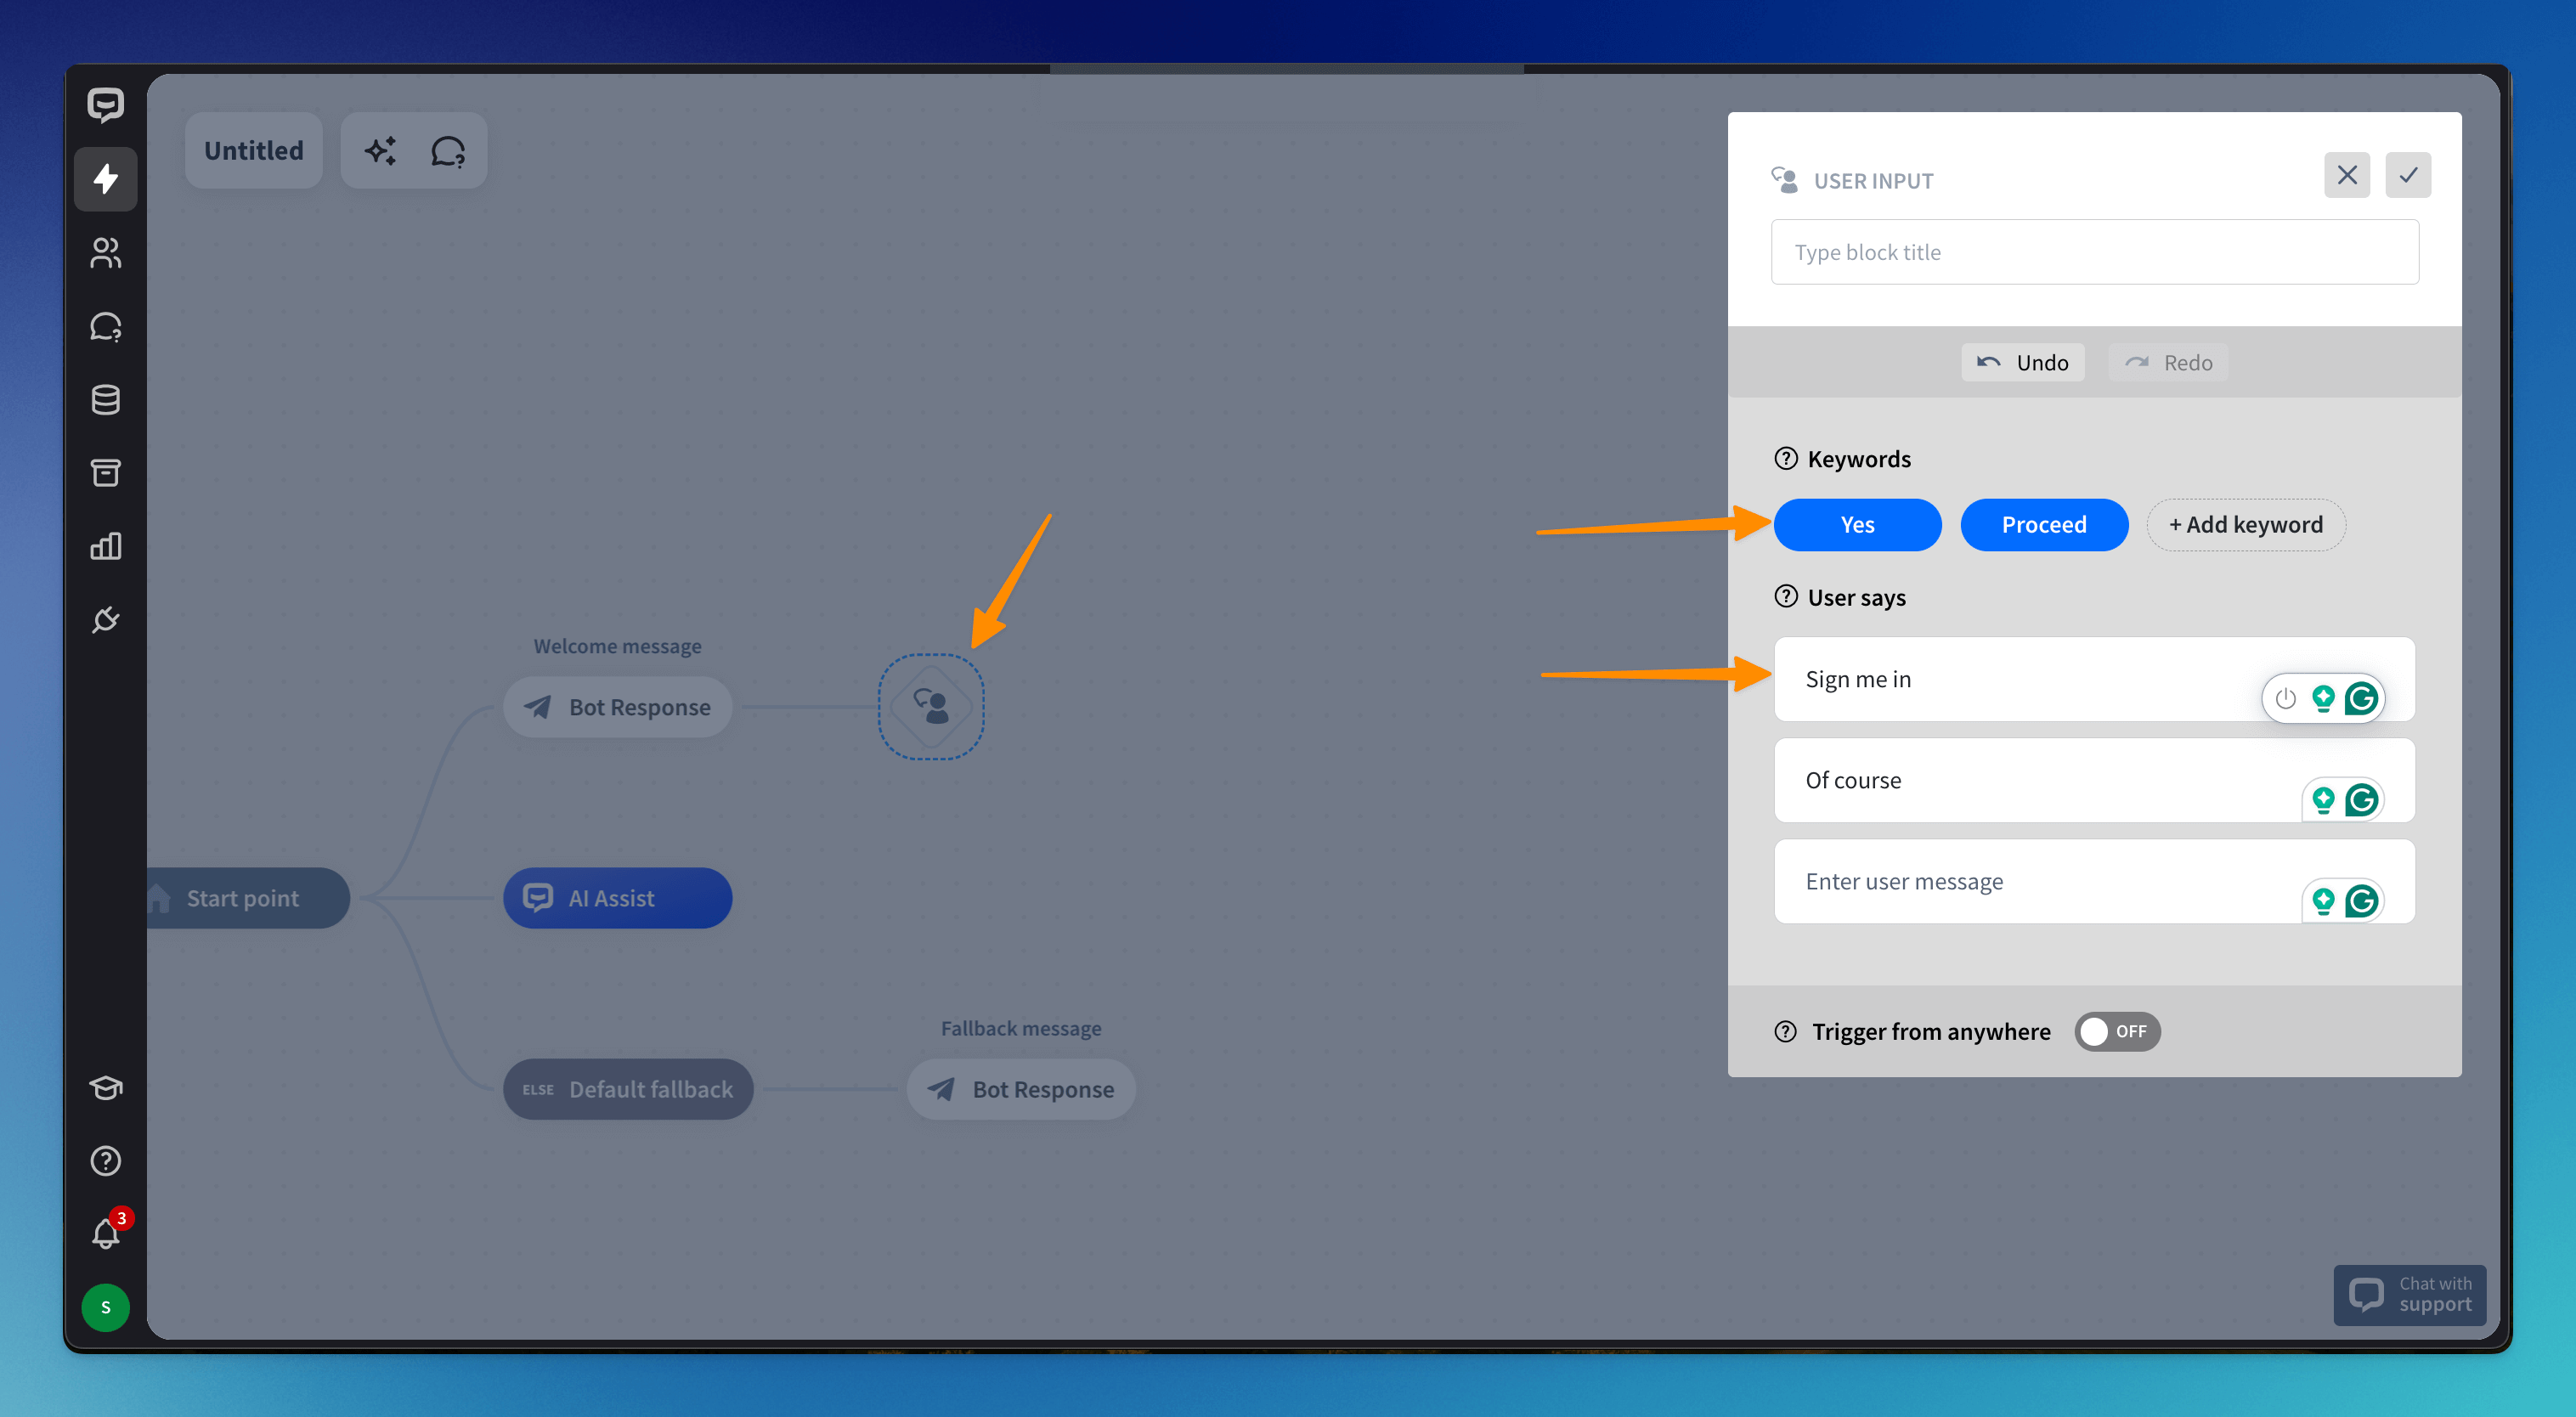
Drag the User input block from the Actions panel under the Thunderbolt icon and drop it after the Bot response block. Click the added block to enter the type of messages that will trigger the chatbot’s next response. You can do that in the Keywords or in the User says section.
-
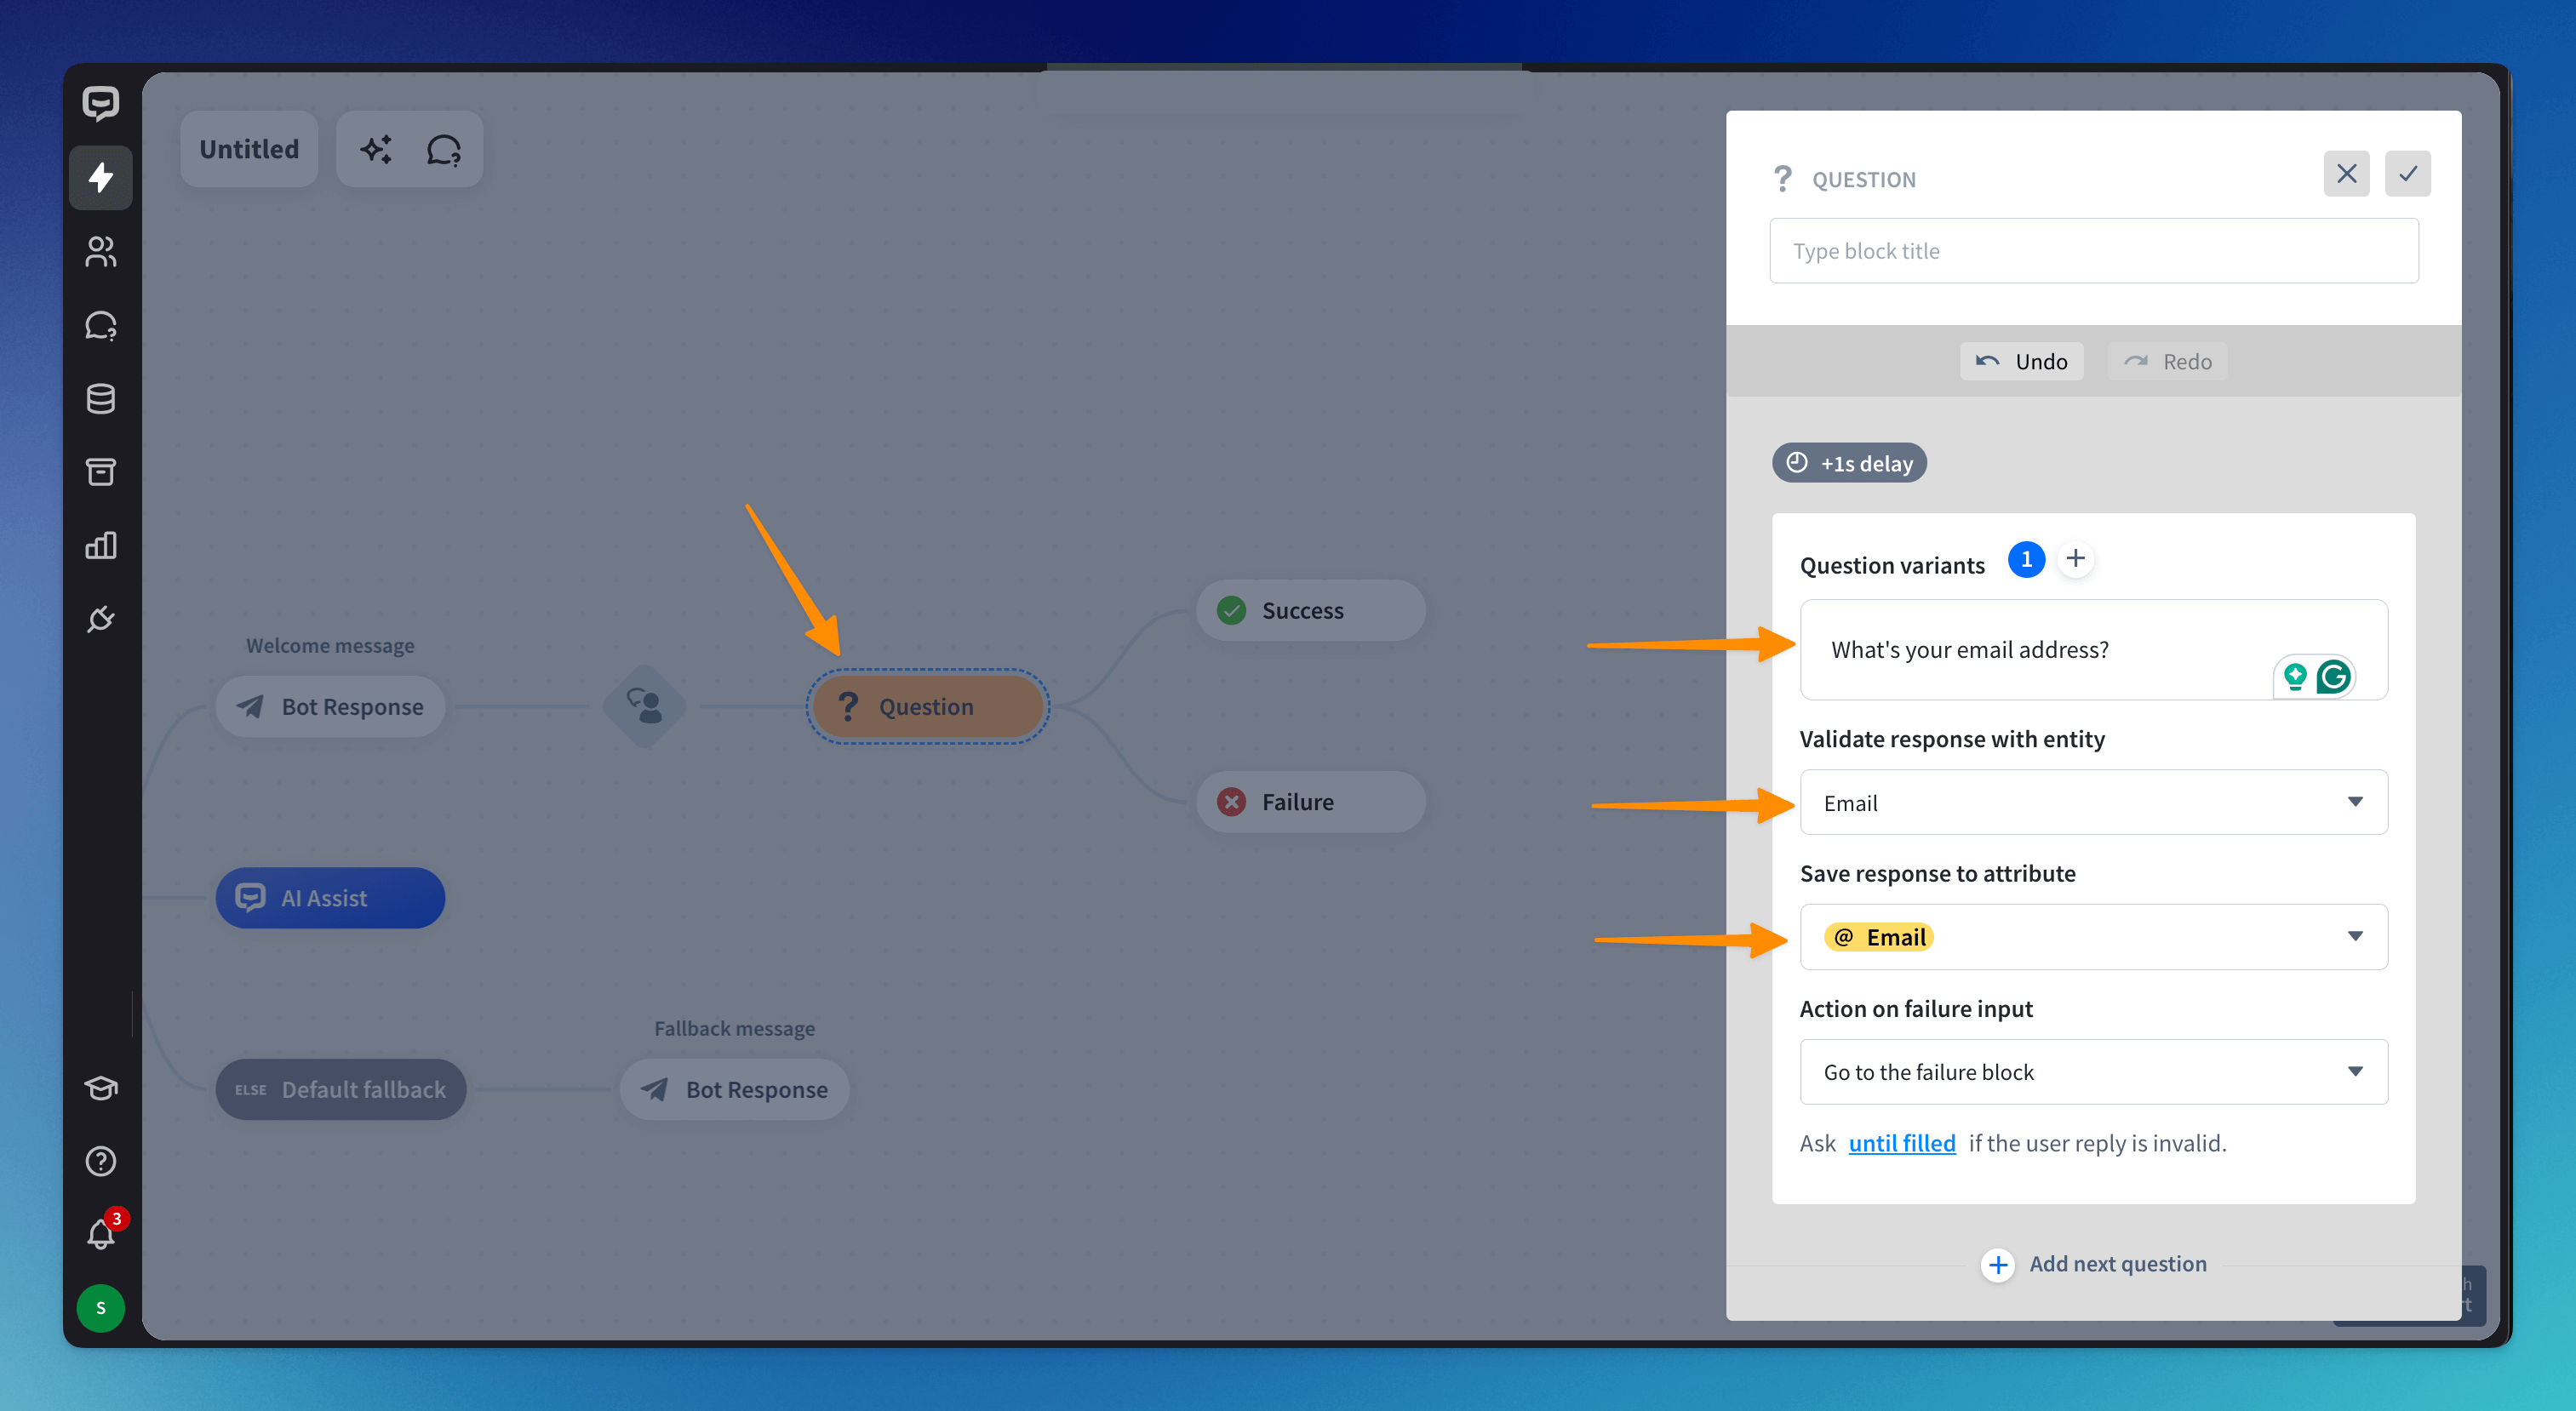
Drag the Question block to collect the email address and drop it after the User input block. Click on the Question block and enter your question. Validate the response with the Email entity. Save the response to the Email attribute. Choose what your bot should do and how many times the bot will ask the question if the user fails to provide the correct format.
-
Drag Bot Response and drop it after the Success block. Add an Image response and enter your messages in the Text response.

-
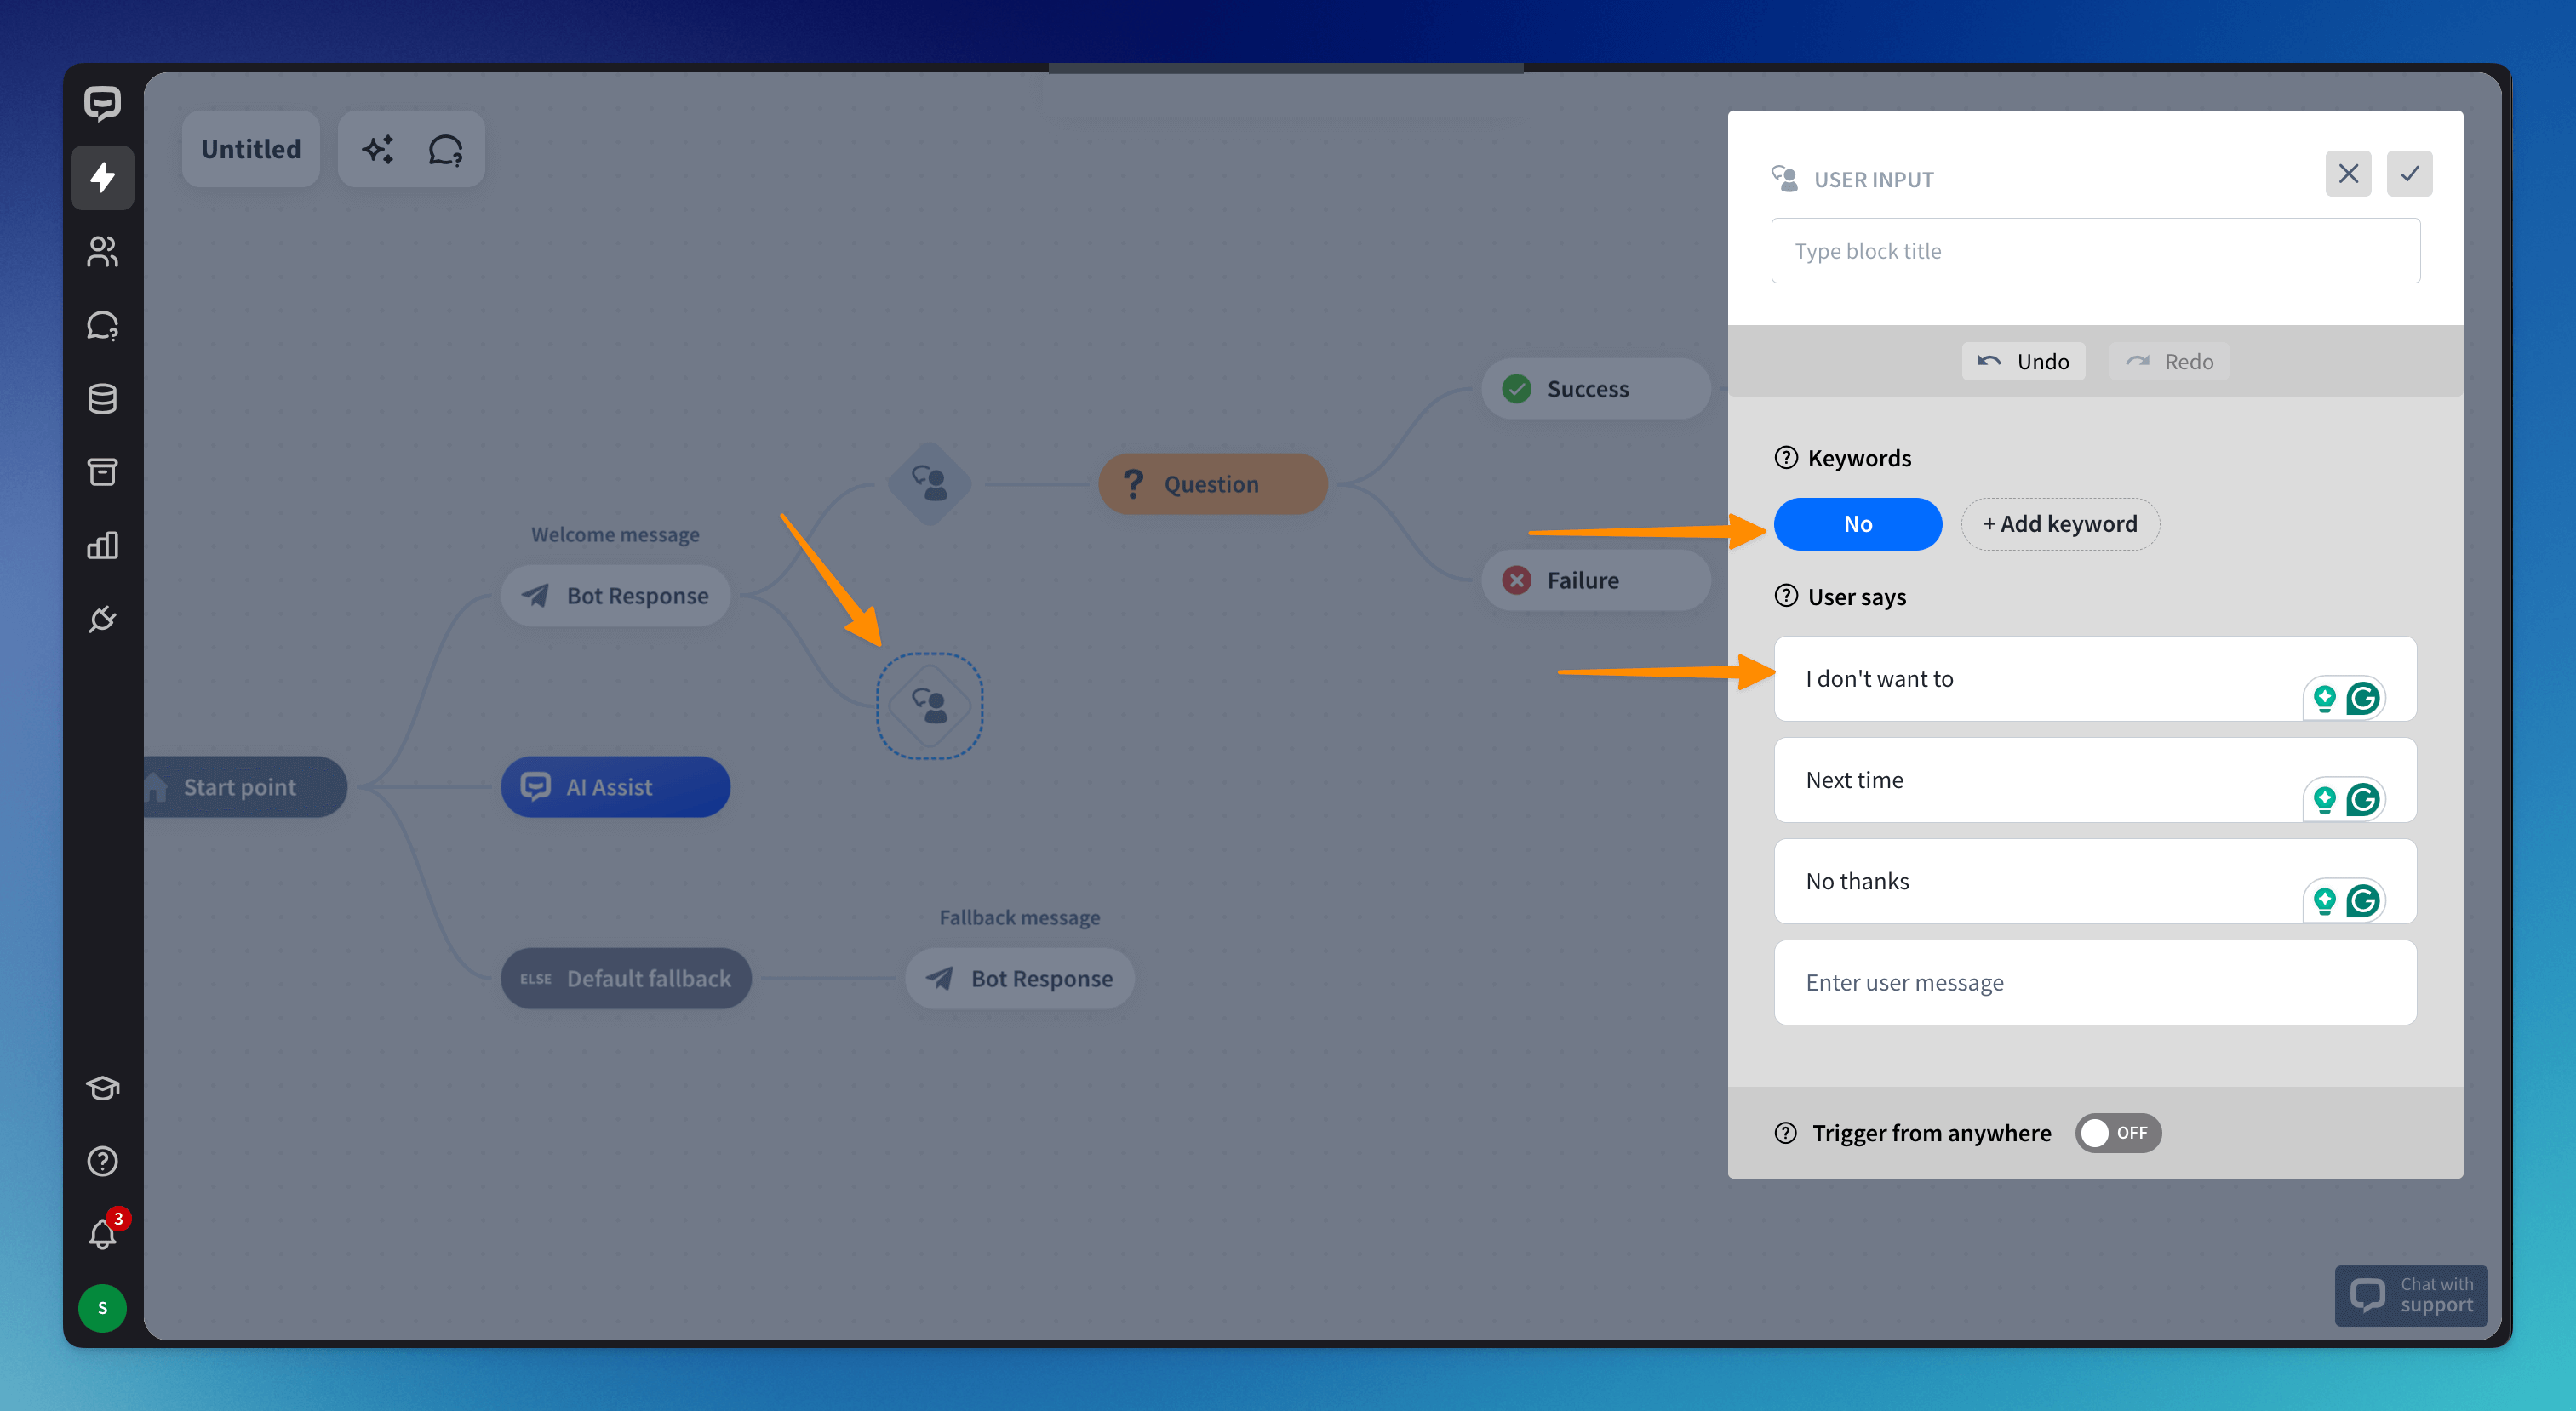
Drag User input and drop it after the Welcome message for when the user doesn’t want to sign up for your newsletter. Enter the user responses.
-
Drag Bot response and drop it after User input. Click on the block and enter the bot’s message.

-
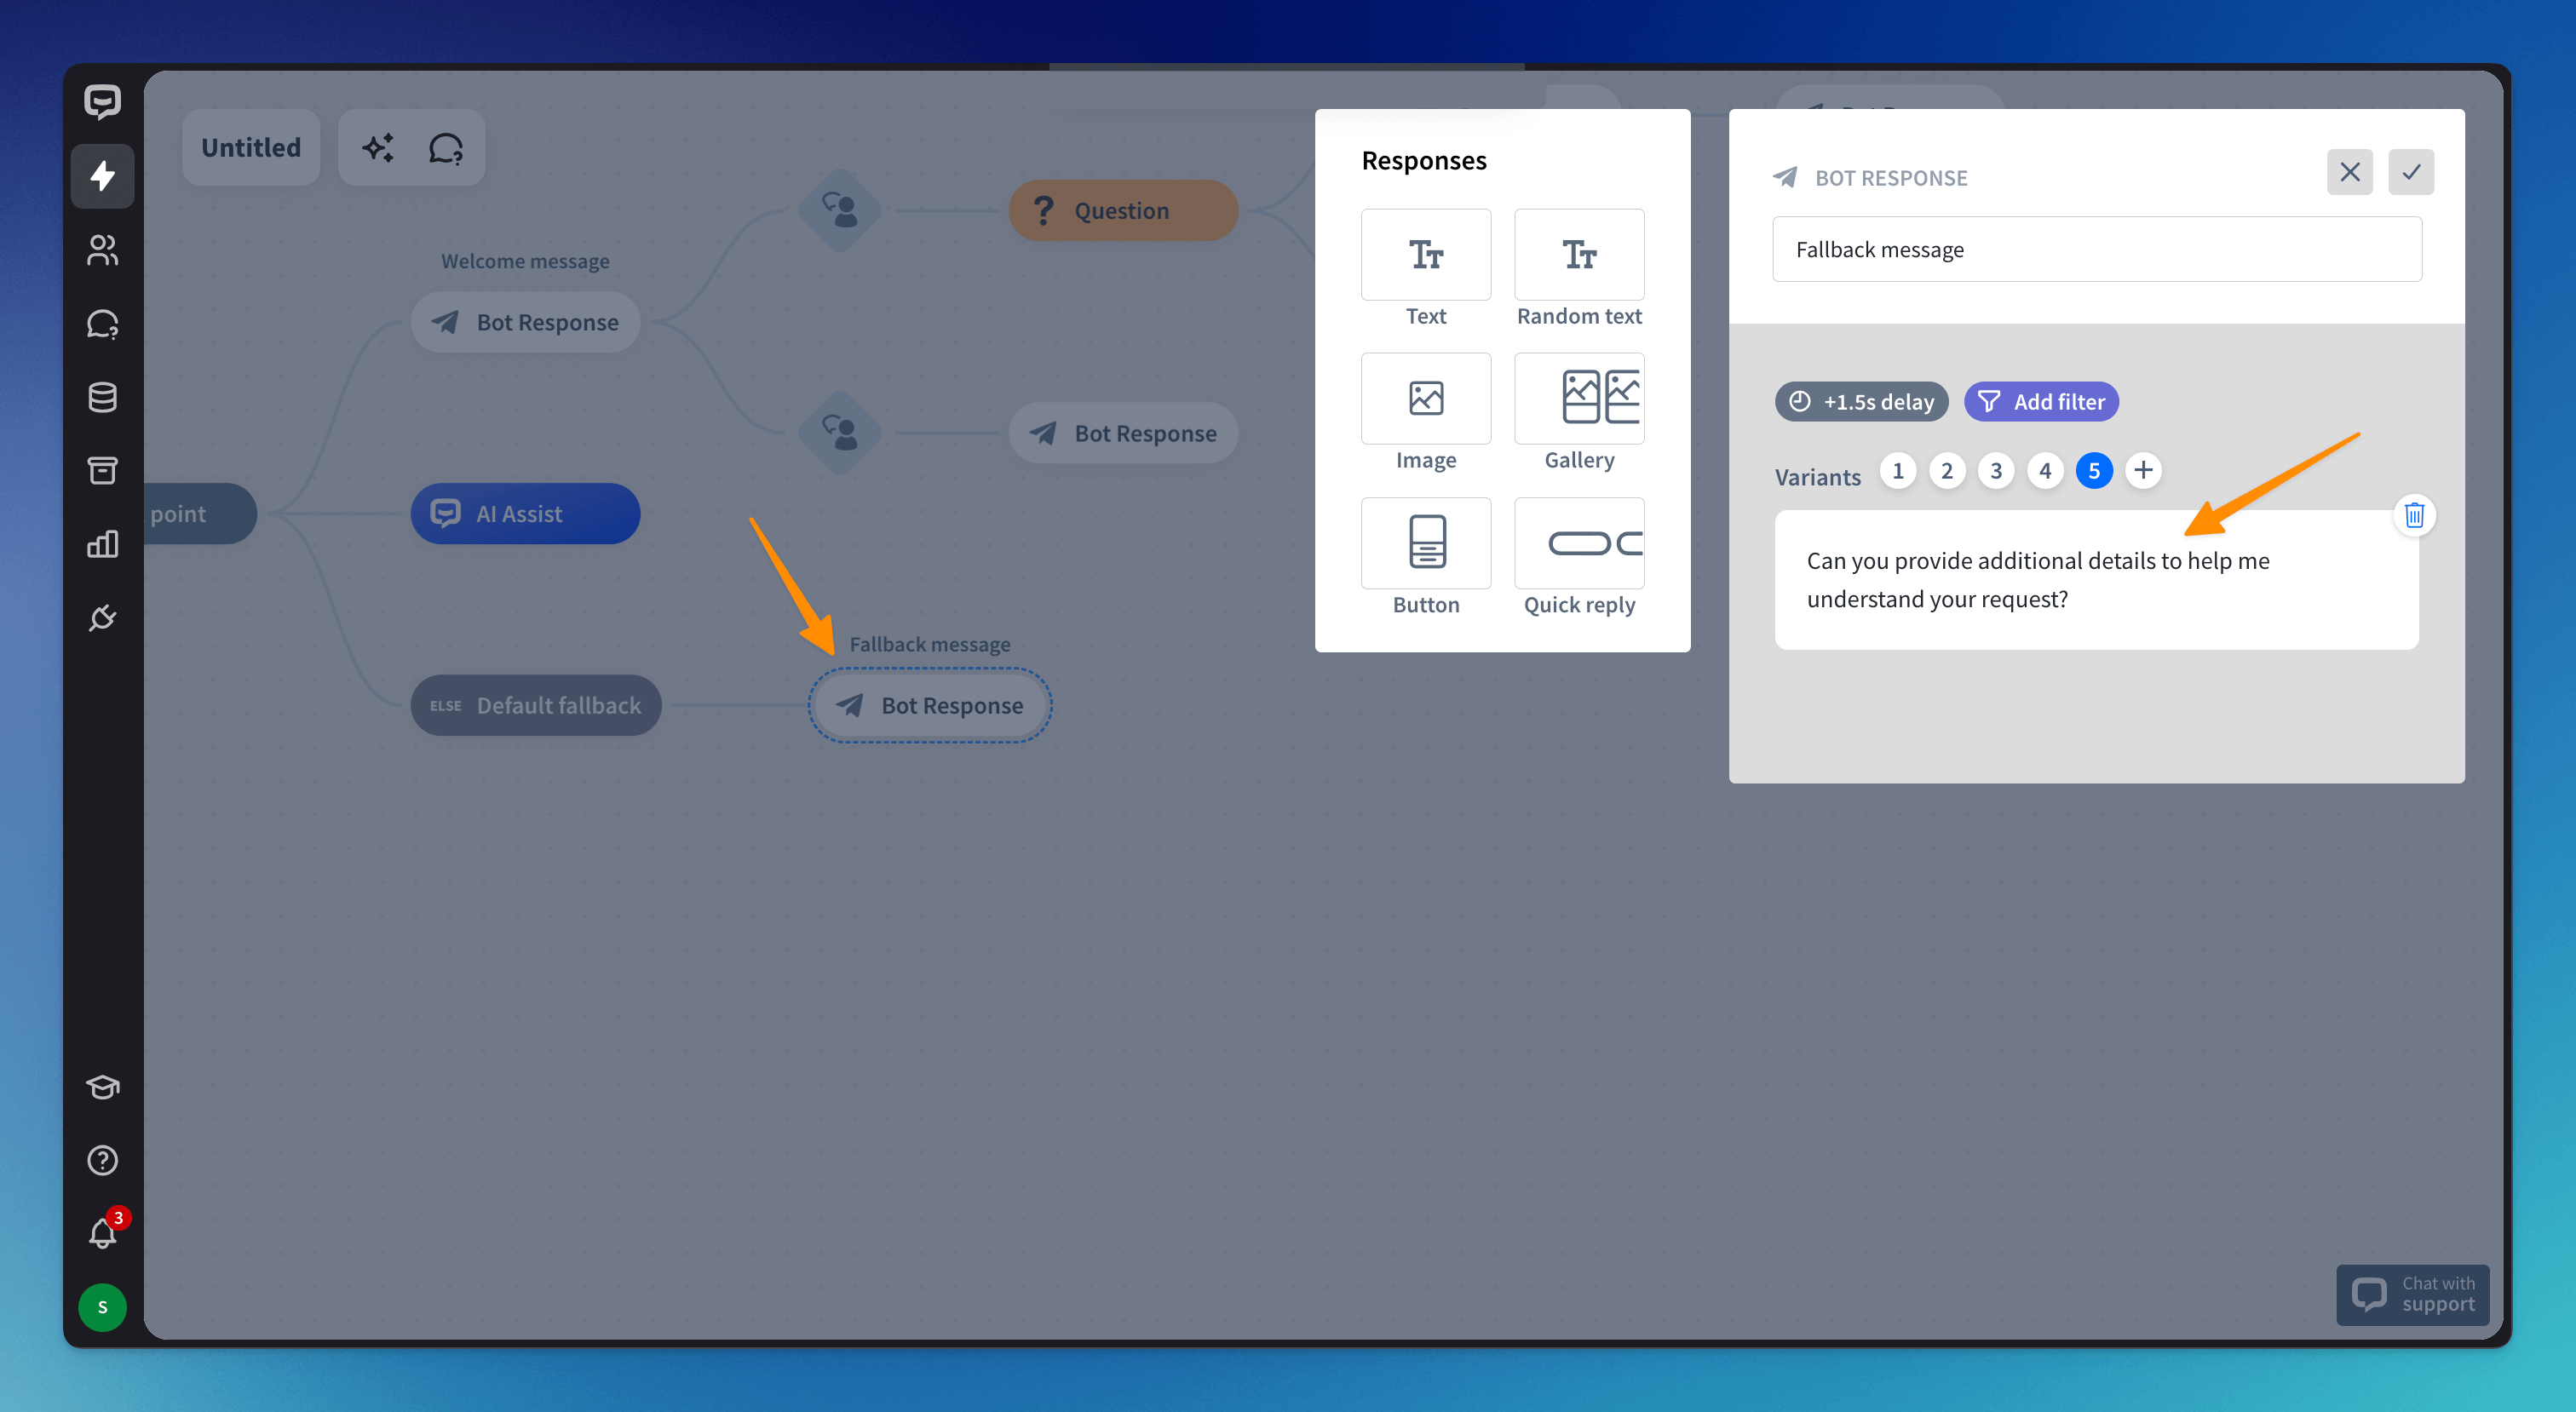
See Default fallback branch. The bot will send these messages when it does not recognize the user’s messages.
How to test the bot
You can test your bot directly in the bot builder. This way, you can detect mistakes much faster and correct them before you show your chatbot to customers.
To test the bot, open the Testing tool in the upper right corner with the Test your bot button. Messages from the bot will appear in the chat window.
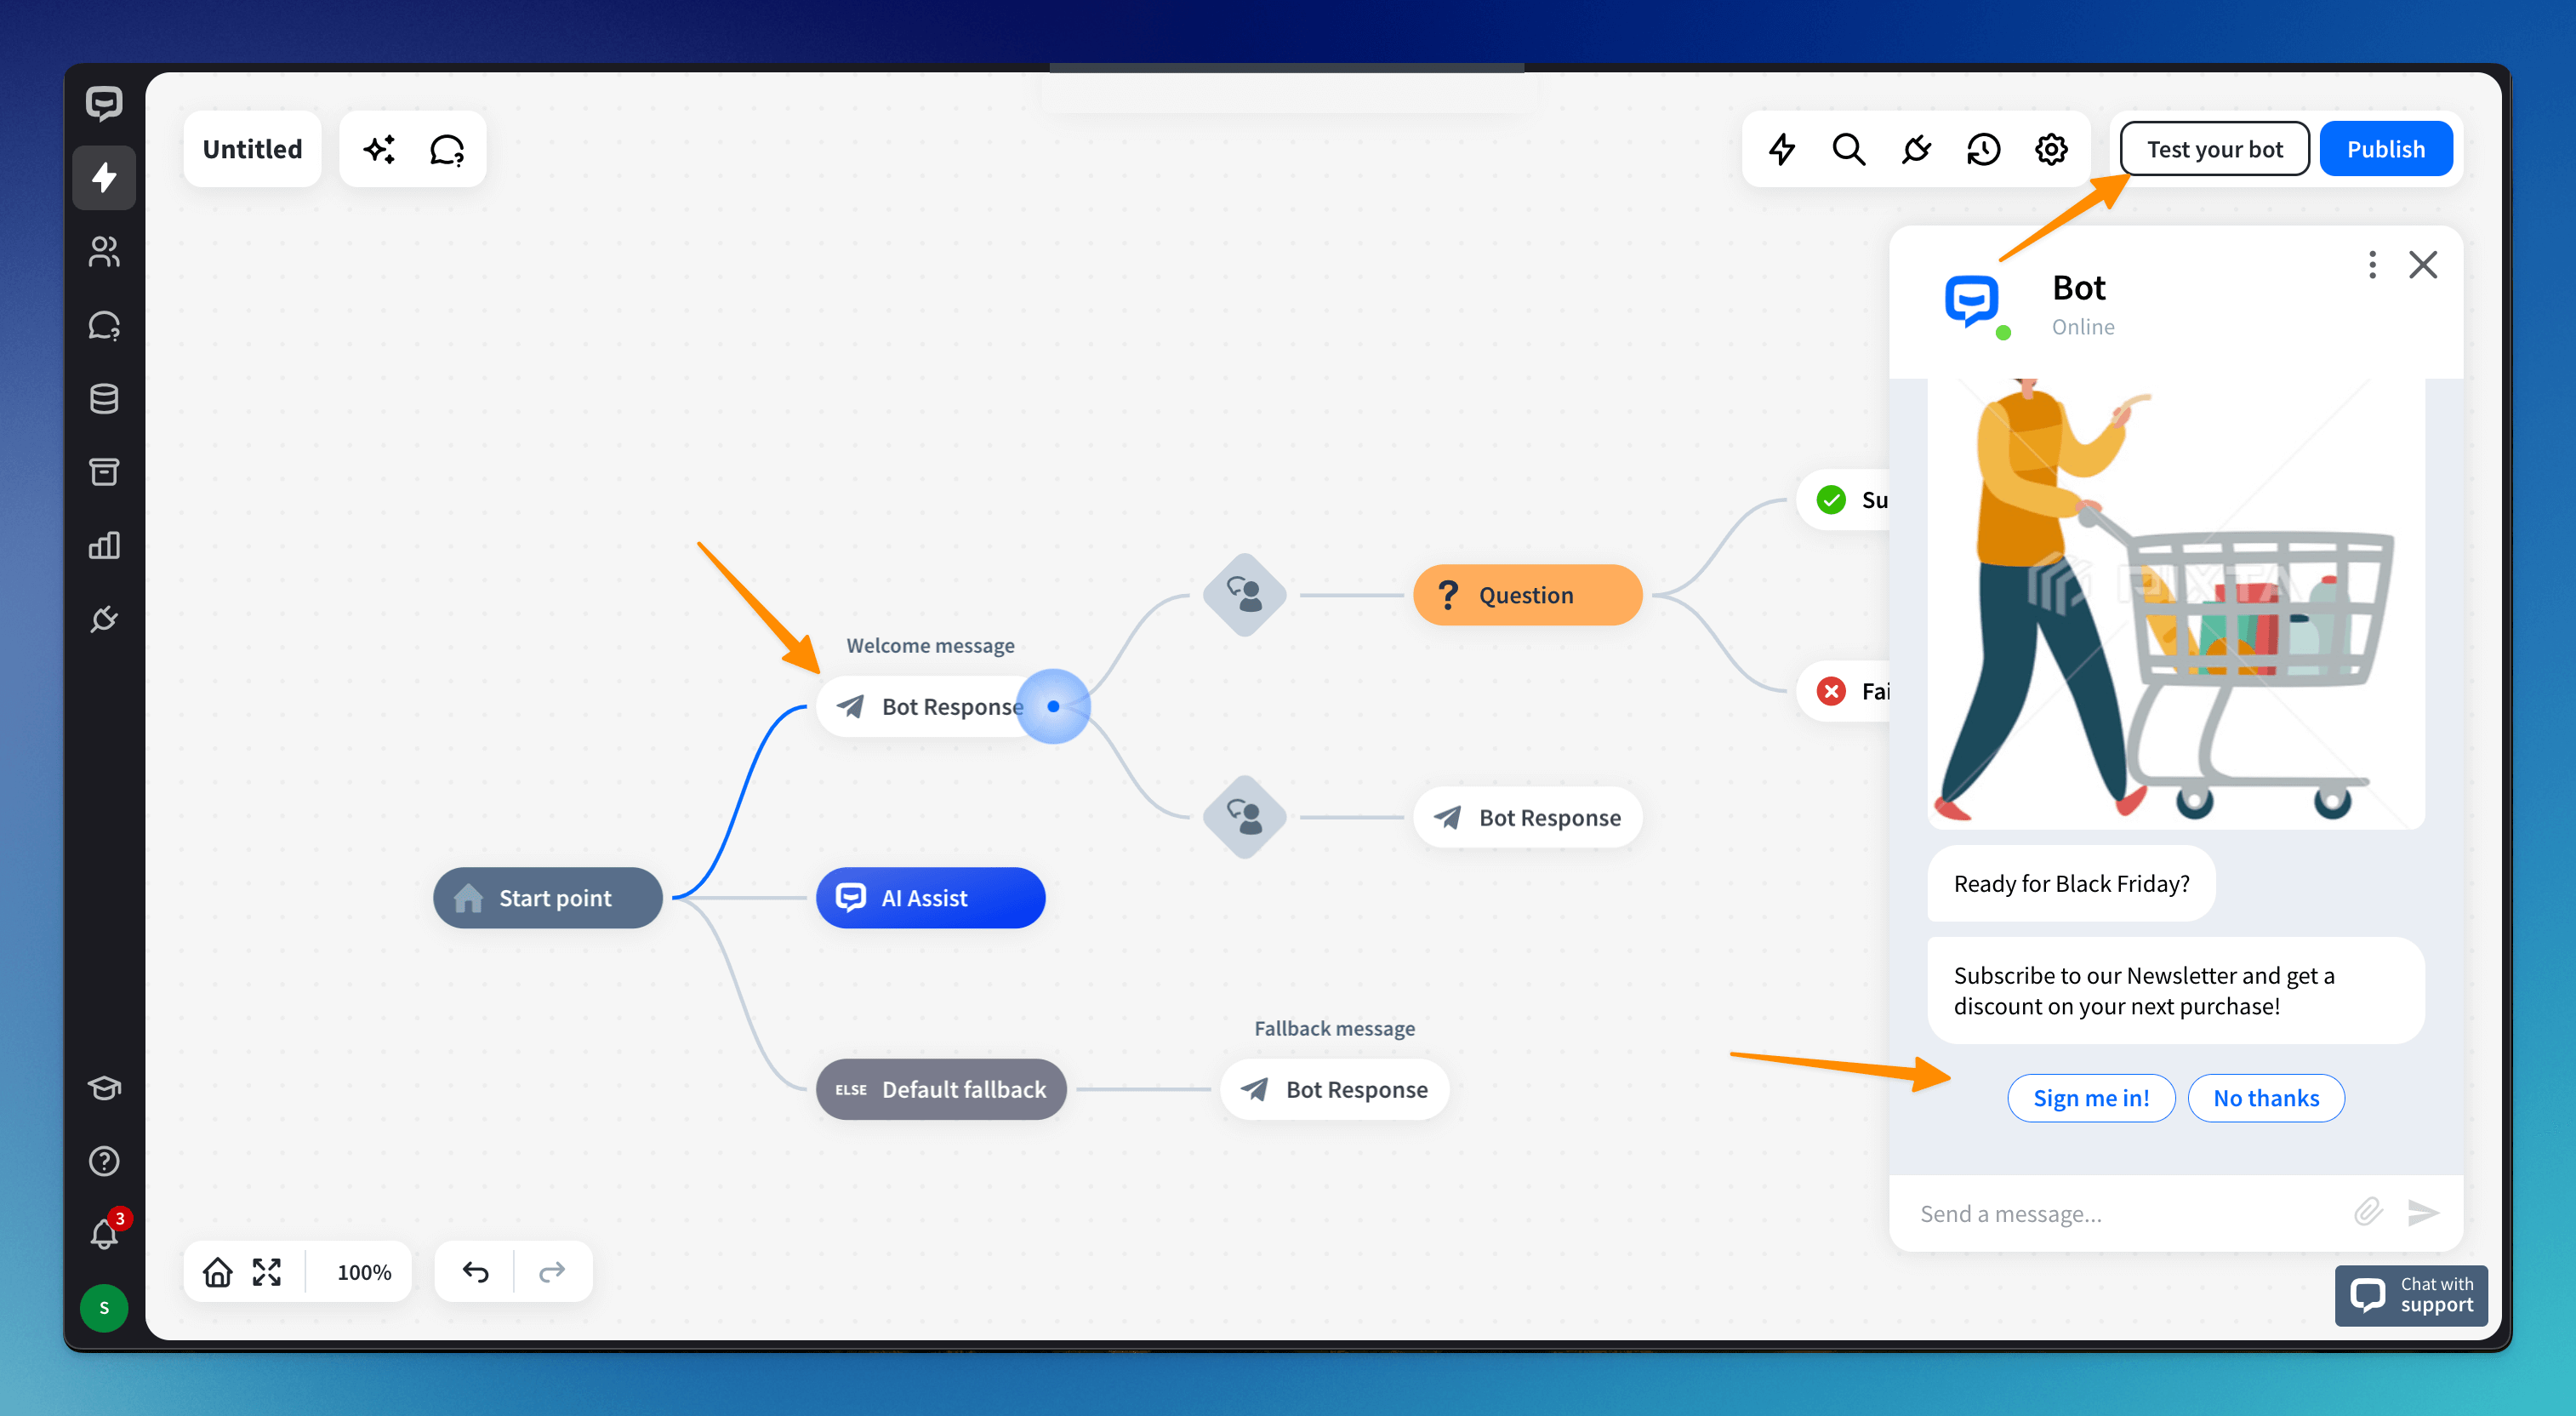 You can follow the bot’s steps when it sends messages. To start the chat from the beginning, click the three dots and choose the Reset chat option.
How to train the bot
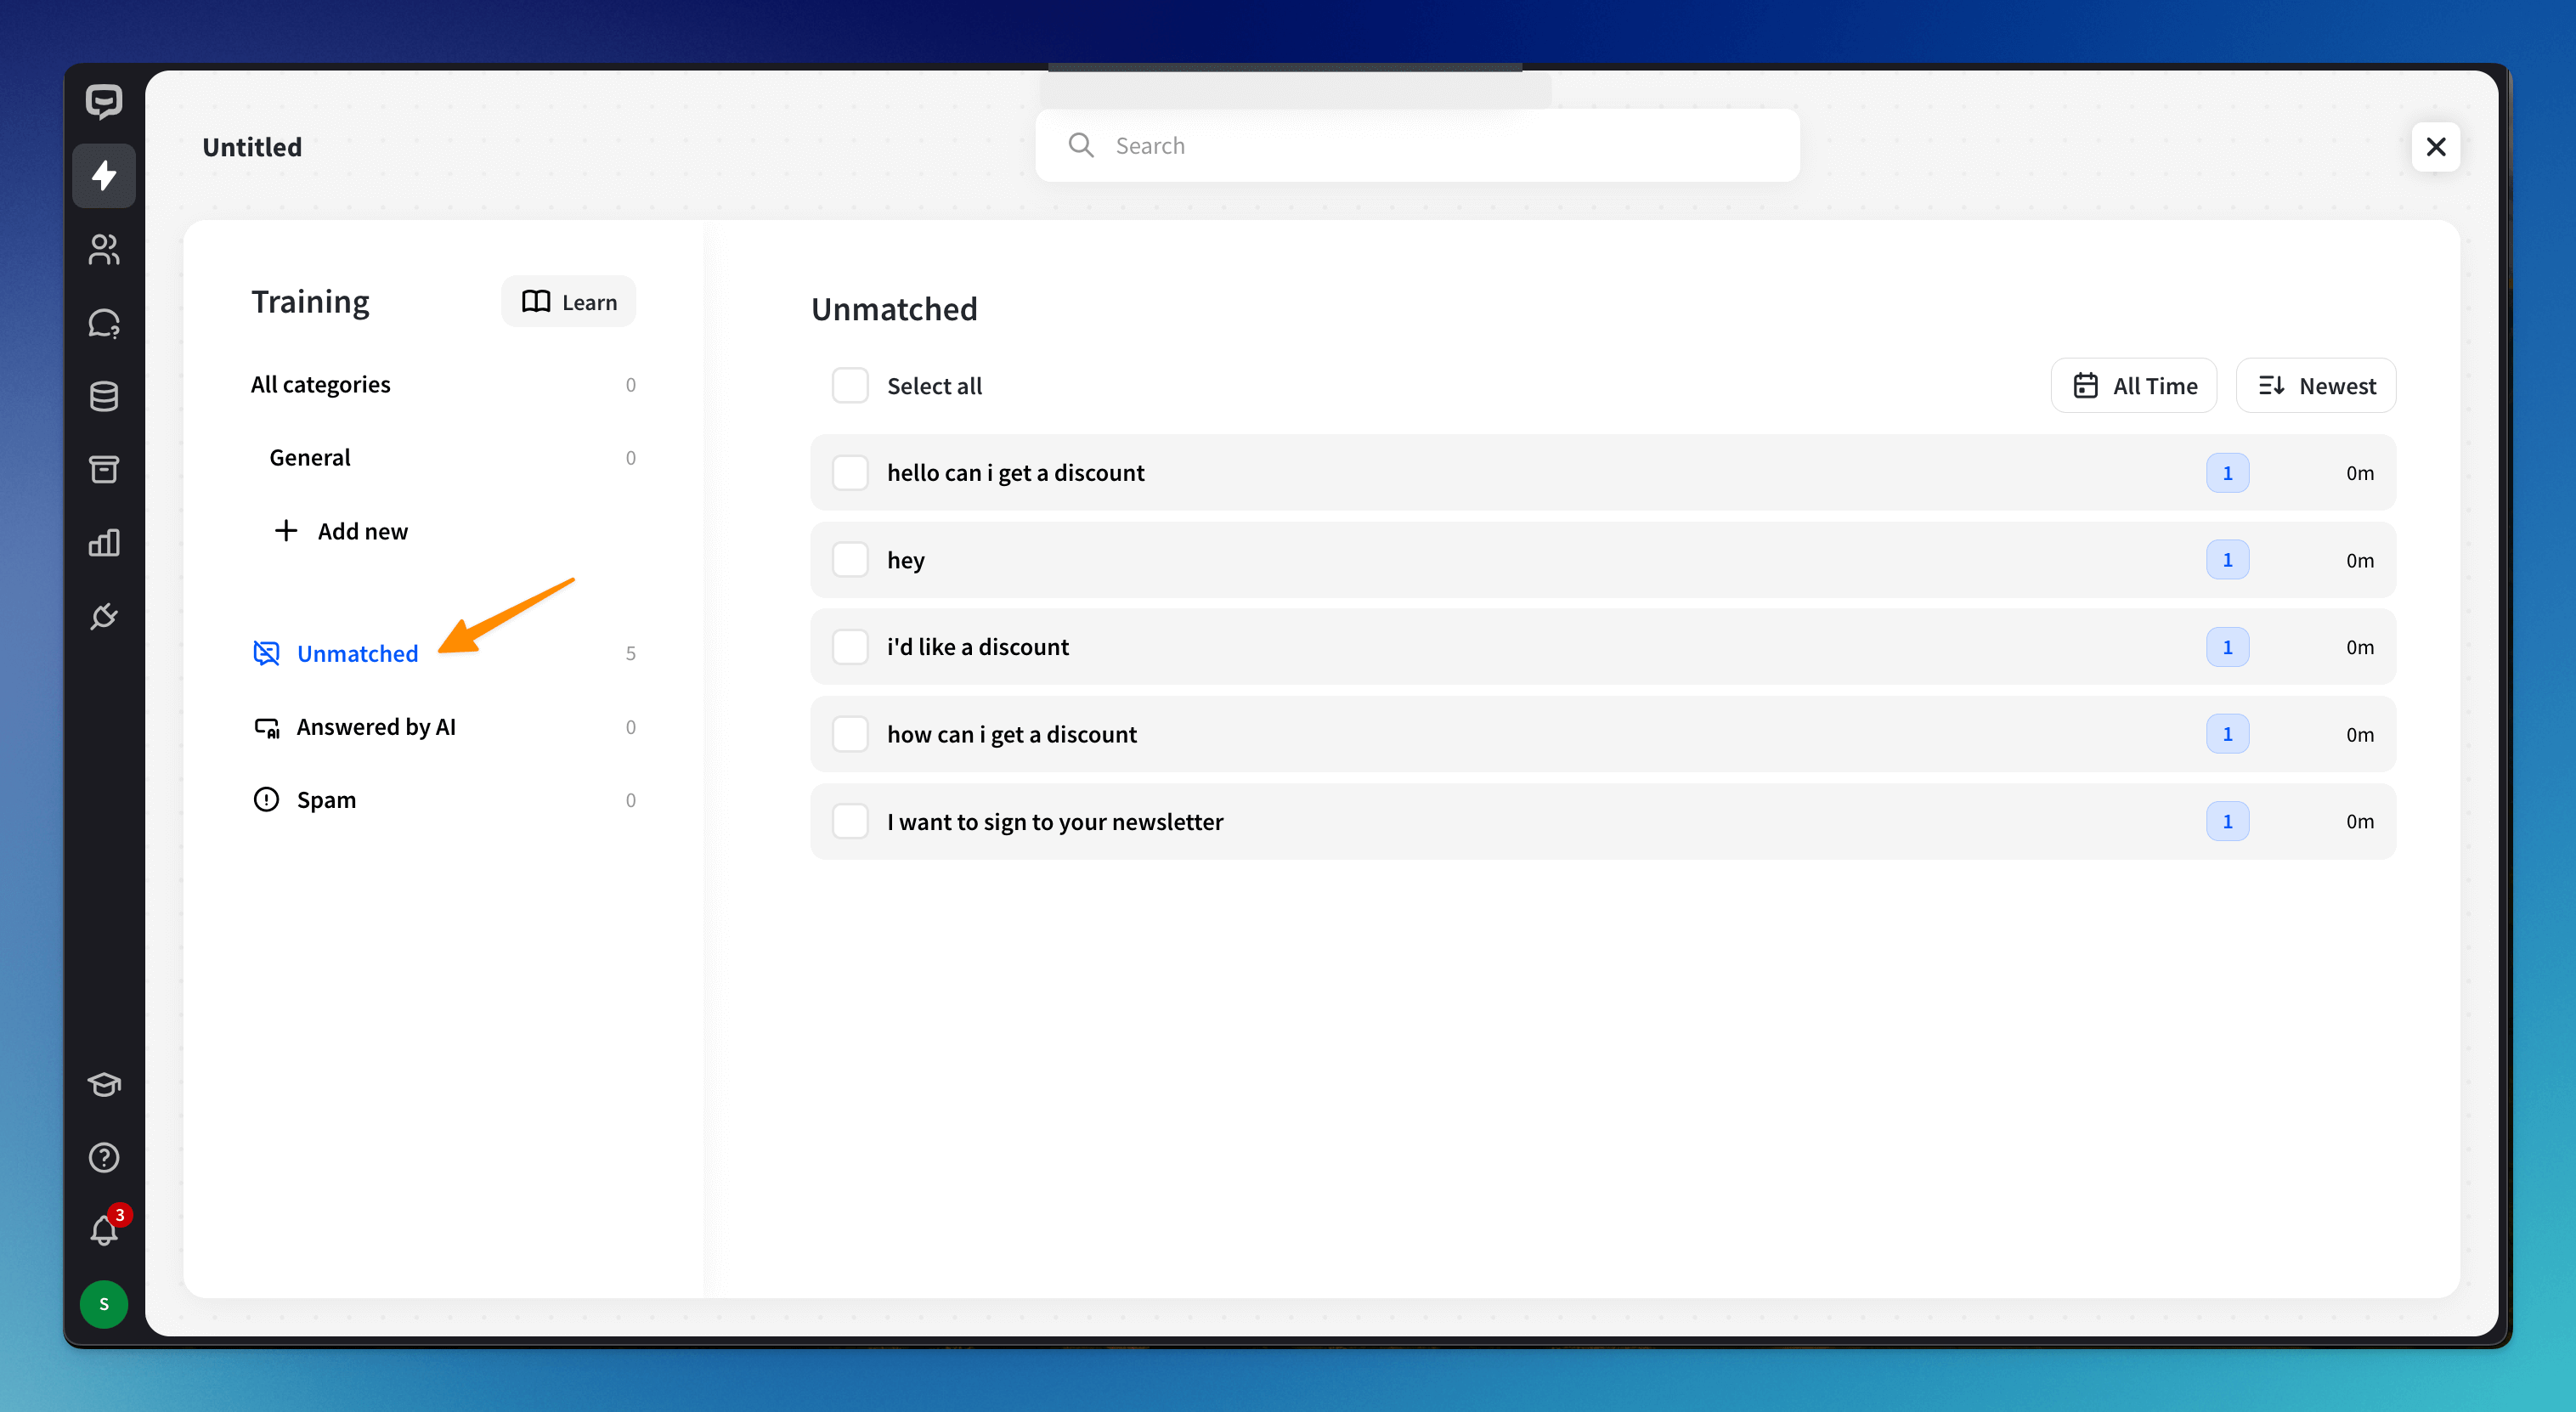
All unmatched interactions that have responded with the fallback interaction are saved in the Unmatched Training module category in the bot builder’s upper left corner. You can add them directly to your chatbot so that your bot can recognize them next time and provide matching replies.
How to install the bot on your site
Before you start the installation process, publish the bot. To do so, click the Publish button at the top right corner of the bot builder view.
To install the bot on your site you must paste the tracking code into your site’s source code before the closing tag. To get the code, go to the Integrations panel, choose the Chat Widget from the list, and go to the Publish section.
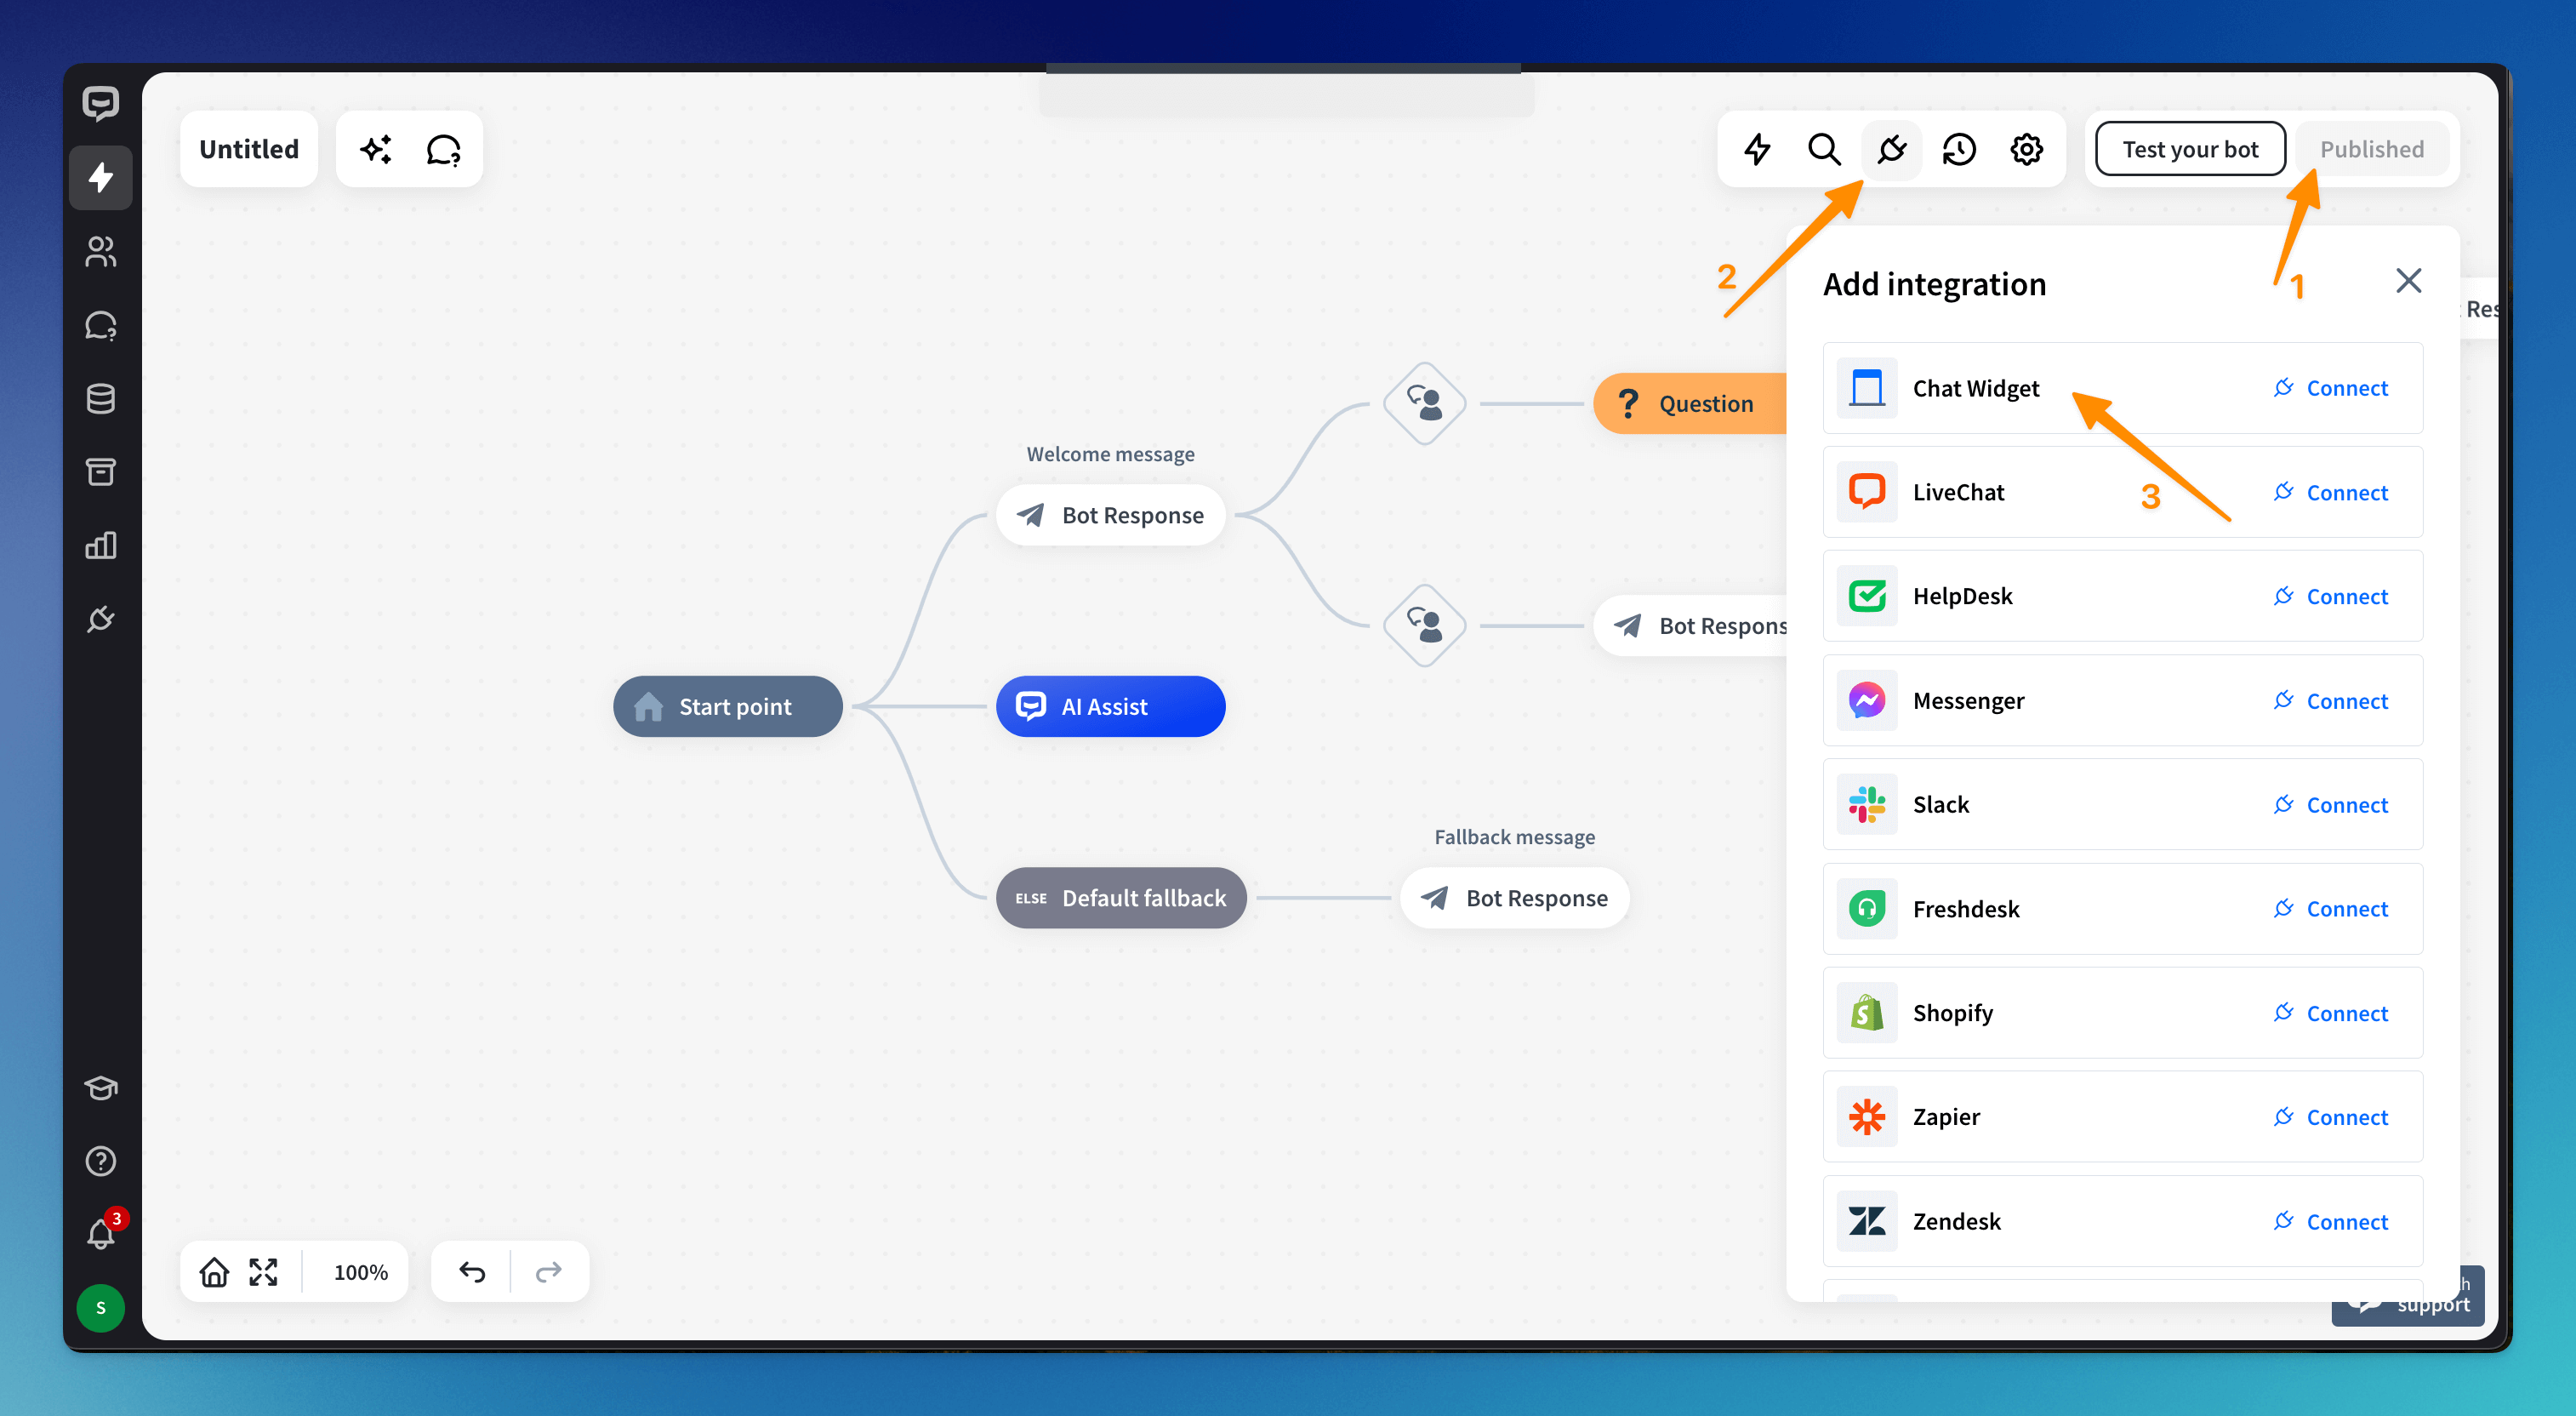 You can customize the Chat Widget in the General and Appearance sections.
Read more: