Freshdesk is an online customer support software that helps you manage your customer communication process. It allows you to track and manage incoming tickets across channels and collaborate with multiple teams for faster resolution.
By connecting ChatBot.com to Freshdesk, you can start using two new Freshdesk actions:
These will help streamline your customer communication process and drive long-term customer relationships.
How to integrate the bot with Freshdesk
-
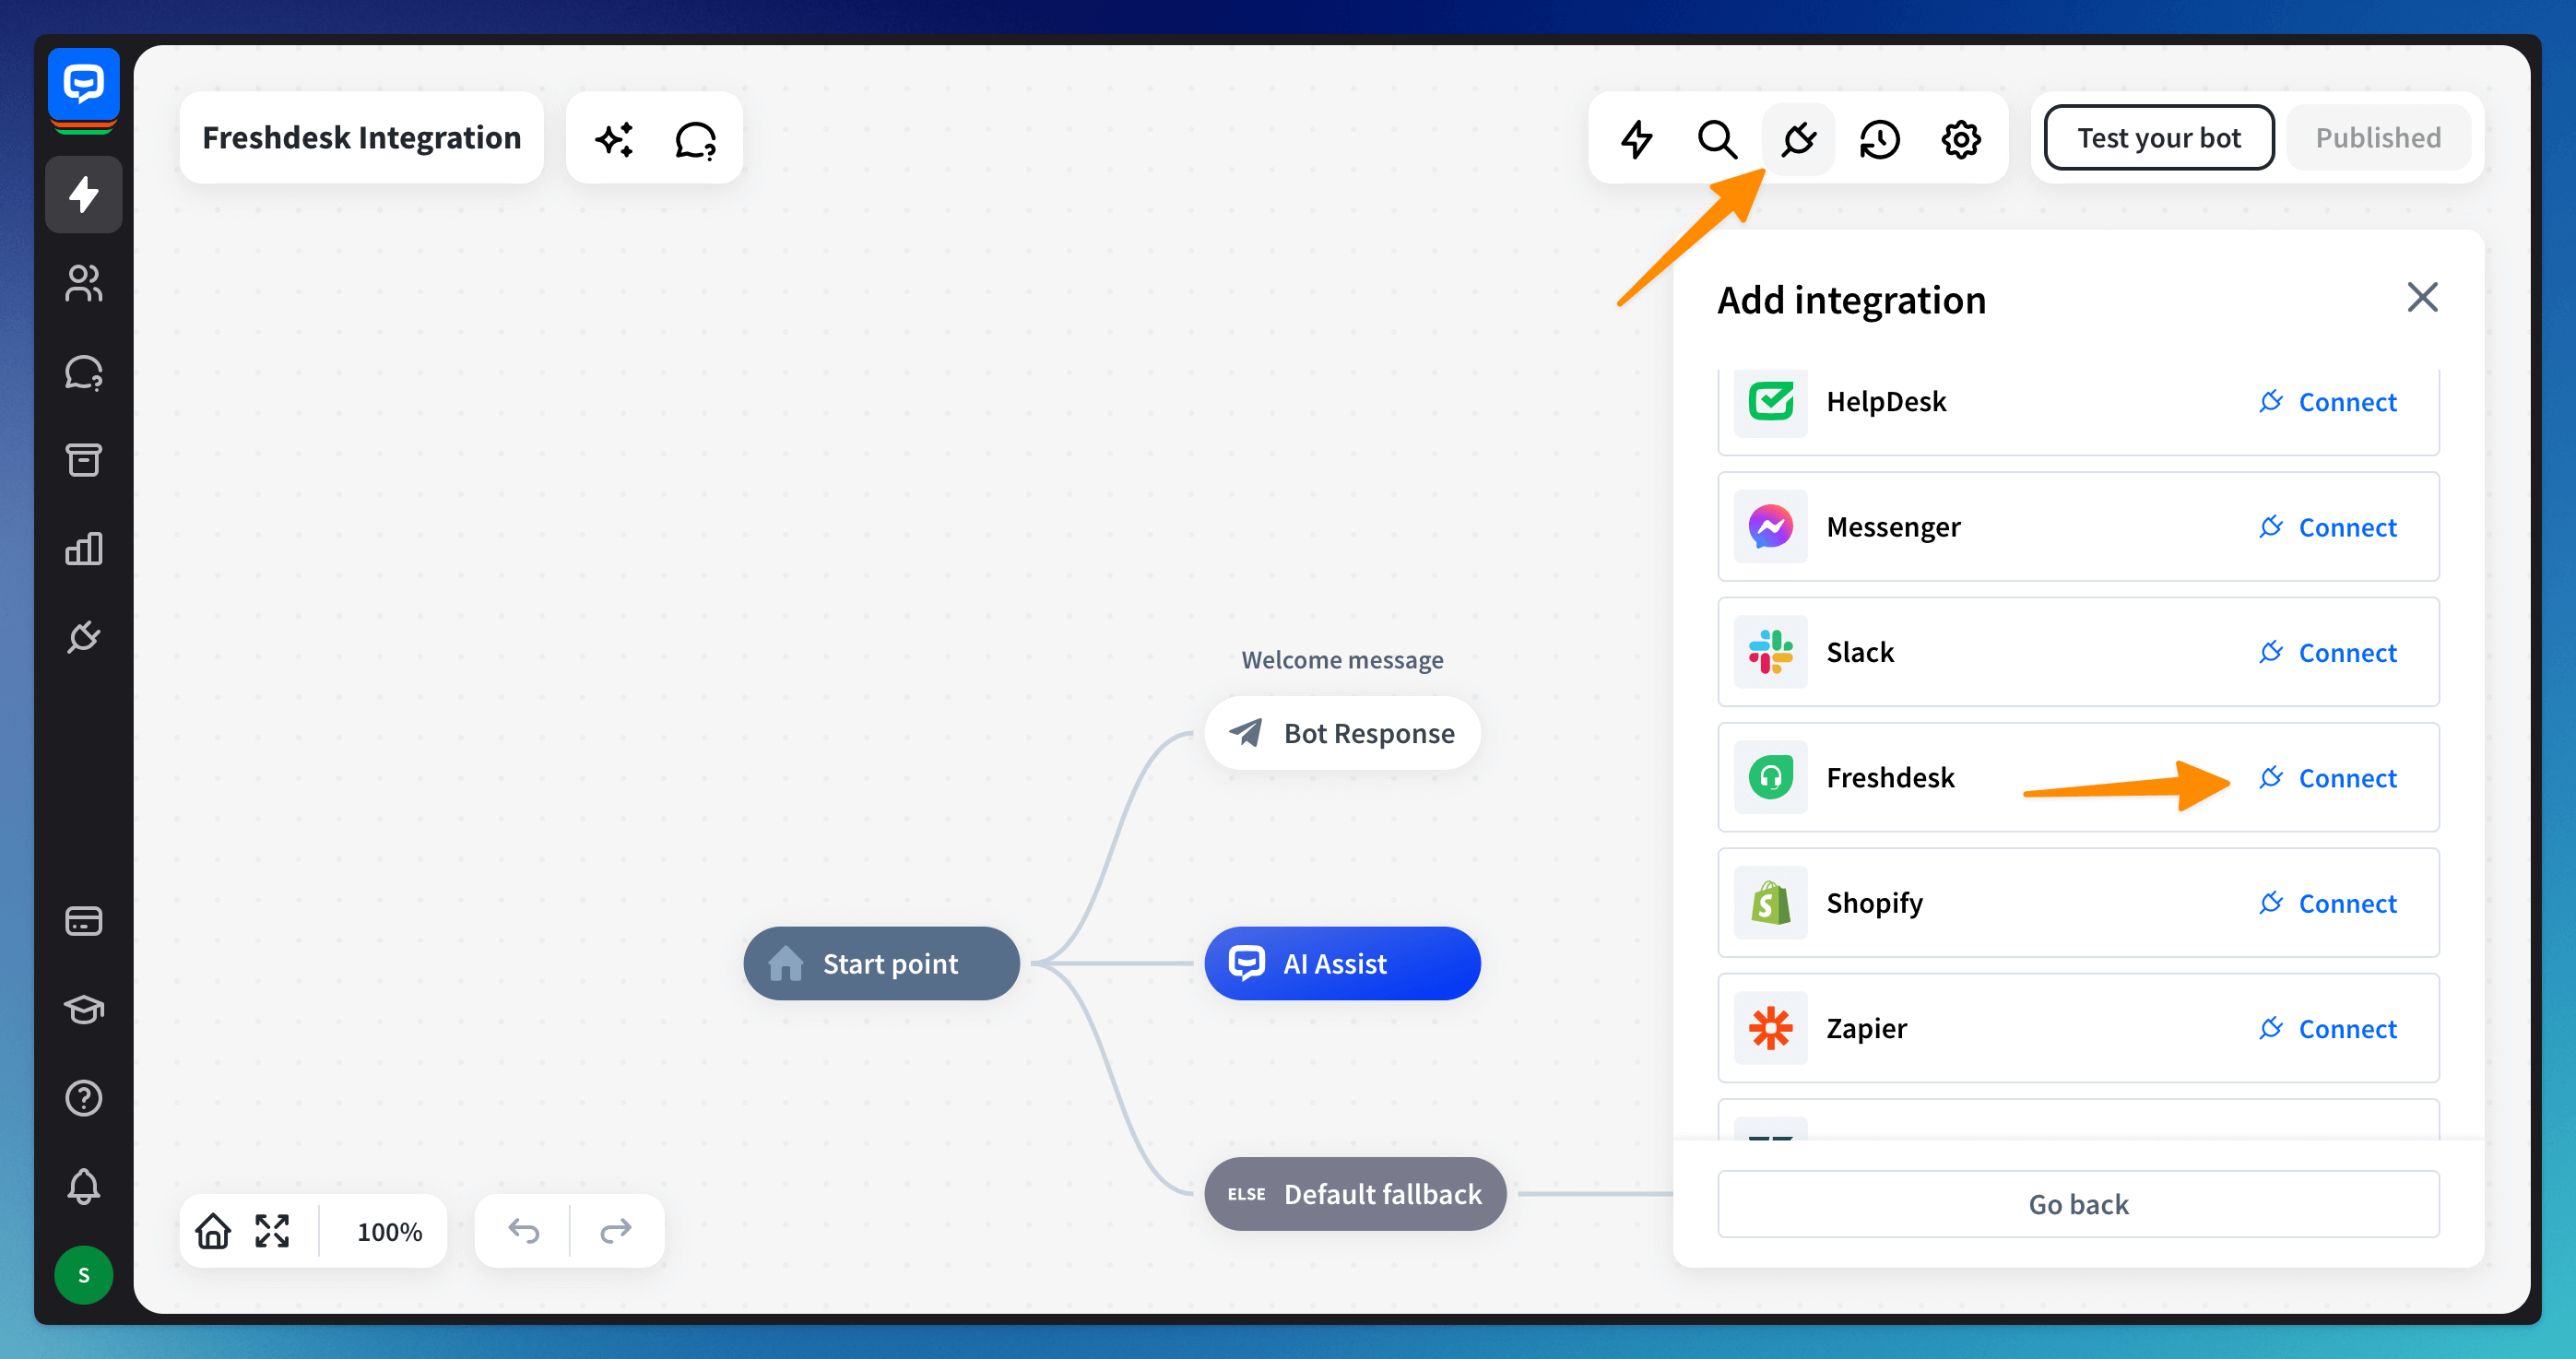
Head to the Integrations menu in your bot and scroll down to access Freshdesk integration. Click the Connect button.
-
Enter your Freshdesk account name and the Freshdesk API Key. Click the Connect with Freshdesk button to finish the configuration. A new active connection will appear on the Integrations list.
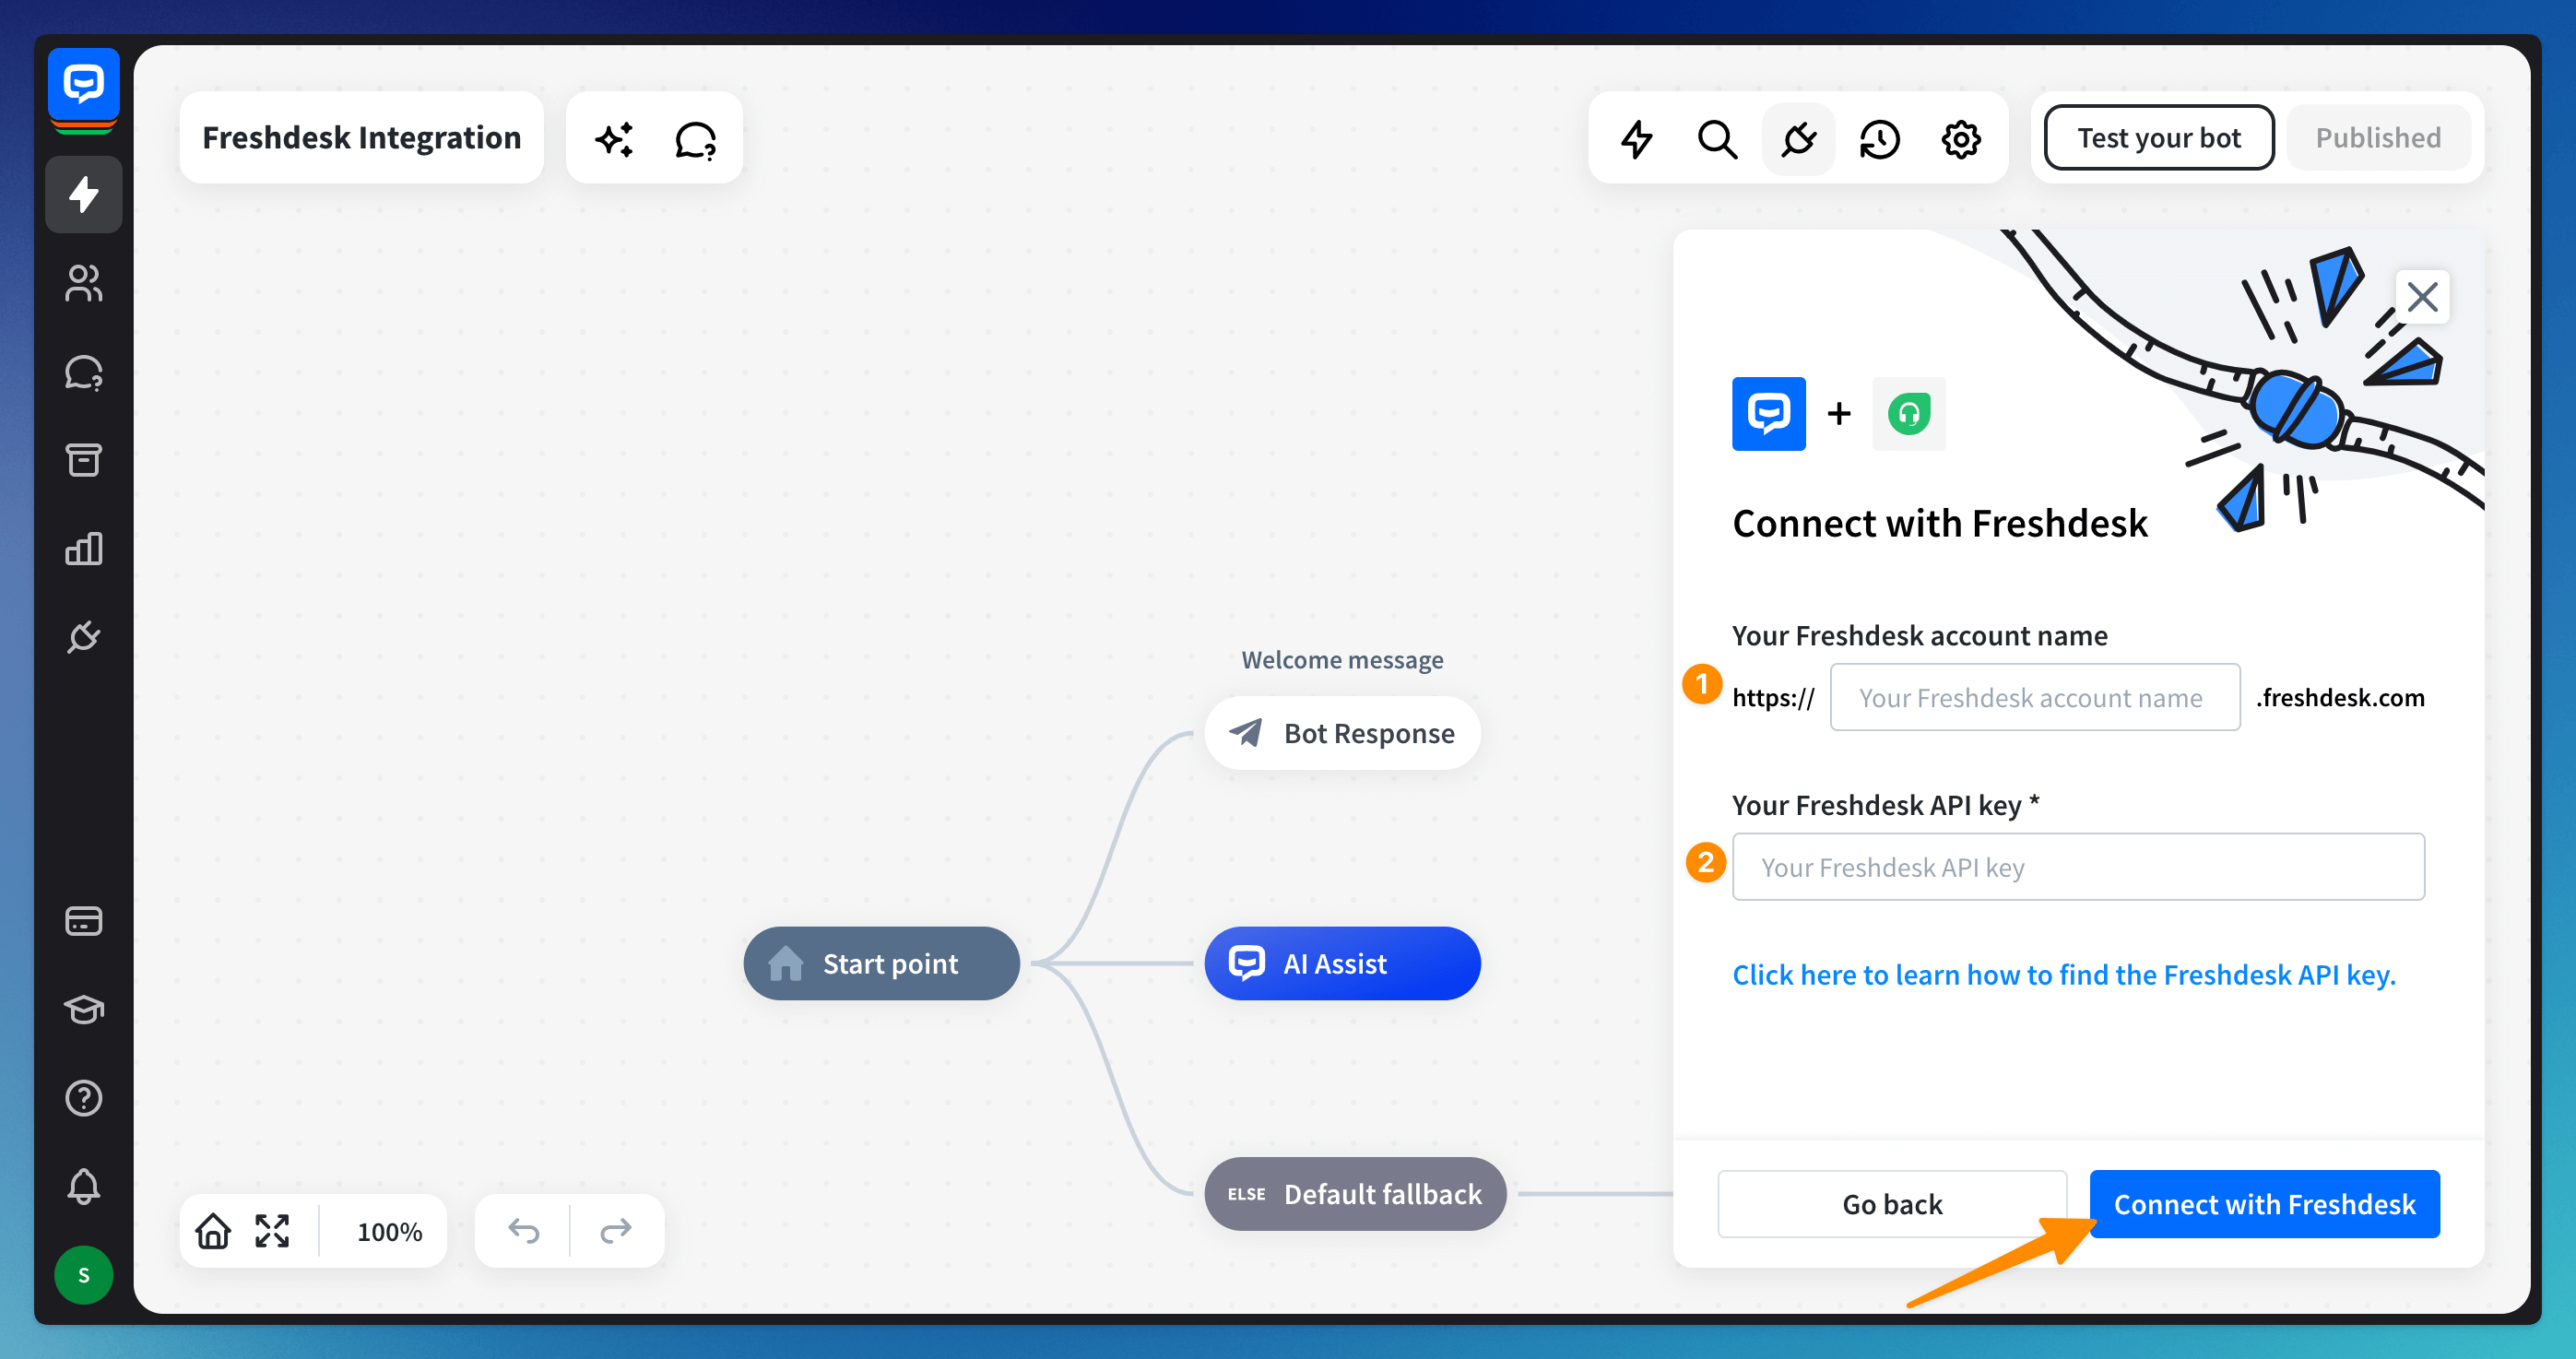 If you don’t know where to find the API key, here’s the link.
How to use the Freshdesk Create ticket action
The Create ticket action for Freshdesk lets you create tickets from your customers’ chats with your chatbot. You must first connect your Freshdesk account to ChatBot.com to use this action.
-
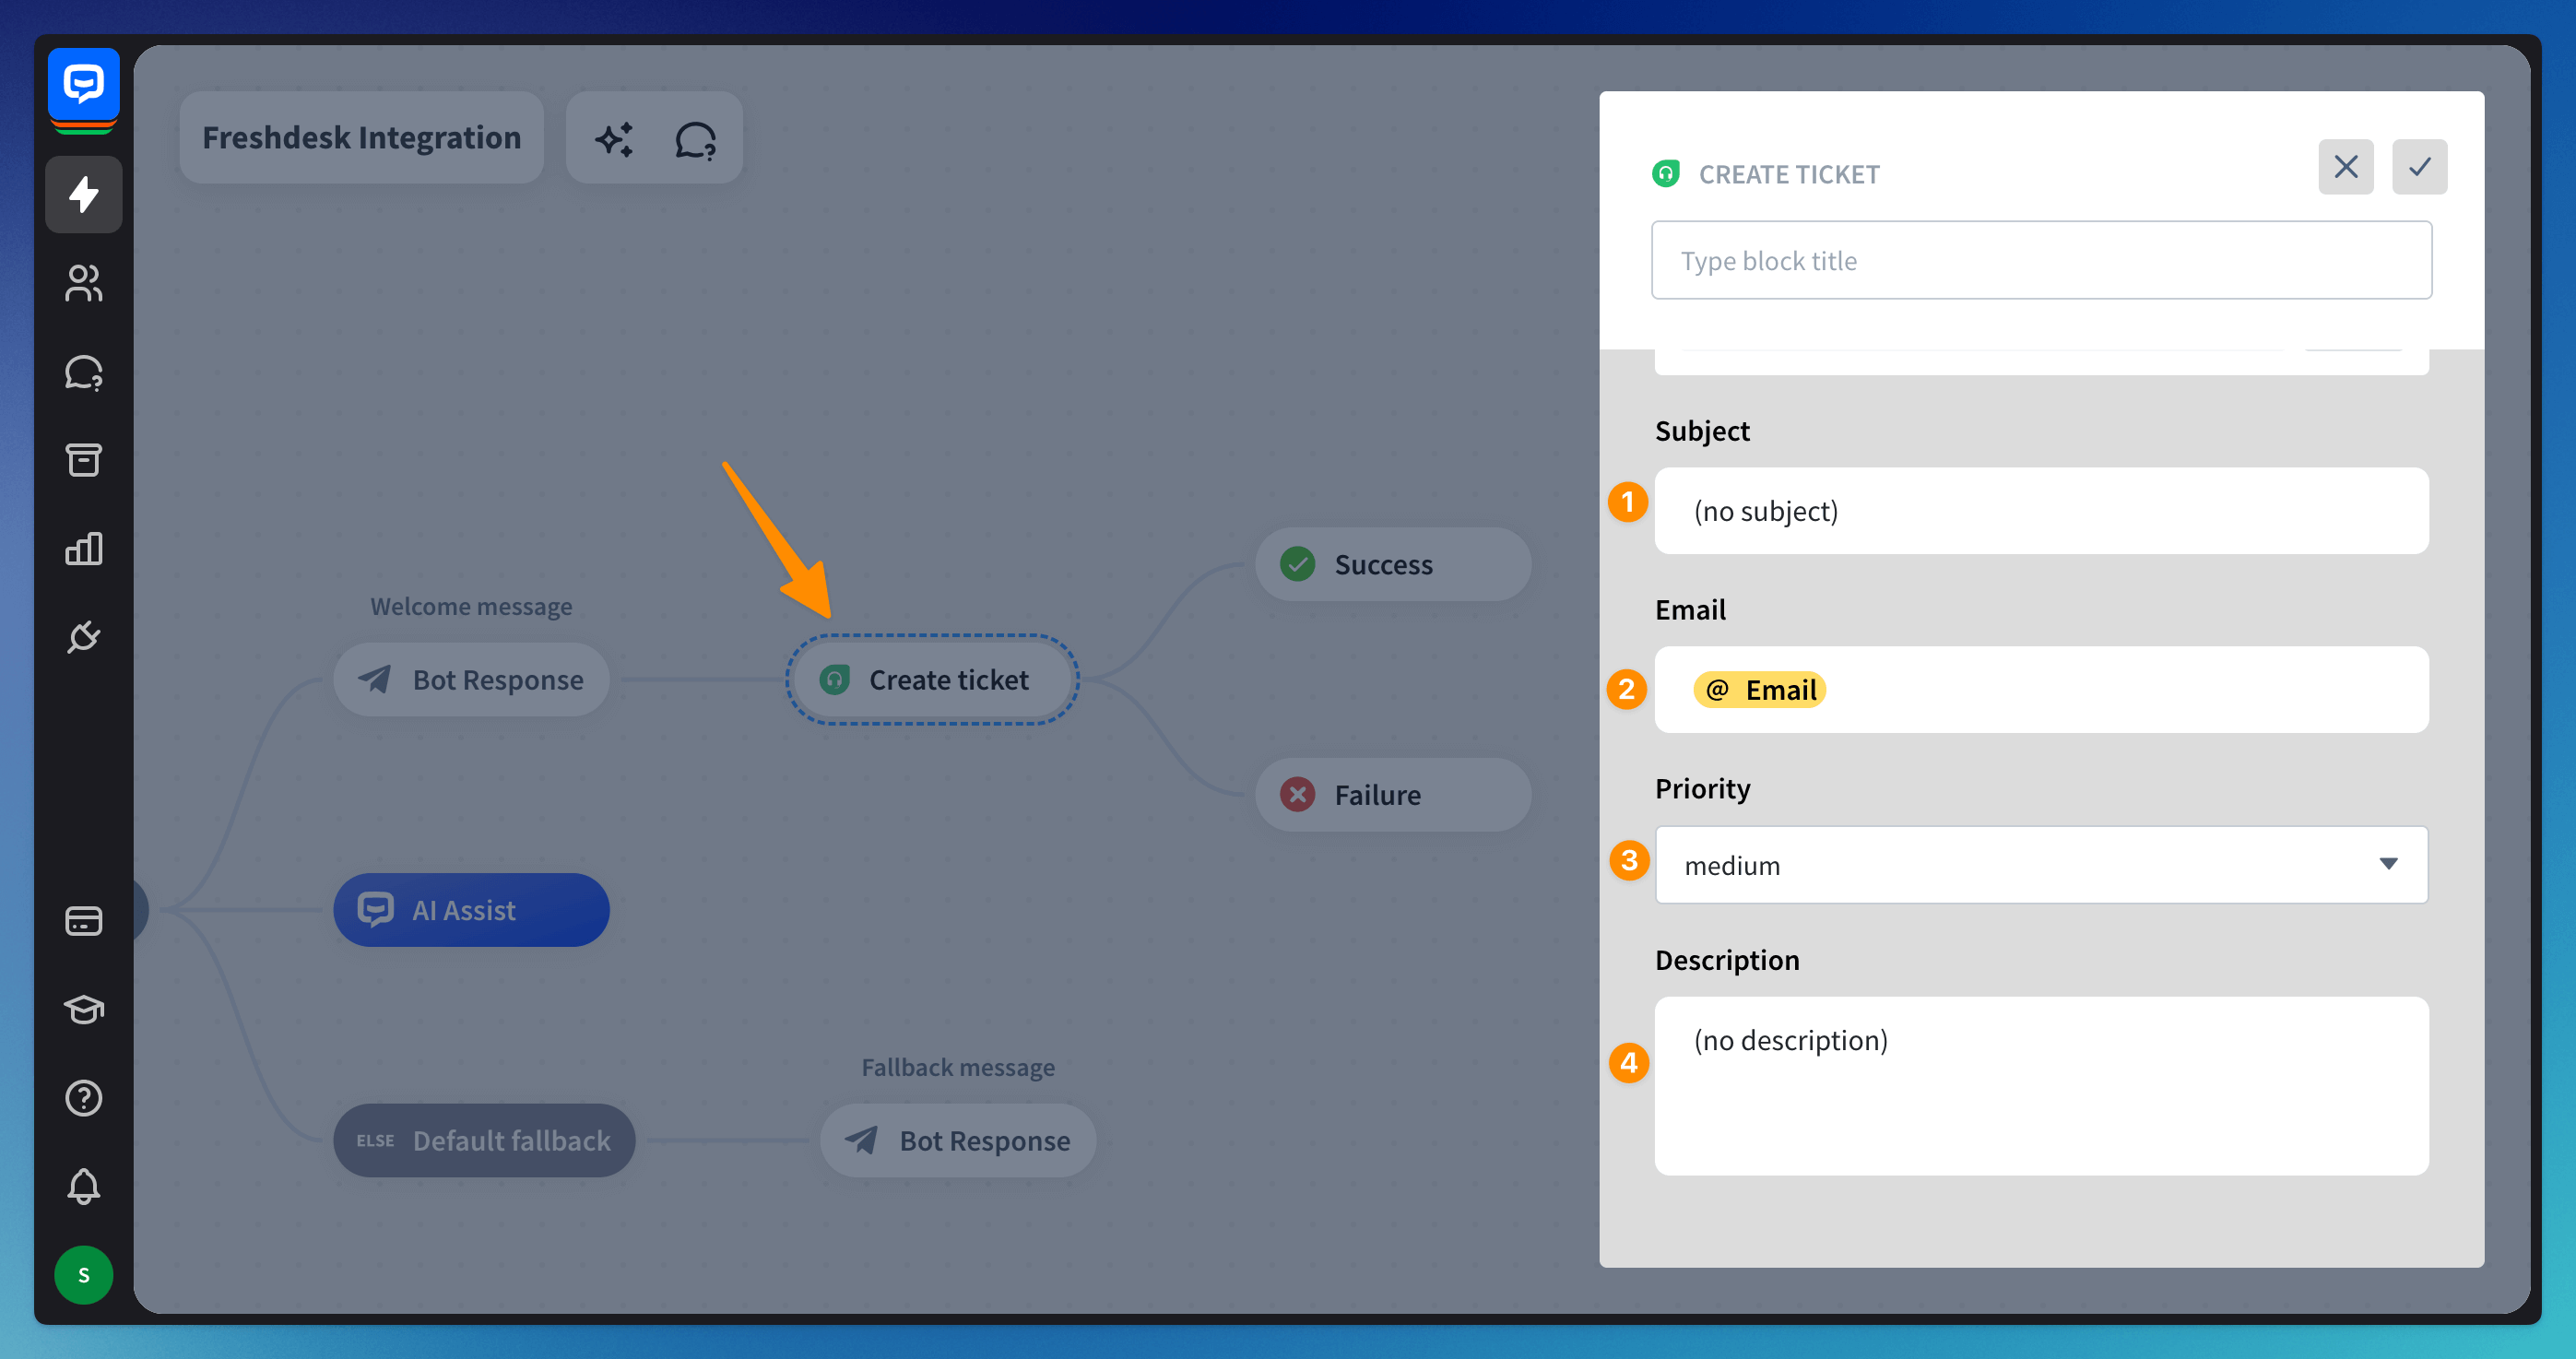
Drag the action and add the block to the bot flow. Click on the block to edit it.
-
We pre-defined the ticket fields for you. You can leave them as they are or change them:
- change the Subject is the ticket title you see in the Freshdesk app
- Email field has the default Email attribute you need to collect before the action in the bot flow. You can use this attribute or create your custom attribute. The response to the customer’s query will be sent to this collected email address.
- set up the ticket Priority - This will help your team verify which tickets need to be handled first. Remember that you can always change ticket priority later.
- fill in the Description field - it contains the content of a created ticket. To configure this field, use the default or custom attributes you collected earlier in the bot flow.
-
Test the integration using the Testing tool.
-
Open the Tickets section in Freshdesk to check out the tickets created by a chatbot.
How to use the Freshdesk Add contact action
The Add contact action for Freshdesk allows you to add contacts gathered by ChatBot.com to your Freshdesk account. To use this action, you’ll need to connect your Freshdesk account to ChatBot.com first.
-
Drag the Add contact block and add it to the appropriate place in your bot flow.
-
Select the block you added and configure the action. We pre-defined the fields for you. You can leave them as they are or change them:
- in the Contact name, leave the default Name attribute or add your custom attribute
- define the Contact email - leave the default Email attribute or add your custom attribute.

-
Test the integration using the Testing tool.
-
Your chatbot contacts will appear in the Contacts section in Freshdesk.
How to find Freshdesk account name and API key
-
Go to your Freshdesk app and check the account URL address. The name of your account is before the freshdesk.com domain. Paste it into ChatBot.com in the Account name field.
-
Go back to Freshdesk and select your profile avatar or picture. Select Profile settings. Your API Key will appear in the top right corner of your dashboard. Copy it. Go back to ChatBot.com and paste it into the API key field.

Read more
