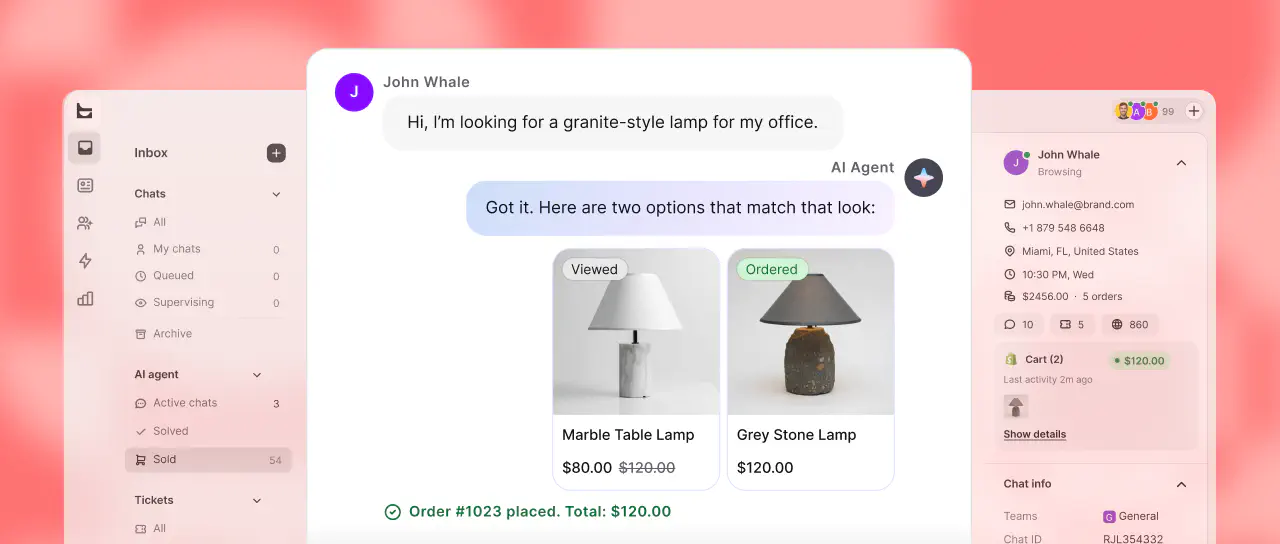
The Show order action for Shopify allows customers to check their order status while chatting with a chatbot. The chatbot needs the user’s order ID and postal code to check where their package is.
Using a ChatBot with your Shopify store can provide a better post-purchase experience.
How to show the Shopify order status in ChatBot
The action will check the order status based on the user’s order ID and postal code in the chat. You need to start the configuration by choosing where to collect the details in the bot.
-
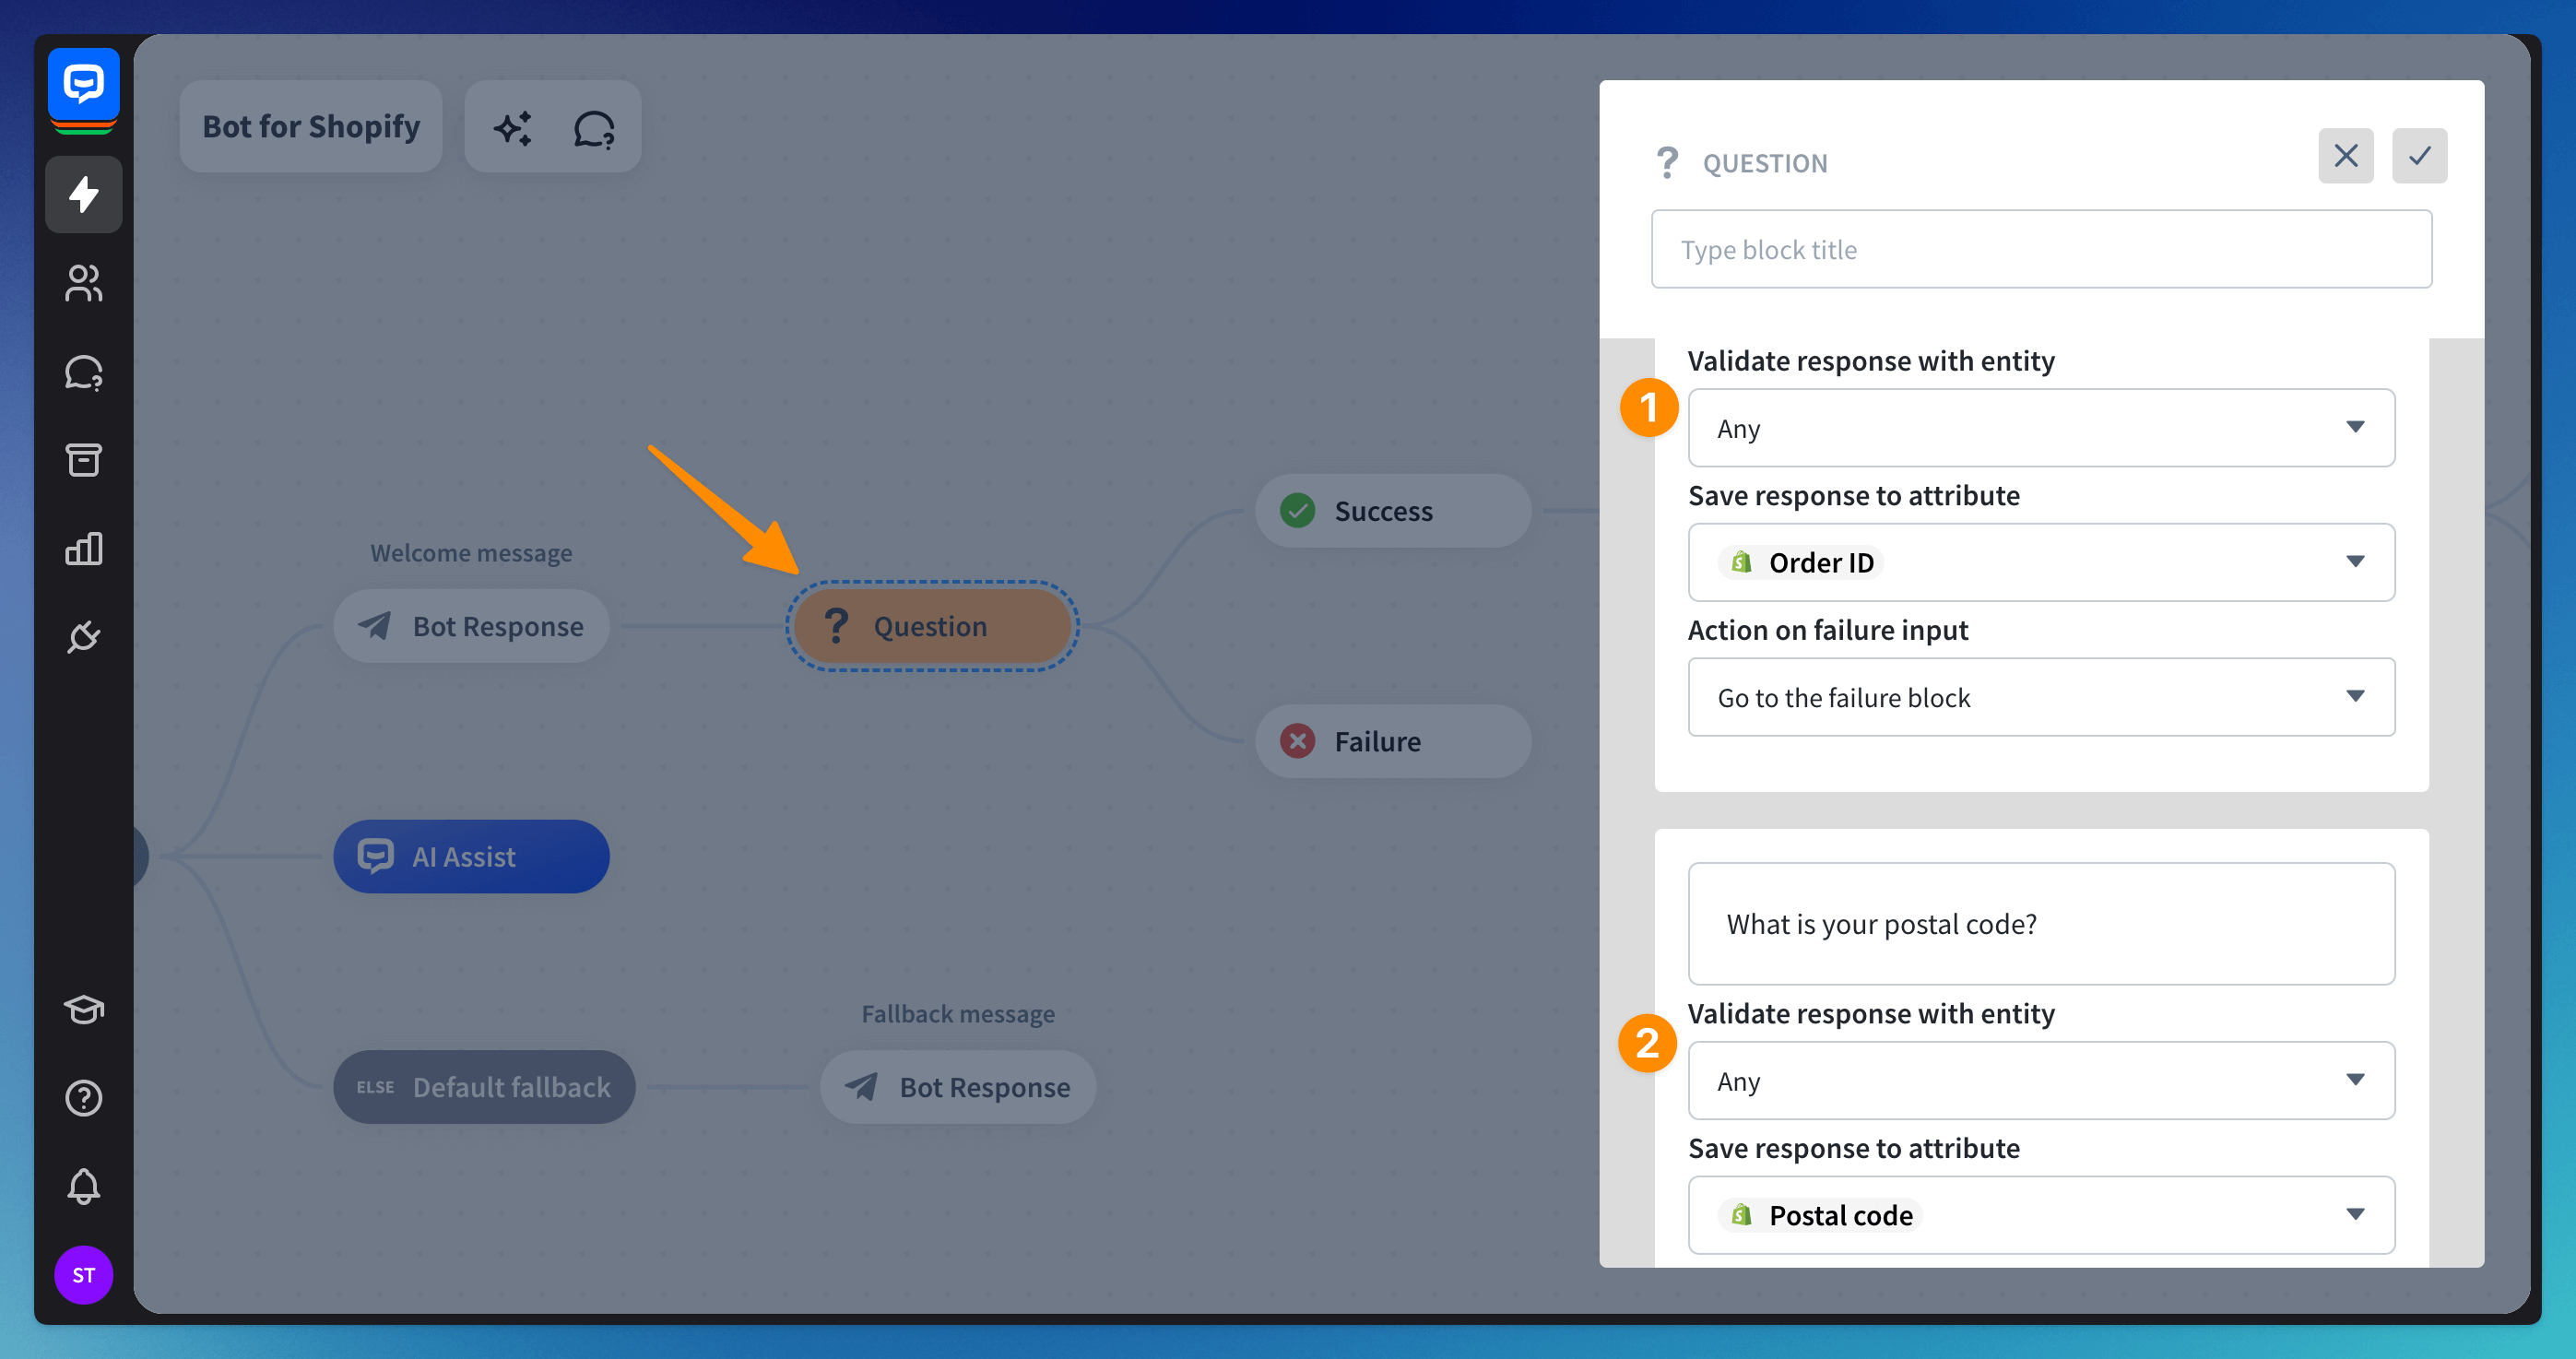
Use the Question action to collect the necessary information. You need to create two questions:
- ask for the ID - validate the response with the Any validation type. Choose a Shopify Order ID attribute.
- ask for the postal code - validate the response with the Any validation type and choose a Shopify Postal code attribute.
-
Add a Bot response after the Success block with confirmation that you have the details.
-
Drag the Order status action and drop it after the Bot response you’ve added. Open the Show order status block. Check if the Order ID (1) and Postal code (2) attributes are there. If they’re not, ensure your Shopify integration is active.

How to show all available Shopify statuses
You need to use Filters after the Order status Success block to show the statuses in the chat. These blocks will help the chatbot display a dedicated message to users. The correct status will be displayed based on your Shopify store’s return to the bot.
-
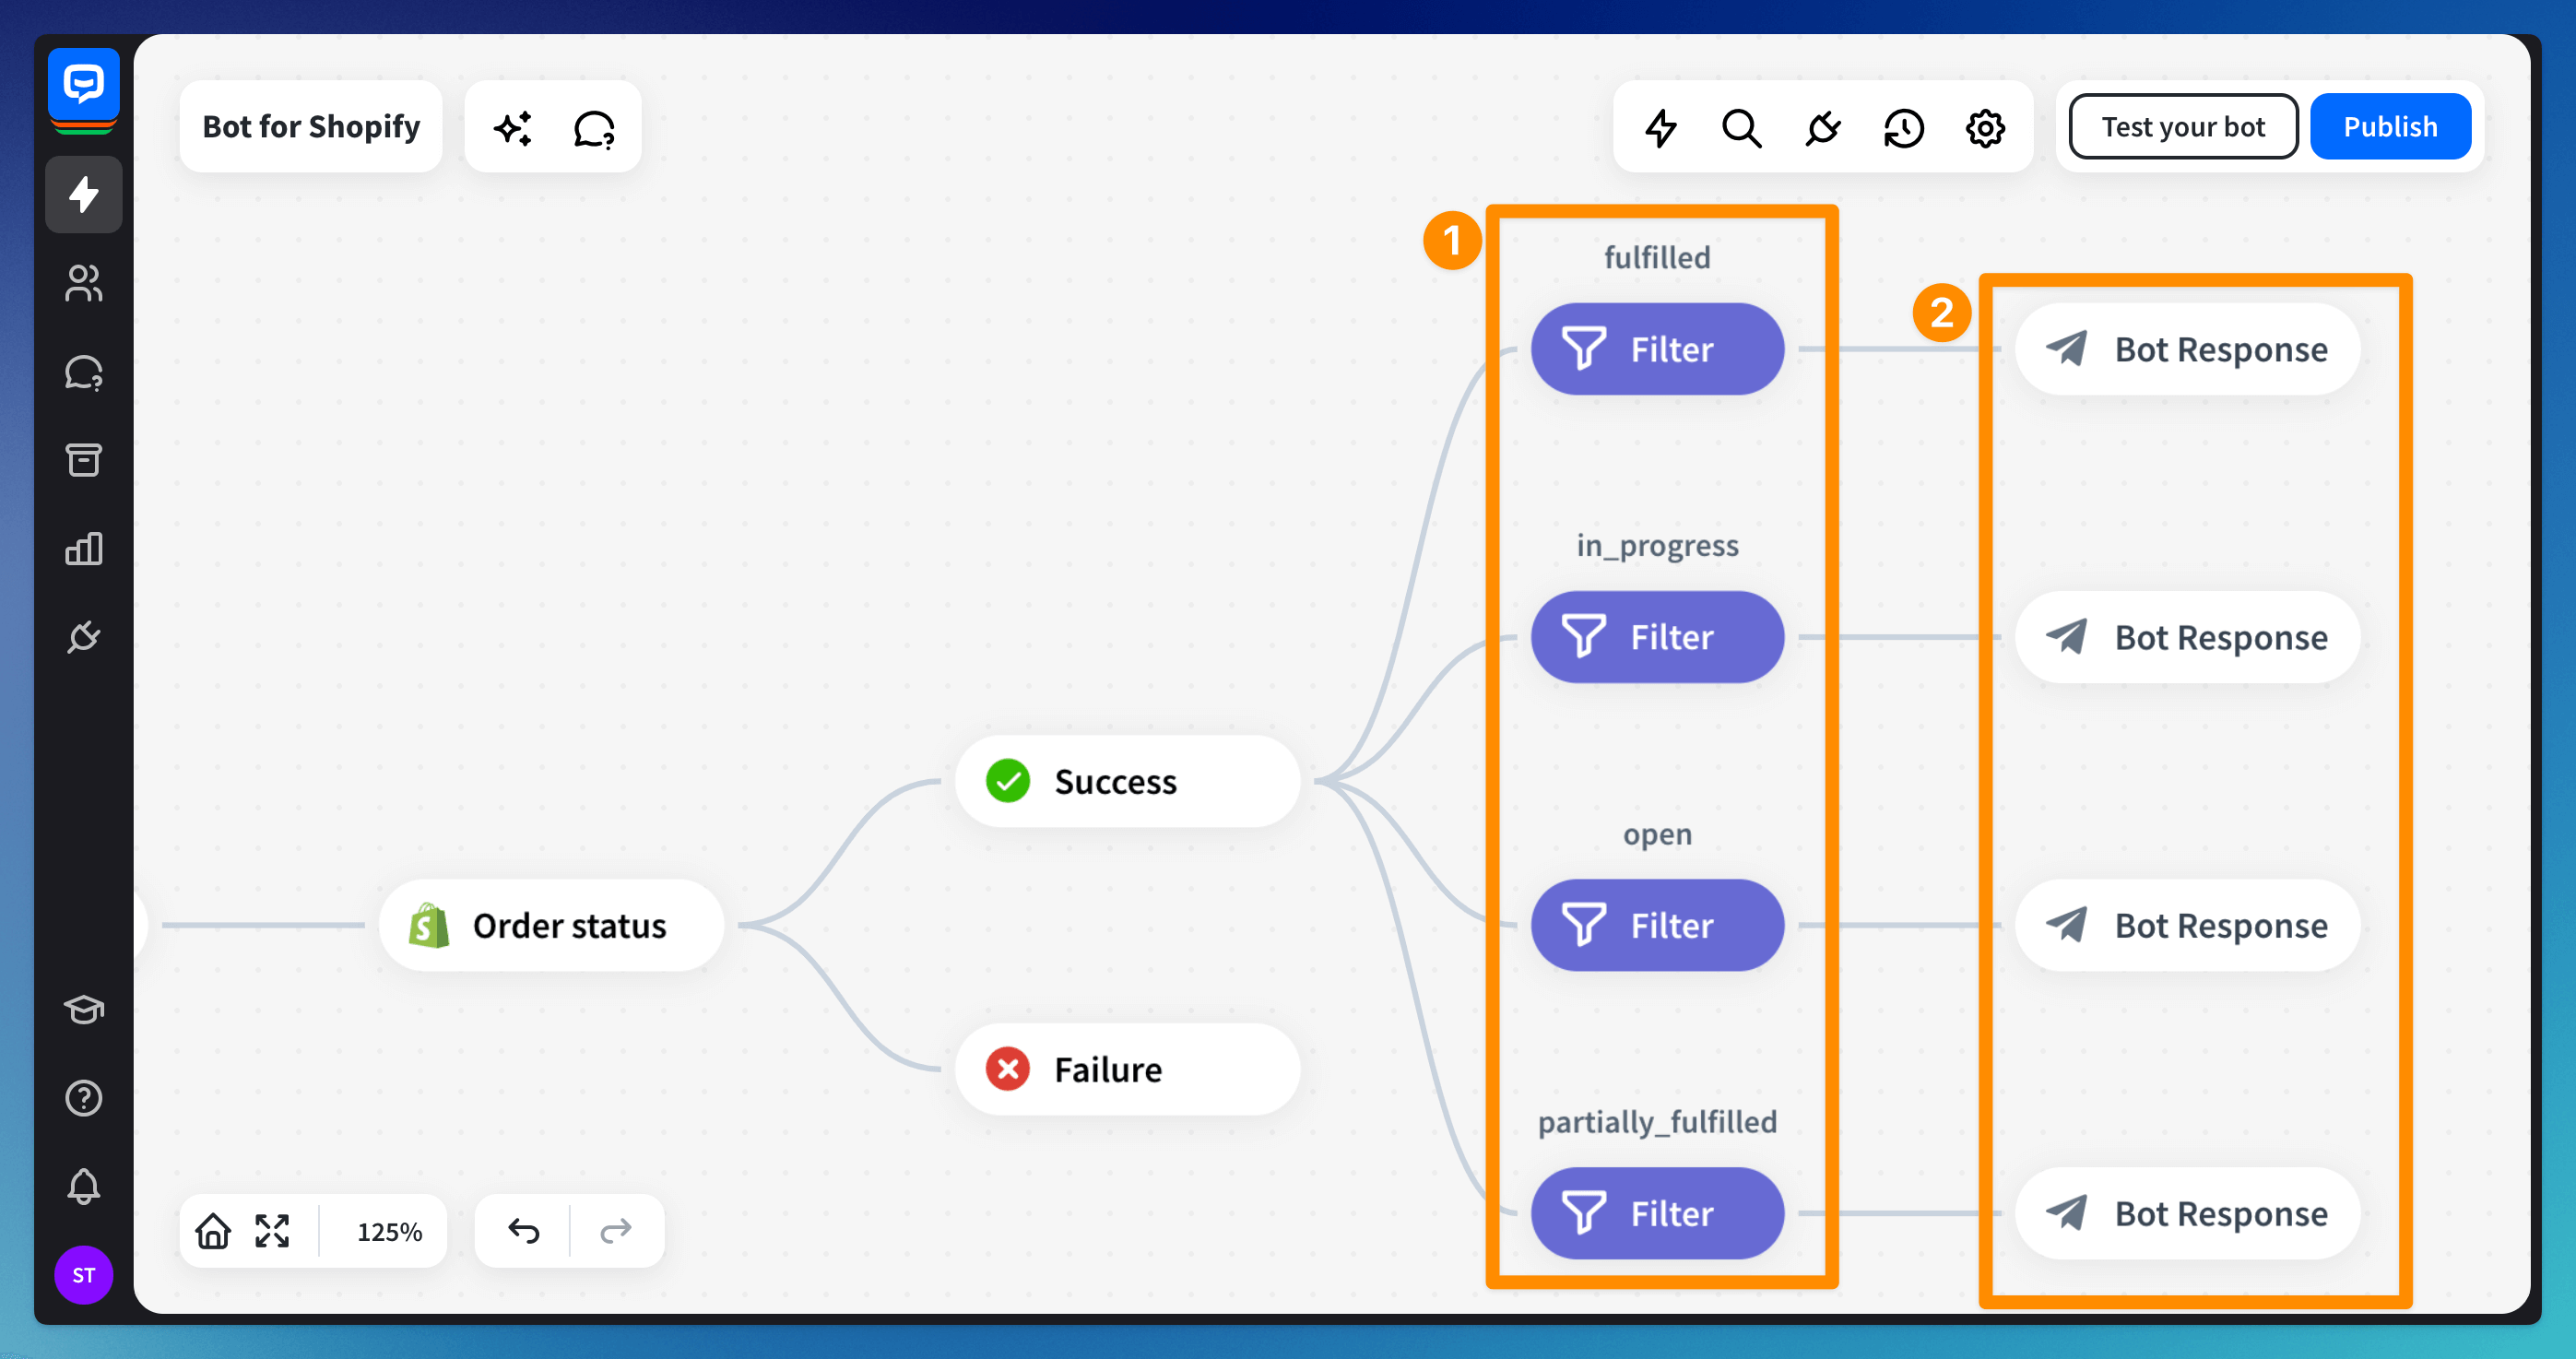
Add filter blocks to the bot (1). You can name each block according to the Shopify status to make the development easier. Add a Bot response block after each filter block (2). You can configure the Gallery bot response there. It’ll give an option to provide a tracking link in the chat.
-
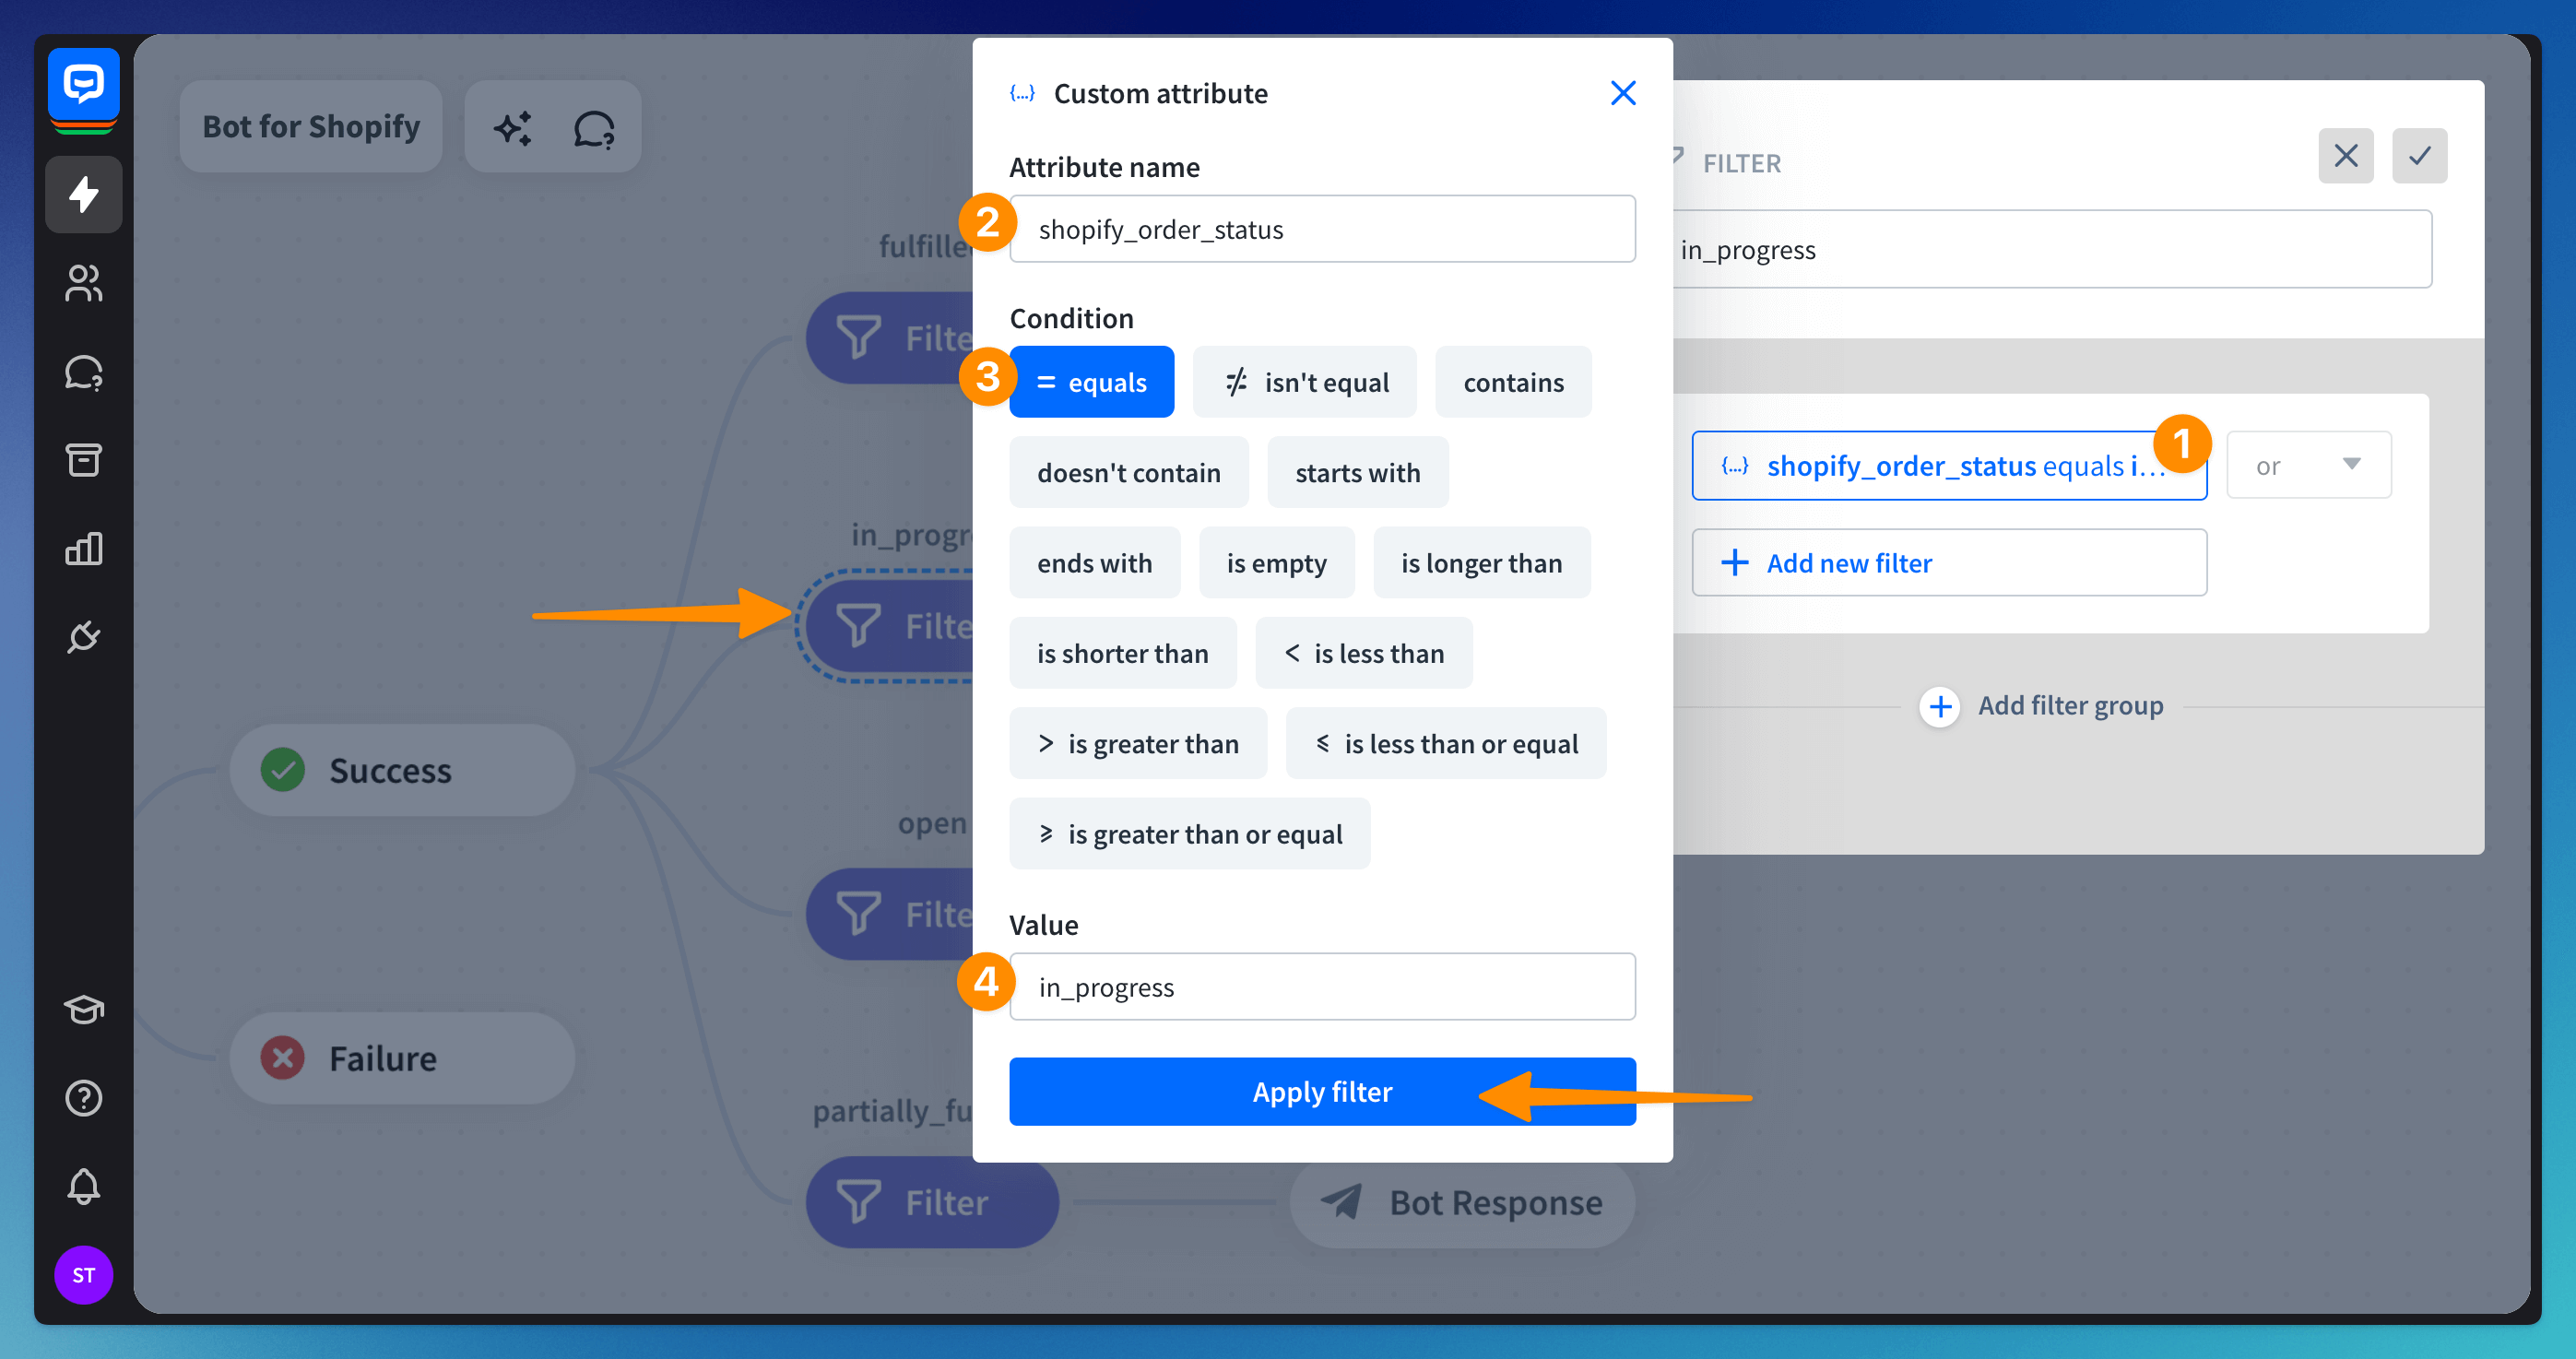
Open the Filter block and select the Add filter for custom attribute (1) option at the bottom. Type shopify_order_status in the Attribute name field (2). In the Condition, choose = equals (3). In the Value, type the status that matches the Shopify list (4).
 After the filter, the chatbot message will appear if the order’s status matches the provided status in the Shopify system.
 -
Repeat the process for all available Shopify order statutes.
What to do when the bot cannot find the order
When the bot cannot match the user’s order ID, it’ll go to the Failure block. Add a Bot response block there to redirect them to the Question action. It will let the chatbot collect their order ID and postal code and start the process again.
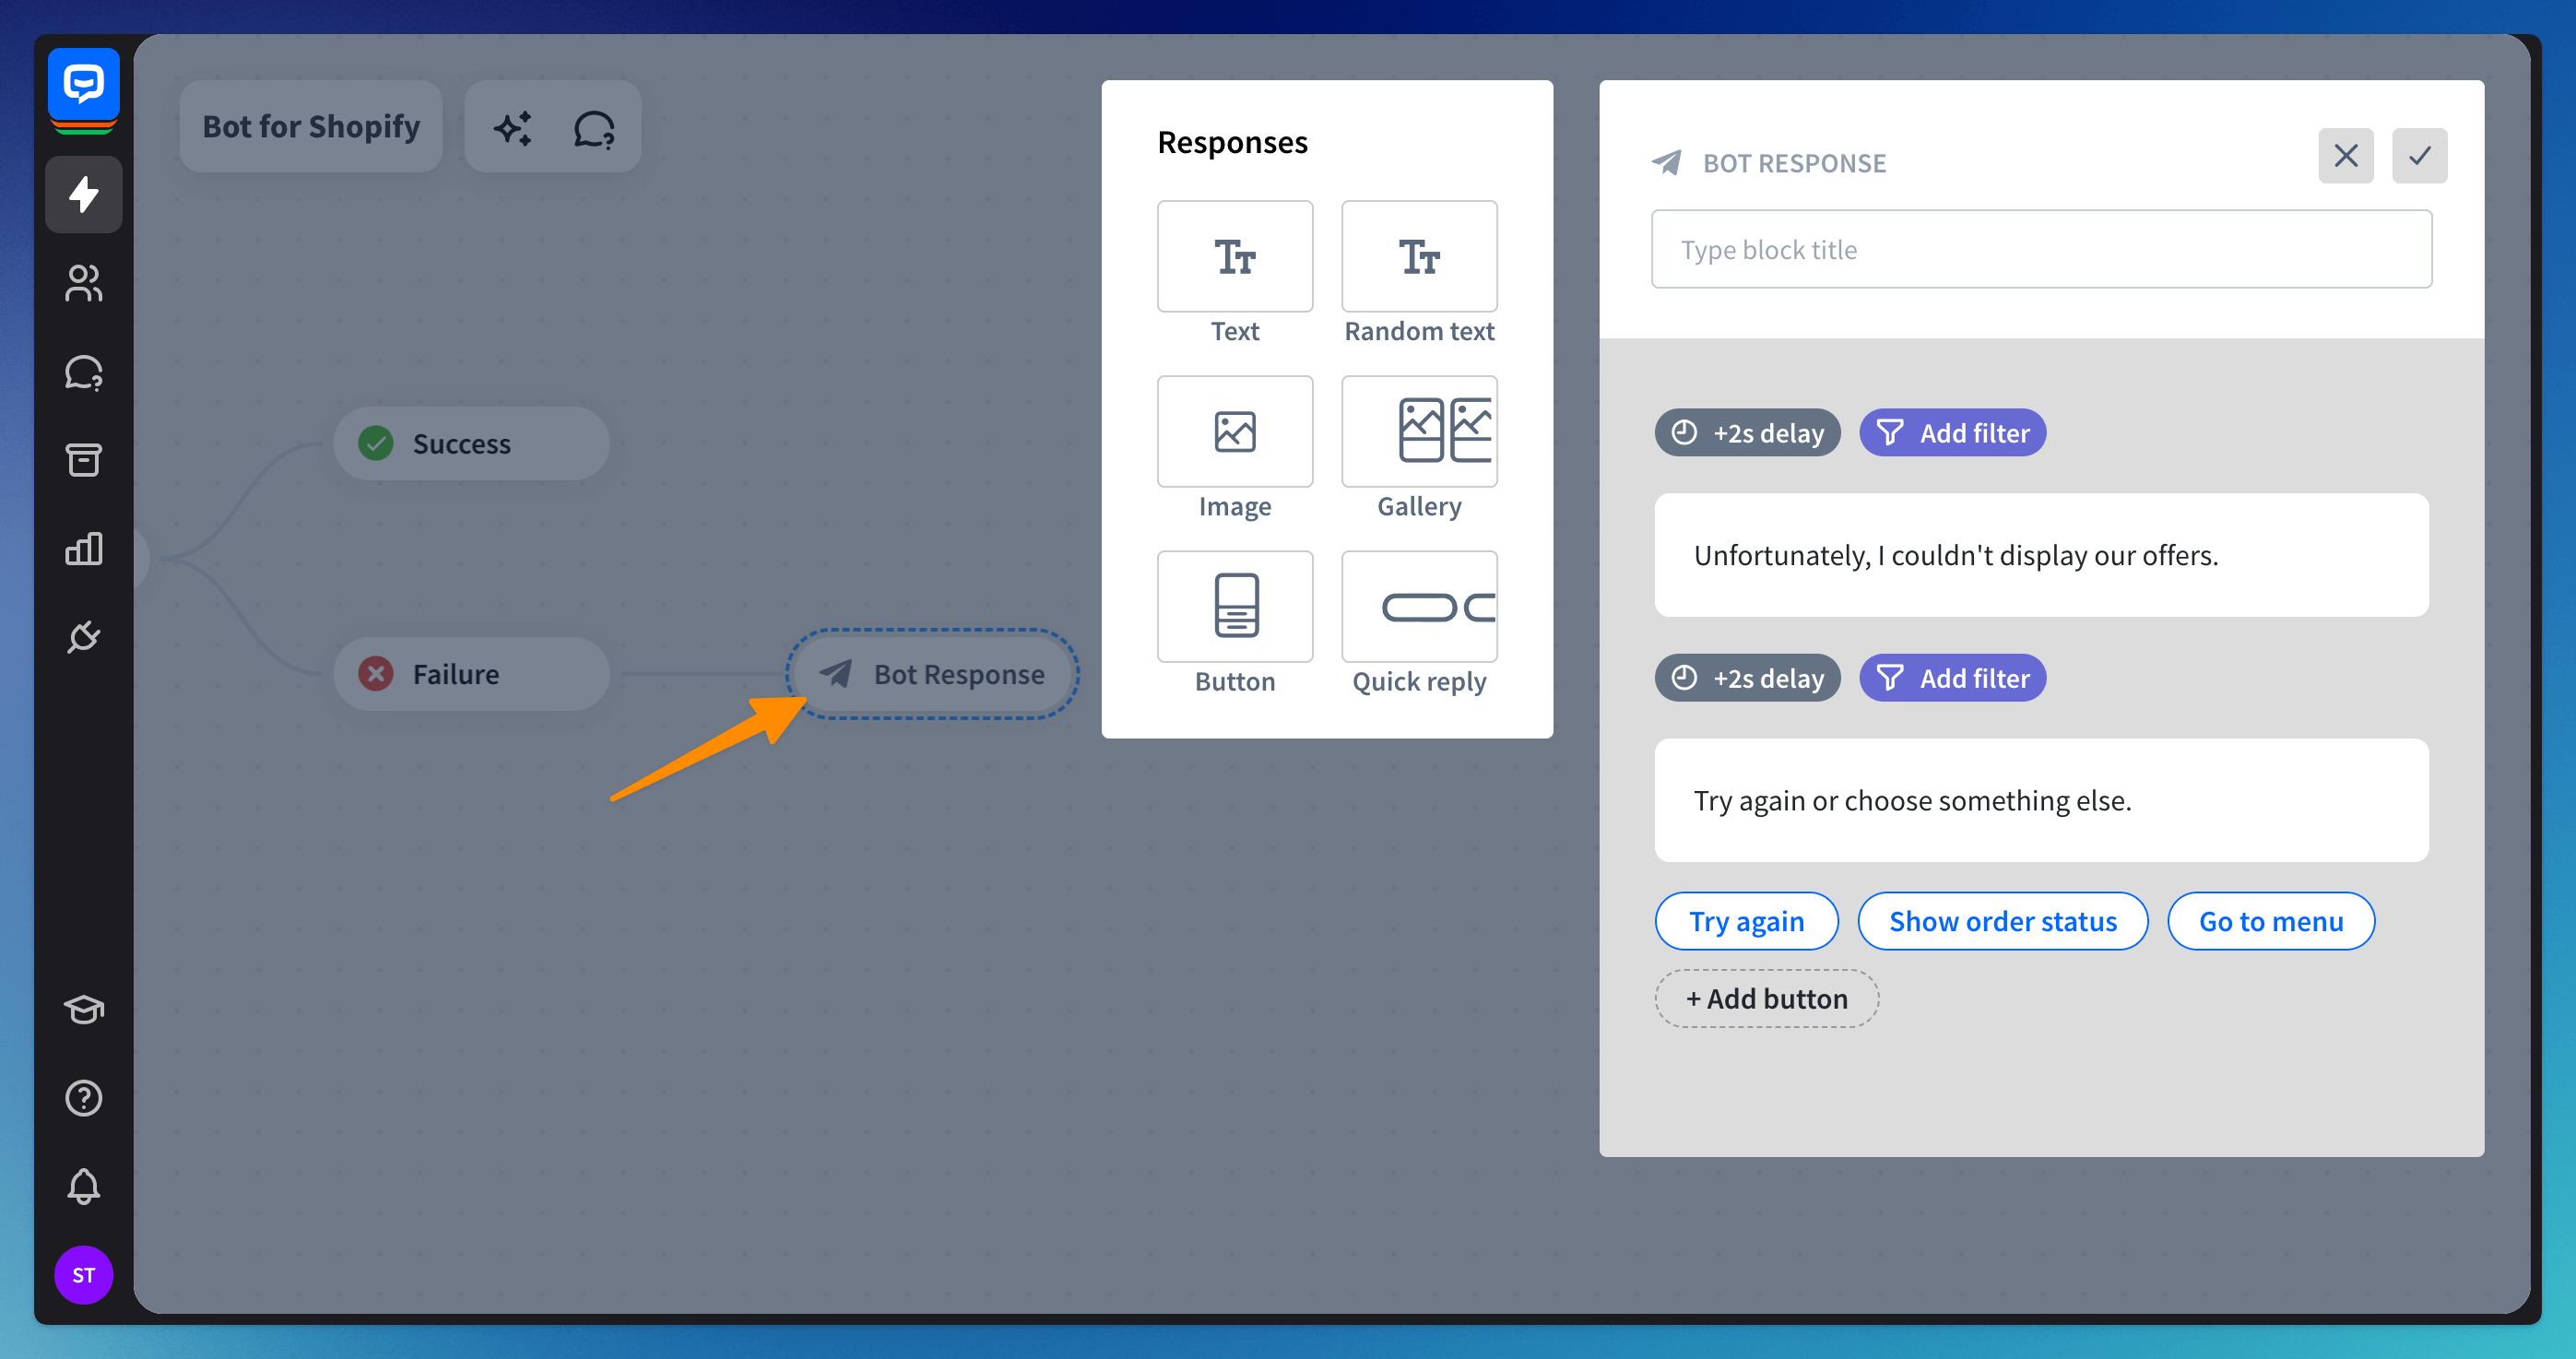 Use the Quick reply response to give the user the option to circle back with a button click. In the configuration, choose the Go to block button type and the Question action from the bot structure.
Read more: