You can develop each bot and design it to manage customers’ orders, schedule appointments, or handle many other use cases. It all depends on the setup. You have full control over the bot’s knowledge and actions.
When a user types a query into a chat window, the bot tries to find the best response based on the knowledge provided to the bot flow or learned from the source you provided. Our AI-powered matching systems find the best answer to your customer’s query and provide it in the chat.
Chatbot’s main parts
When you select one of your chatbots, you see and manage the most important aspects of each bot.
-
Bot Flow - the structure created from your knowledge source or manually by you. Every chat starts with the bot flow’s welcome message. The bot searches for answers to your users’ queries in the bot flow first. You can click on every block in the flow and adjust it manually.
-
AI Knowledge - a module to manage all the knowledge sources your bot uses to provide answers. You can update and provide new knowledge sources to the bot there.
-
Training - a module where you can see all the answers provided by the AI Assist and manage unhandled queries.
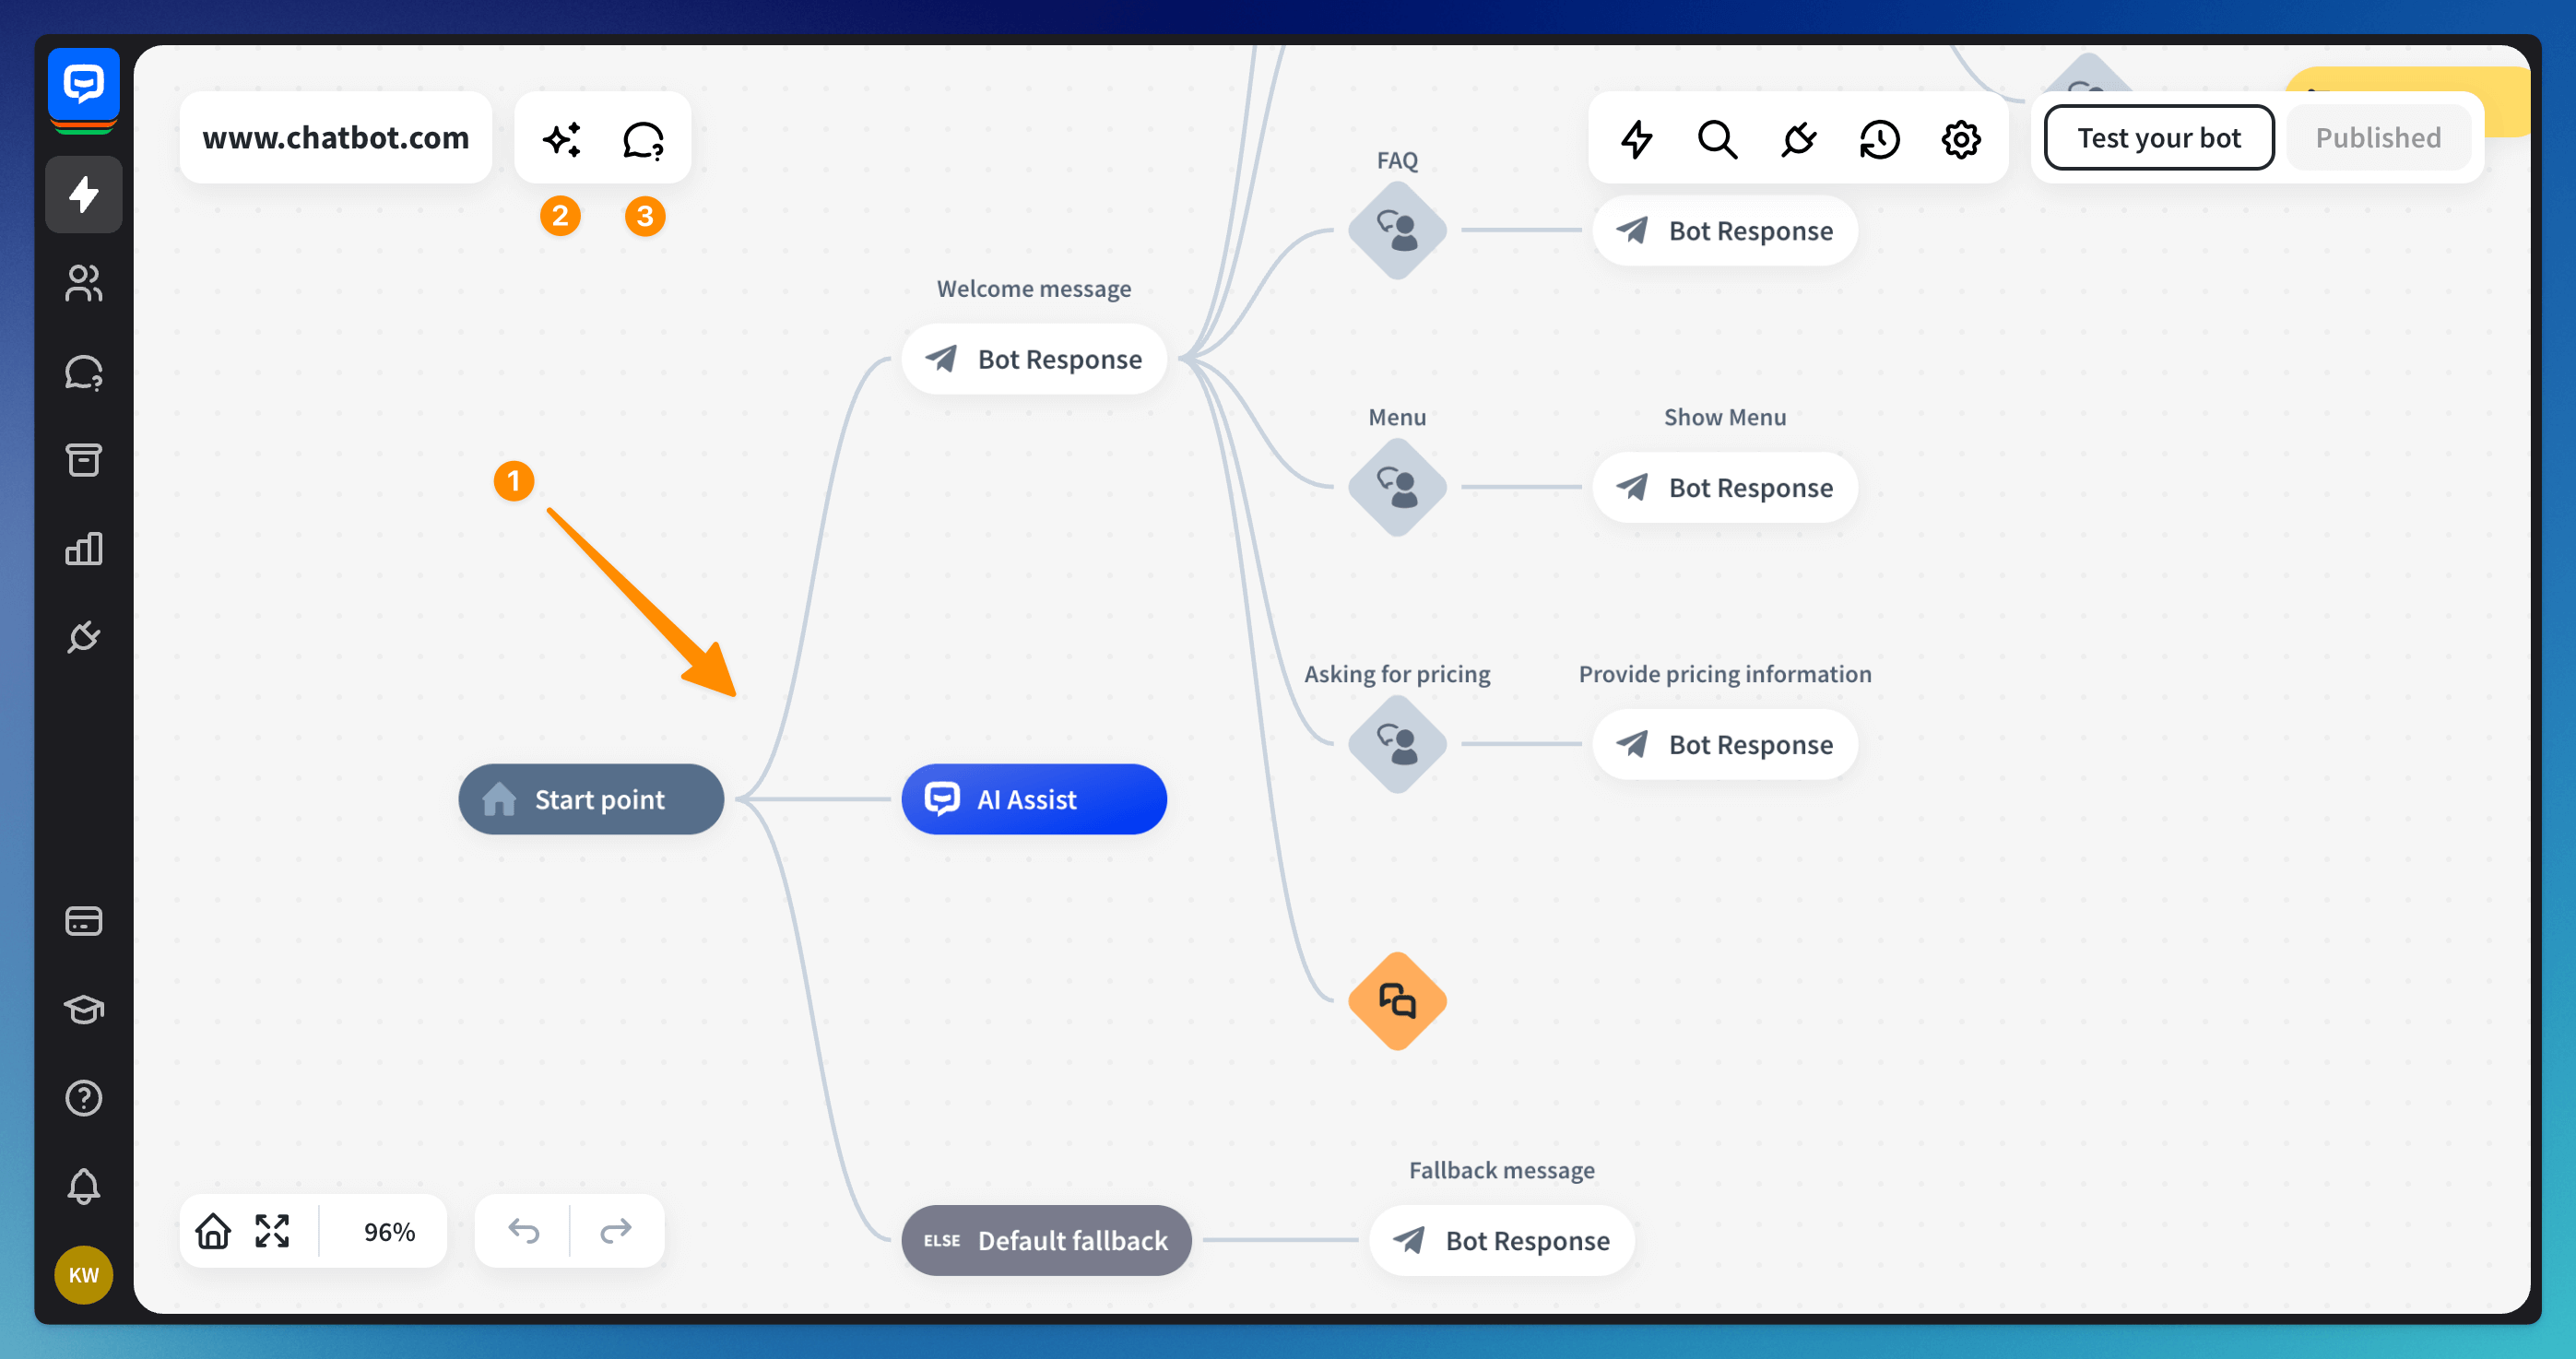
Manage your bot flow
Conversational blocks
All the bot elements are conversational blocks, and they have different colors and shapes to help you differentiate them on a conversation tree.
Interactions
Interactions are steps that define a bot’s behavior. They describe what the bot and users say and when these interactions occur.
Types of interactions:
Actions
Actions help your bot better navigate conversations, validate user responses, and automate the process of grouping and organizing users. Actions are invisible to users.
Types of actions:
Additionally, we have dedicated actions for every integration.
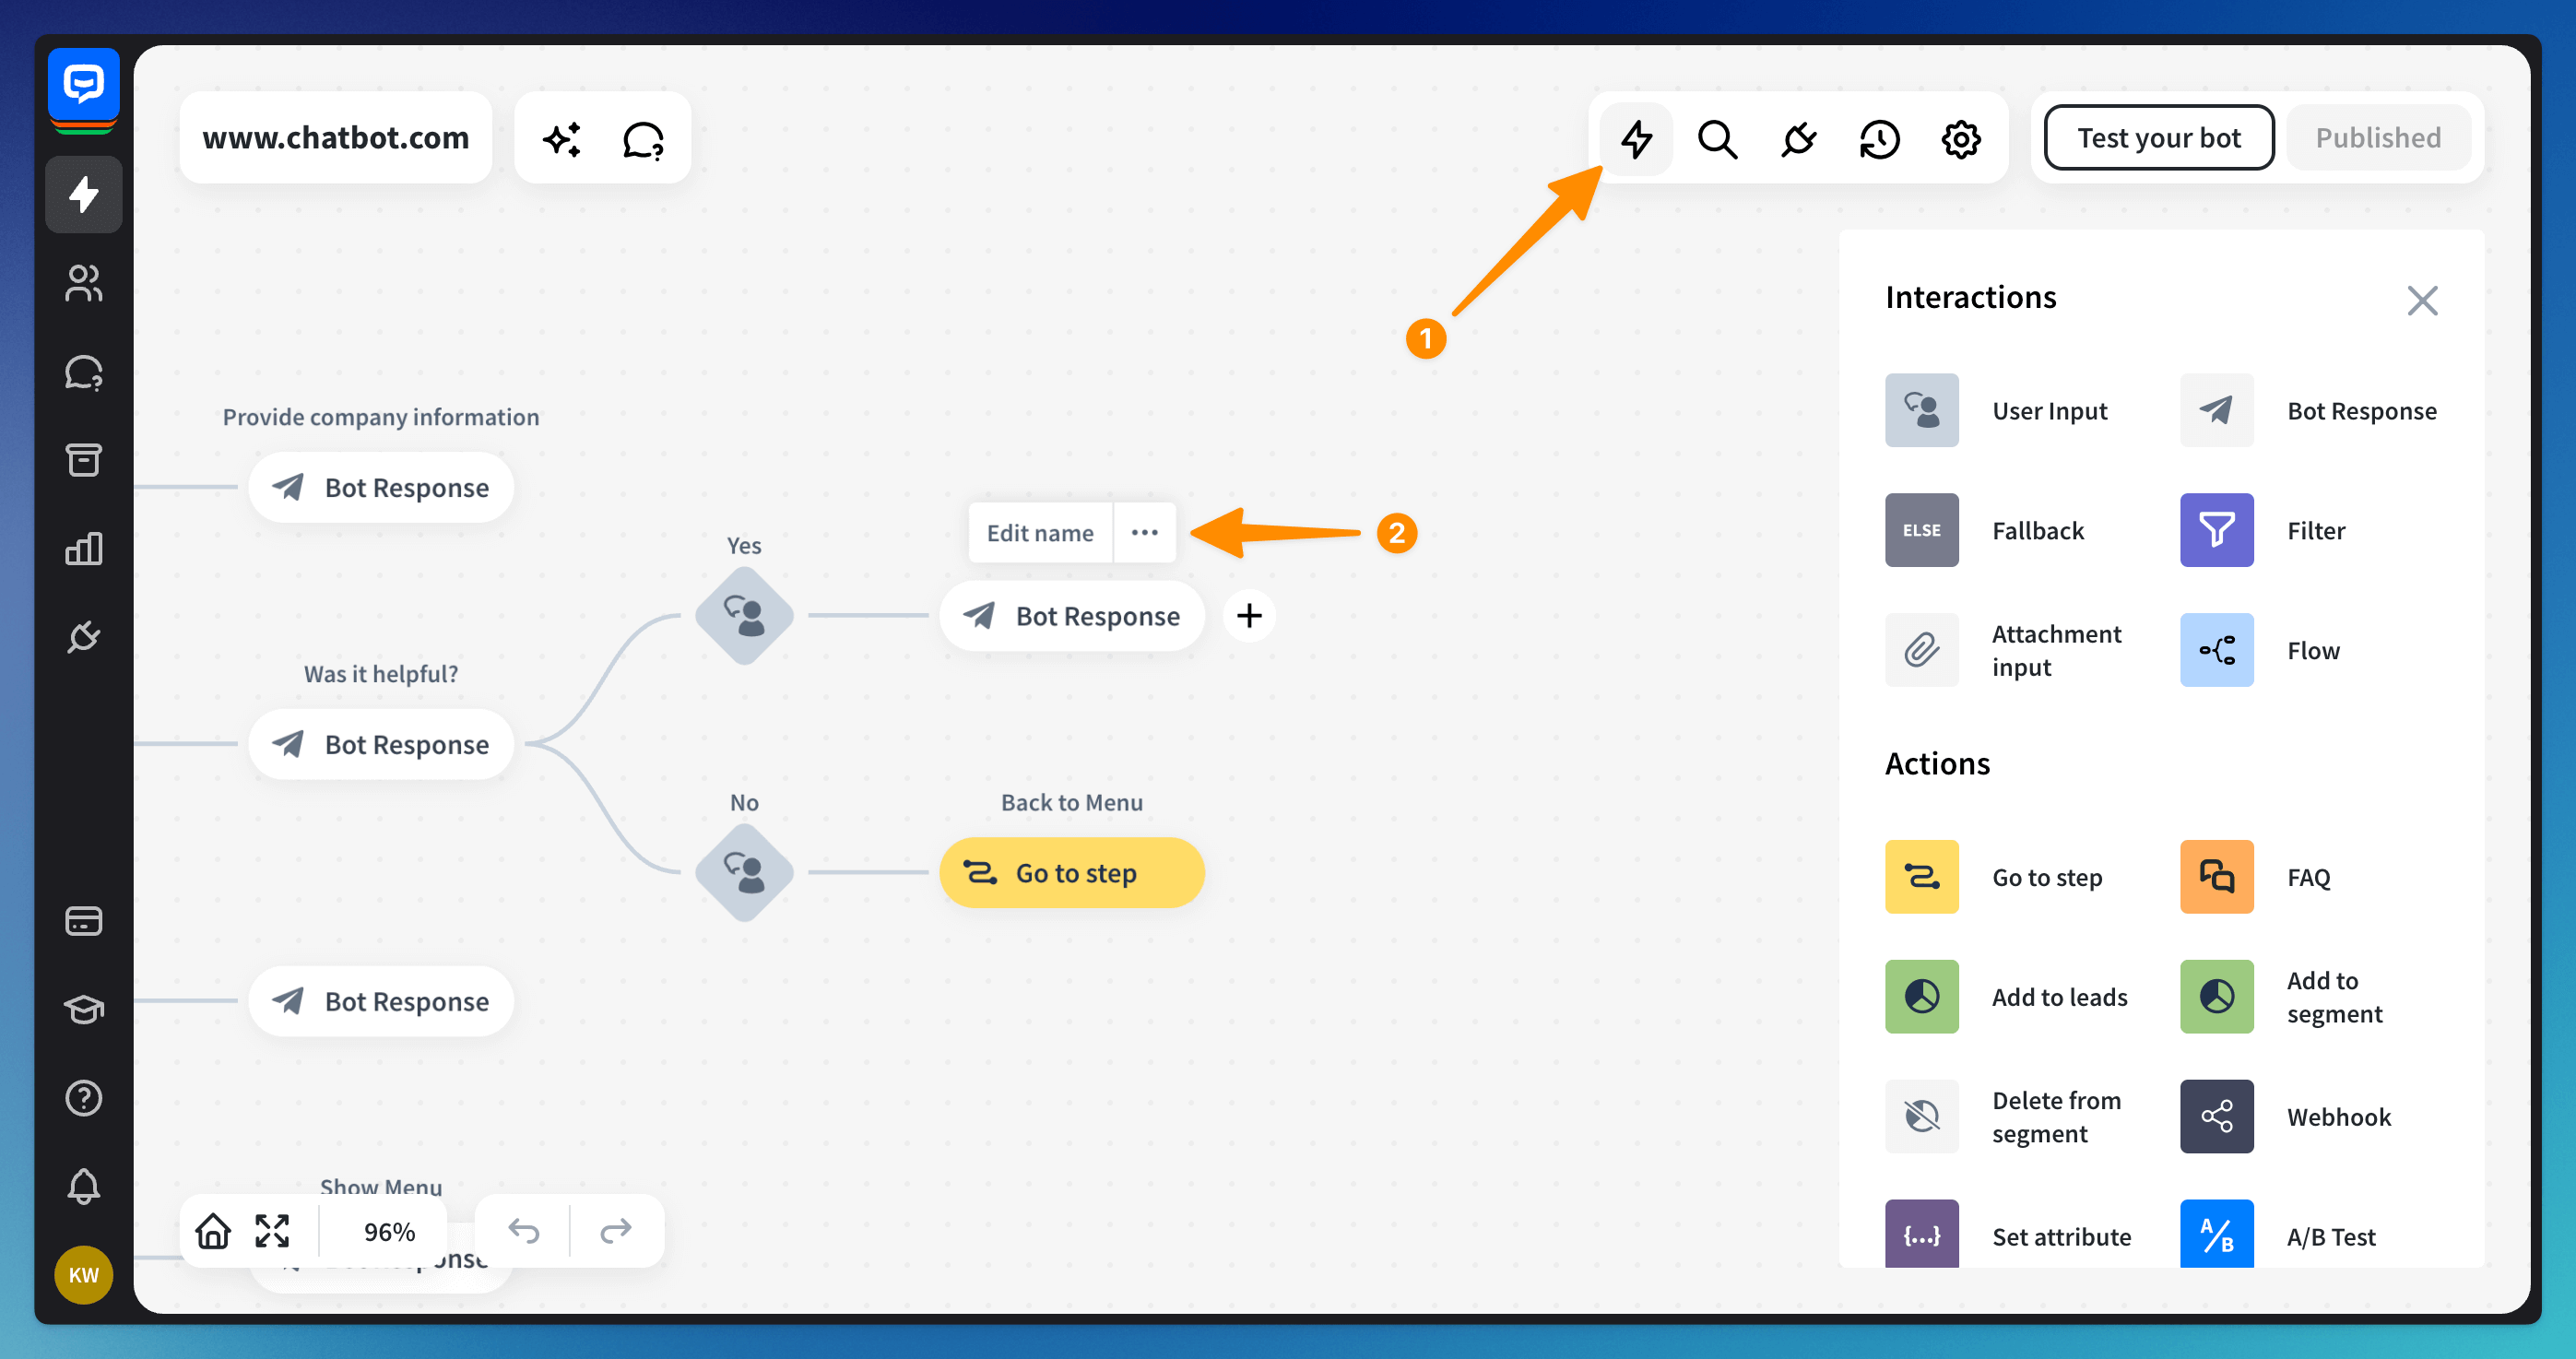
Managing blocks
To add a block to your bot flow, click the Actions (1) menu (bolt icon) at the top right. Choose a block from the list and drag it on the board. You can also use the plus icon on the board when you hover over a block.
You can name a block after clicking on it or by hovering on it and choosing the Edit name (2) option. Name your blocks to easily locate particular interactions using the search option.
 You may need to change the position of some blocks. To move them, right-click on the block you’d like to move and choose the Move option from the menu.
You can move the block up or down or to a different part of the flow. The plus icons indicate where you can move the block.
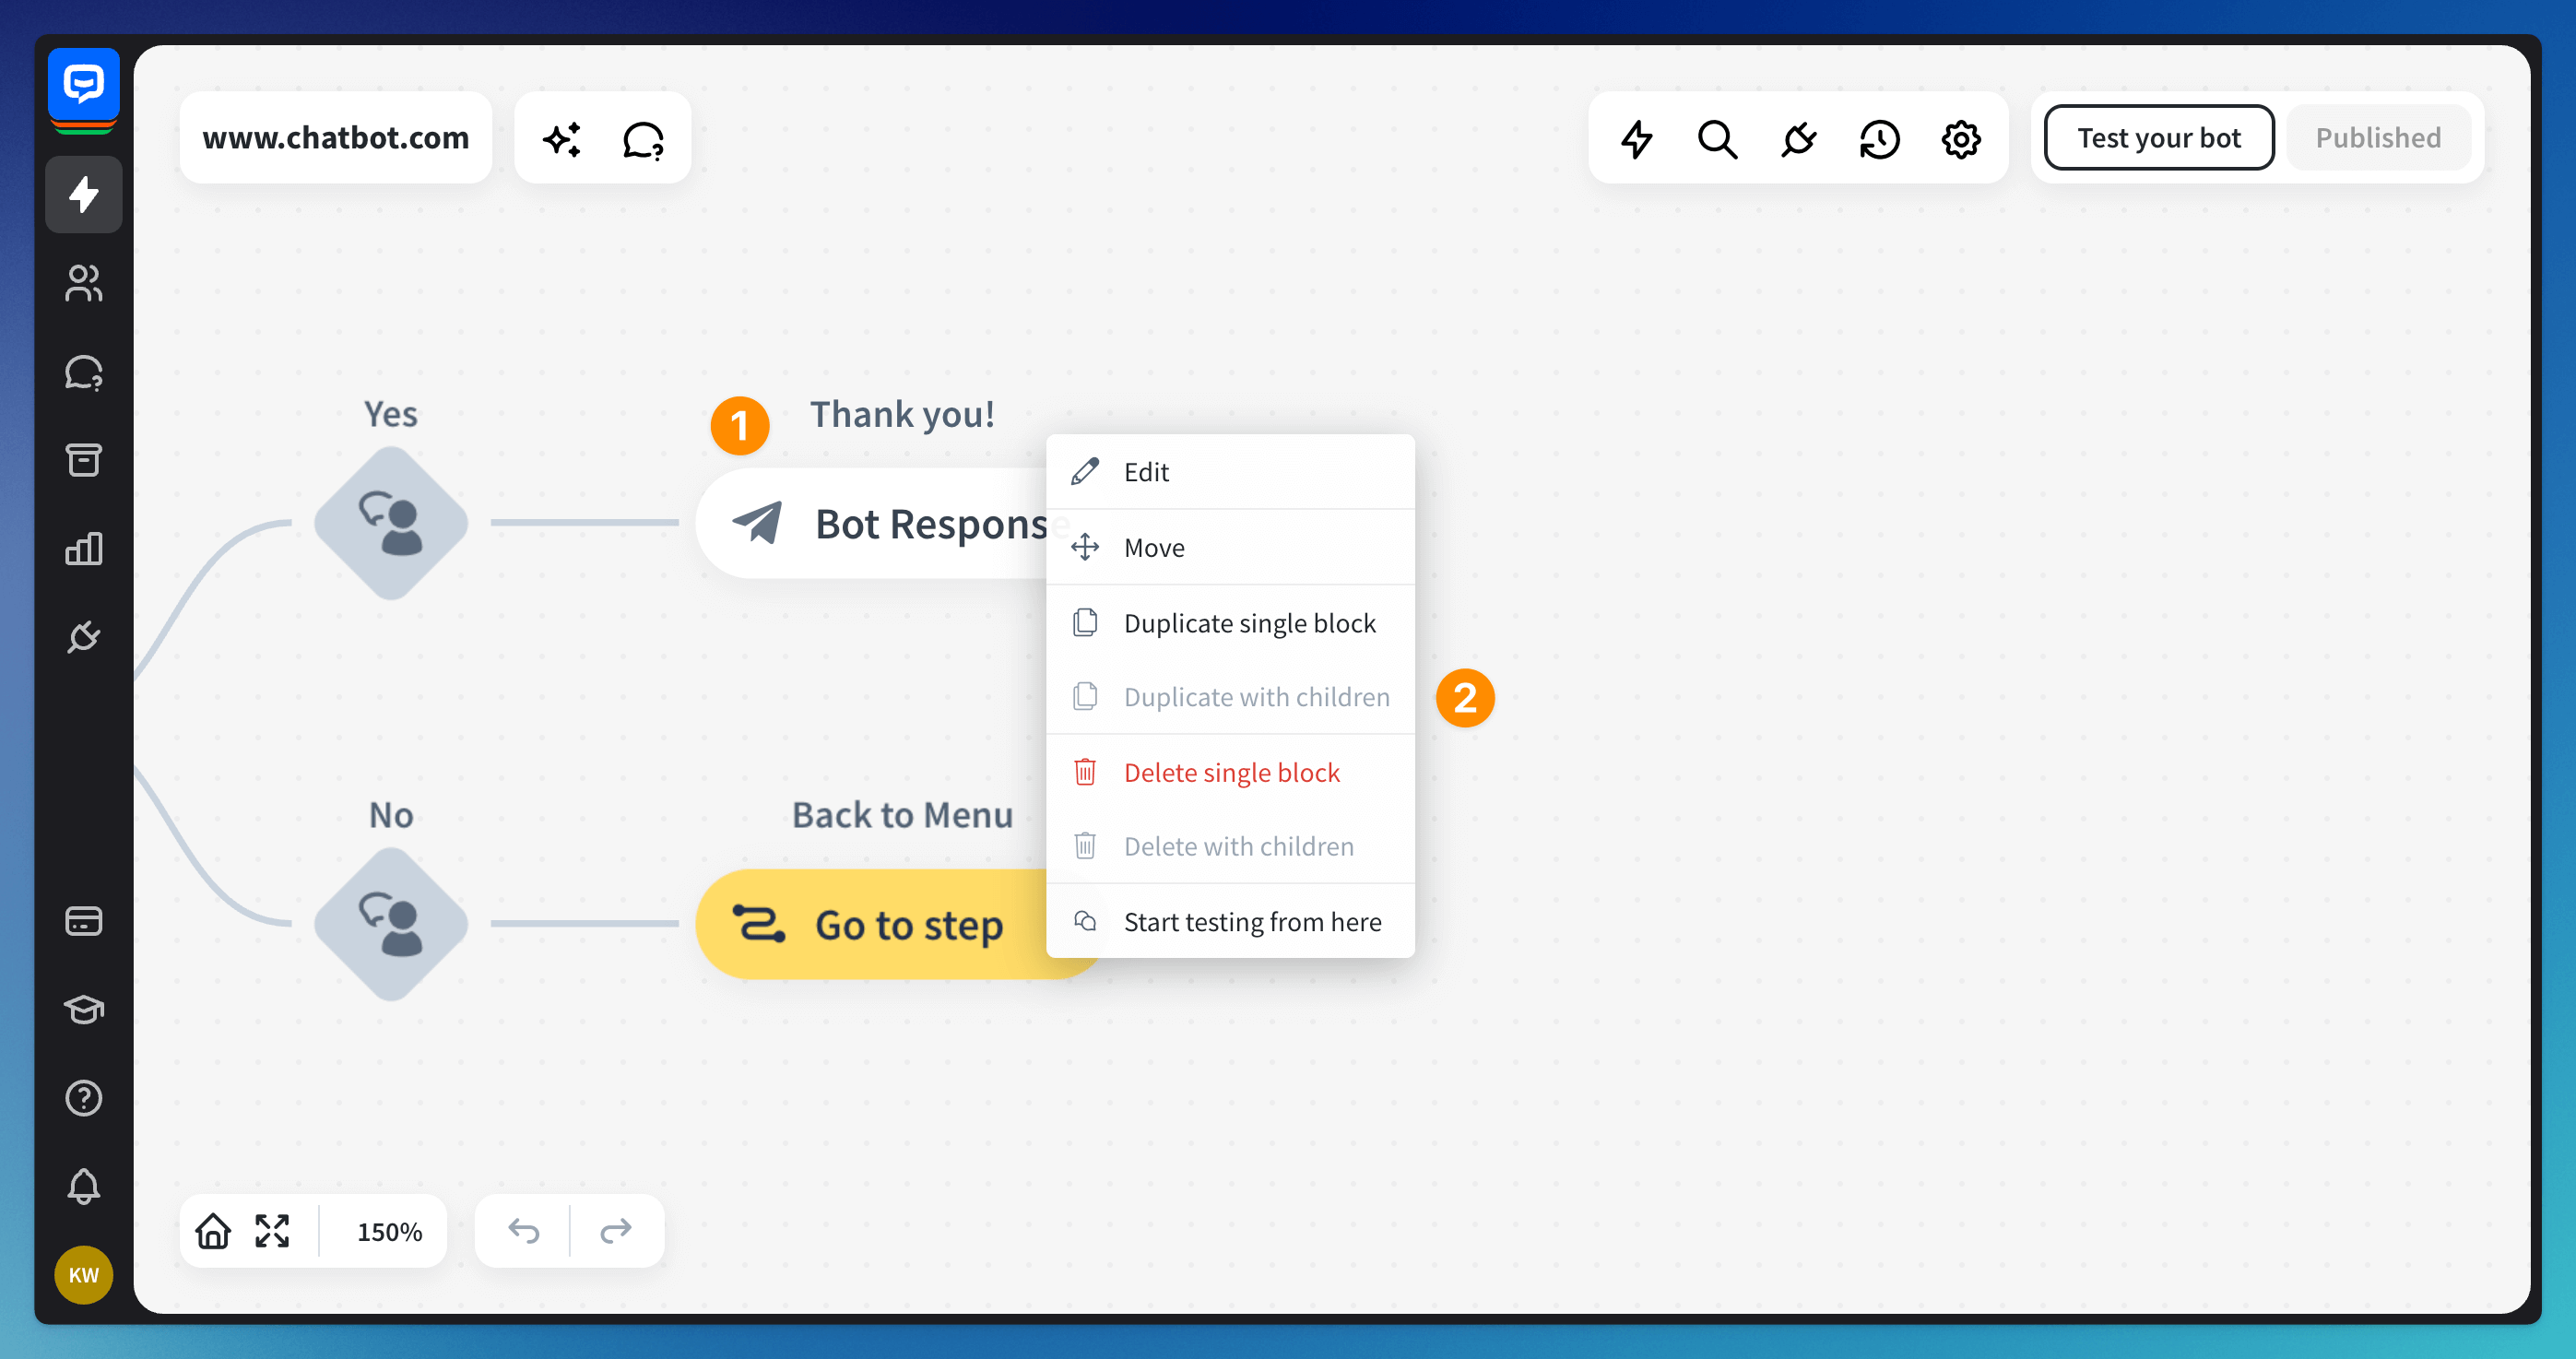
You can duplicate the blocks and branches if you have many similar bot branches and want to accelerate the development process. To duplicate, right-click on the block and choose the correct option from the menu.
You can duplicate a single block or a whole branch (when you choose the with children option). The plus icons will indicate where you can place the duplicated blocks.
To delete blocks, right-click on the block (1) and choose the correct option from the menu (2). You can delete a single block or a whole branch (when you choose the with children option). Keep in mind that deleting blocks is permanent.
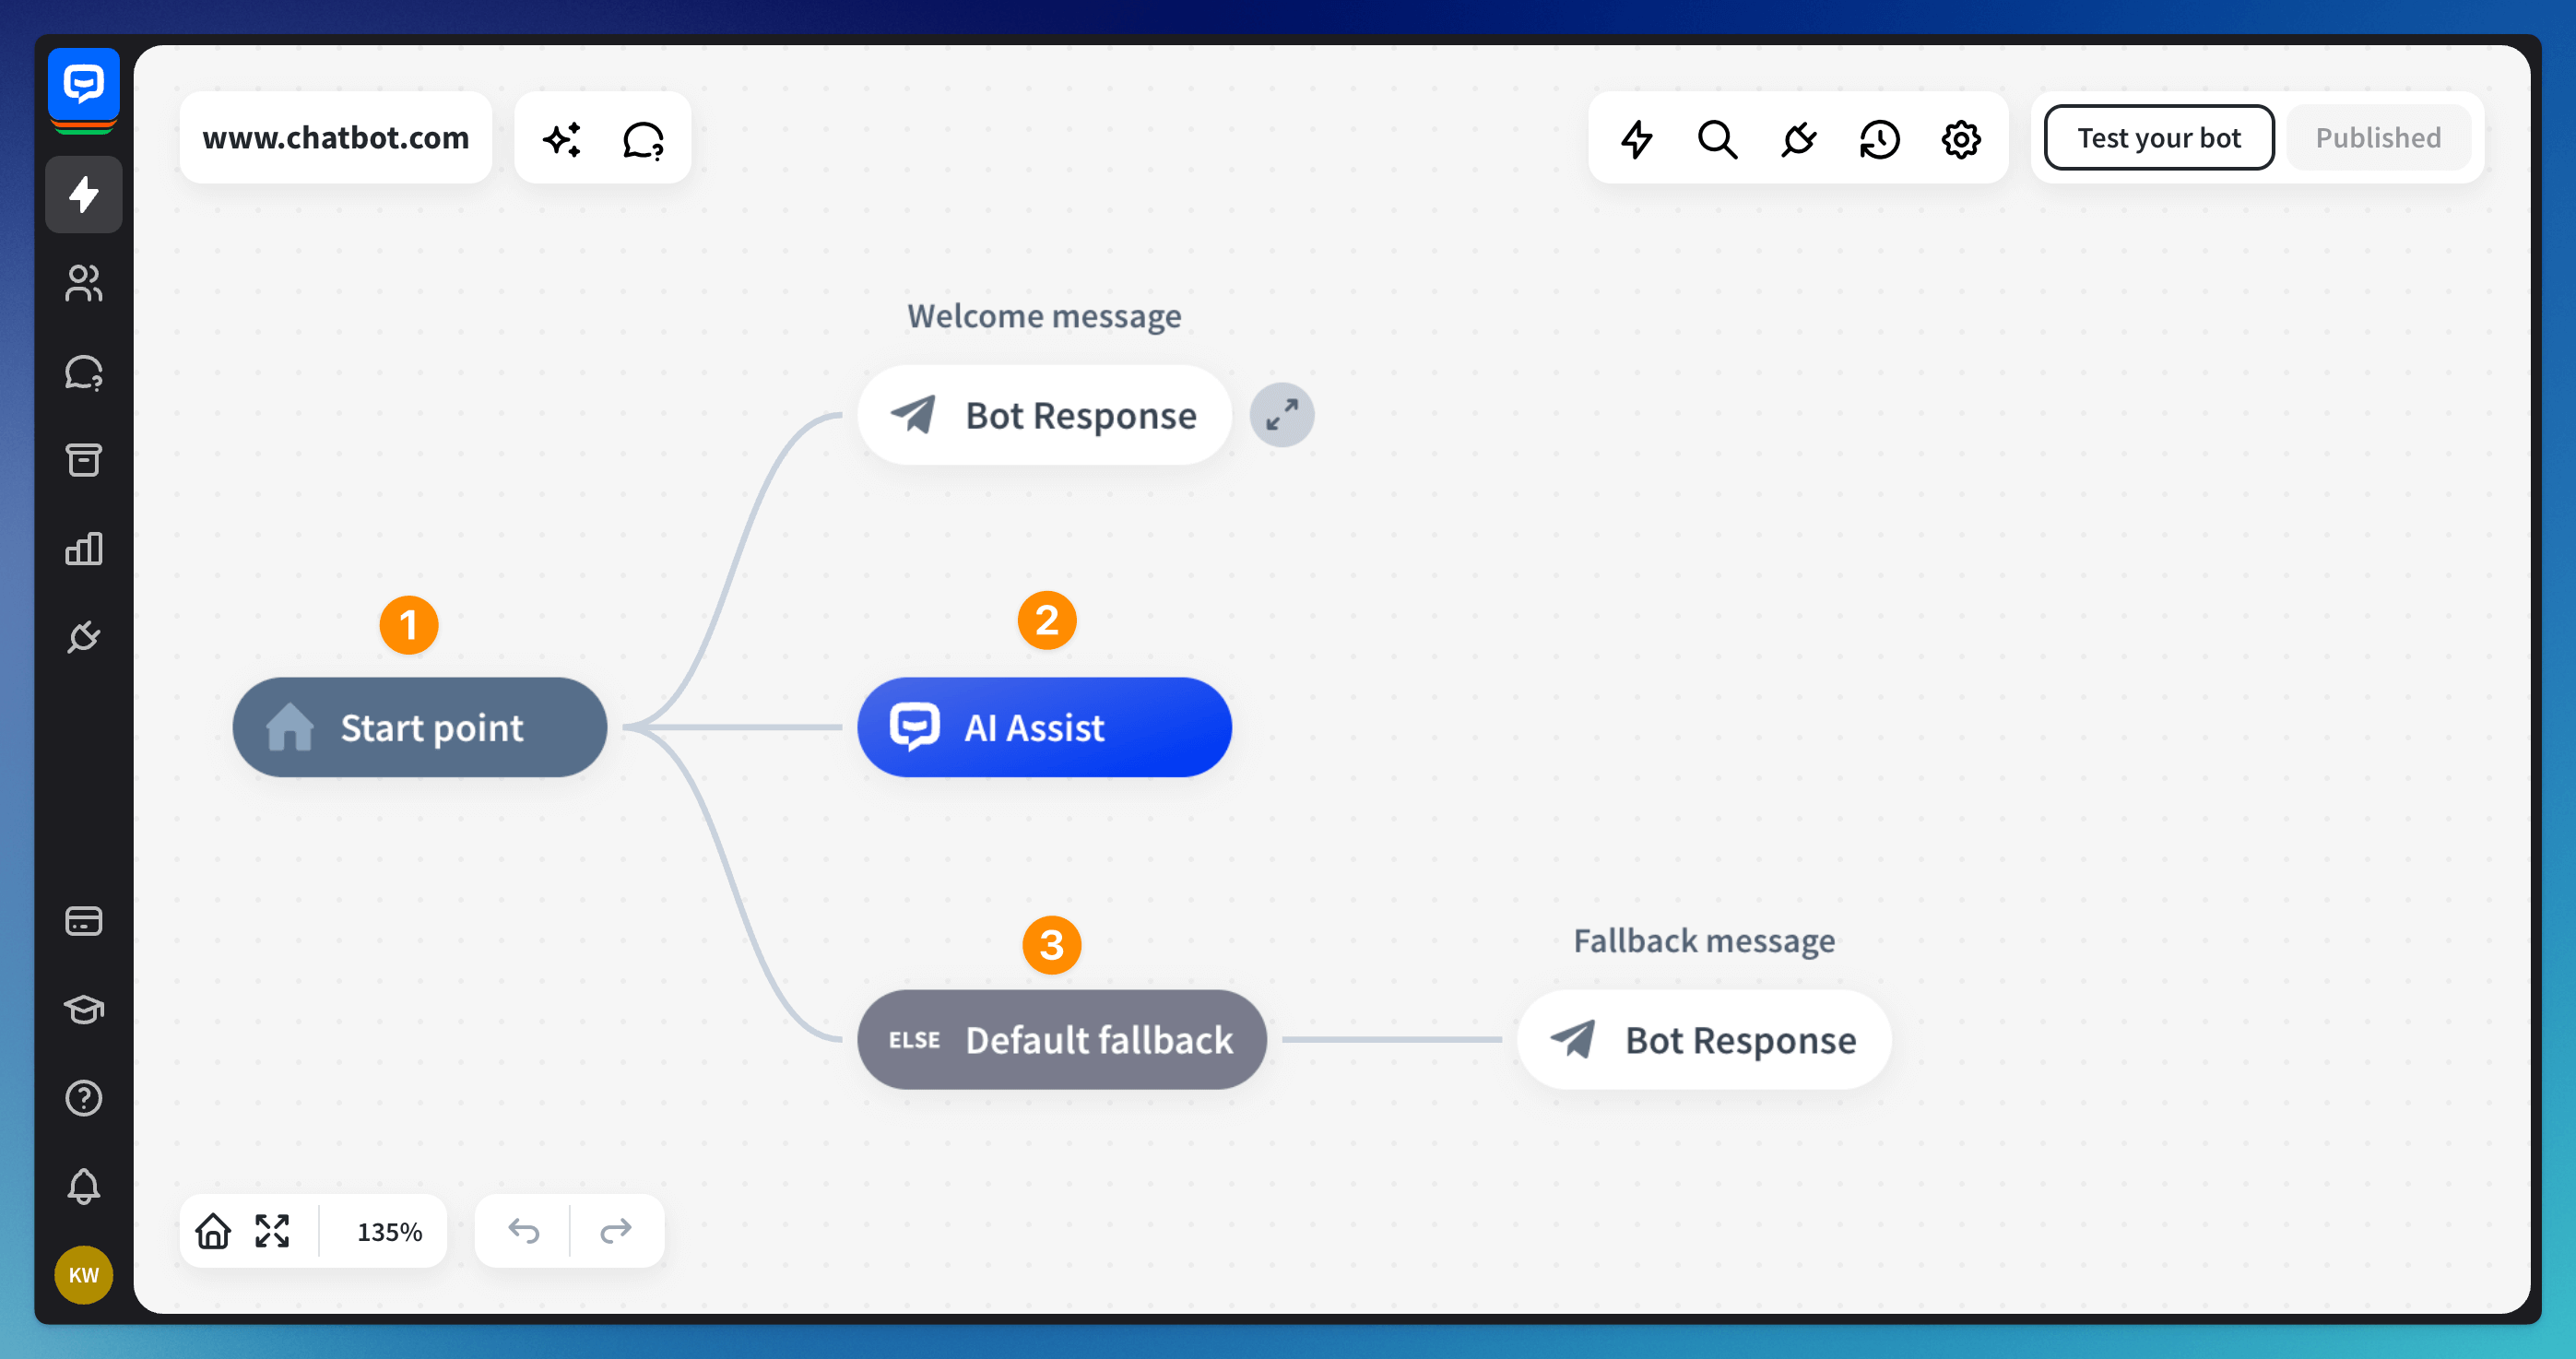
Bot flow trigger points
Every bot blow has default elements. The Start point, AI Assist, and Default Fallback blocks are added to help you start the flow. You can develop the bot further.
-
Start point - each chat with the bot starts here. A default welcome message is automatically added to every blank bot to help you get started. You can develop the bot flow further manually.
-
AI Assist - a block that uses our in-house AI model to provide dynamic responses to the end users based on the data trained from the initial source (Website, Zendesk, KnowledgeBase).
-
Default fallback - triggered when the bot doesn’t recognize the user’s message; shows you where you need to add a bot response or action that should be recognized
Read more:
