Filters allow you to decide if and when the bot sends a specific answer to users.
Filters enable you to decide what type of bot responses and actions are triggered based on the user information your bot collects. For example, based on the filter applied, you can show a different message to a returning customer or someone who entered your website through a specific URL.
You can filter your responses with a separate Filter block or use a filter option above every bot response inside a Bor Response block.
There are four different types of filters:
-
Attribute — enables you to use default or custom attributes.
-
Score — uses the confidence score value to decide what action or response the bot should trigger.
-
Message — triggers the action based on user input.
-
Failures — counts how many times the bot went to the Fallback interaction.
You can apply multiple filters to a single bot response or action. Bot responses or actions are shown to the users only if the query meets the criteria in the filters.
If you use the separate Filter block, you can add up to 5 groups of filters with up to 5 filters in each group in a single block.
You can apply multiple filters to a single bot response or action. Bot responses or actions are shown to the users only if the query meets the criteria in the filters.
If you use the separate Filter block, you can add up to 5 groups of filters with up to 5 filters in each group in a single block.
In the next part of the article, you’ll see how to use filters in 4 situations, each setting a different condition.
Usage example - Message
You want to use a chatbot to help your customers (in this case, students and teachers) find good books. You need to create different conversation paths for customers looking for student books and users who are looking for teaching resources.
-
Start building your bot flow by editing a Welcome message and following the block with User input.
-
Click on the added User input block to open its edit window. Write all the possible variations of the messages your users might write on chat in the Keywords (1) and the User says (2) sections.

-
Drag the Filter blocks from the Actions and Interactions menu and drop it after the User input block
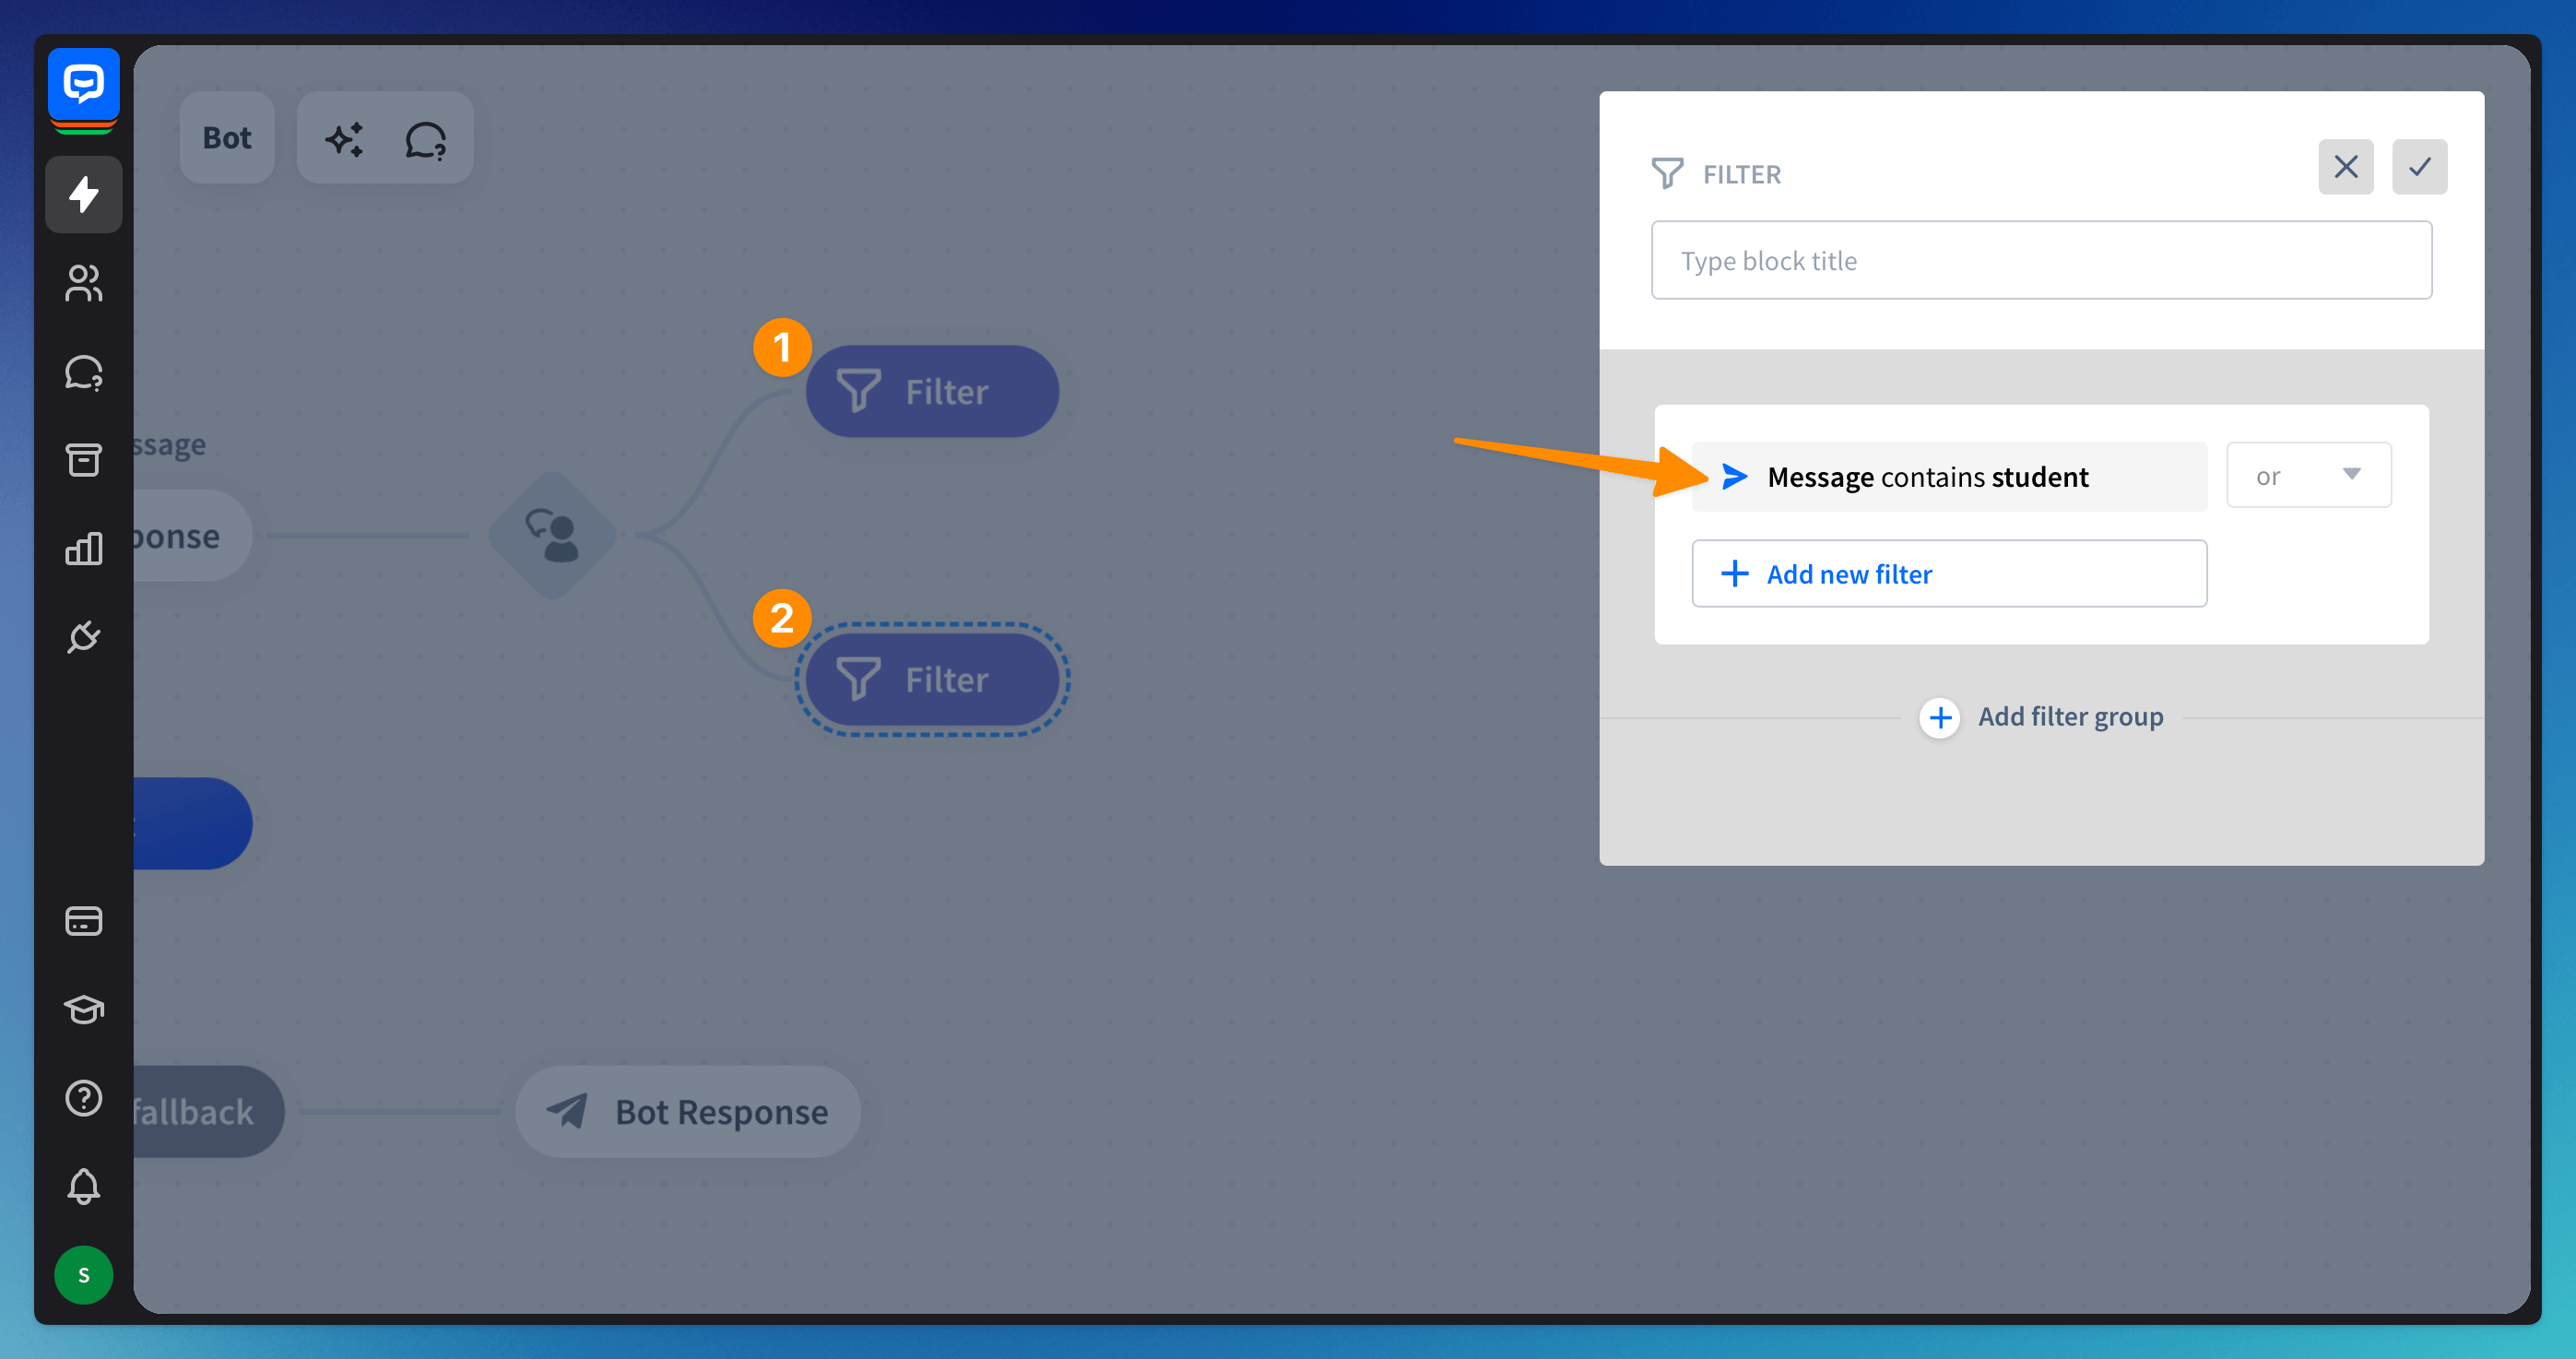
- Click on the added Filter block and Add new filter. Select Message to filter the kind of message your users will write on chat. Choose the contains option. Write the word or phrase to trigger the bot responses (“teach”) in the Value field.
- Repeat the same with the second filter’s condition. This time, use the “student” keyword.
-
Drag Bot Response blocks and add them after the Filter blocks. Choose the response you want to display after the query meets the filter’s conditions.
-
Test the bot flow to check if everything works as intended.
Usage example - Source attribute
You can use a default attribute if you’d like the chat to start from a specific branch. The widget will load, and the chat will start based on the condition you set in the filter.
To do so, delete all blocks after the Start point. You can do that by right-clicking on the blocks and choosing the option from the menu. Add as many Filter blocks as you need to accommodate as many URLs as you have.
Keep in mind that the bot searches the flow from top to bottom, so if you have URLs with the same parts, place more specific URLs higher than the rest (e.g., URL https://www.chatbot.com/help/get-started/#artificial-intelligence should be higher than https://www.chatbot.com/help/get-started/).
-
Enter the Filter block and click the +Add new filter button (1). Choose the Source option (2) from the list and set the condition to contains (3). Provide value from the URL or the whole URL address (4).
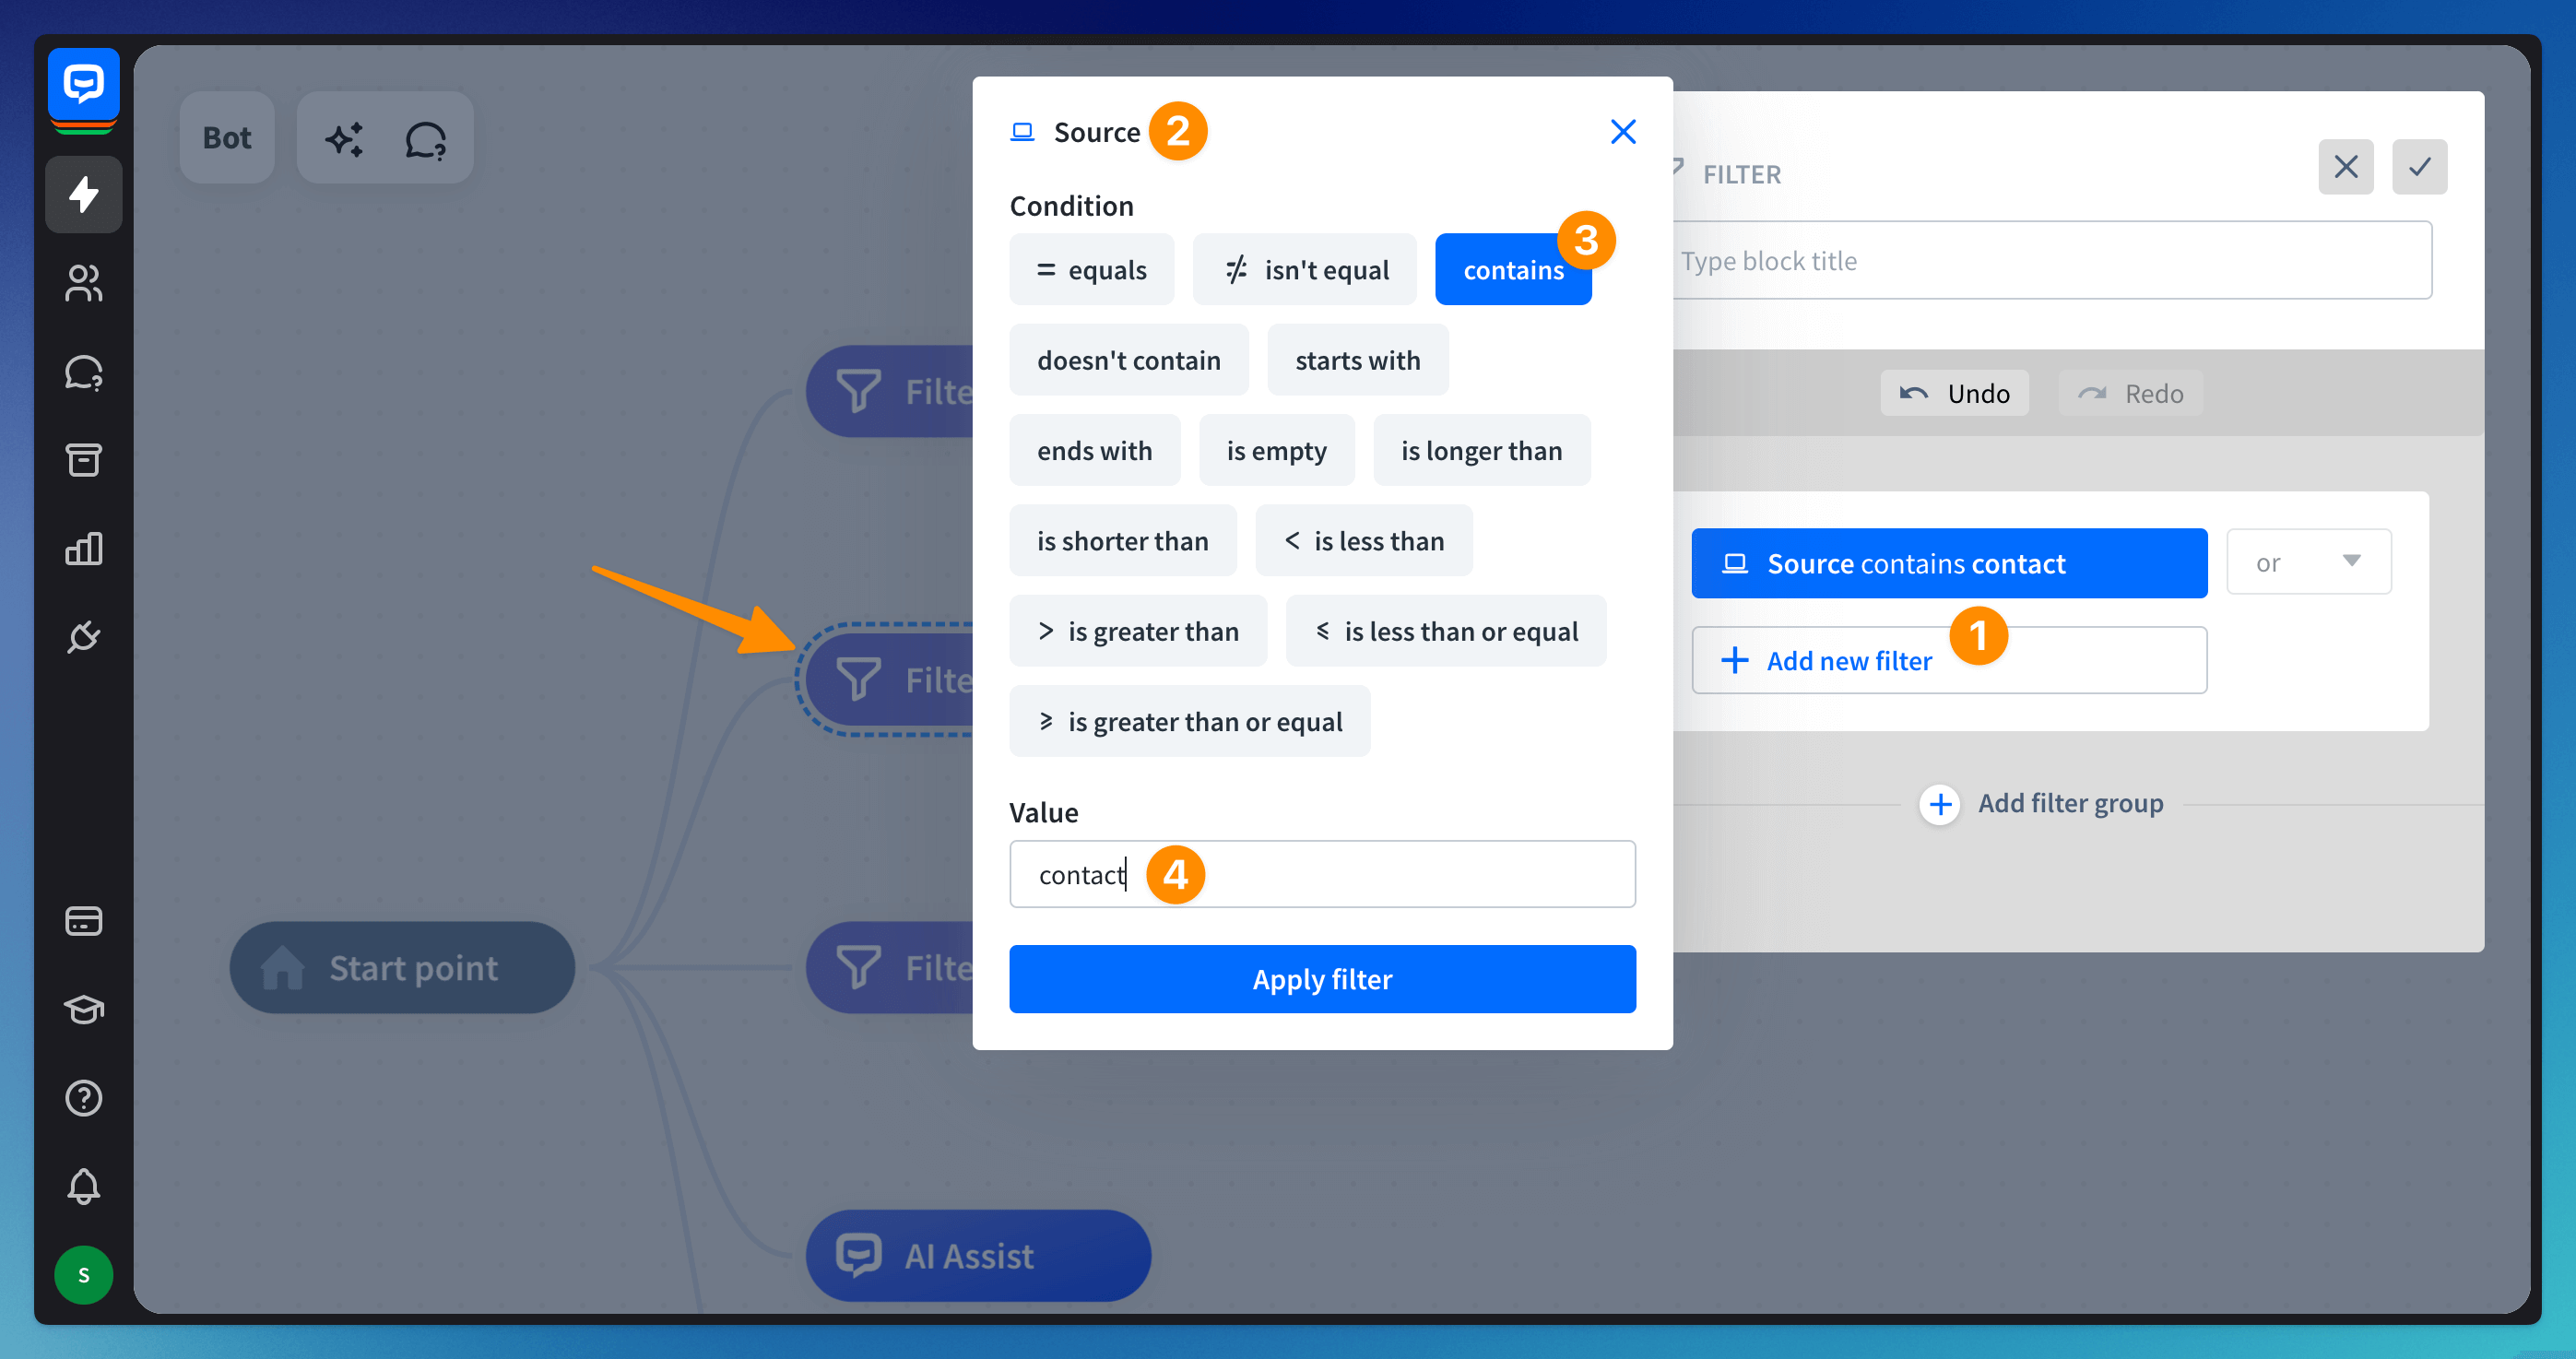 Proceed with providing all the necessary URLs the same way. The bot will start with the path from any page that contains the phrase from the value field or URL address.
 -
Drag Bot Response blocks and add them after the Filter blocks. Choose the response you want to display as the Welcome message after the query meets the filter’s conditions.
-
Publish the bot and test its functionality on the Sample page. The page is available in the Chat Widget integration section in the bottom left corner.
Usage example - Email attribute
You can use the Email attribute to differentiate the paths for new and returning users. For that, you’d need to use the Segments feature.
The Email attribute collects and saves the email addresses that your users provide. You can use the addresses later in the bot. The attribute is also kept within each Visitors section, so the bot already has the email address when returning.
You must create a segment before creating the bot flow. This way, while you build your bot flow, you already have a place to keep all the email addresses the users will provide while chatting.
-
Create a segment in the Visitors section. Name the segment “returning customers".
-
Create the bot with the Add chatbot button. You can do that in the Chatbots tab.
-
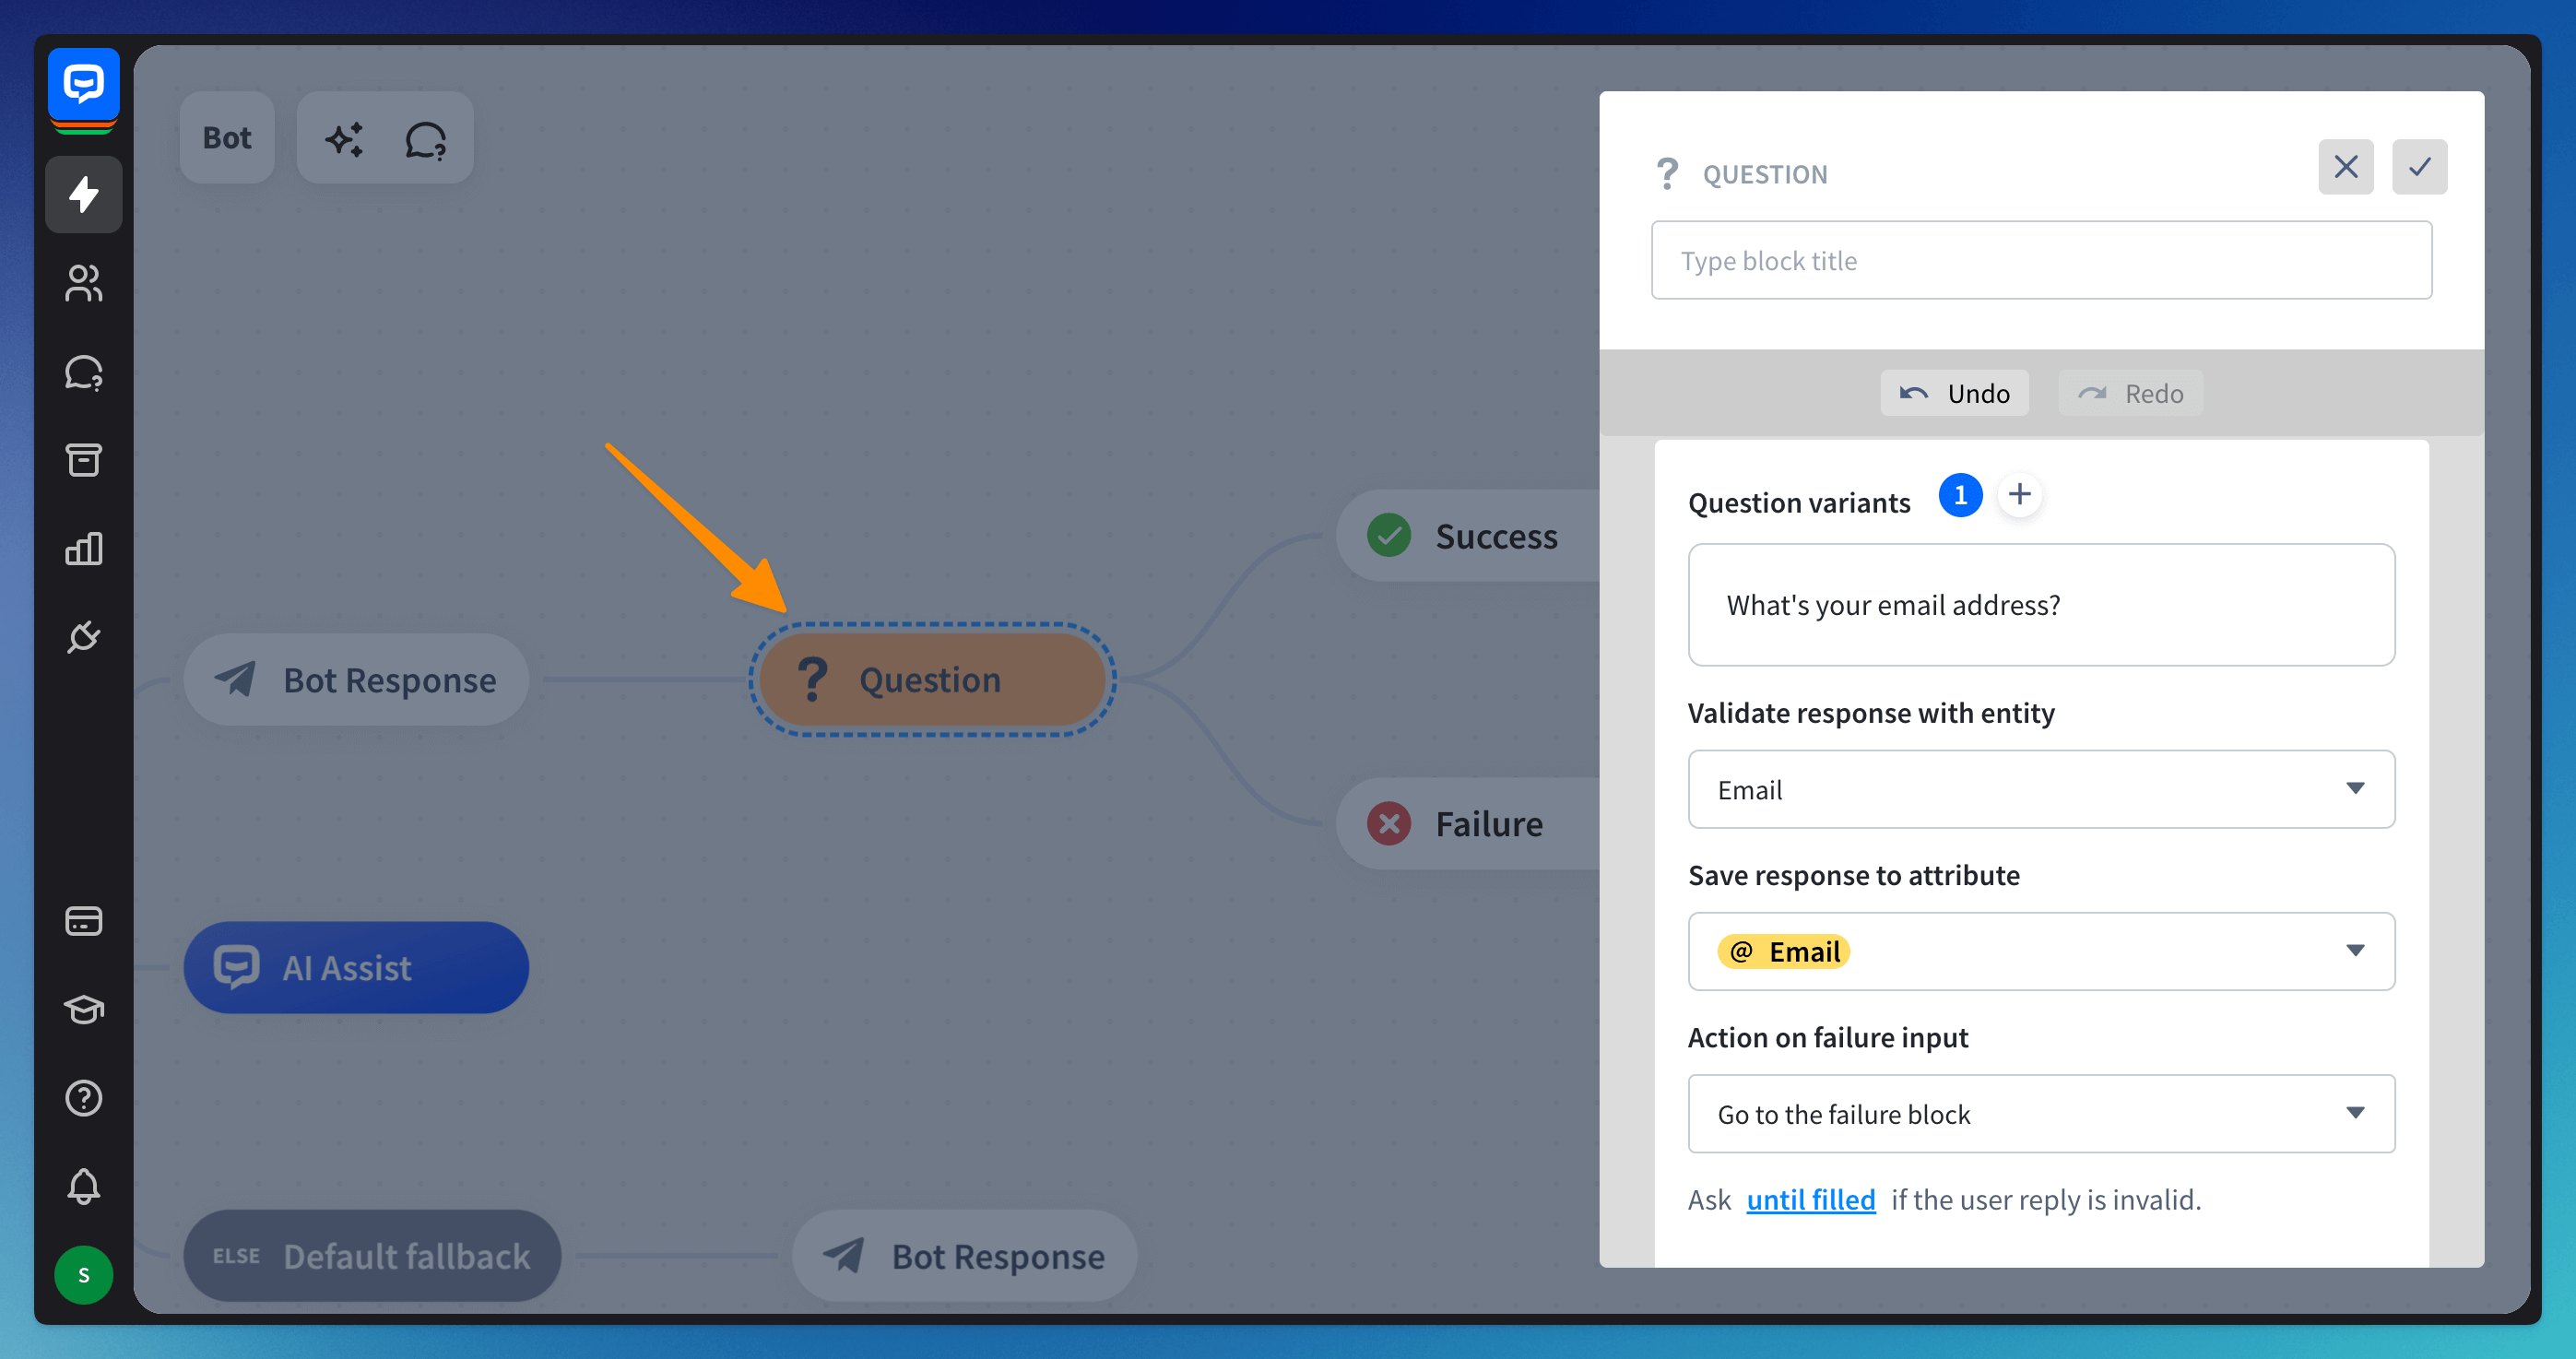
After the Welcome message, ask the user for their email address using the Question action. Make sure to use the Email validation and the Email attribute.
Using this action provides an additional layer of security—the bot will ask the question again if the user provides the email address in the incorrect form.
-
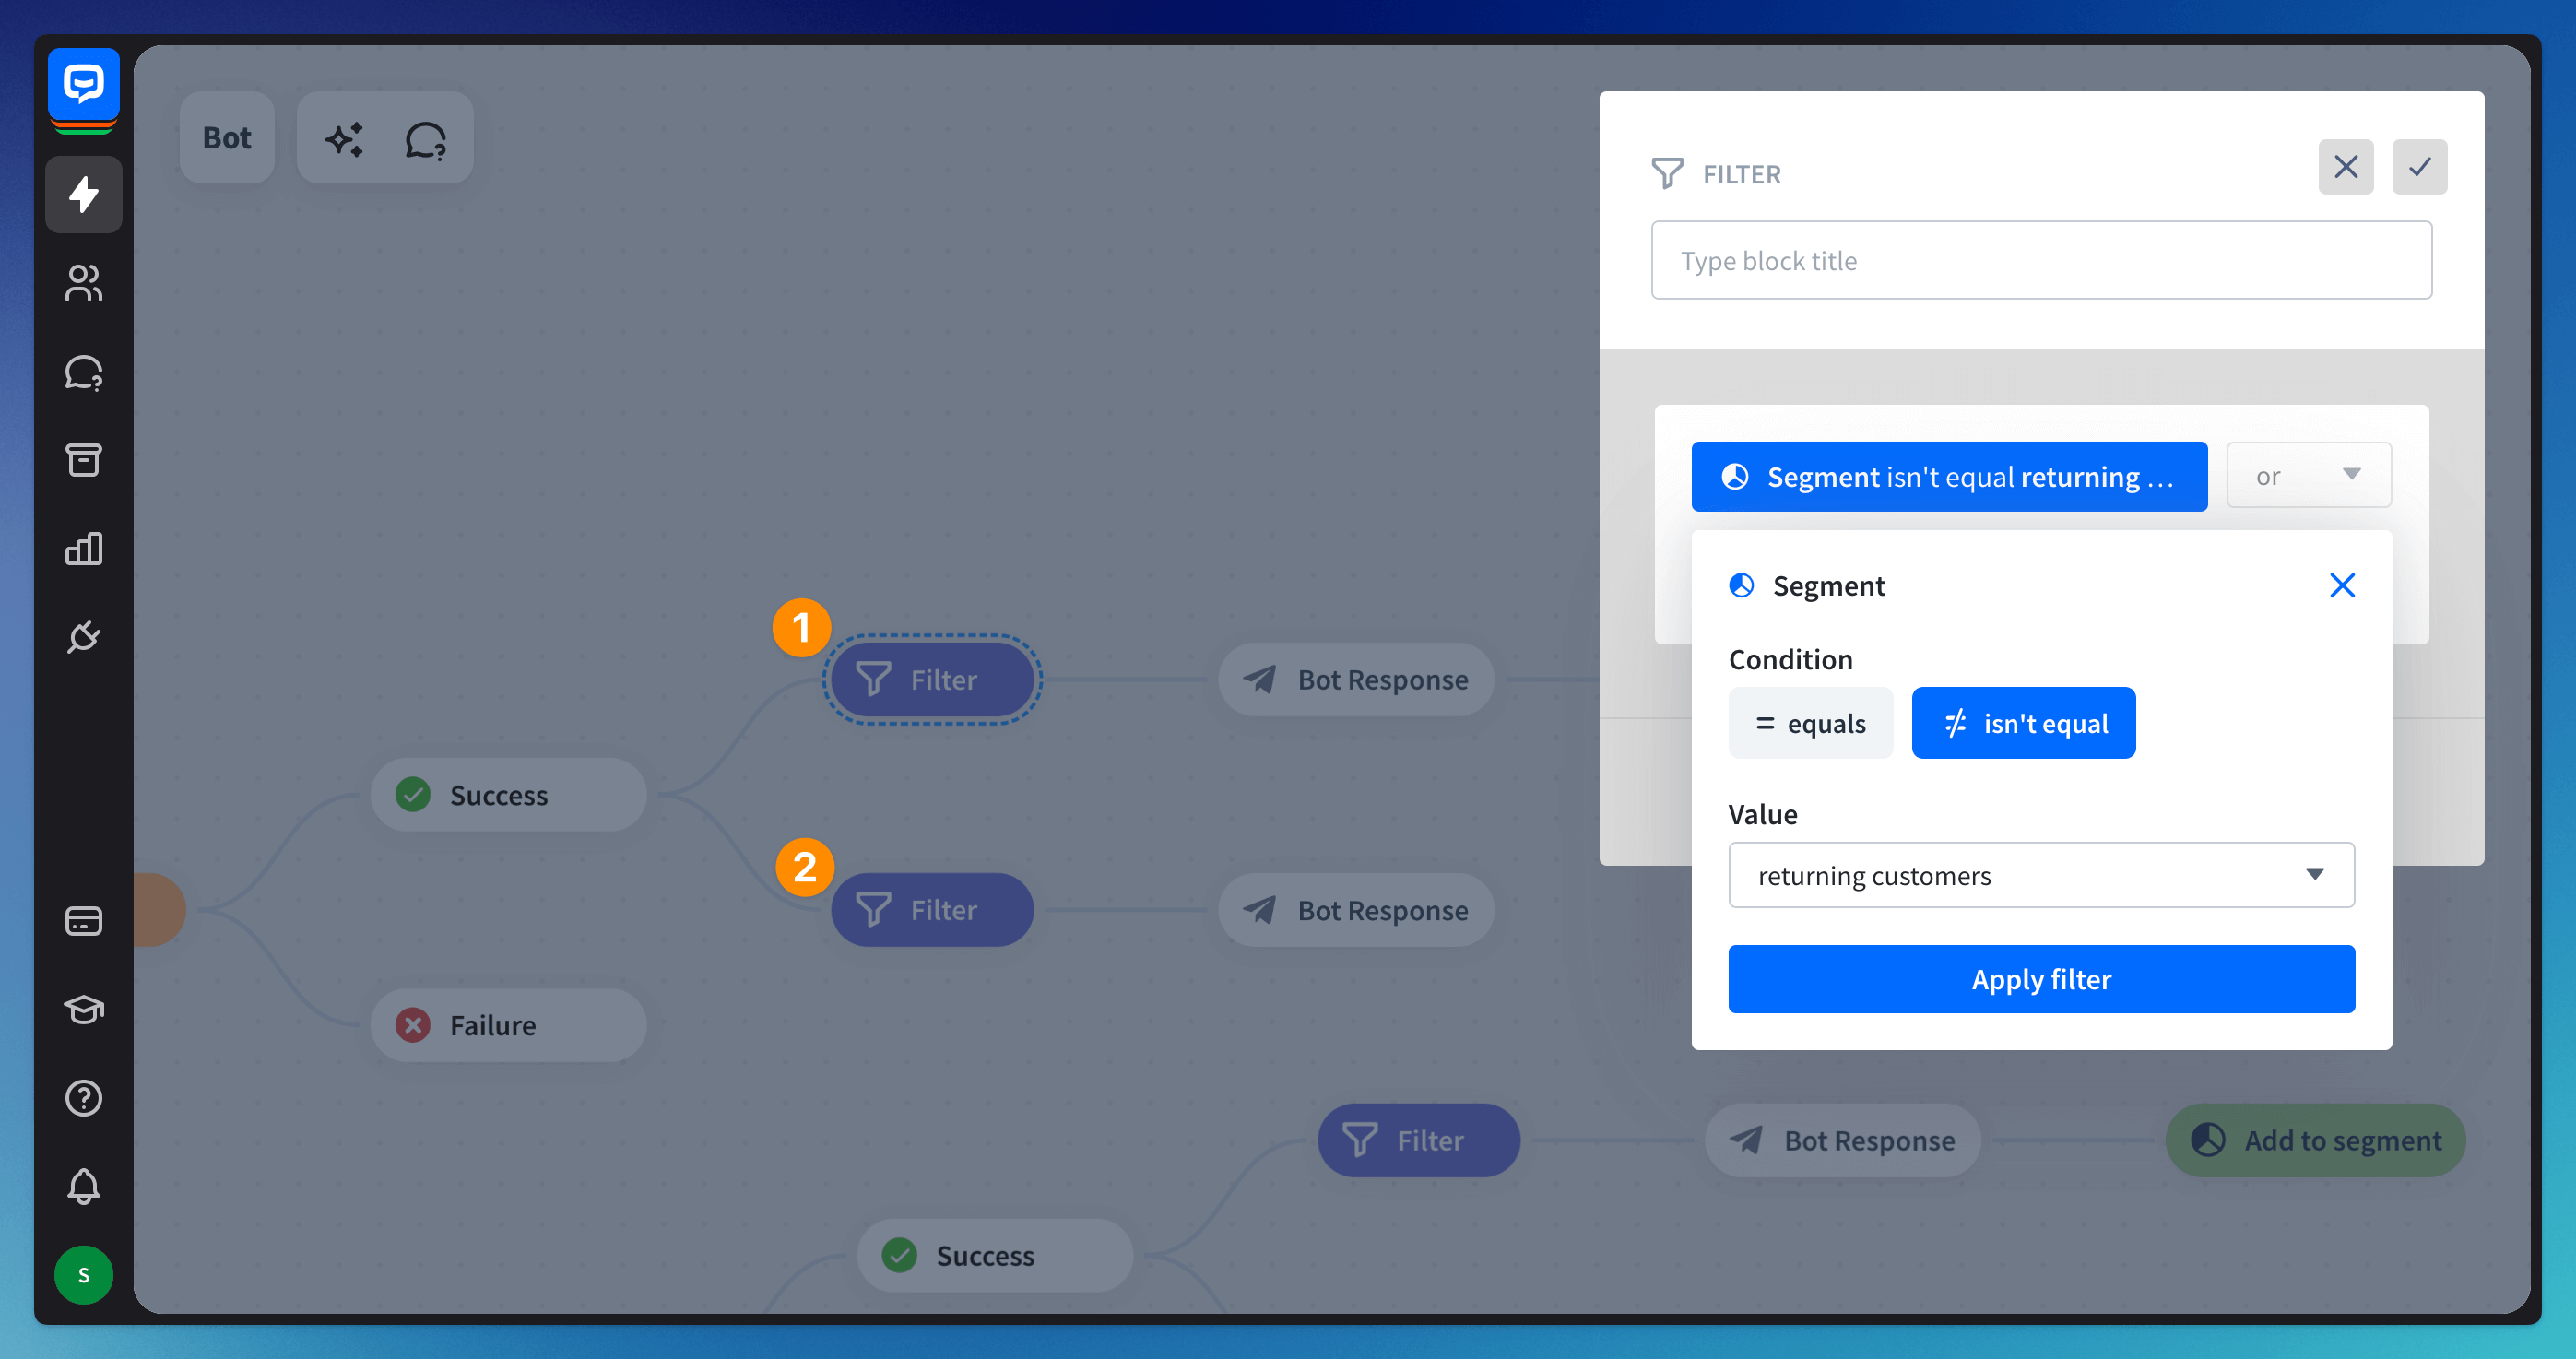
Add Filters after the Question Success block. Add one filter for each of the user types. Add a Bot response after the filters, so you’d know if the bot chose the correct path.
- If the user is chatting with the bot for the first time, their email address can’t be in the Segment. That is why, in the Filter configuration, choose the “isn’t equal” condition. After this filter, add the Add to segment action. Choose the correct segment inside the action.
This way, when the new user provides their email address, the bot will add the address to the segment. When the user returns to the chat, the filter will check if an address is already in the segment.
- You have a different message for the users who chatted with the bot before, so you must choose the second condition, “equals”. Select the equals condition because the email address is already in the segment in the user’s chats.
-
Publish the bot and test its functionality on the Sample page. The page is available in the Chat Widget integration section in the bottom left corner.
Usage example - Pre-chat form from LiveChat
In the previous filter example, you can see how to use the Email attribute and show different paths to the users who come to the chat for the first time and to the returning users. In this example, you can use the Pre-chat form from LiveChat for that.
-
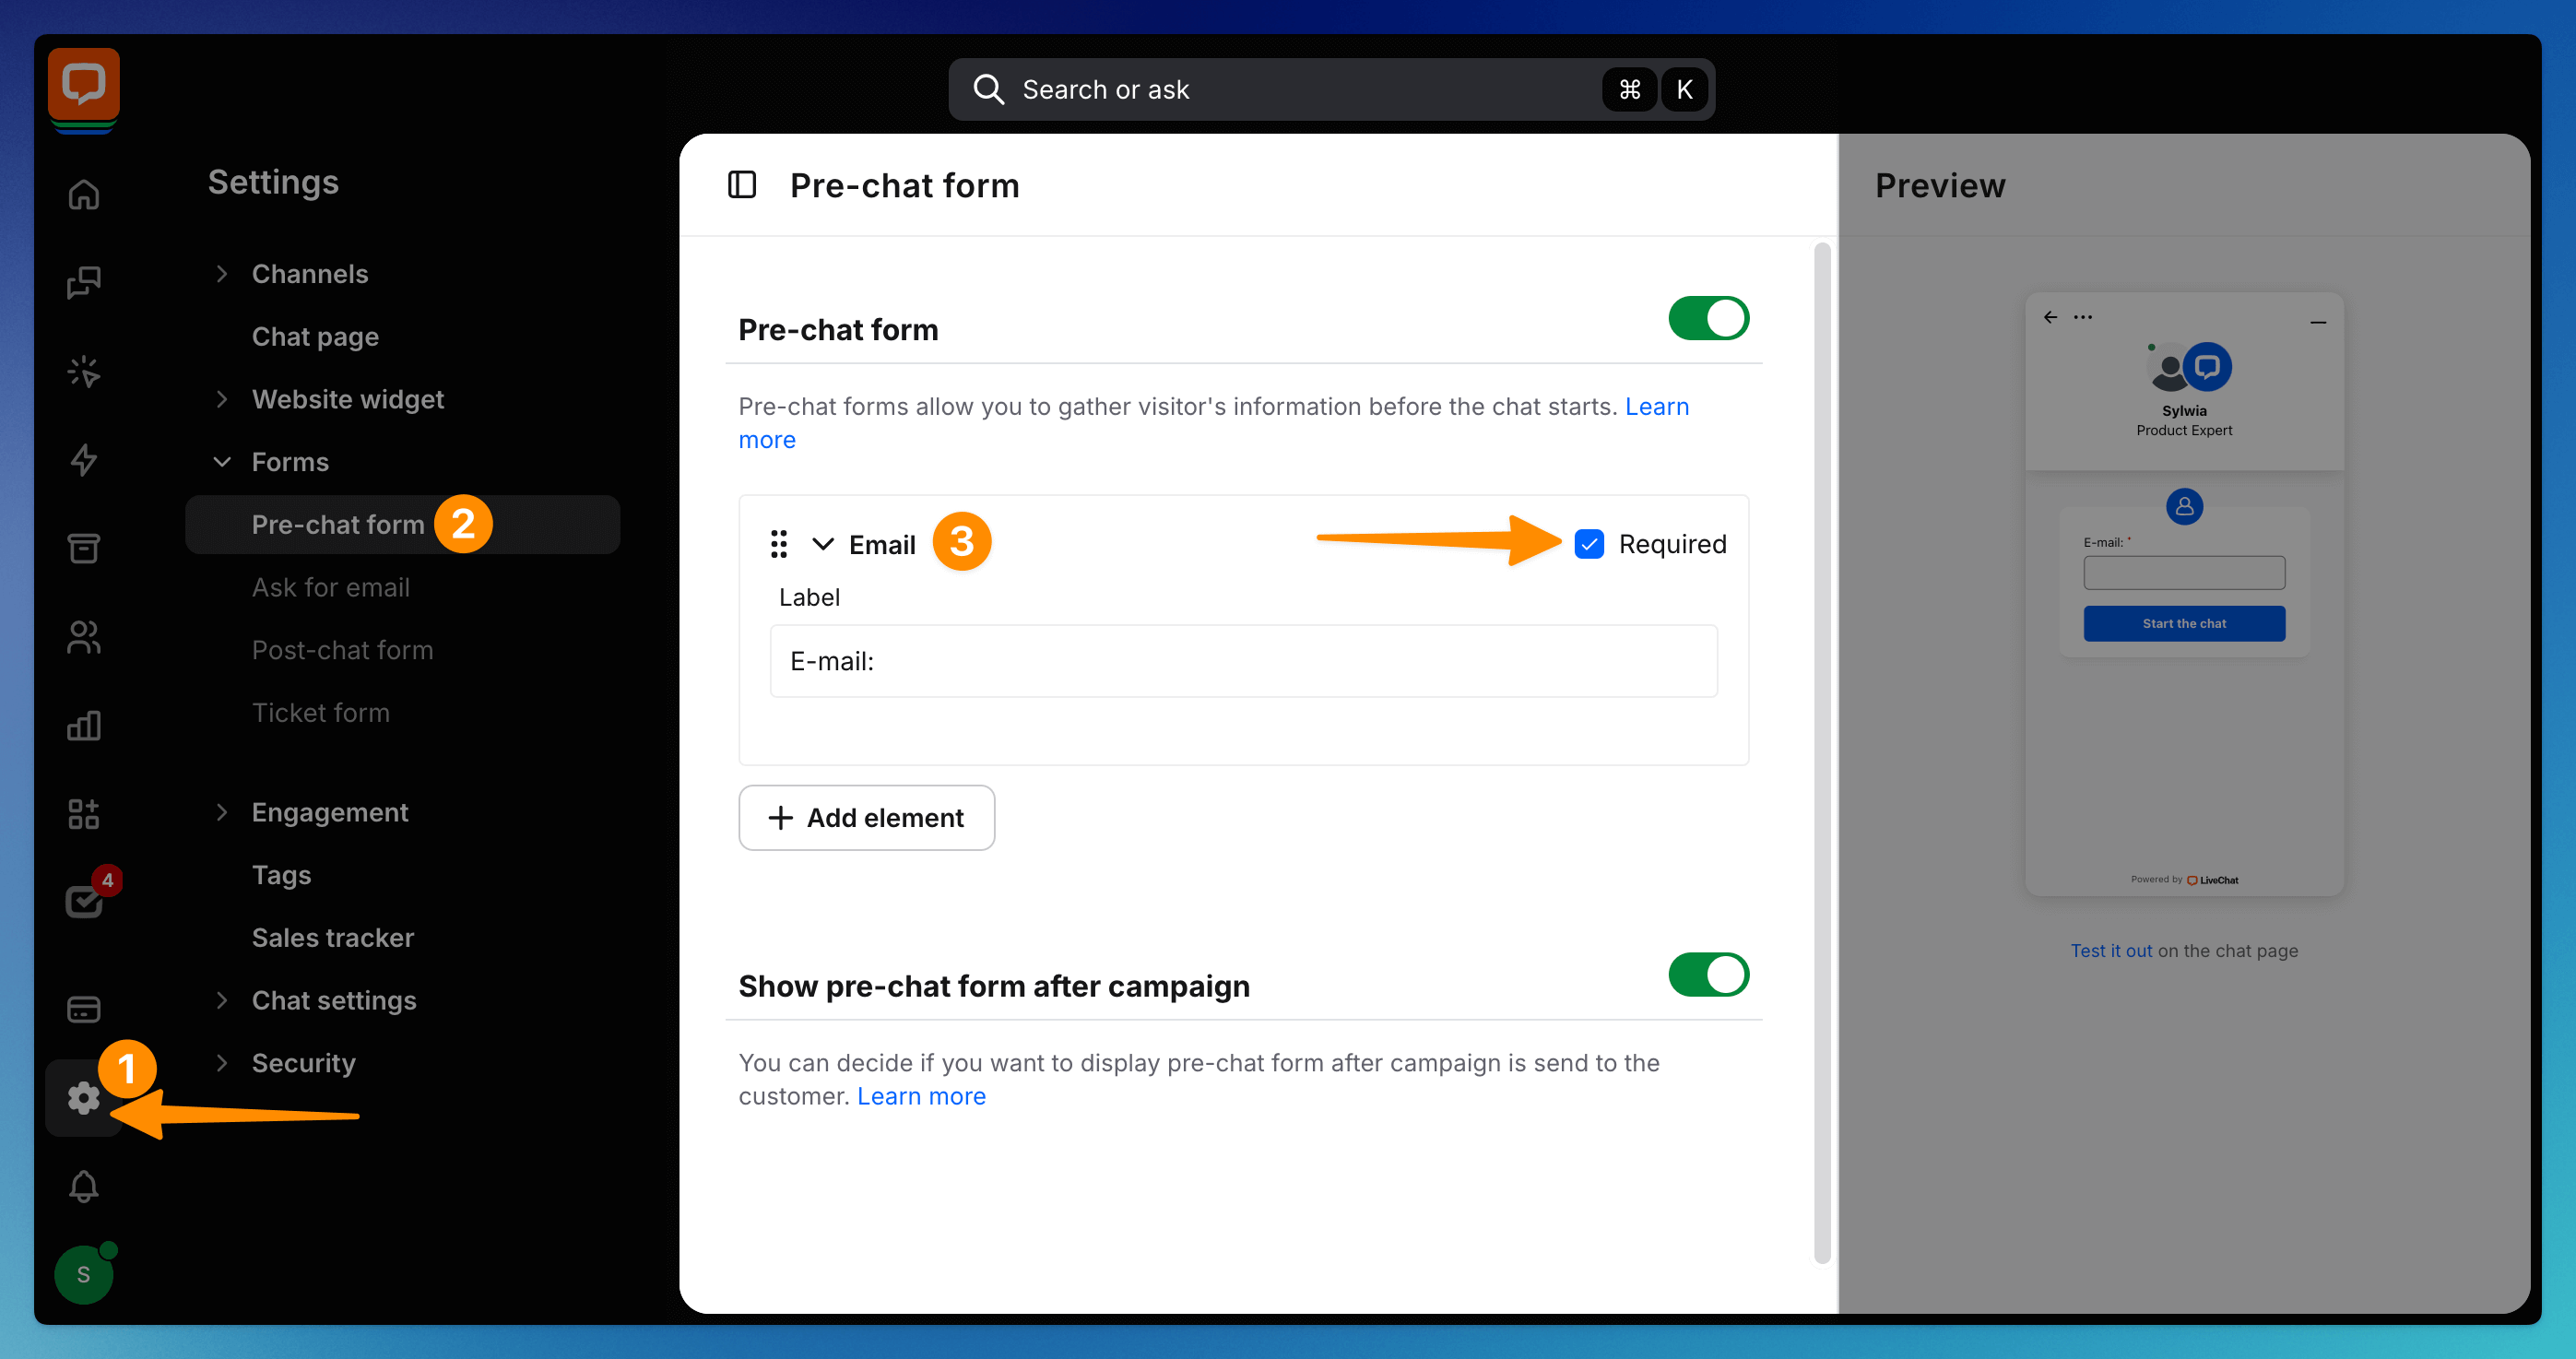
Go to the LiveChat app and enter Settings (1). Find the Pre-chat form section (2). Choose the Email element from the list (3). Check the Required box field. This way, the user must provide the email address before the chat starts.
-
Go to your bot. As in the previous example, we will use Segments. Check how to create a segment and use it.
-
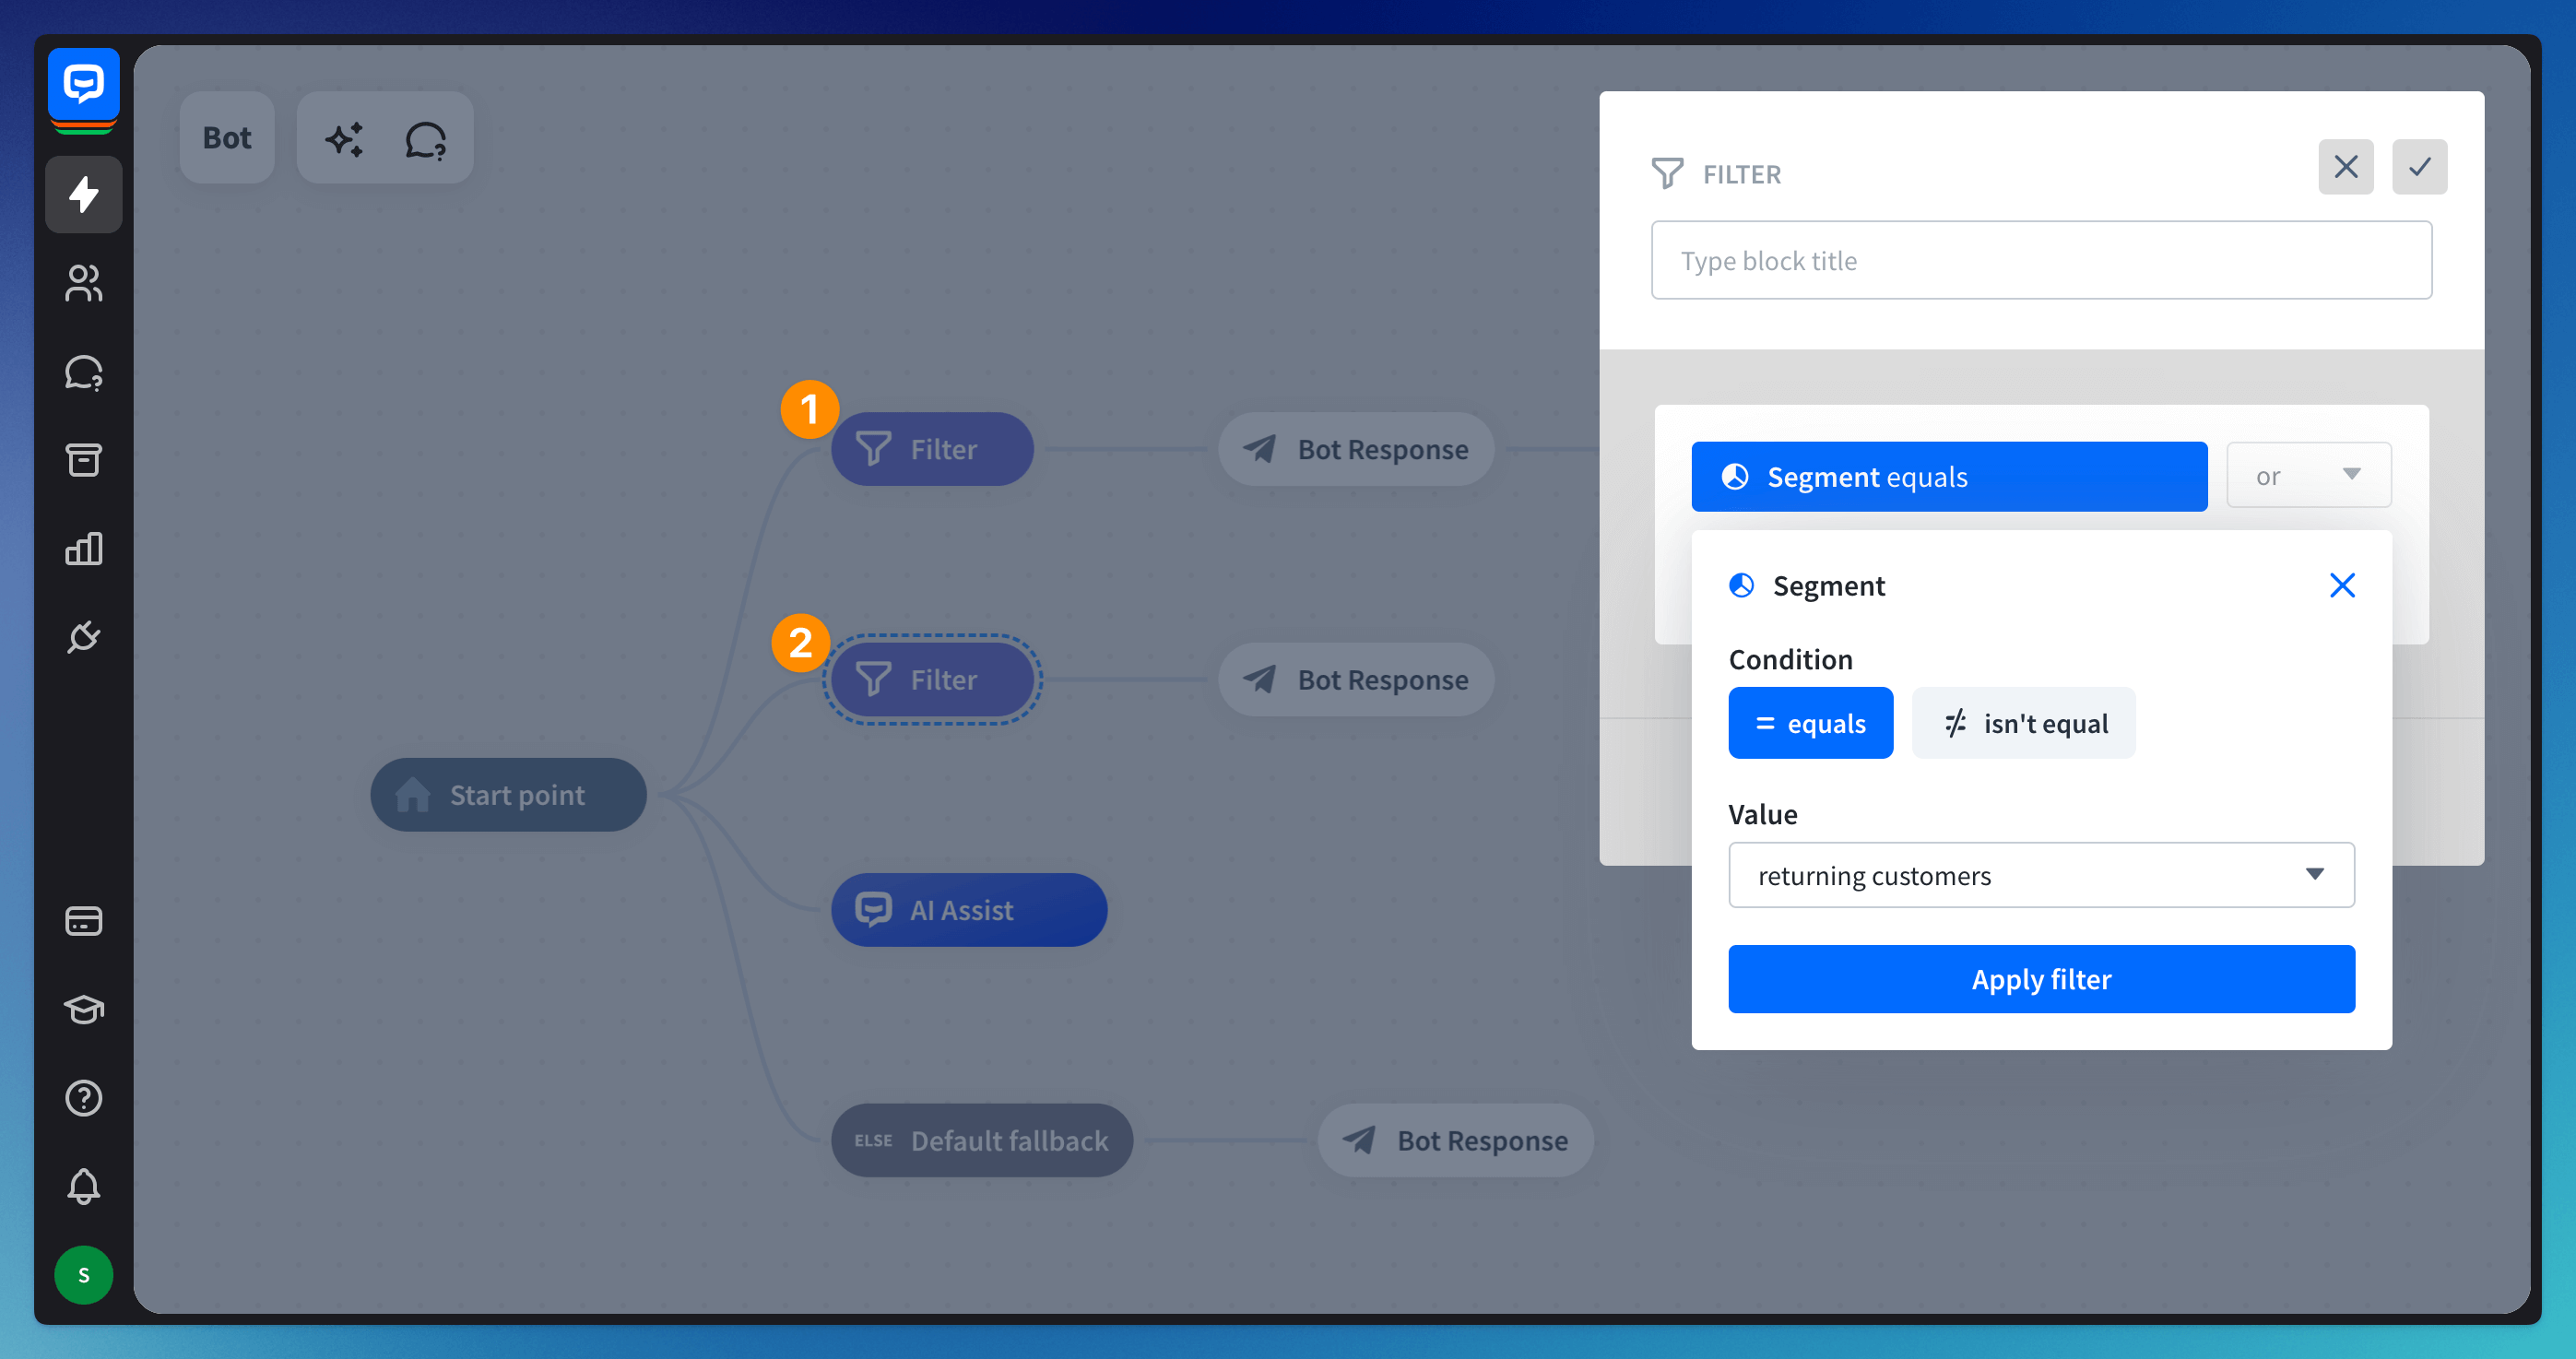
Place two filters at the very beginning, just after the Start point.
- Use “isn’t equal” for the first-time users. Add the Add to segment action after the new user’s filter. Choose the correct segment and save. Add a message after the action.
- Use “equals” for the returning users. When the returning user approaches the chat, the bot will show different messages based on the email address provided via the LiveChat pre-chat survey.
Remember to publish the bot. The new version of your bot will be available to use once you click the Publish button.
-
Test the bot on the LiveChat Chat page.
Read more:
