The Visitors section lets you get closer to the people who chat with your bot.
This section gathers all the information collected by the bot during chats. Each visitor profile shows how often the person talks to the bot and when the last chat occurred. You can see all the attributes assigned to their profile, add them to custom Segments, filter specific records, export information, and more.
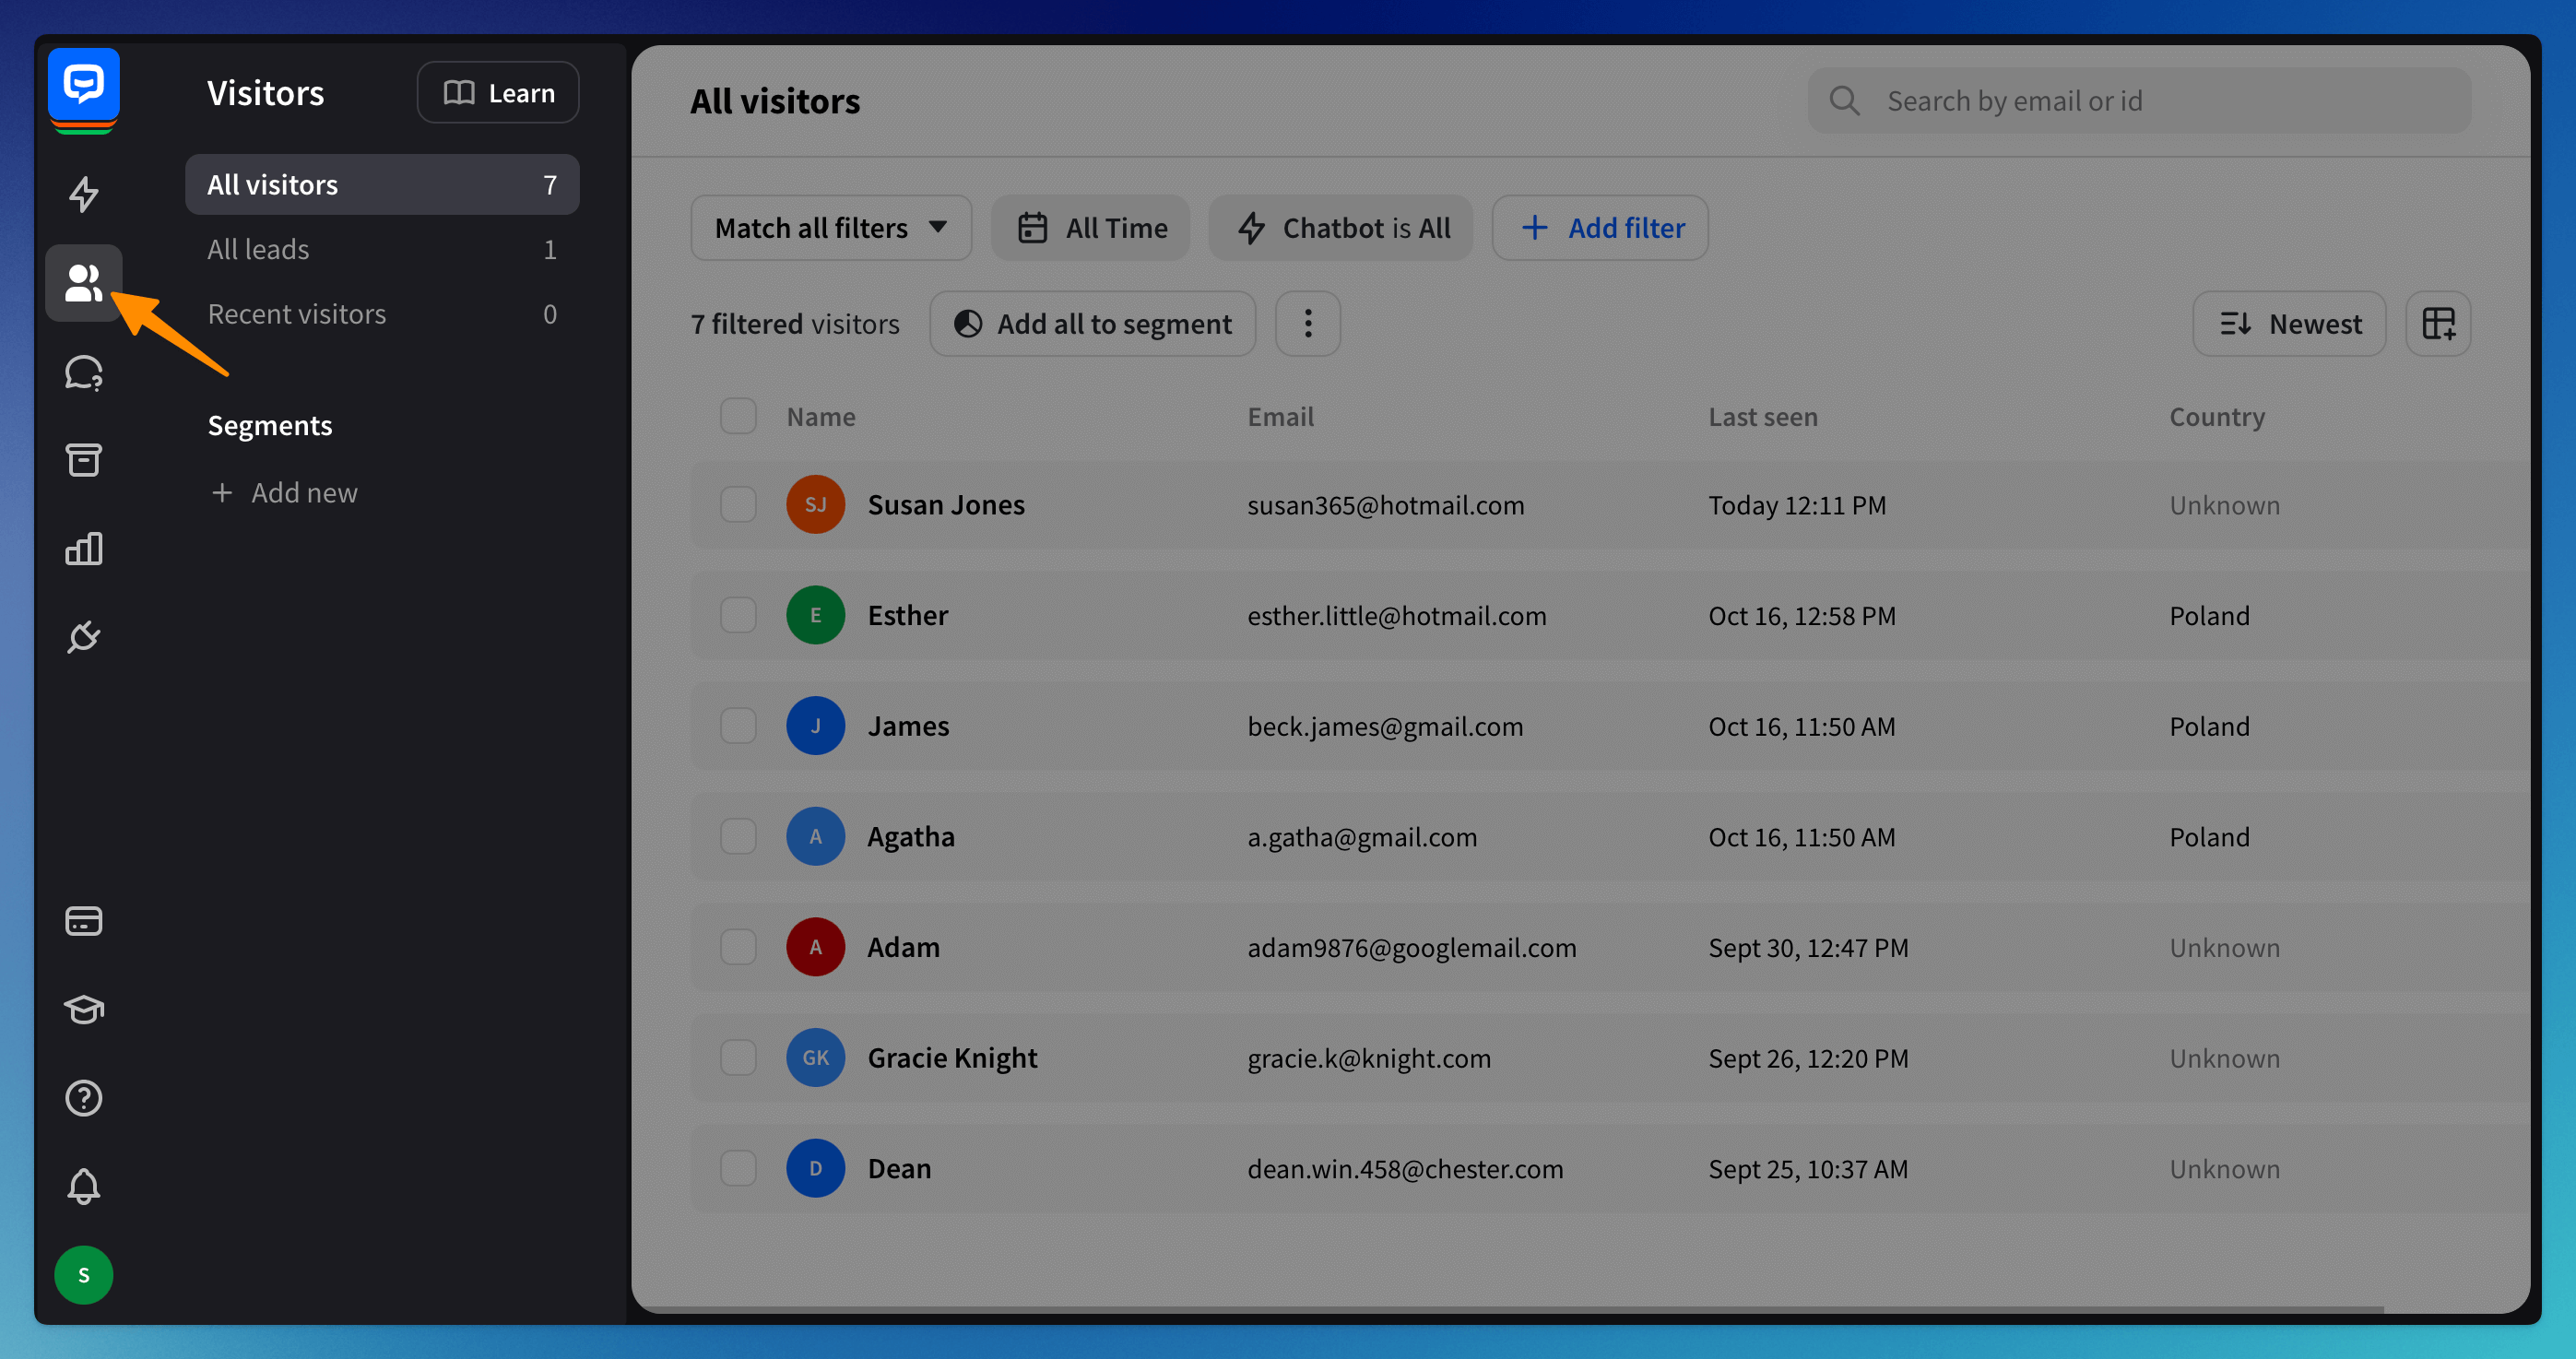
To access this section, click the Visitors icon in the left sidebar.
 On the left side of the screen, you can see all the sections you can browse:
You will be taken to the All visitors section when entering the section from the sidebar.
All visitors section
In this section, you can view all the people who have interacted with your chatbot, sorted by the last time they chatted with the bot. You can also see their name, email address, and country of origin.
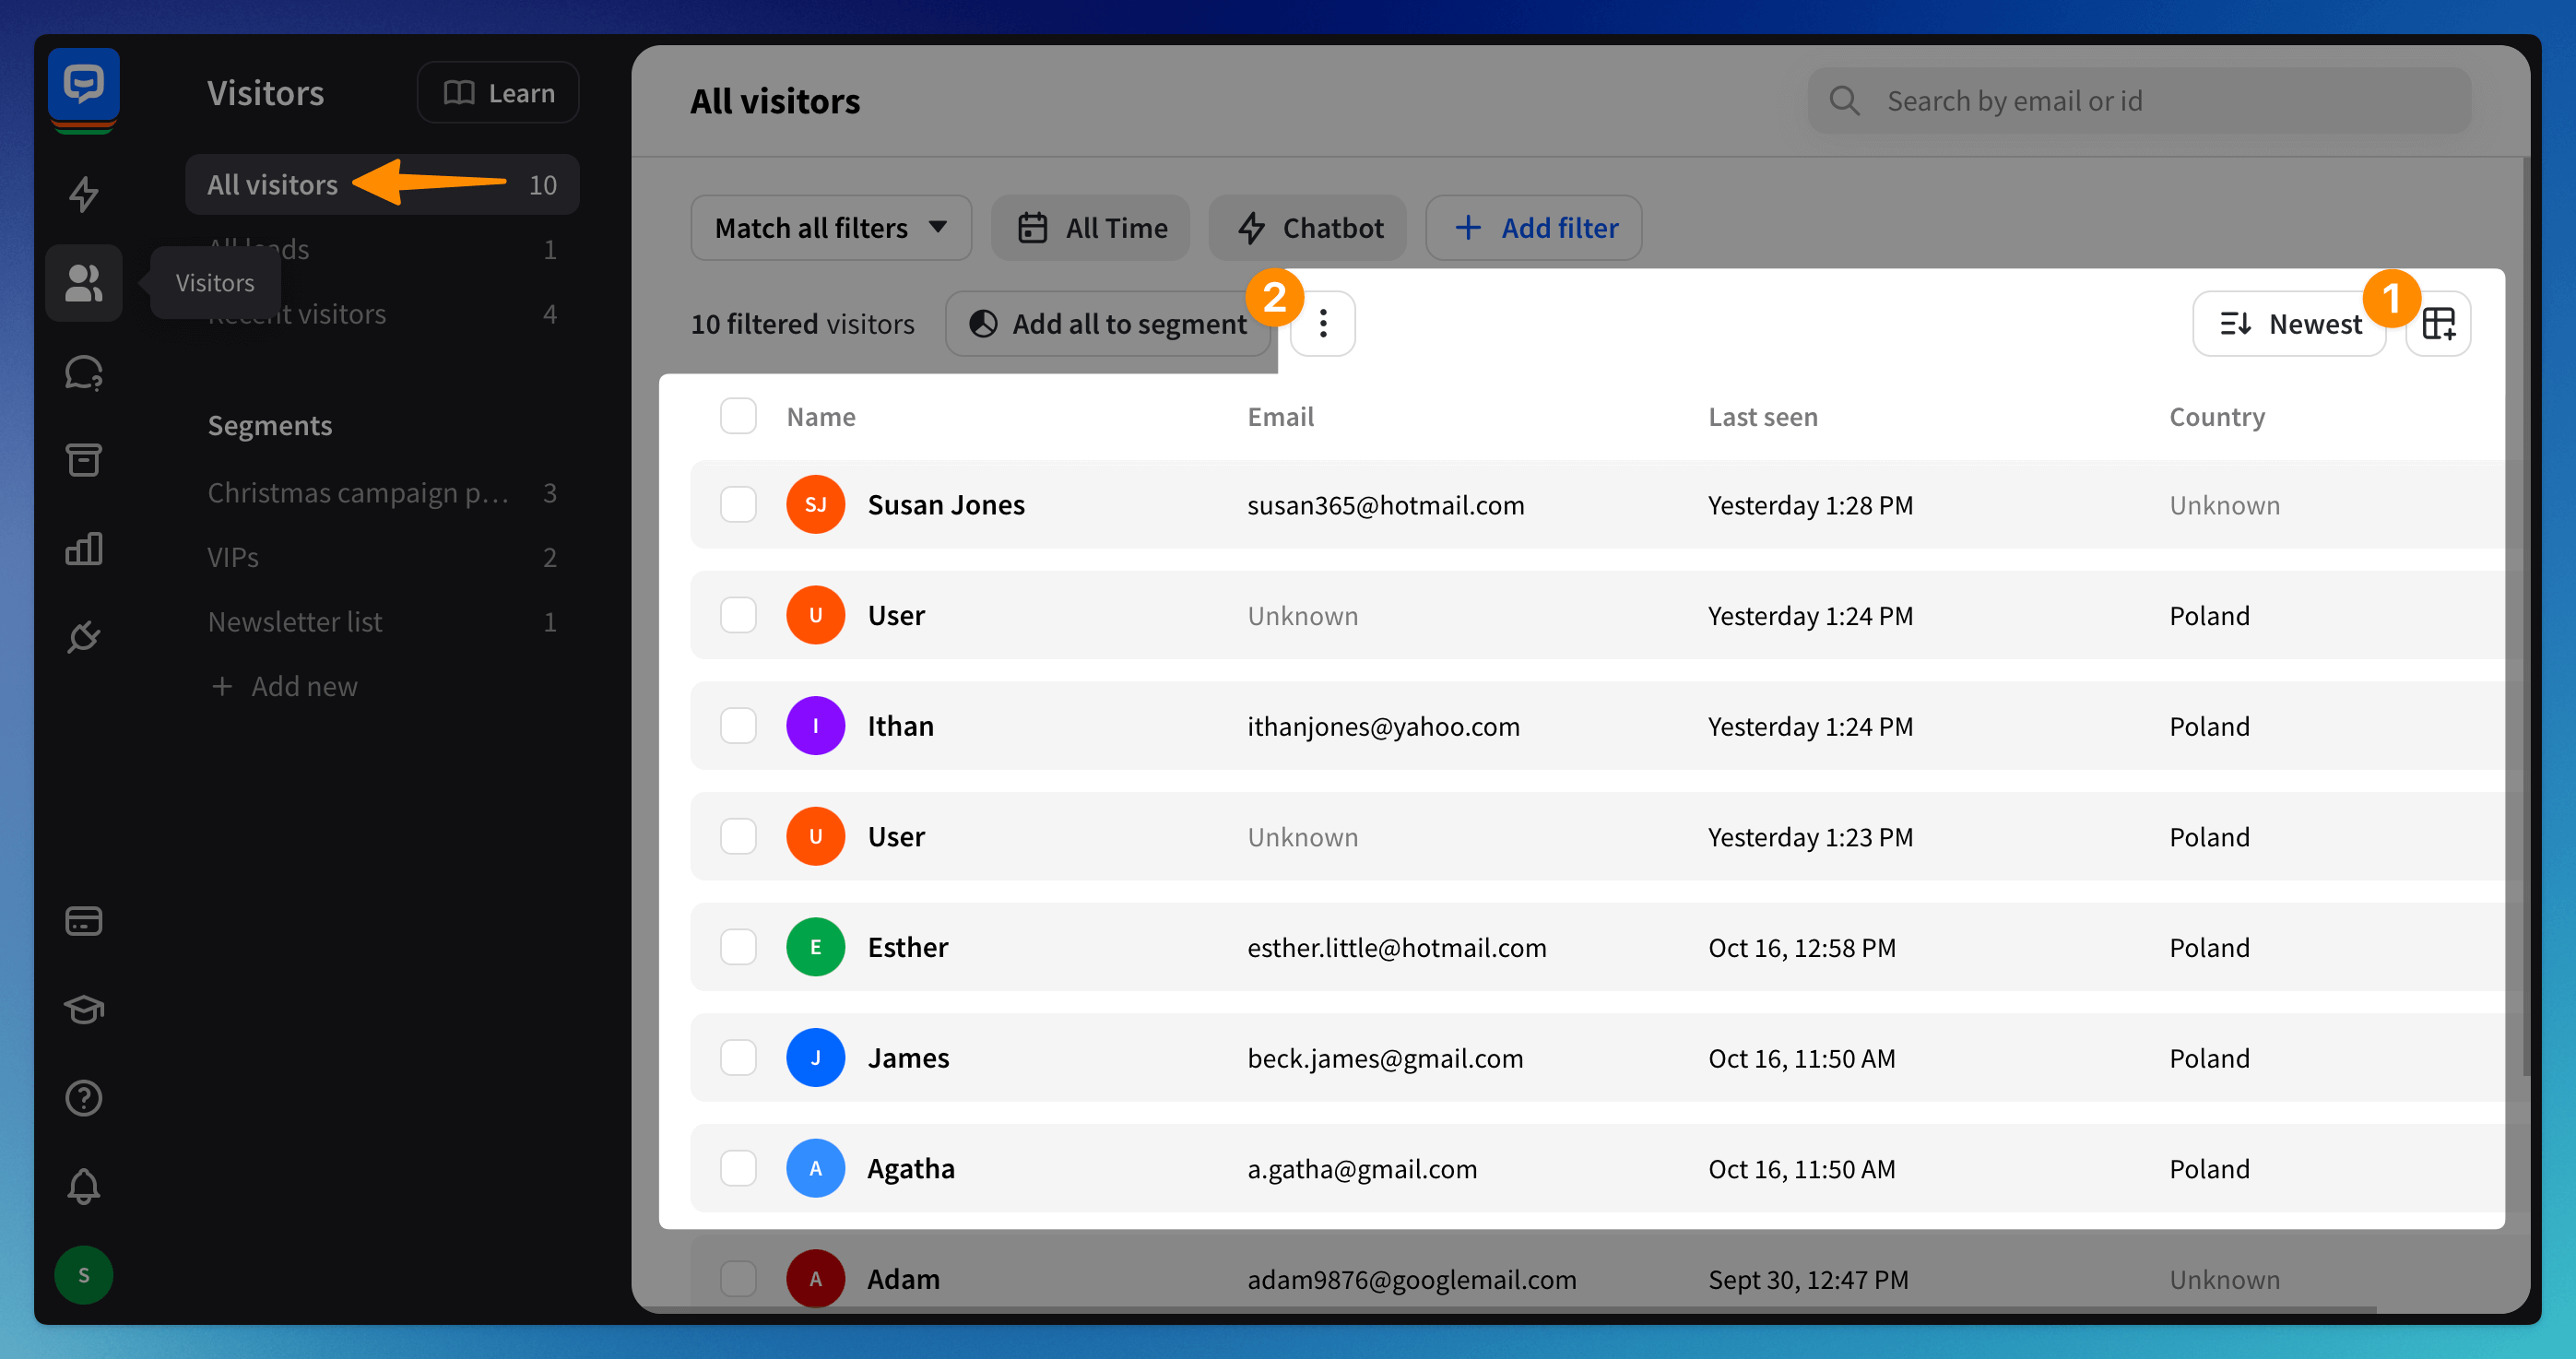 You can customize the columns displayed in the main view by clicking on the + icon (1) on the right side of the screen. To export the visitors’ information, click the 3-dot symbol (2) above the visitors list. The list will be sent to the email address you used to log in to ChatBot.com. Under the same symbol, you can delete visitors.
You can filter the visitors (1) based on time, bot name, and the collected information saved as default attributes during the chat. In this view, you can also add visitors to segments (2).
All leads section
This section shows all the leads your bot has gathered during chats. The Add to leads action in the bot flow lets you decide which visitors will be here. You can gather sales leads, marketing leads, or support leads here.
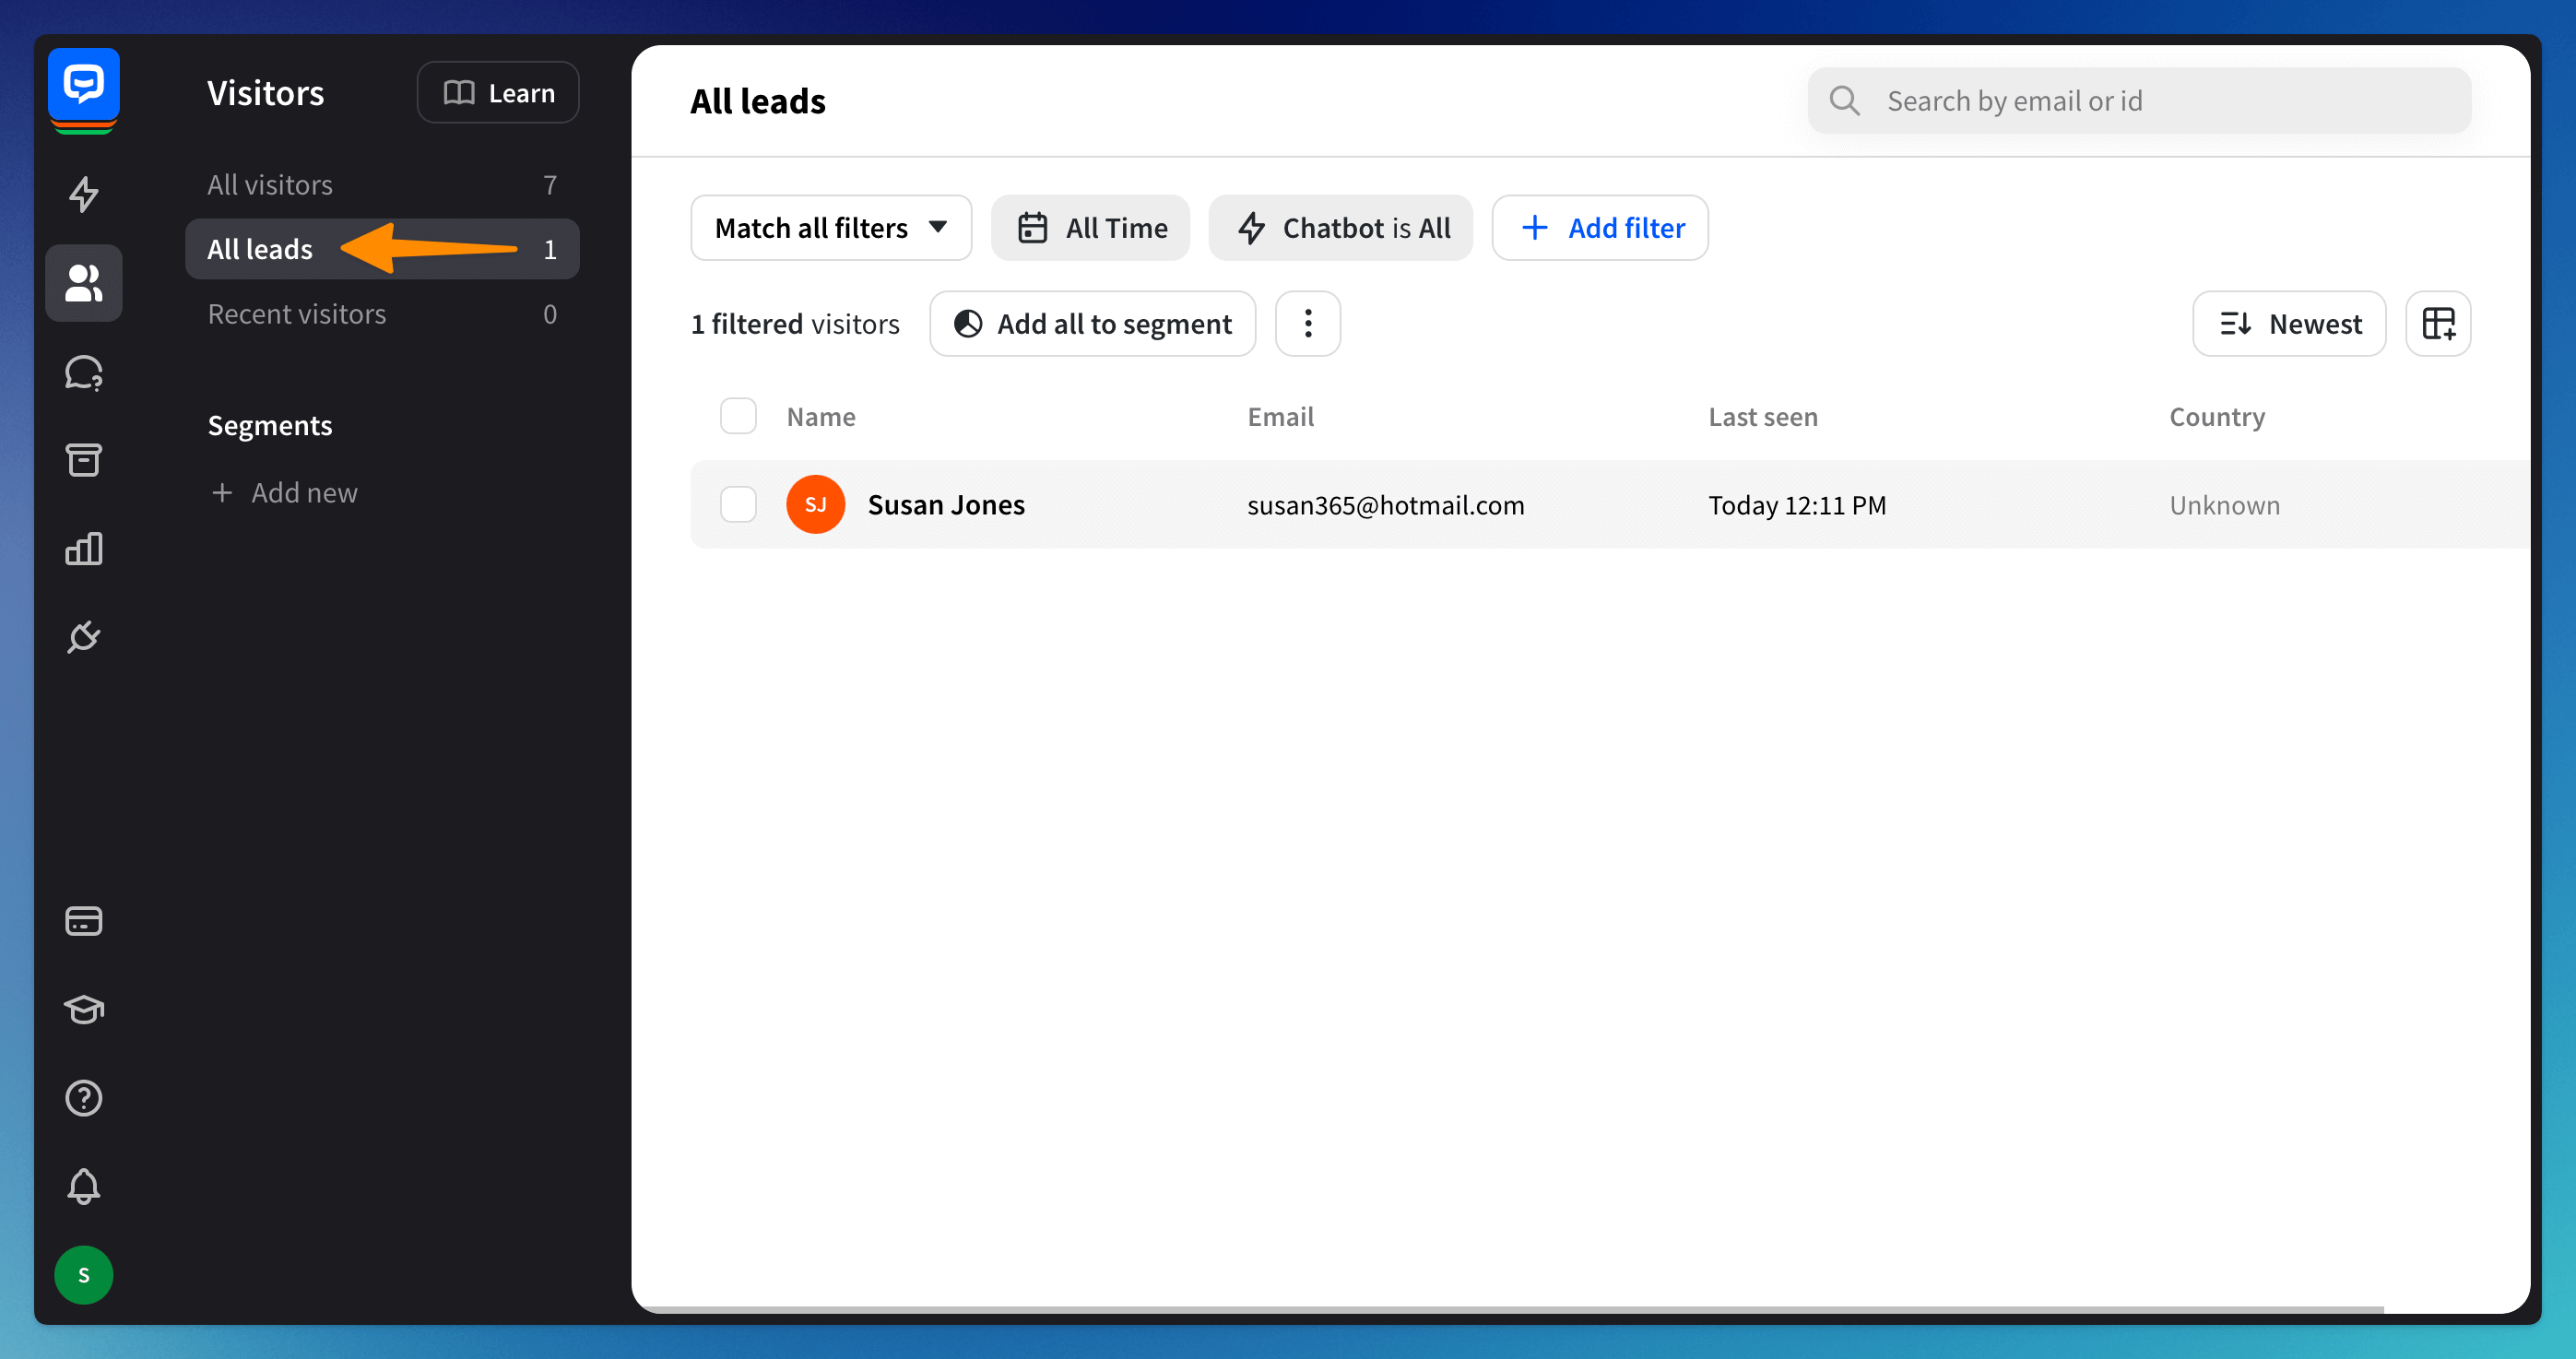 You can perform the same actions as in the All visitors section — add visitors to segments, filter them as needed, export the information, and delete them under the 3-dot symbol.
Recent visitors section
This section shows all visitors who chatted with your bot in the last 24 hours. When the last time they reached out to the bot was longer than that, they will be removed from this section. You can then find them in the All visitors section.
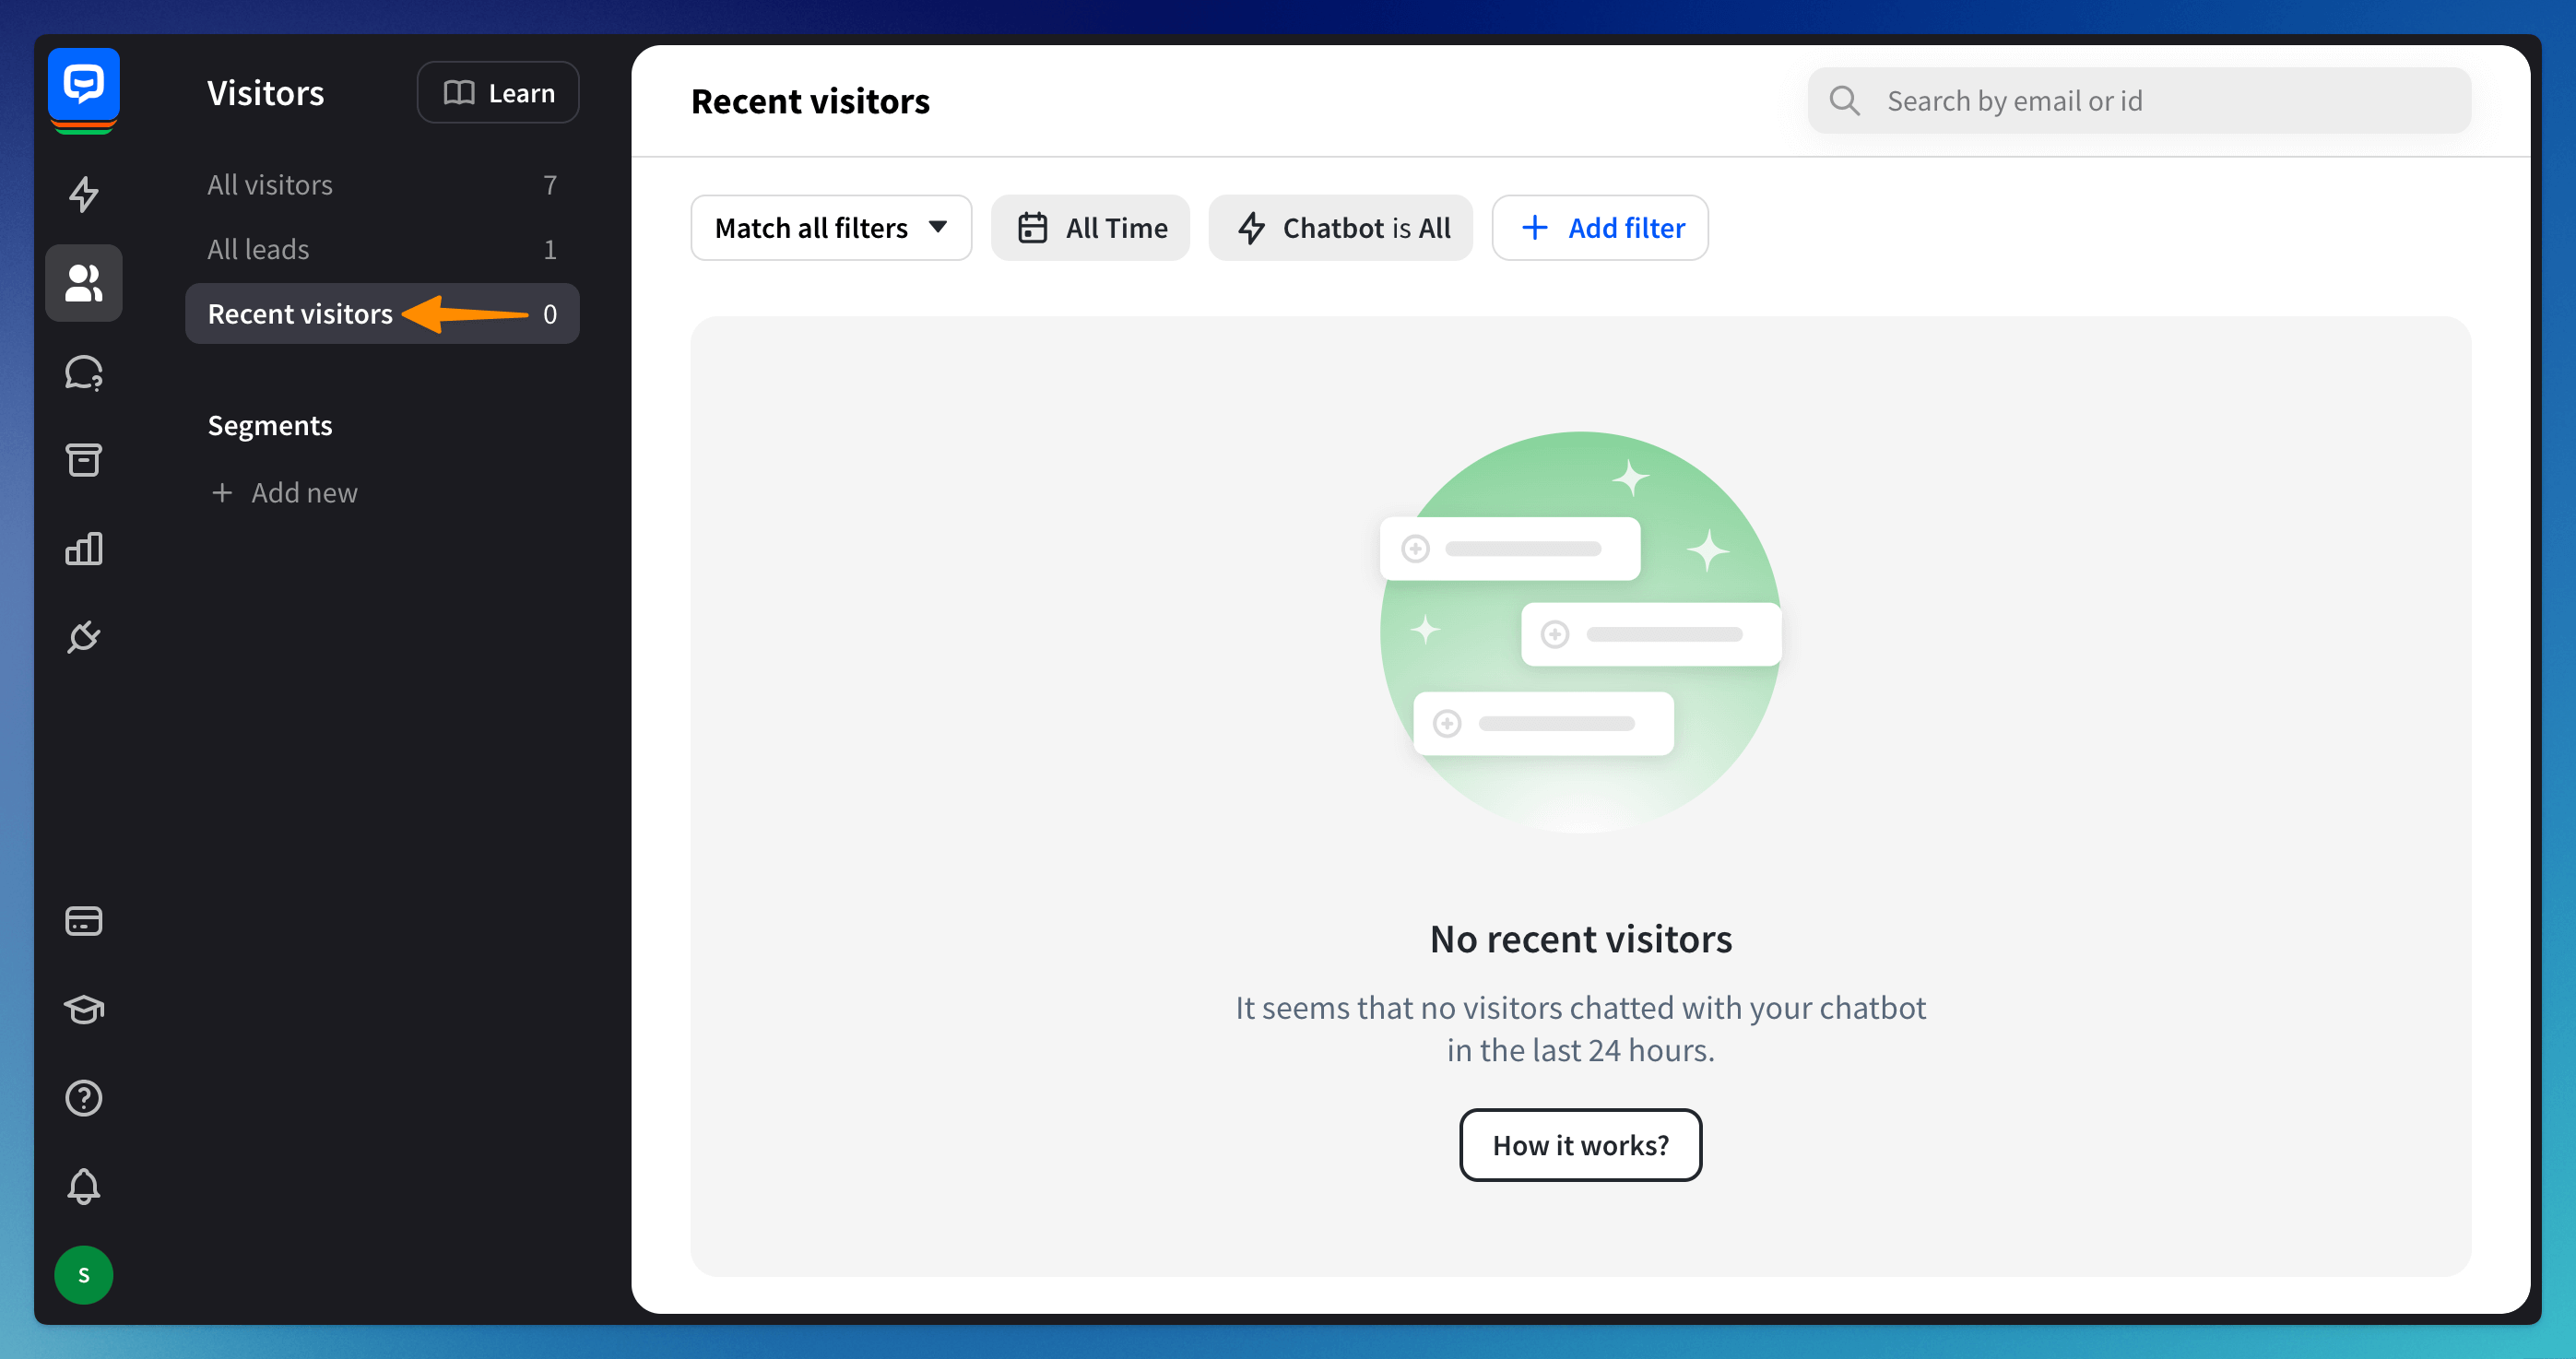 You can perform the same actions as in the All visitors section — add visitors to segments, filter them as needed, export the information, and delete visitors under the 3-dot symbol.
Segments section
You can create a segment to collect people who want to join your newsletter, VIP visitors, returning visitors, and more. Depending on your needs, you can add or delete visitors from Segments at any point in this section.
To access the segment, choose its name from the side menu. You will see the list of all visitors added to the segment.
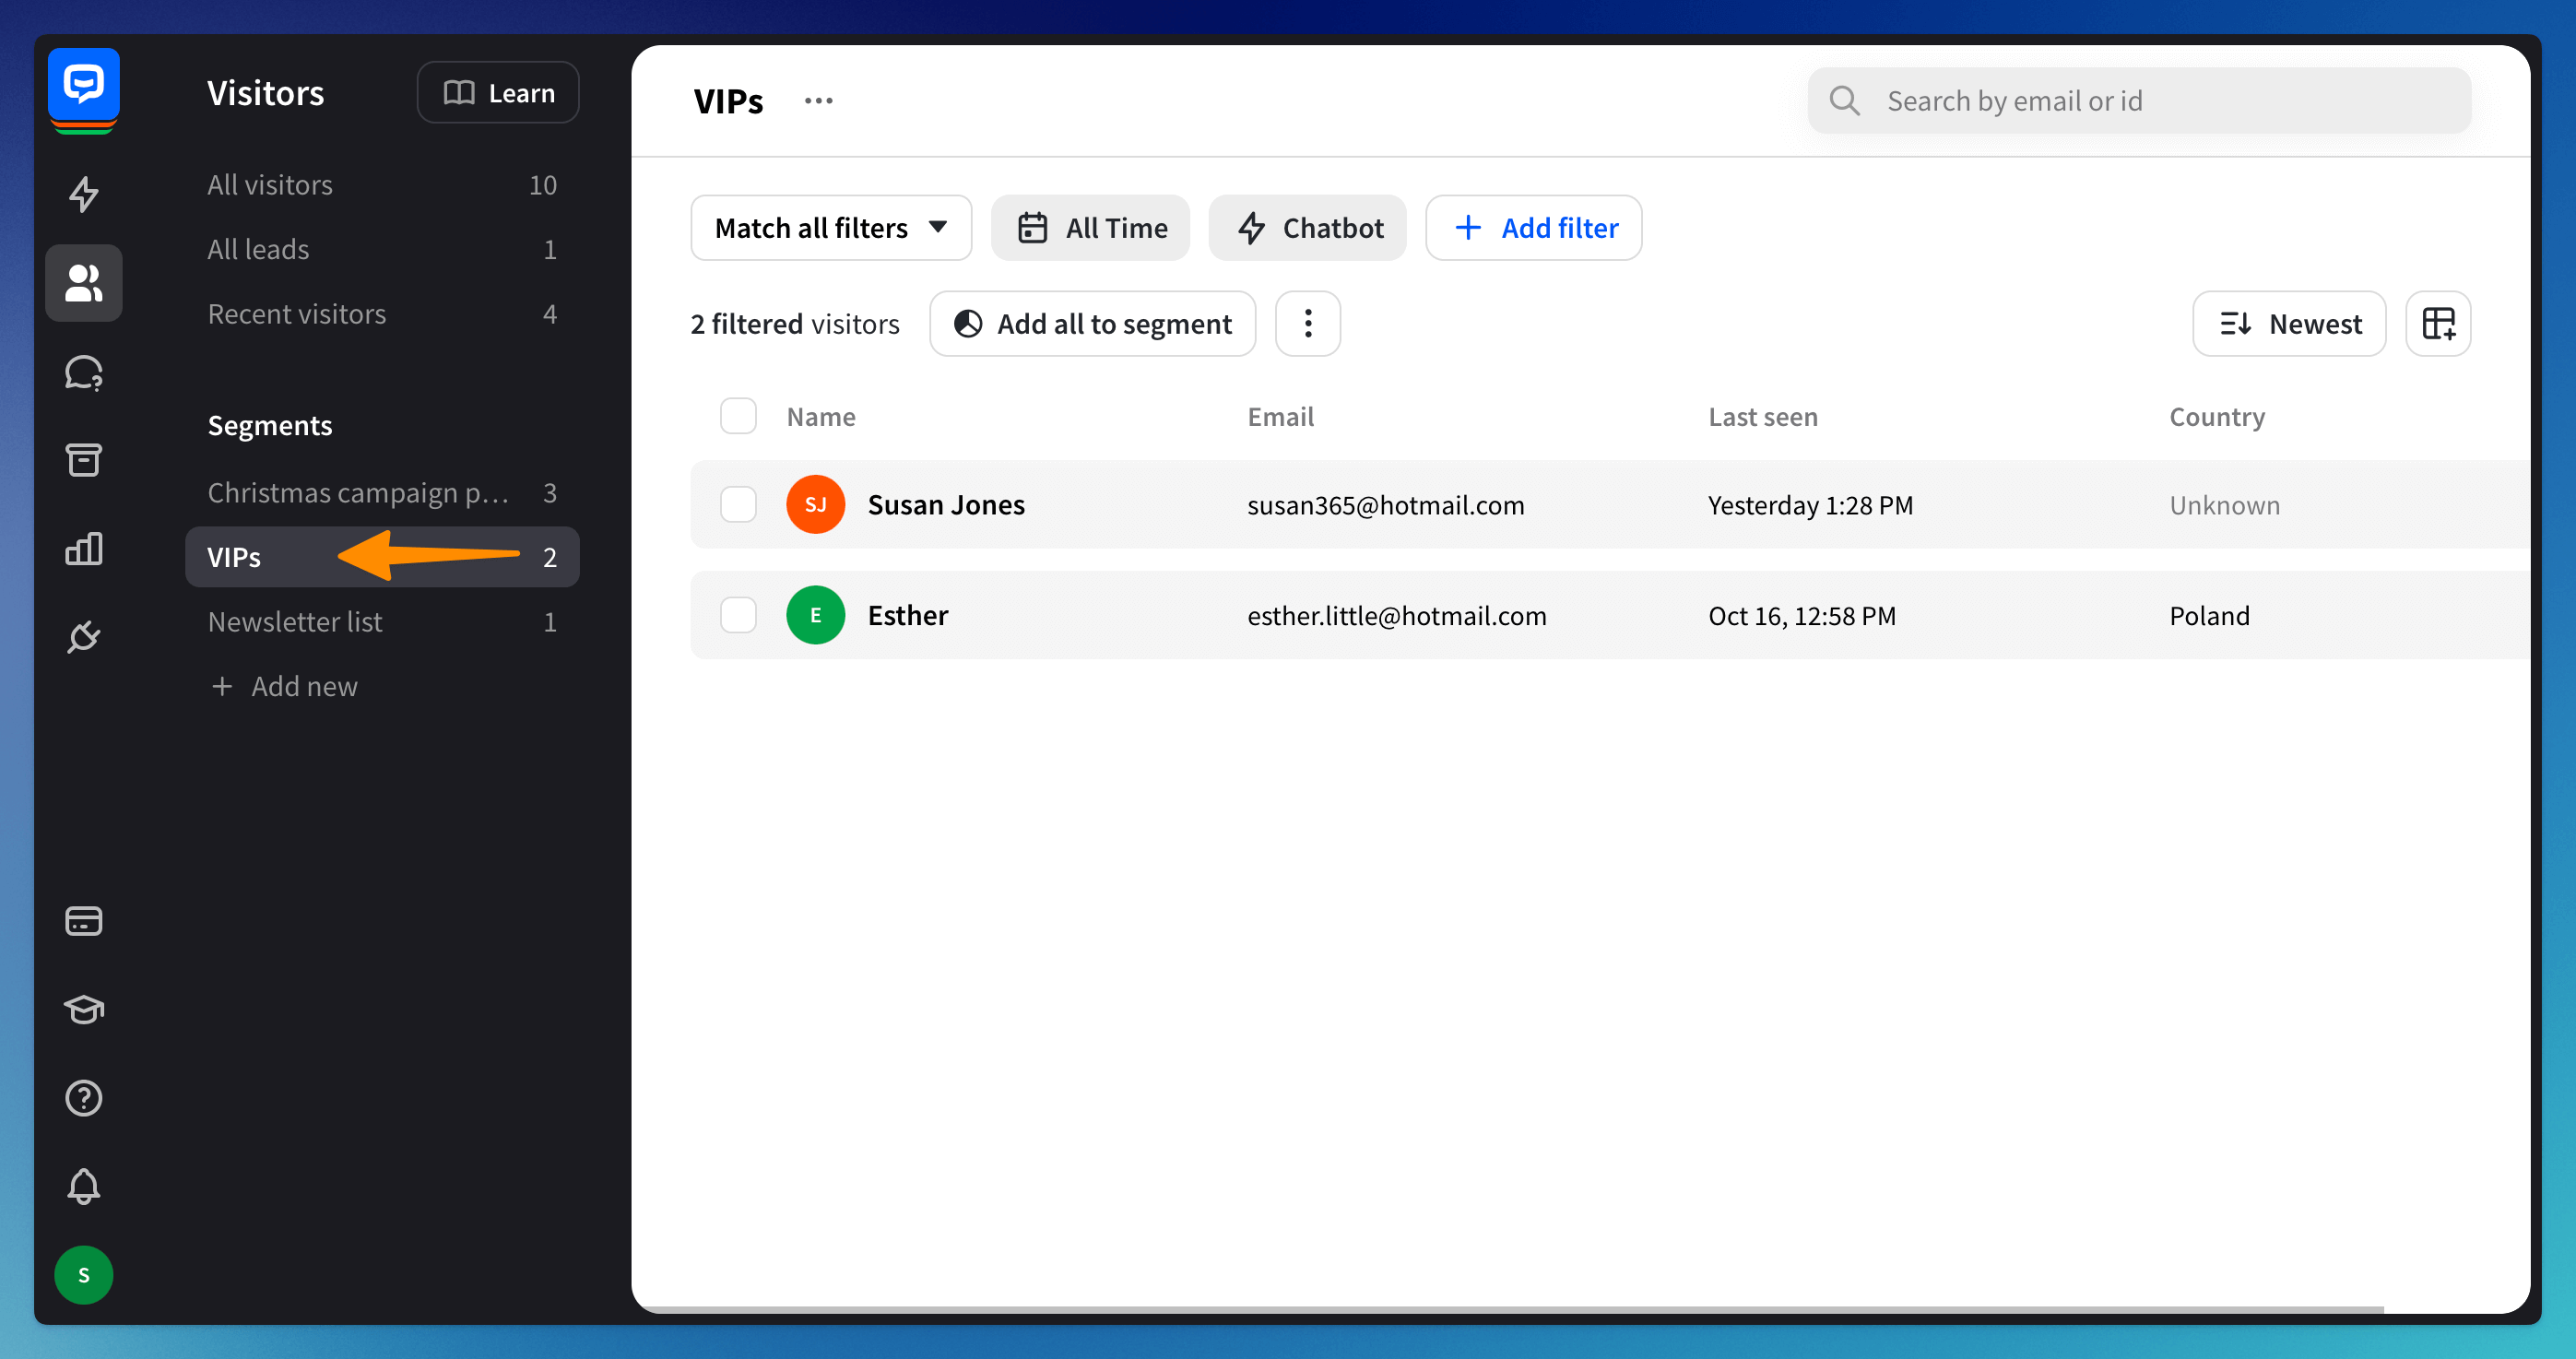 You can perform the same actions as in the All visitors section — filter them as needed, export information, remove visitors from a segment, and delete them under the 3-dot symbol.
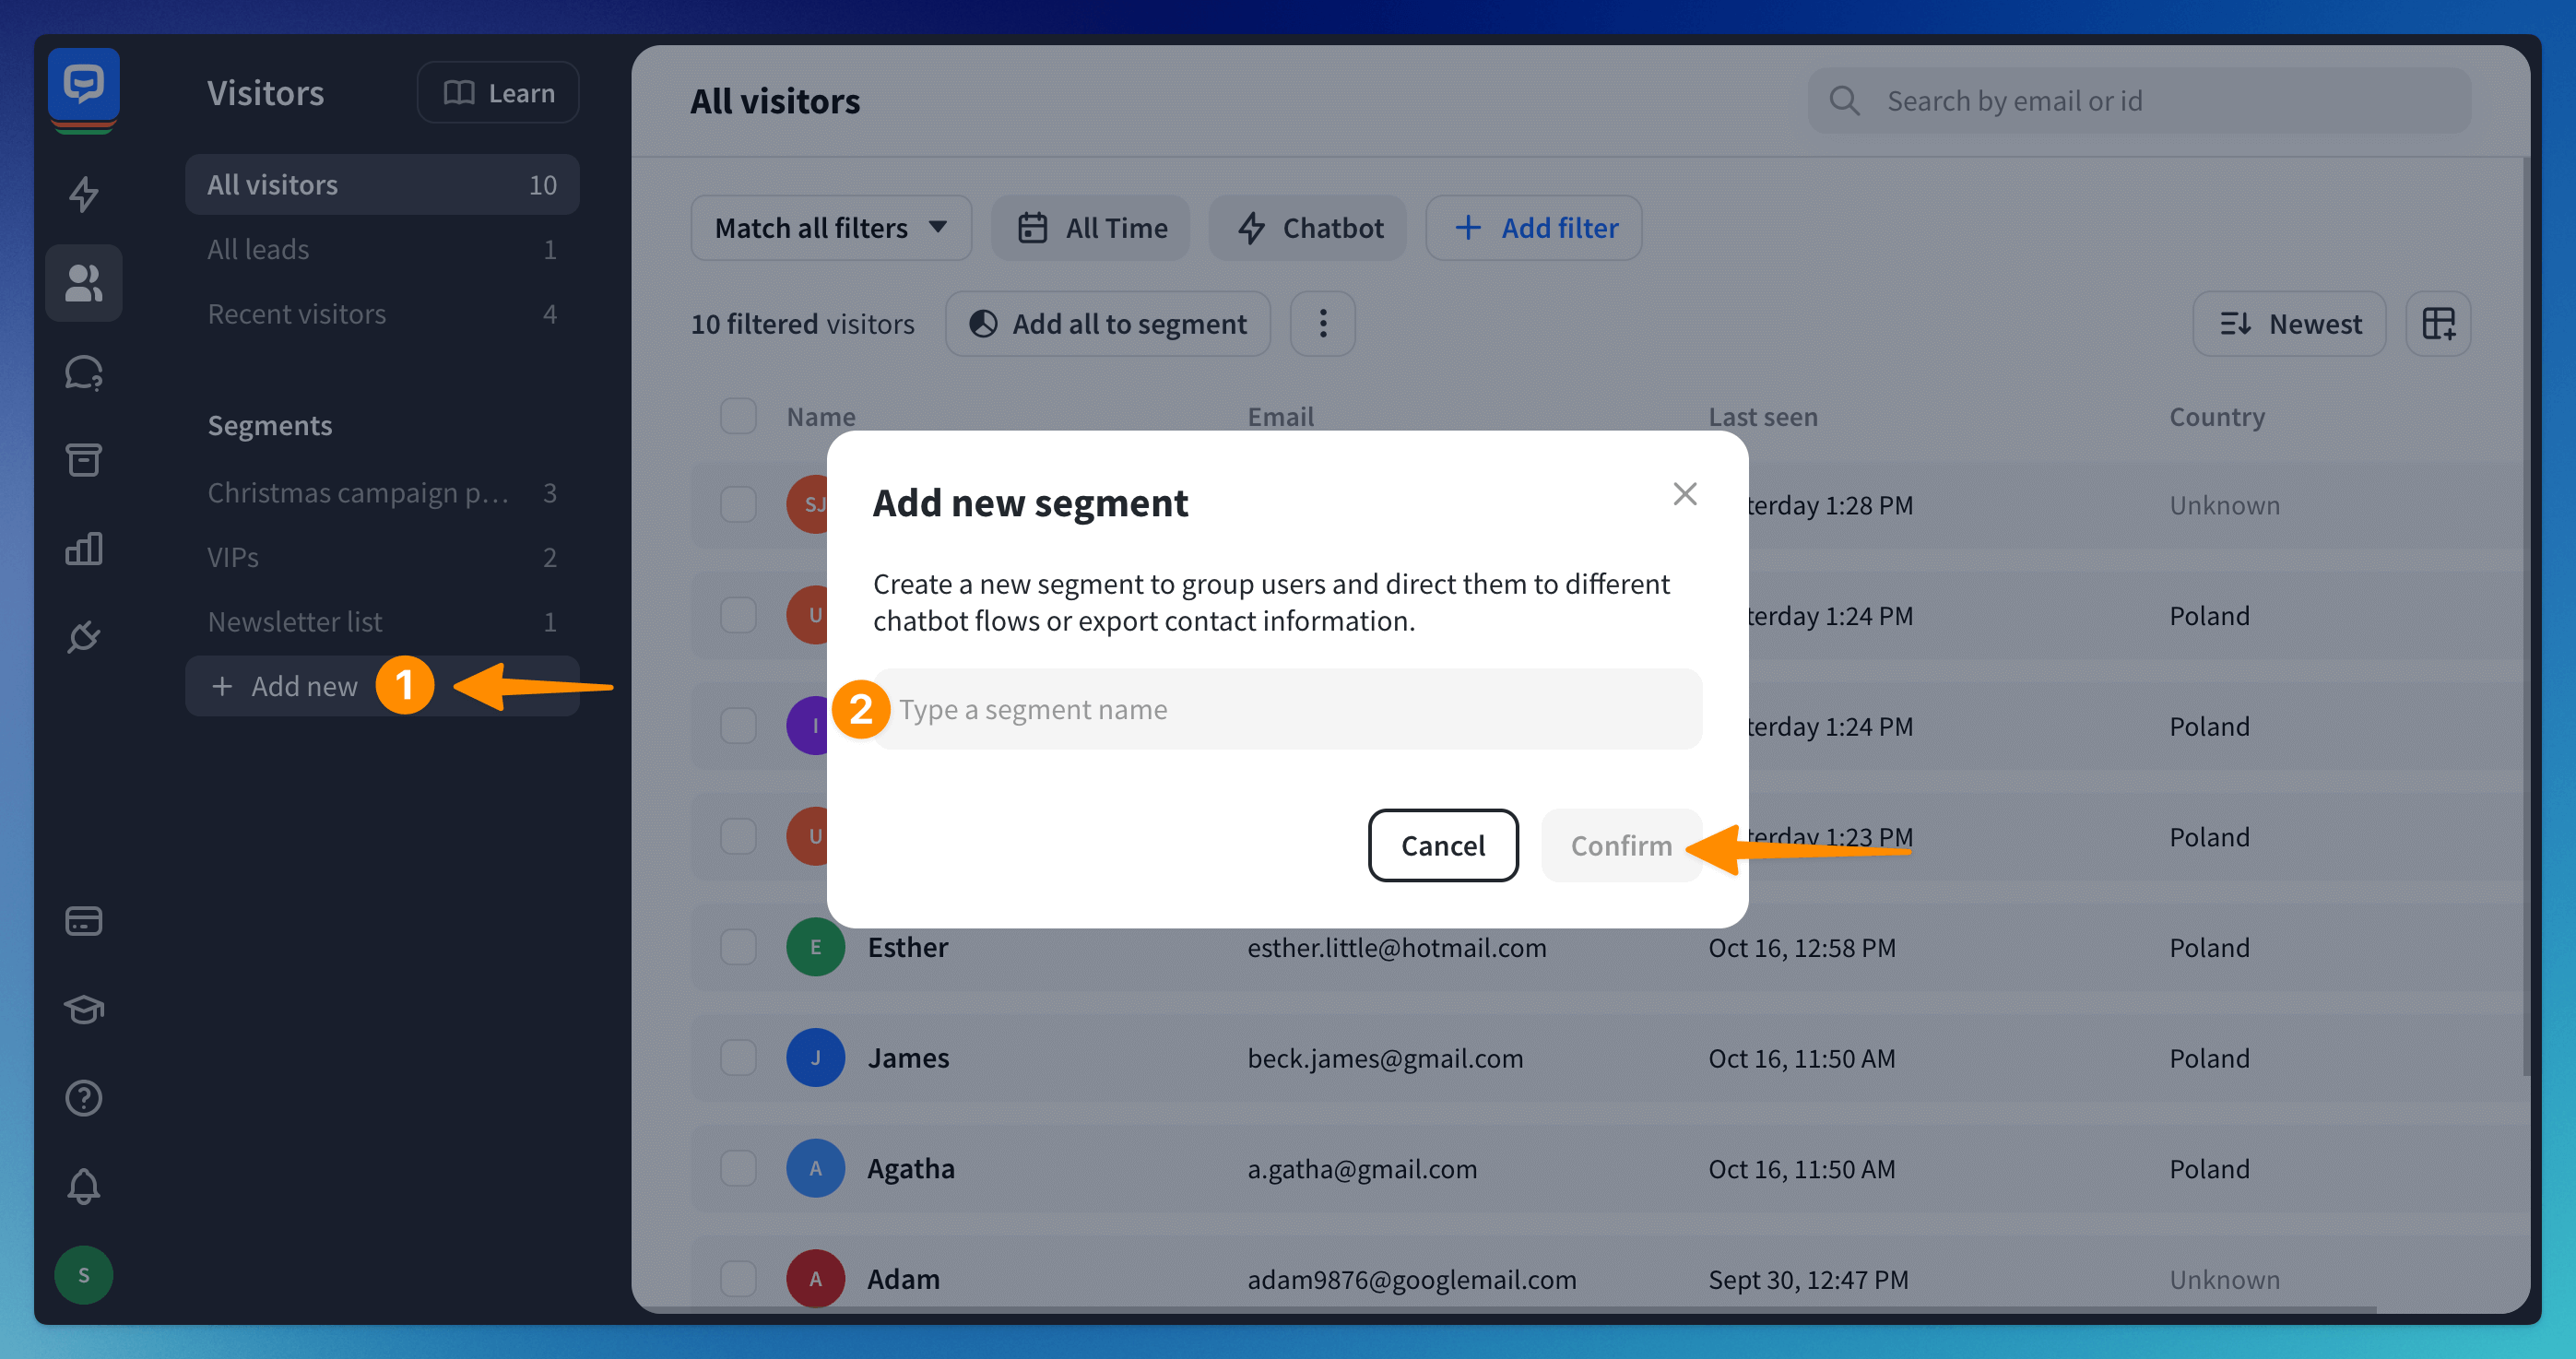
To add a new segment, choose the +Add new option. Then, provide the segment’s name and confirm. The new segment will be visible under the Segments section.
Setting up filters
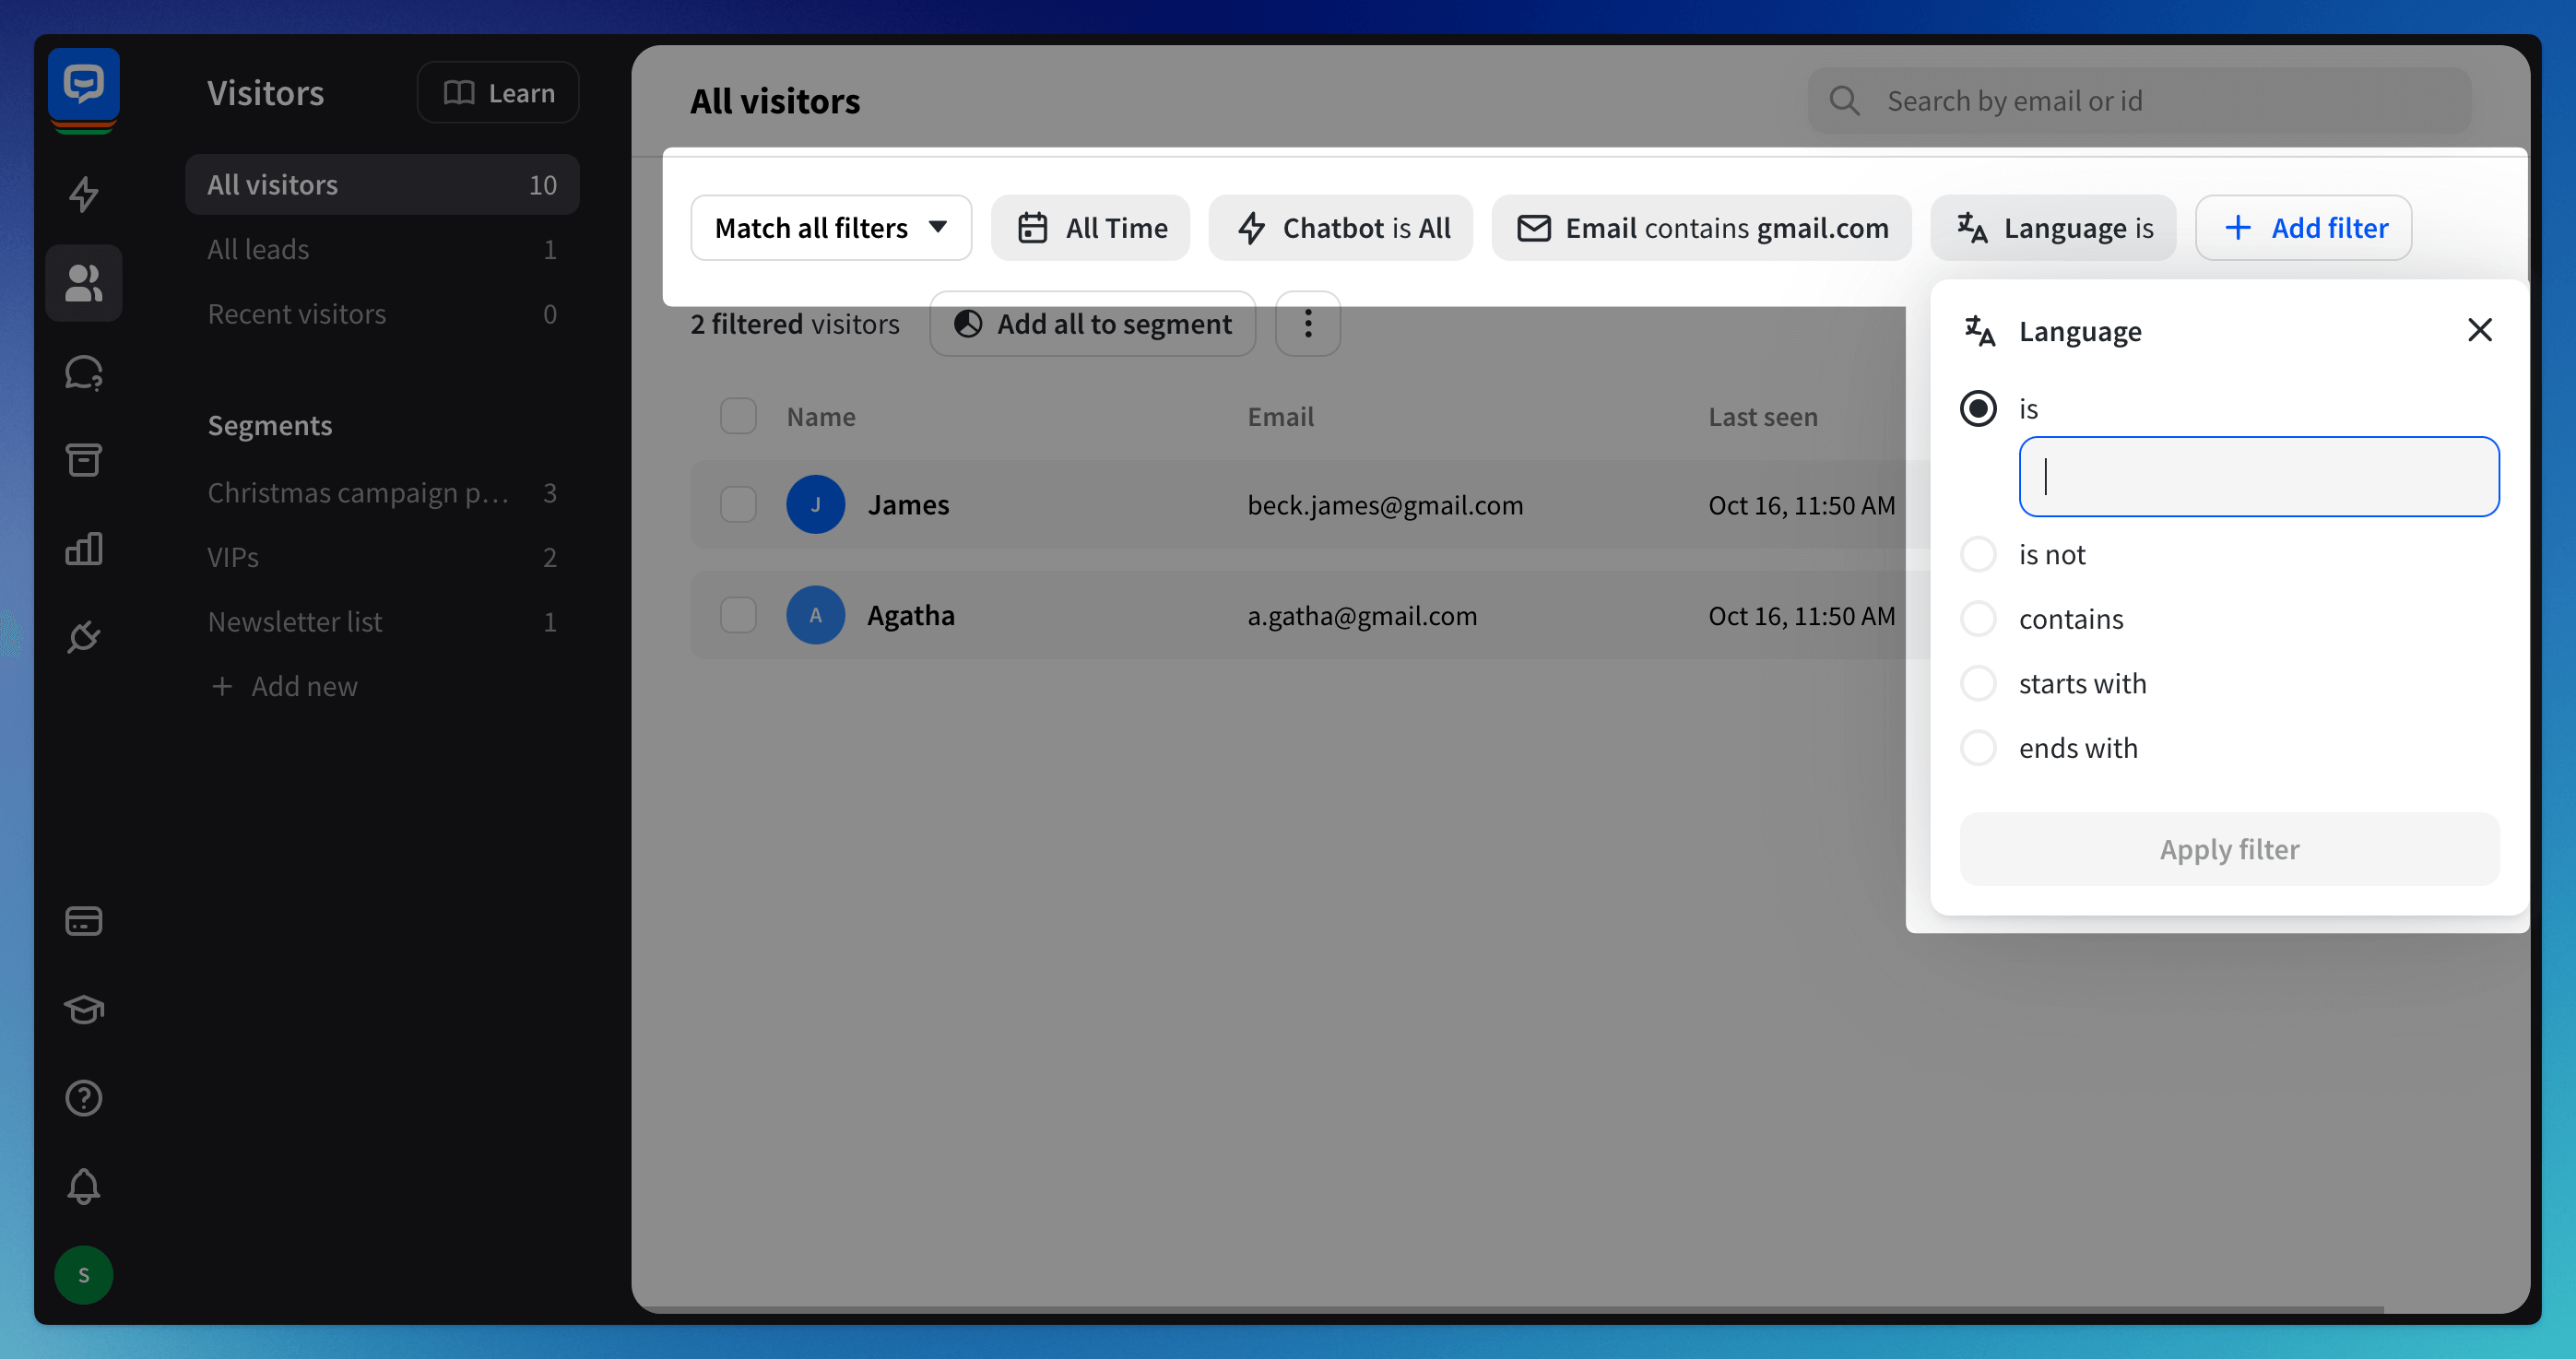
When the list of visitors grows, you can use filters to extract valuable information. You can apply multiple filters and decide whether visitors must meet all the criteria or just one.
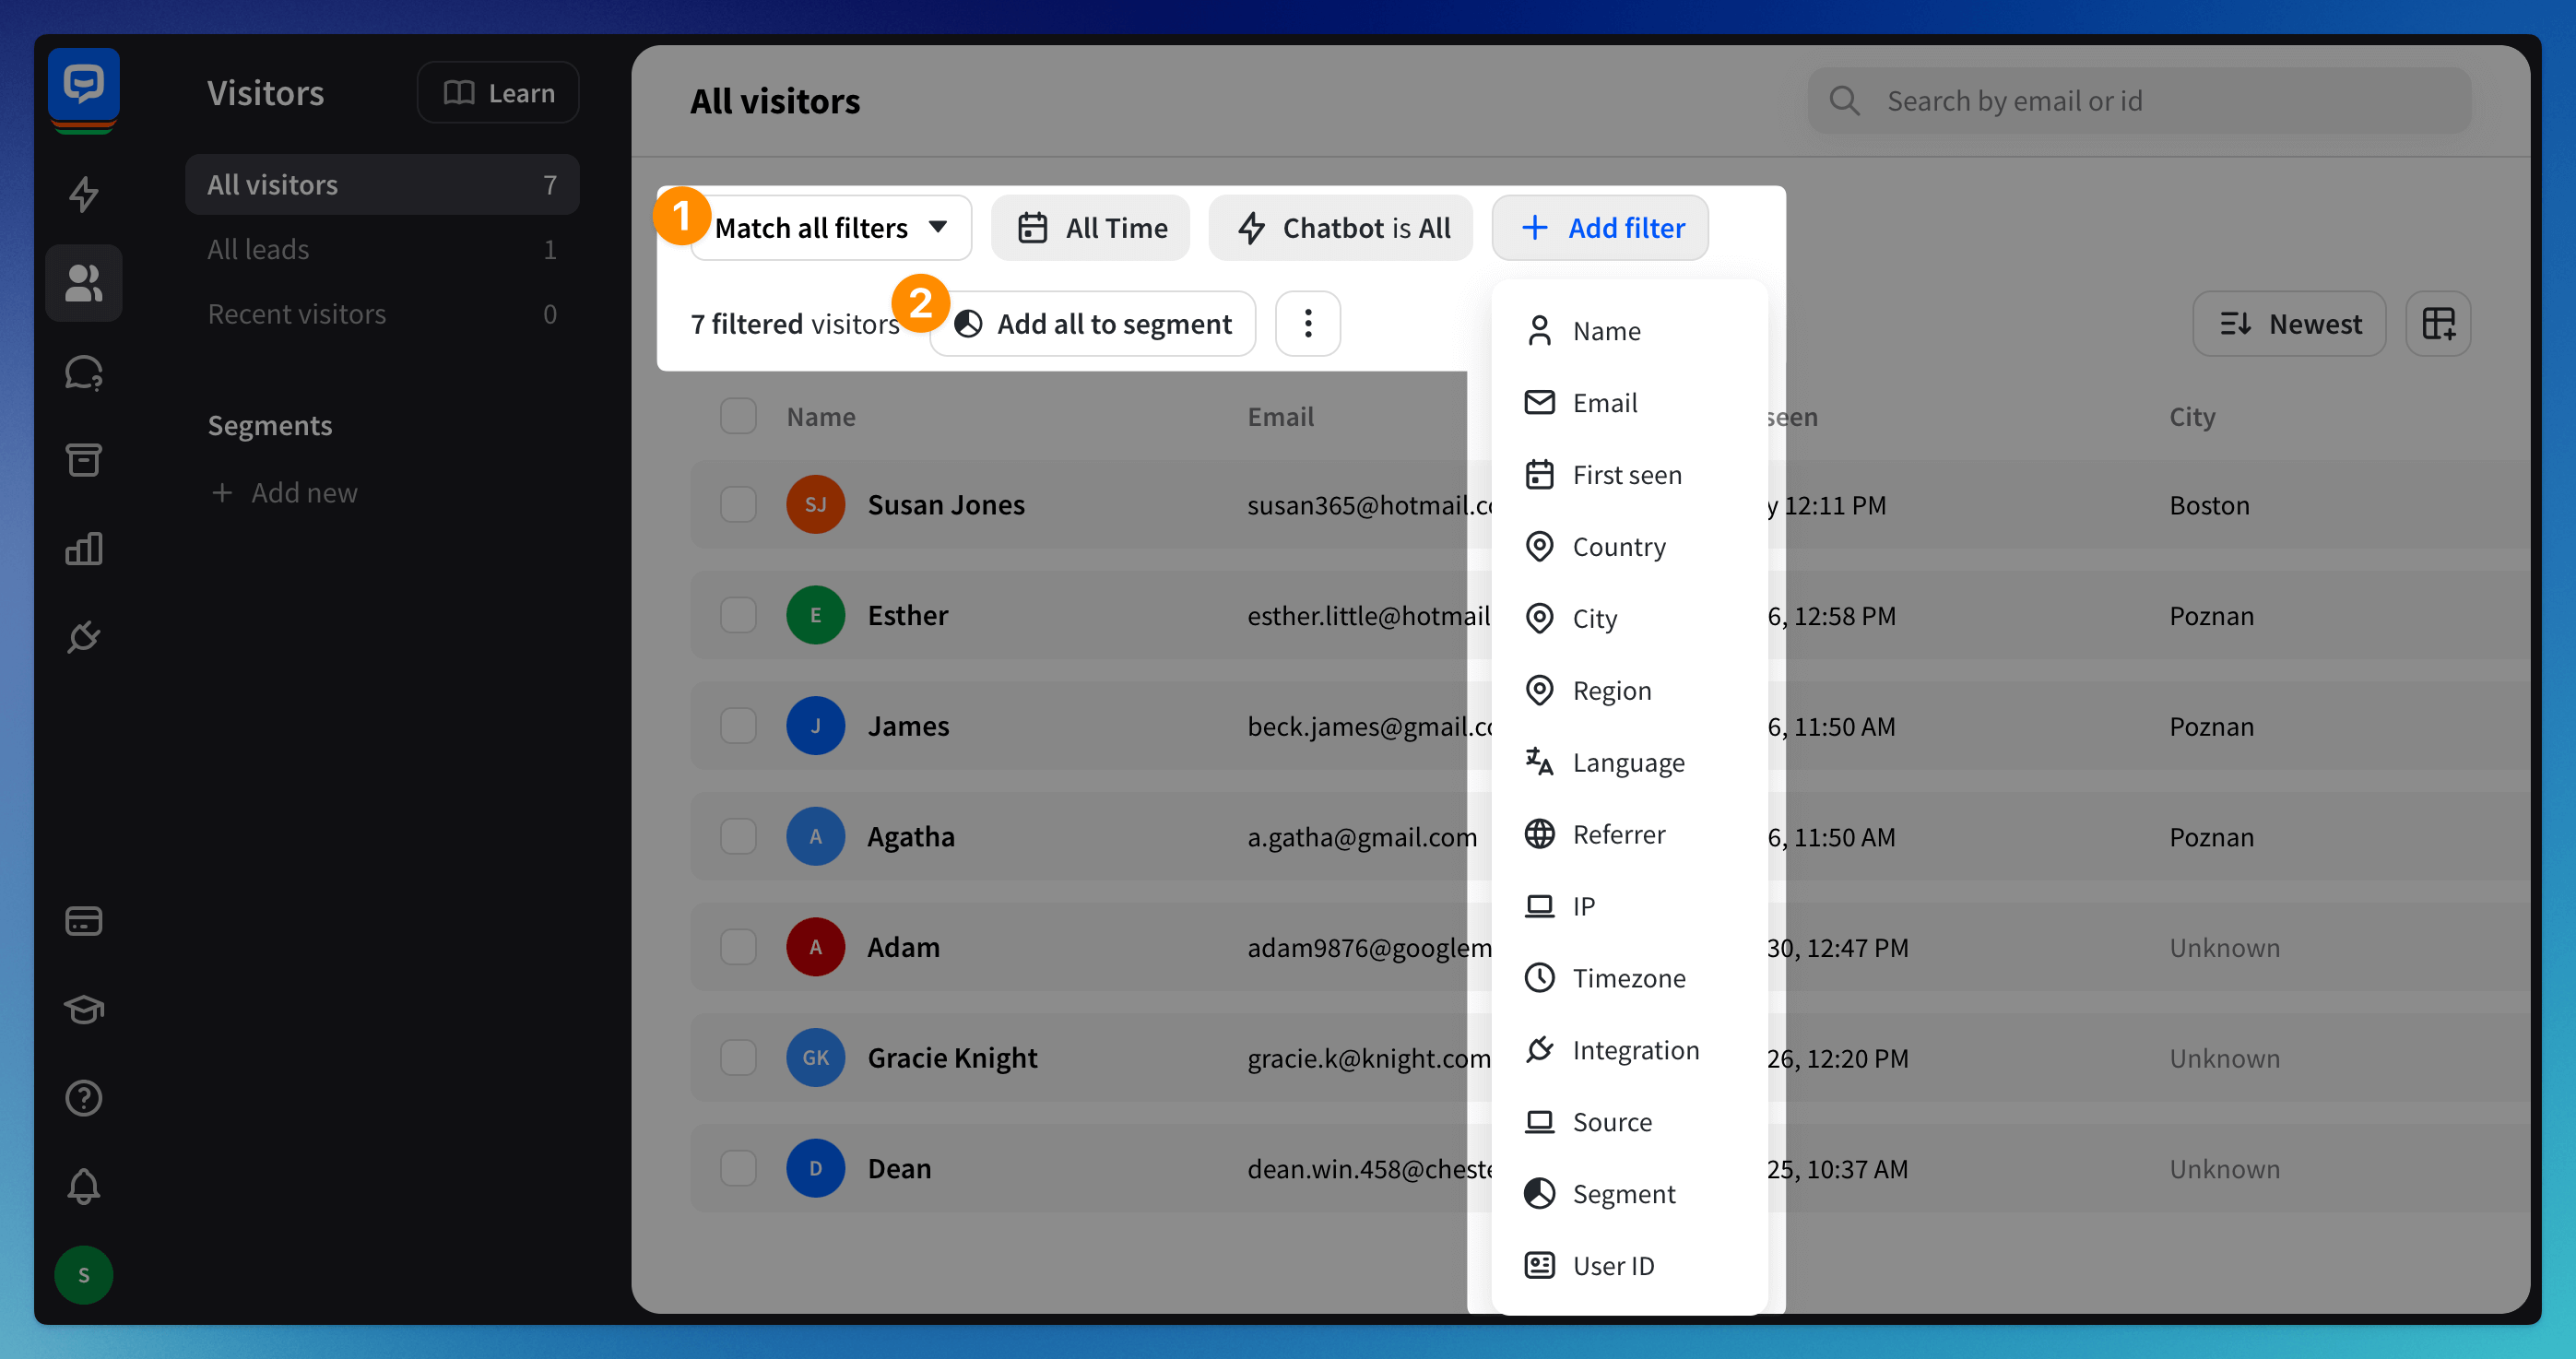
Decide if you want to match all selected filters or any available ones. Adjust the default filters to your needs — time and Chatbot’s name. Click on the +Add Filter button to open the full list of available filters. Select one of the available filters and provide conditions.
 The list will show all the visitors who have met your requirements.
Using filters with attributes
Attributes enable you to assign information to visitors or ongoing chats and then pass that information to web services. They help you personalize chats. Most attributes, such as Timezone, City, Language, and Avatar, are automatically received from the Chat Widget, LiveChat, Slack, and Messenger integrations.
During the chat, you can also prompt visitors to gather the attributes listed below. Remember to use the same attribute names listed below.
Attribute name | Description |
Name | visitor's login/name |
visitor's email | |
Last seen | the most recent chat's date and time |
First seen | the first visitor’s chat date and time |
Country | visitor's country |
City | visitor's city |
Region | visitor's region |
Language | configured visitor's language |
Referrer | the URL the visitor originated from |
IP | visitor's IP address |
Timezone | visitor's timezone |
Integration | integration used in the conversation |
Source | the URL the visitor started the chat from |
Segment | the segment the visitor is added to |
User ID | the visitor ID gathered from external integrations |
Managing multiple Visitors
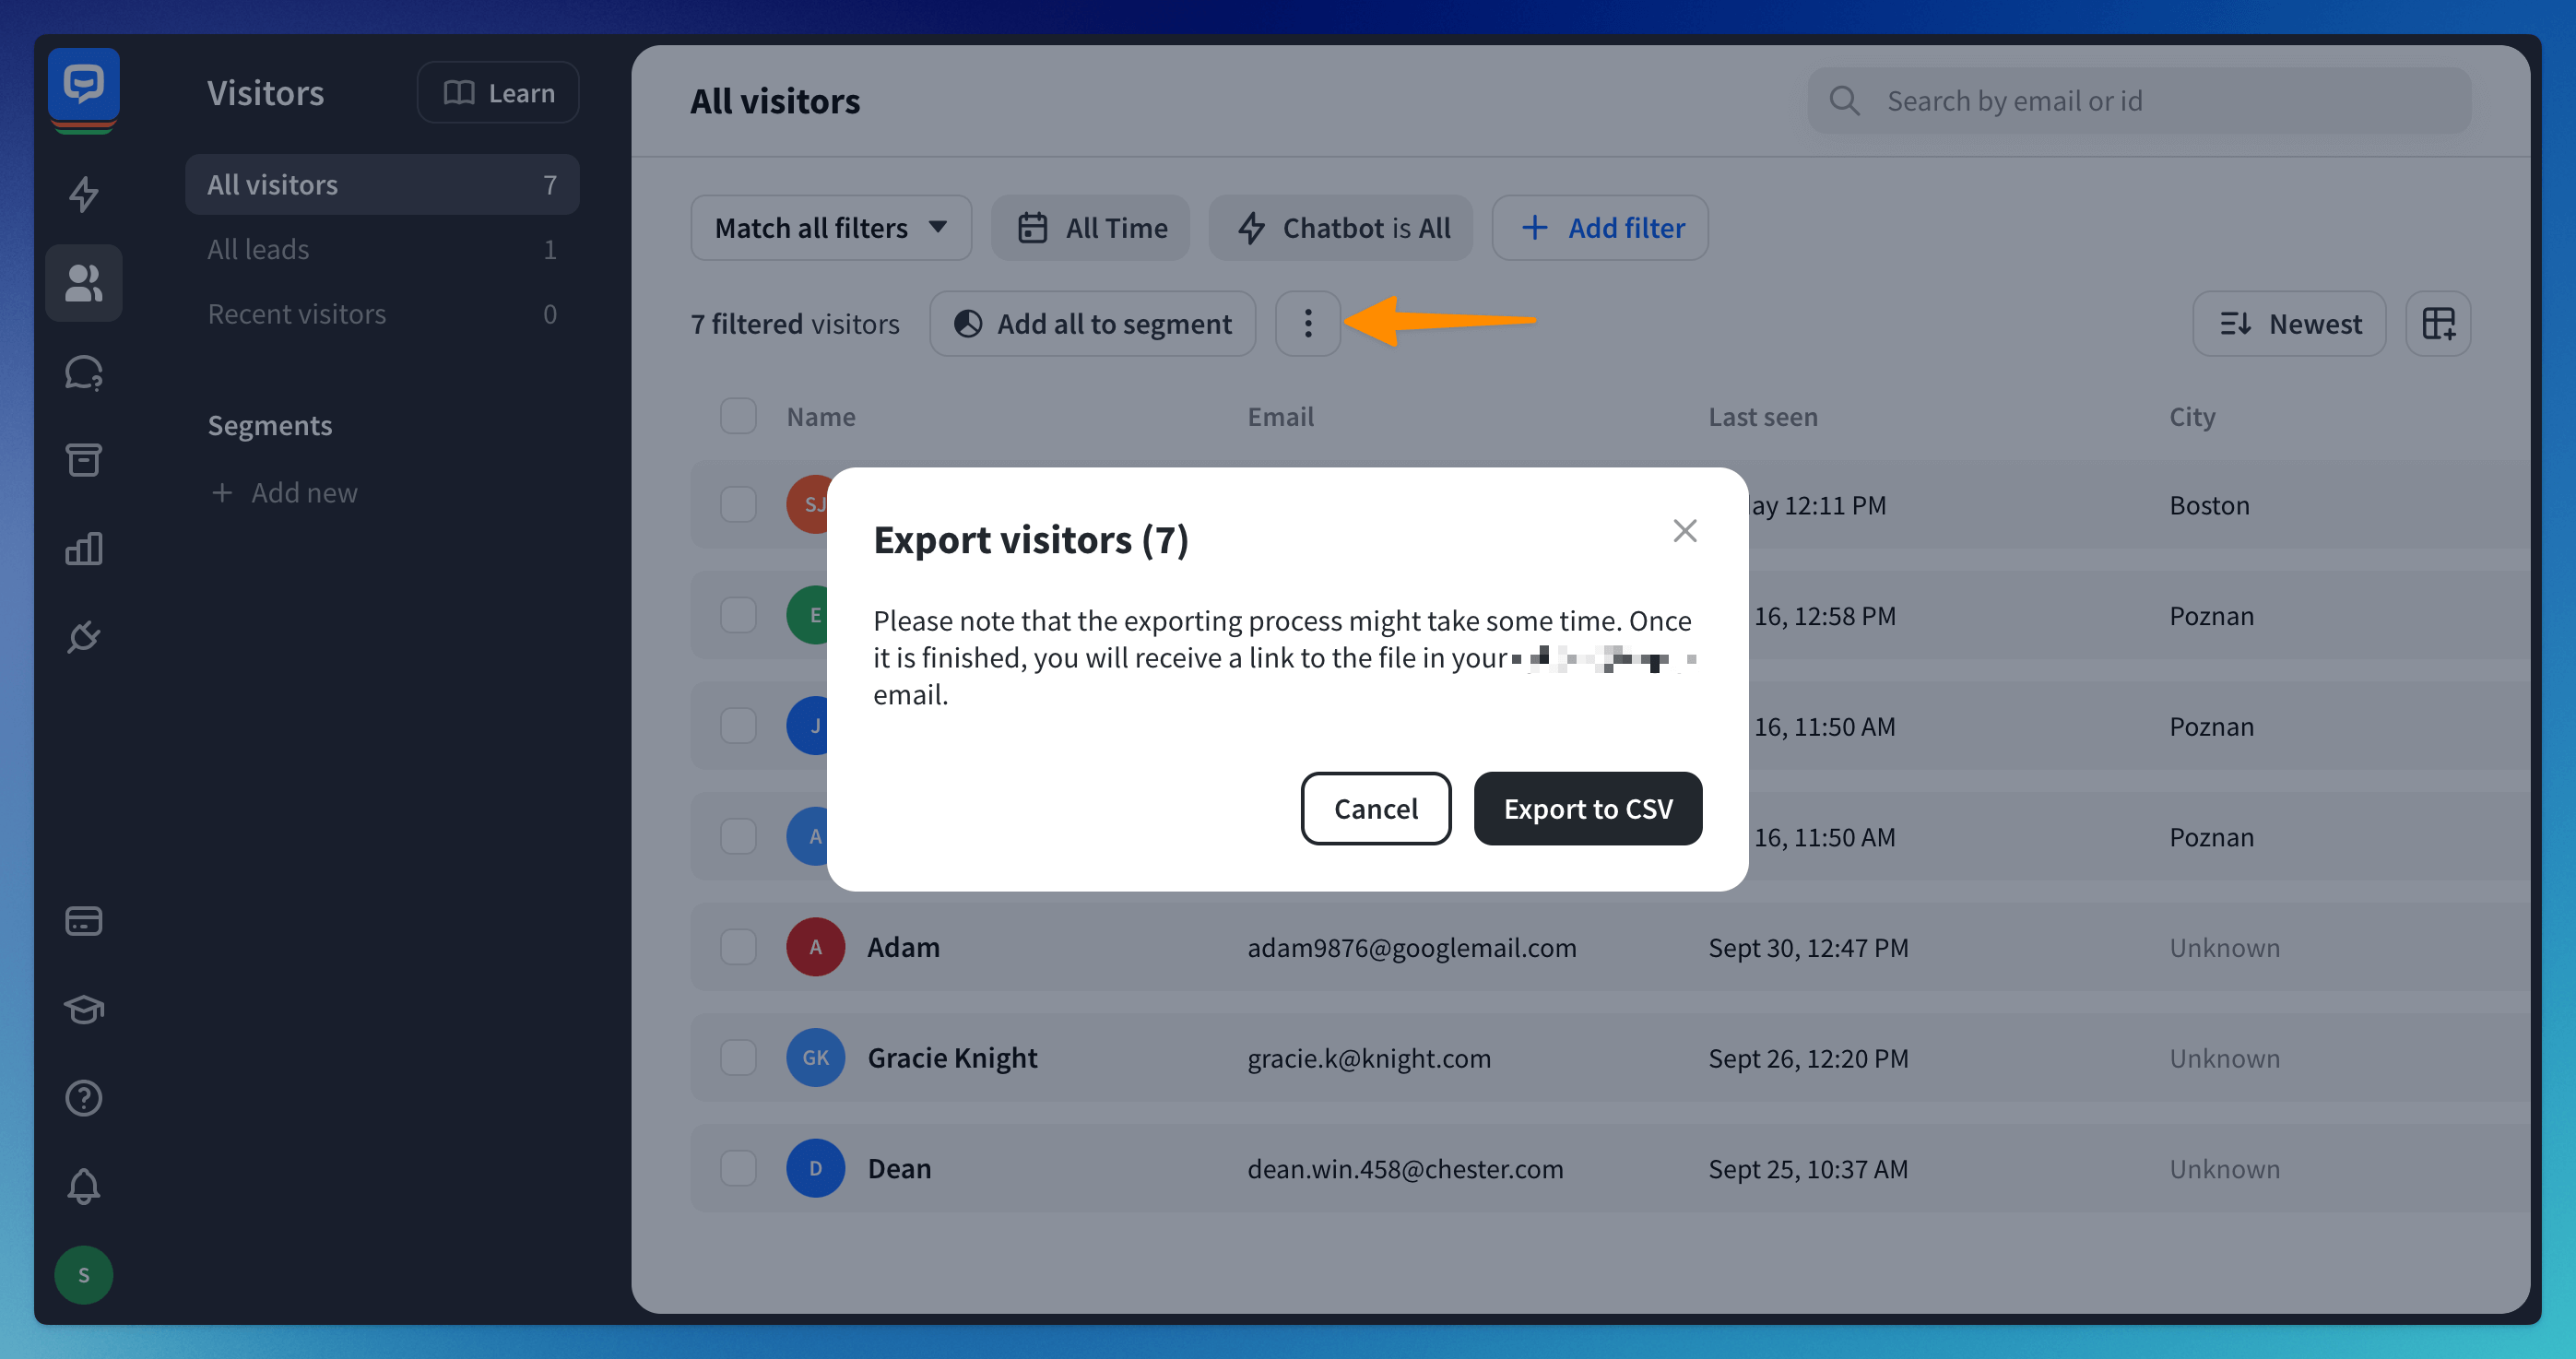
You can select multiple visitors from the list and perform one of the available actions in bulk — export all the visitor data to a single .csv file, add visitors to Segments, or delete them.
Select visitors from the list and use the menu available at the bottom of the page.
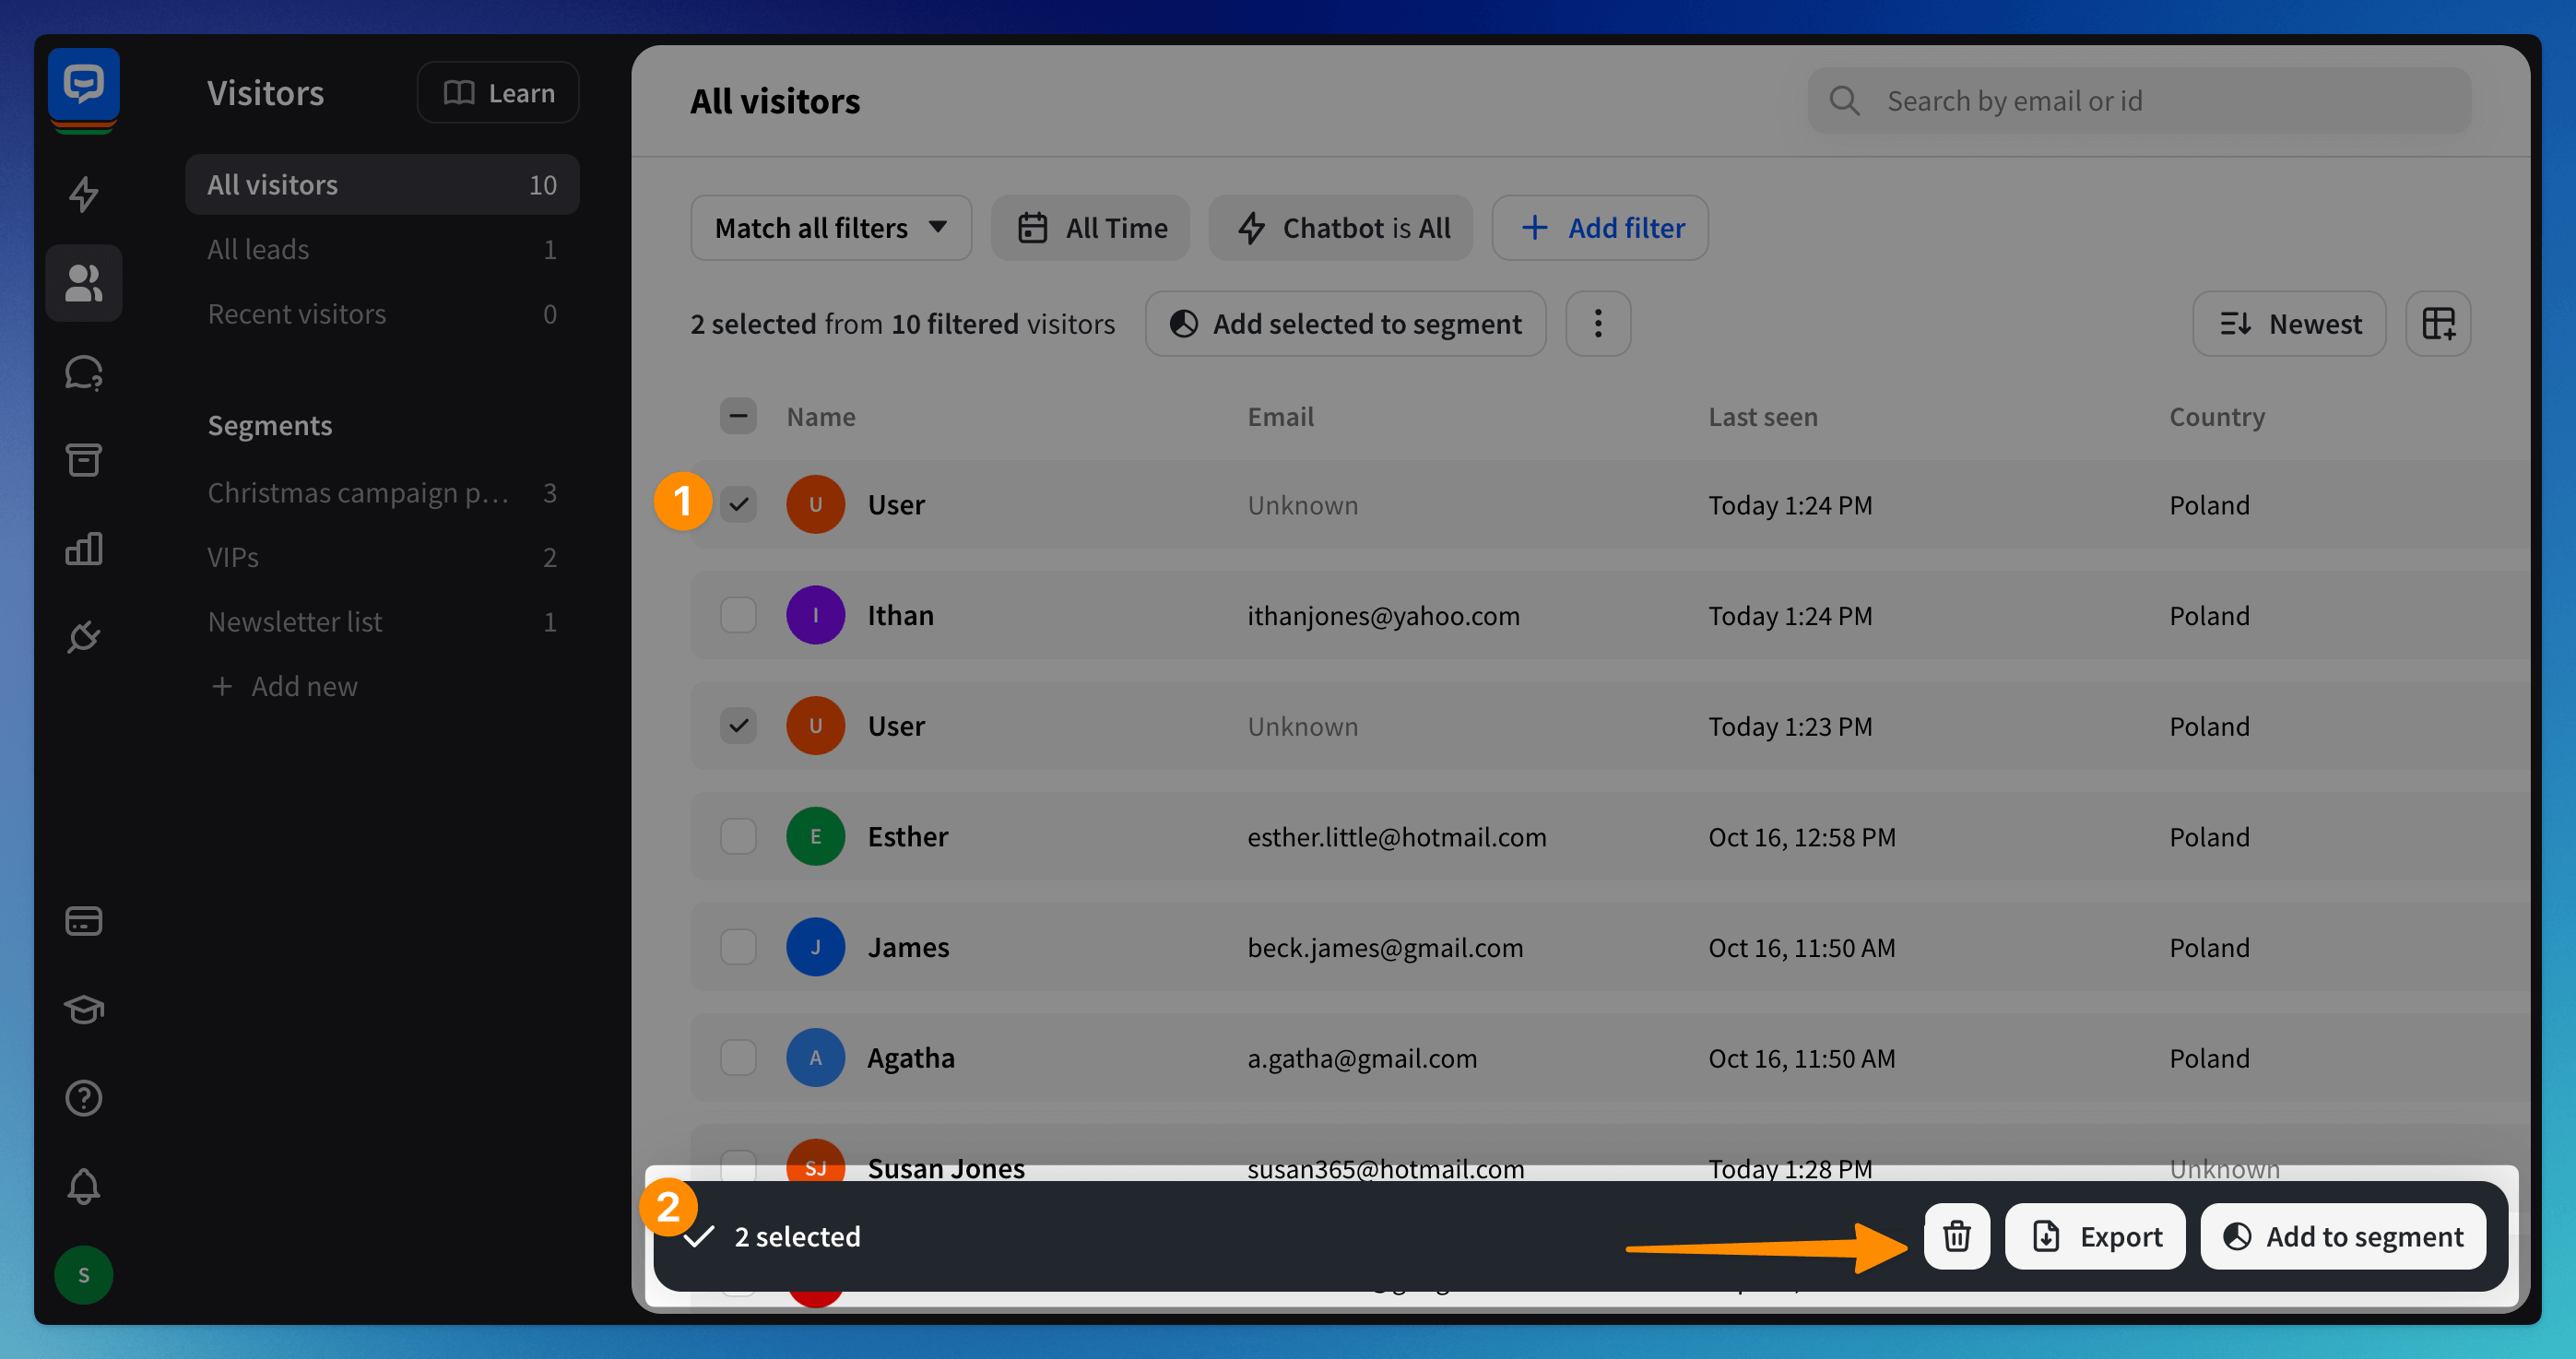 You can delete multiple visitors, export them, and add them to segments using the menu bar.
Visitor details
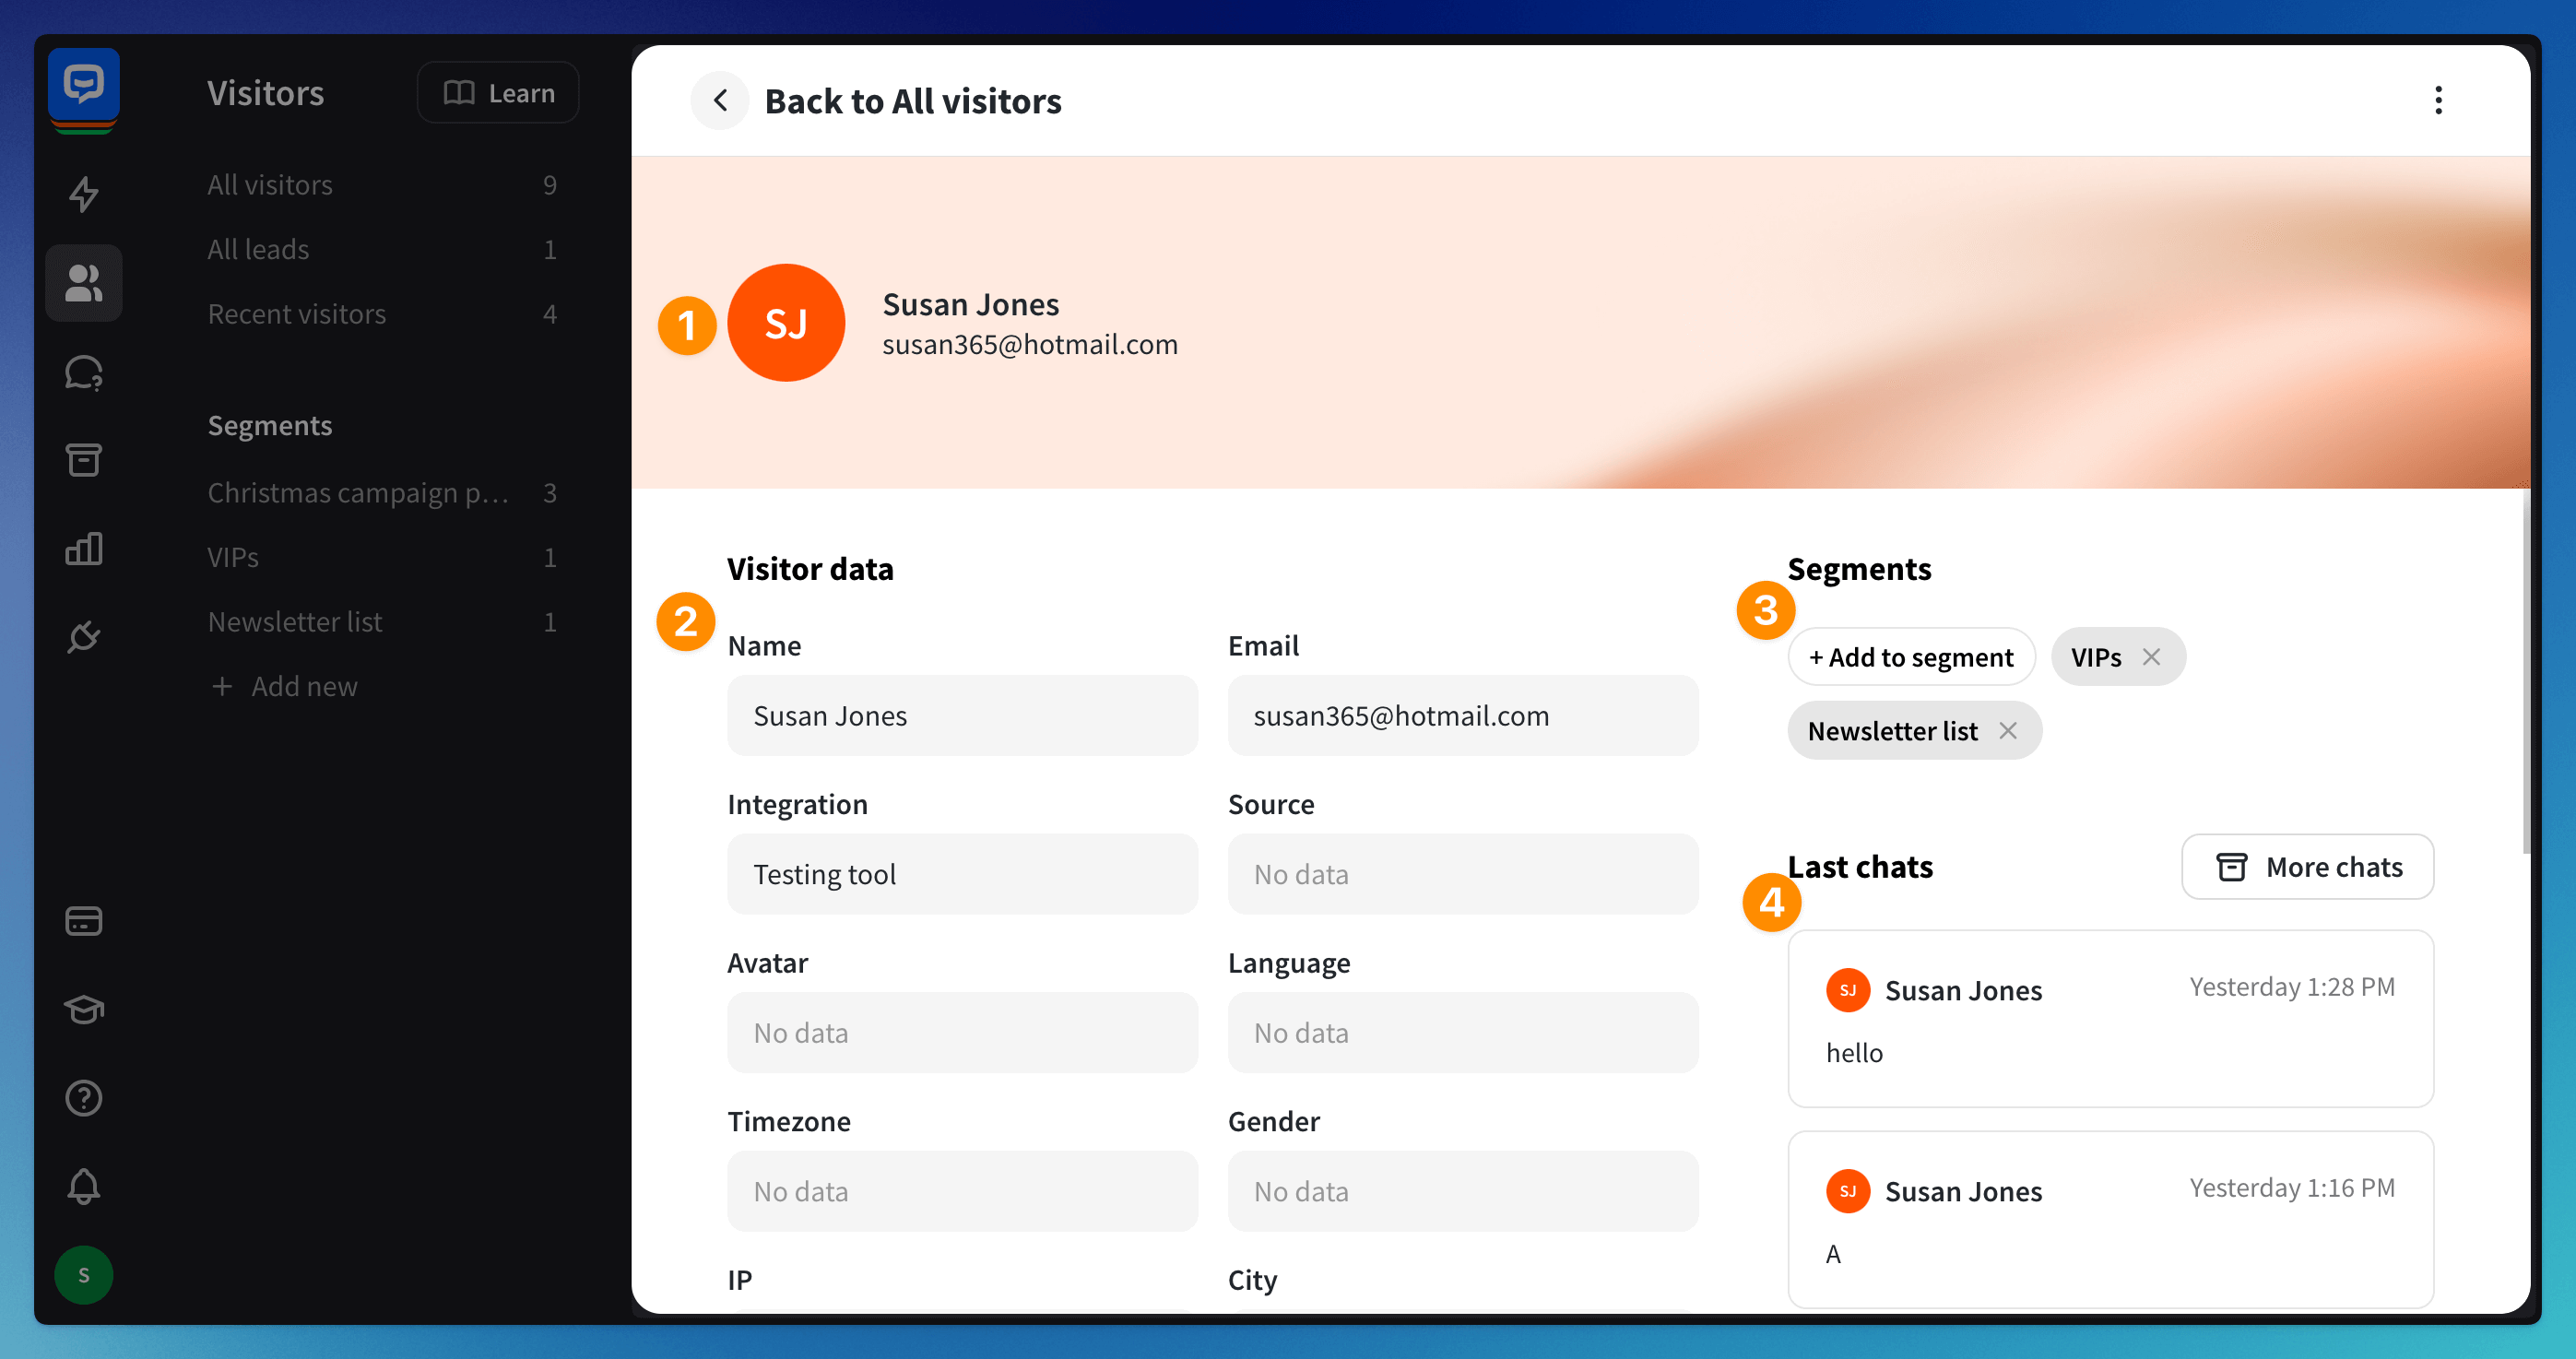
To access this view, select a visitor from the list. The visitor’s name and email address (1) will be displayed at the top of the screen.
Below, you can find Visitor data (2) — the basic details collected by the bot at the beginning of the chat. Additionally, you can view the Segments (3) the visitor is a part of and the previous chats (4) the visitor had with the bot.
Visitor data
This section contains the complete list of all default information gathered during the chat. In the main view, you will see visitor details, including Name, Email, Source URL, and more. Certain visitor details, such as name and email, can be viewed, edited, or deleted.
On the right side of the screen, you can see which segments the visitor was added to. You can also add them to one directly from this view with the +Add to segment button.
Last session data
Below the Visitor data, you can see data collected during the last session. This section lets you know what has changed or happened recently if your visitor had multiple chats. If you have custom attributes, you can see the values here.

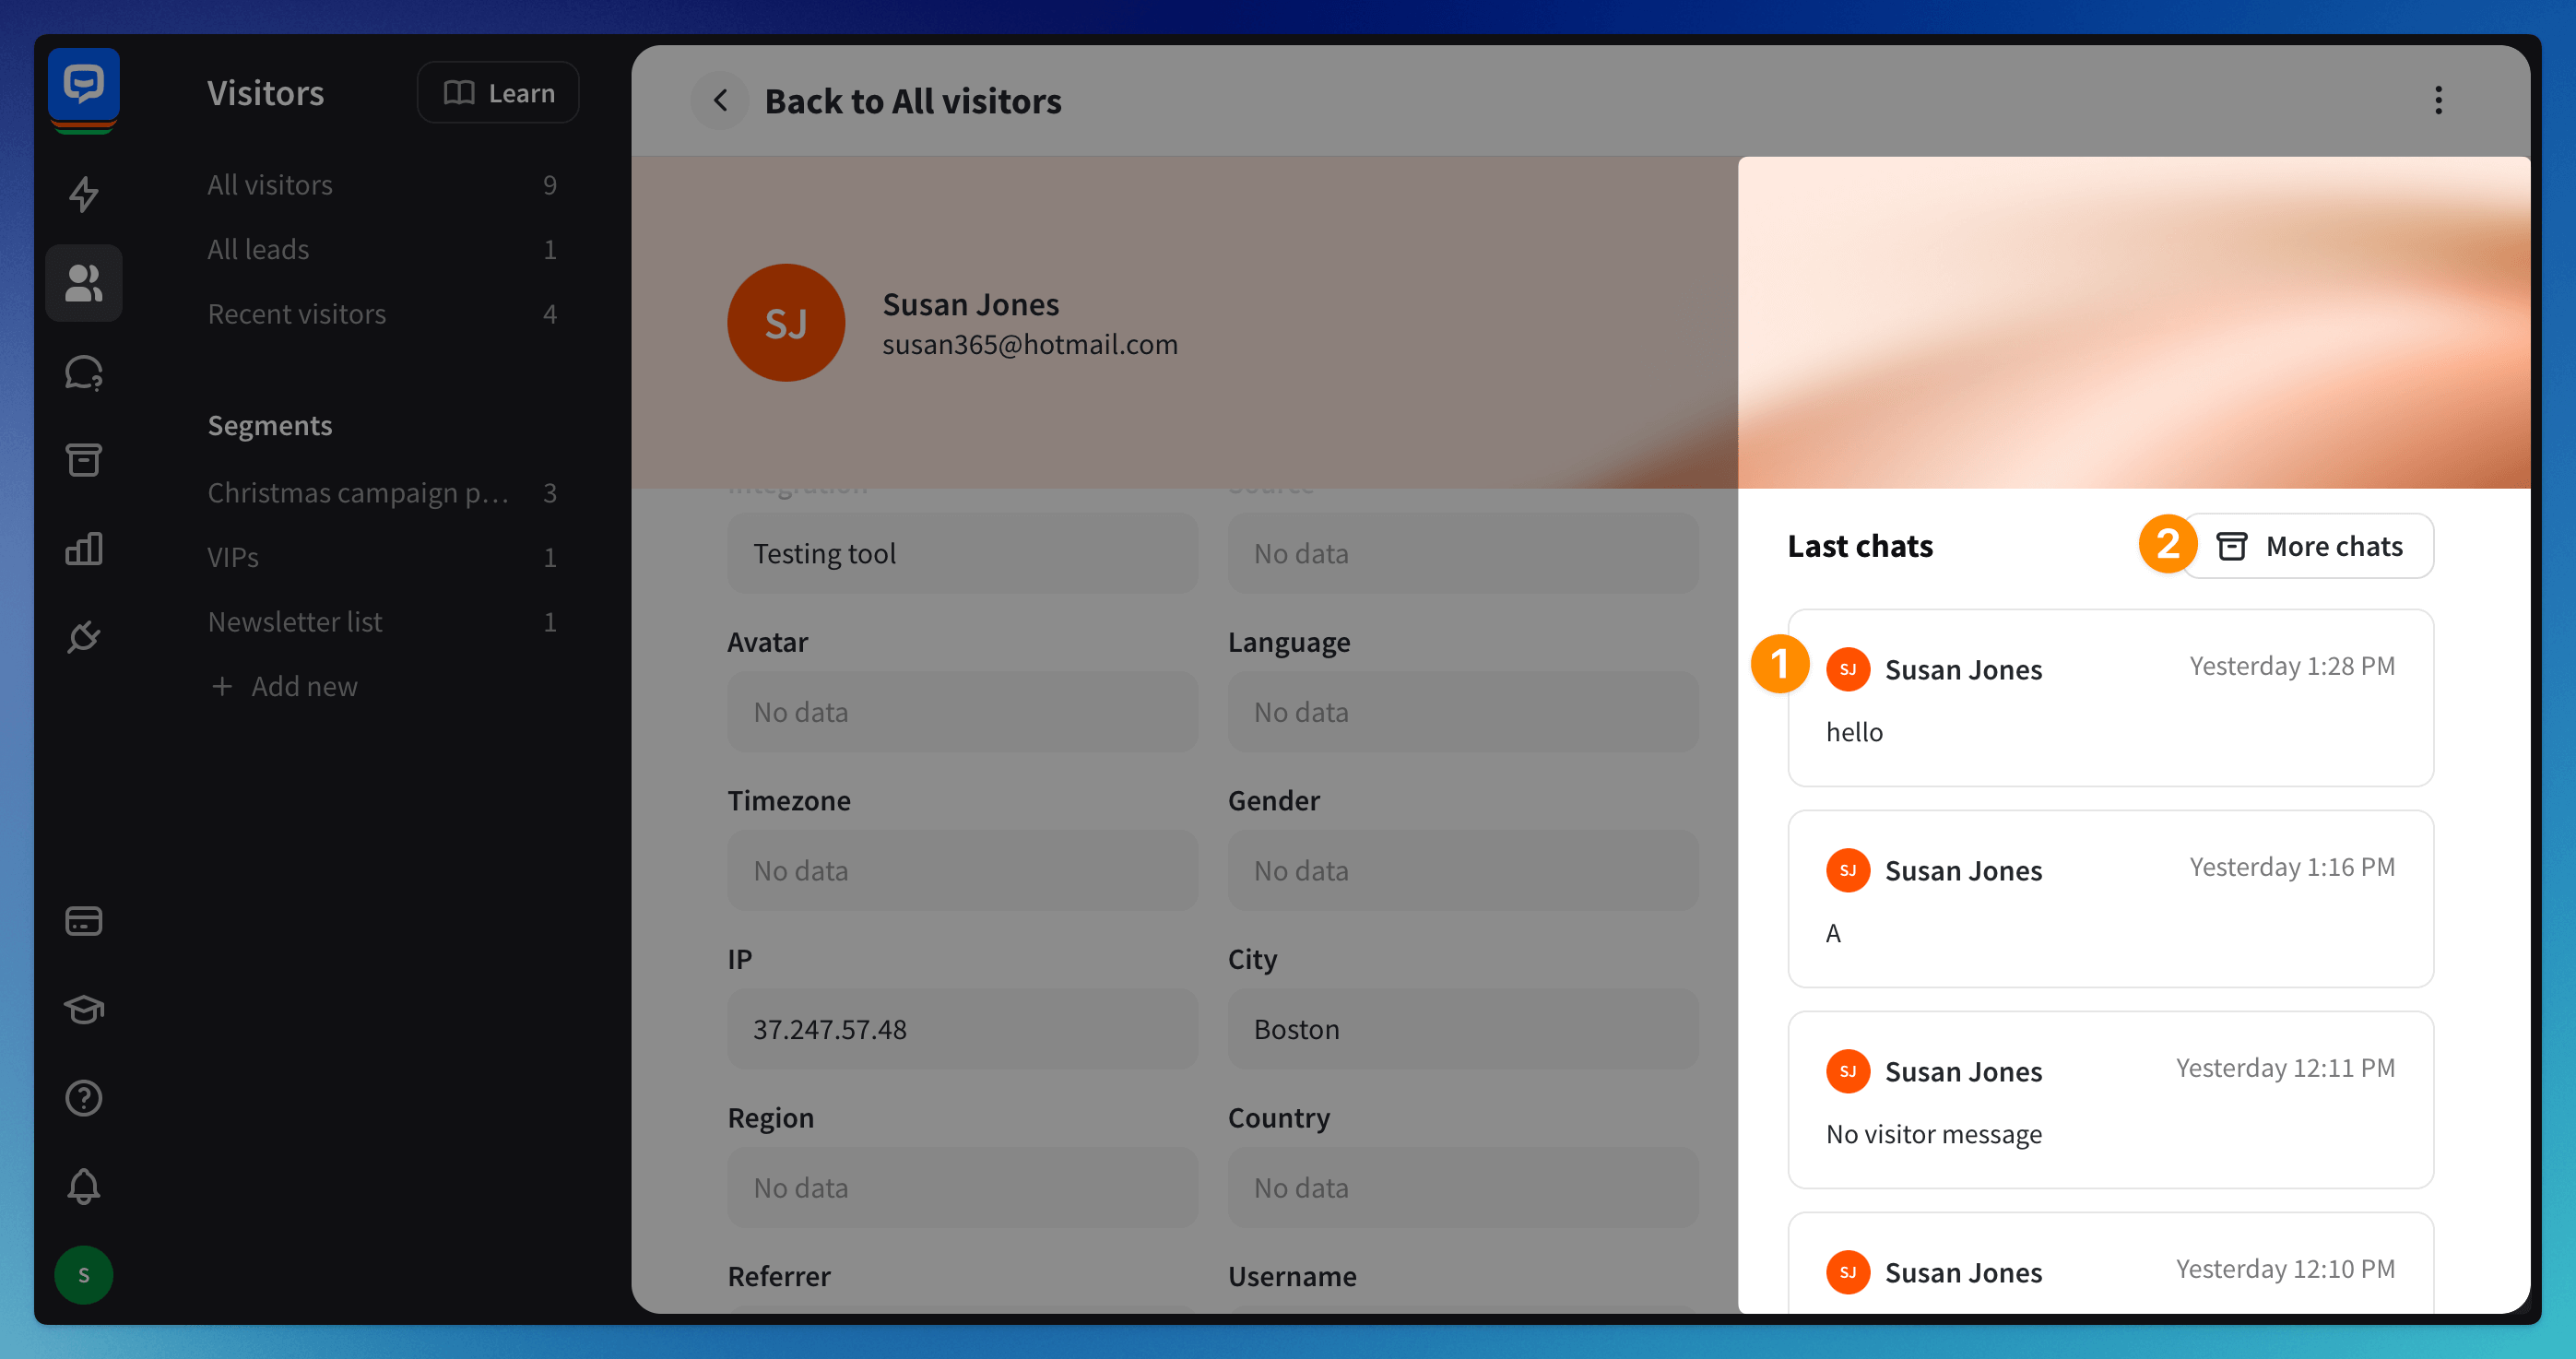
Last chats
Check Last chats to access transcripts of all past interactions between the bot and the visitor. Clicking a chat (1) will automatically redirect you to the Archives section, where you can review the selected chat. When you click on the More chats button (2), you will be redirected to the latest chat, but all the chats will also be available on the list.
Read more:
