Scan your website and knowledge base, and let ChatBot AI Assist answer the most common user questions.
The AI-trained bot generates responses with ChatBot AI Assist based on your website or other resources. You can train your chatbot by scanning:
-
Website URL
-
KnowledgeBase help center
-
Zendesk help center
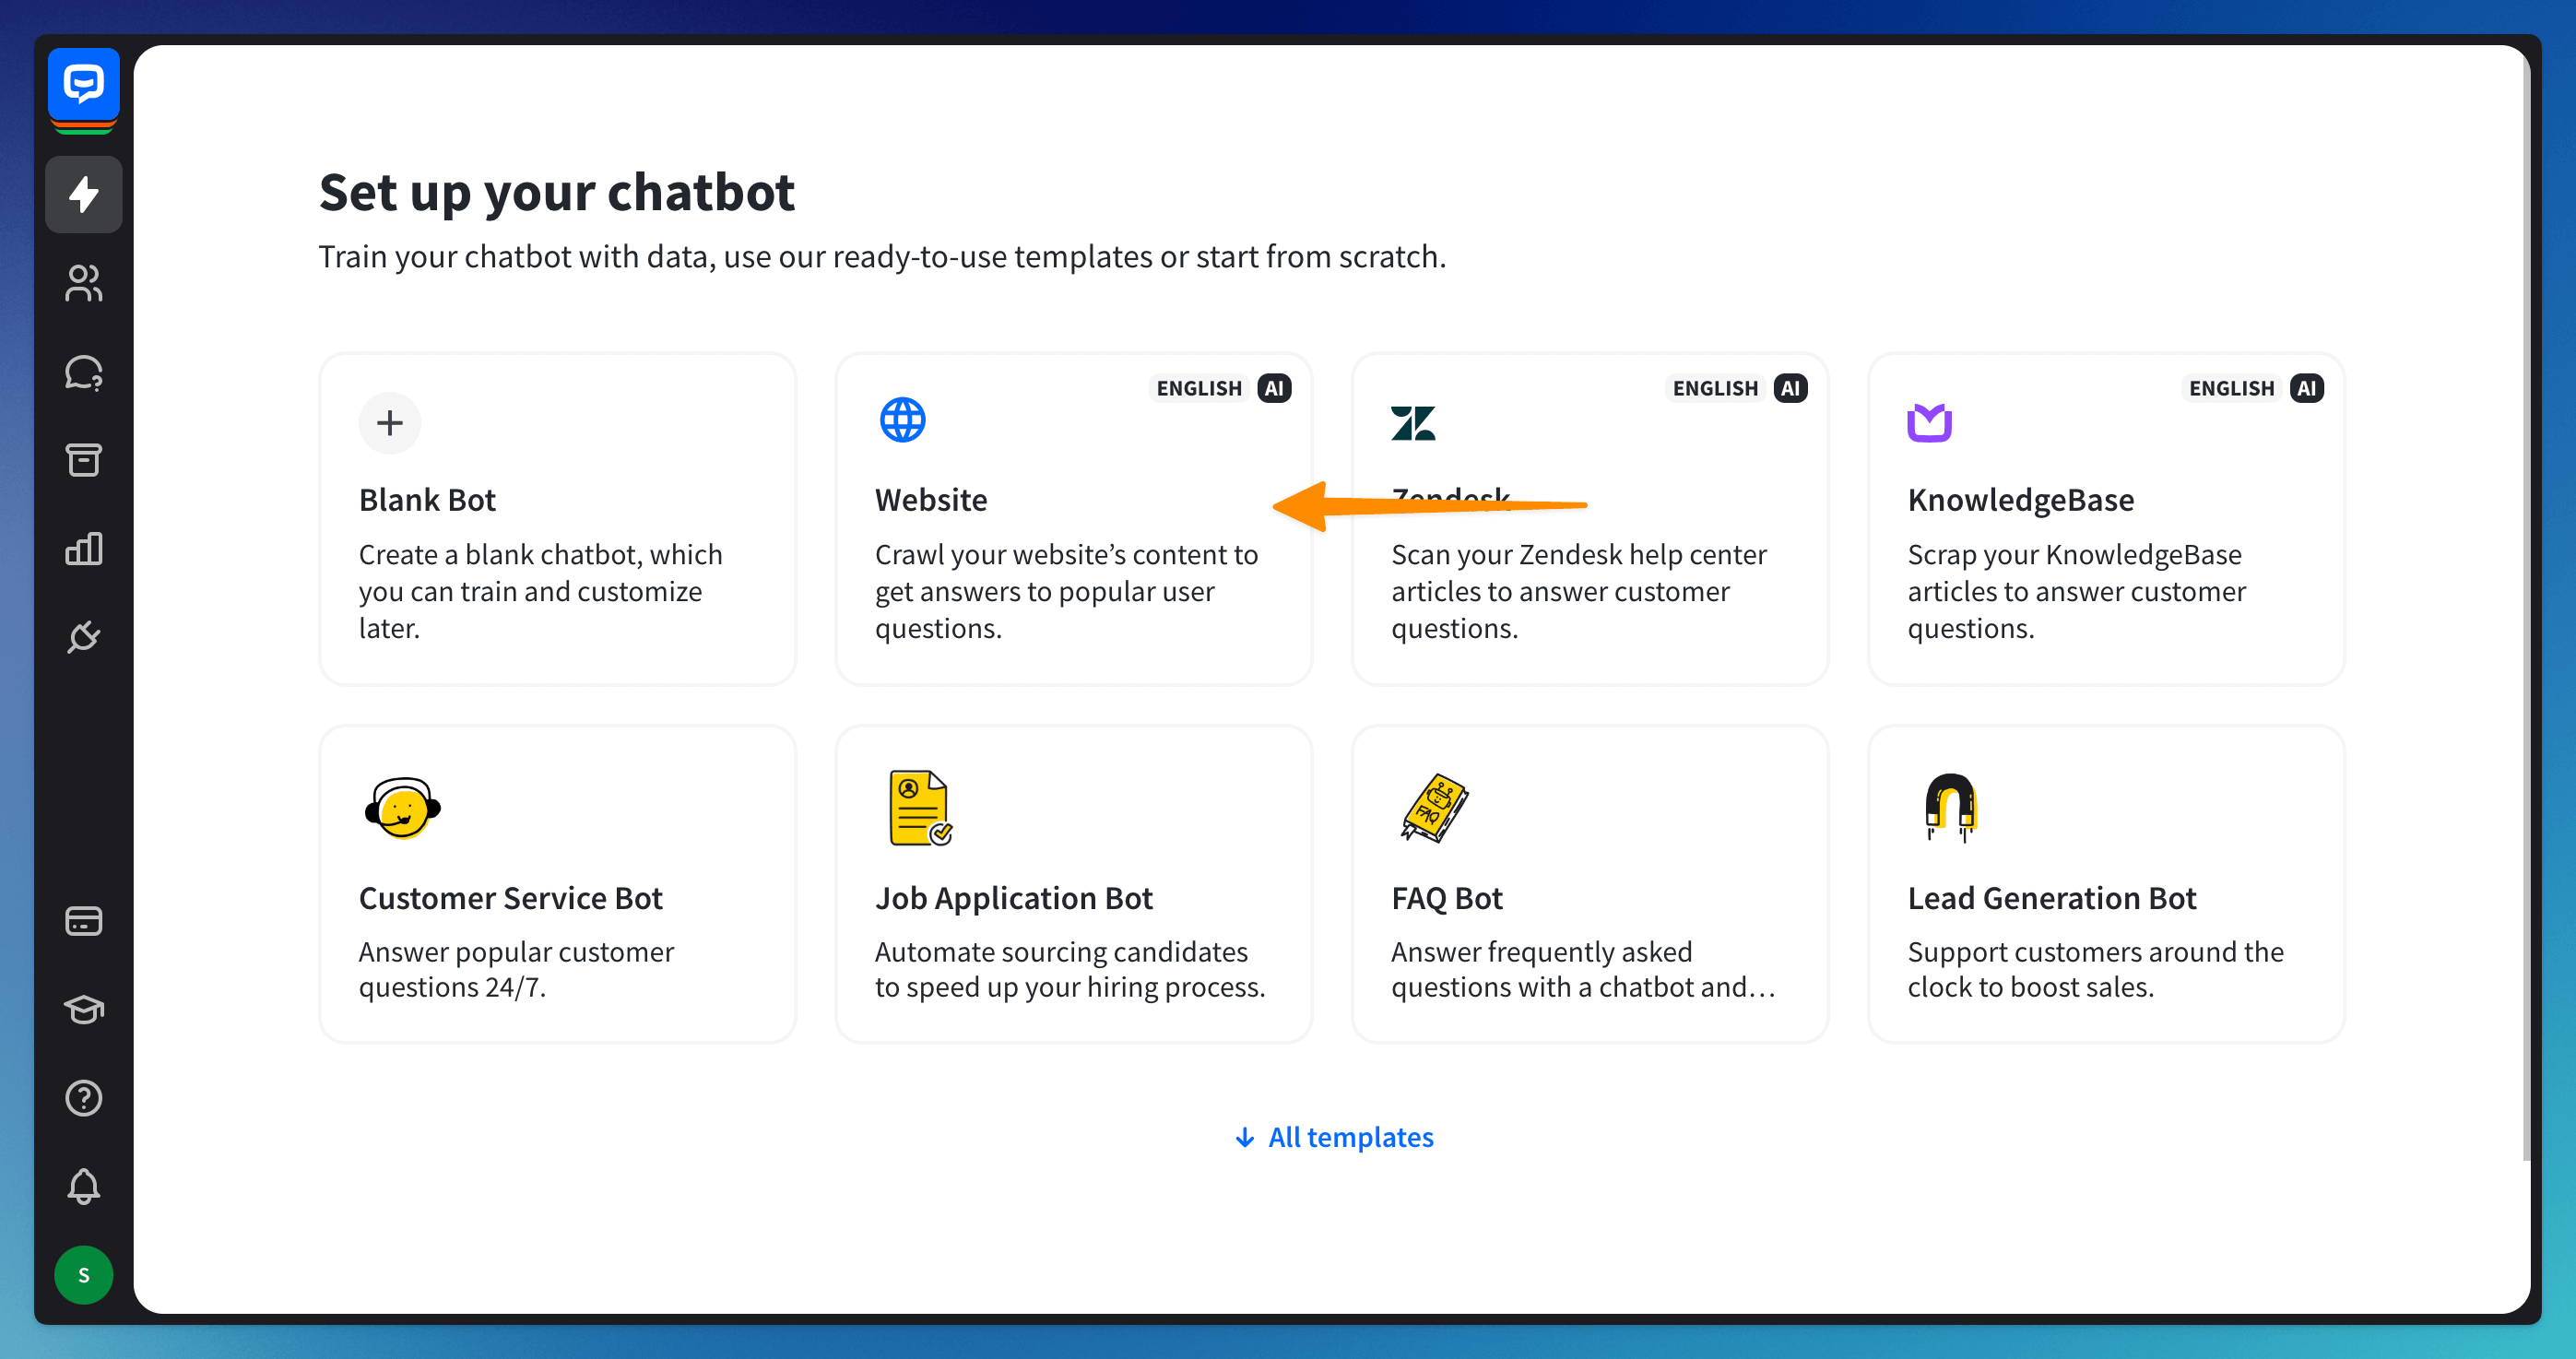
Create a bot by using your website URL
Set up your chatbot
Start in the Chatbots tab and select + Add chatbot field. Choose Website from the provided option.
Train
Enter your website URL and click on the Continue button. Choose the scanning option:
-
Scan a full page
-
Scan only nested pages
-
Scan a single page
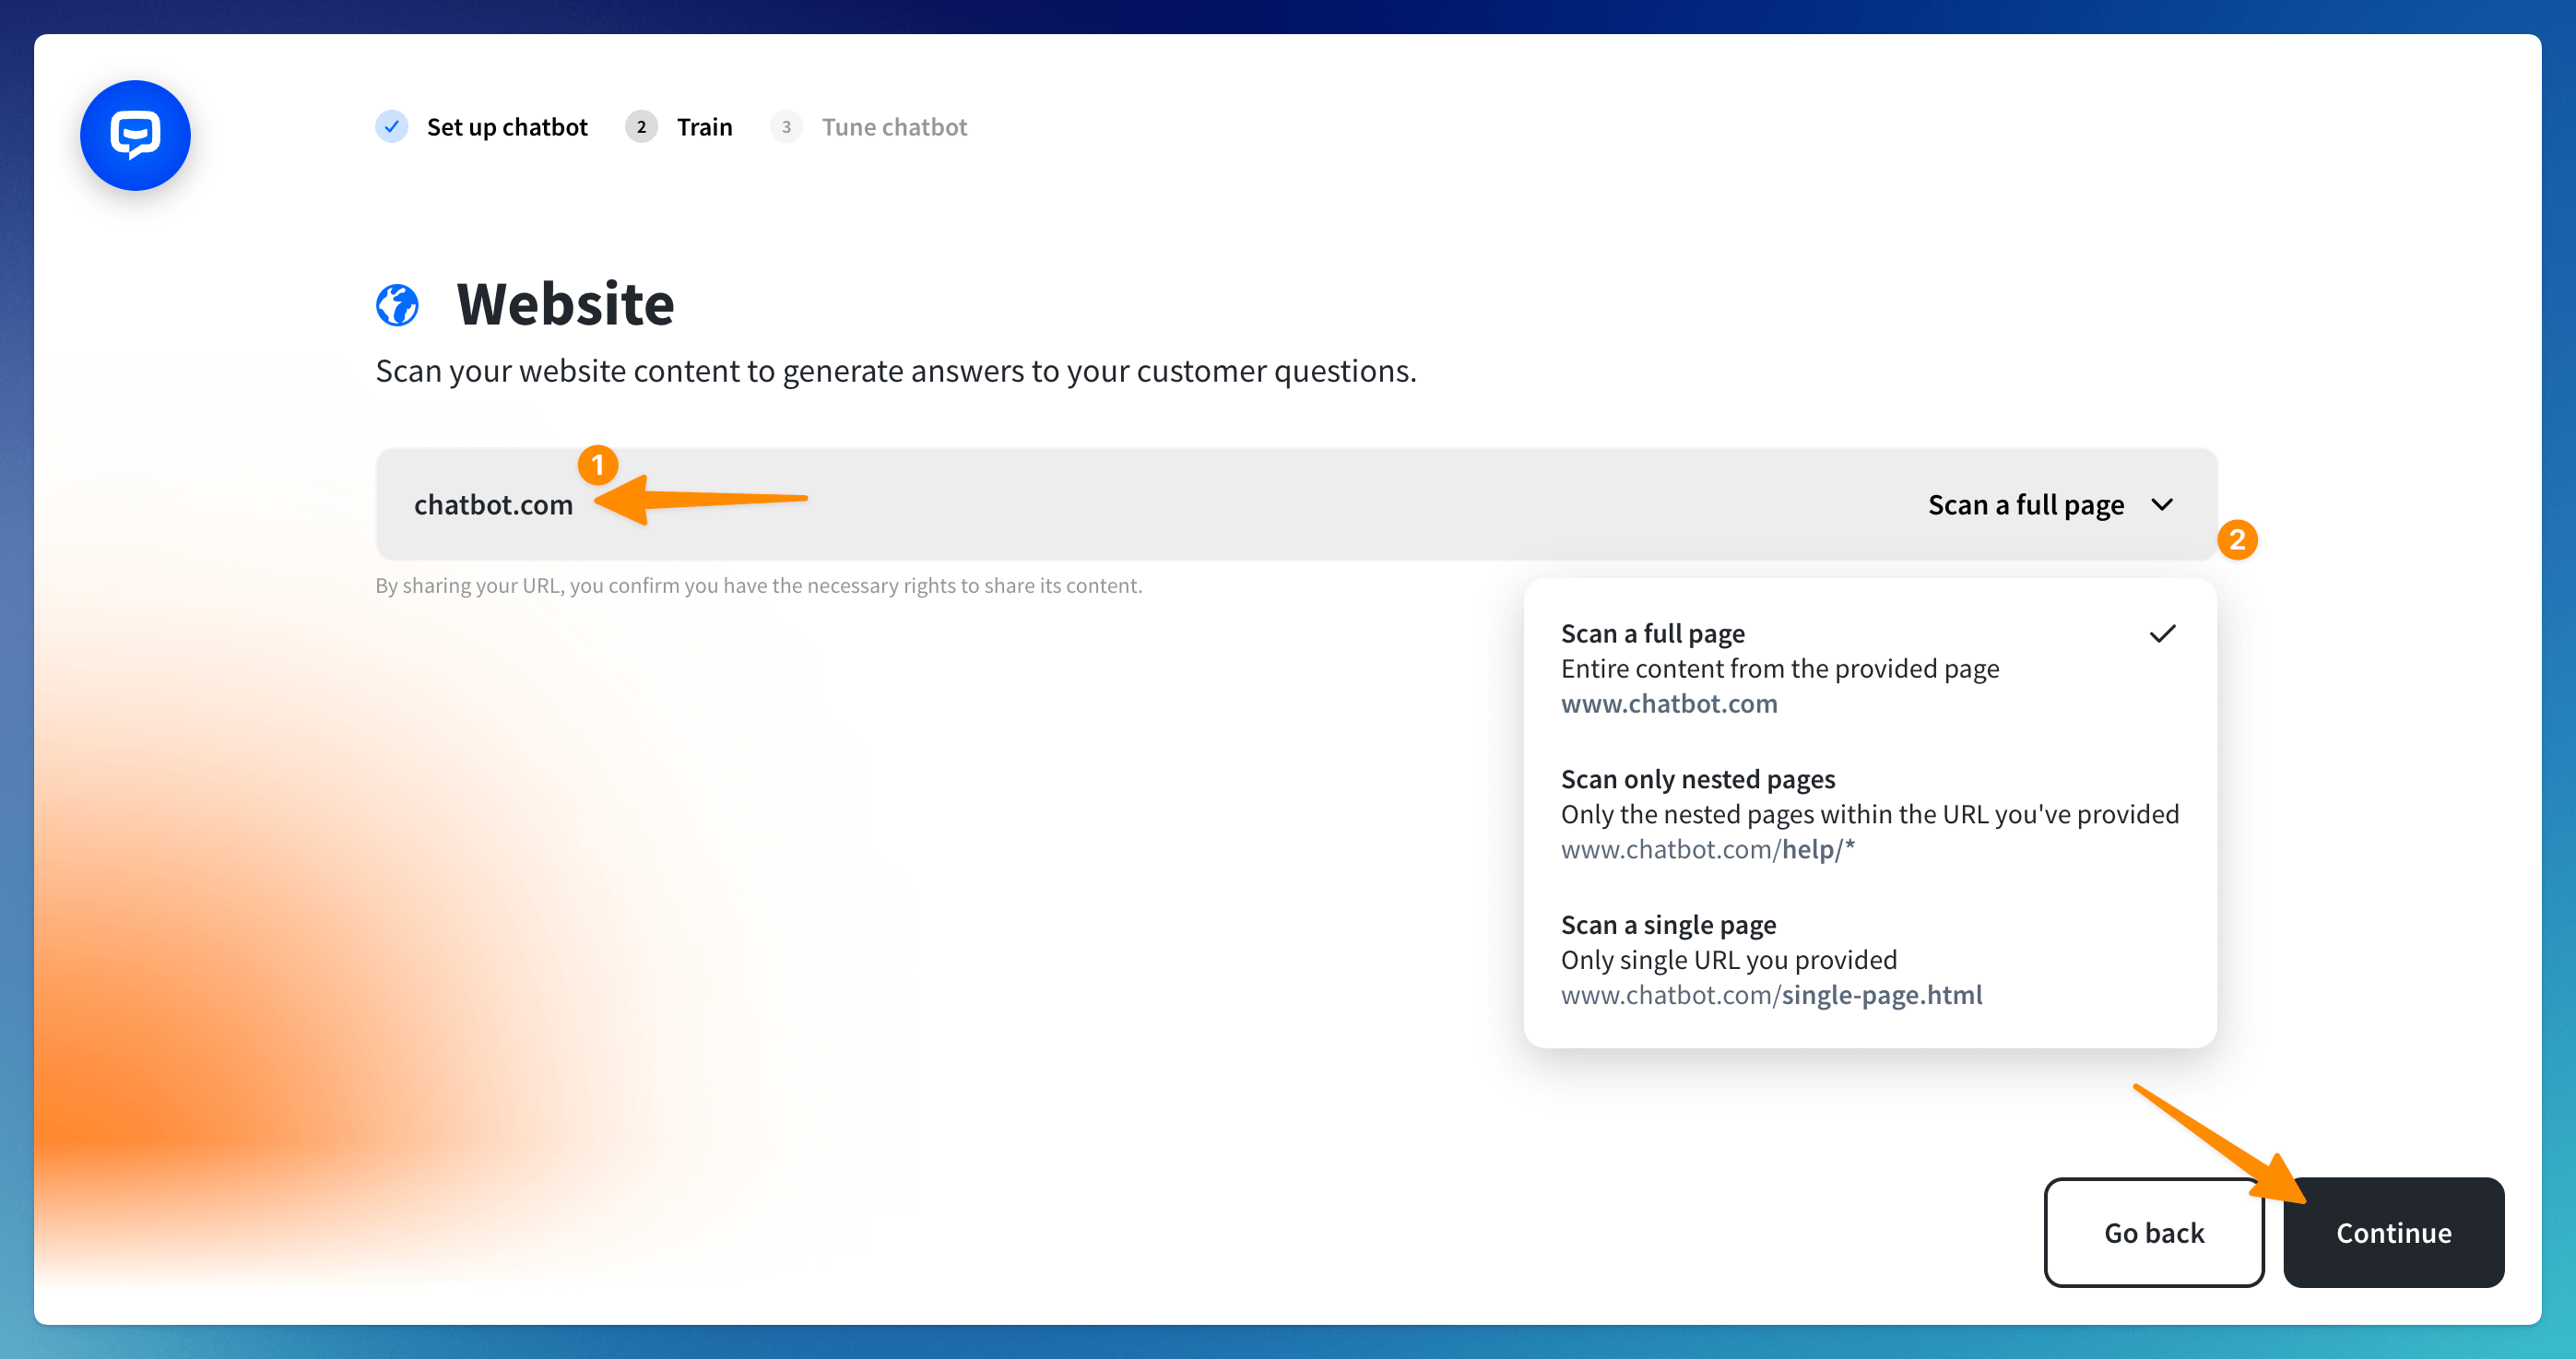
Before training your bot, use the green toggle to turn off specific category pages of your website. Click Continue.

Tune your chatbot
The final step allows you to:
-
Customize welcome message if needed.
-
Choose basic skills generated from your website’s content (such as the Contact us skill, suggested whenever contact details are collected).
Skills are dedicated chatbot flows designed for specific tasks. Depending on your website’s content, some skills are generated automatically during the chatbot creation process (for example, FAQ, About, Pricing), while others can be manually added.
-
Check and edit the attributes collected through the website scanning process.
Attributes such as company name, company address, URL to privacy policy, URL to terms, social media links, and more are collected automatically during the scanning process.
 When all changes are done, click Continue.
Your AI chatbot is ready for testing, but the knowledge is not fully loaded yet. The training is completed when the “Test your bot button” does not have a spinner running.
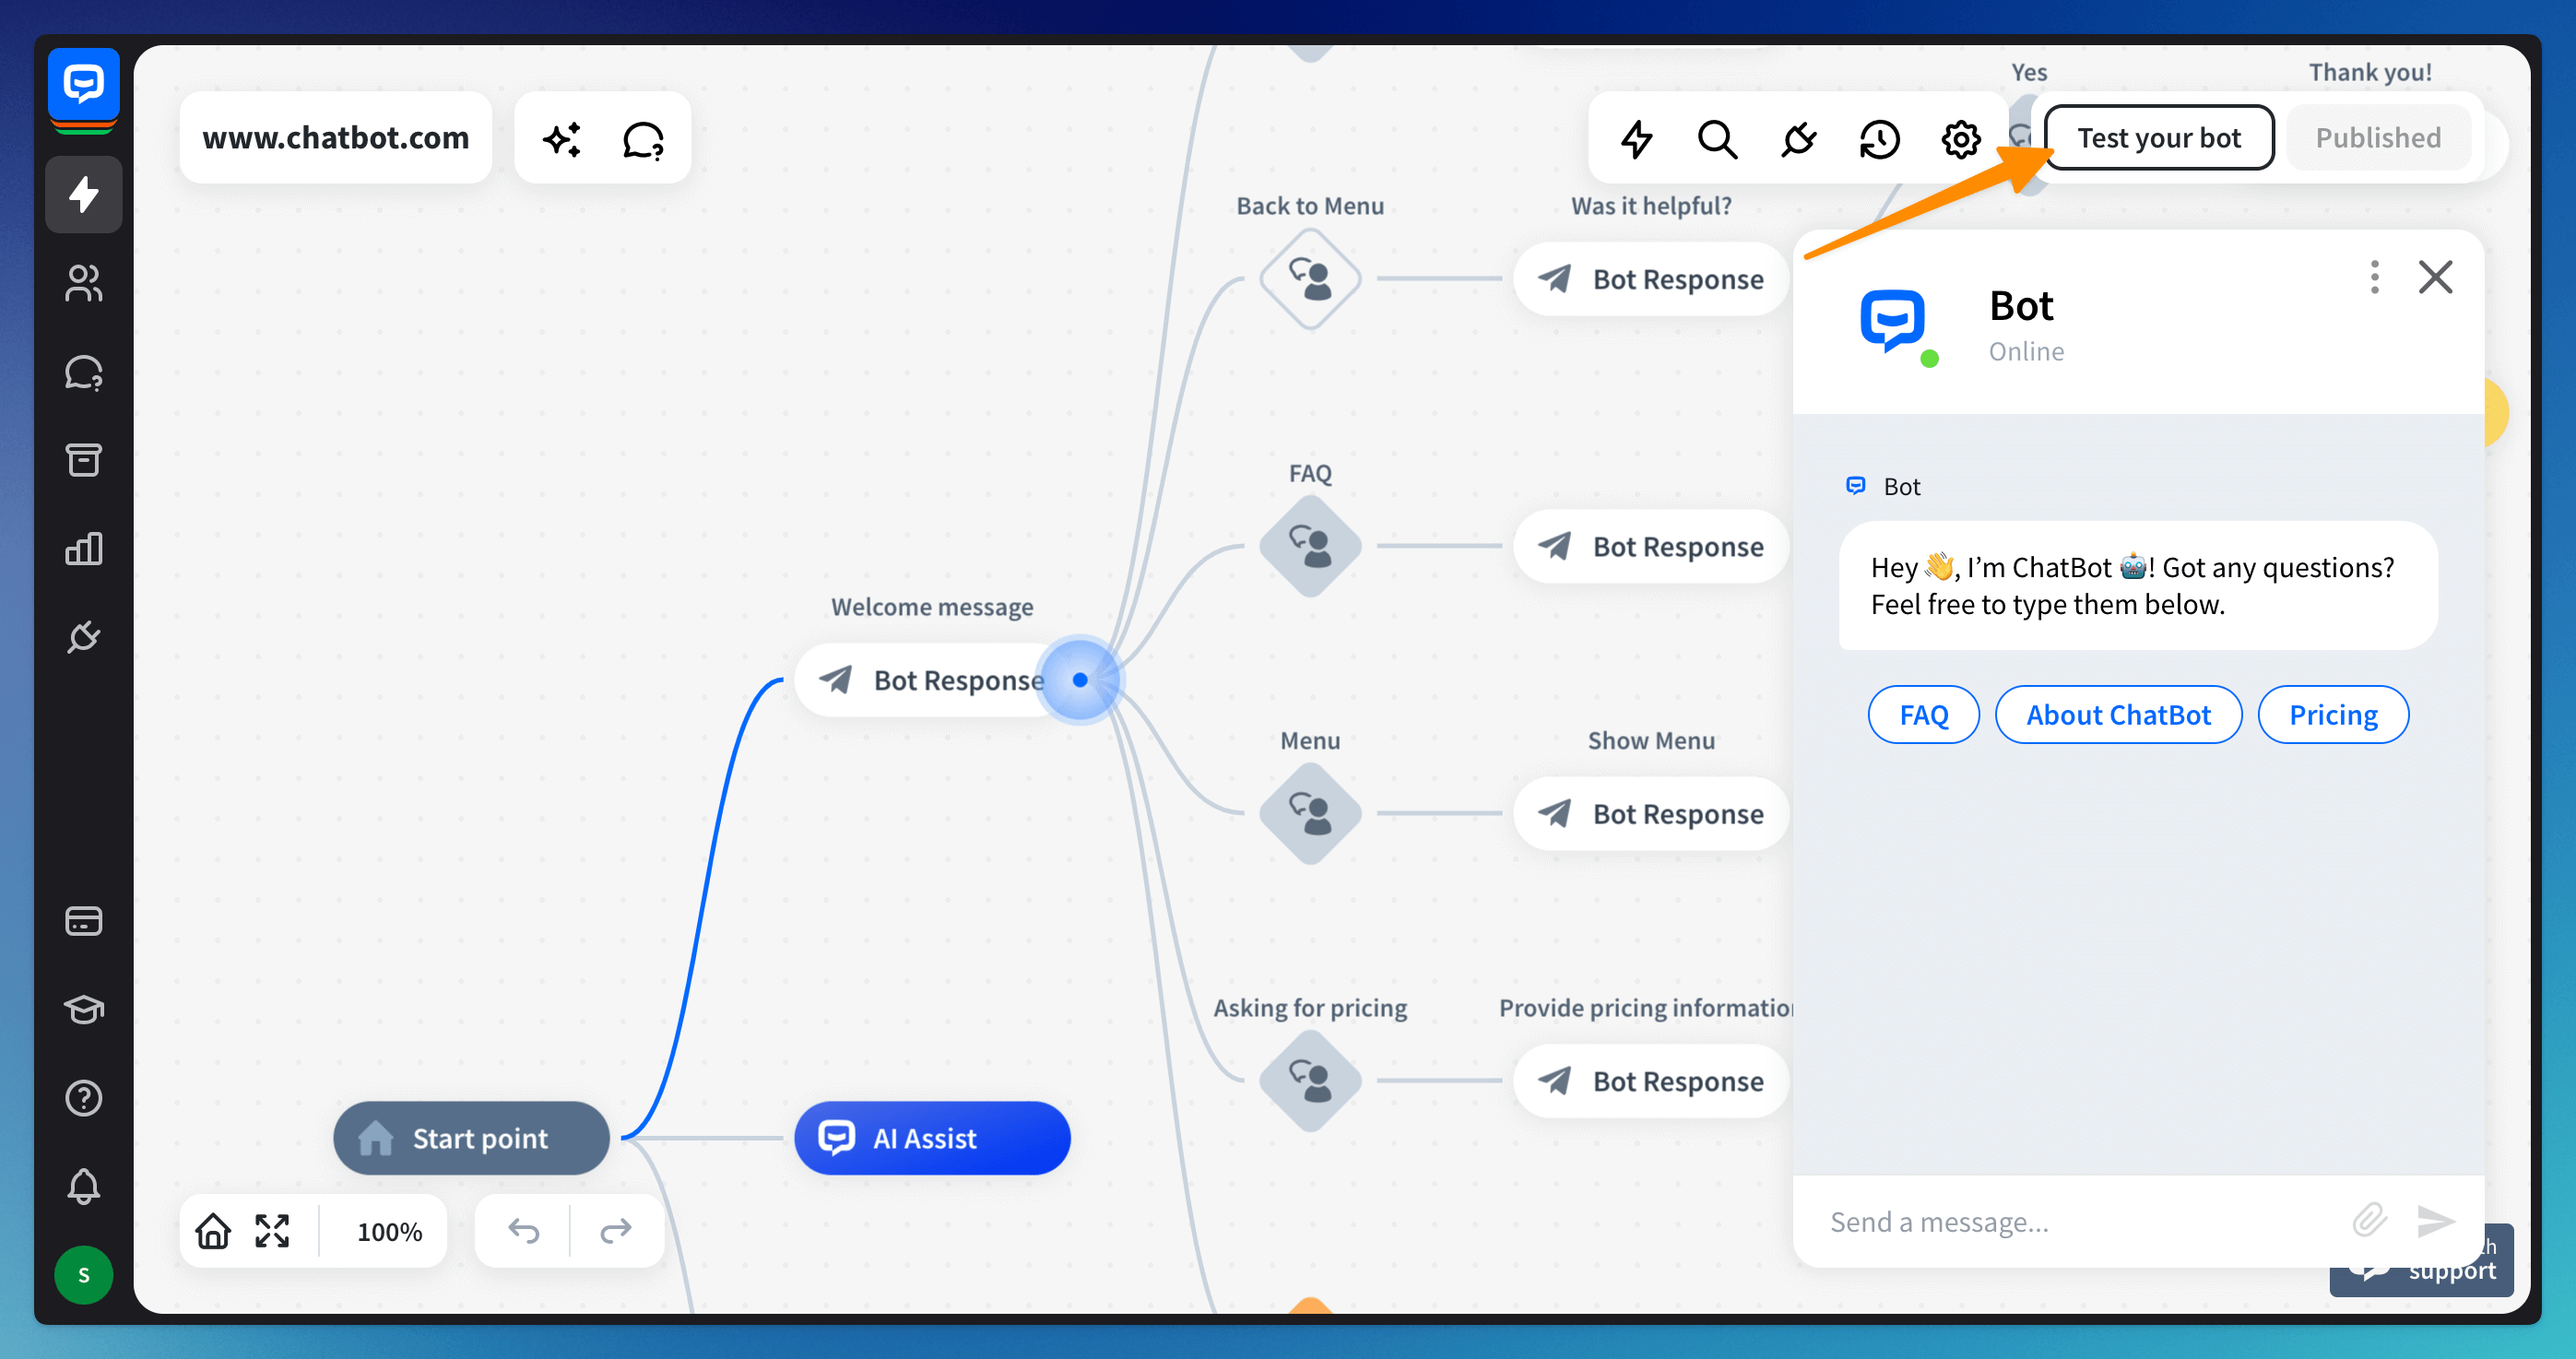
Test your AI chatbot
Testing tool
Testing tool allows you to test your AI chatbot within the ChatBot web app. You can check if everything works as intended before your chatbot connects with users.
-
Go to your AI chatbot. Click on the Test your bot button to start a chat. The bot flow shows the active branch during the chat with the blue line.
-
If you click on the three dots icon in the top right corner, you can choose between 5 options:
-
Show or hide Debug mode — it shows the names of all the actions and interactions that happen during the chat.
-
Returned user — turning on the “Returned user” option allows you to test the chat as a customer who’s already chatted with the bot.
-
Follow steps on the tree — it displays where the tested interaction is located on the conversation tree.
-
Show or hide the Typing indicator — it precedes the message sent by the user.
-
Reset chat — lets you start a new chat.
The AI chatbot will search for an answer on the conversation tree first. If one isn’t found on the conversation tree, it will use the knowledge from AI Knowledge, and then use AI Assist to provide the best answer.
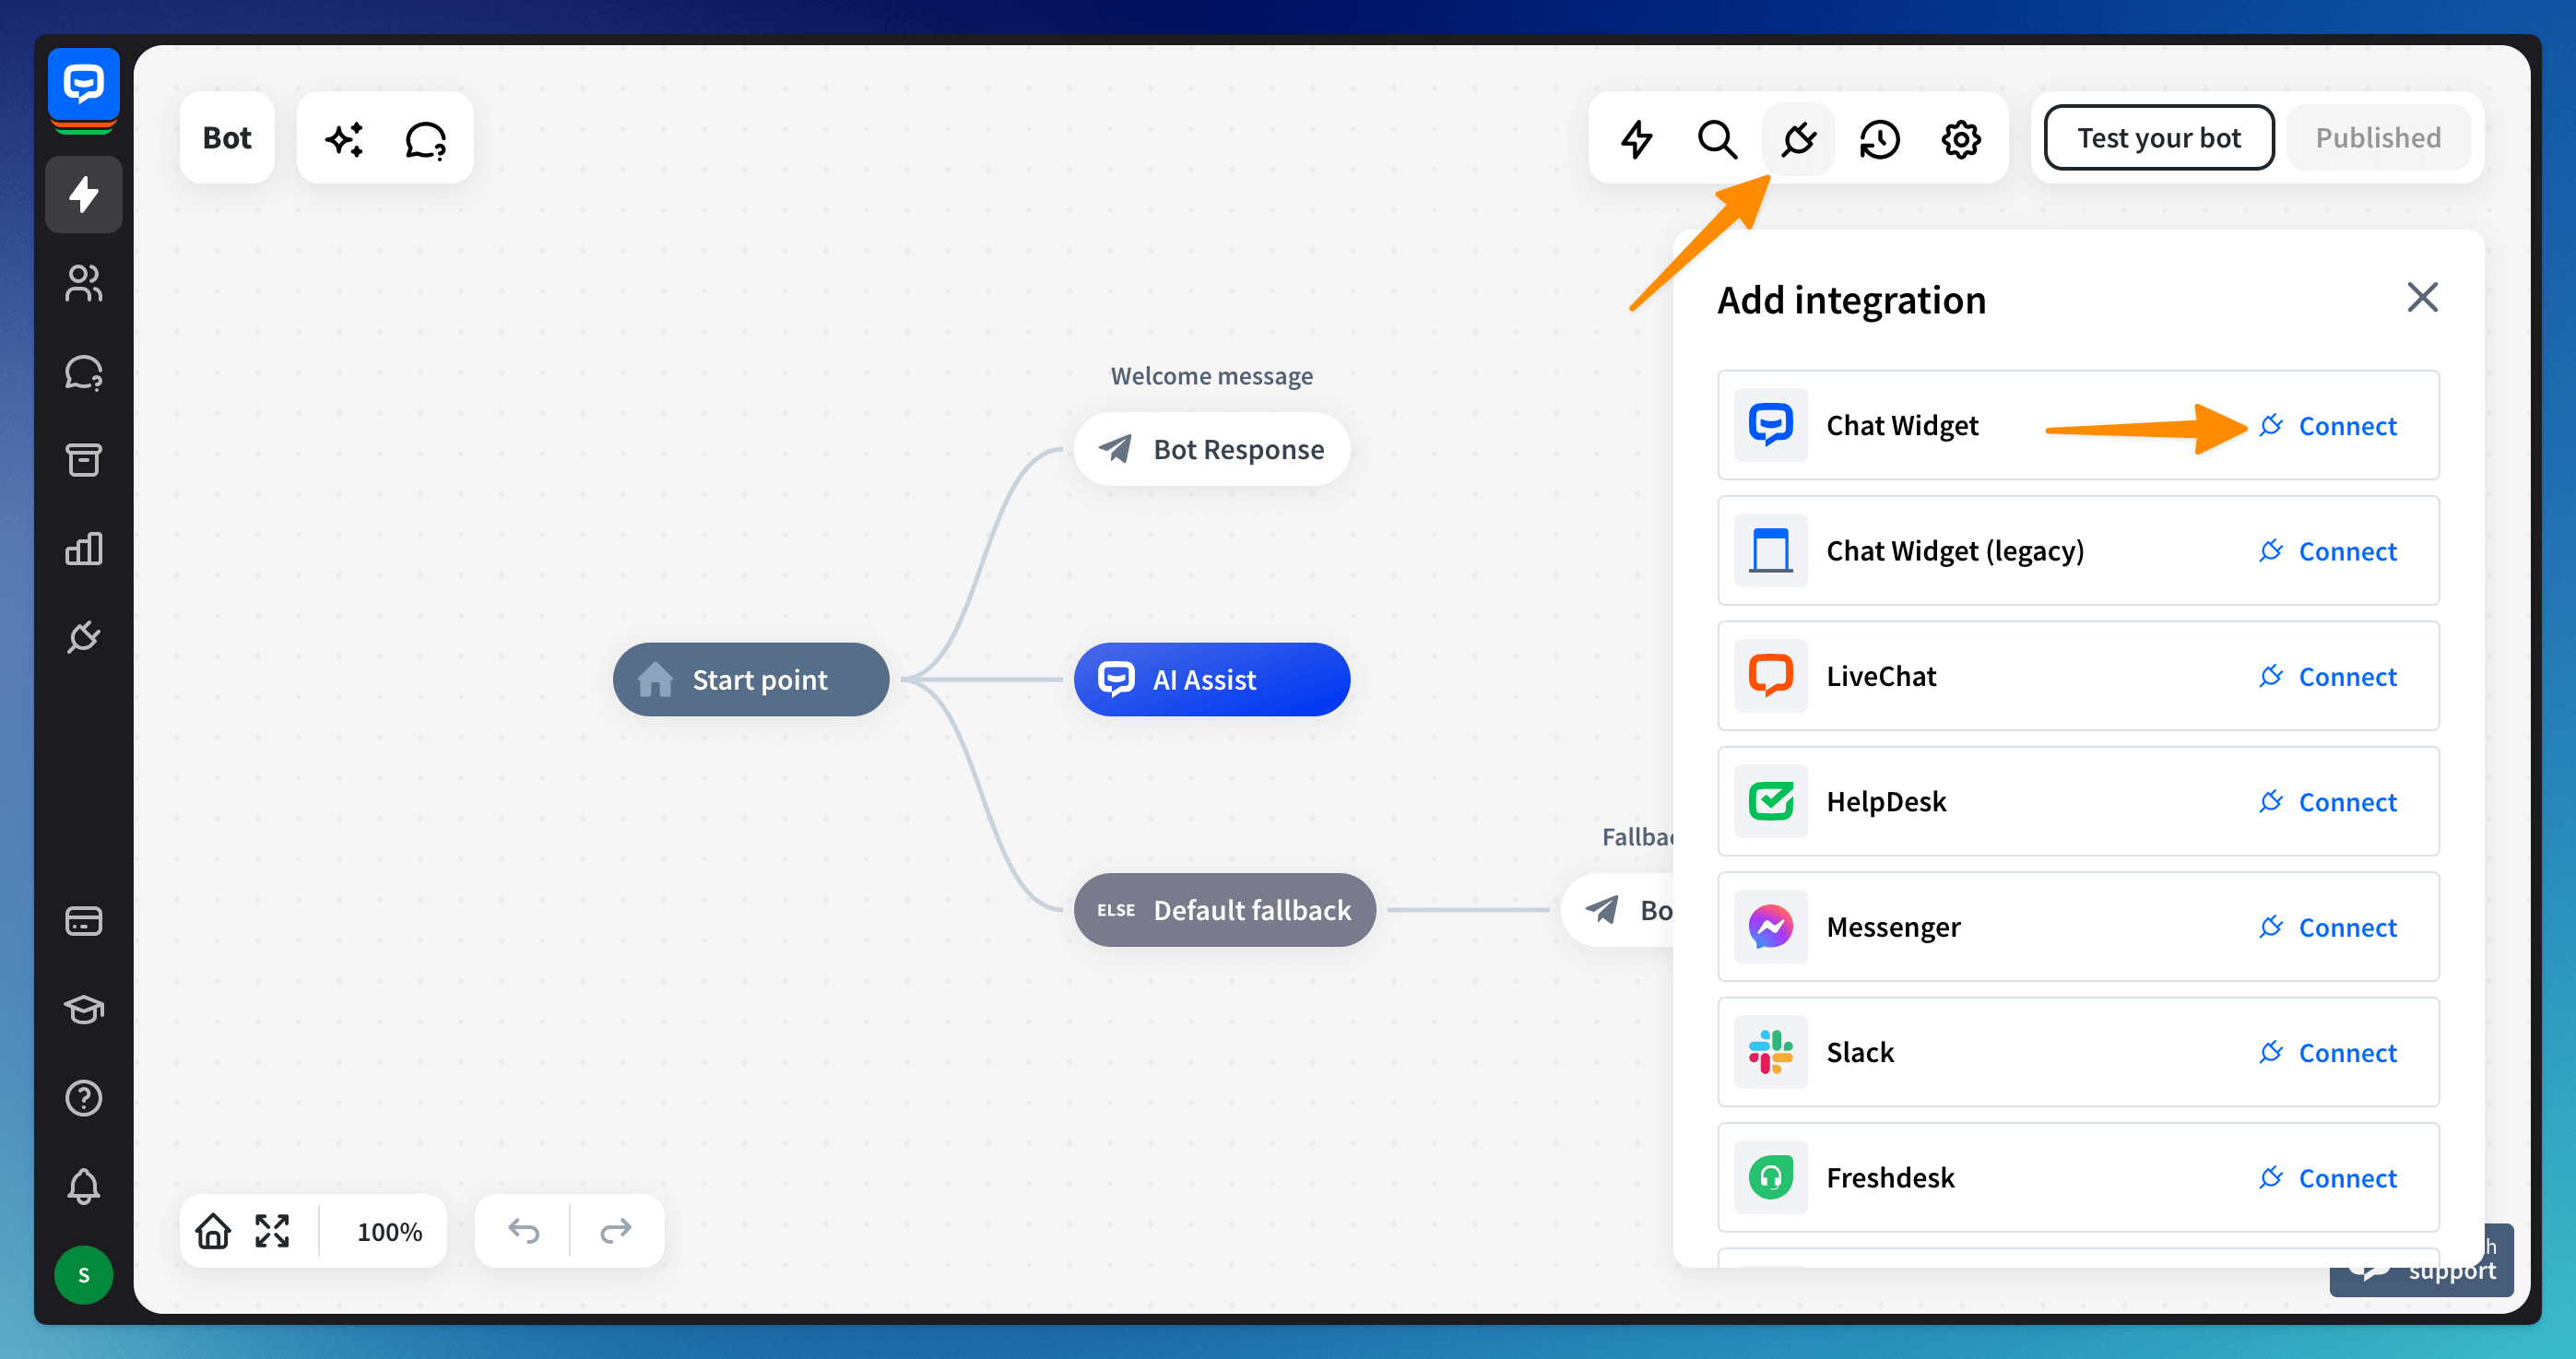
Create and configure your Chat Widget
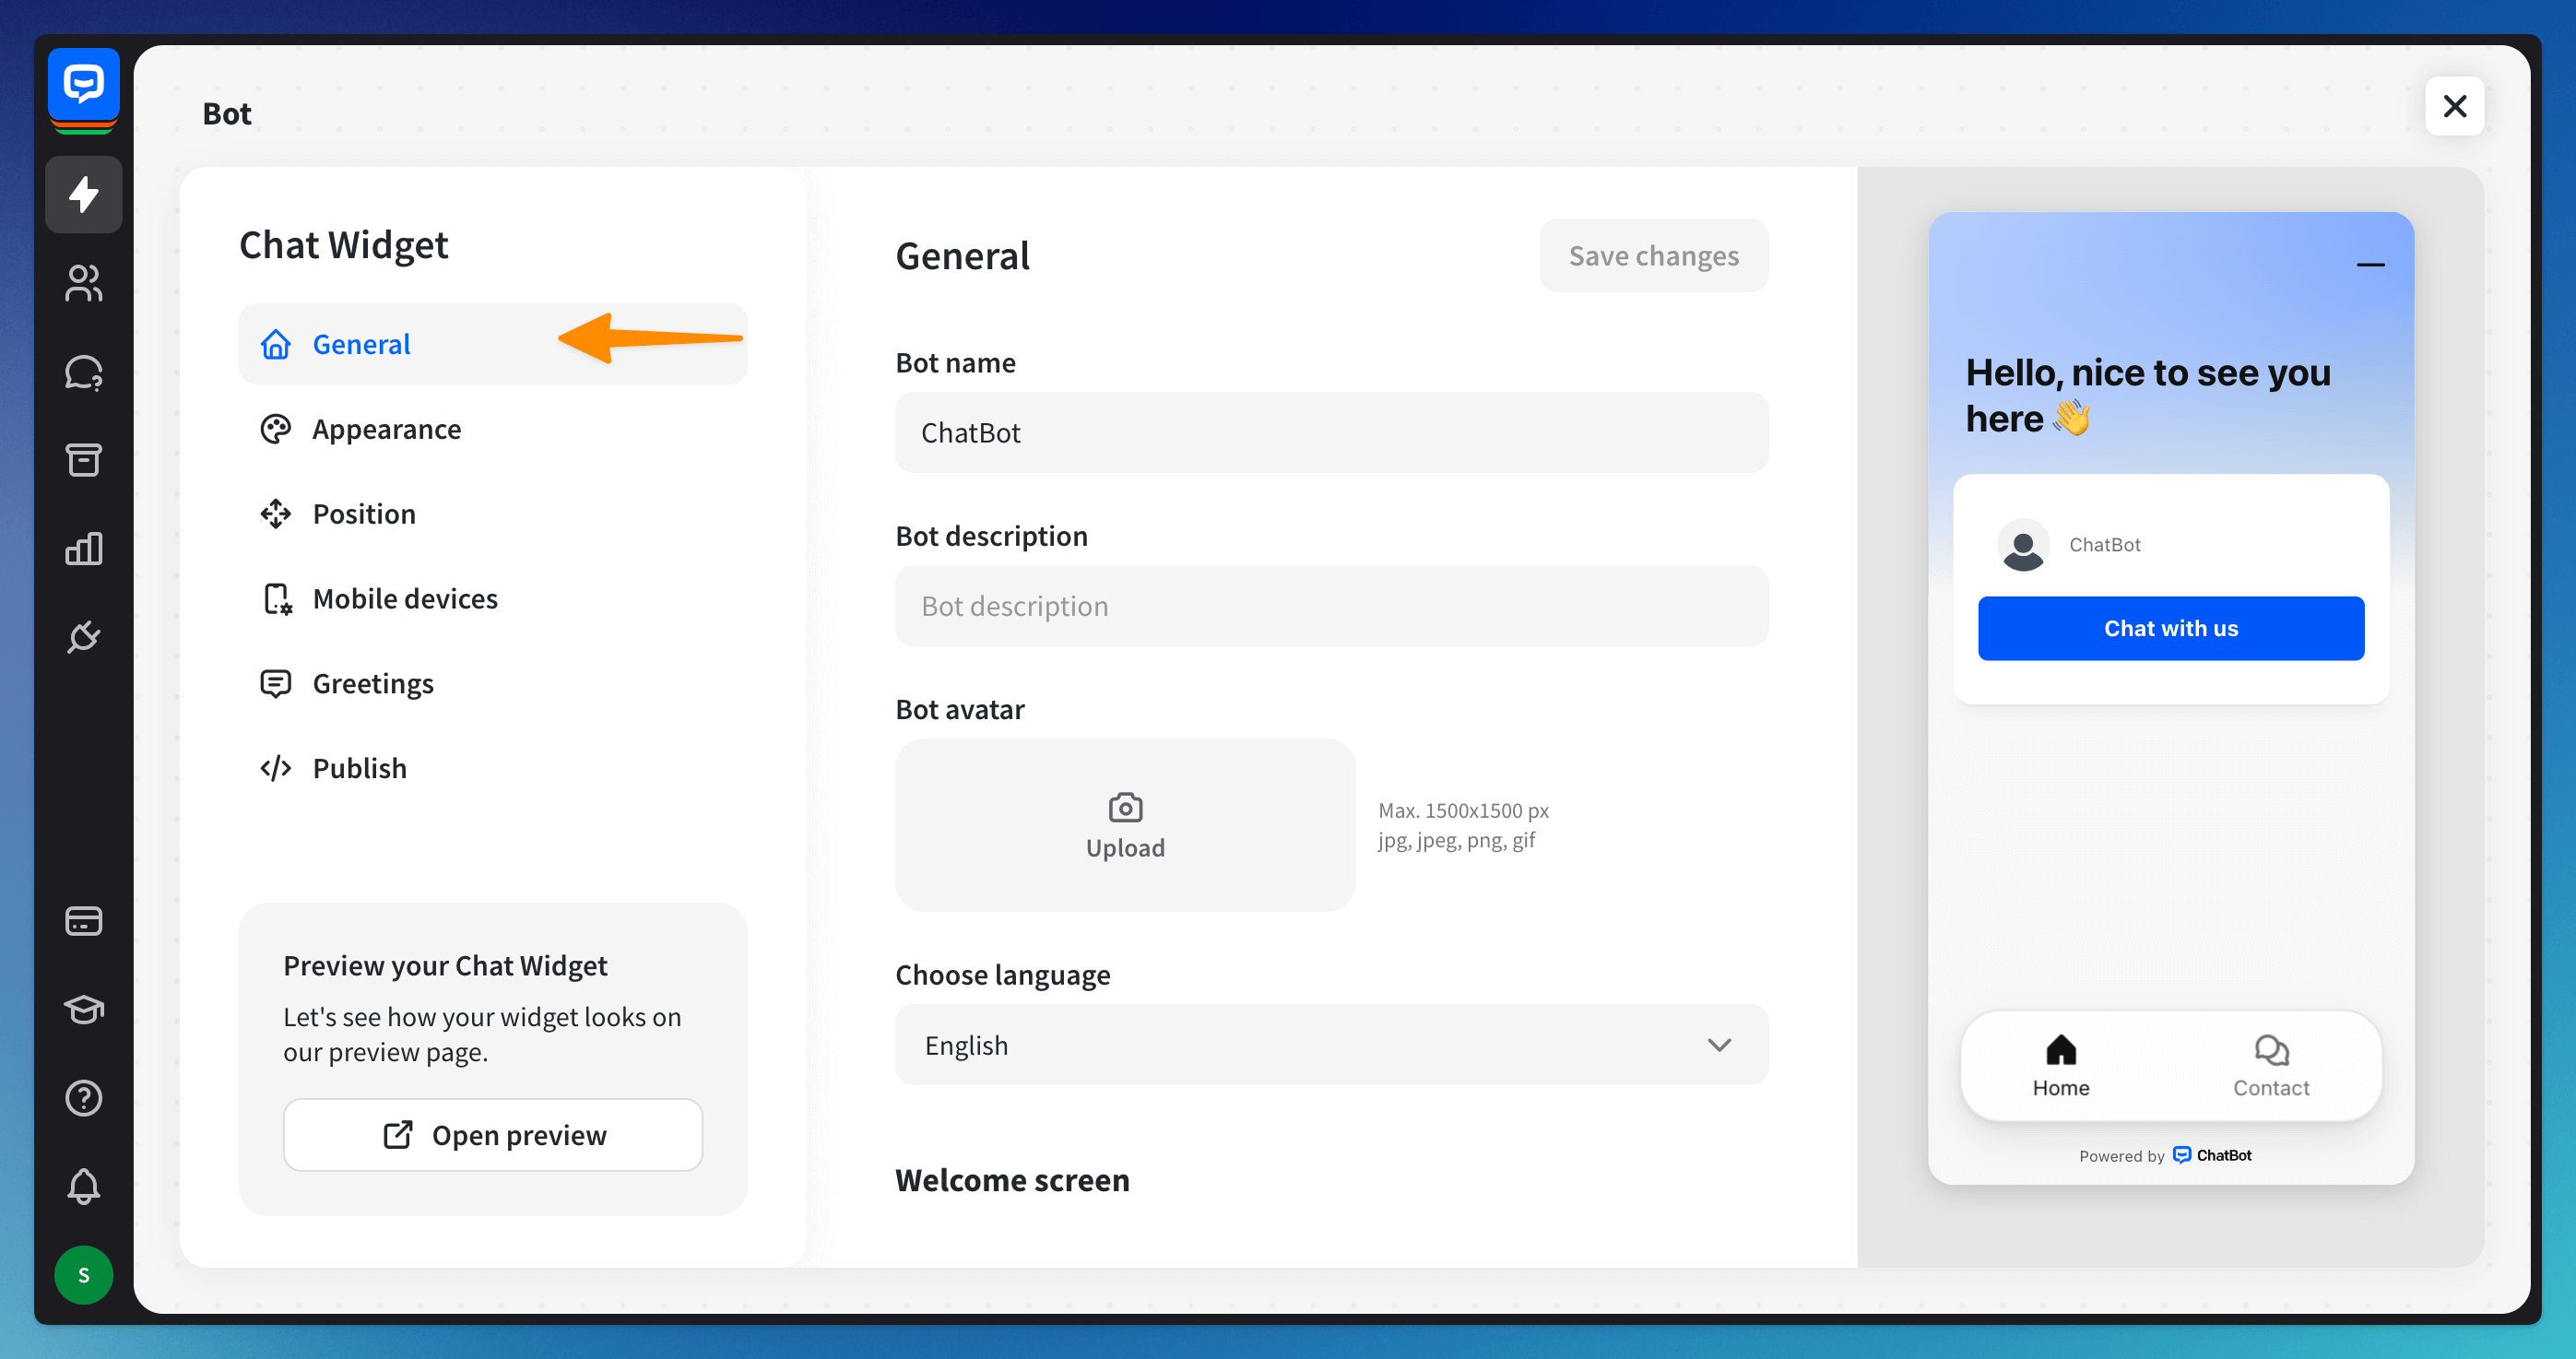
To create your Chat Widget and configure its settings, open your AI chatbot, navigate to the Integrations icon, and click Connect located next to the Chat Widget option.
Go to the General section and set up the bot’s settings:
-
Bot name — type your chatbot’s name here.
-
Bot Description — this short text is displayed on the welcome screen. It should briefly describe your business and explain how the chatbot can help the user.
-
Bot avatar — an image displayed next to every message the bot sends
-
Choose Language — choose the language the chat will be in
-
Welcome screen — a screen with a description and your social media links displayed before the chat starts.
-
Custom links — use it to share your social media links with customers directly in the Chat Widget on the welcome screen.
-
Powered by — you can turn off this option to remove the Powered by ChatBot label from your Chat Widget (Business and Enterprise plans only).
-
Text field — if needed, you can turn the text field off and show it only when a question from the bot needs to be answered by the user.
Remember that if you do so, you’ll need to build your chatbot using rich messages. If you turn the text field off but use the Question action in your chatbot, the text field will be activated so that the user can answer that question. After the user provides an answer, the text field will be automatically turned off again.
Customize your Chat Widget
Navigate to the Integrations icon, and click on the Chat Widget. Go to the Appearance section.

Set up the bot’s appearance settings:
-
Theme and color — this option allows you to change the main widget theme, color, and the background image. You can choose from ready-to-use presets or configure your colors by selecting the More Advanced Colors option.
-
Choose background — you can add the bot’s background here. Drag and drop or browse for an image and crop it if needed.
Set up greetings
The Greetings feature allows you to display a pop-up message right above the minimized Chat Widget on your website. This can be used to catch users’ attention and encourage them to start chatting.
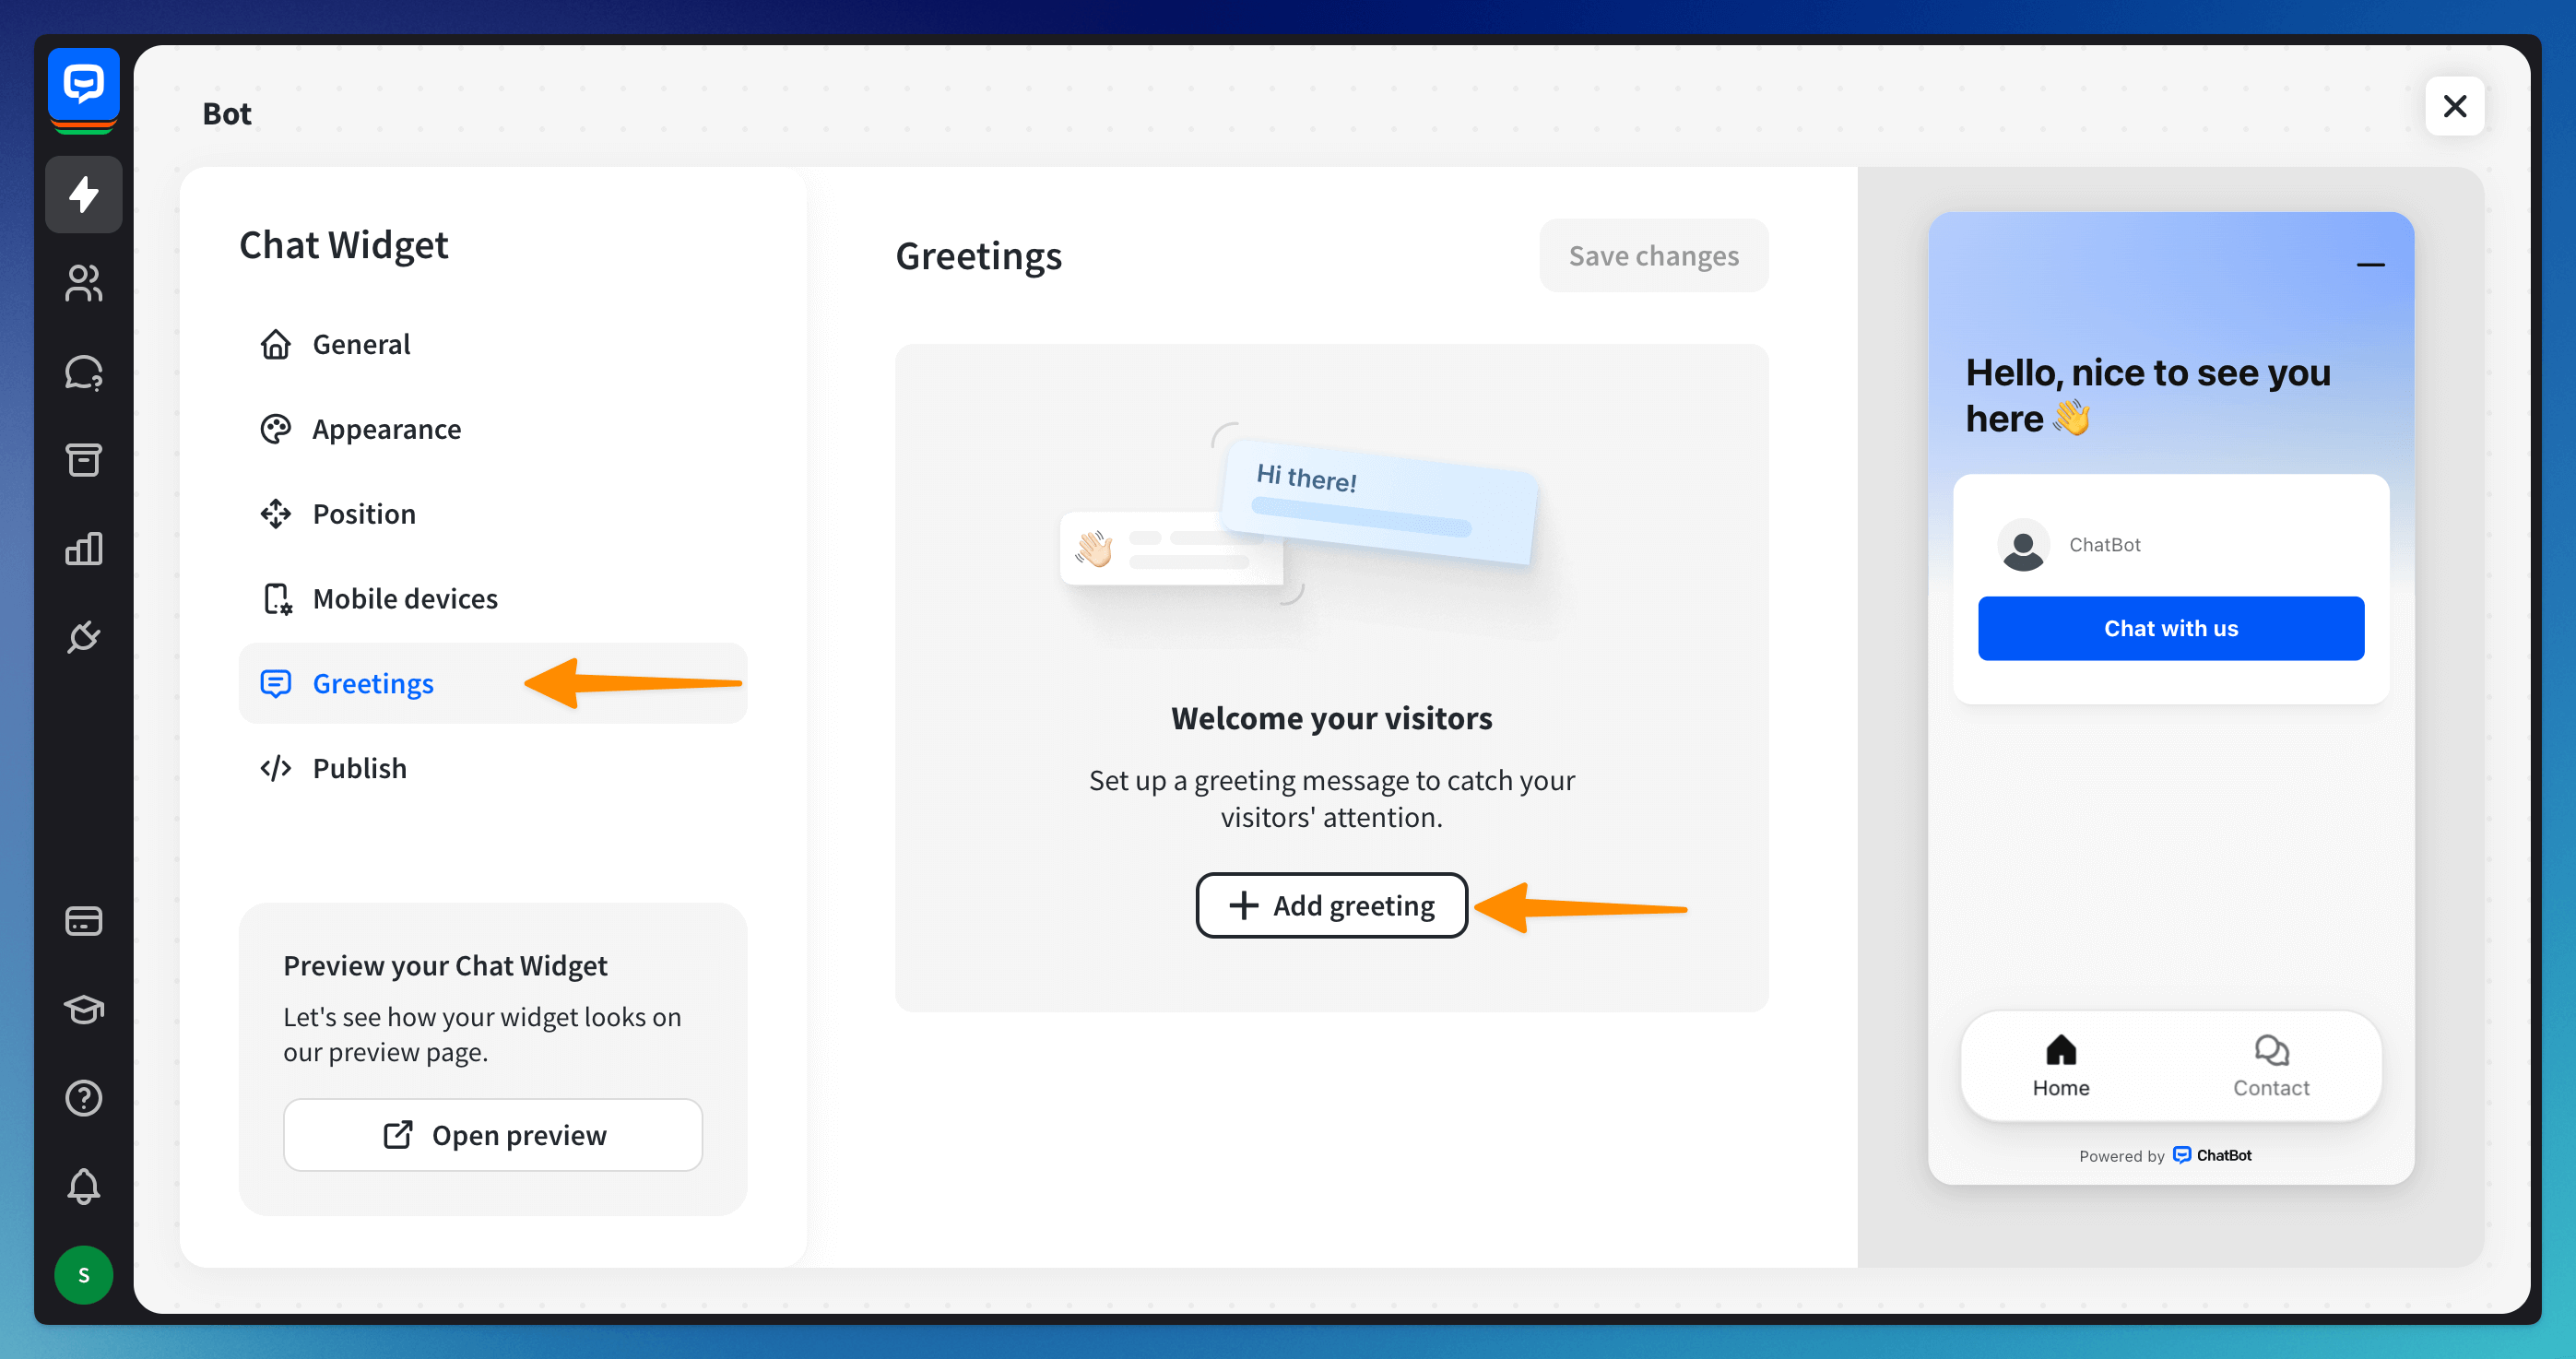
You can decide when your greetings should be sent to the user. For instance, you can create a customized greeting for the user who spends a specific amount of time on a particular page or a whole domain. You can also send a customized greeting to visitors who enter your website through a specific URL address.
Click on the + Add condition button and select a condition from the list.
Preview the Chat Widget
ChatBot also lets you verify your settings and test your chatbot on the Sample Page — a default demo page. To open the Sample Page, click on the Open preview button in the bottom left corner.
You can share the link to the Sample Page with your team or beta testers to gather feedback and ensure your bot provides an excellent user experience.

Publish your chatbot
When editing your chatbot, you will automatically create a new draft of your chatbot. The draft version is a duplicate of your published chatbot with the changes you added.
Draft lets you work on your chatbot without updating the published version. This way, you can experiment with your chatbot without worrying that any of these tweaks will change the behavior of your published version.
When you’re ready and decide that your draft can replace the already published version, click the Publish button.
 You can see all the previous versions under the Version History icon.
Install ChatBot using the Chat Widget
To install the ChatBot Chat Widget on your website, open your AI chatbot, navigate to the Integrations icon, and click on the Chat Widget.
Go to the Publish section and click the Copy code button. Paste the copied code to your website’s source code before the closing < /body > tag.
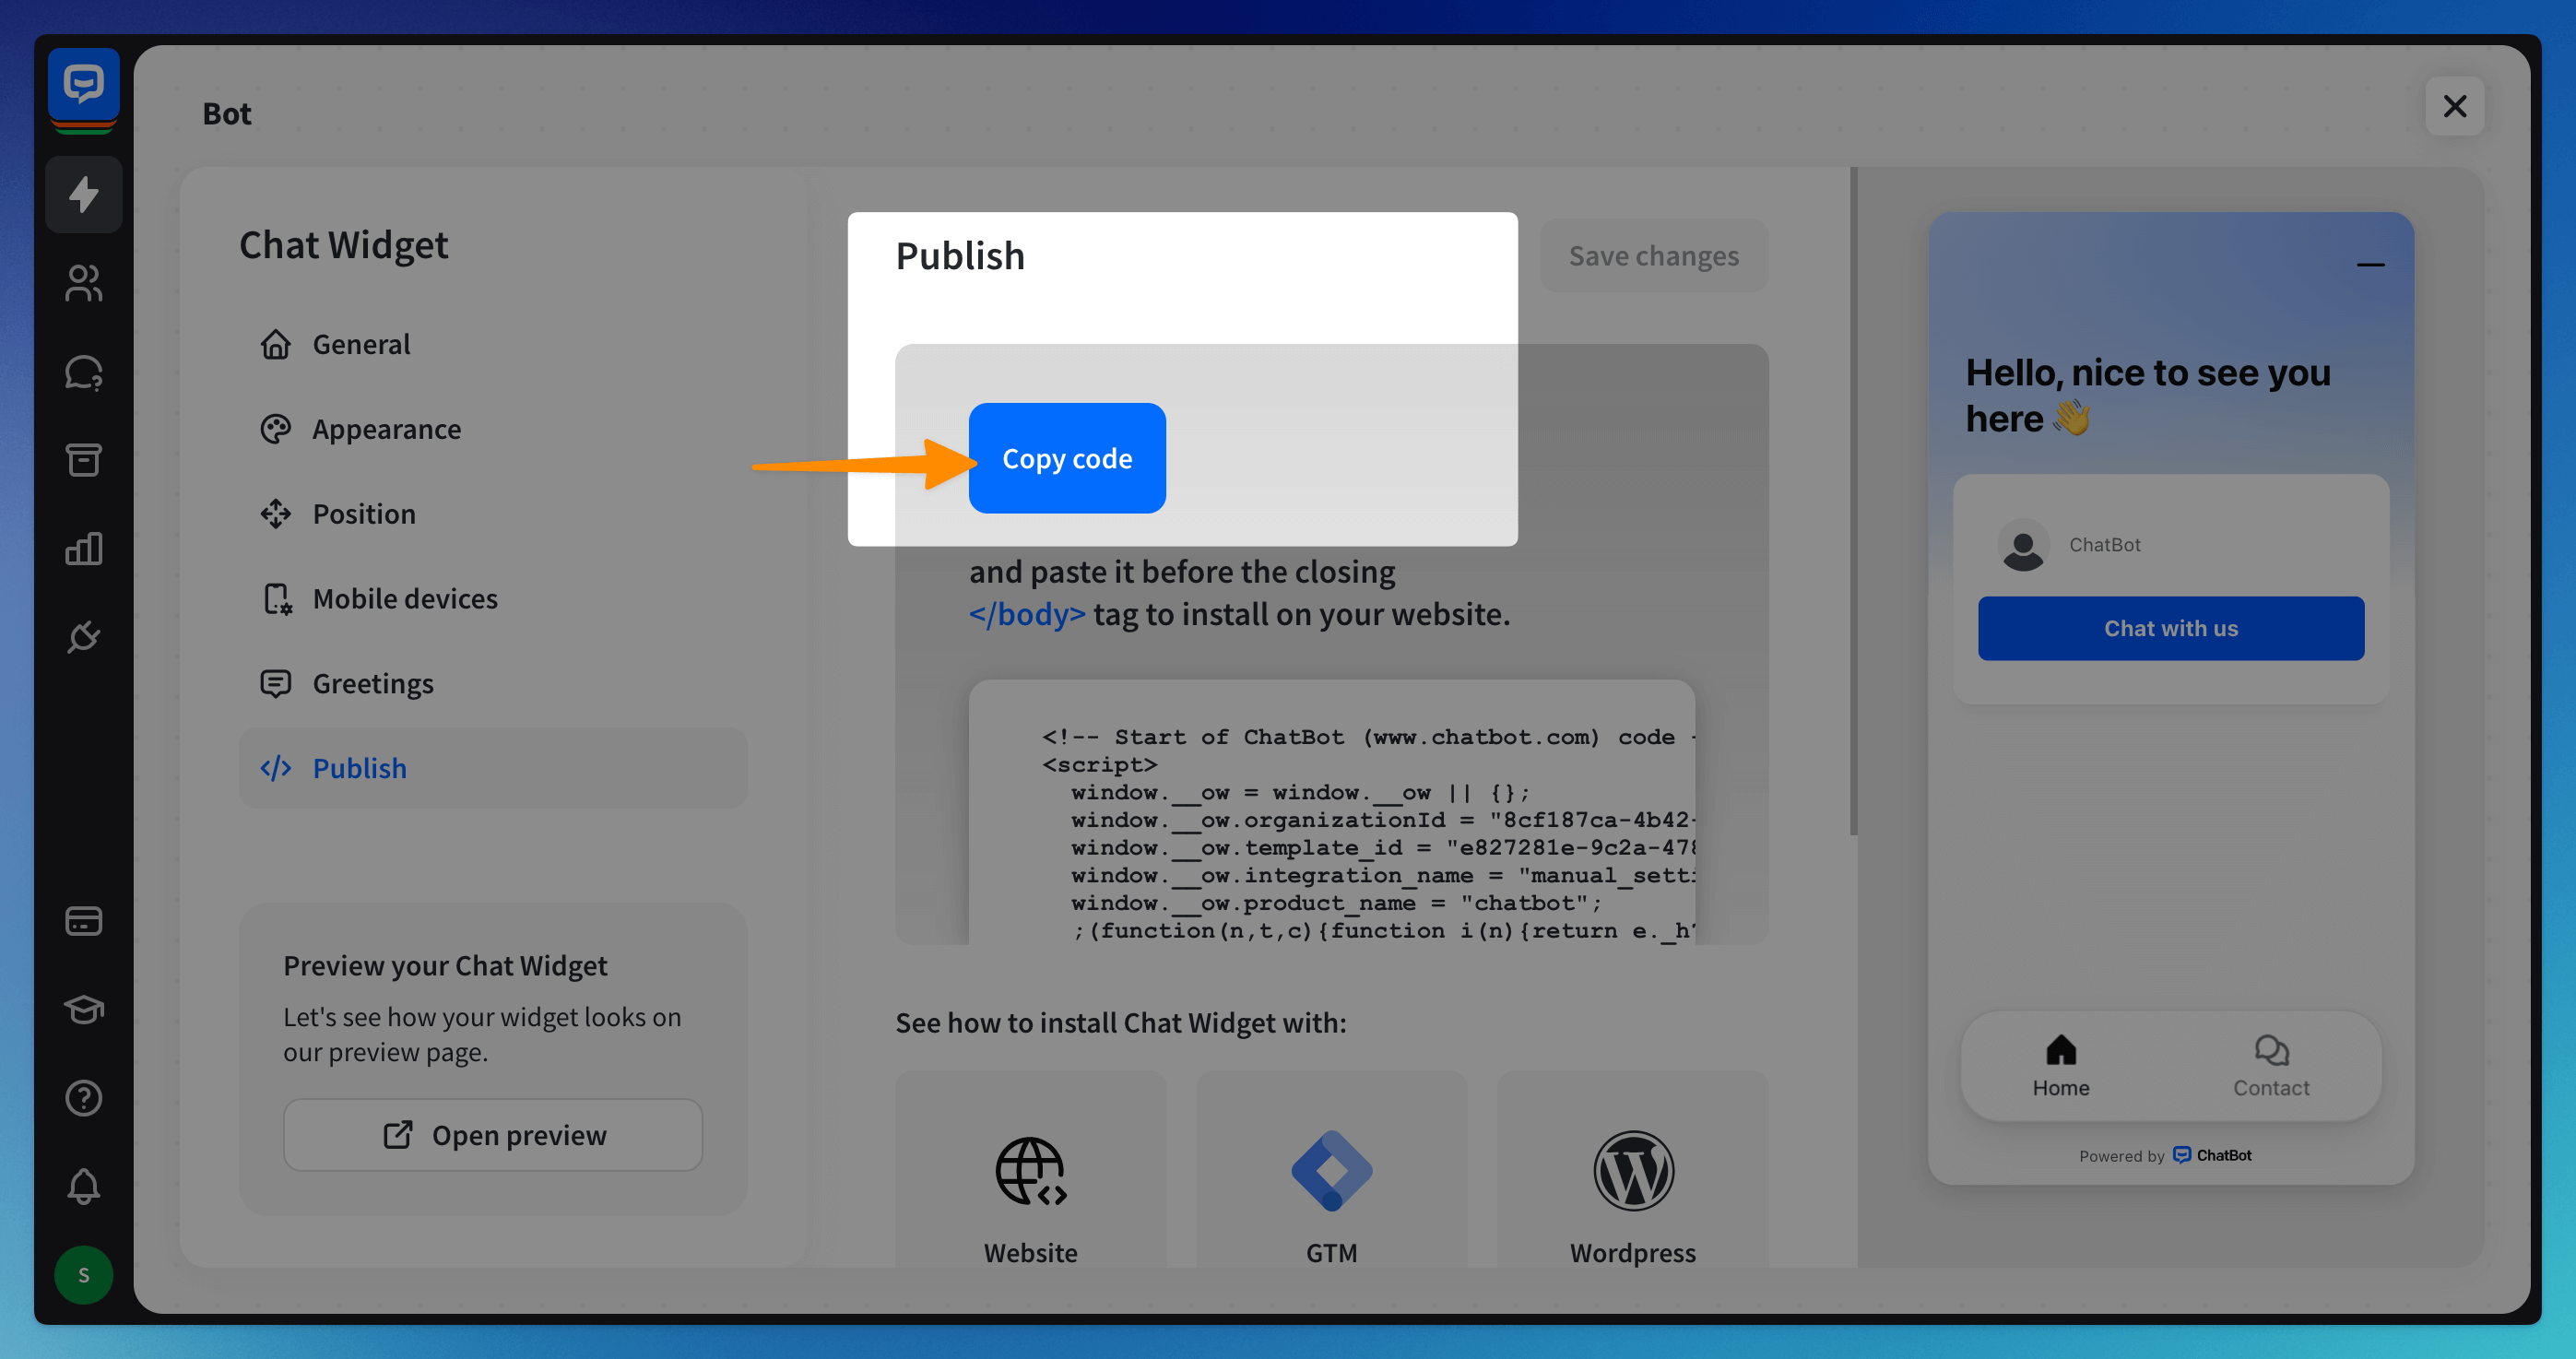
Reload your website. The Chat Widget should appear in the bottom corner of a page.
Master your AI chatbot’s performance
You can continue training your AI chatbot with the help of the Training section in the main view of your bot, in the top-left part of your screen.
 Check the Unmatched category to see user messages your AI couldn’t answer. You can provide answers for these questions and your AI model will use these for questions later. You can also review and edit all ChatBot Answered by AI queries.

Read more:
