Zapier is a handy tool designed for non-technical users that helps automate daily tasks by connecting various web apps into workflows.
You can connect your chatbot with your favorite apps without writing code, automate daily tasks such as adding new customers to your CRM, sending emails and text messages, and much more.
A zap is a short workflow that can automate a piece of your daily work. With a few clicks, you can send collected data to your Google Sheets, text customers with Twillio, schedule events in your calendar, add new contacts to Autopilot, and much more.
Most popular Zaps
Connect your marketing tools with your chatbot to organize your work and control your goals.
-
Add a new contact to Autopilot — When a visitor arrives at a predefined point of the scenario, Zapier automatically adds the new contact to Autopilot.
-
Create a new calendar event — Use the Zapier integration to automatically allow your chatbot to add events to your calendar.
-
Add new leads to Salesforce — Organize your contacts by adding them automatically to your Salesforce lists.
-
Add rows to Google Sheets — Collect any needed data and store it in your Google Sheets rows.
-
Create a new user in Intercom — Automate your Intercom user list with a single Zap.
-
Get emailed when an action is triggered — Control your ChatBot flow and get notified when a certain scenario step is reached.
-
Send an SMS when an action is triggered — Automatically text any phone number directly from the bot scenario.
How to prepare your bot
Zapier enables you to send information between apps. You can use ChatBot to collect all the necessary details and send them to your app using zaps.
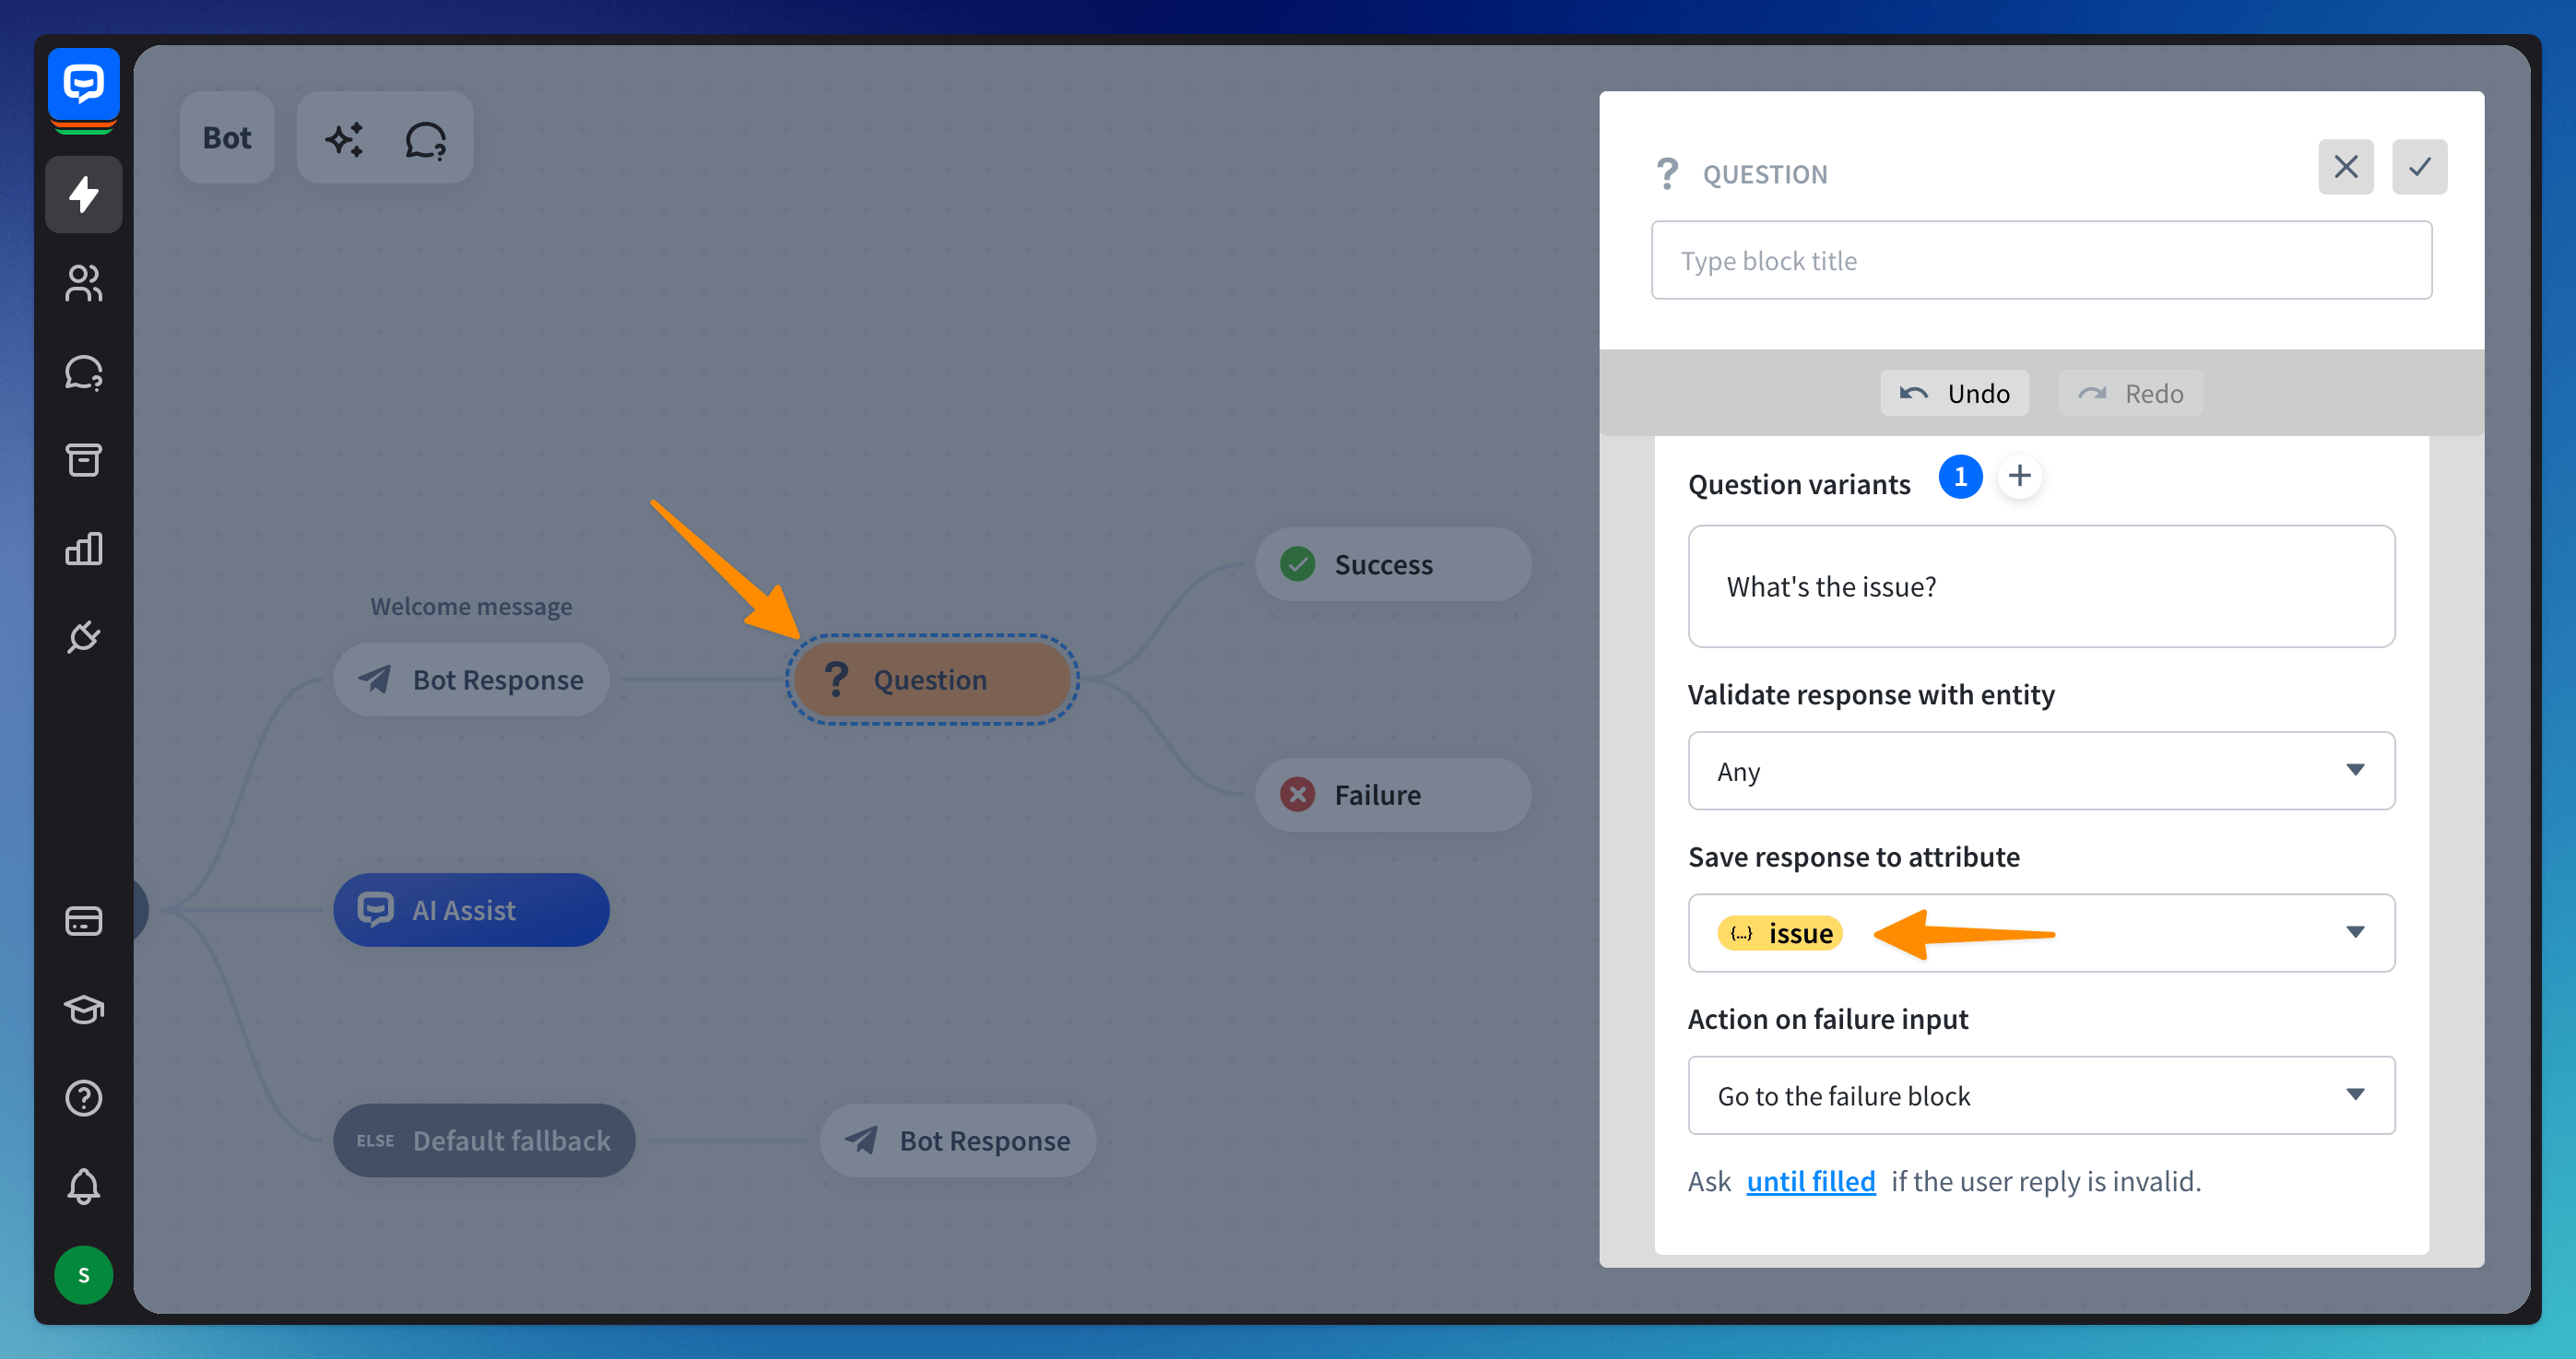
You need to use Attributes to save the needed details from your customers. The easiest way is to use the Question action - add the action to the bot and configure it. You can use our default attributes to collect basic user information and create custom attributes for more detailed information.
Remember to choose the correct validation type when setting up the Question action. Choose the Any validation type to save the whole message as an attribute.
If you would like to collect an email address or a phone number, we have dedicated Entities.
Remember to choose the correct validation type when setting up the Question action. Choose the Any validation type to save the whole message as an attribute.
If you would like to collect an email address or a phone number, we have dedicated Entities.
You can also add a Bot response block to inform your customers that you have their response. Then, you can Test the bot using Testing Tool to check if the flow suits your needs.
 Remember to Publish the bot when you are done and check the Archives to see the attributes.
Create a Zap
We have a native integration with Zapier. That means you can connect your bot with the app offered in the Zapier Marketplace directly in the bot view.
-
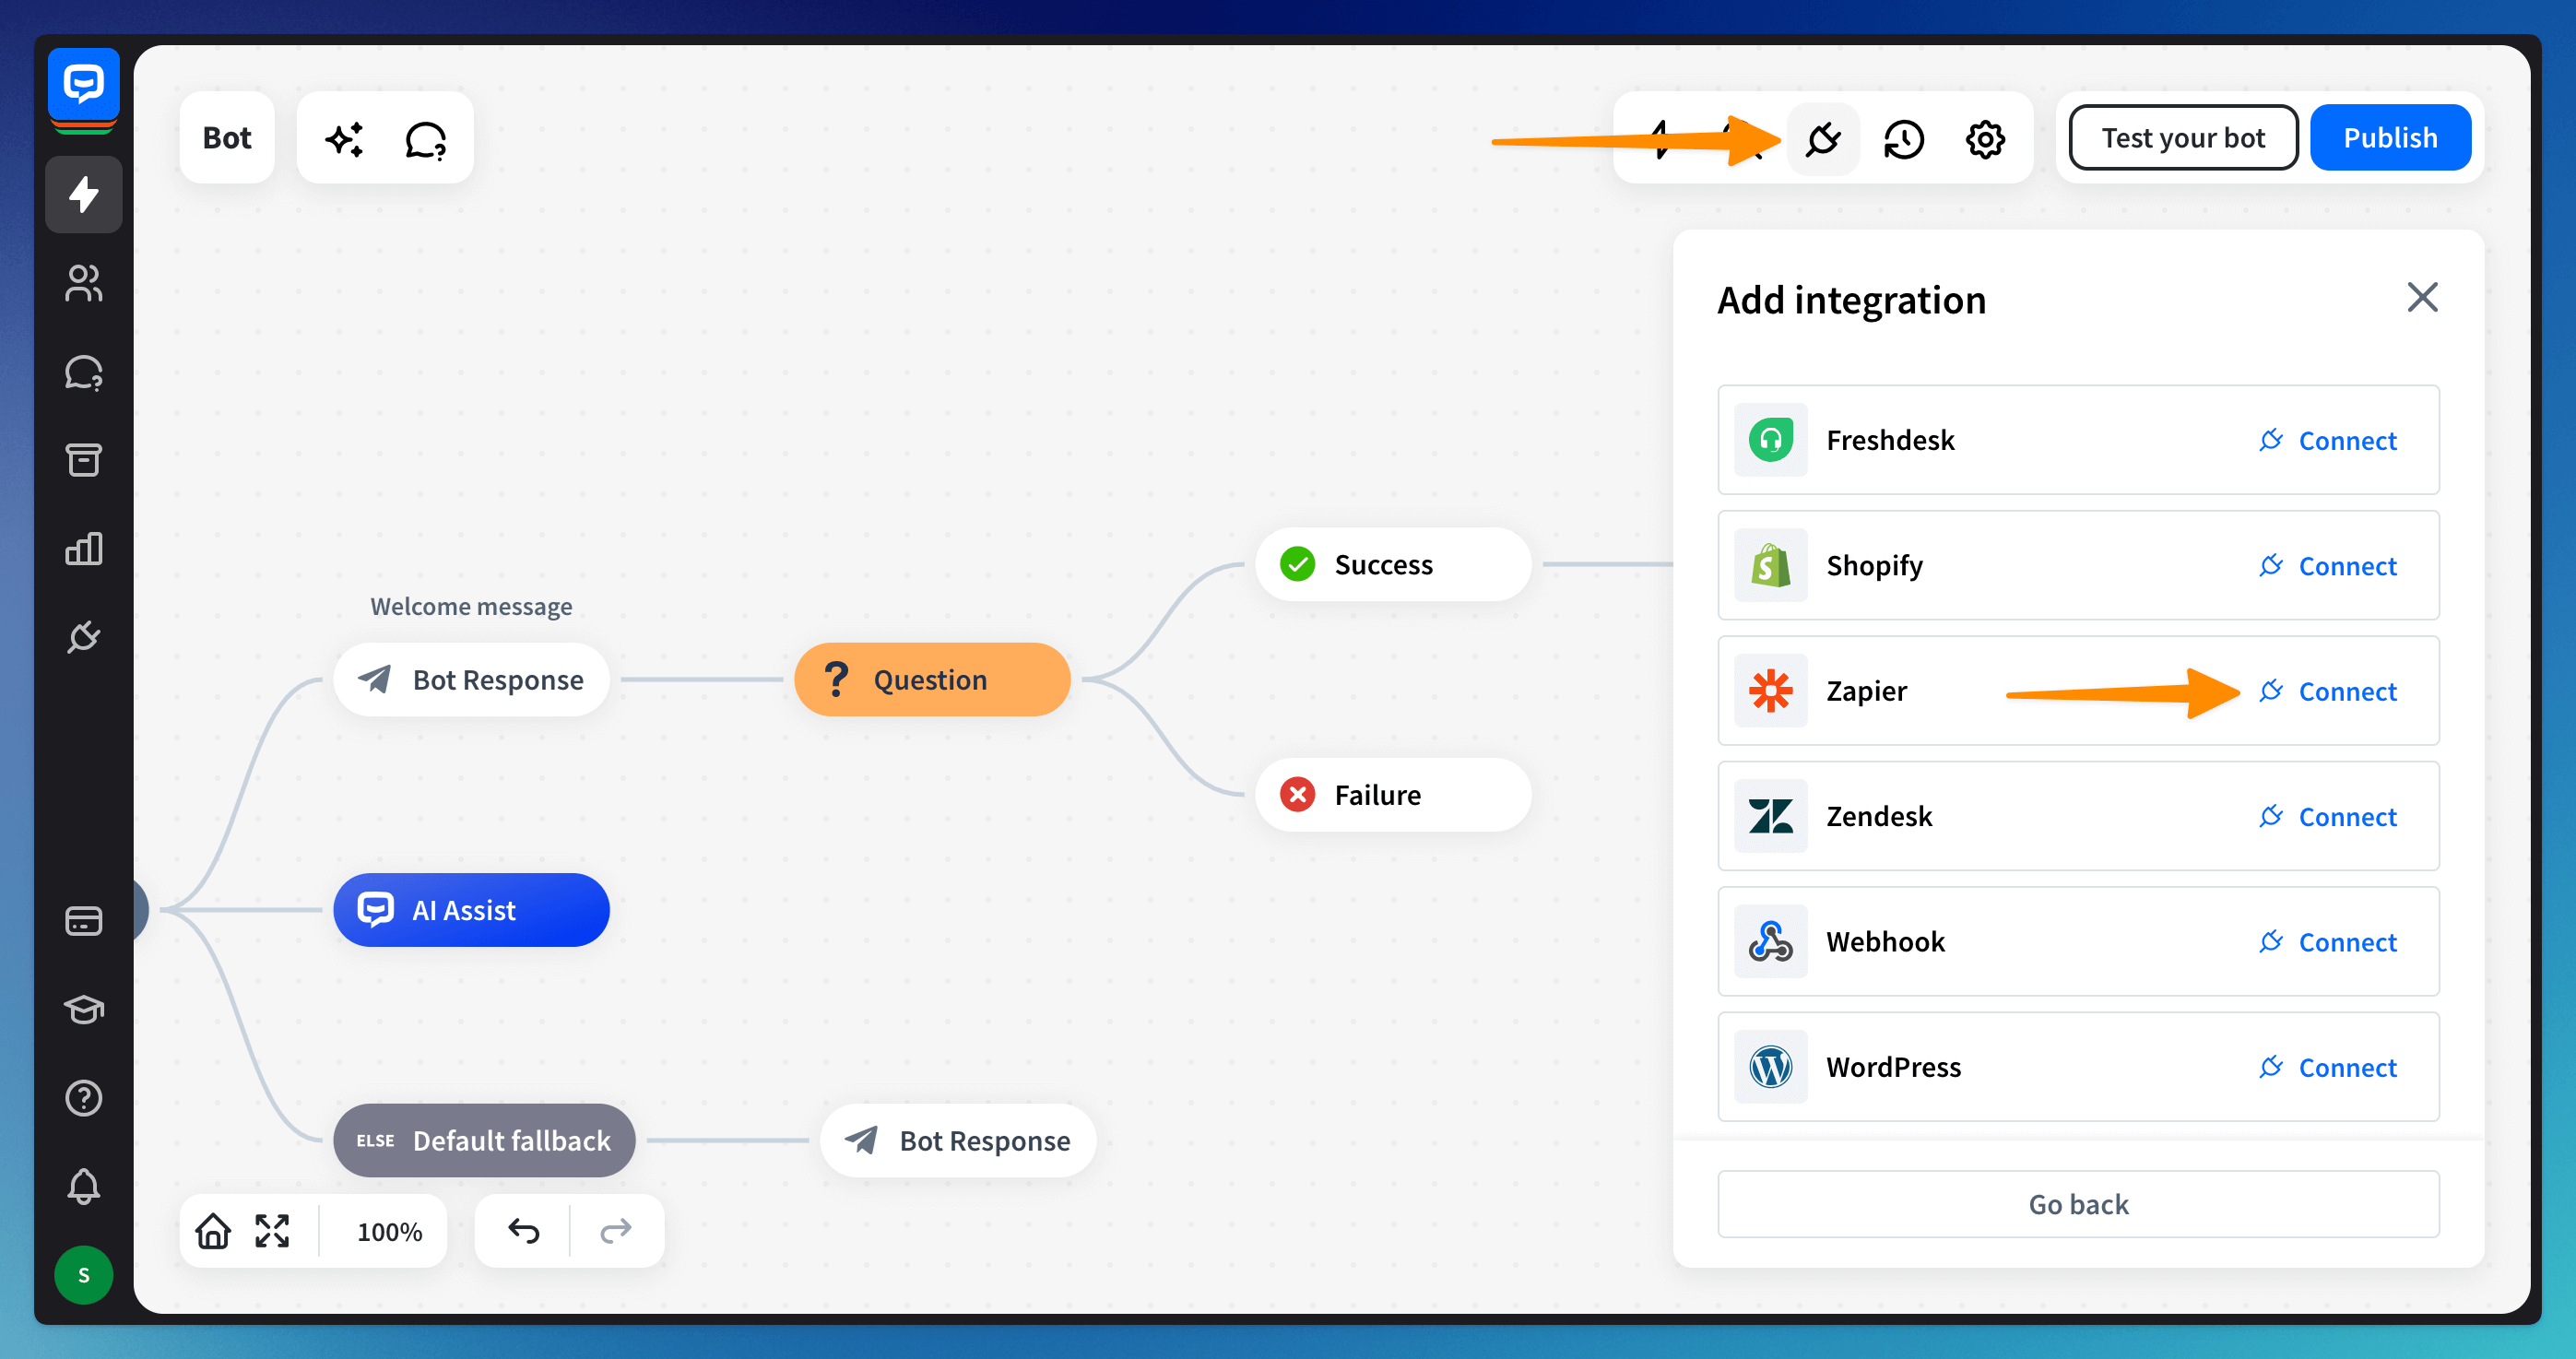
Go to the bot. Open the Integrations panel and choose Zapier from the list.
-
Click Connect with Zapier to start and pick a Zap from the list.
Provide your Zapier credentials if you are not logged in.
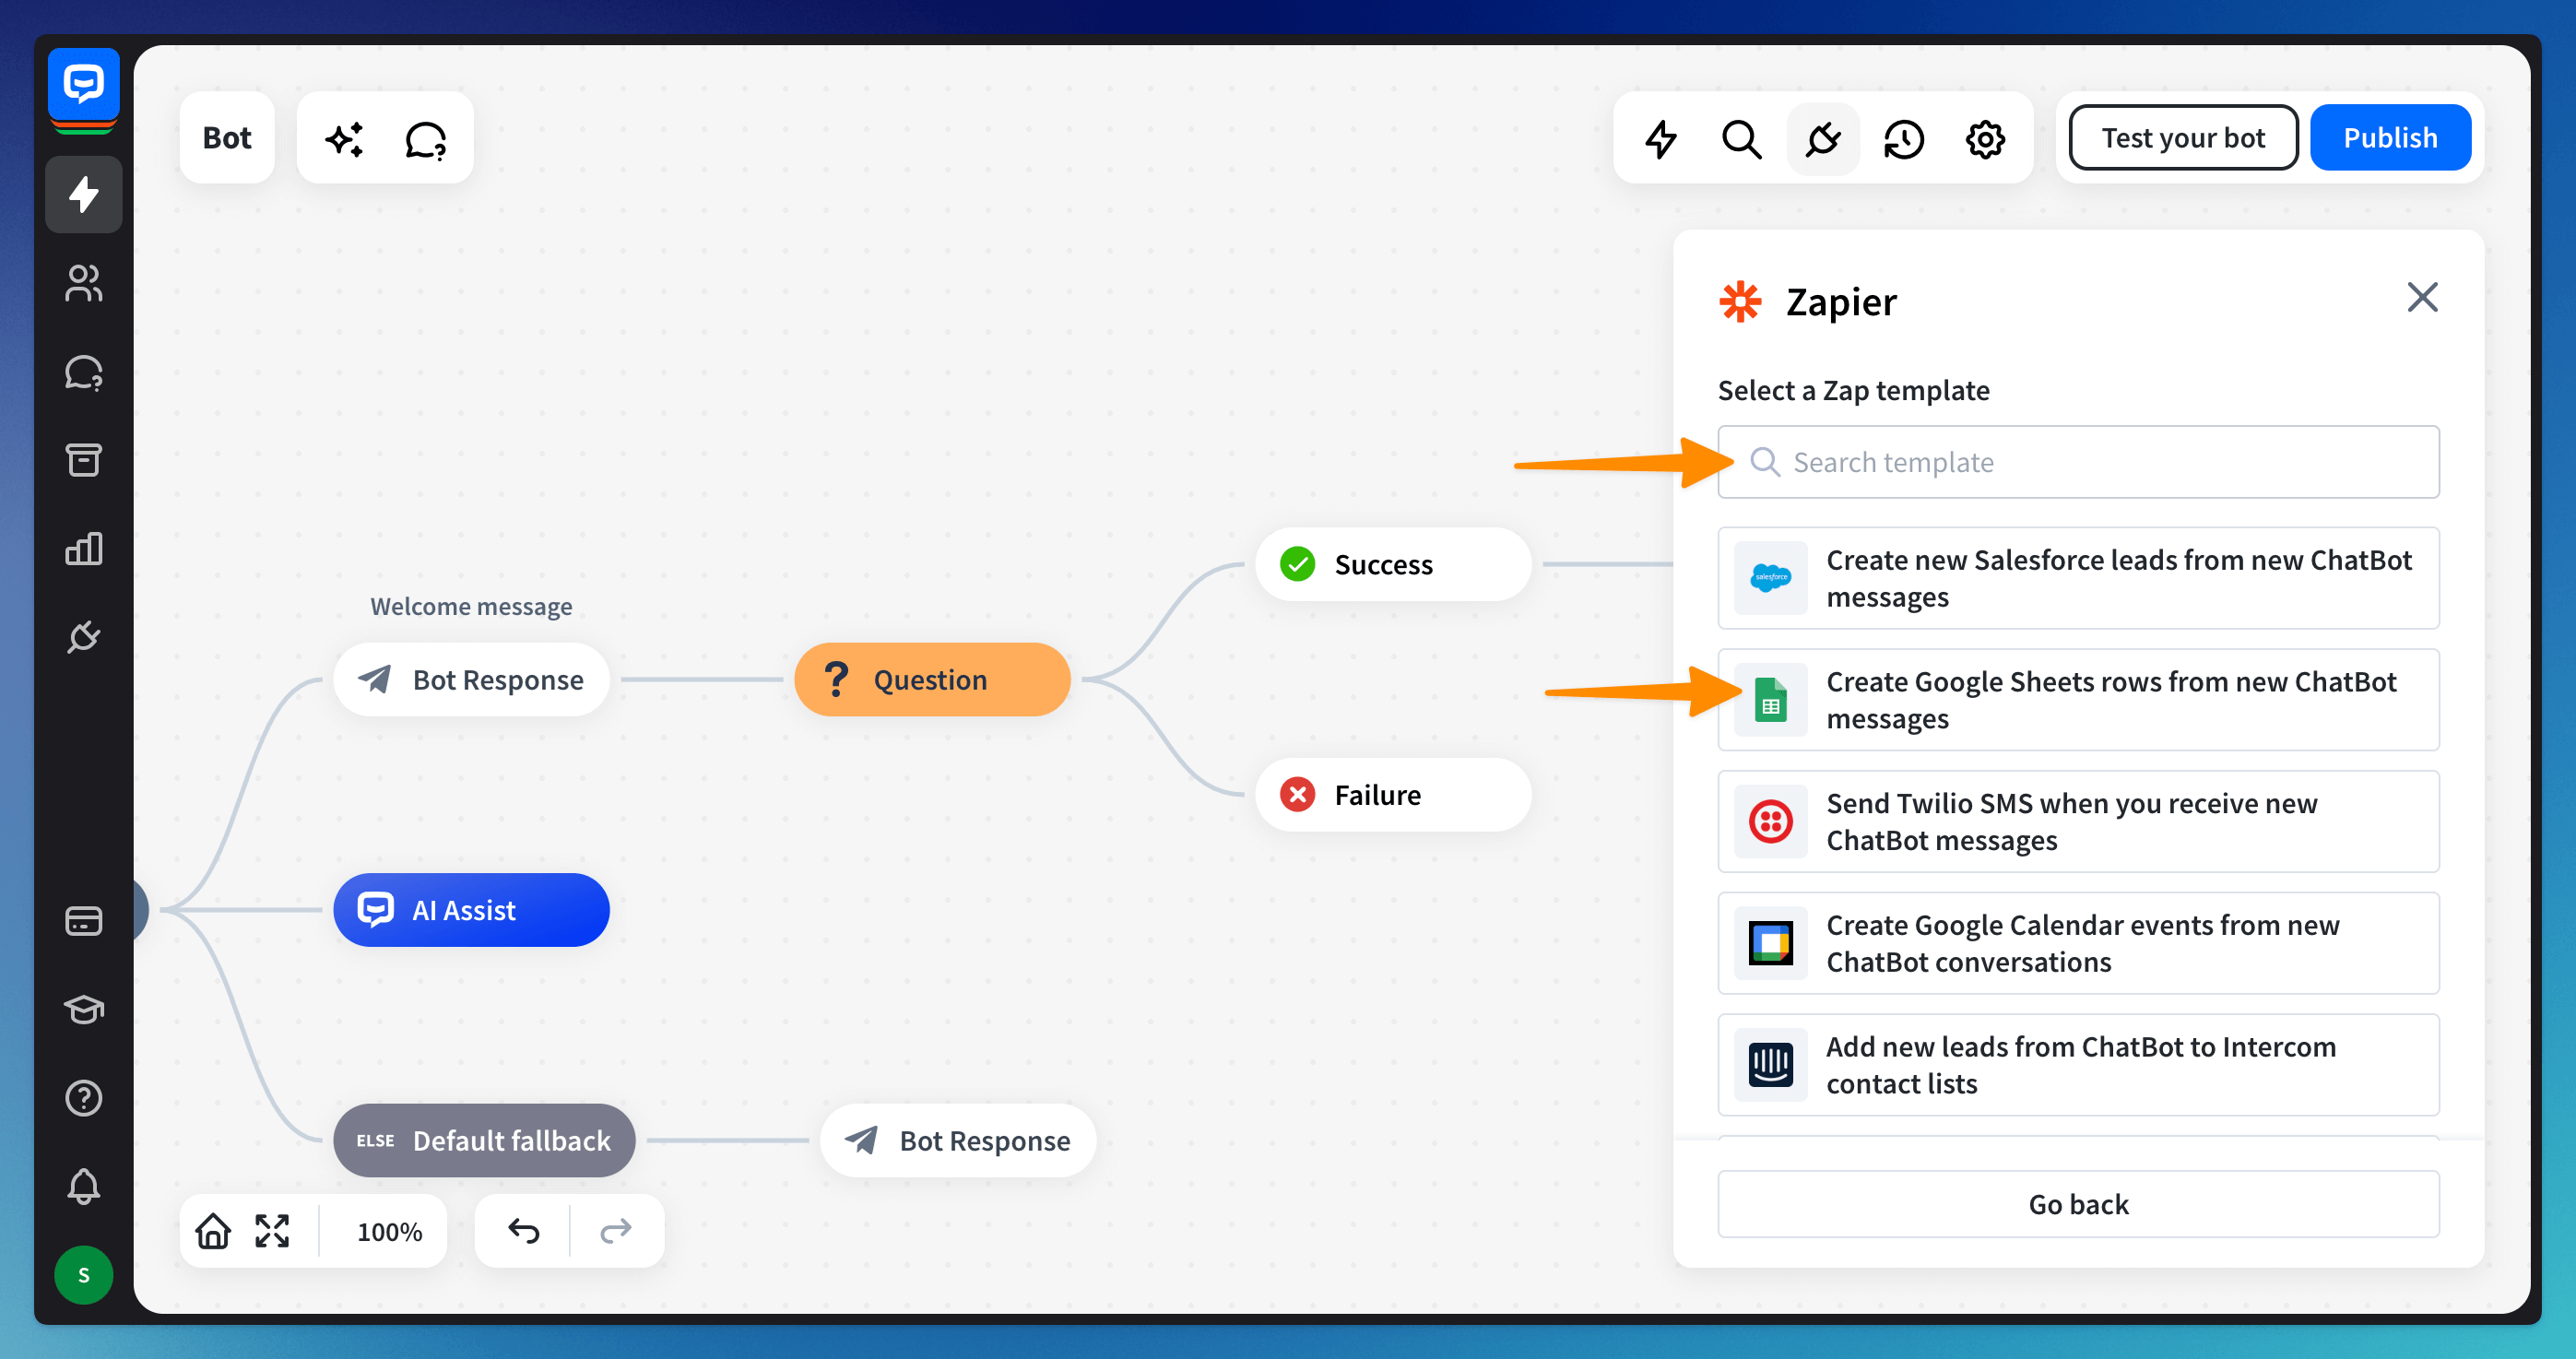
This is a list of the most popular zaps. If your app is not on the list, you can choose any available zap and change the app in the next step.
You can also search for the desired app and see if we have a template prepared.
This is a list of the most popular zaps. If your app is not on the list, you can choose any available zap and change the app in the next step.
You can also search for the desired app and see if we have a template prepared.
-
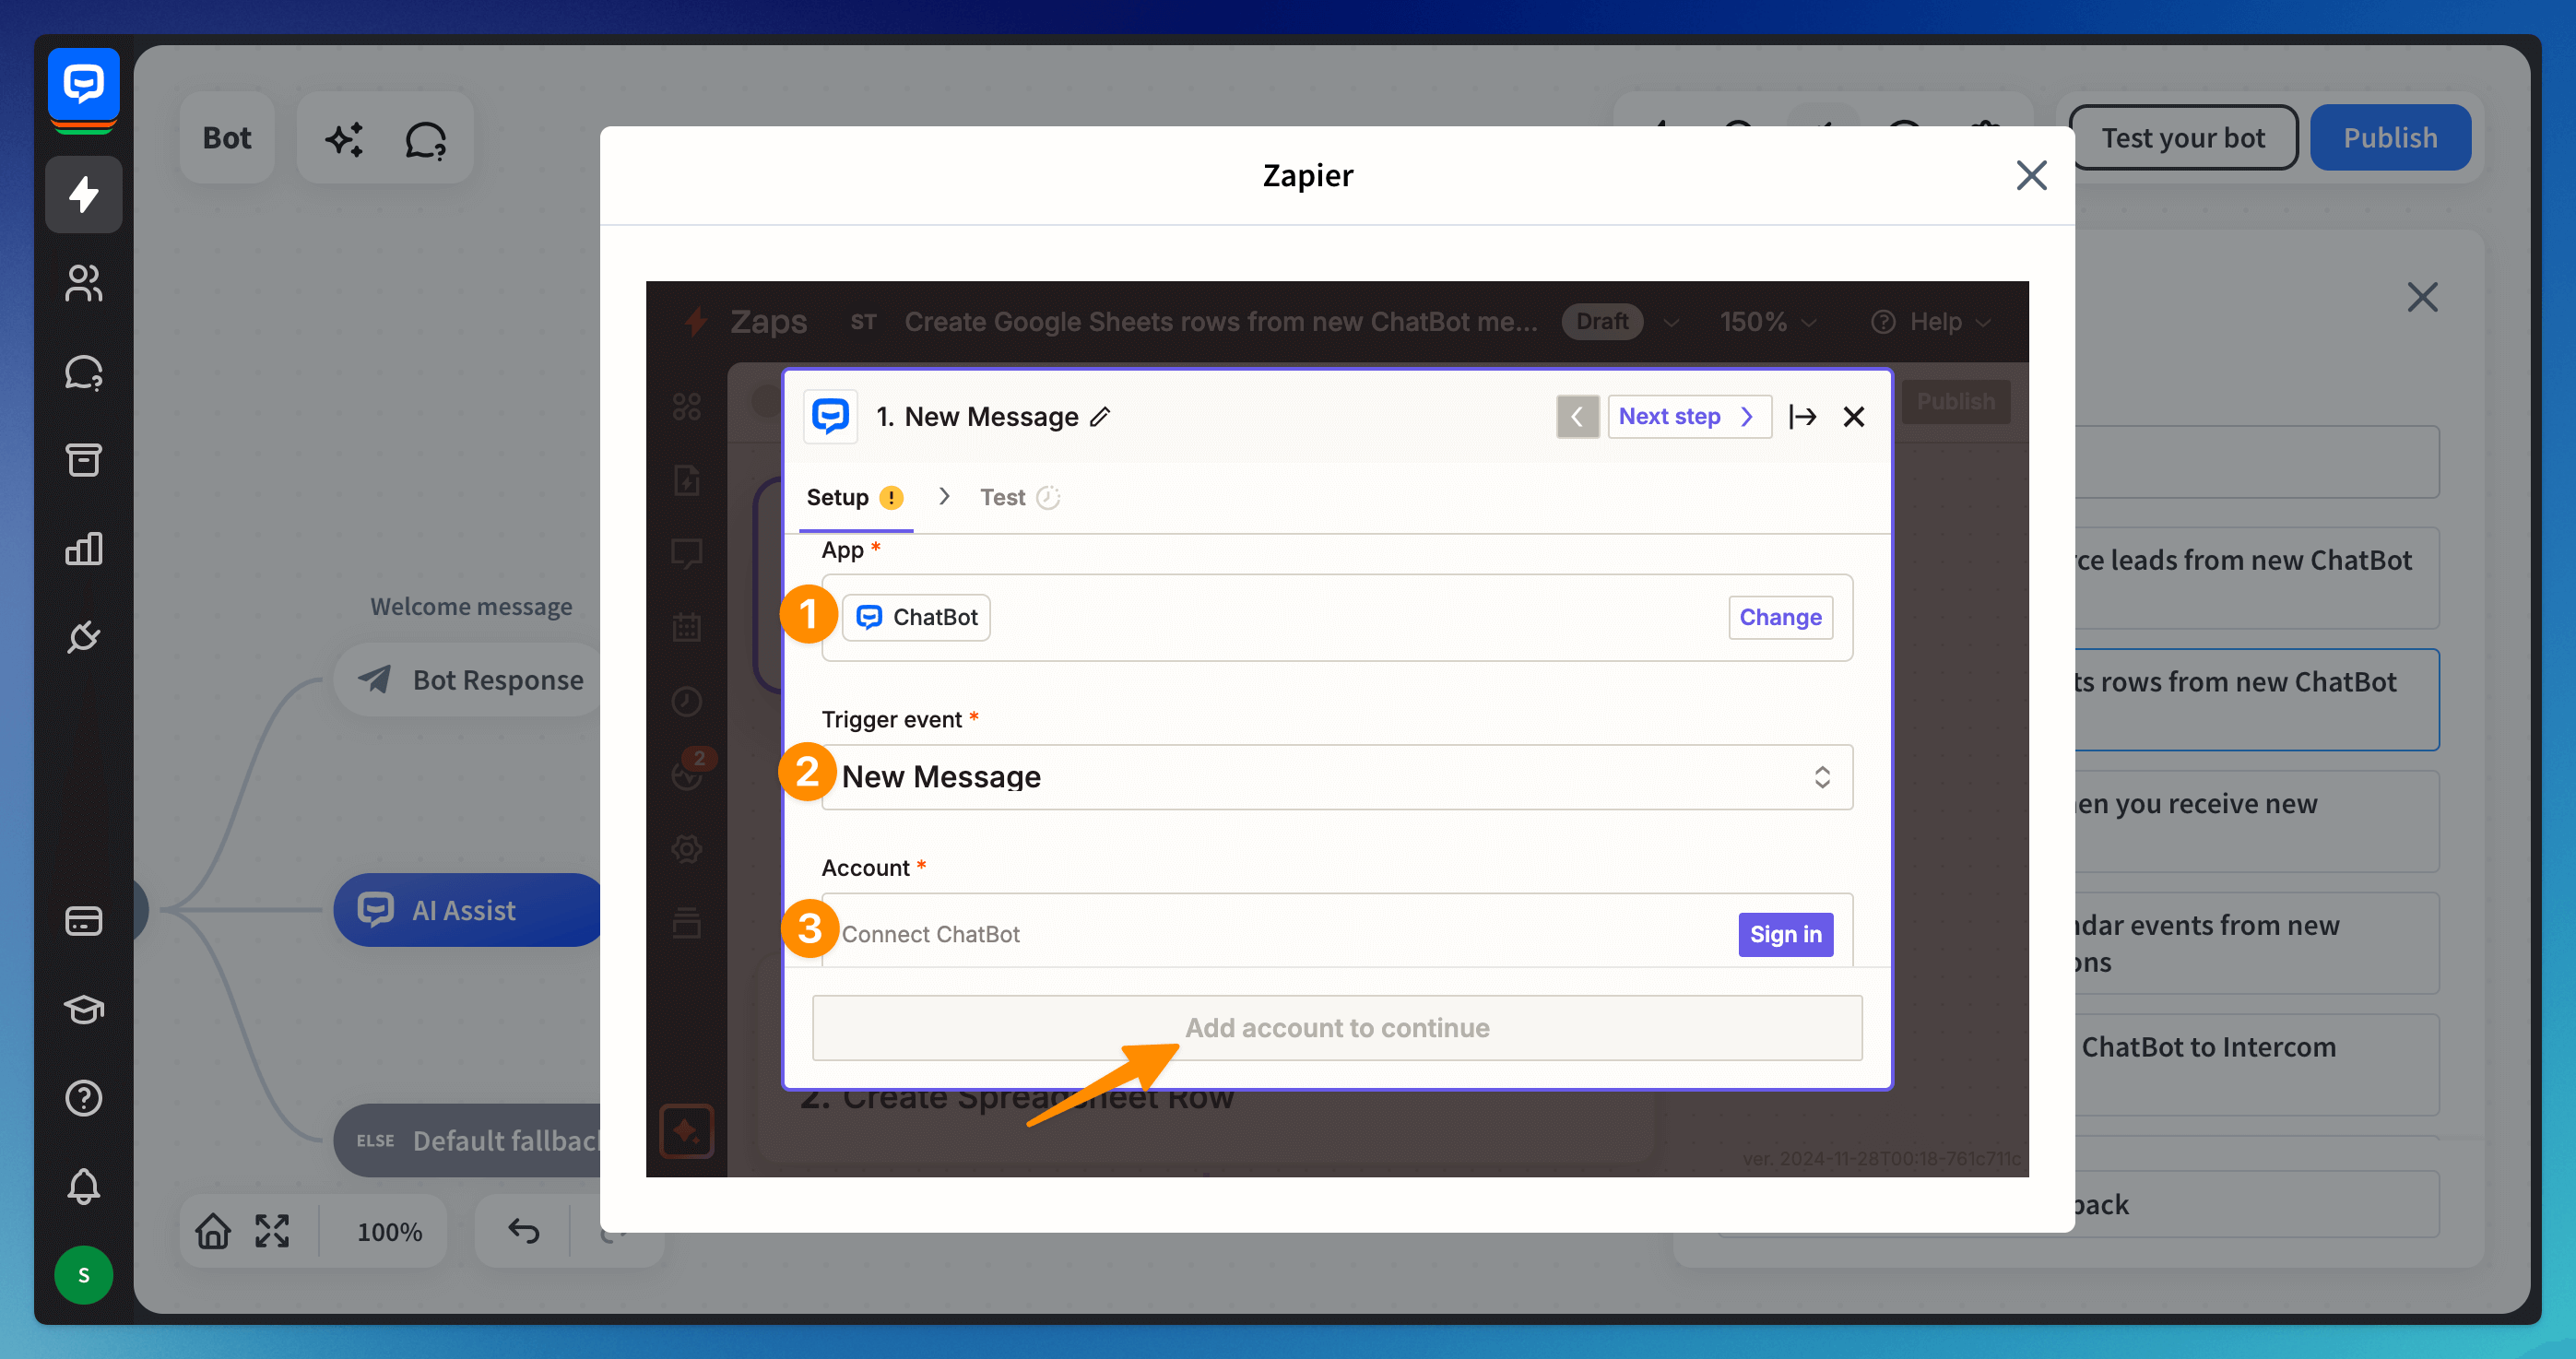
Click on the ChatBot module. Choose ChatBot in the App field (1), the New message in the Trigger event field (2). Then, sign in to the ChatBot account (3). Continue.
-
Choose the bot in the Story field (1) and a block from the bot (2). Continue.
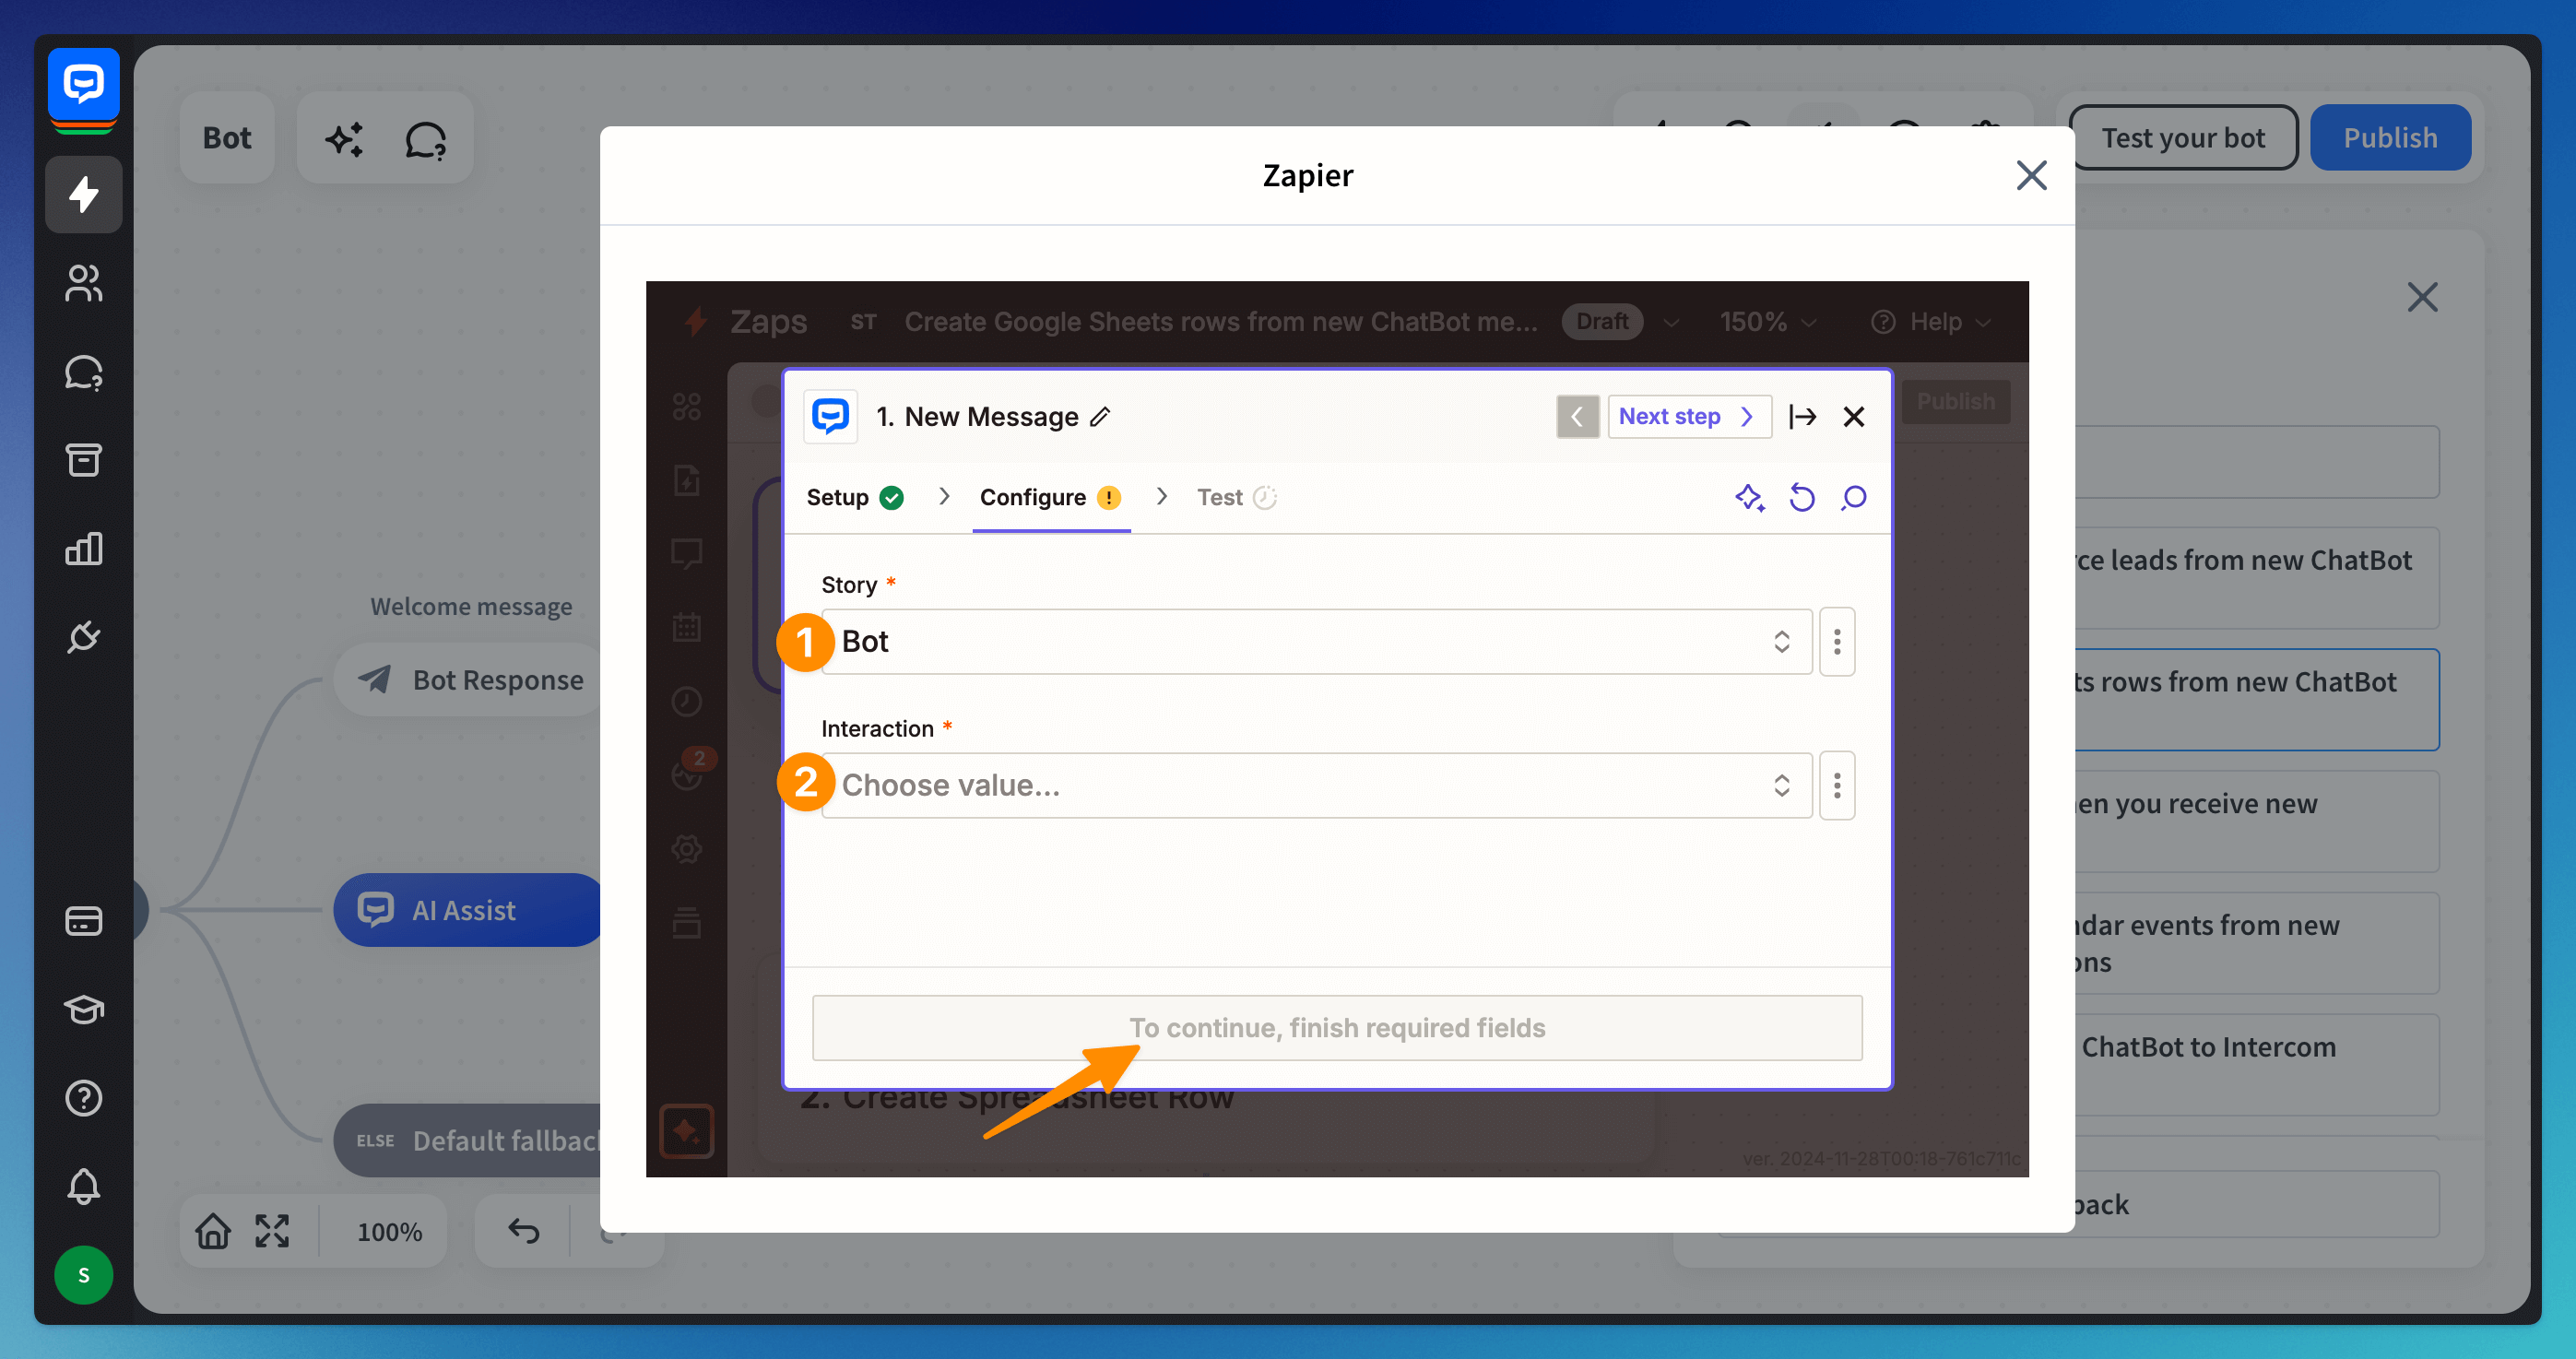
You should choose the block that is after the Question block. This will ensure that all the questions are answered, and the bot collects all the answers.
If you are not using the Question action in your bot, choose the block after the block where you collect your attributes.
You should choose the block that is after the Question block. This will ensure that all the questions are answered, and the bot collects all the answers.
If you are not using the Question action in your bot, choose the block after the block where you collect your attributes.
-
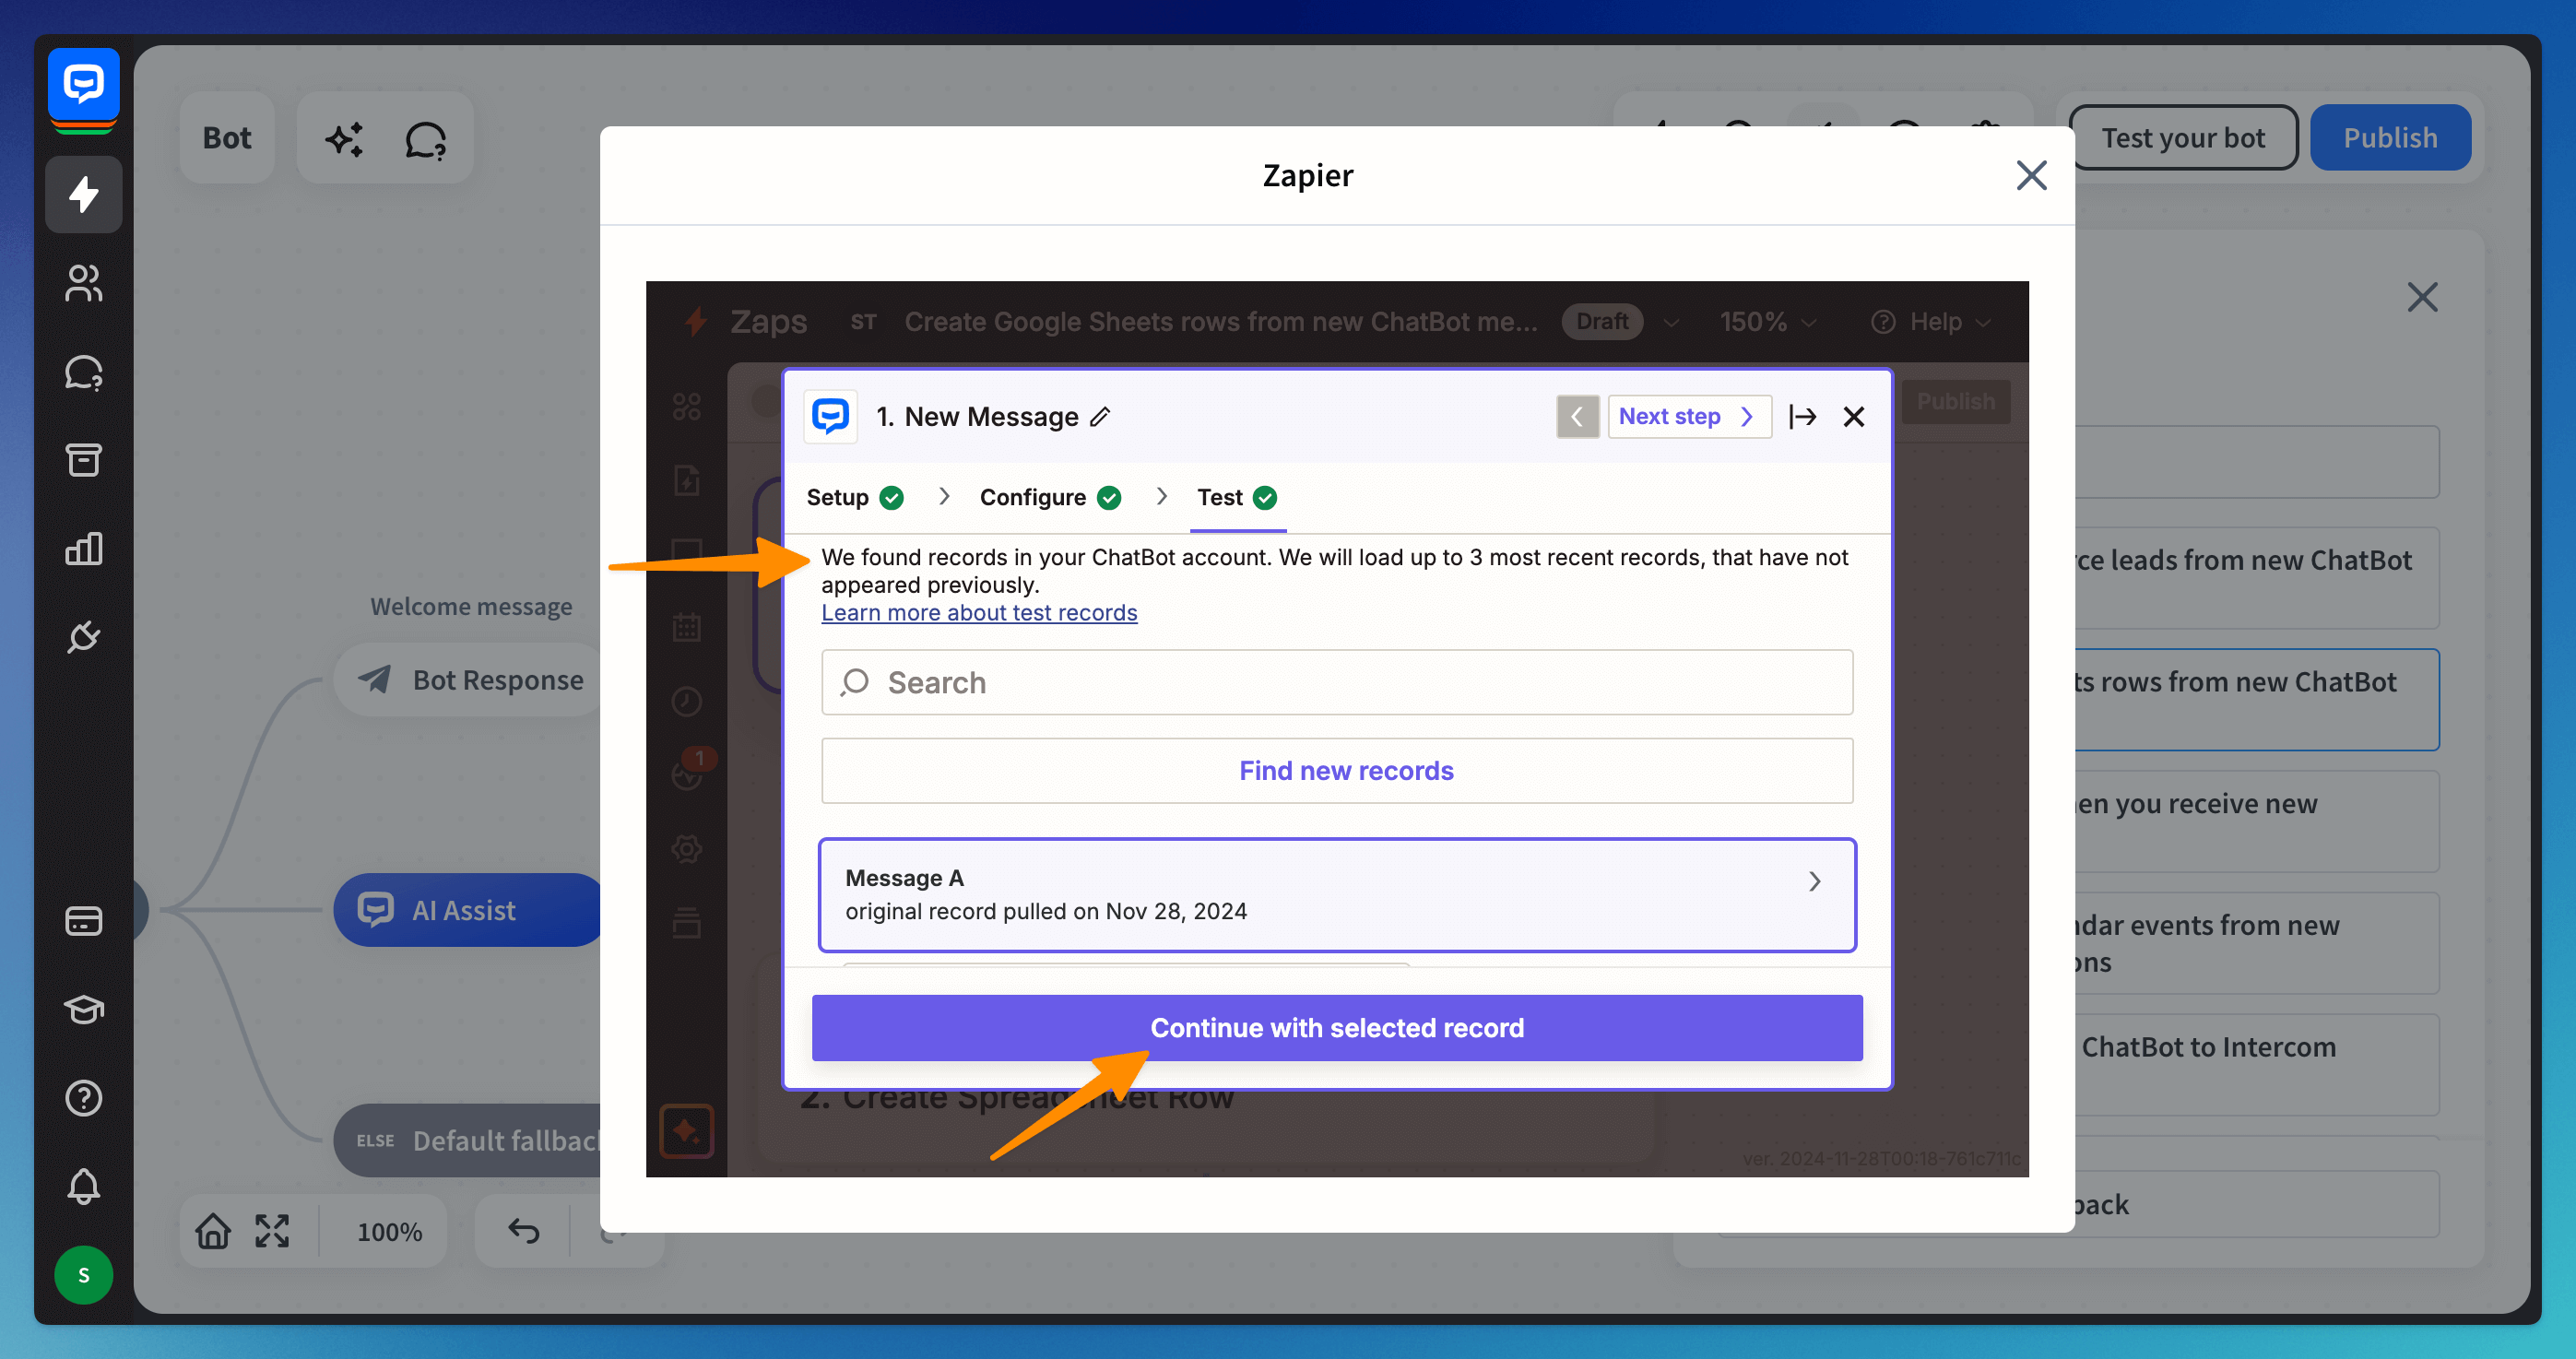
Test the trigger. The Zap found the block when you see all the attributes in the details of Message A. Continue.
-
Remember to turn your Zap off and back on after making any changes. Don’t forget to also click the Publish button in ChatBot each time you edit the Zap.
How to configure an app
In the next configuration phase, choose the app you want to integrate with the bot. You can choose from various applications.
See how to integrate the bot and choose the correct values in the configuration process with:
-
Google Sheets to gather all the information in one place and have easy access to it
-
Gmail to send emails when the user triggers the Zapier block in the bot
Do you not see your desired app in the options offered in Zapier? Try to configure your own Webhooks with Zapier.
Read more:
