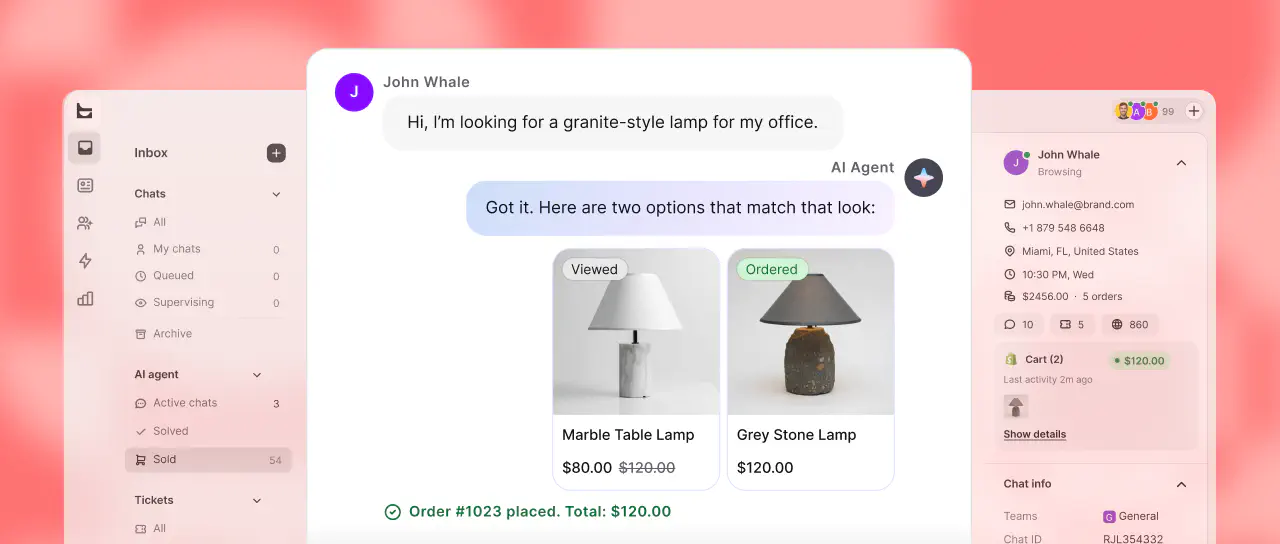
With Zapier, you can connect your chatbot with apps such as Gmail, Google Sheets, and more to automate repetitive tasks. The installation process takes a few minutes and you can finish it directly in the bot builder view.
You can create your integration when your app is unavailable in the Zapier Marketplace. With Webhooks by Zapier, you can integrate the bot with even more apps. The integration doesn’t require coding skills.
Bot configuration
First, we need a bot flow that collects this data. We recommend using the Question action to gather information from users. Follow the detailed explanation of how to set up the bot.
To complete this tutorial, you must have Zapier and ChatBot accounts:
Zap configuration
This configuration needs to be performed in ChatBot and Zapier simultaneously, so make sure you have both accounts open in the browser and can switch between the open tabs.
-
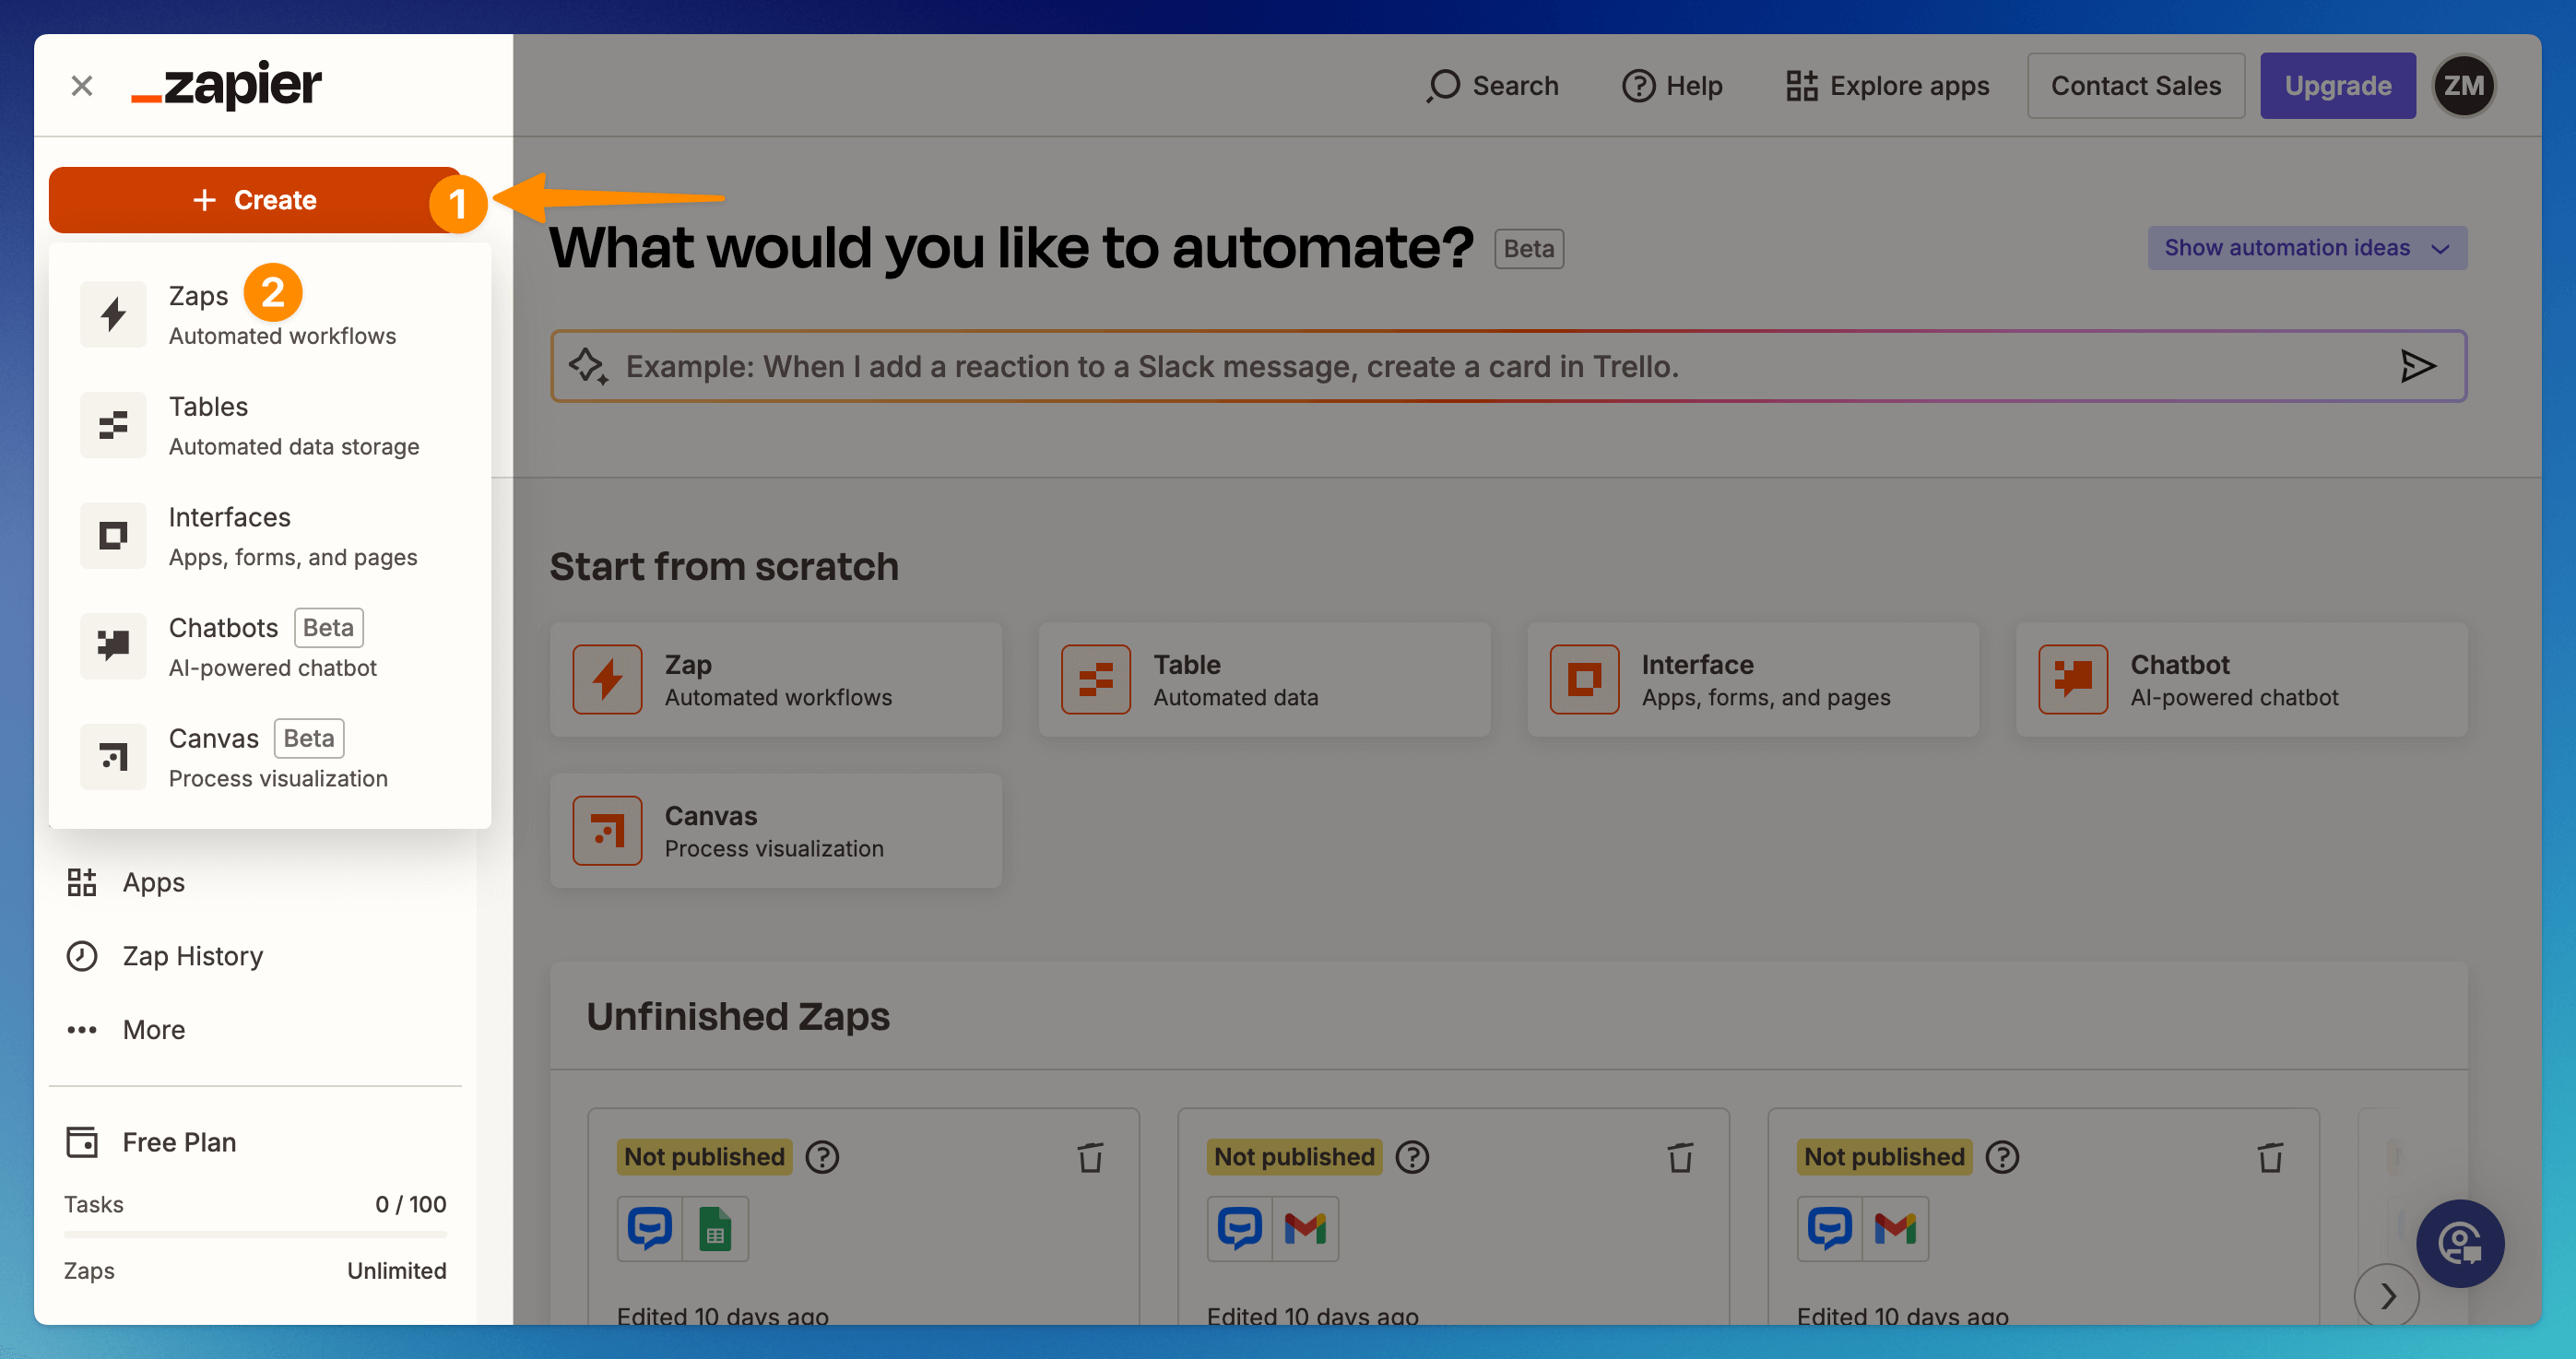
Go to zapier.com and choose the Create button on your account. Choose Zaps from the list.
-
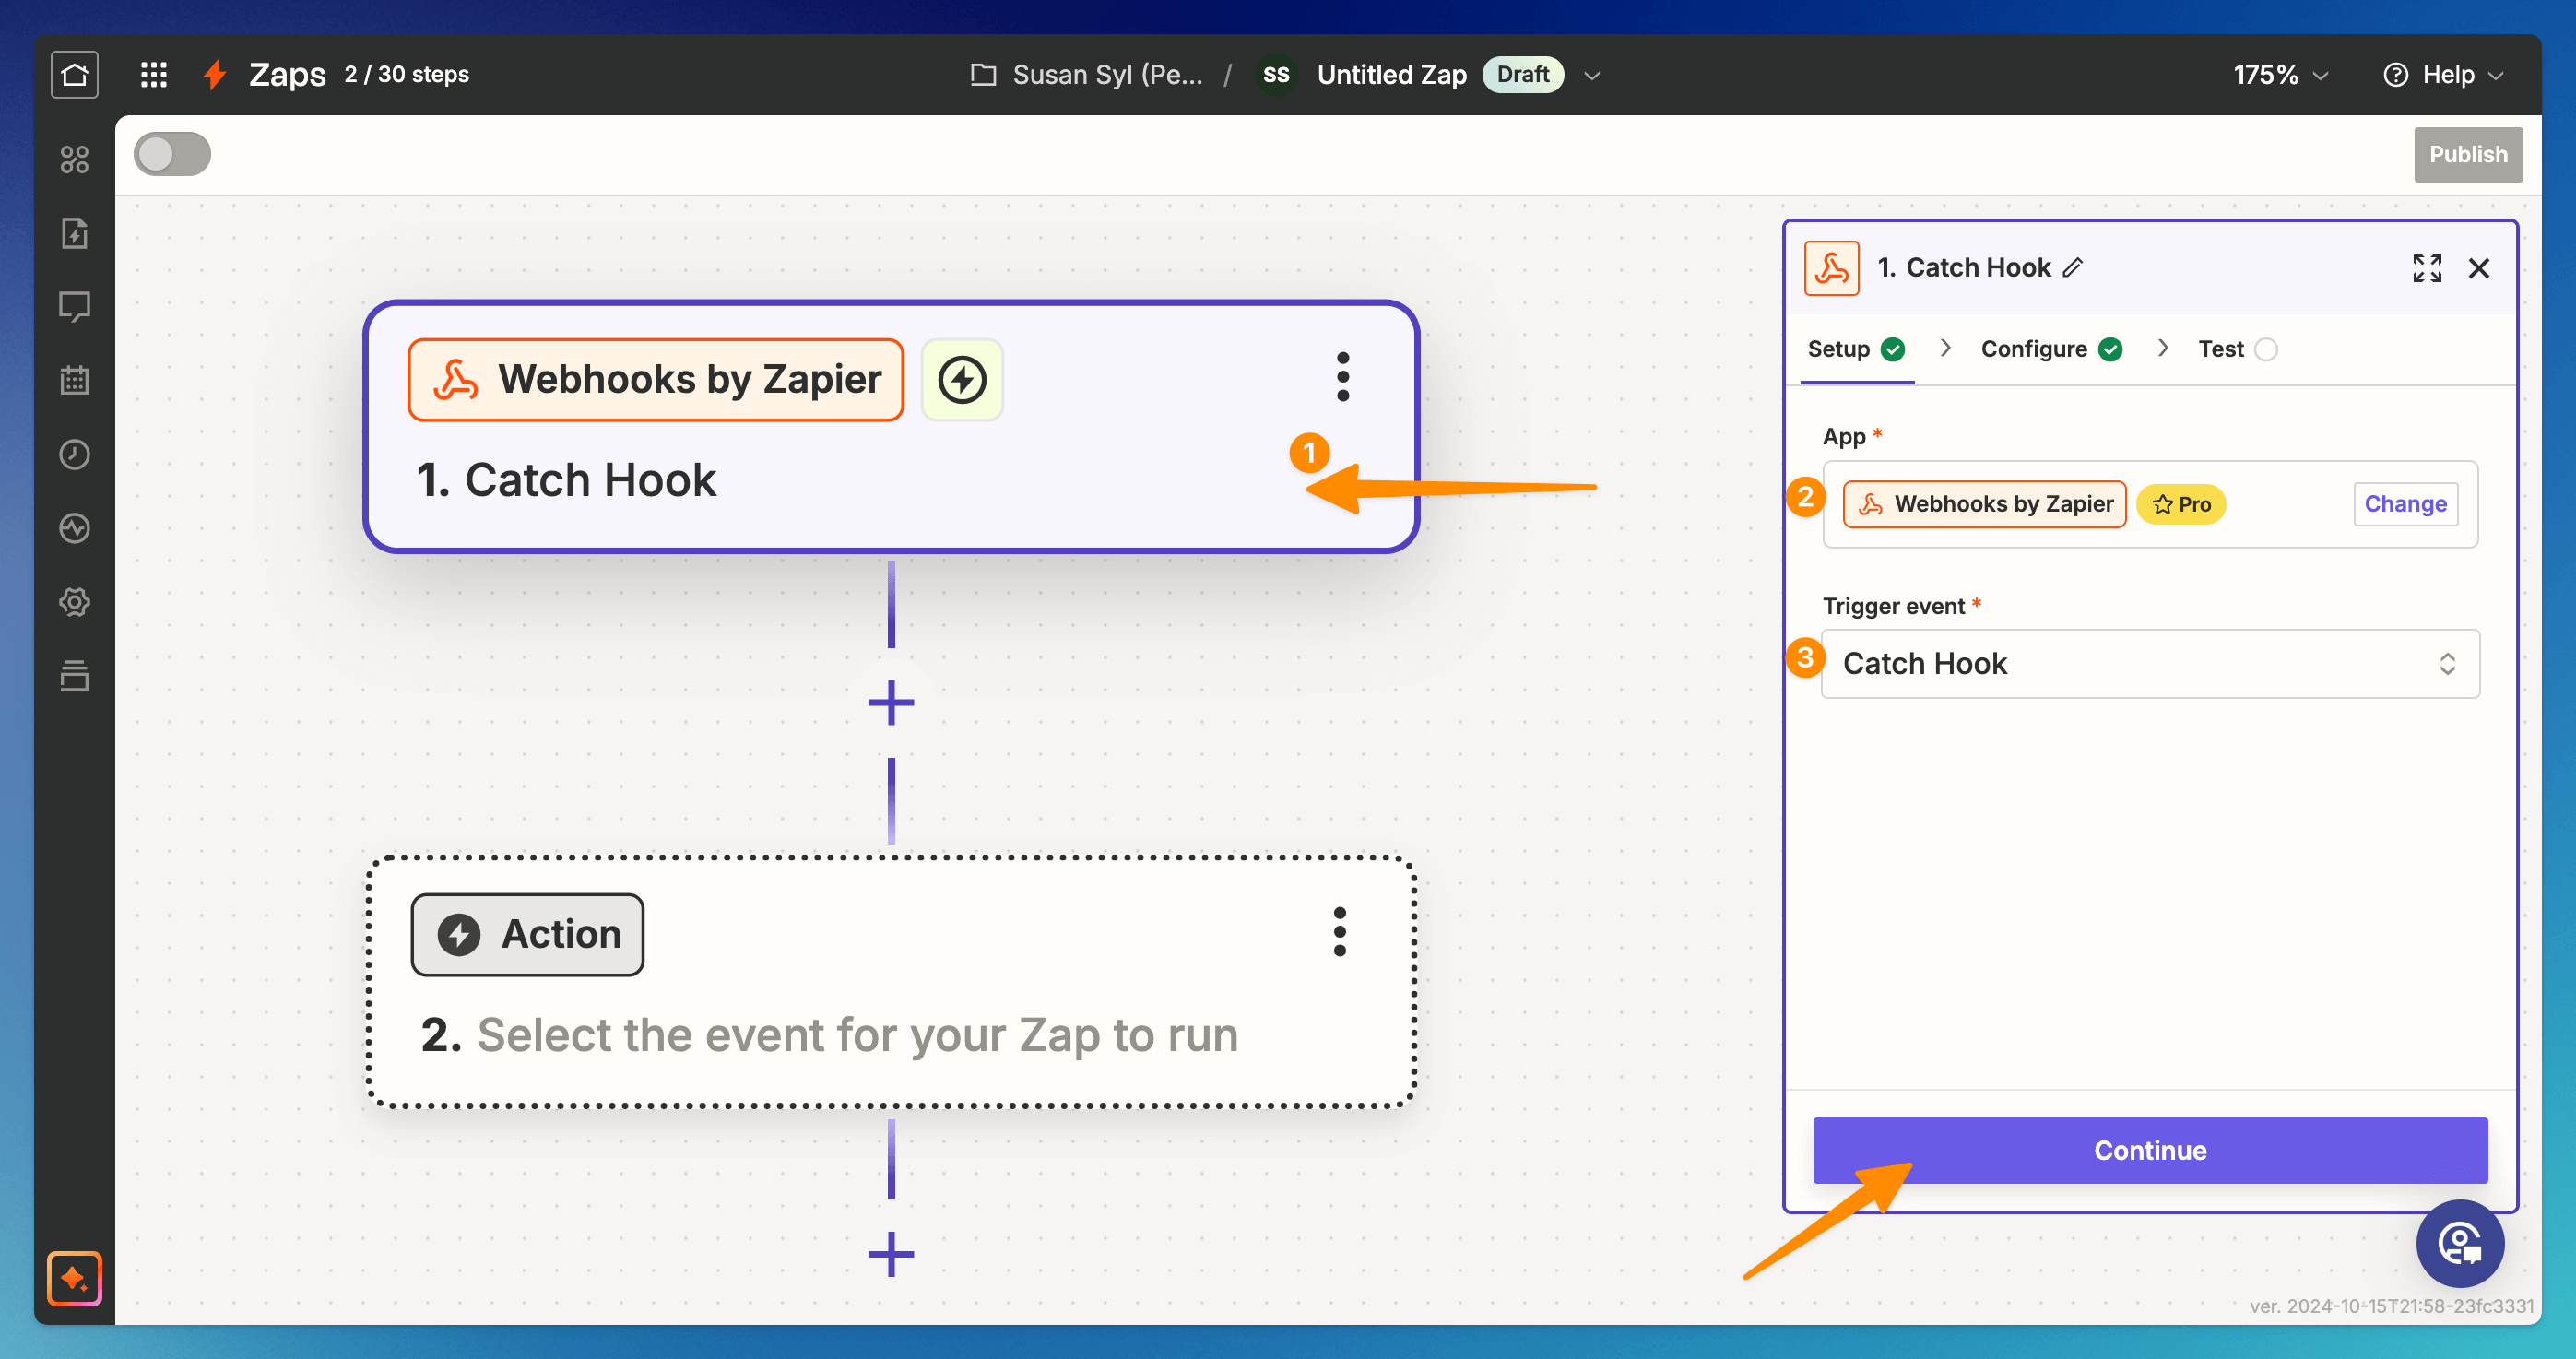
In the Trigger module, choose: (2) Webhooks by Zapier, and in the Trigger event field, choose (3) Catch hook option. Continue.
-
Pick off a Child Key is an optional field. You can continue without providing this information.
-
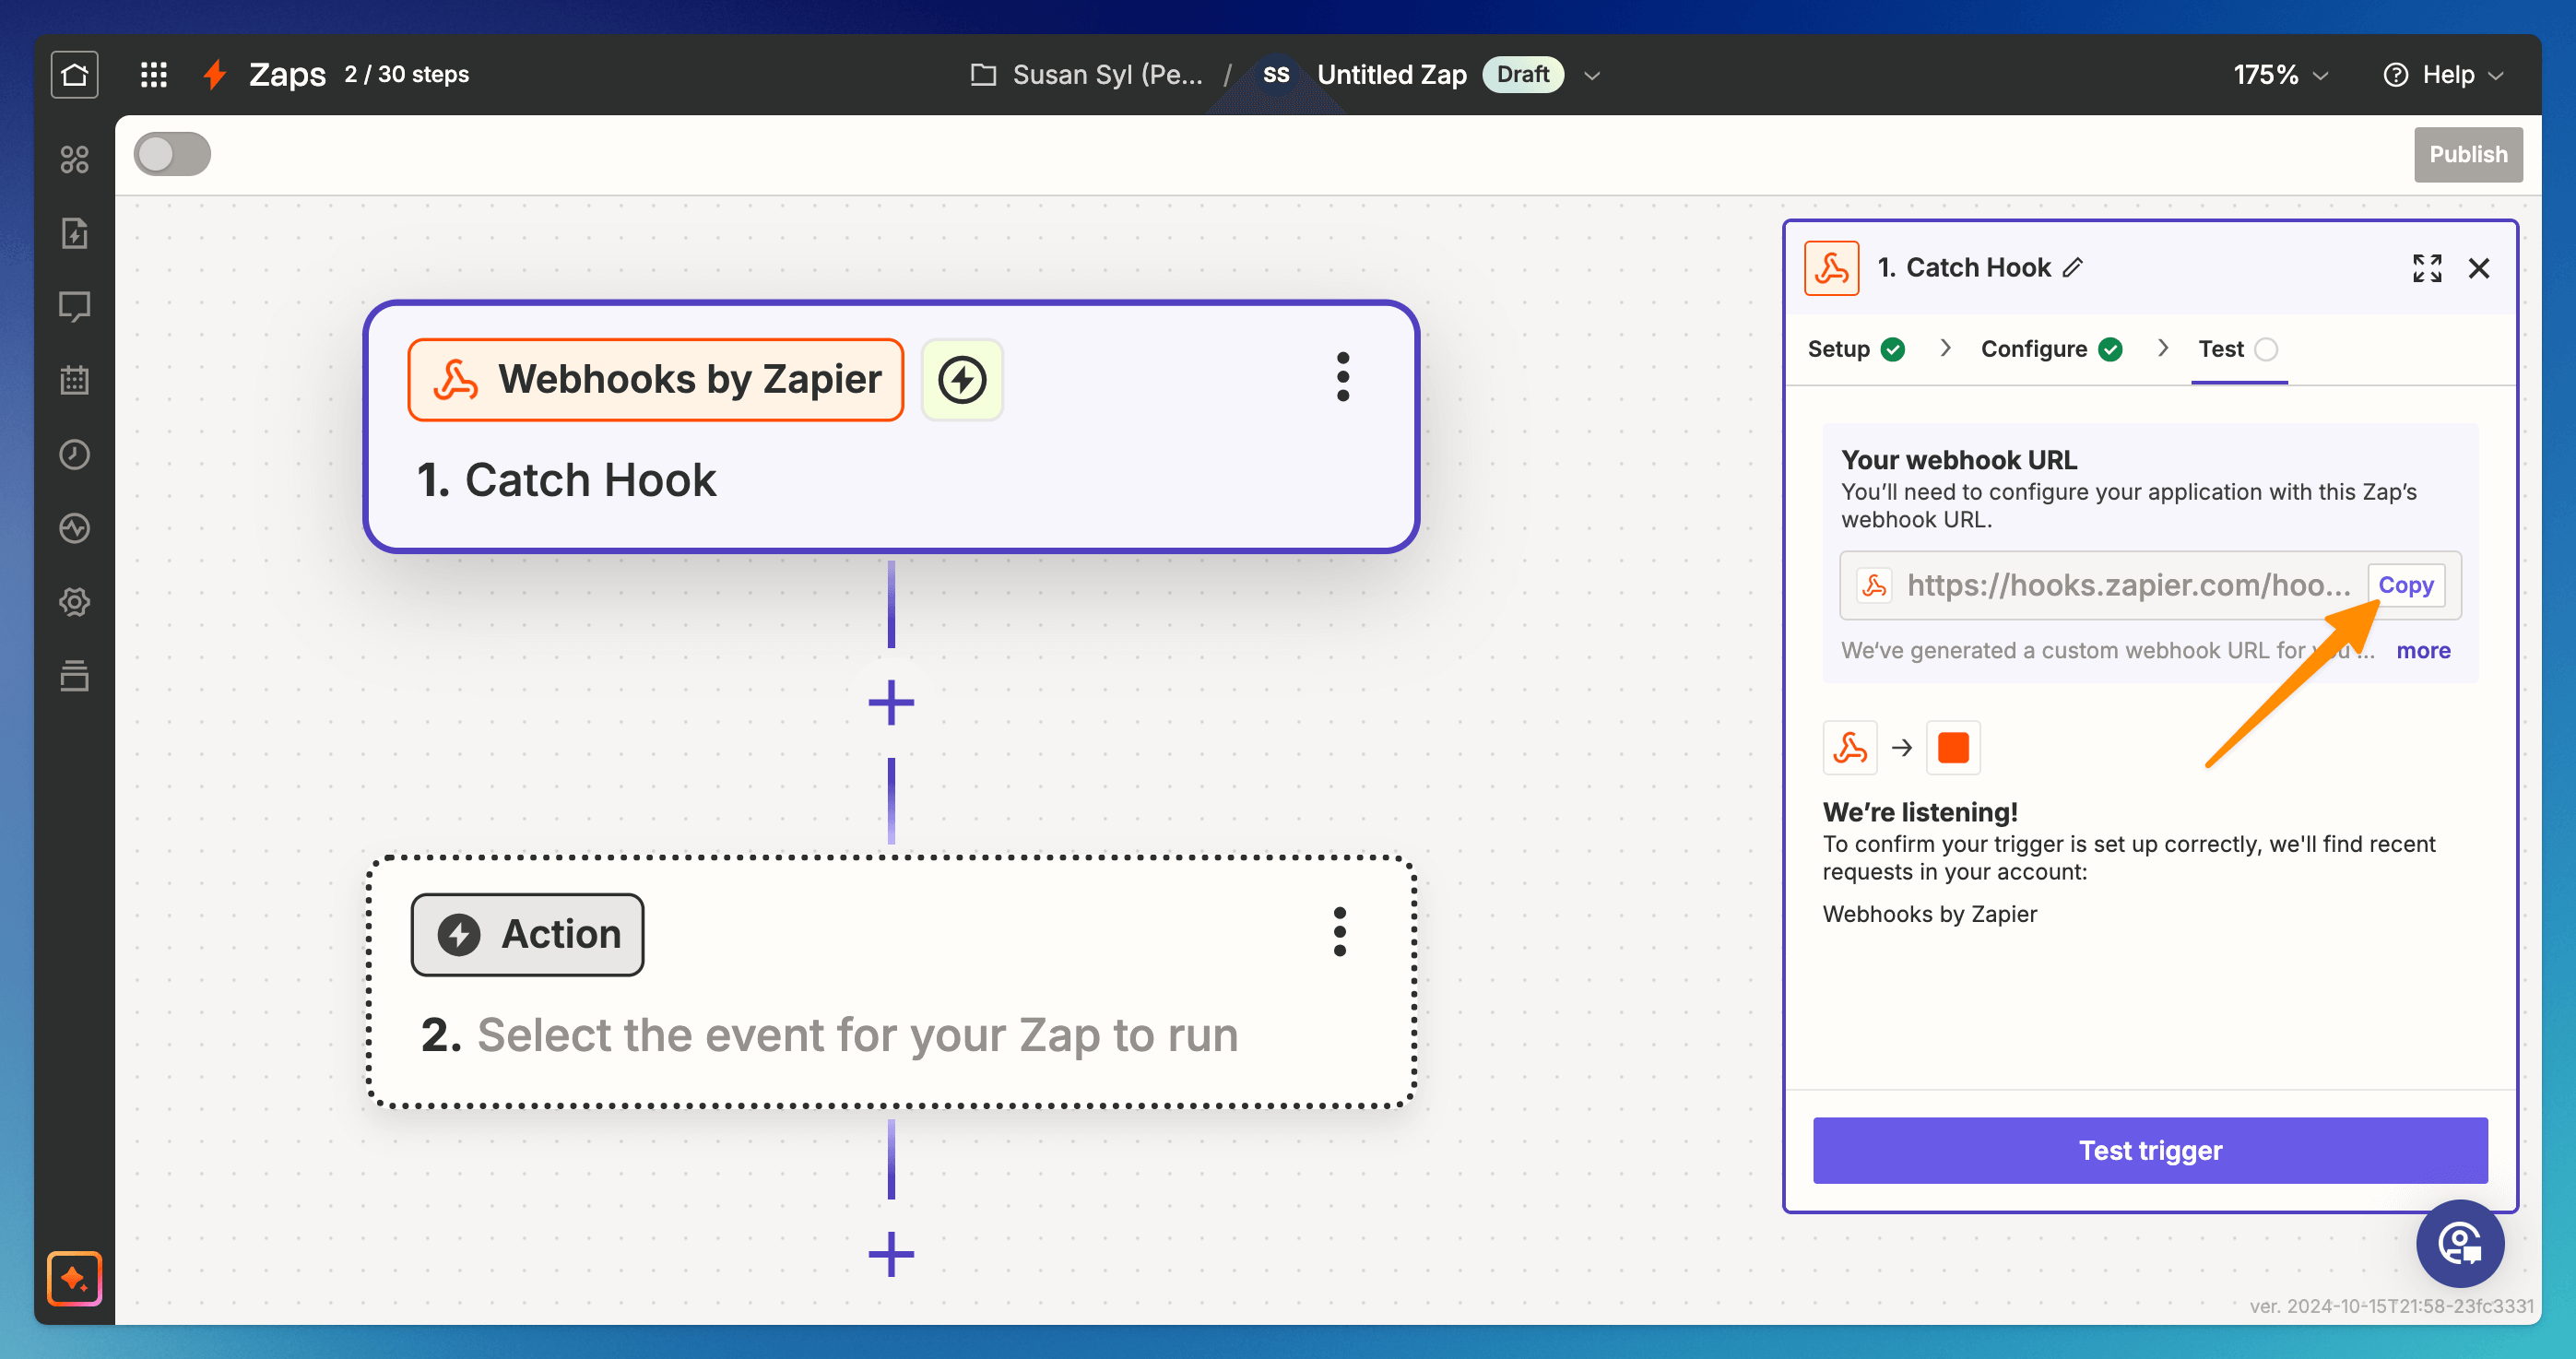
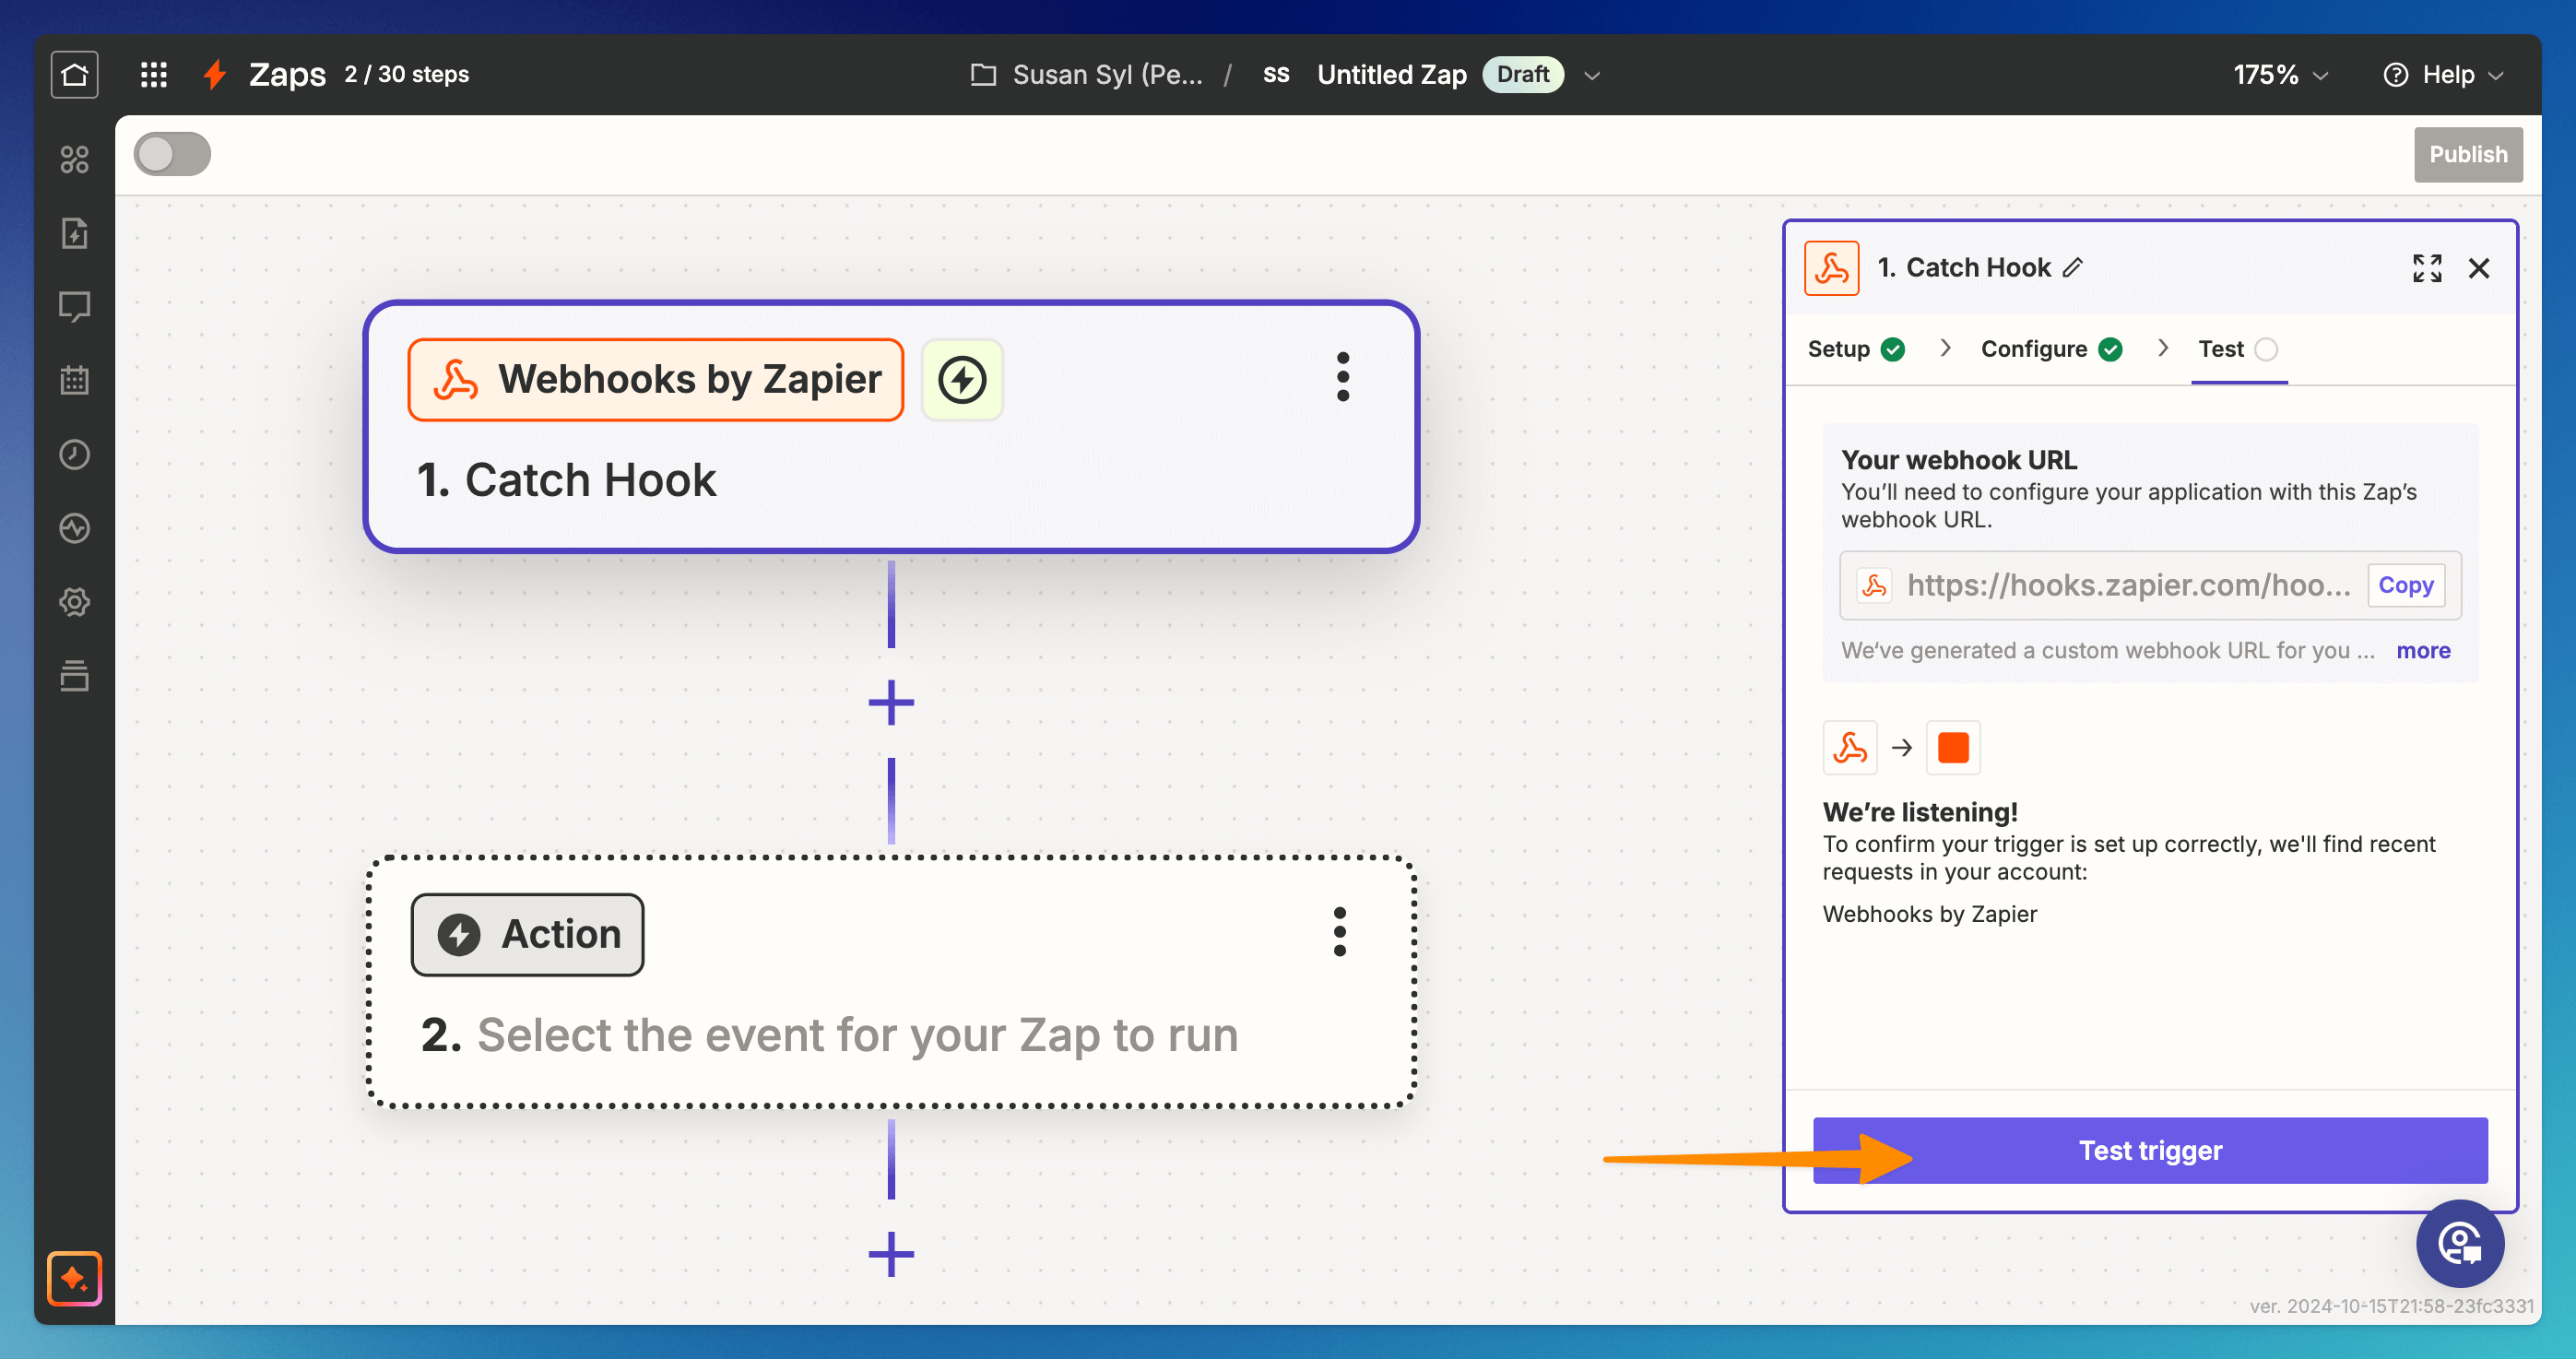
Copy the webhook URL generated by Zapier. We will paste it to the ChatBot webhook in the next steps.
-
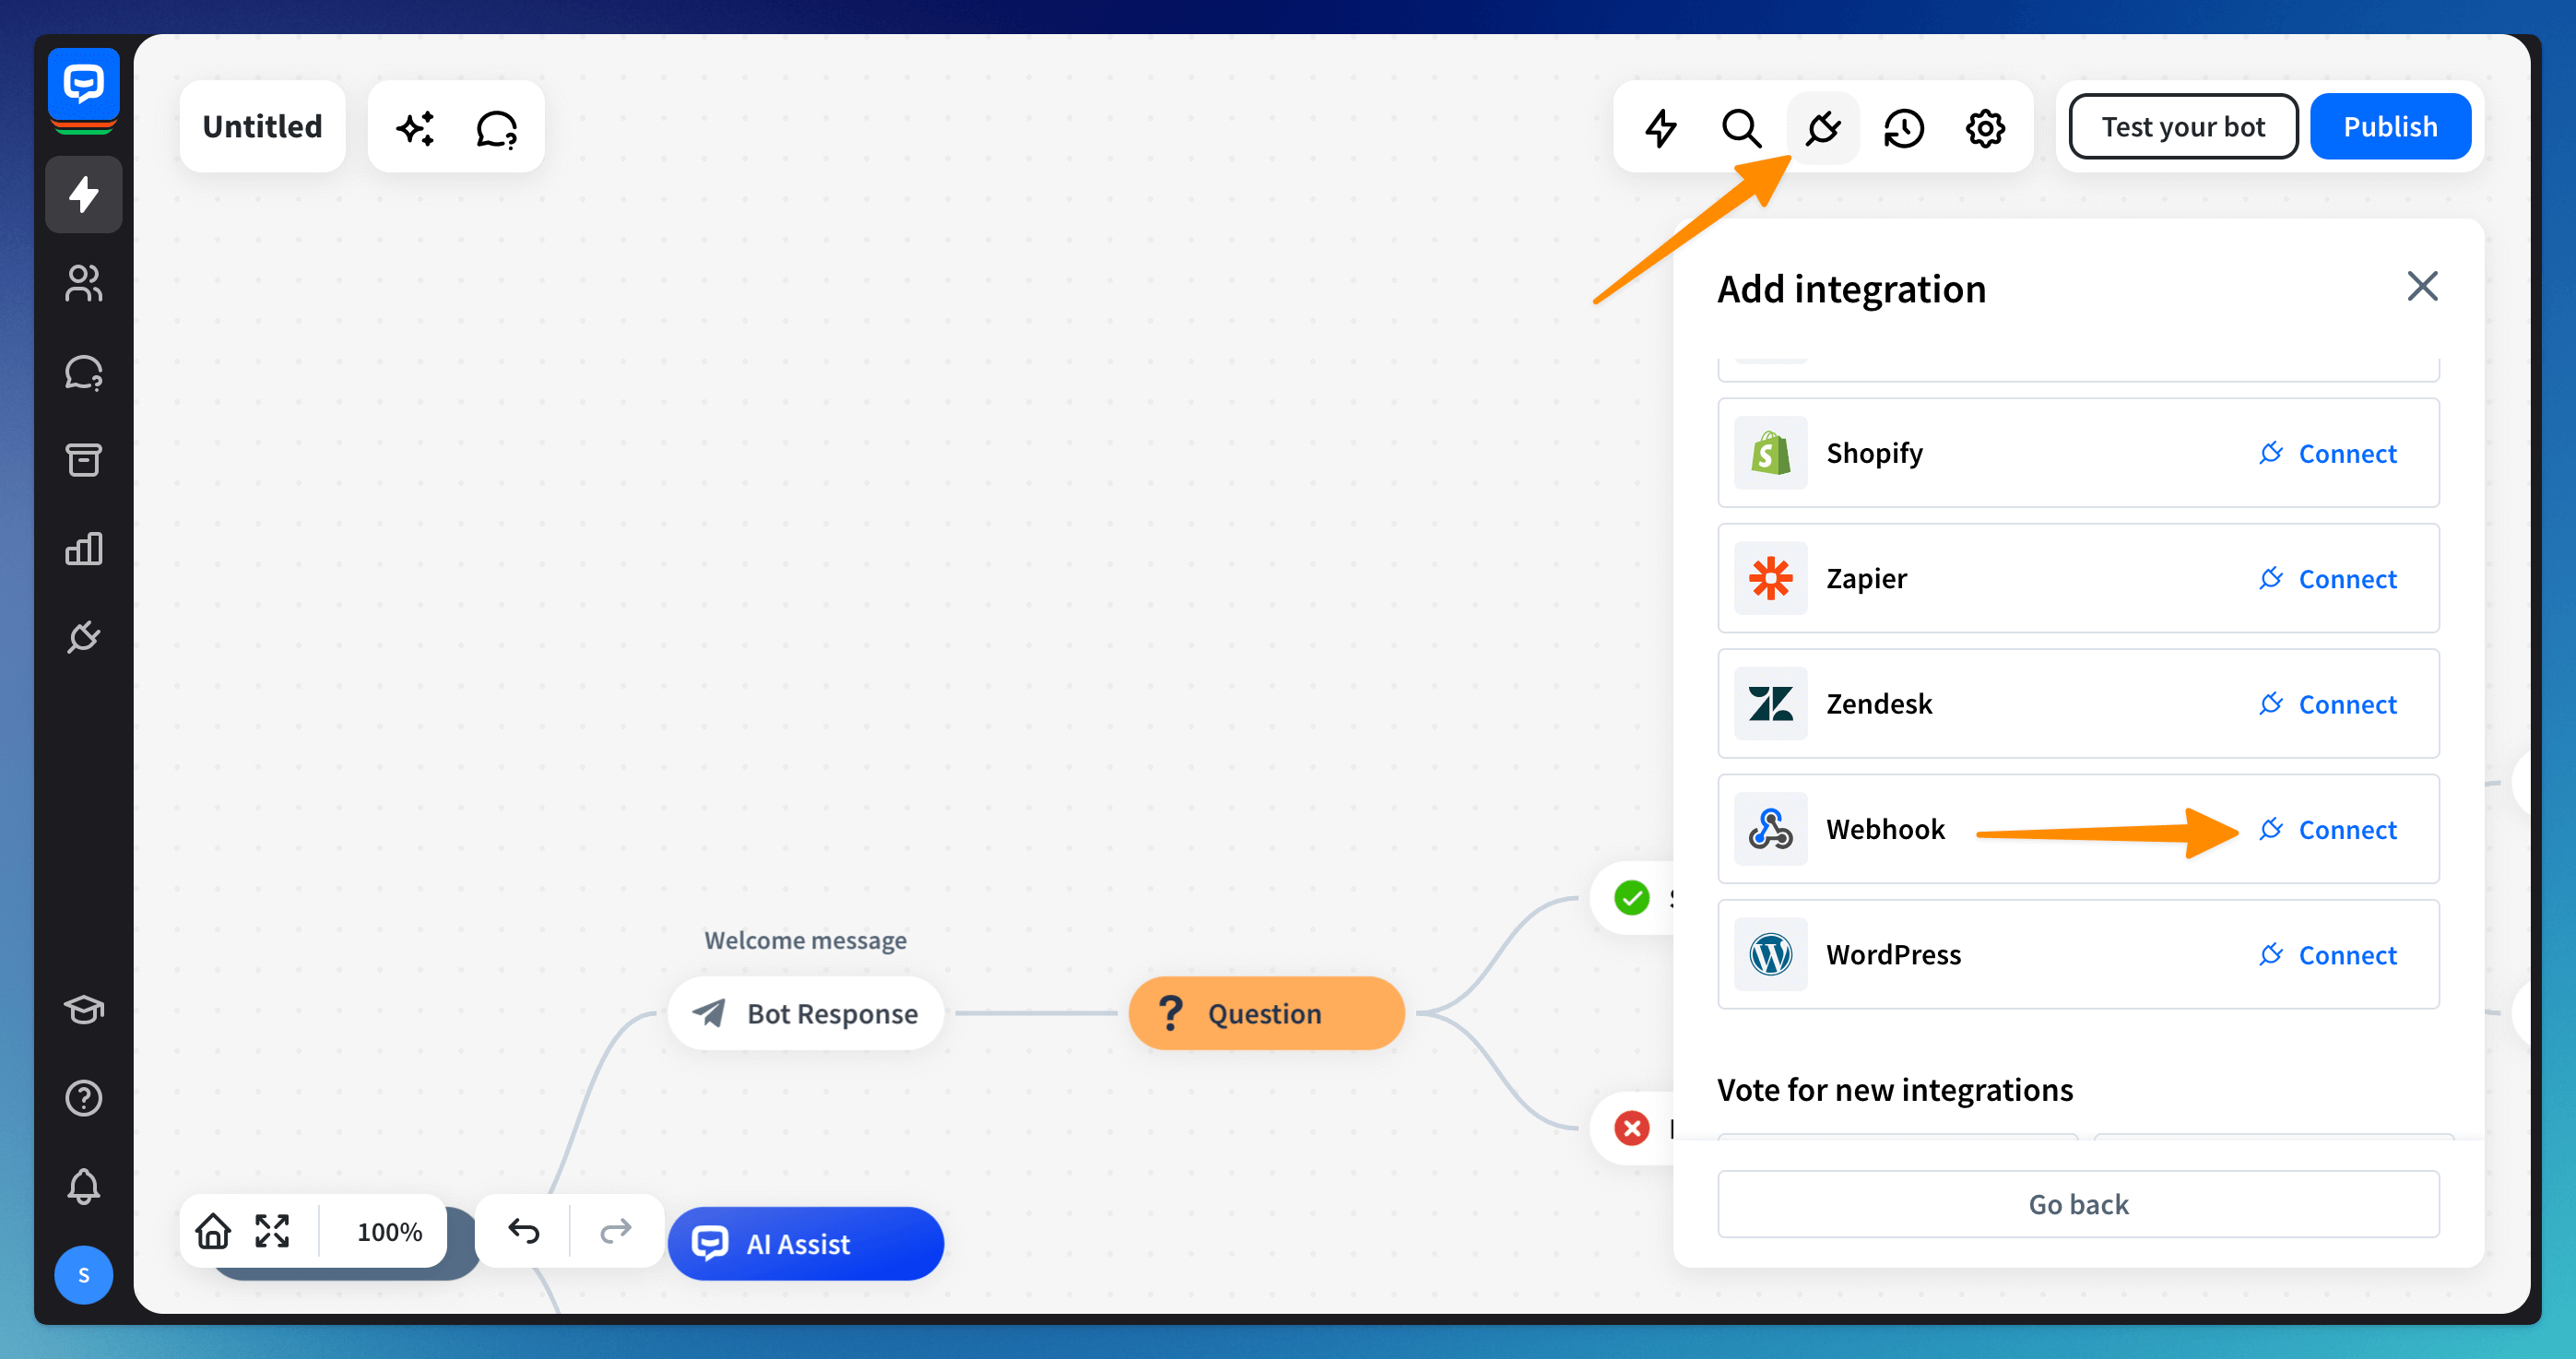
Go to the bot and open the Integrations menu. Choose Webhooks from the list and click the Connect button.
-
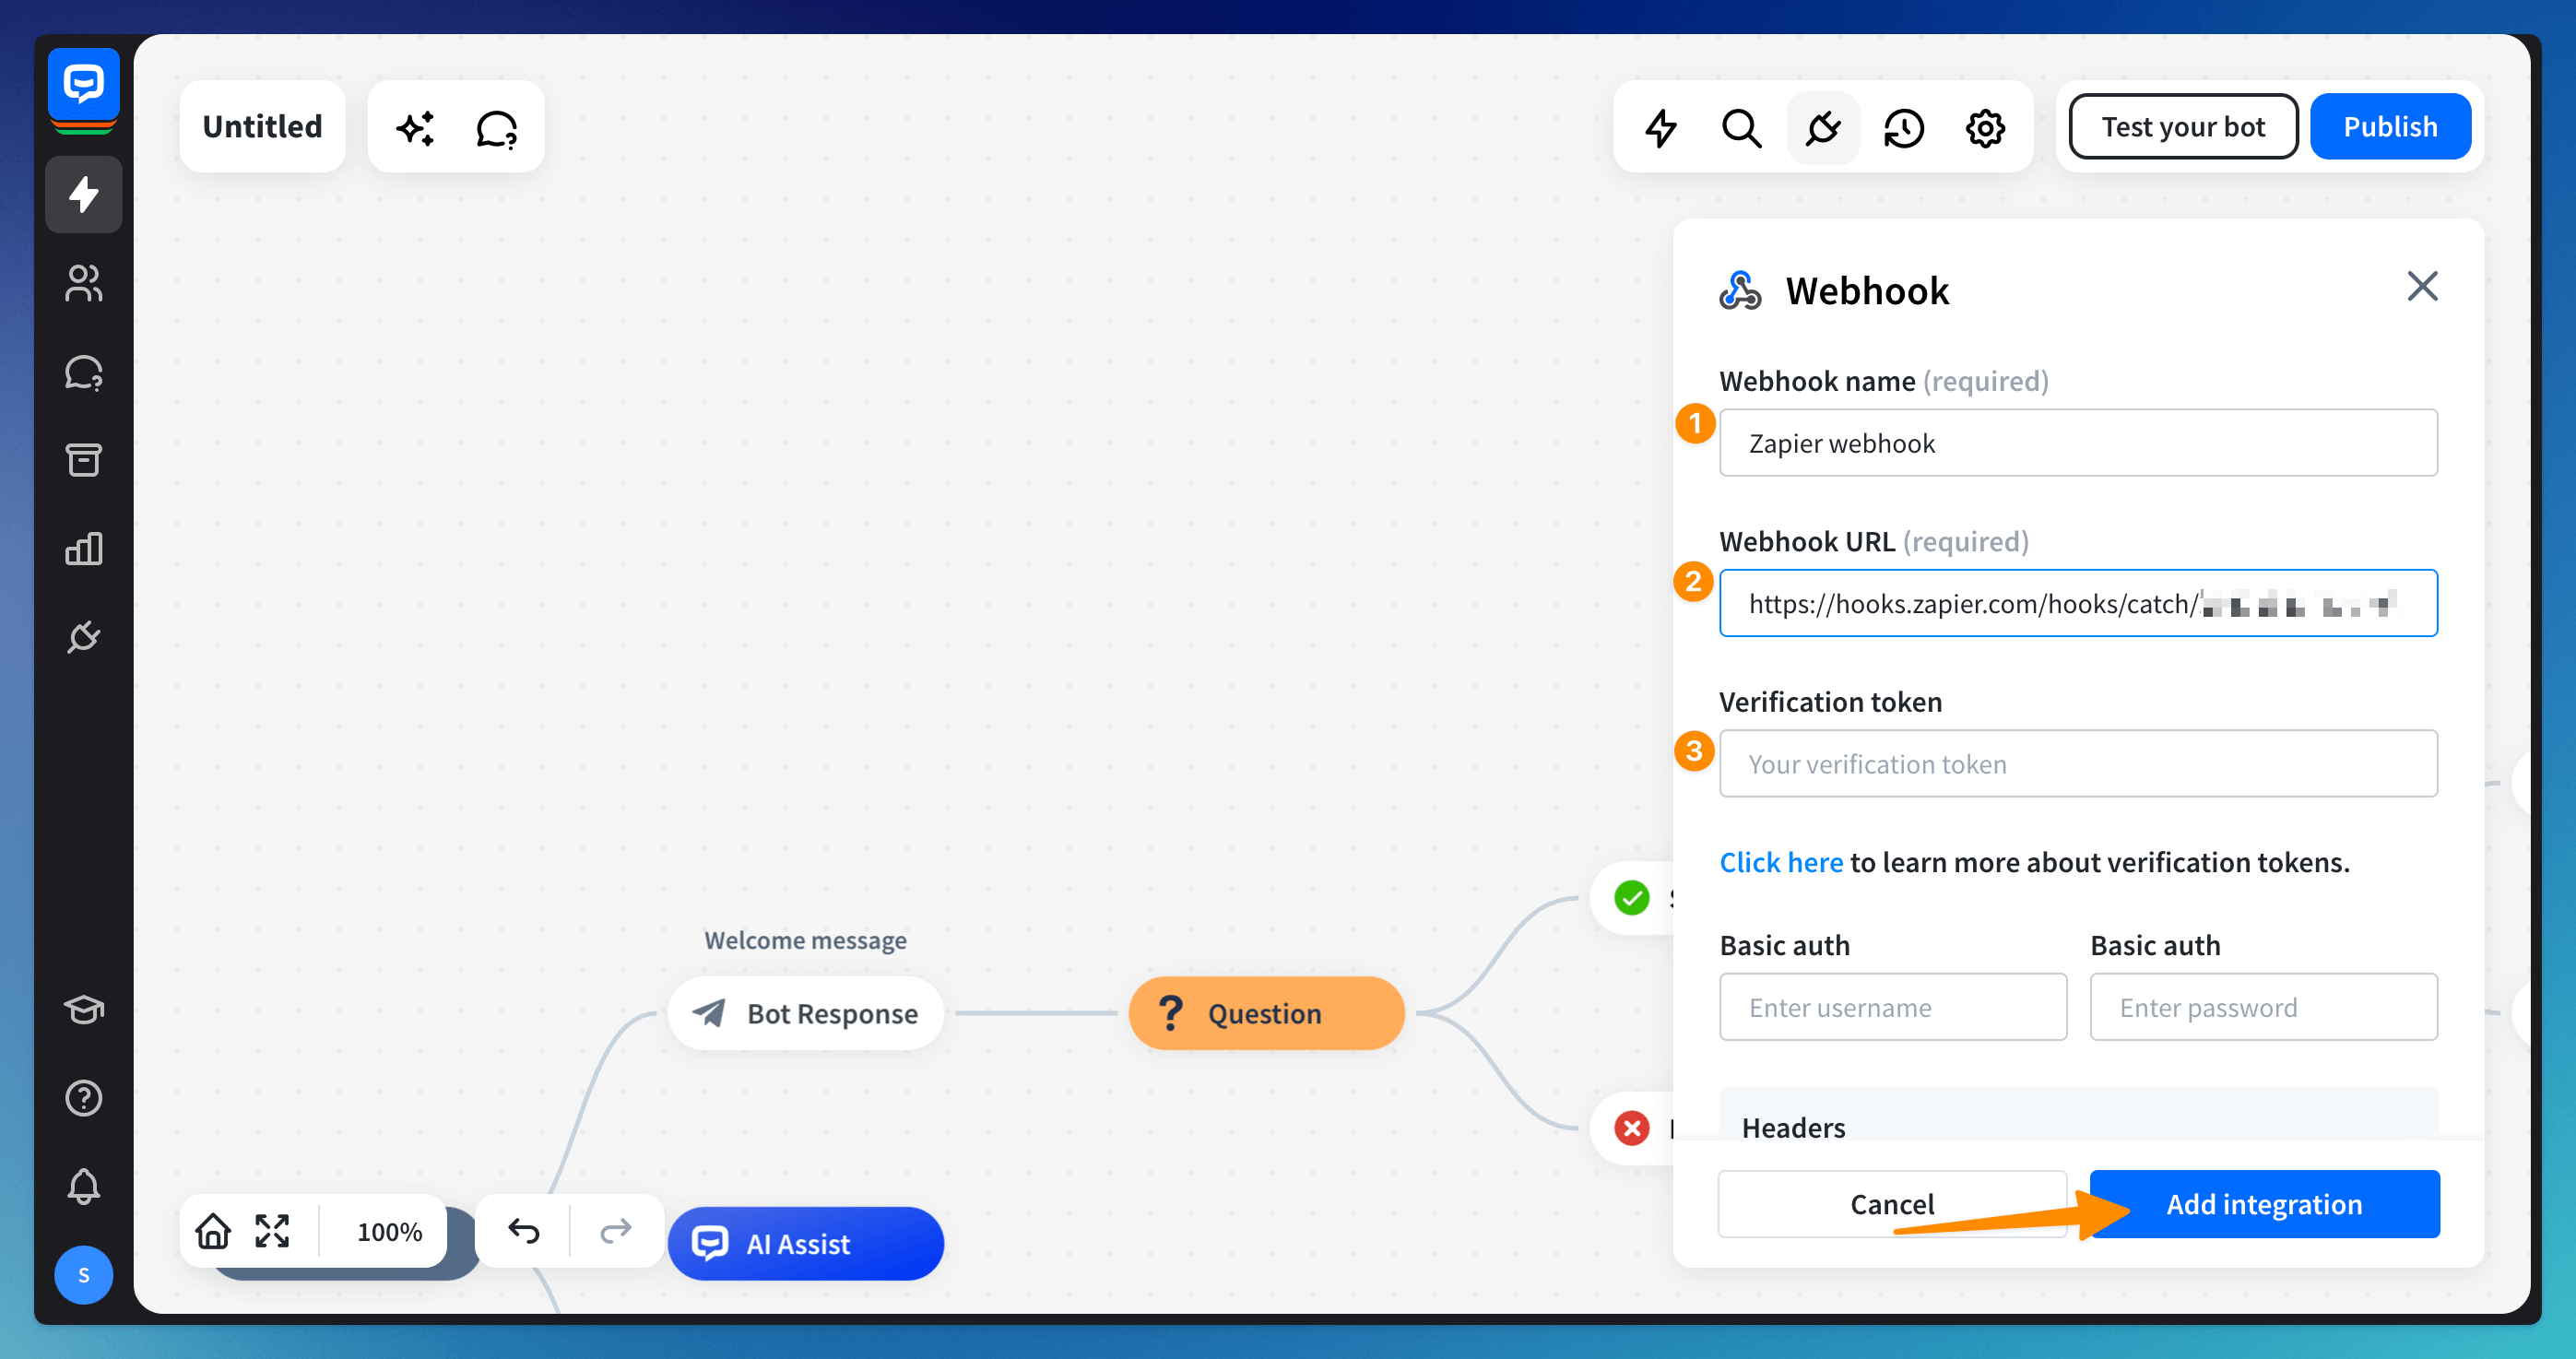
Provide:
- webhook name
- Zapier URL
- leave the verification token empty
Click the Add integration button. The webhook integration will be visible on the integrations list.
-
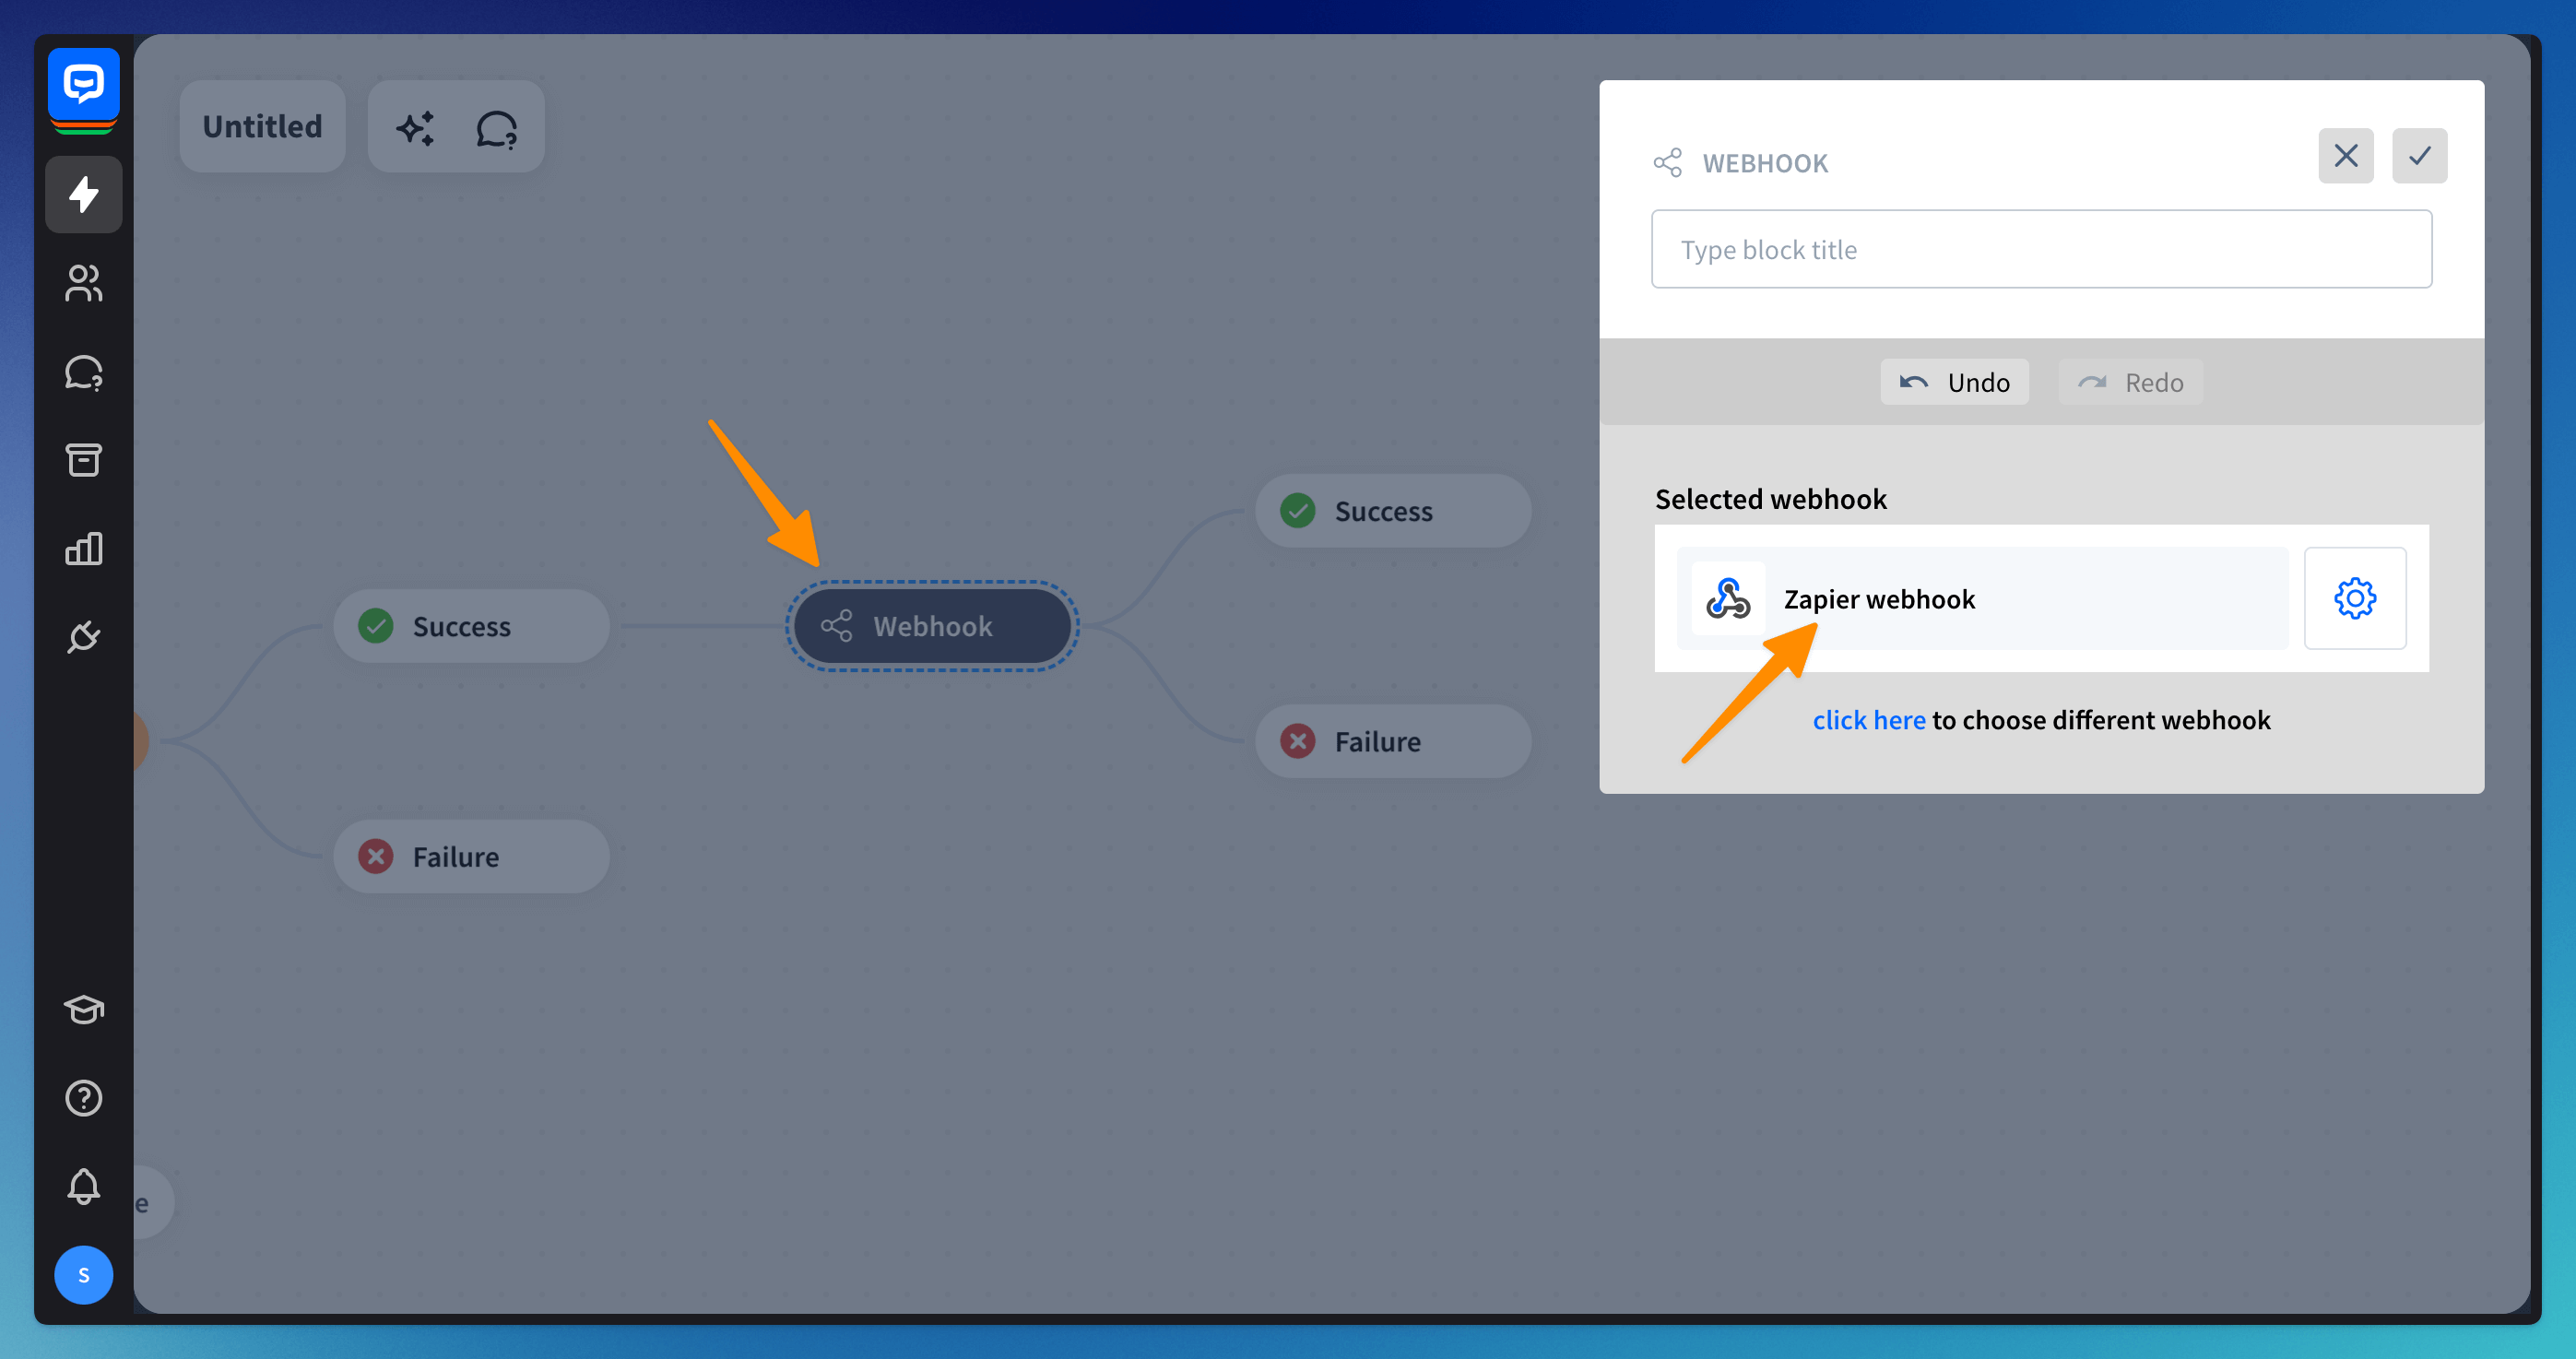
Drag the Webhook block to the bot flow and choose the webhook from the list.
-
Go back to the Zapier page. Choose the Test trigger button.
-
The test was successful when you could see the request and its body. Click Continue with selected record button.
-
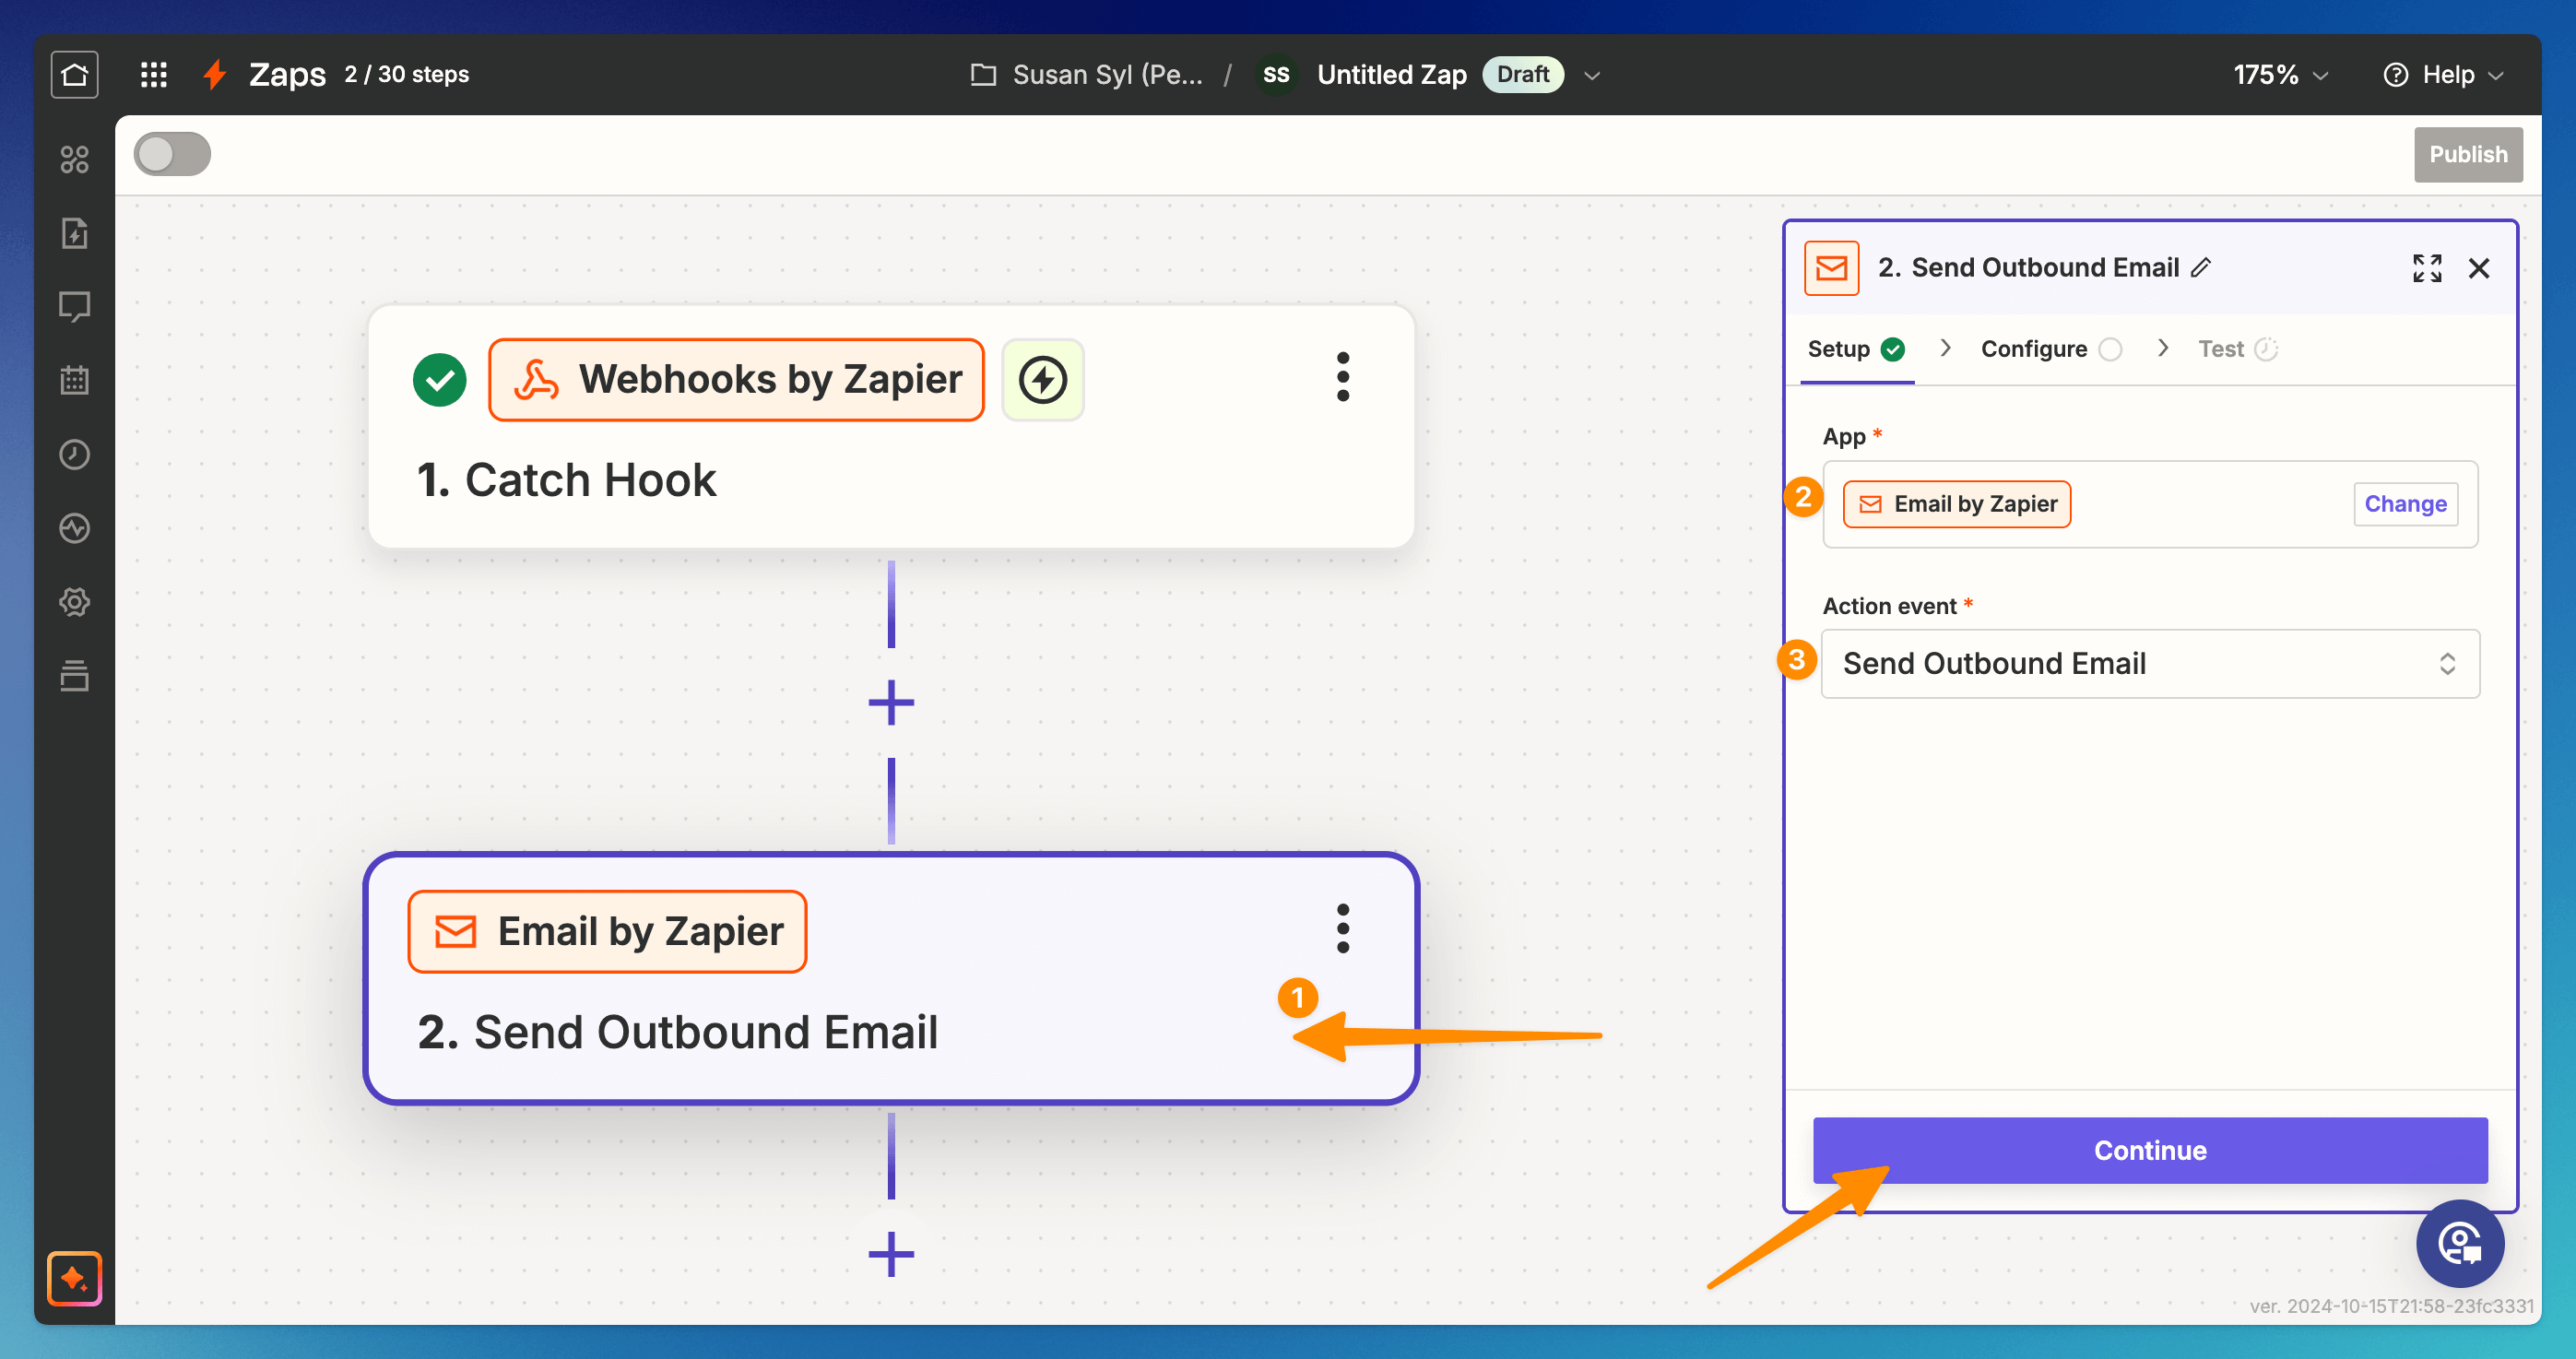
In the Action module choose: (2) the app you want to integrate with the bot, (3) the action you want to perform. Click Continue button and configure the action.
-
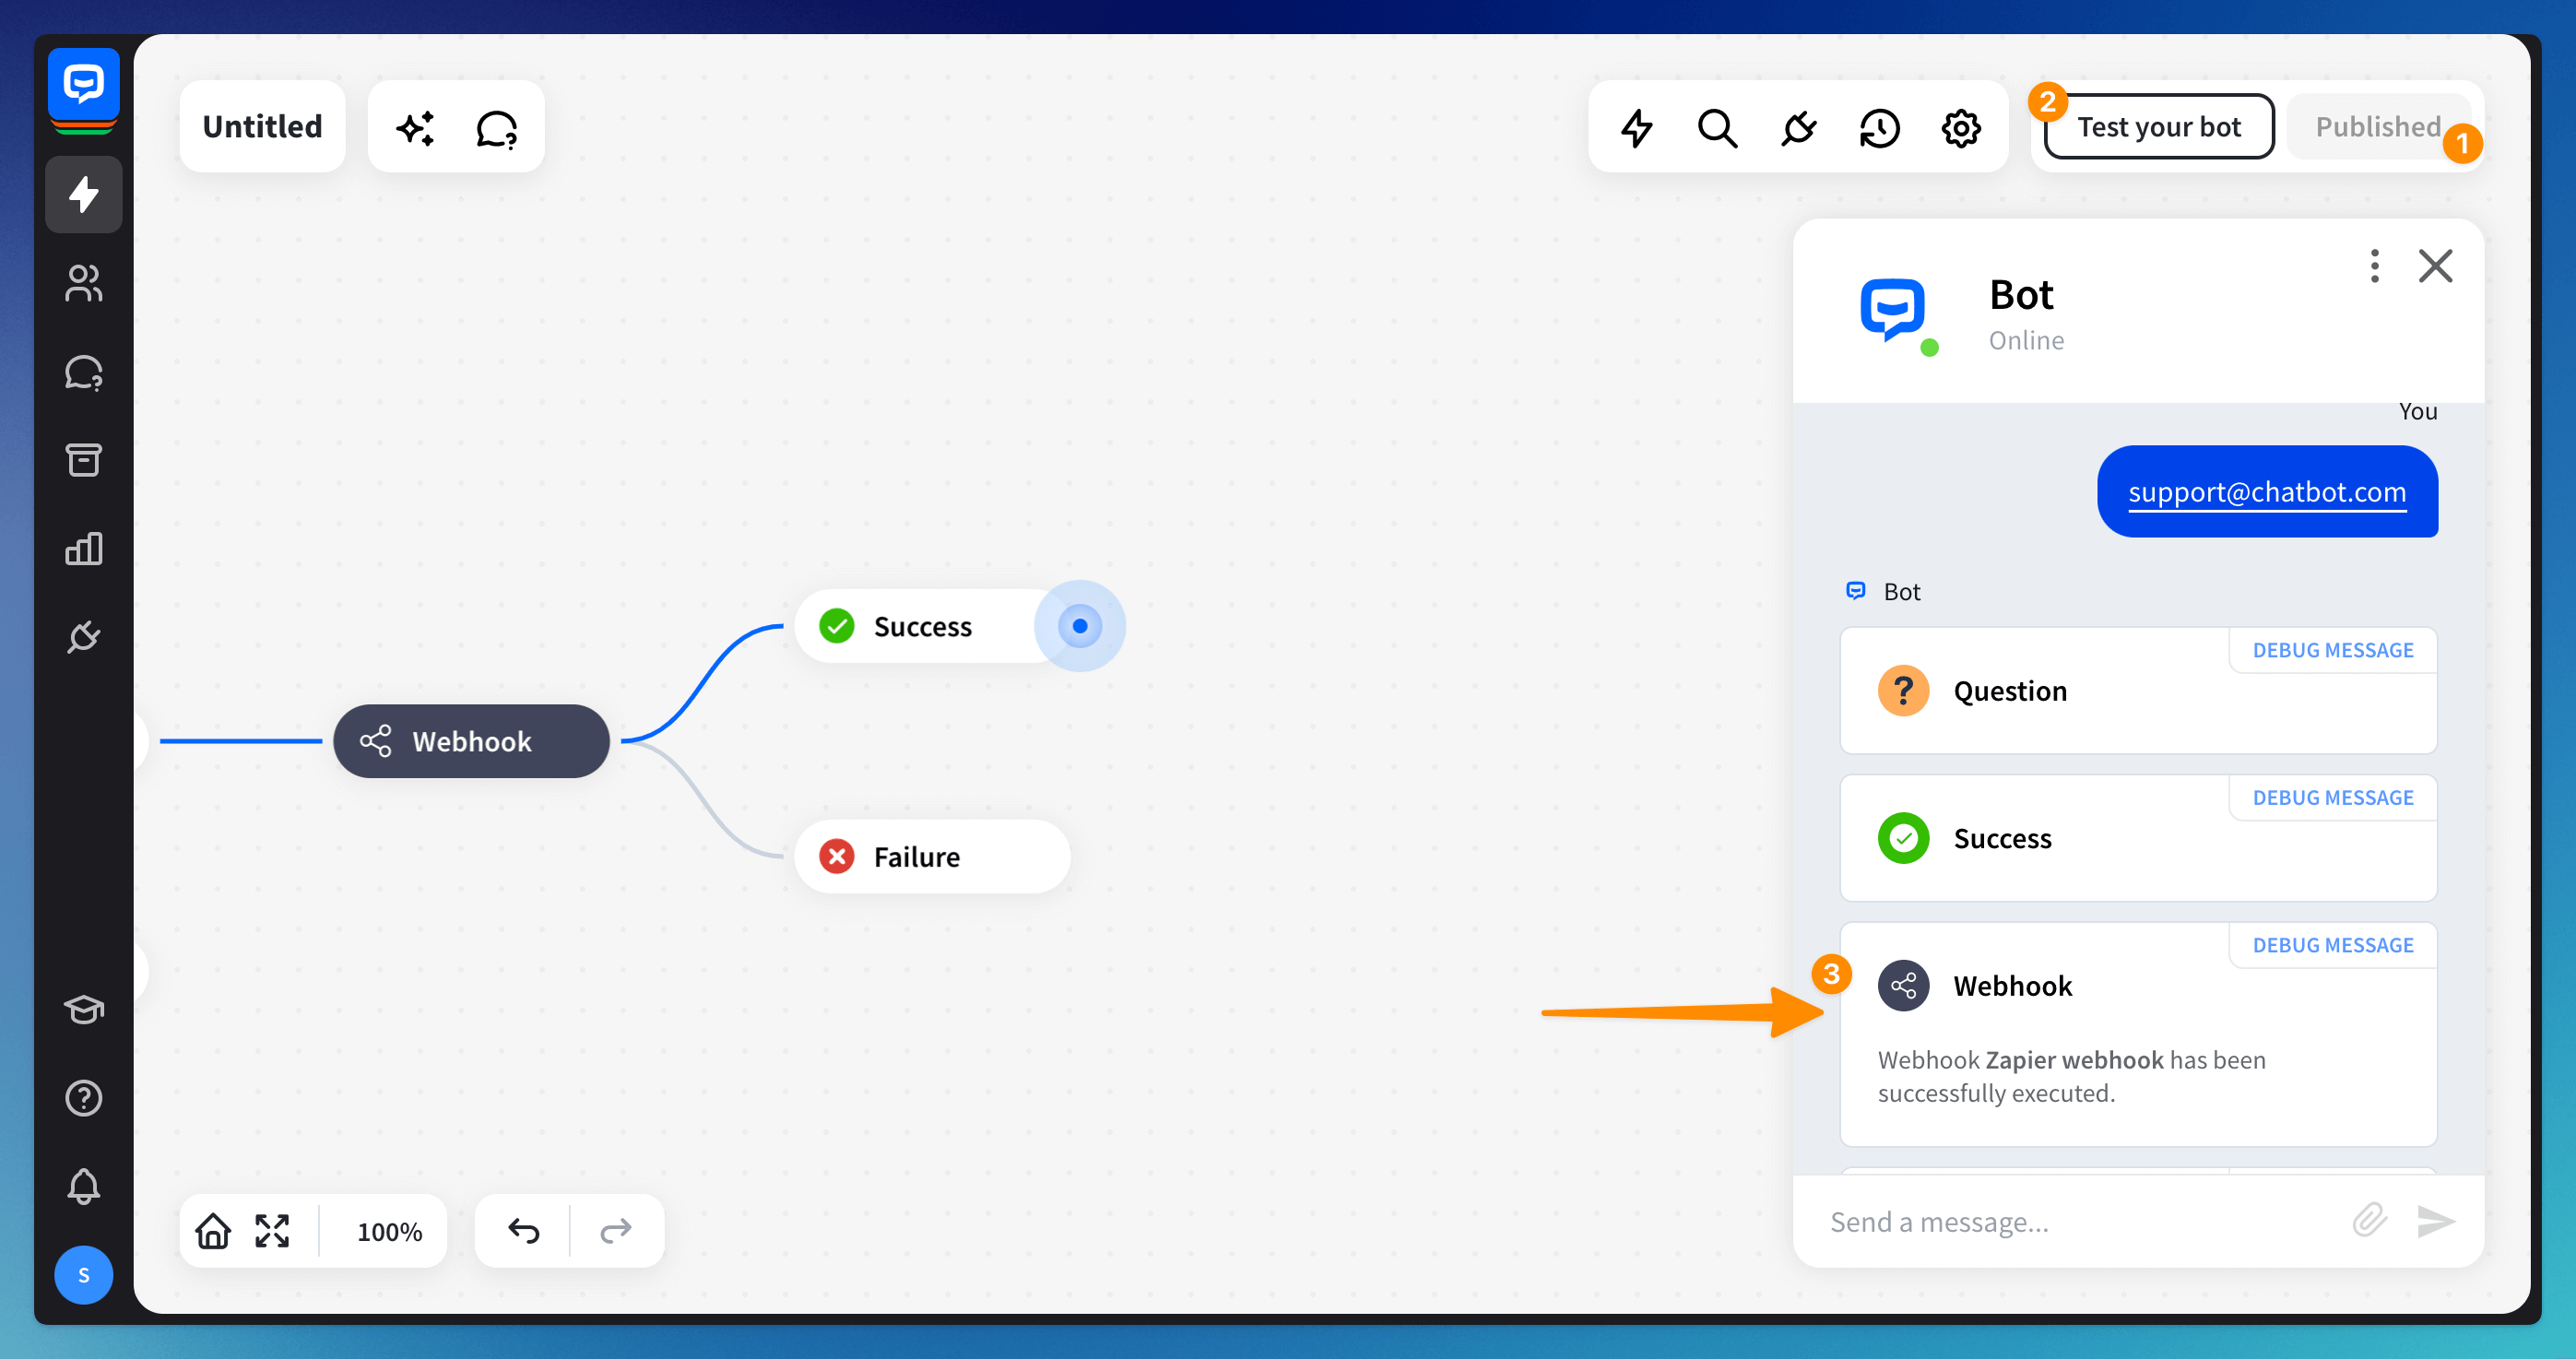
Return to your bot and test your bot flow using the Testing tool. Remember to publish the bot.
-
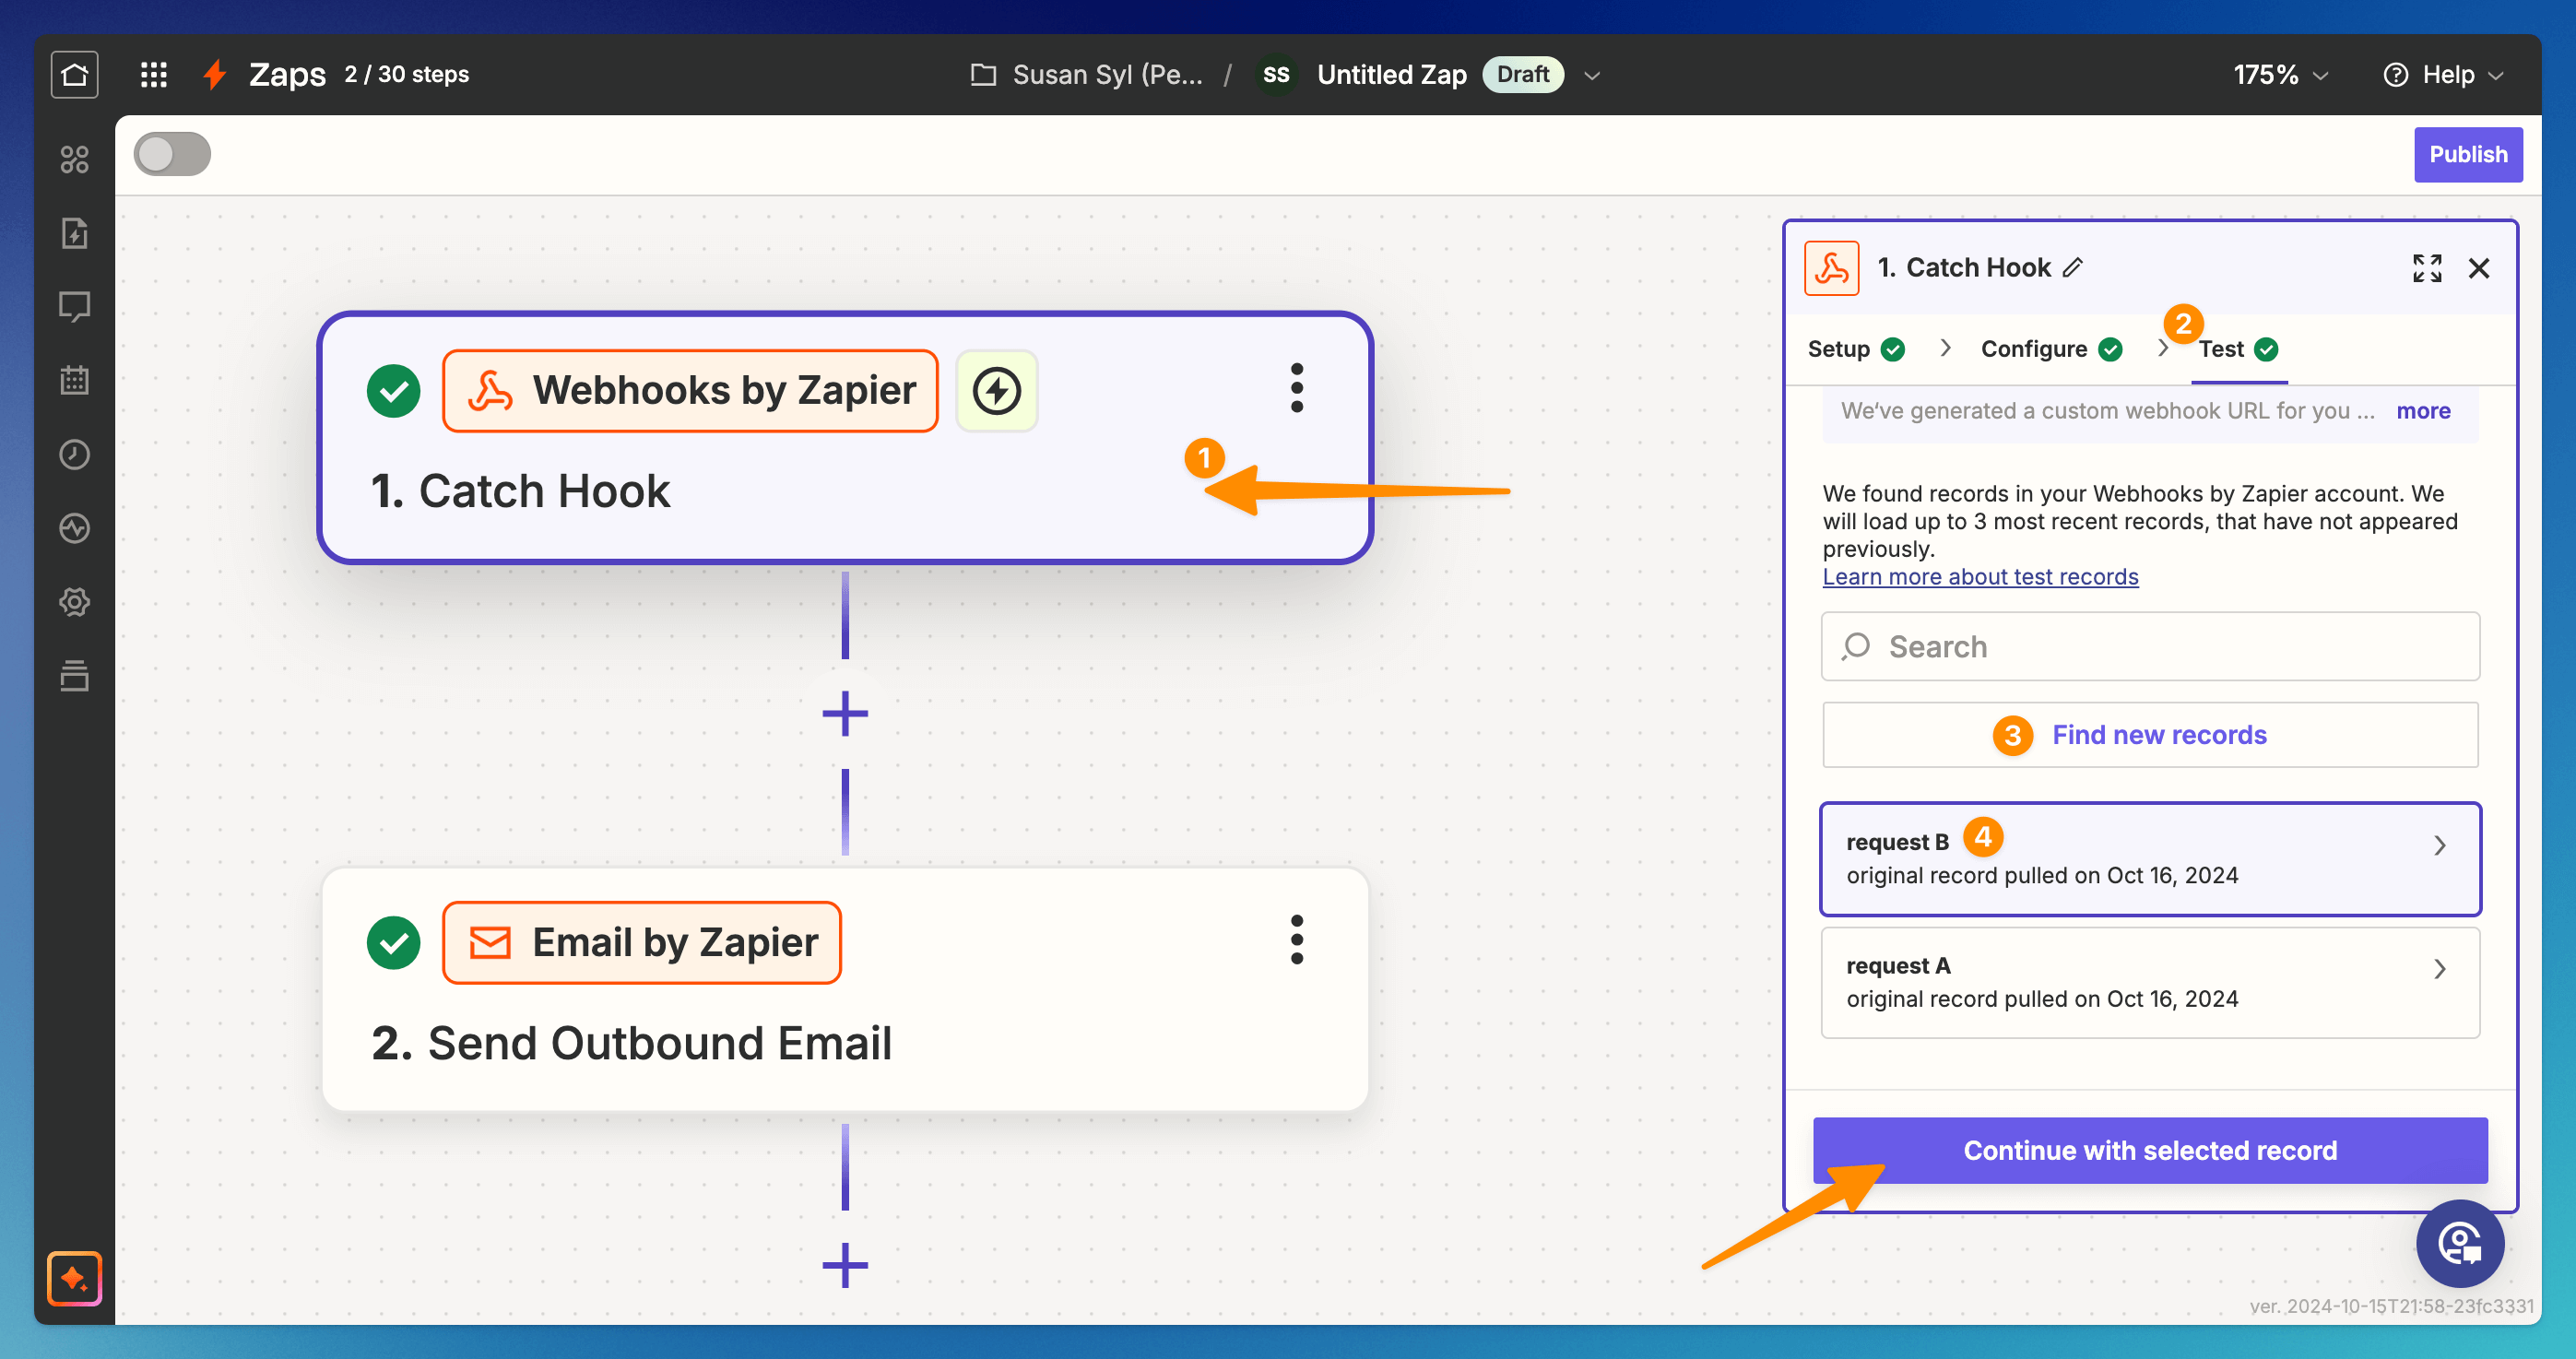
Go back to the Zapier site. Go to the (1) Trigger module, (2) choose the Test stage, and (3) Find new records button. (4) Choose request B from the list. Click the Continue with selected records button.
Request B shows the information gathered during the test chat and the default attributes the bot gathered automatically.
-
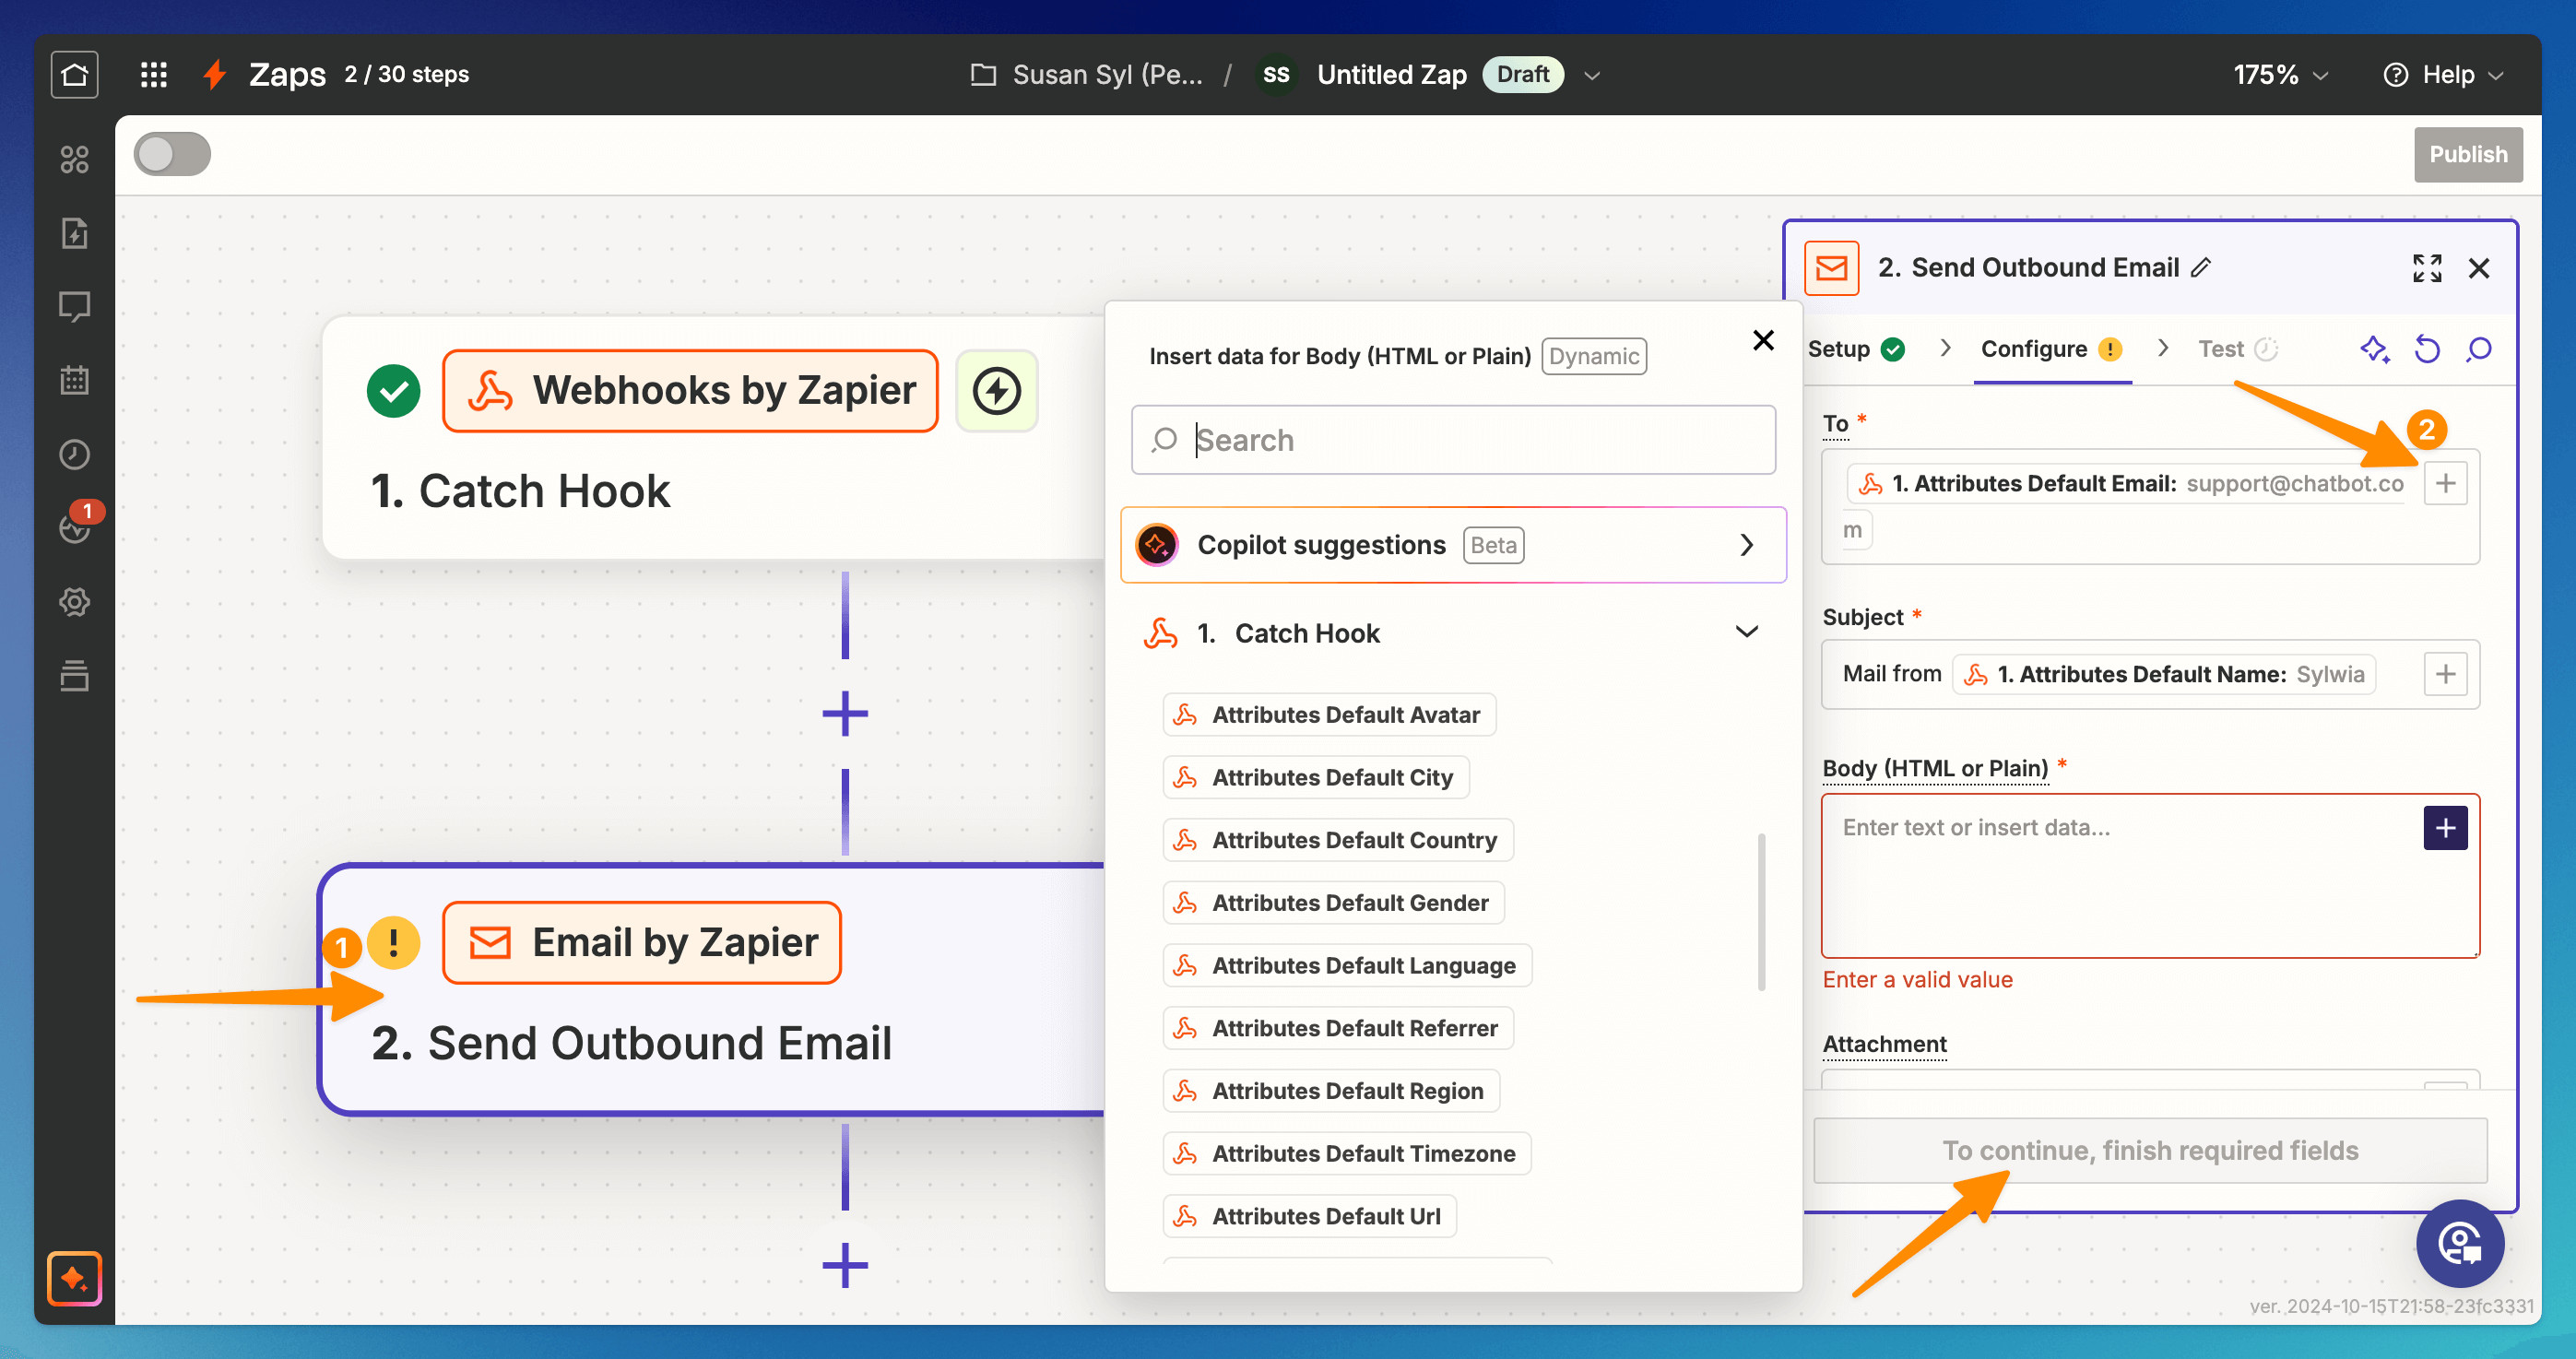
Go to the (1) Action module and (2) use the + sign to configure the action by adding attributes collected during the test chat. You can combine attributes with plain text. When all the required fields are filled, Continue.
-
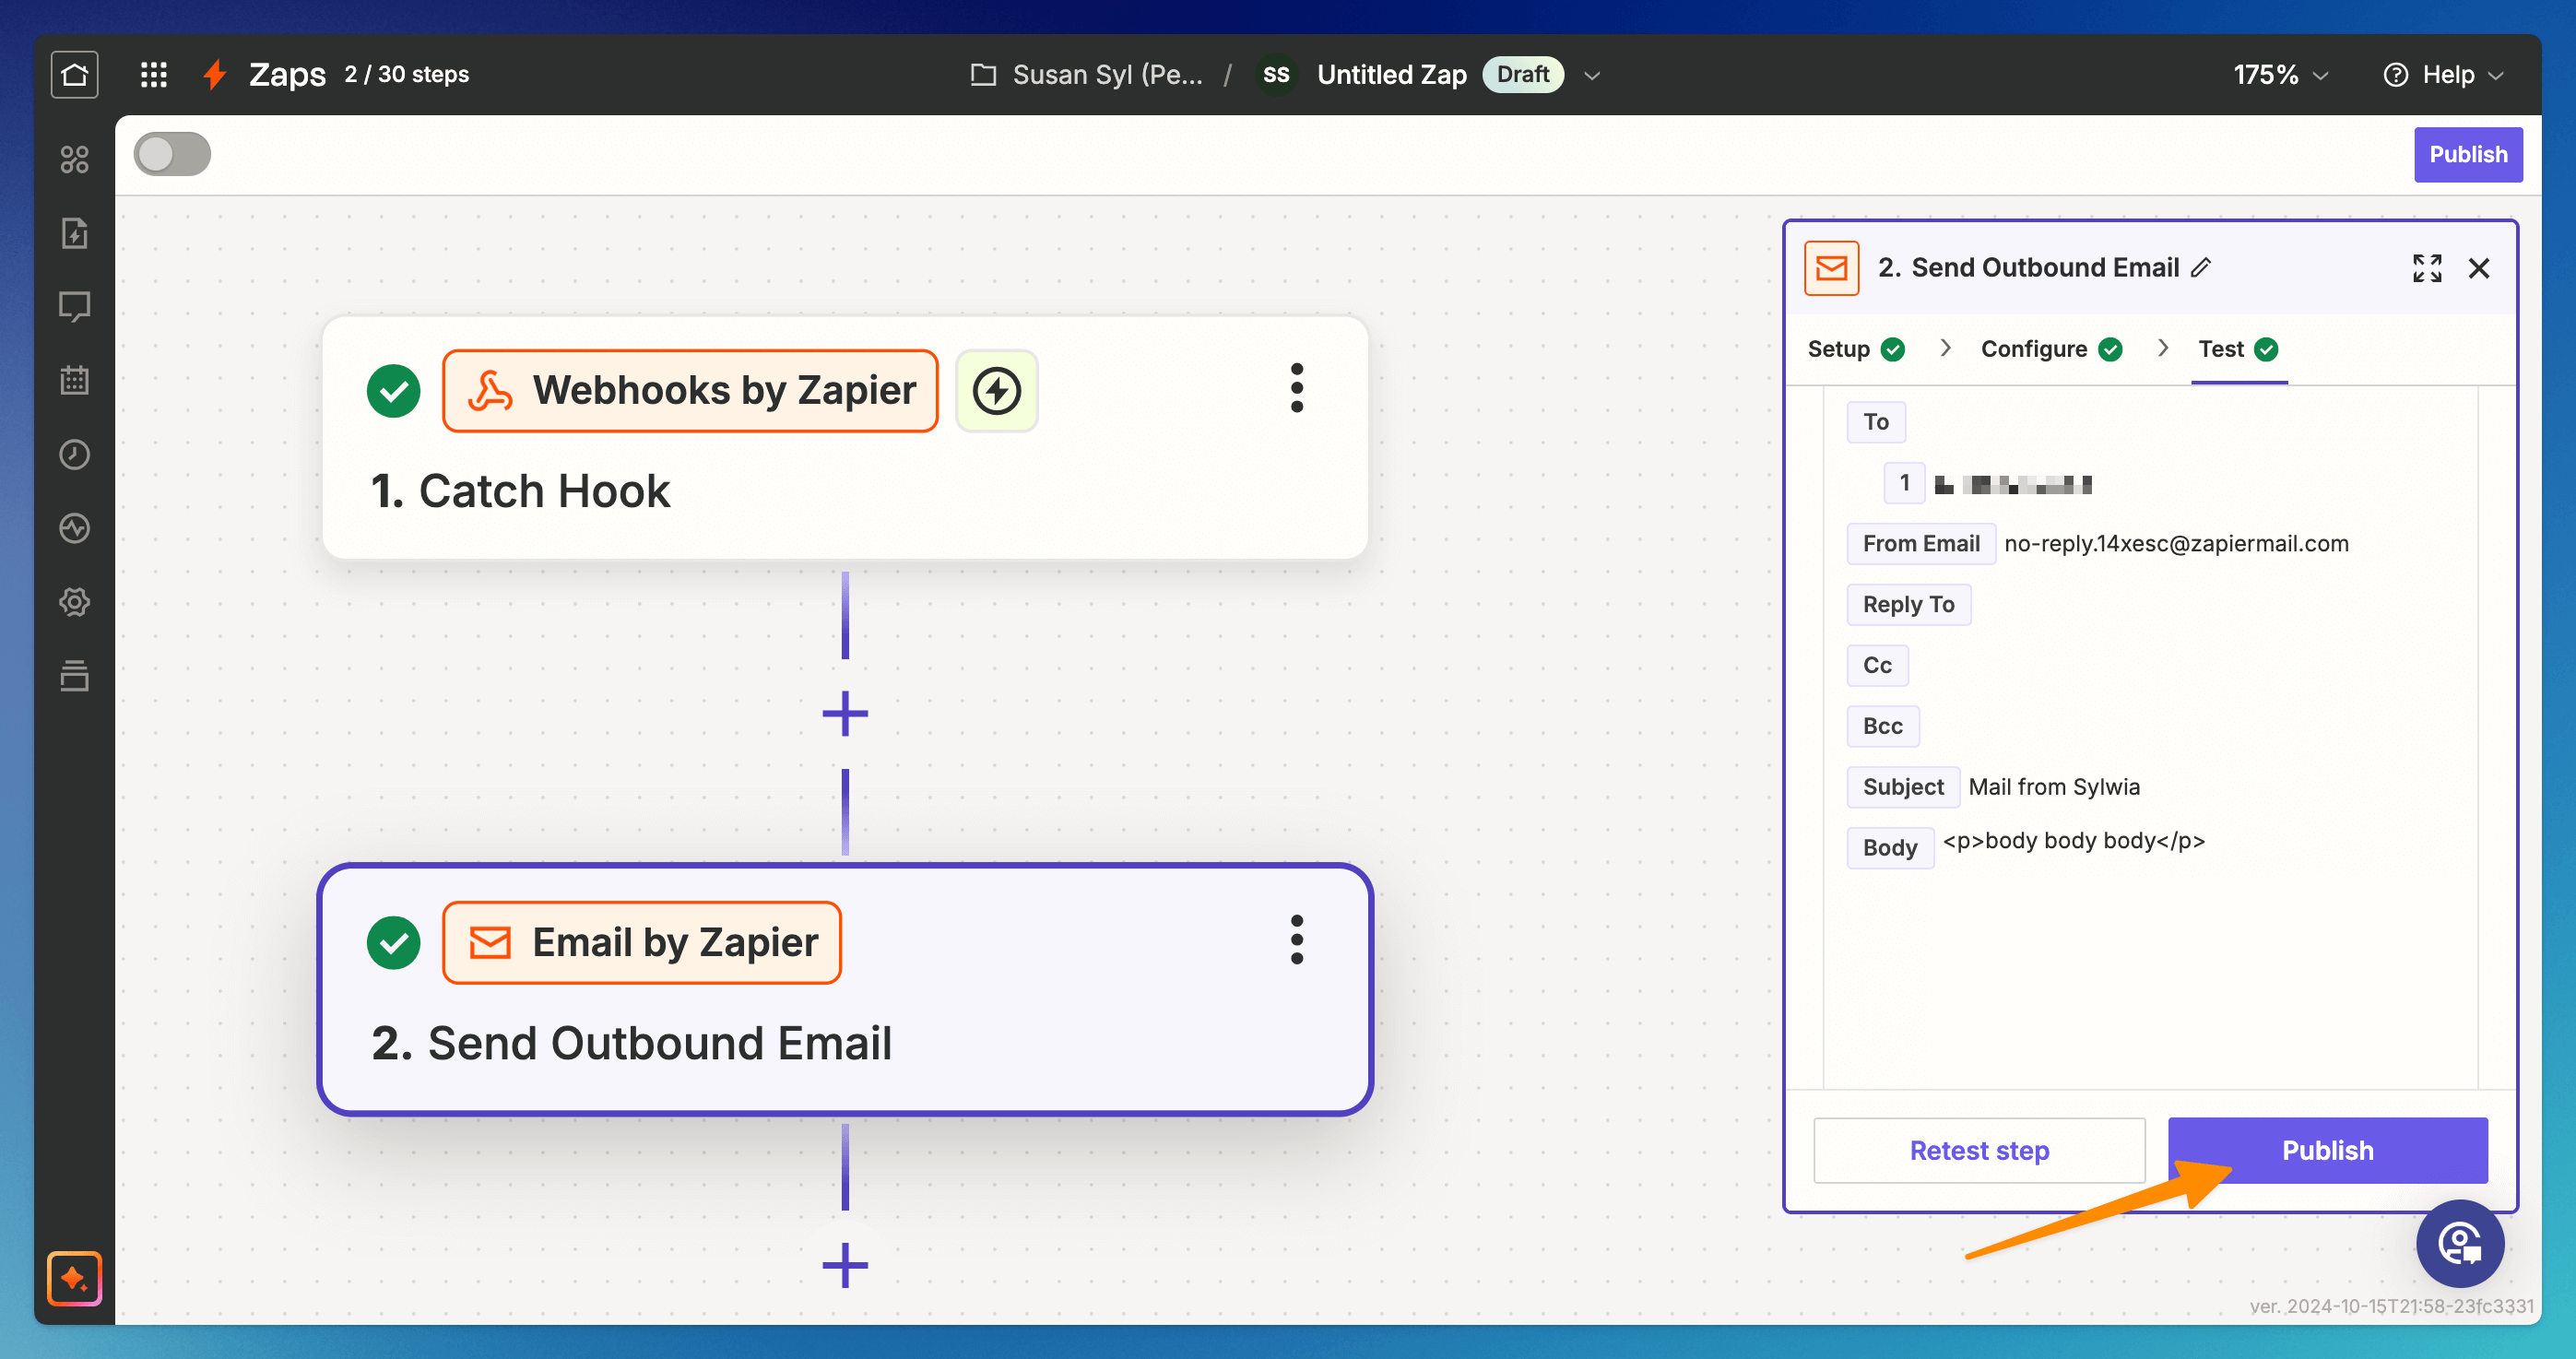
See the attributes chosen in the previous step. Test the integration. The test succeeded when you can see the body of the action.
-
Publish the Zap.
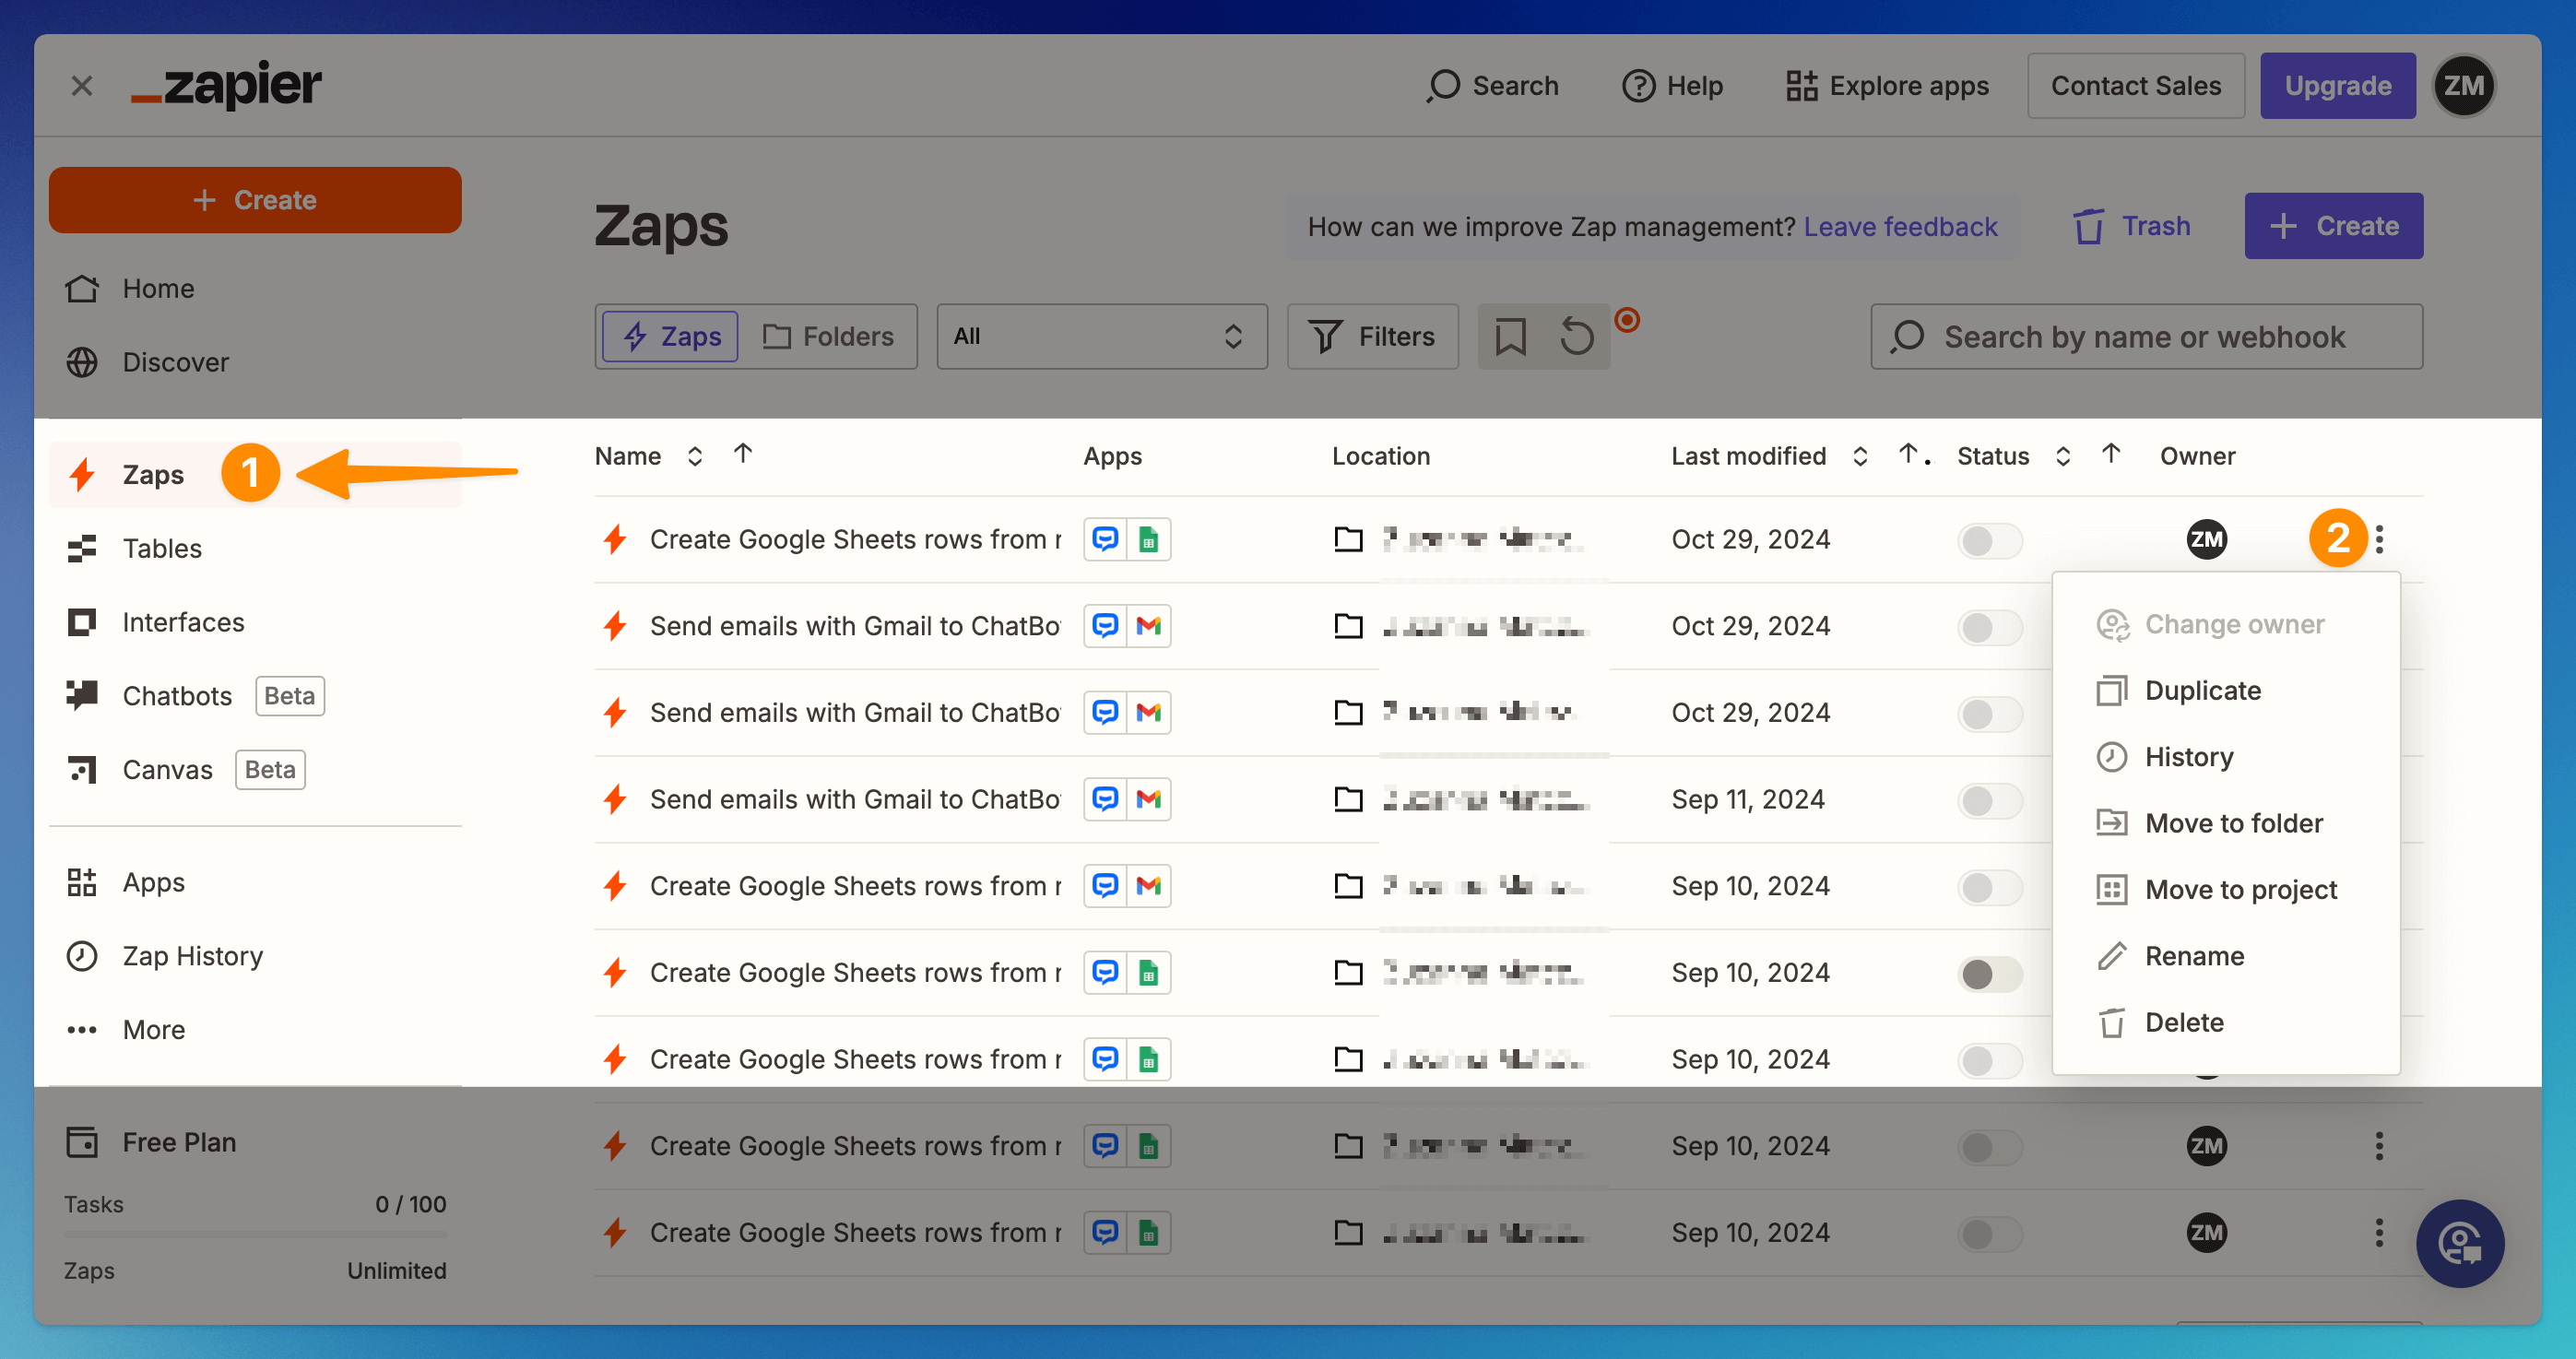
Editing the Zap
If you’d like to change the Zap you created, select it from the list on the Zapier site. You can also turn it off there.
Read more