KnowledgeBase is a customer support and effortless self-service software that helps you manage your customer education process. It encourages your customers’ self-service and helps your support teams decrease the total support time.
By connecting ChatBot to KnowledgeBase, your customers can receive article suggestions during the chat with the bot.
The integration process has two parts:
-
creating a KnowledgeBase and ChatBot webhook
-
adding it to the bot flow to show possible articles in the chat
The suggested articles will be displayed as the Gallery bot response - each article will be displayed as a separate card.
How to create a webhook in ChatBot
You must create a webhook connection between ChatBot and KnowledgeBase products to suggest an article to your customers. You can do that directly in your bot.
-
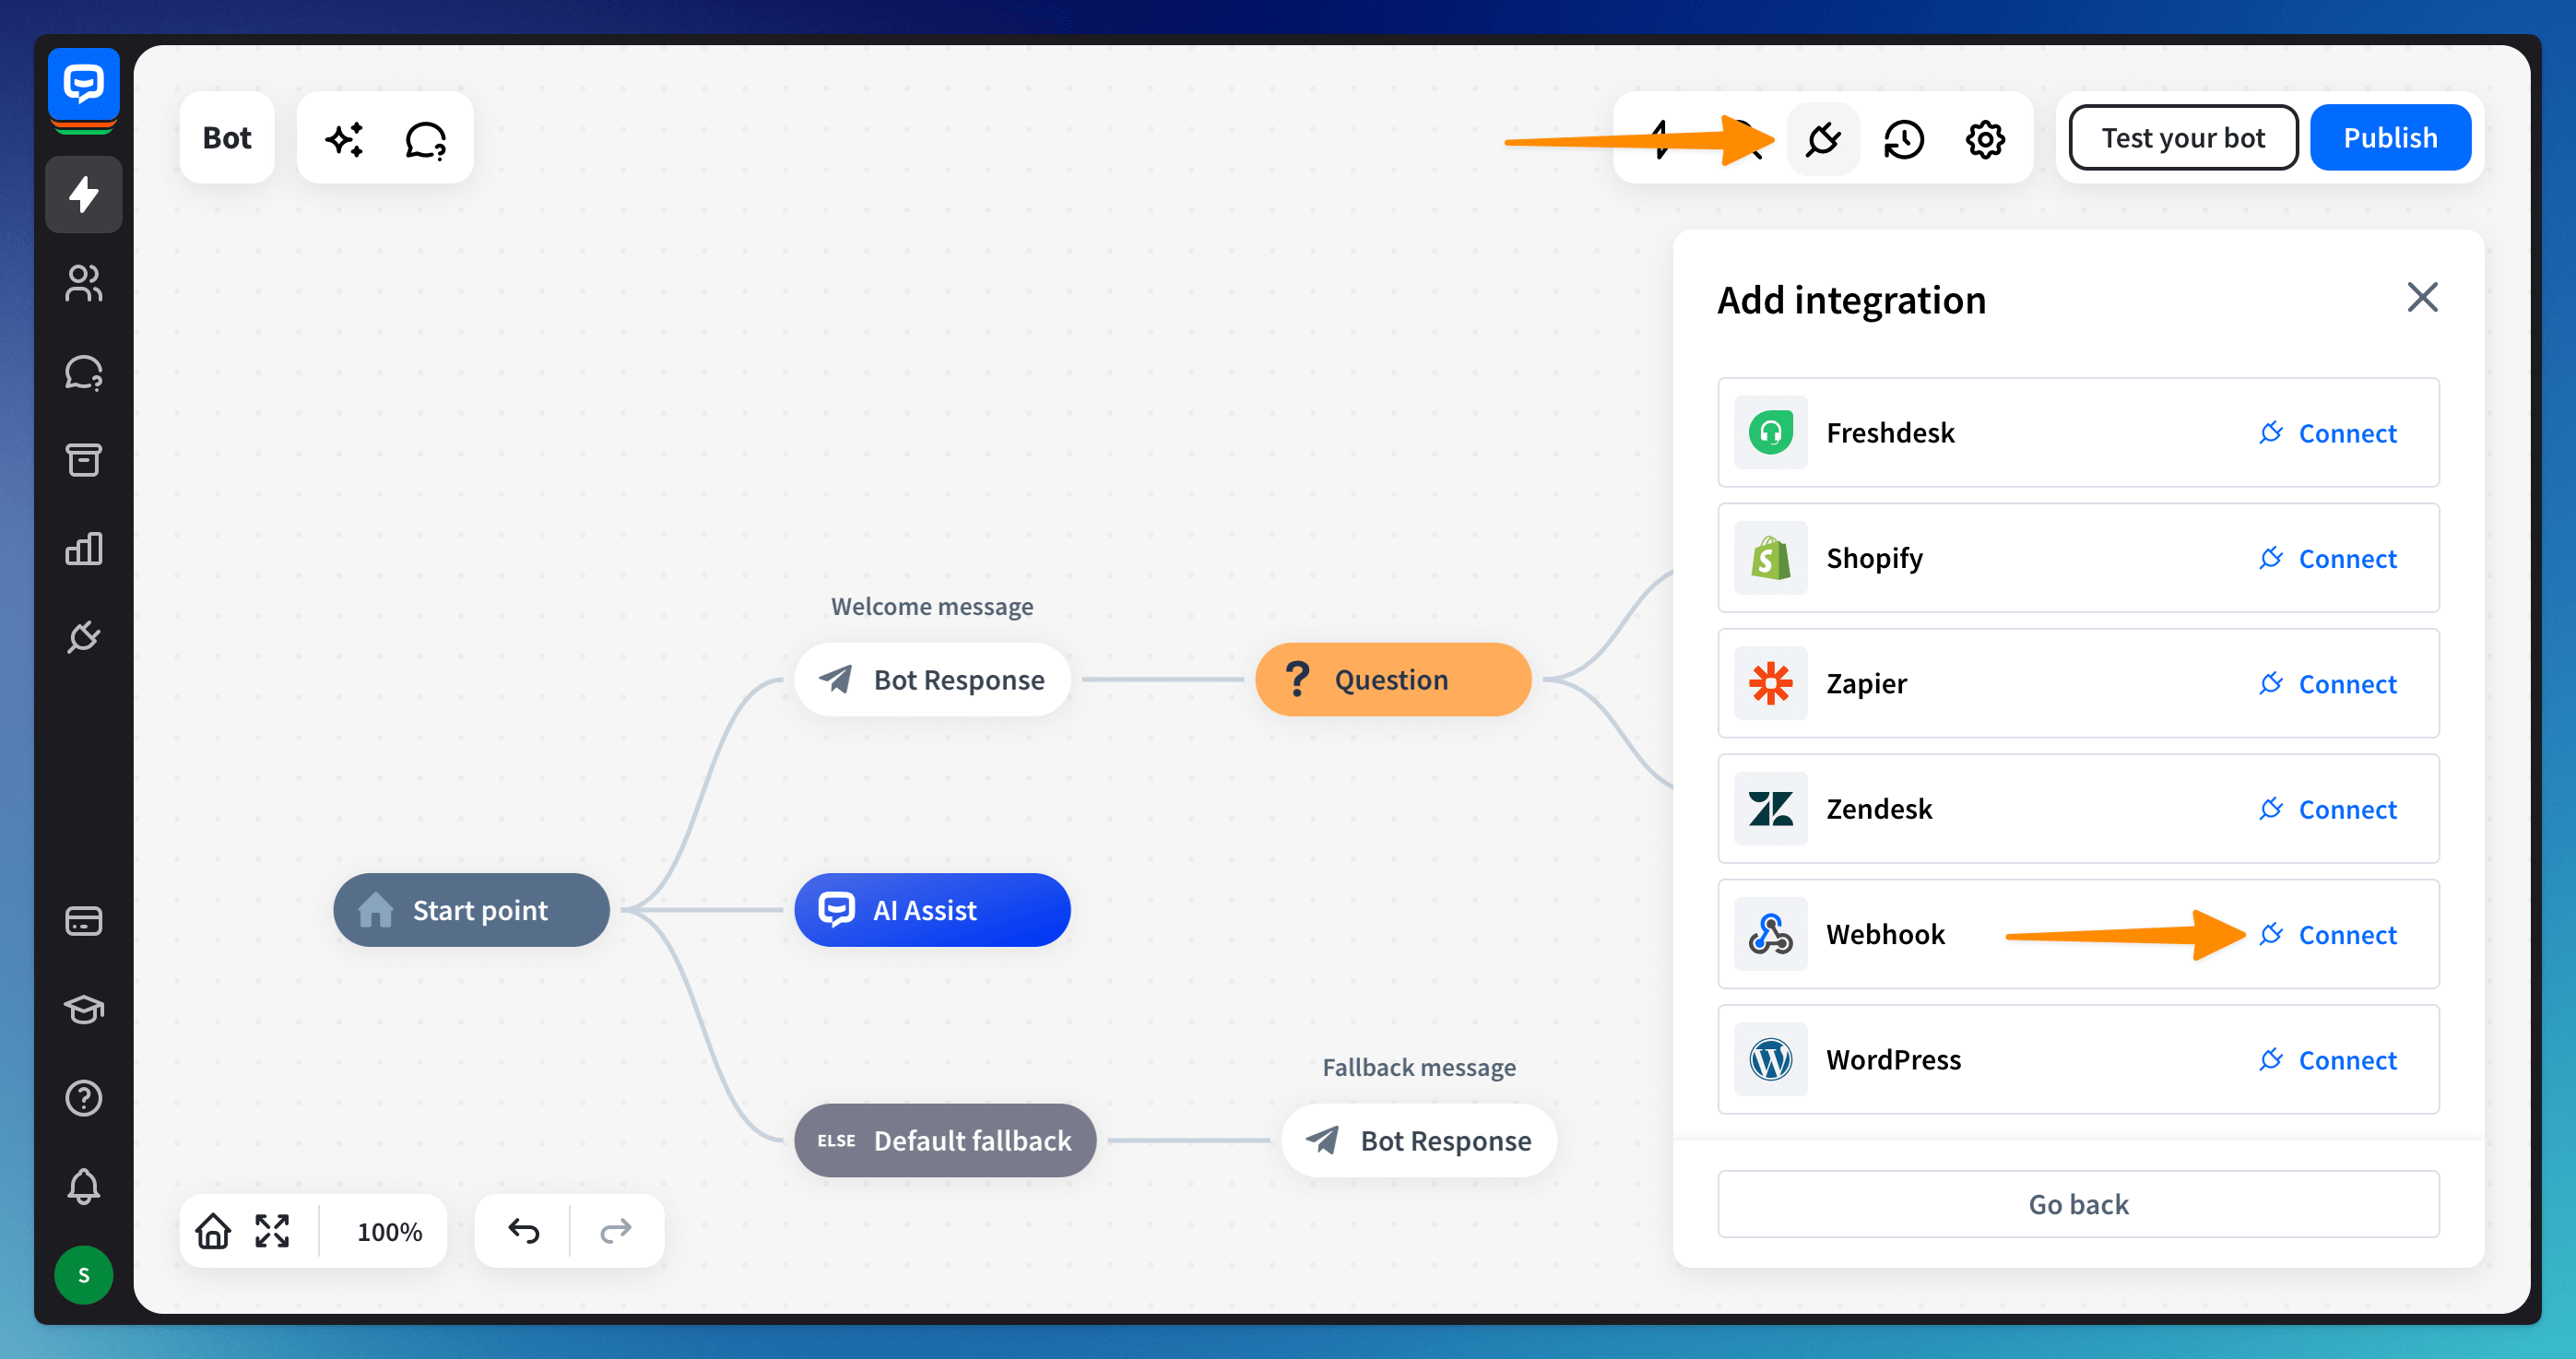
Go to your bot, open the Integrations panel, and choose the Webhook option from the list. Proceed with the Connect button.
-
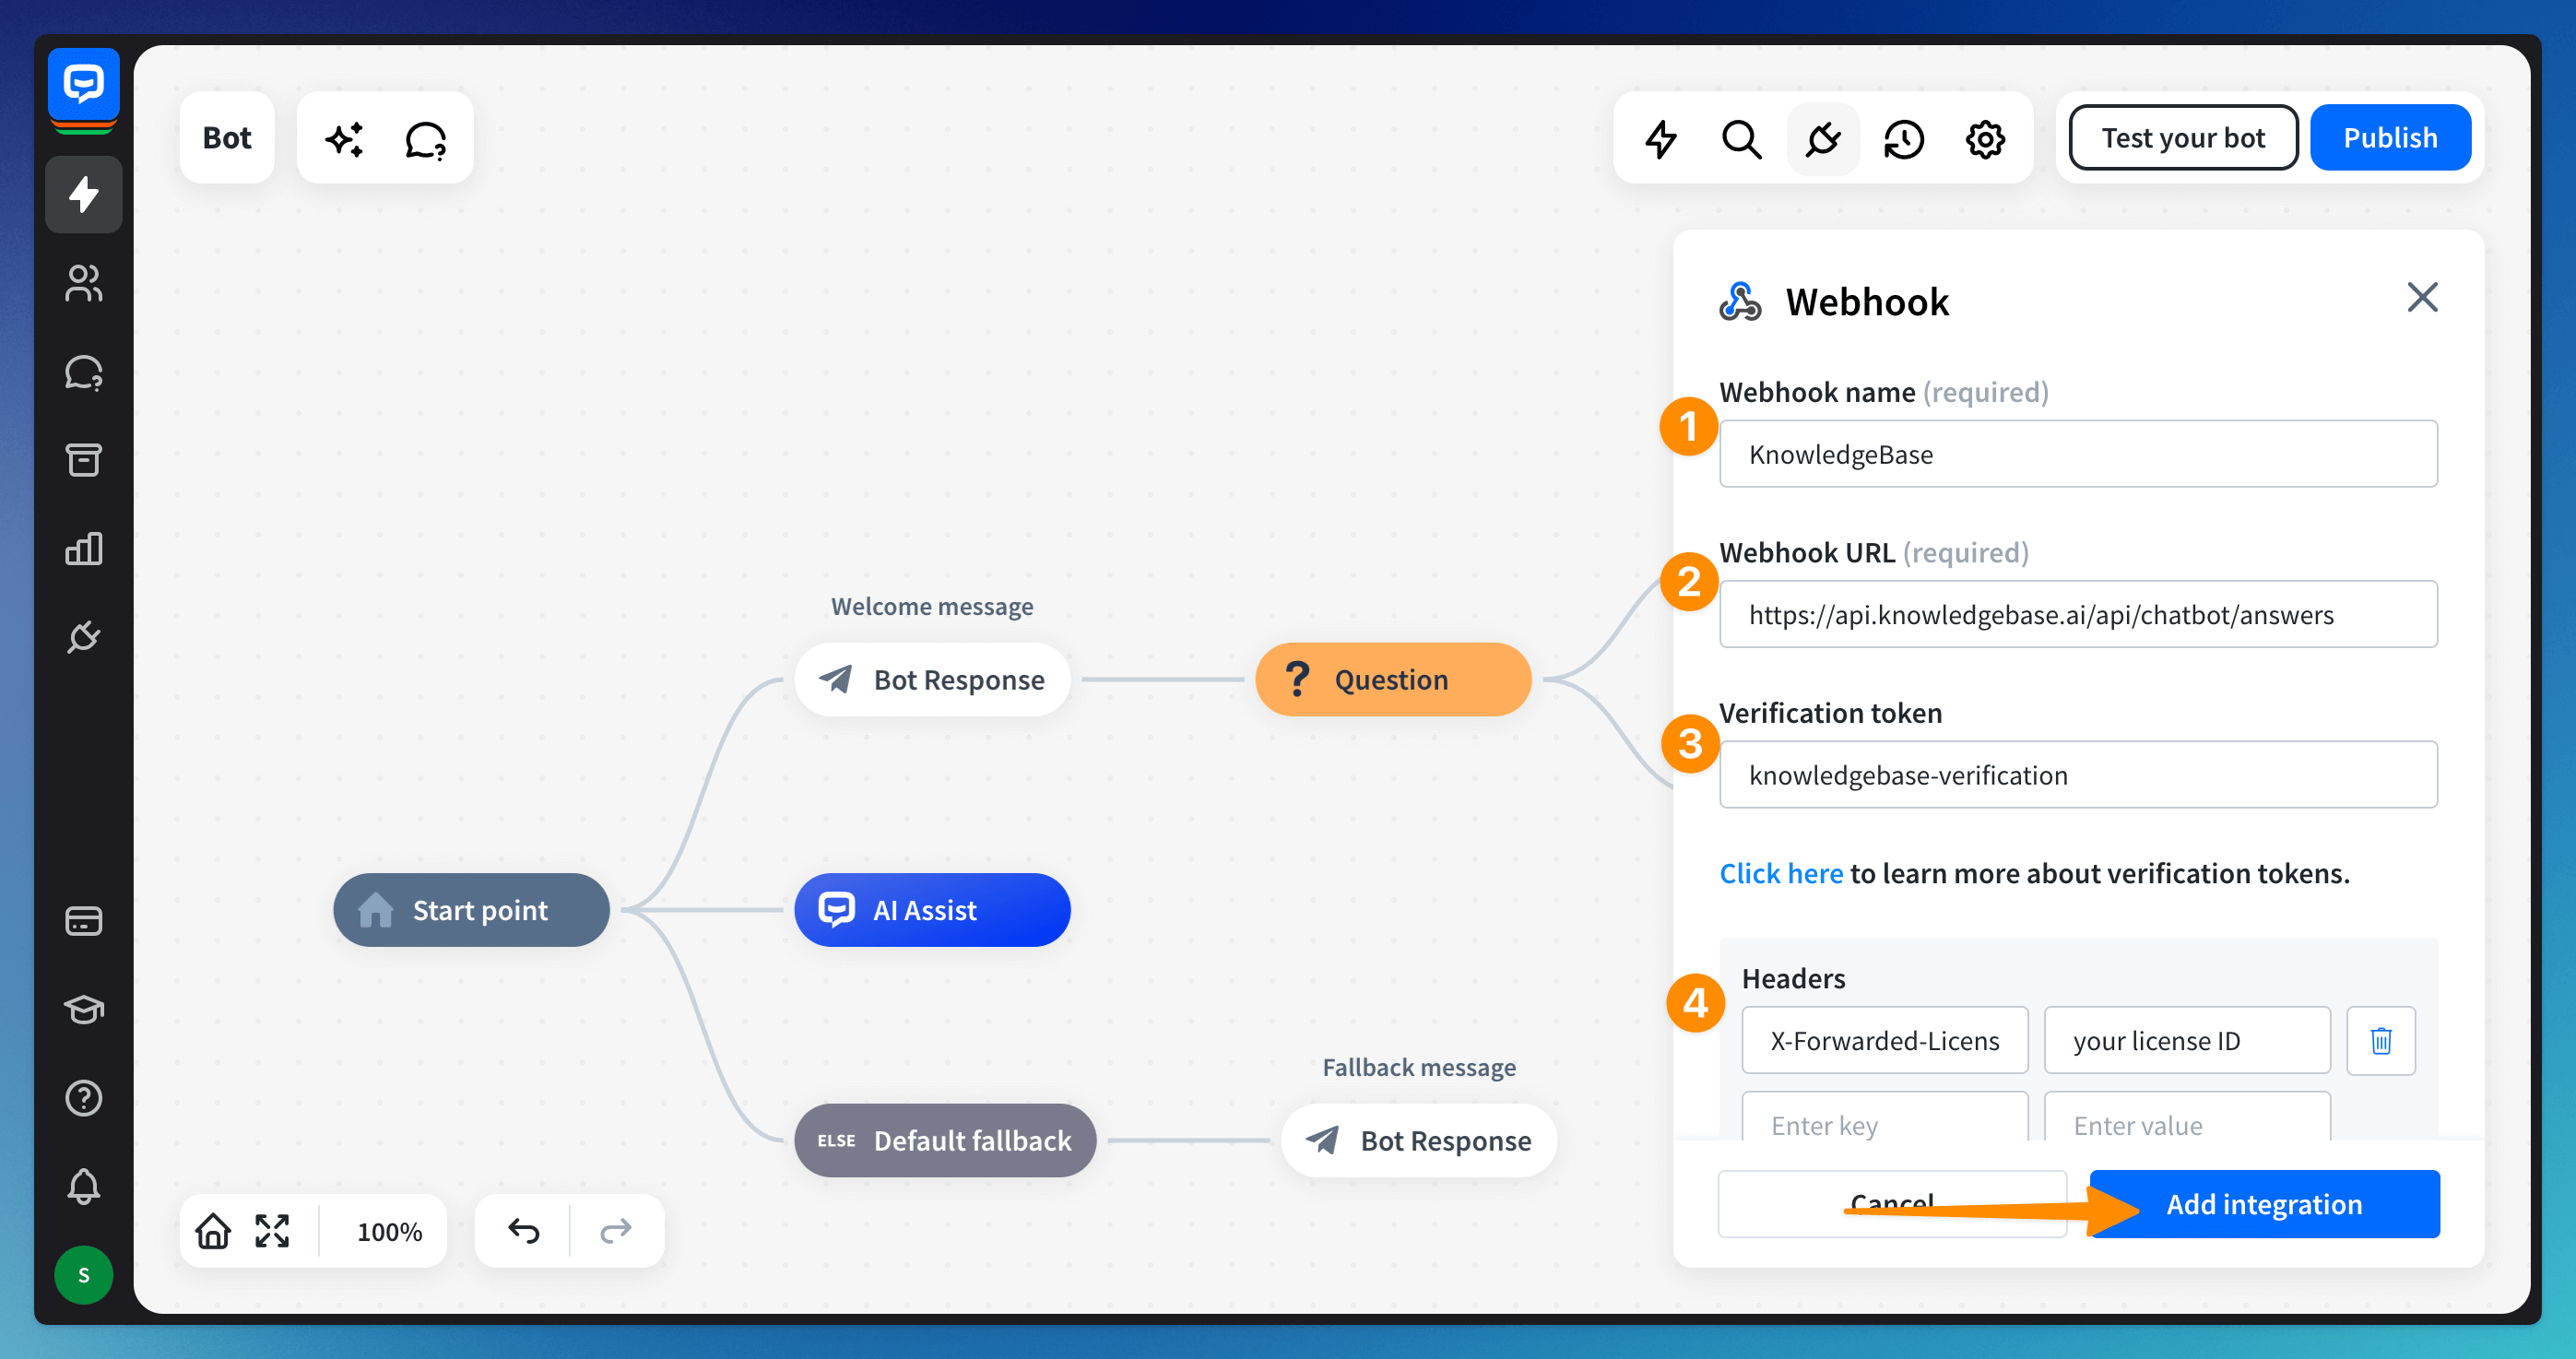
Fill in the form with the following details:
-
Webhook name: KnowledgeBase
-
Webhook URL: https://api.knowledgebase.ai/api/chatbot/answers
-
Verification token: knowledgebase-verification
-
Headers:
- key: X-Forwarded-License
- value: your license ID
-
-
Add the integration. The new webhook will be displayed on the integrations list.
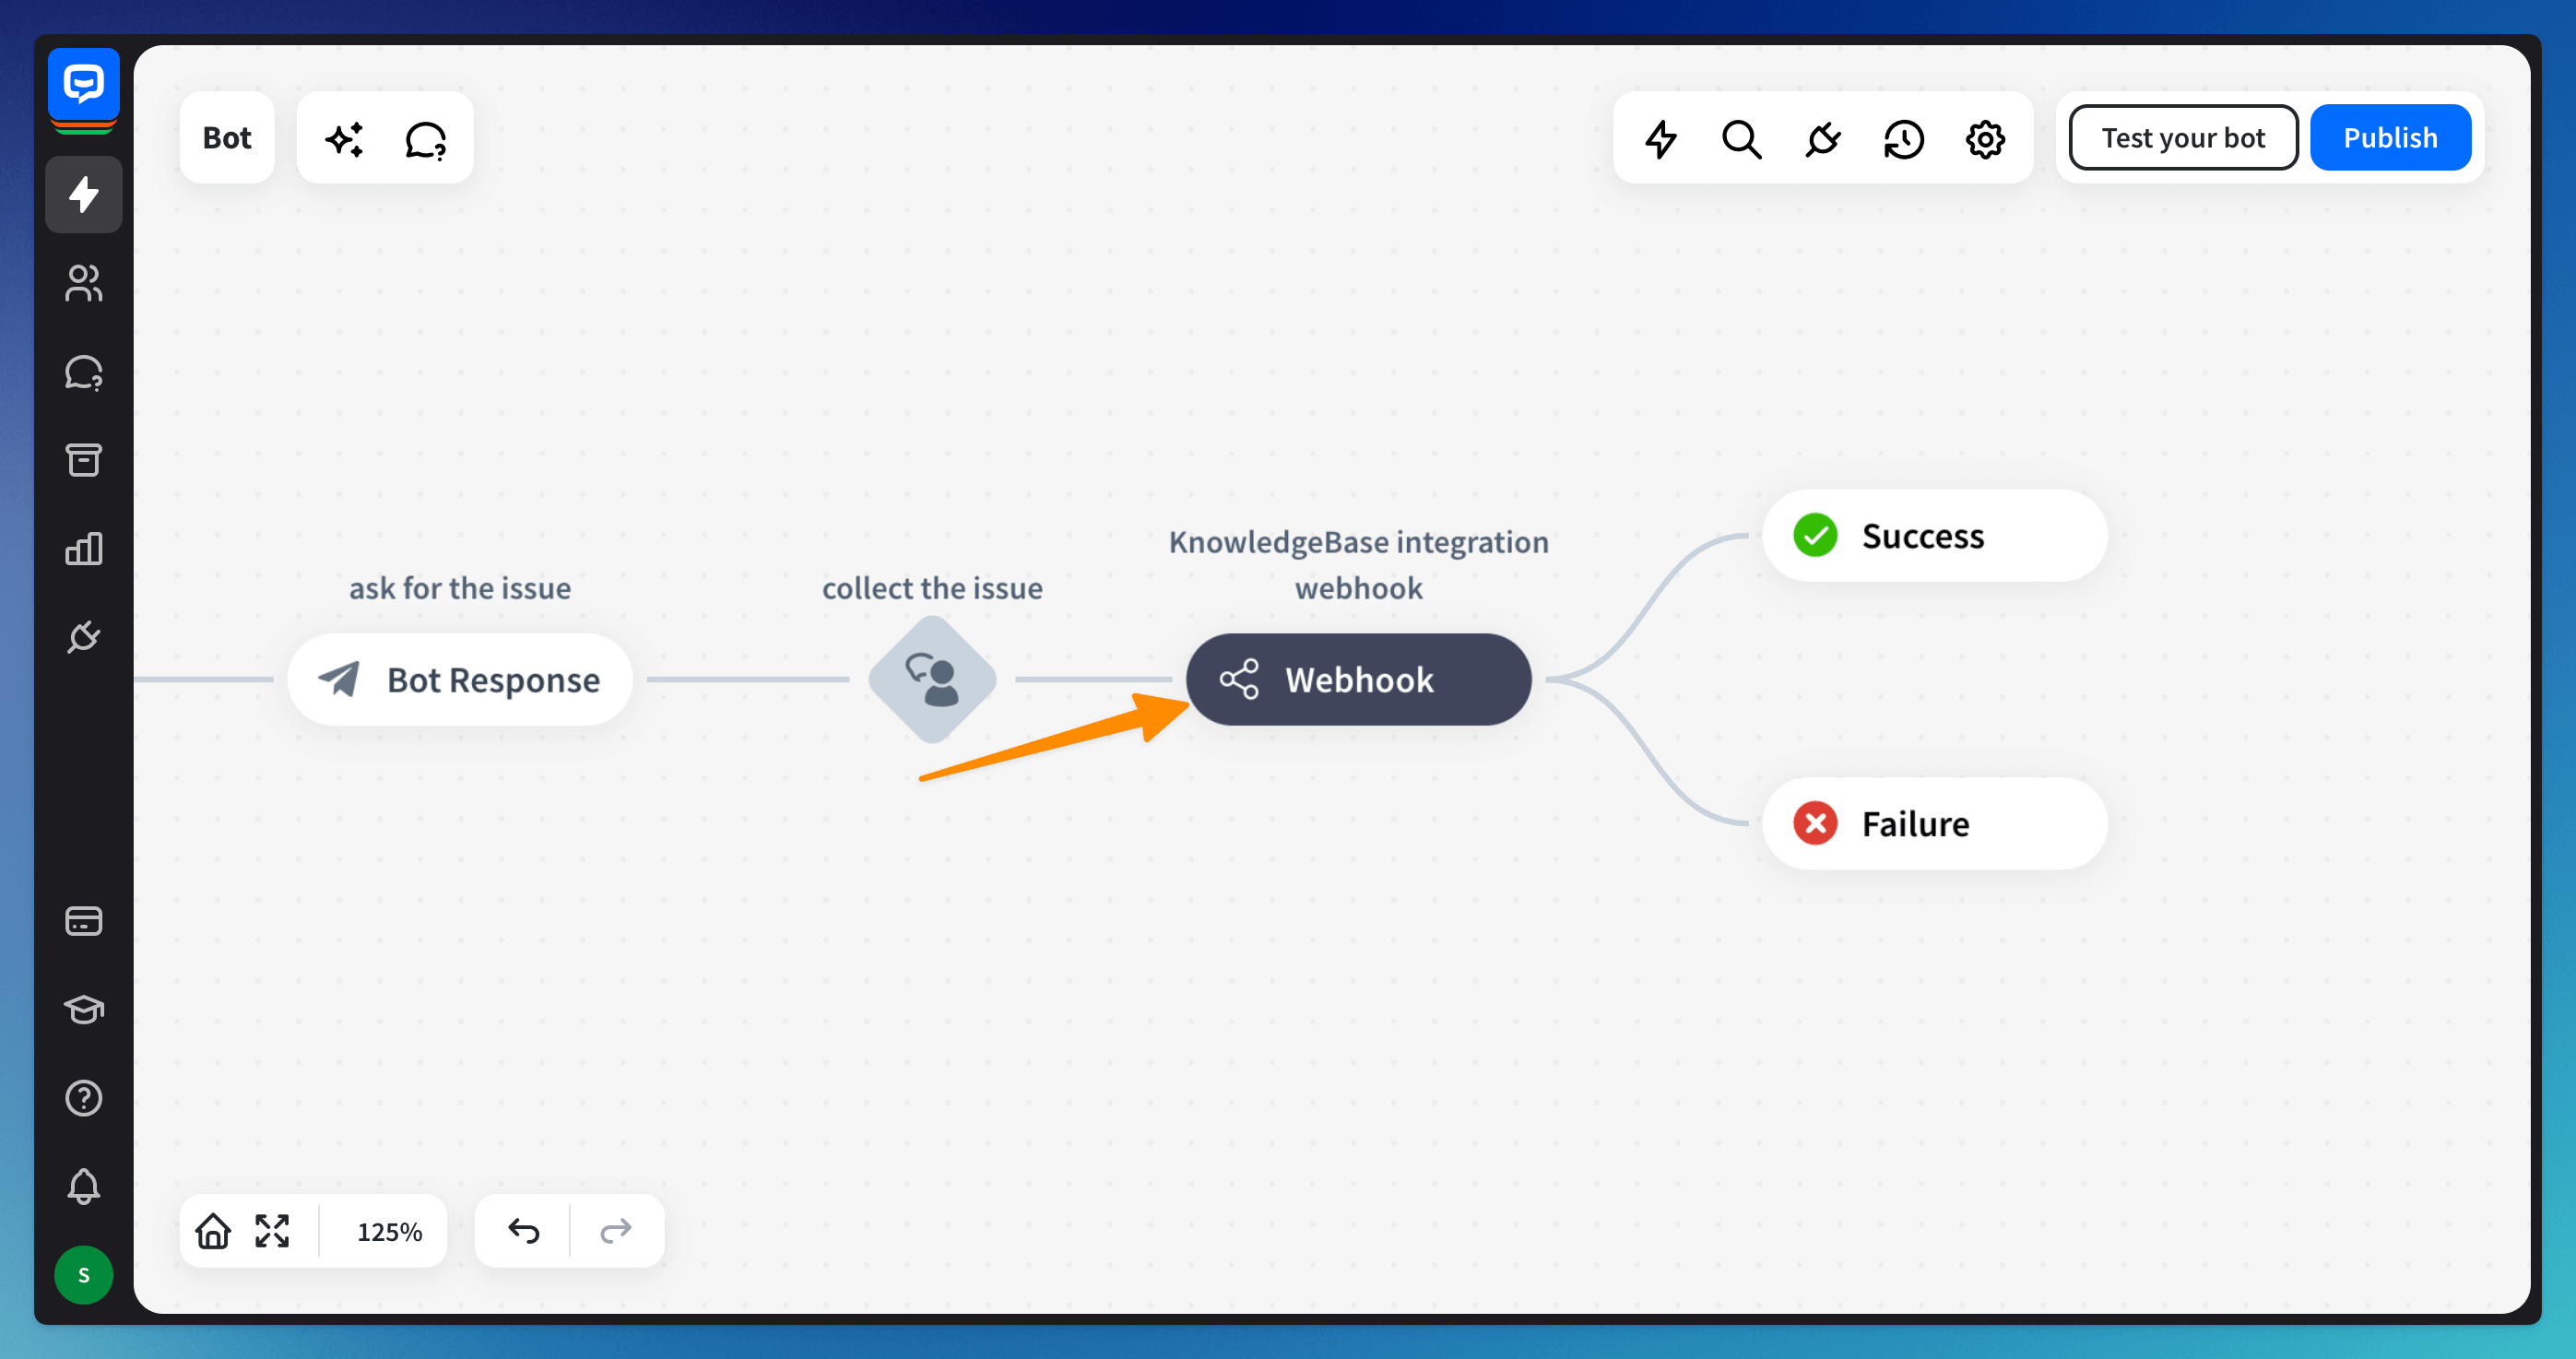
How to add the KnowledgeBase webhook to your bot flow
When the webhook is created and the integration is active, you must place it correctly in the bot flow. The bot will display the articles only when the block is triggered on the bot flow.
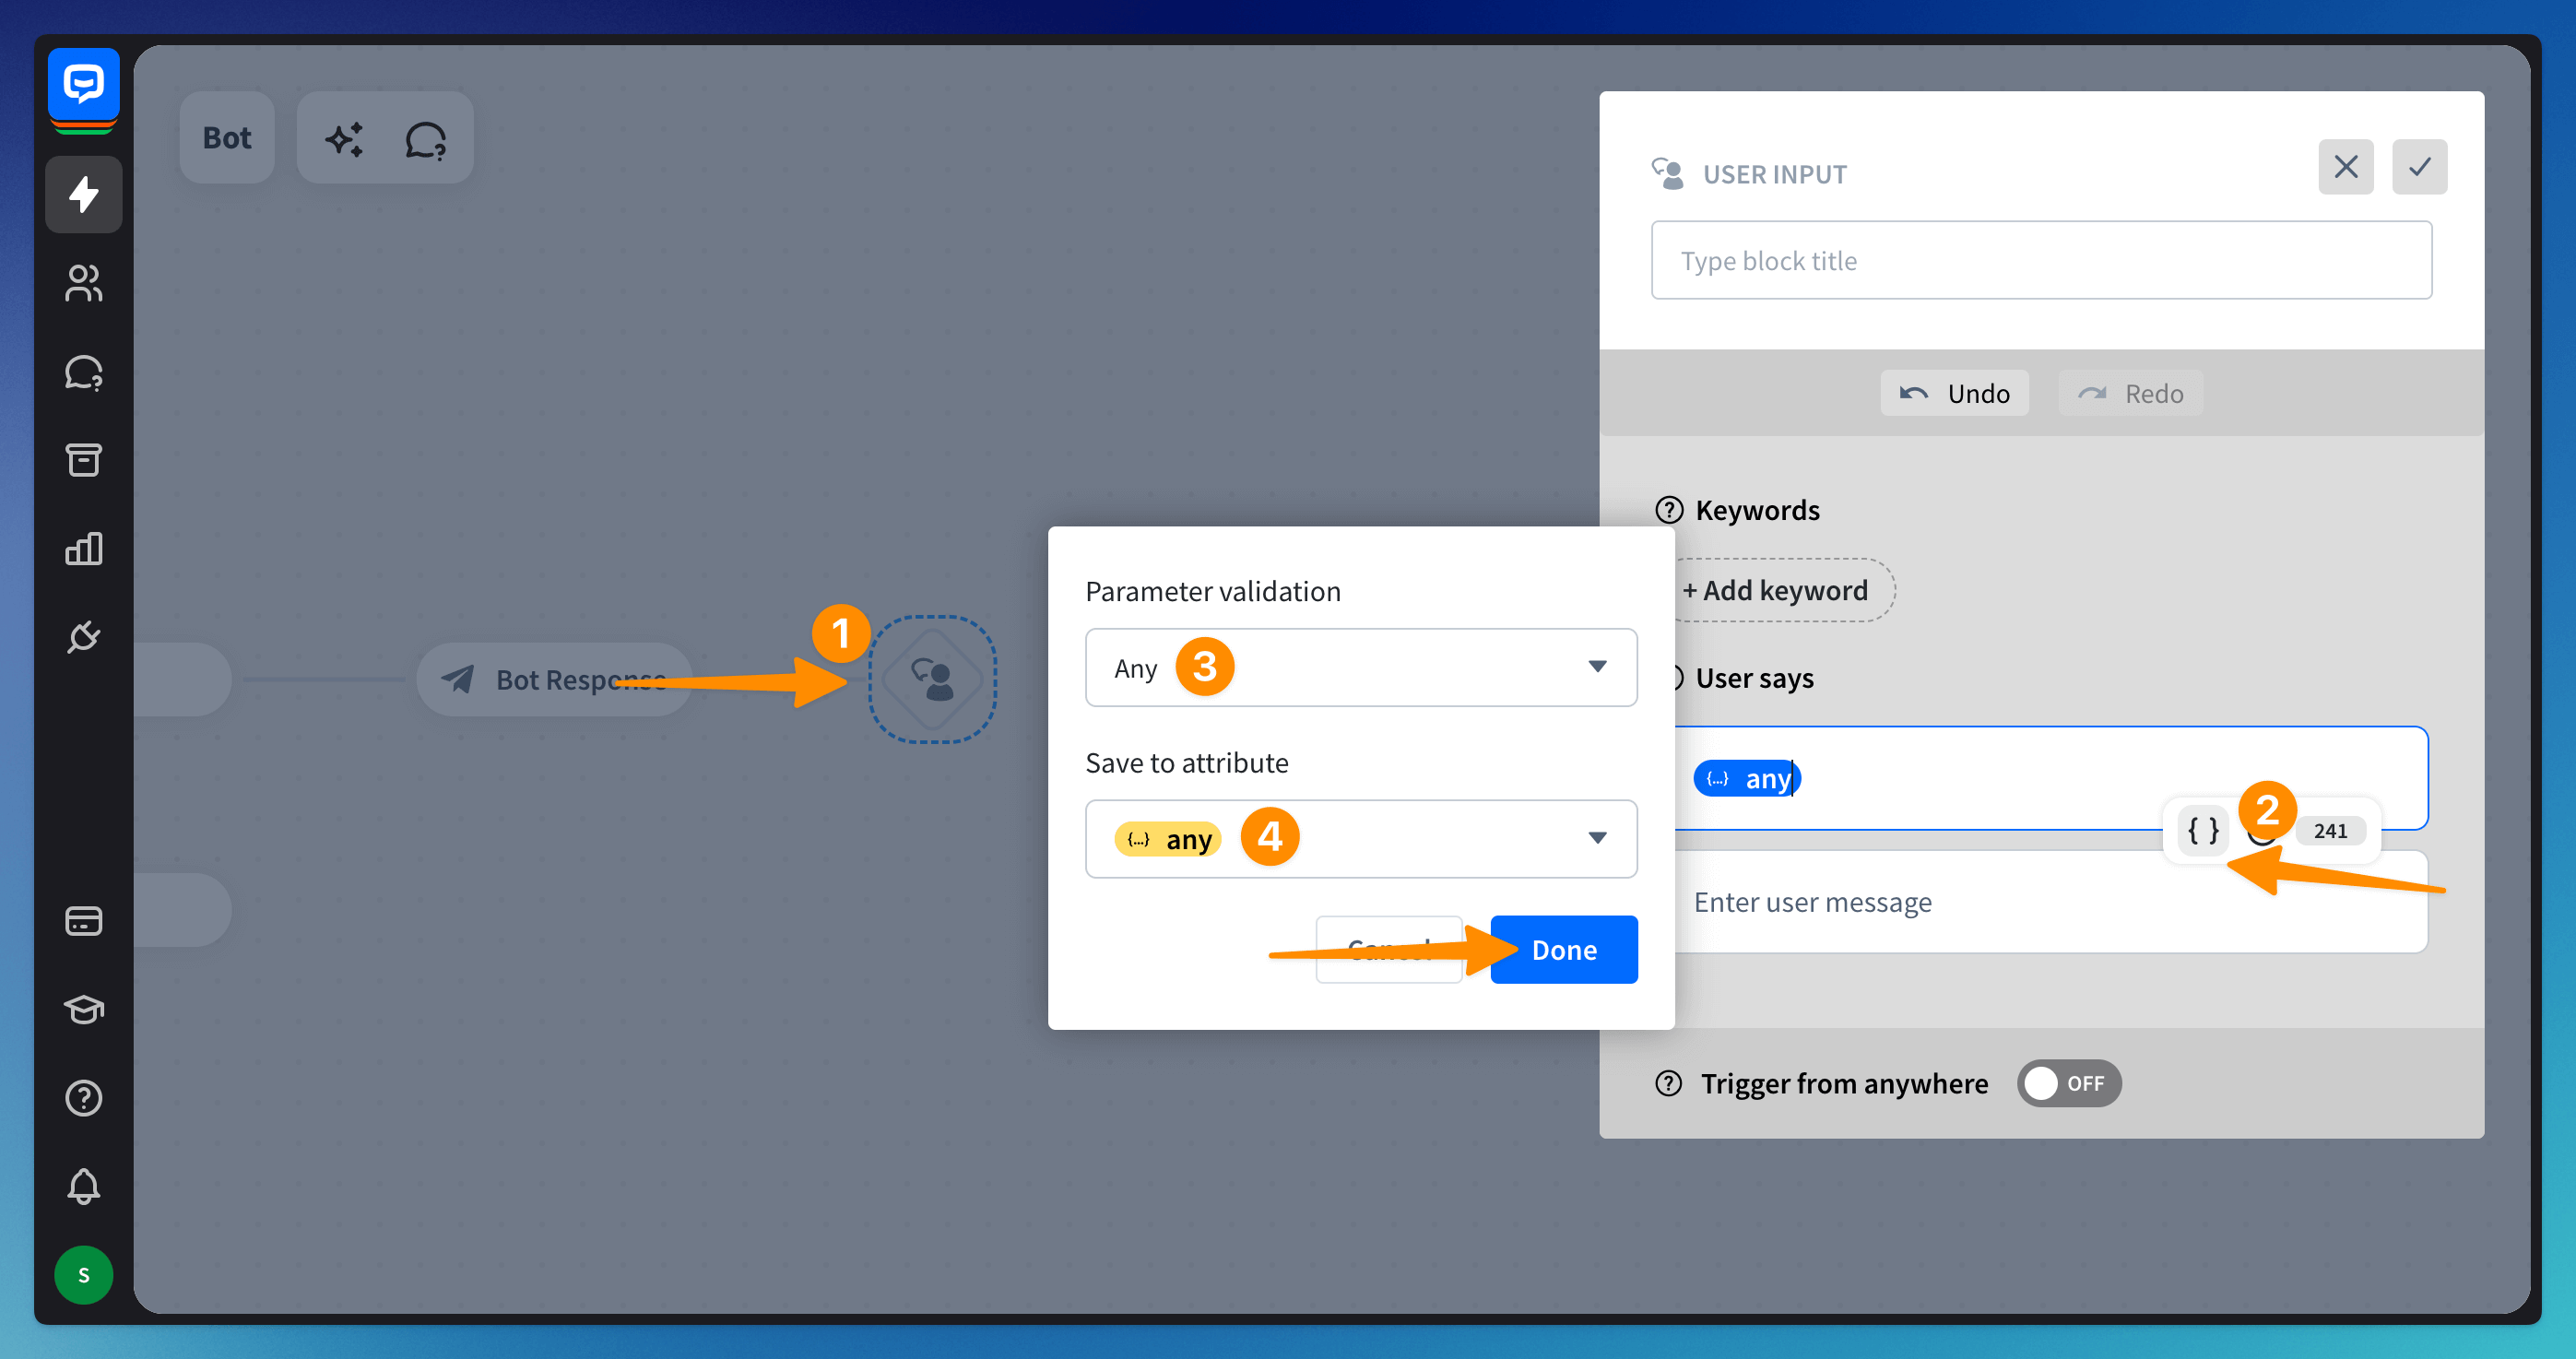
To start the searching process, you need to collect the user’s query. The best way to do it is with attributes.
-
Add a User input block (1) to the bot flow. Add an attribute (2) to collect the user’s question - choose the Any Entity (3) to collect the whole user response, and choose an attribute from the list, or add your custom attribute (4).
-
Add the Webhook block right after the User input block. Click the Webhook block and choose KnowledgeBase webhook from the list.
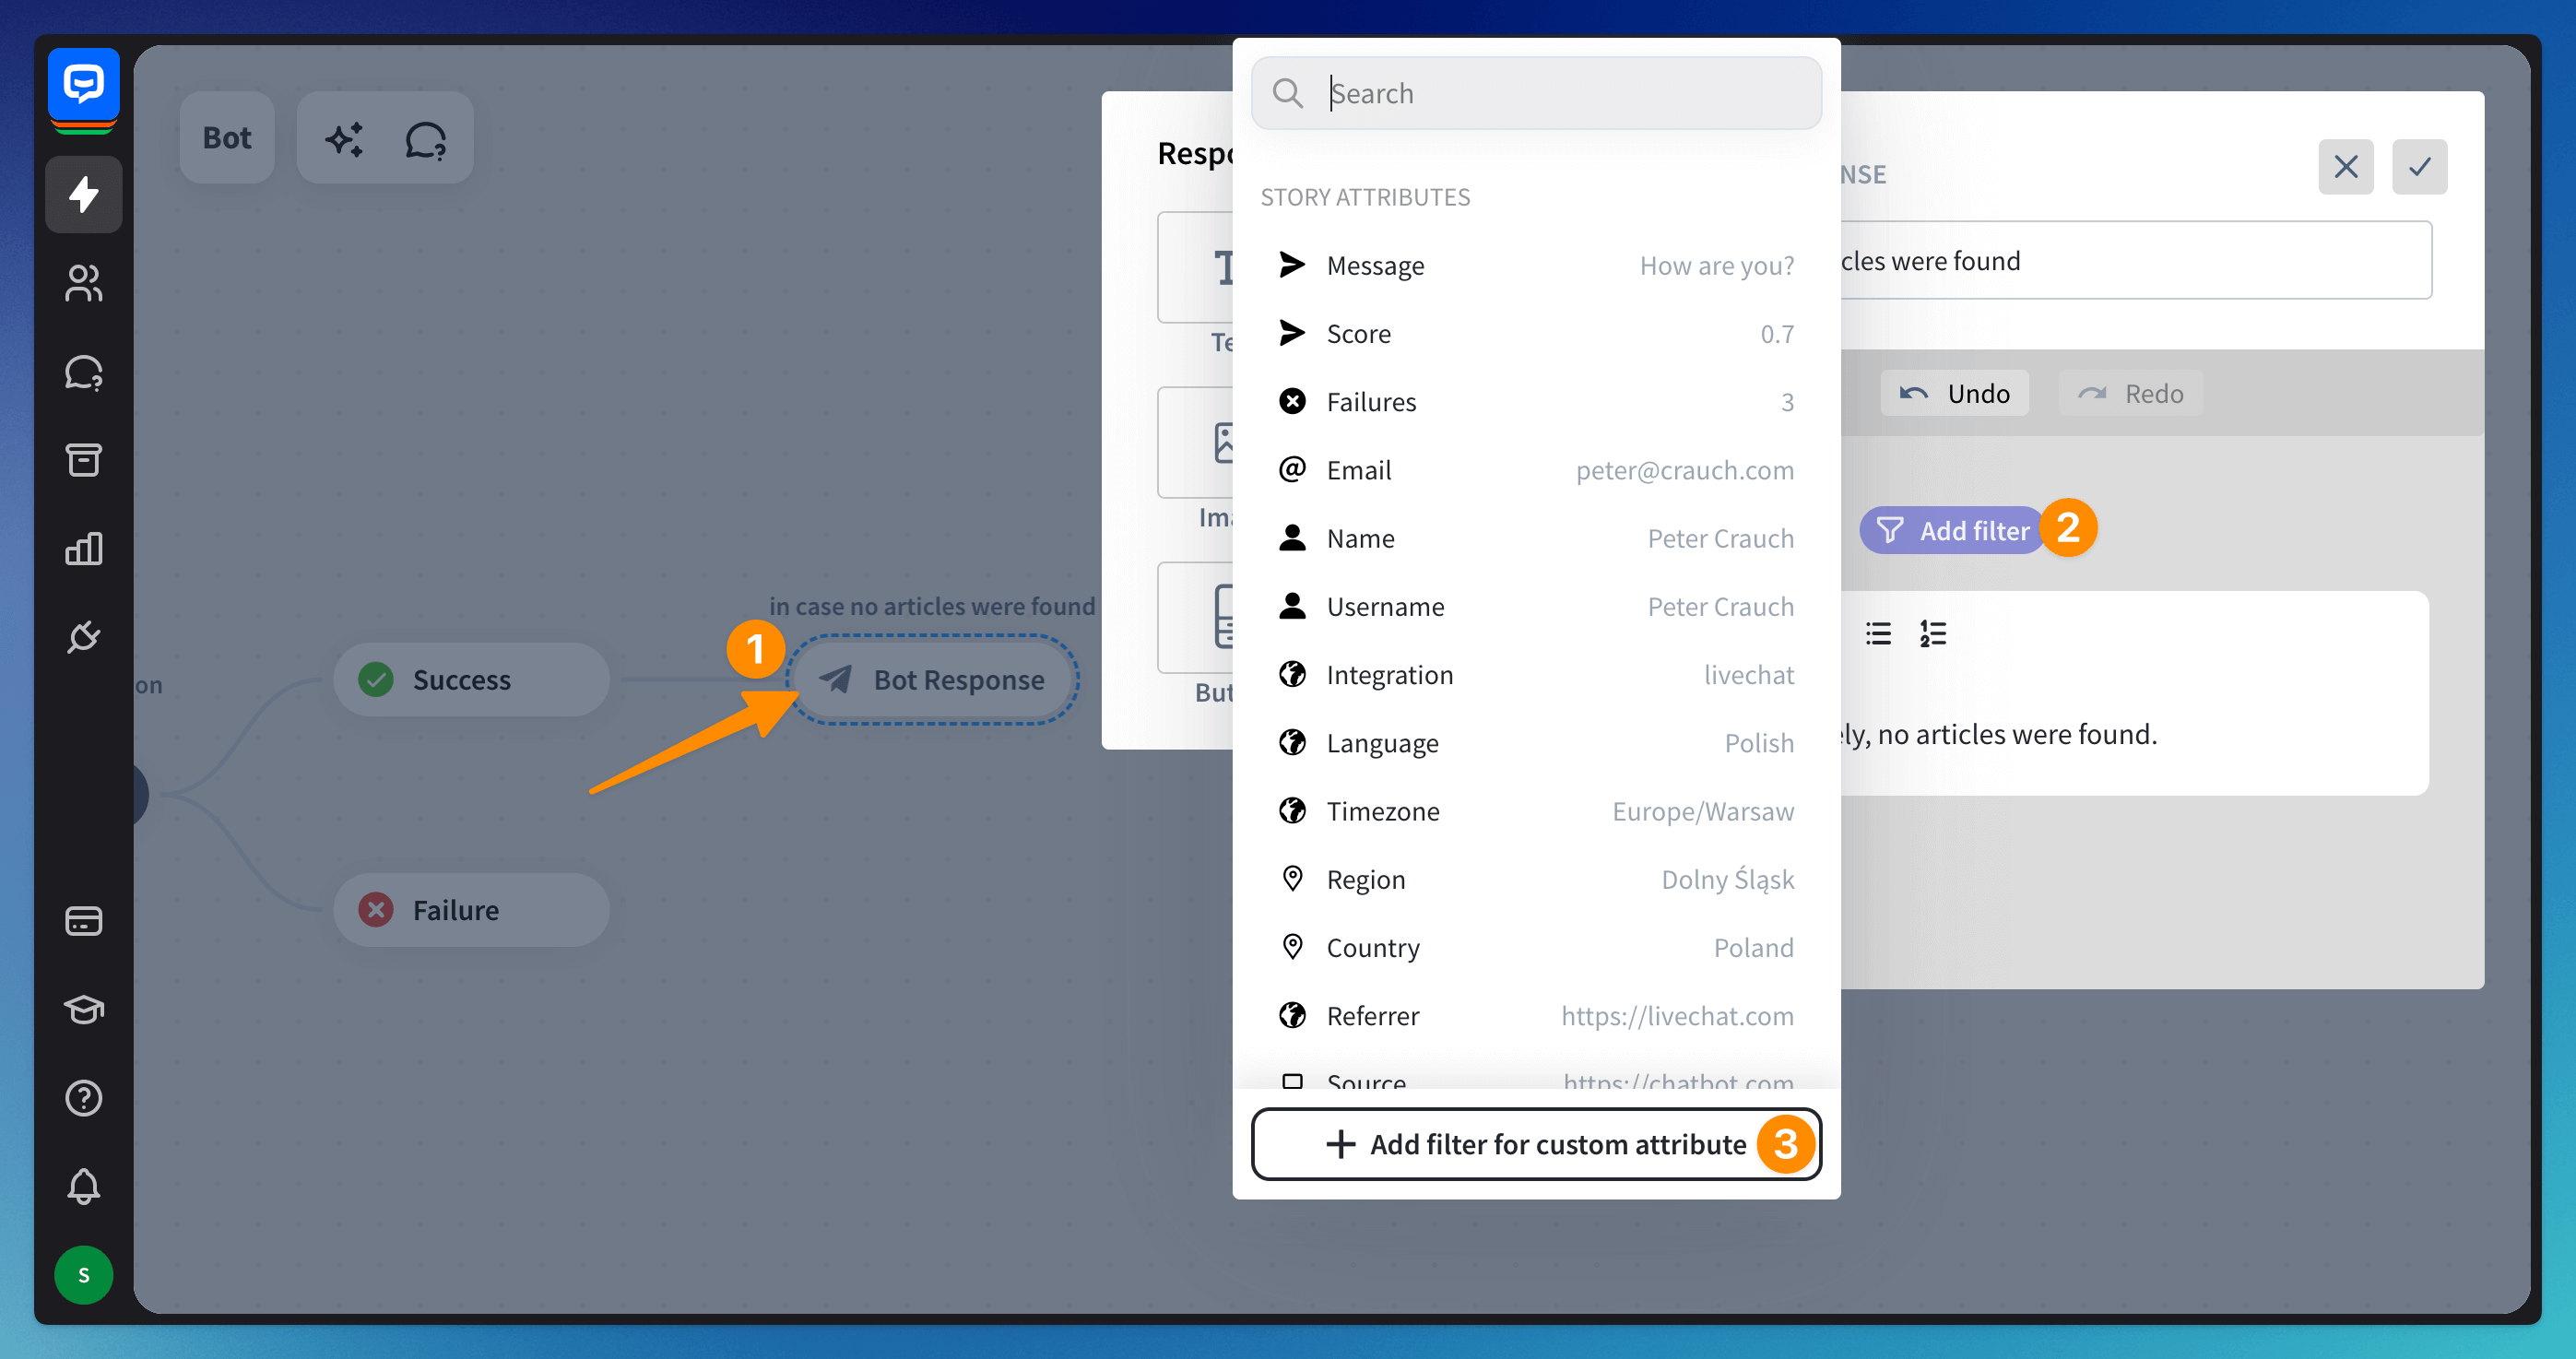
What to do when no articles are found
If the user’s query does not match any articles you have created in the KnowledgeBase, none will be returned to the bot. If you don’t cover such a case, the chat will be stuck.
To cover such cases, add a Bot response block after the Webhook’s Success block (1). Enter your response about not having an answer and select Add filter (2) button above the message. Choose an option to Add a custom attribute (3).
 Fill in the form:
-
Attribute name: kb_search_results
-
Condition: = equals
-
Value: 0
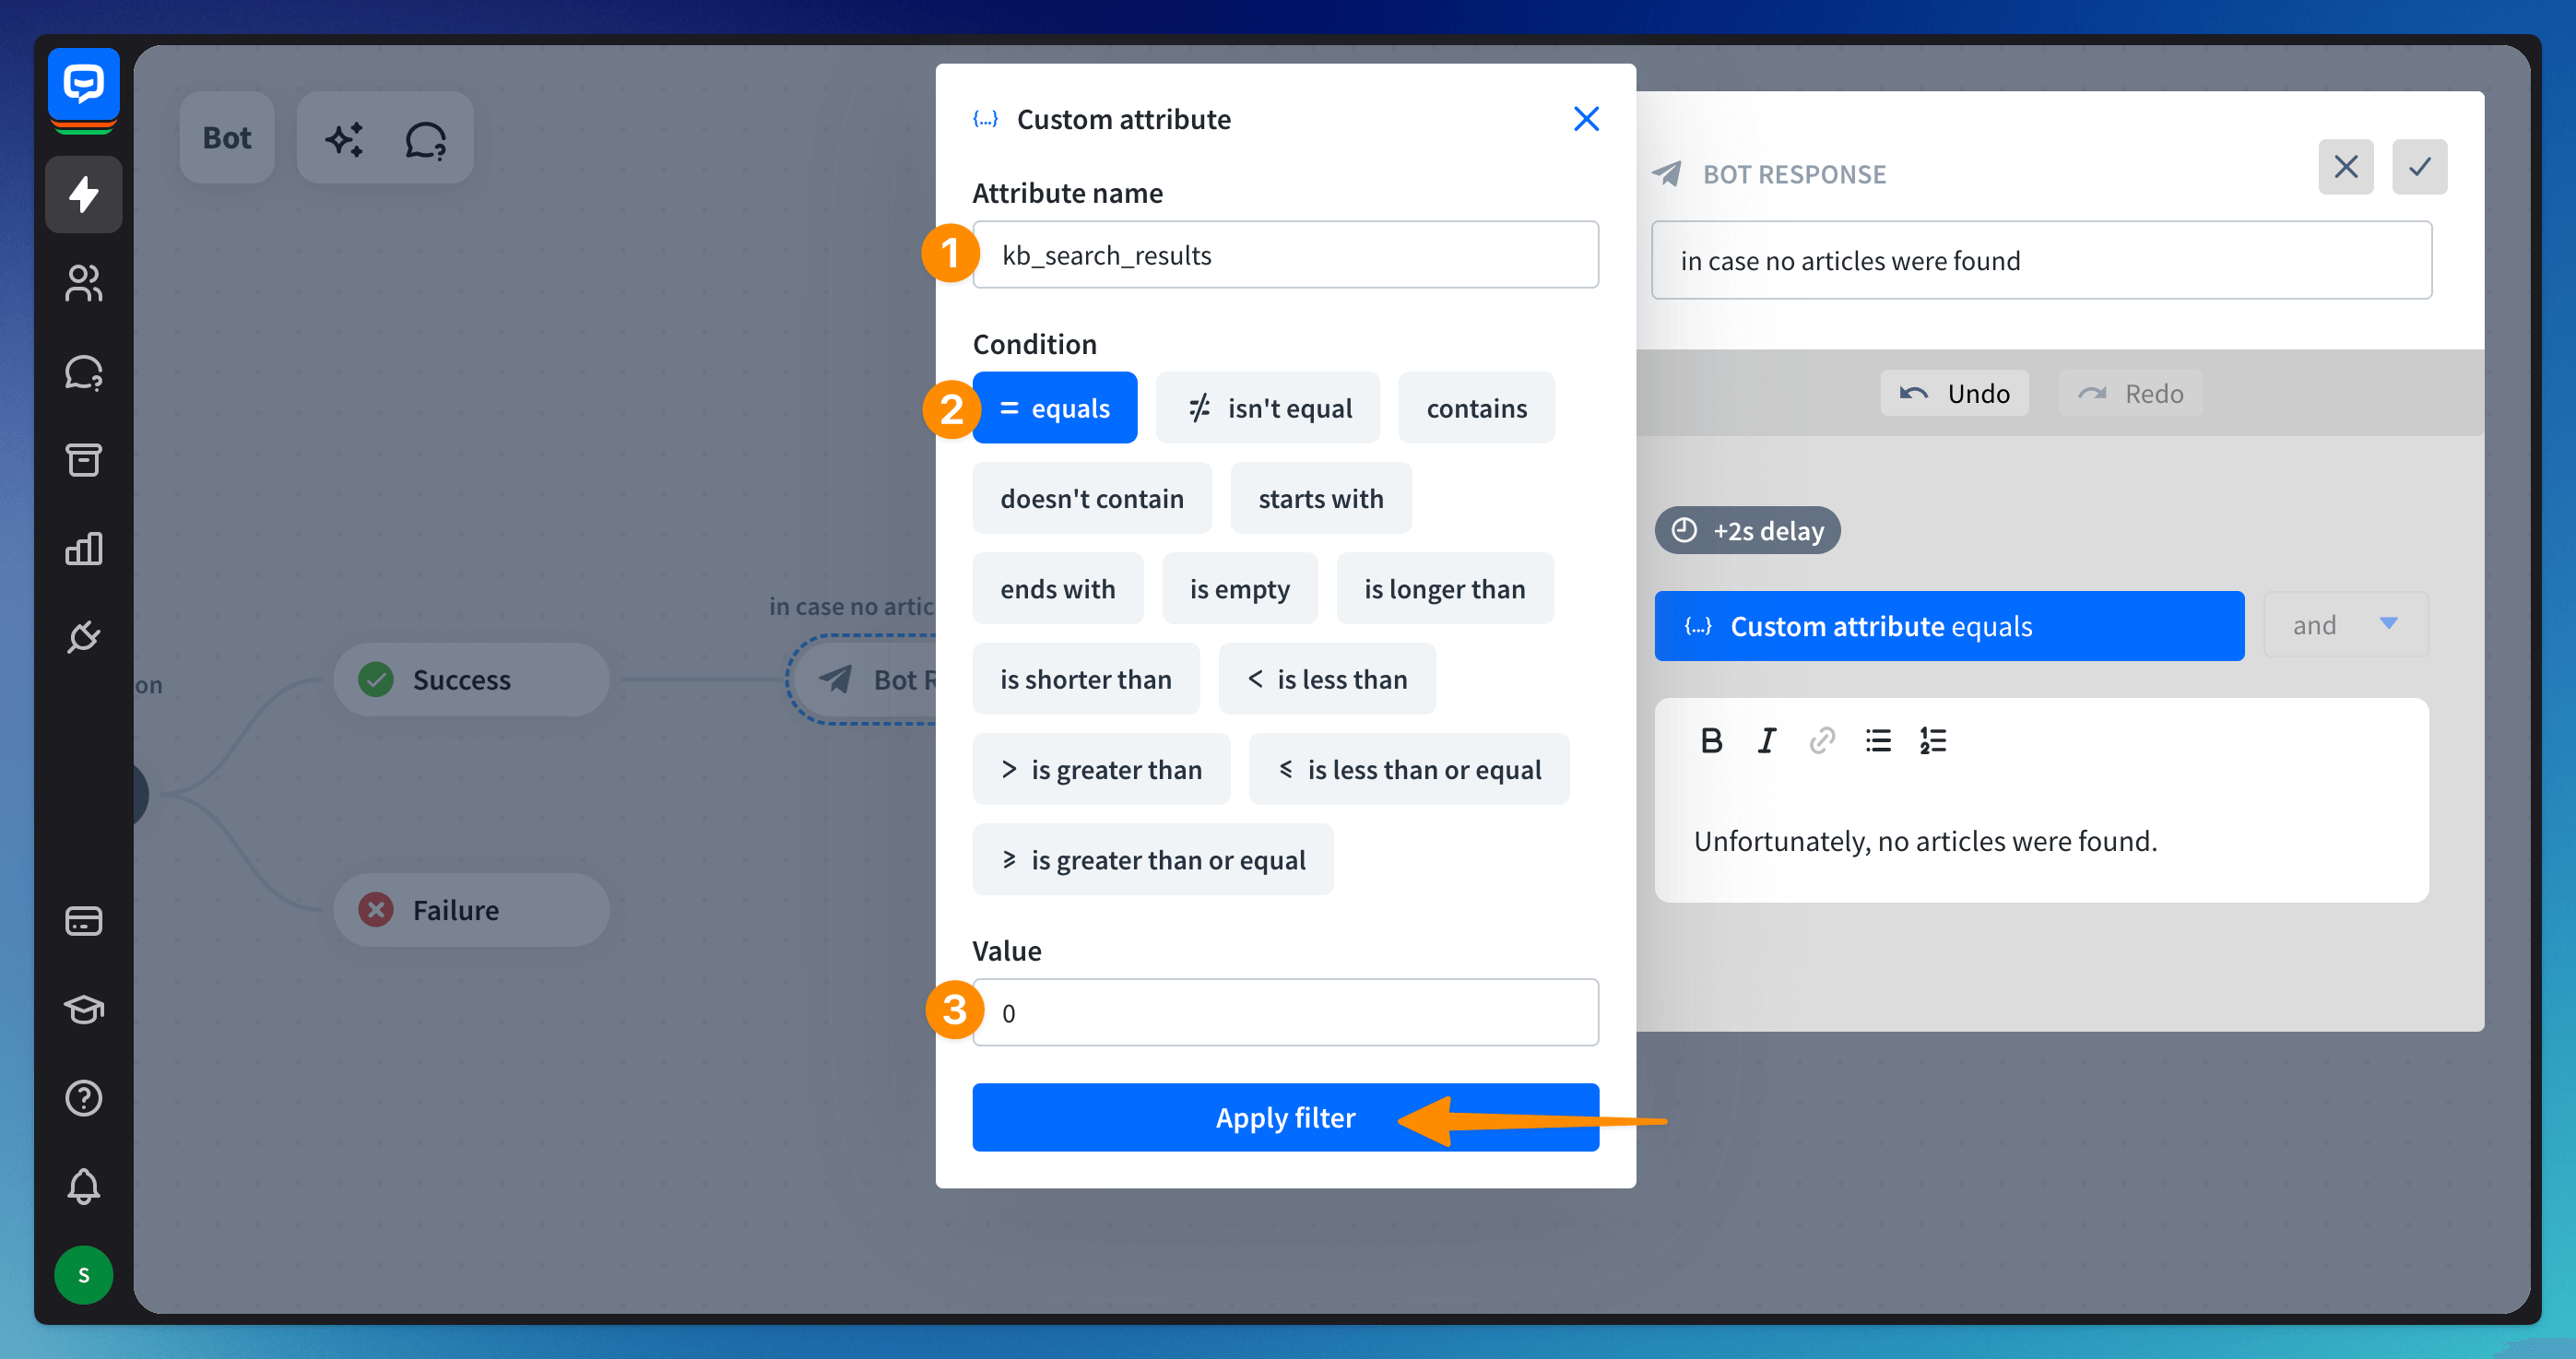 Apply the filter and close the block. The filter will be visible above your message.
Read more: