The Question action is helpful when you need specific information from your customer to proceed with their request. It can help you verify a username before completing the order, validate the email address provided by the user on chat, and much more.
To make it work, you need to set up an attribute. You can use one of our default attributes or create your own attribute. It all depends on what you need.
To save an attribute, you need validation to check that the provided information is correct. You can use our default validation types or create your own format.
The Question action elements
You can decide what is happening each step of the way while setting the Question action - fill in several fields to make sure the information you need is being saved correctly.
The fields you need to adjust are:
-
Question variants - provide your question. You can use multiple ways to ask for the same information.
-
Validate response with entity — select an entity with which you want to validate the response. If you do not want to use our default Entities, create your own Entity before configuring this action.
-
Save response to attribute — name your attribute. You can create your custom attribute if you do not want to use our default ones.
-
Action of failure input — choose what should happen when the user fails to provide the answer in the correct format. You can go to the Failure block, or skip this question and proceed to the next one by choosing the Success block.
Remember to configure your bot structure according to this choice - you must place Bot response blocks in the correct place to ensure the chat goes smoothly.
-
Ask until […] — decide the number of times the bot should repeat the question if the answer is incorrect.
The Action on failure will be executed if the bot reaches the number. If the information is necessary, choose the “until fulfilled” option. If you can recognize the user without it, choose a concrete number.
How to use the Question action
To successfully use this action, you must customize it based on your needs.
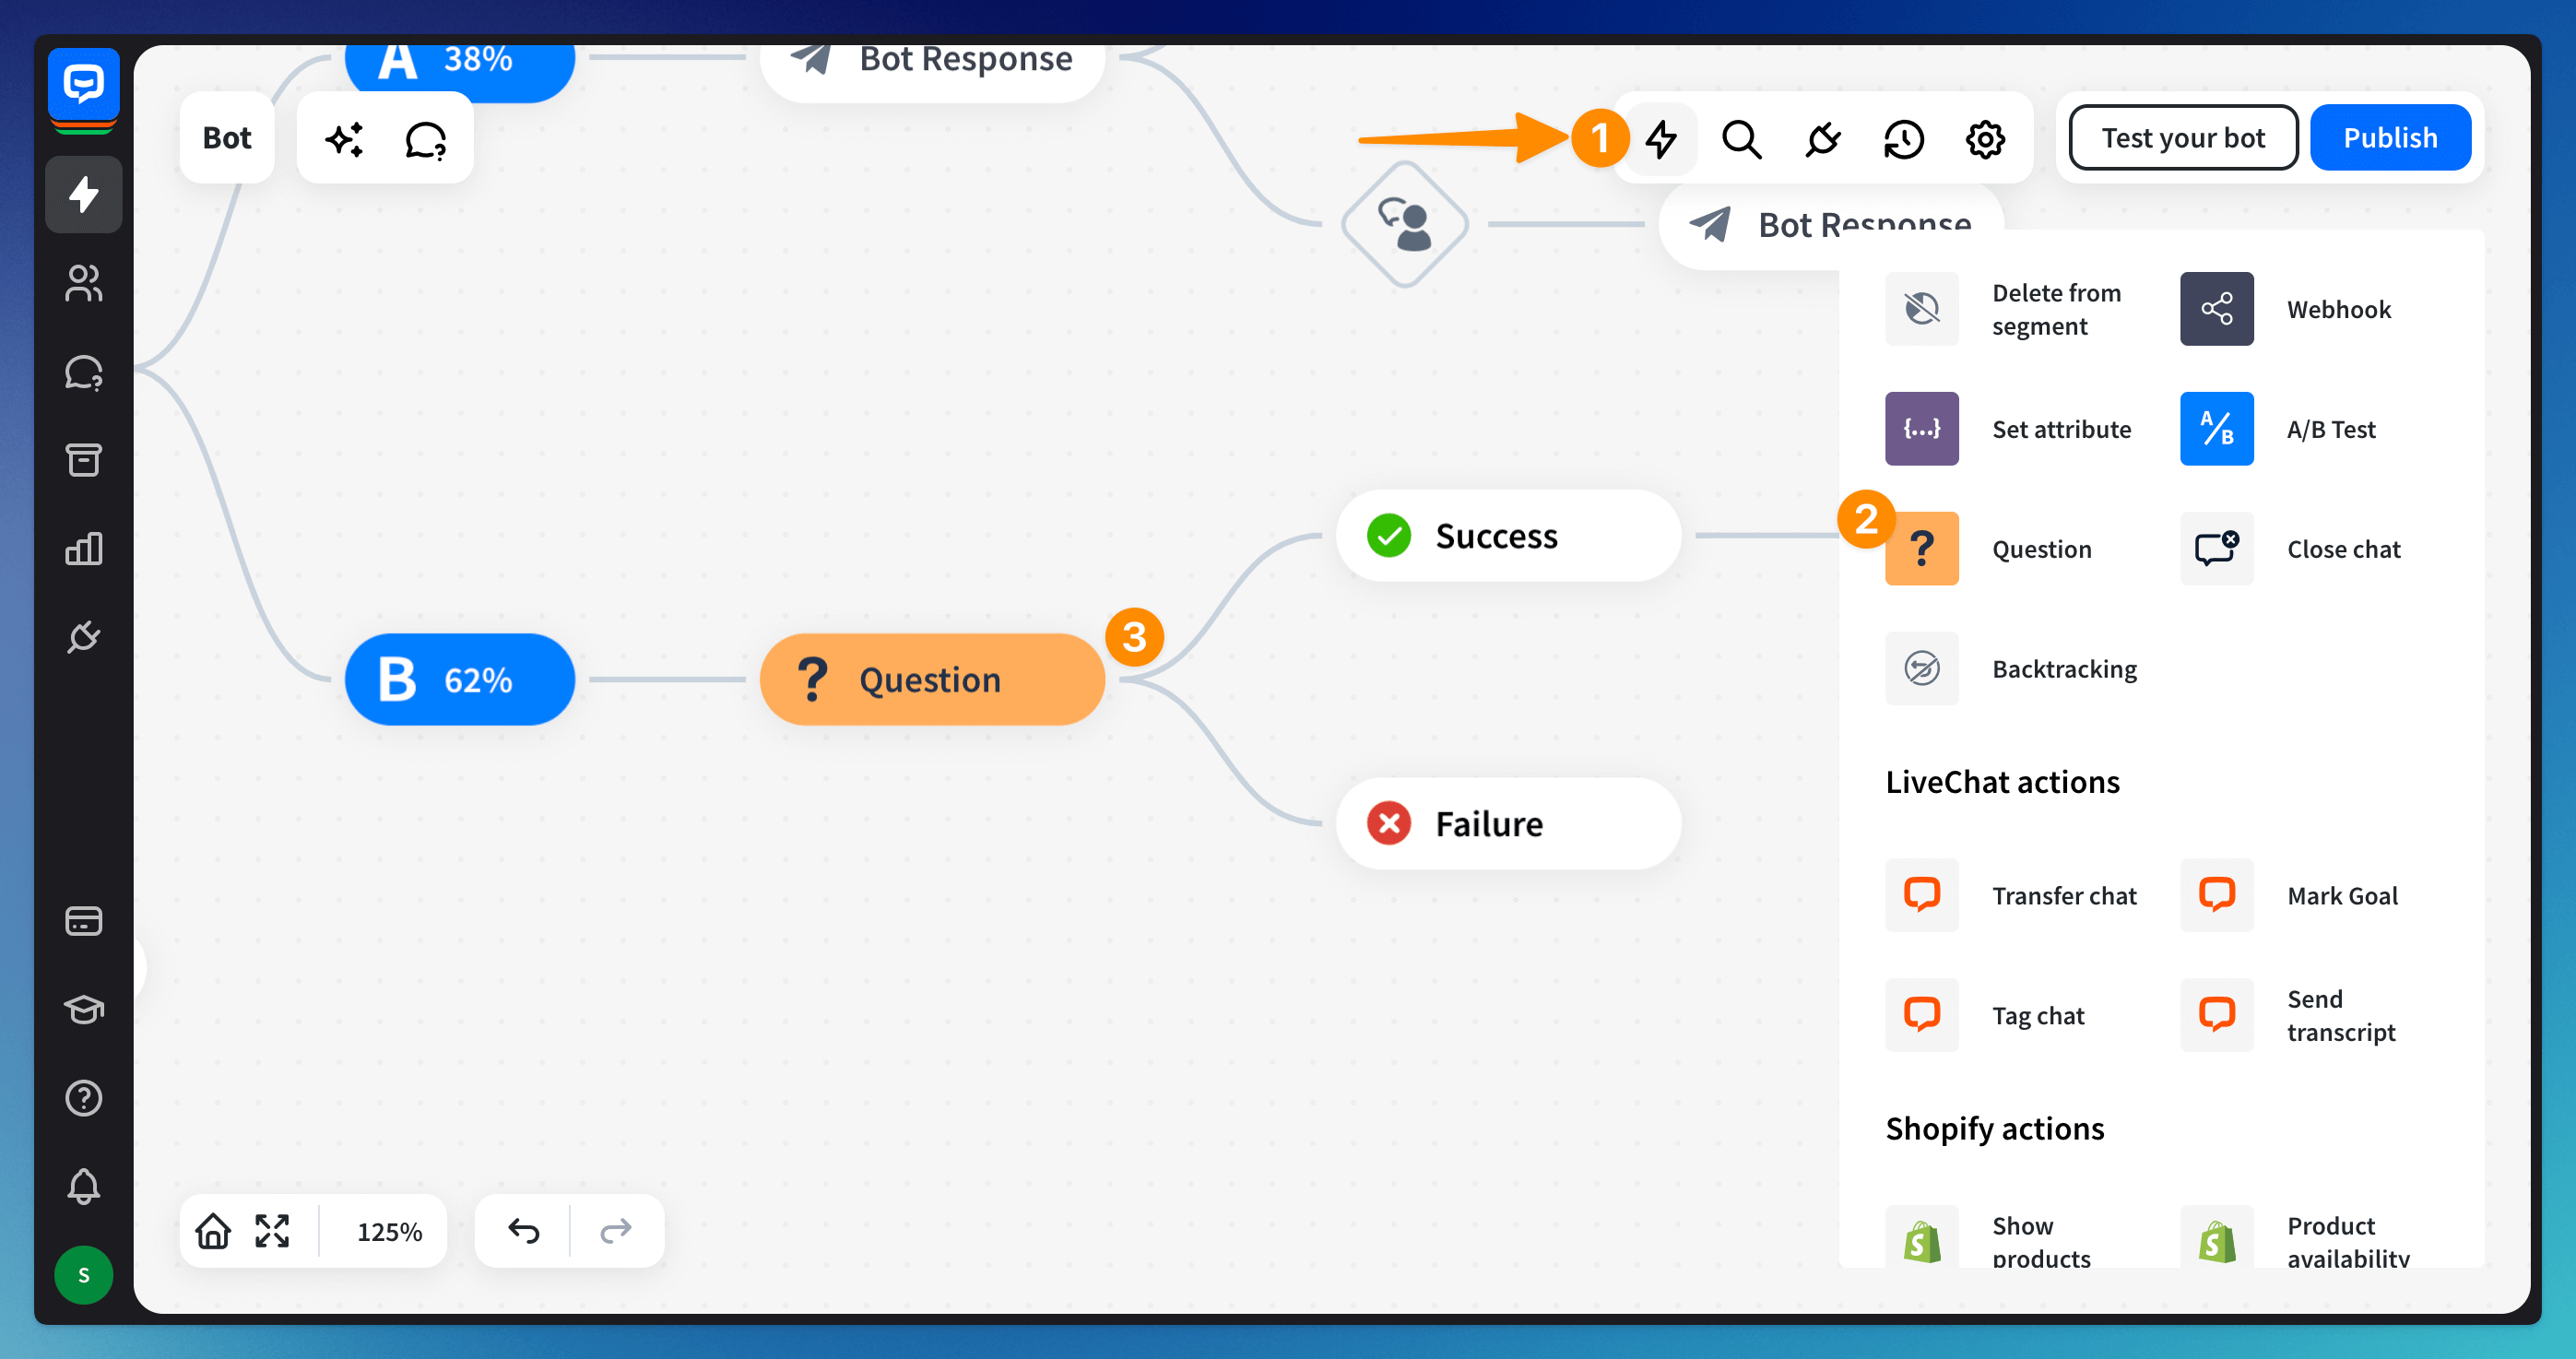
-
Drag the action to the bot structure. It will be placed with the Success and Failure blocks.
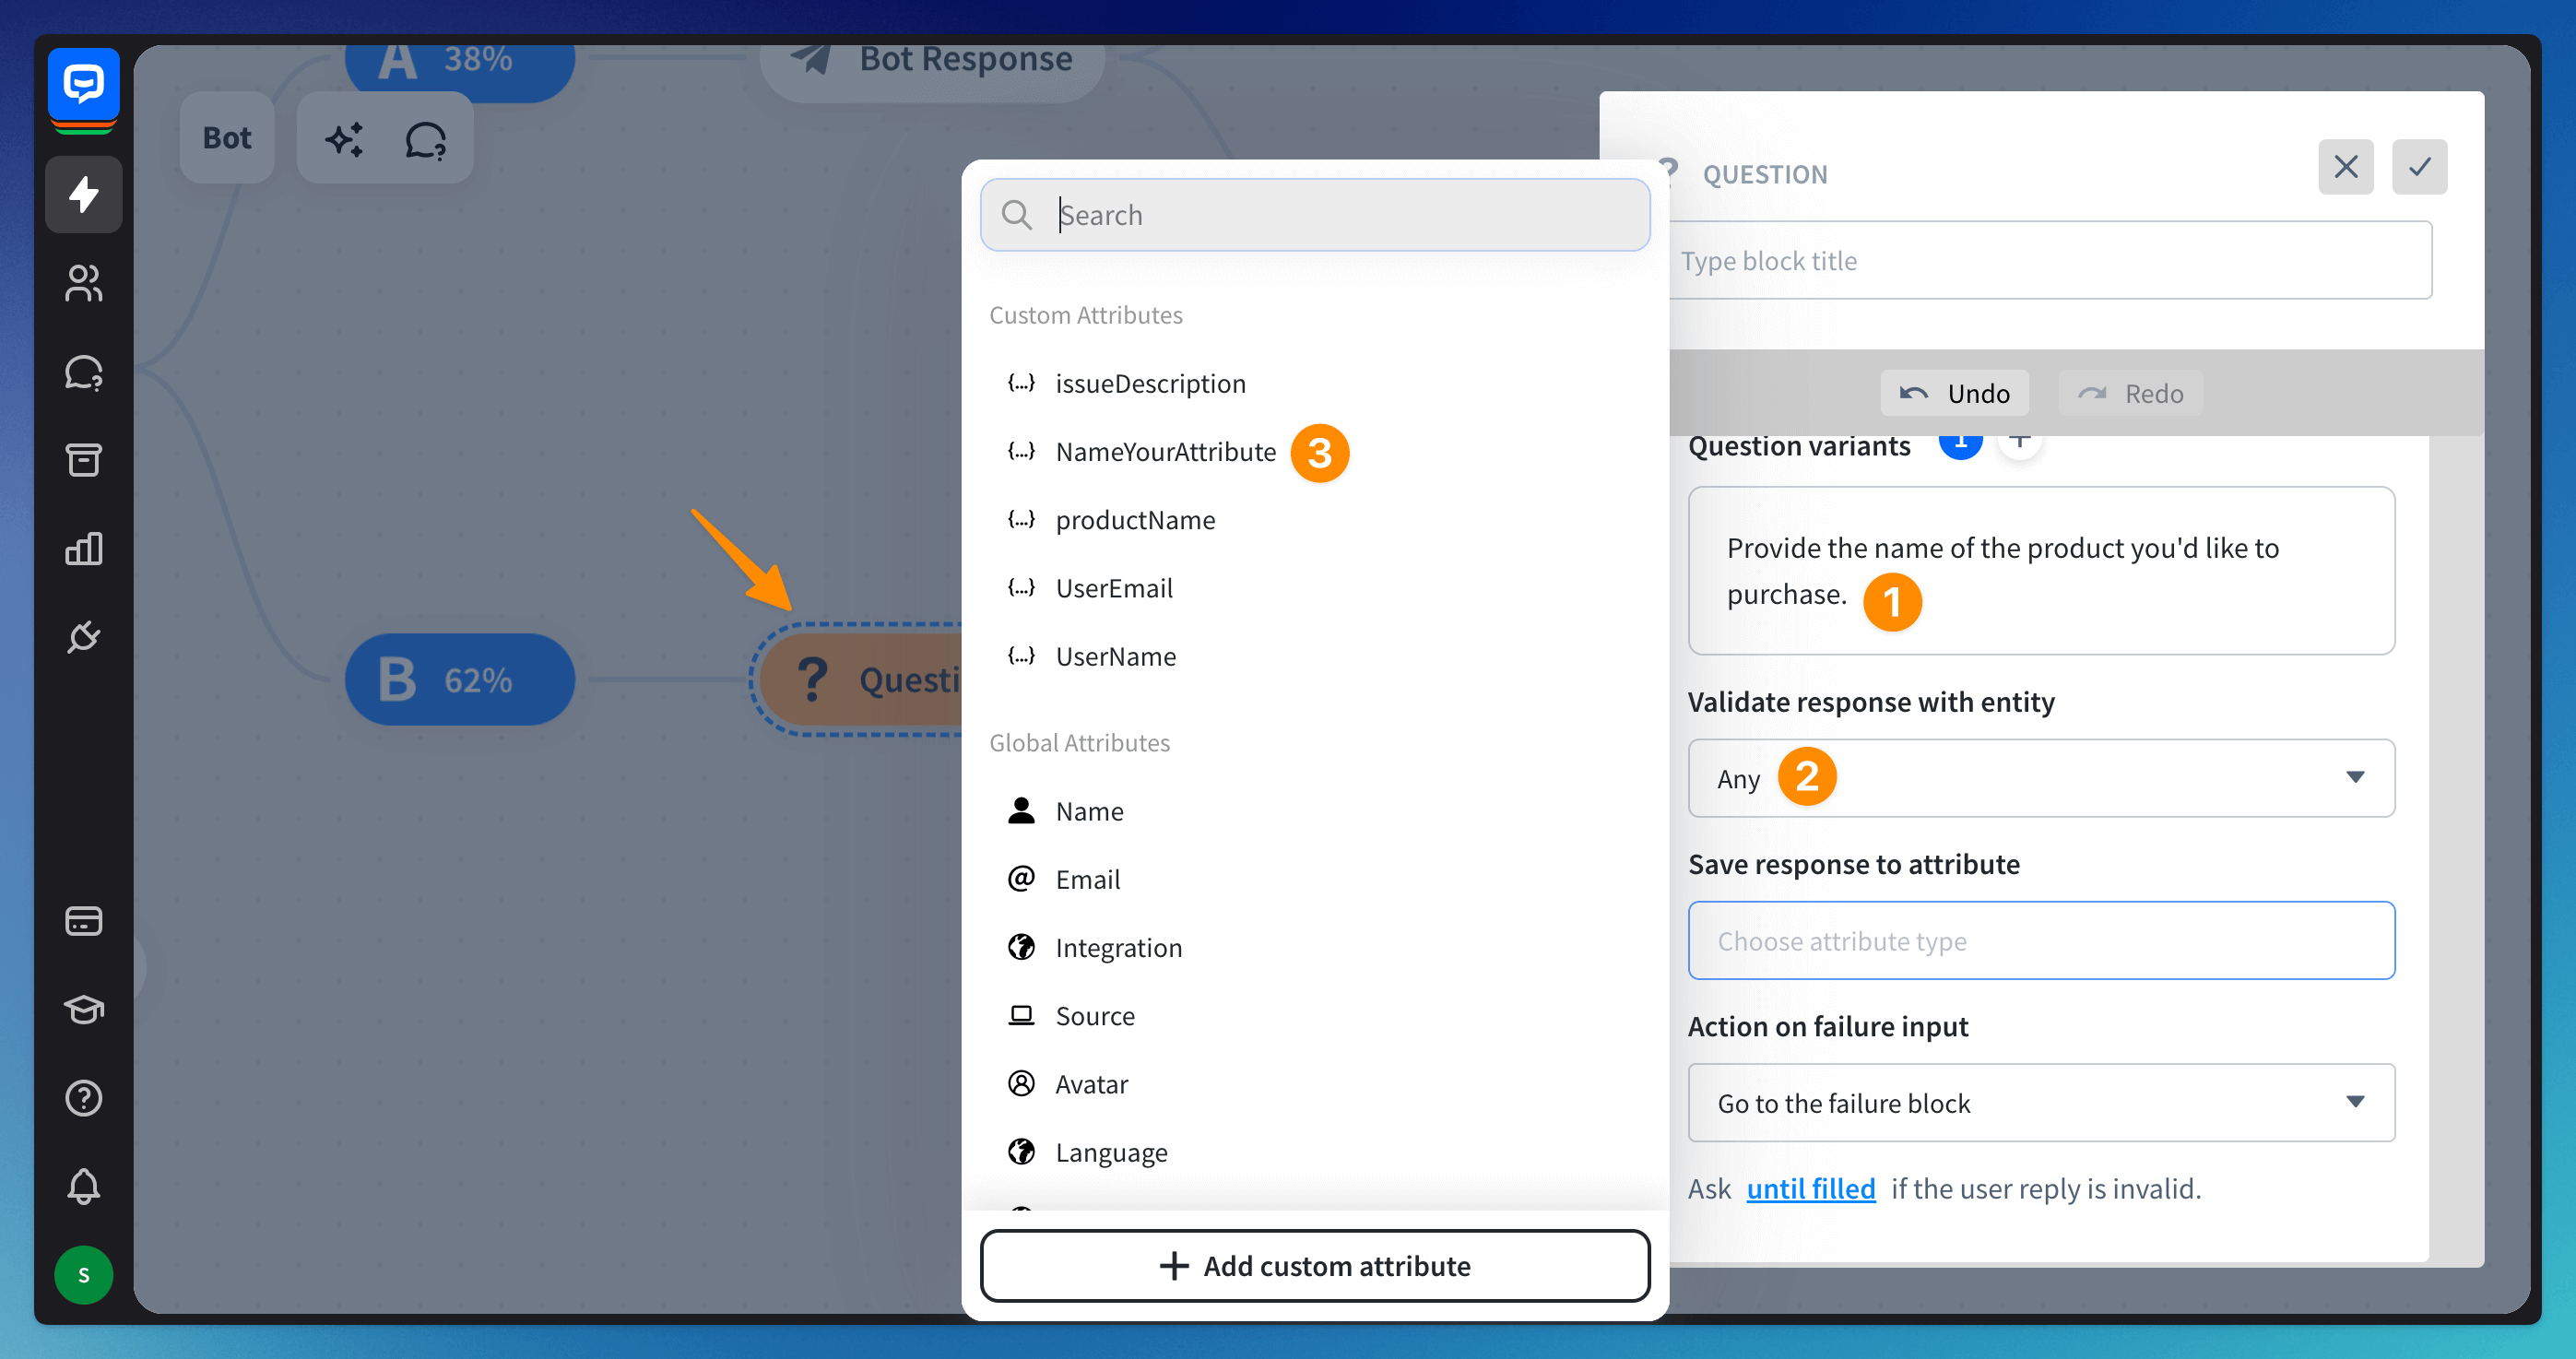
-
Configure the question (1). Choose the validation type (2) - choose a system entity or create your own. Choose to which attribute the response will be saved (3).
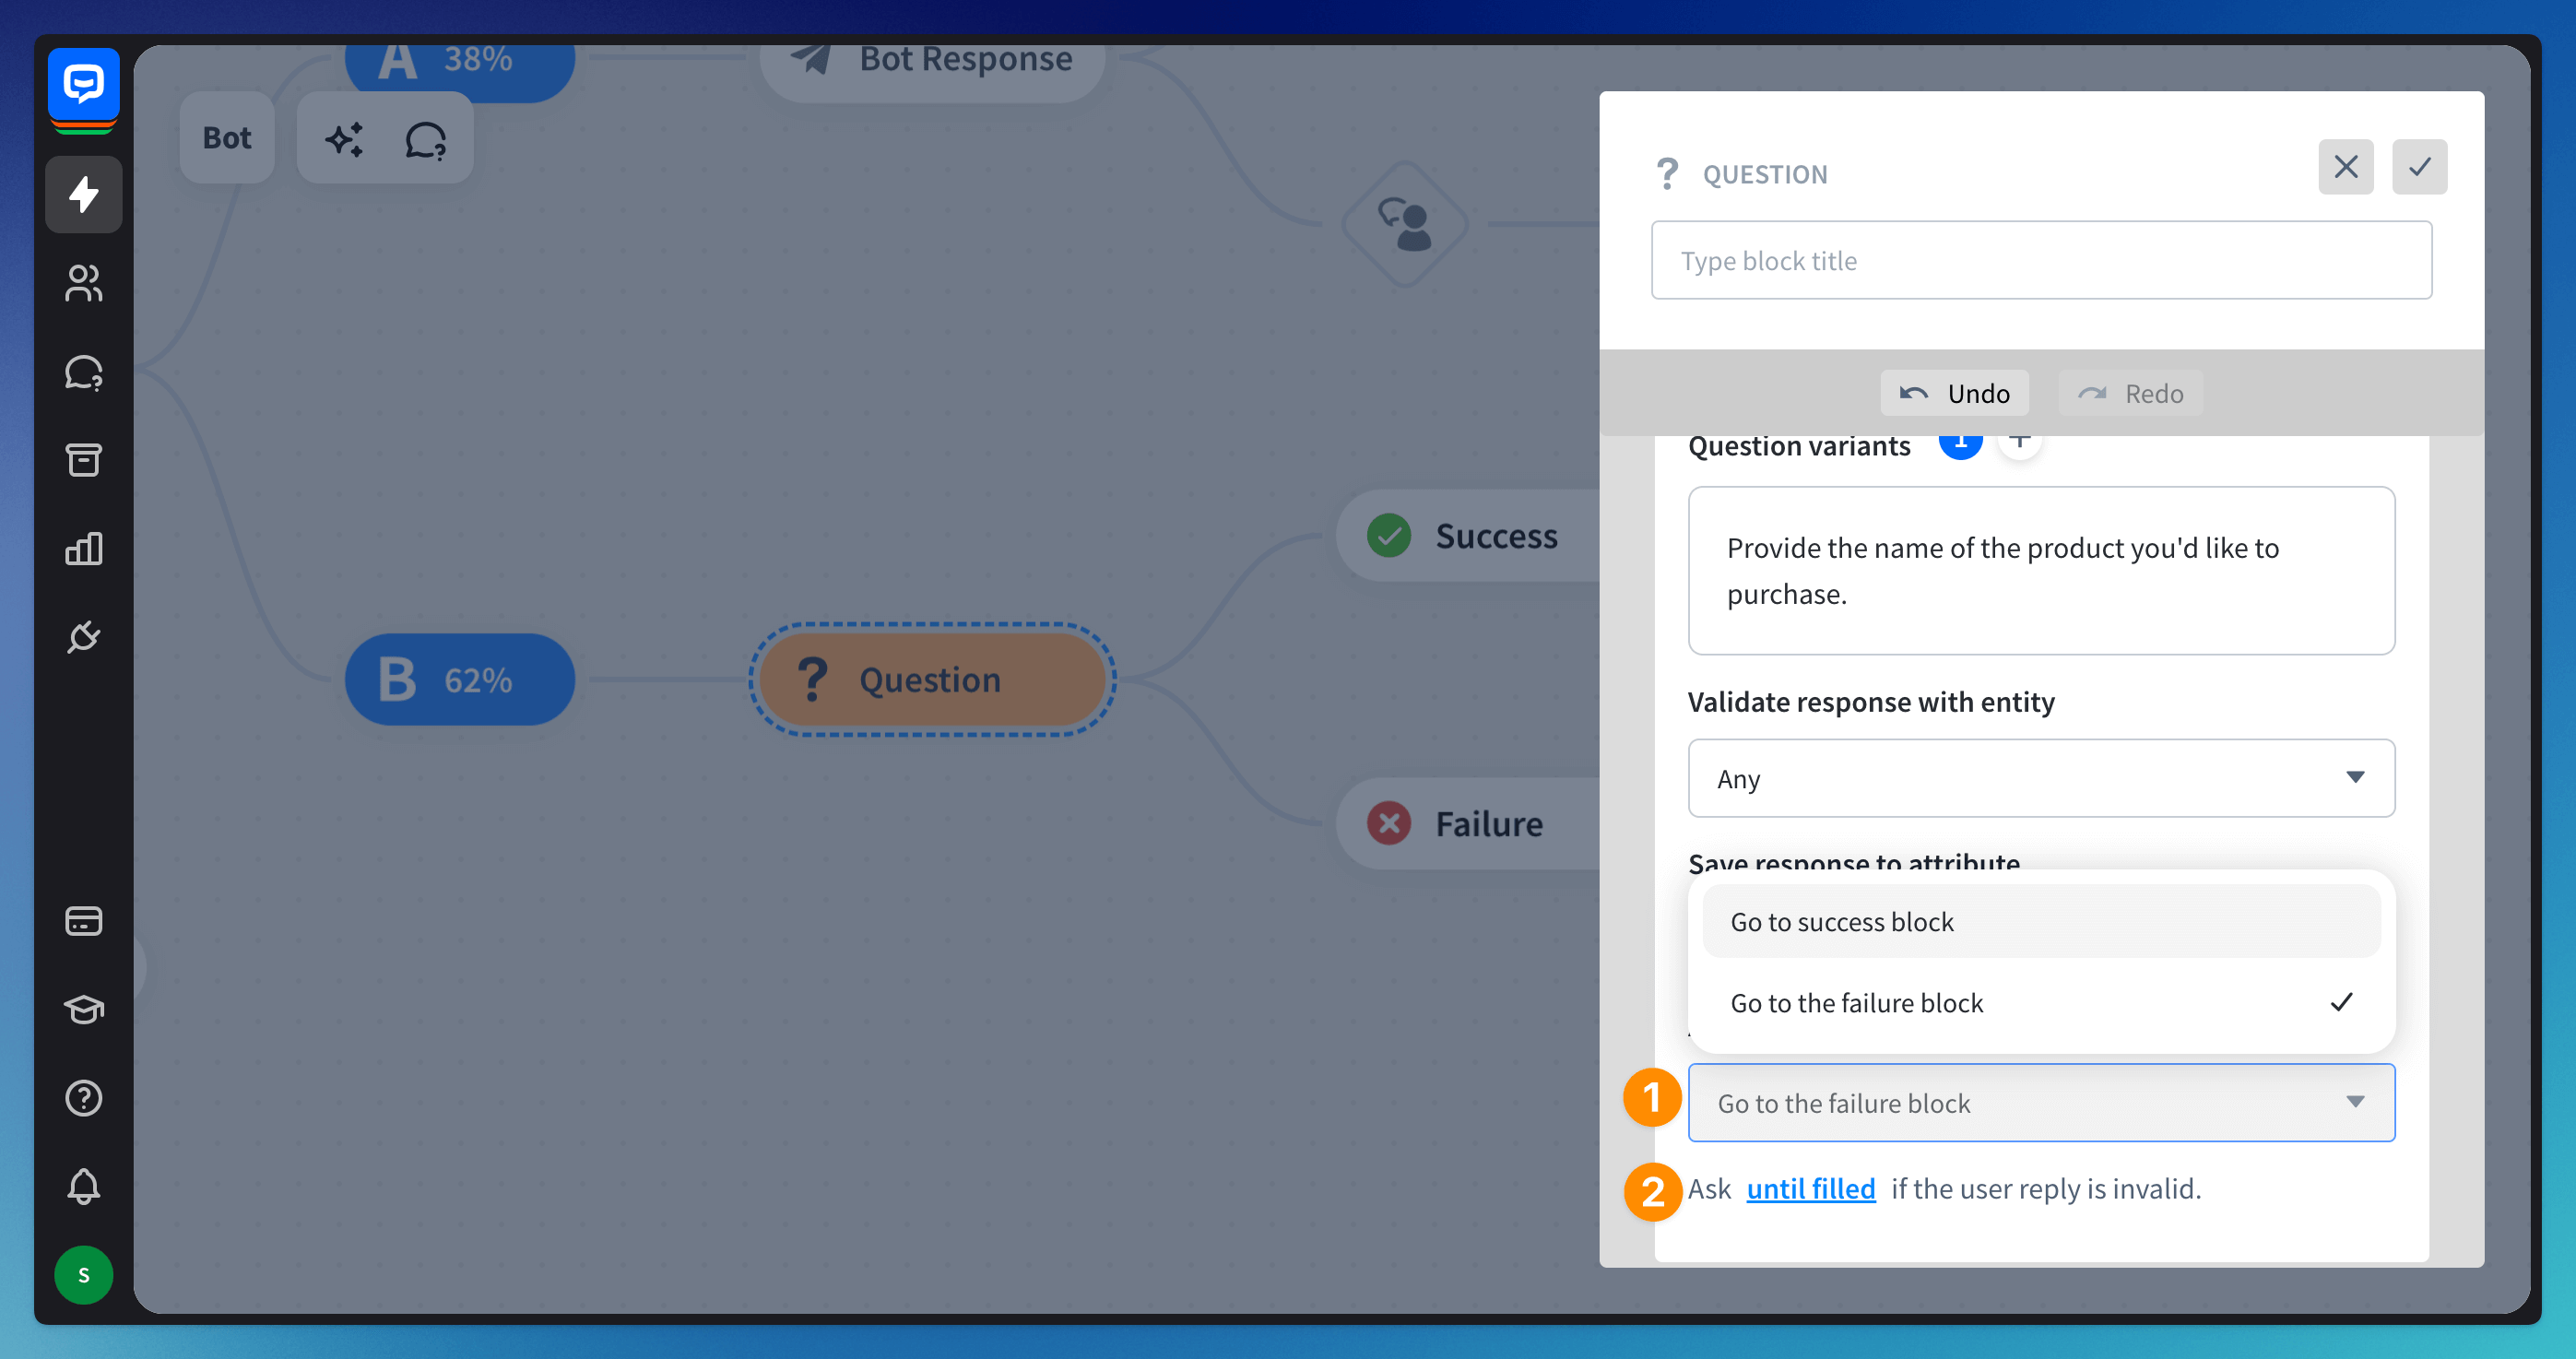
-
Choose what will happen when the input is incorrect (1) and pick the number of times the bot asks the question again (2).
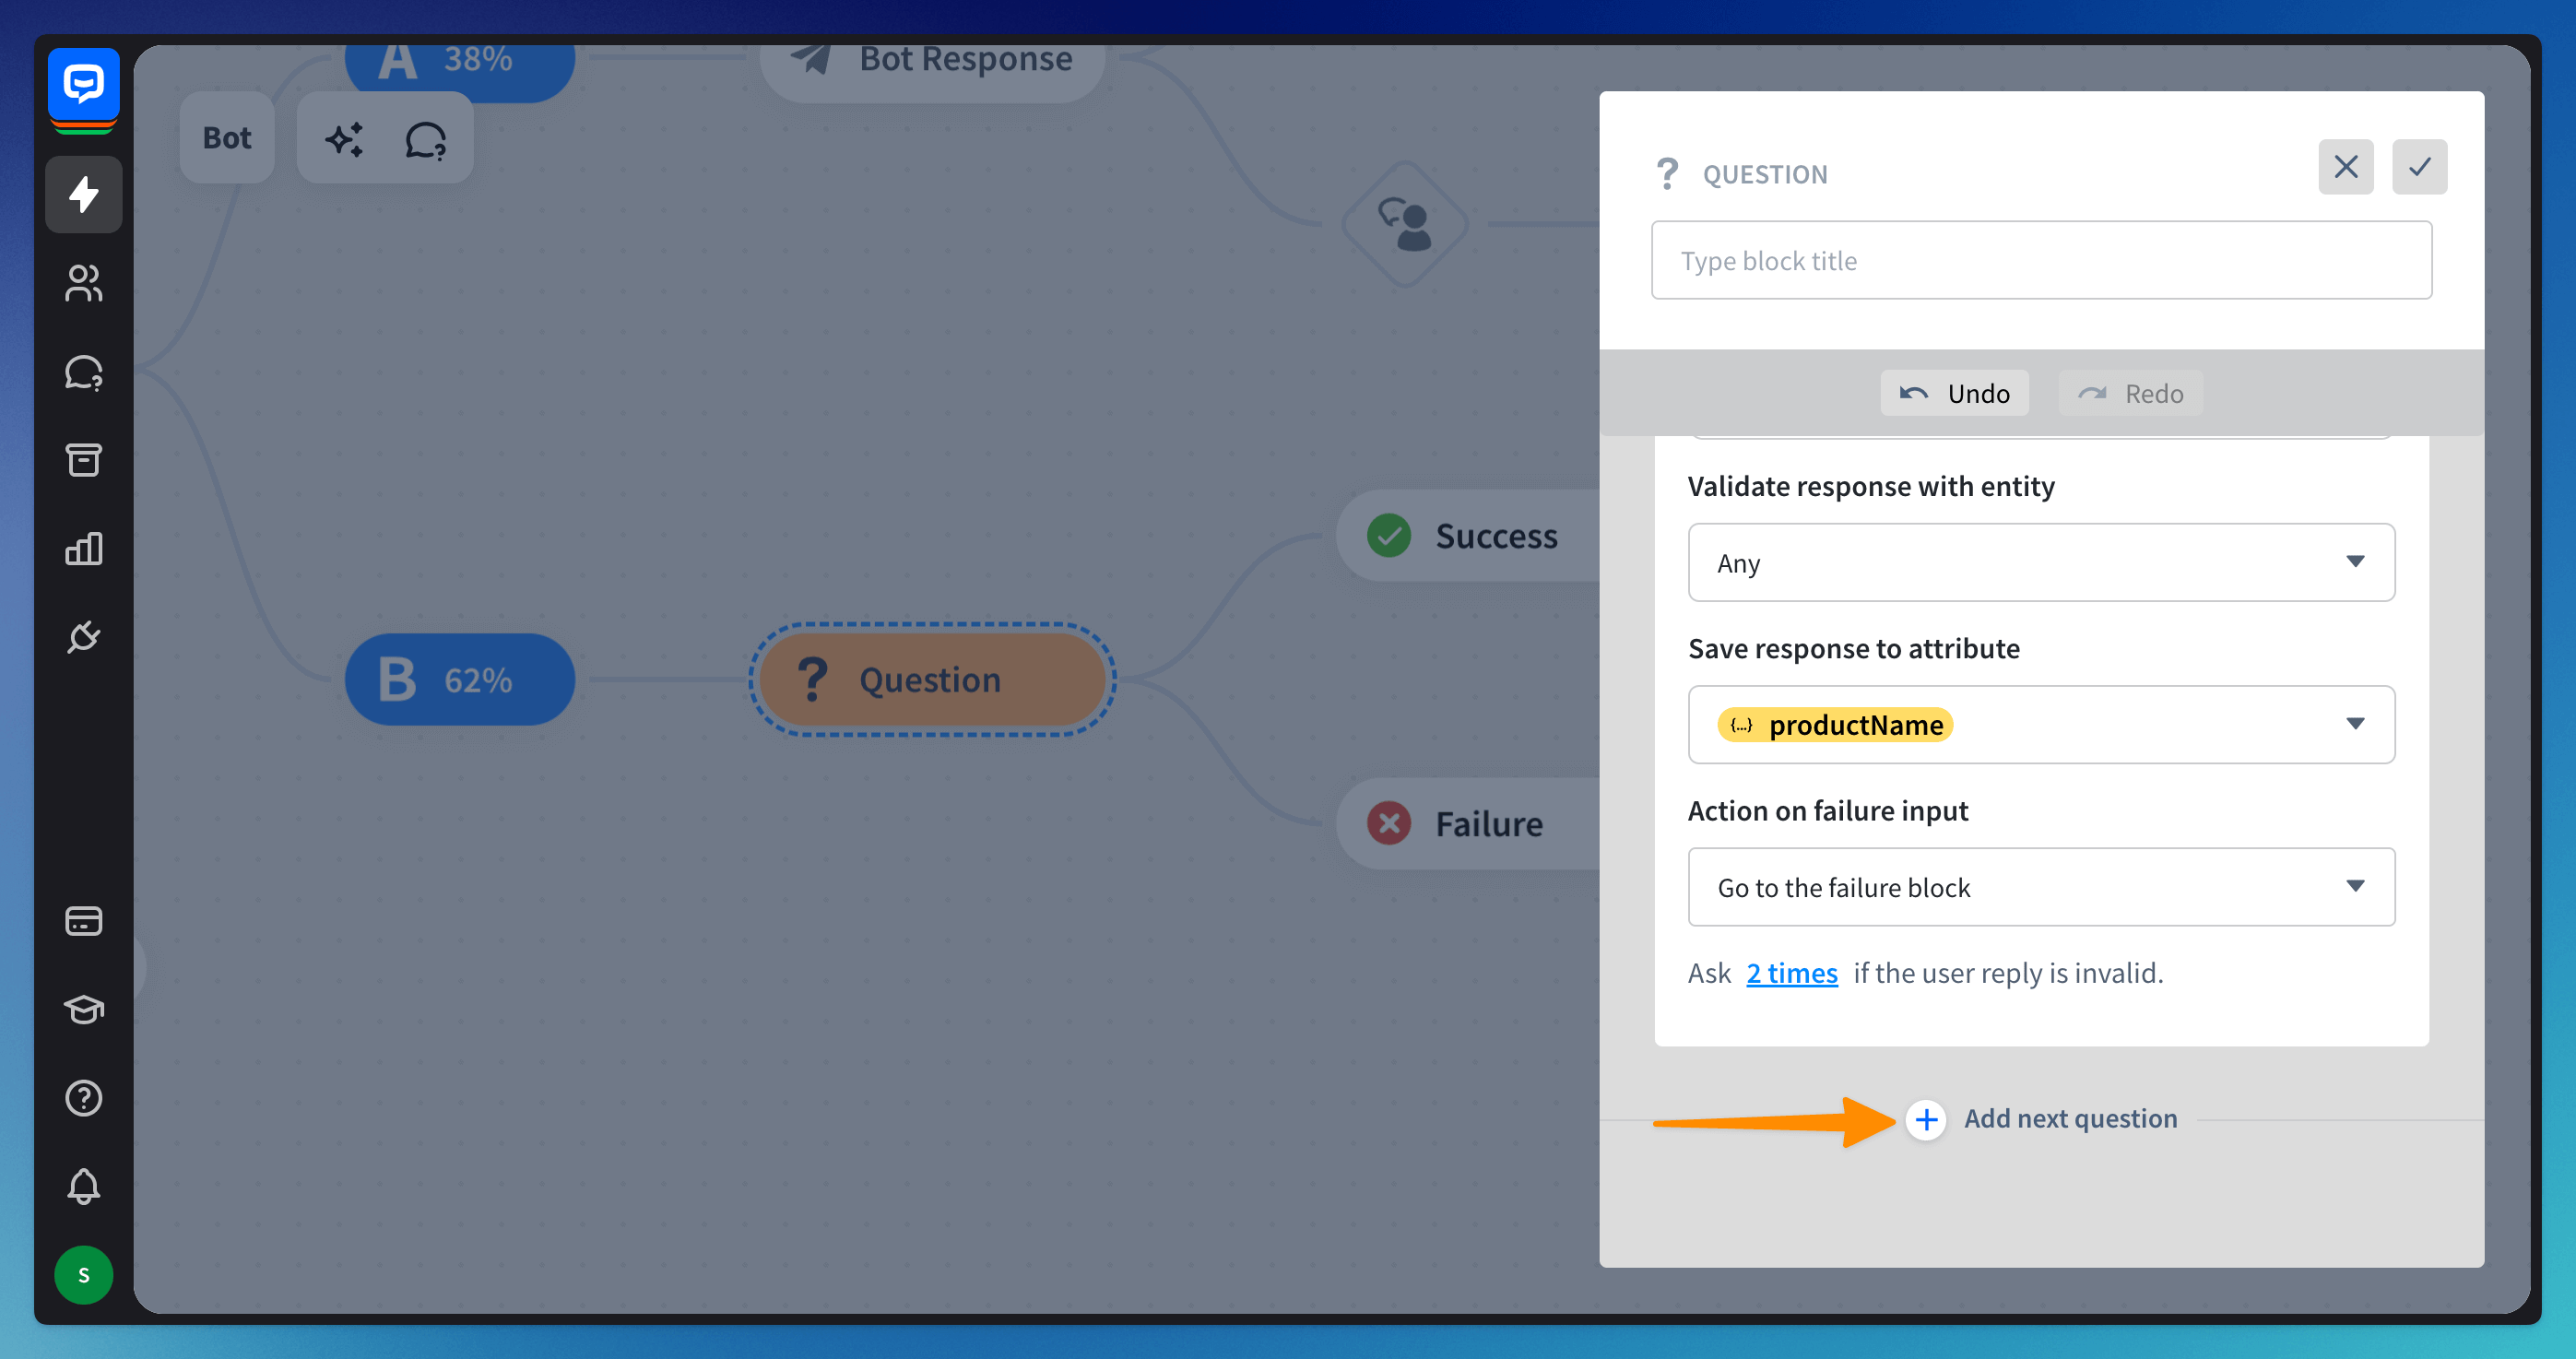
-
Configure another question. The questions will be asked one right after another.
Read more:
