Webhooks in ChatBot.com allow you to connect your bot with external data sources. It can be another product, your internal CRM, or a customer database. With webhooks, you can pass information about the chat at any point of the bot flow. Optionally, you can also return a response back to the customer and send a message in the chat directly from your server.
In this article, you’ll learn how to set up a basic webhook on your local machine. We’ll show you how to collect and log data about the current chat and return a message to the customer.
Getting started
To complete the setup described in the next steps, you will need to prepare your local machine first. The requirements are:
-
NodeJS must be installed on your computer.
-
ngrok account is required (free or paid).
-
The code editor (like Visual Studio Code) is recommended.
Step 1 | Create a new NodeJS project
Run the following code on the command line to create the needed files and dependencies:
$ mkdir chatbot-webhooks // create a new directory
$ cd chatbot-webhooks // go to the created directory
$ touch index.js // create empty index.js file
$ npm init // create package.json
$ npm install express body-parser --save // install required dependencies
Step 2 | Create HTTP server
Add the following code to your index.js file and put your verification token into the token variable.
'use strict';

const express = require('express');
const bodyParser = require('body-parser');
const app = express().use(bodyParser.json()); // creates http server
const token = 'VERIFICATION_TOKEN'; // type your verification token here

// app.listen() part should always be located in the last line of your code
app.listen(3000, () => console.log('[ChatBot.com] Webhook is listening'));
This code creates an HTTP server that listens for requests on port 3000. For this guide, we’re using Express.js, but you can do it using only Node.js or any other framework you use.
Step 3 | Return the challenge
Add the following code to your index.js file right above the app.listen line:
app.get('/', (req, res) => {
    // check if verification token is correct
    if (req.query.token !== token) {
        return res.sendStatus(401); // if not, return unauthorized error
    }

    // return challenge
    return res.end(req.query.challenge);
});
This code is required to ensure your webhook is authentic and working. In this code, we’re checking that your verification token is correct with the one sent in the request. We’re also returning a challenge response to confirm that your webhook works correctly.
Step 4 | Webhook endpoint
Add the following code to your index.js file right above the app.listen line:
app.post('/', (req, res) => {
    // check if verification token is correct
    if (req.query.token !== token) {
        return res.sendStatus(401);
    }

    // print request body
    console.log(req.body);

    // return a text response
    const data = {
        responses: [
            {
                type: 'randomText',
                messages: ['Hi', 'Hello']
            }
        ]
    };

    res.json(data);
});
This code creates your webhook endpoint.
Similarly, as in the previous step, we have to check if your verification code and received tokens are the same. If these tokens are identical, ChatBot.com returns the object and an example bot response.
Note that the endpoint returns a 200 OK response, which tells ChatBot.com about the event that has been received.
Main steps in the verification process:
-
To create a verification token, choose a random string and assign its value to the token parameter in your code.
-
Go to the Webhooks configuration section in ChatBot.com and enter the same verification token in the appropriate field.
-
ChatBot.com will send a GET request to your webhook URL with the verification token in the token parameter of the query string.
-
Verify the received token with the verification token. If both strings match, ChatBot.com will respond with the challenge parameter.
-
Your webhook has been verified successfully.
Step 5 | Publish your webhook server
In this tutorial, we’re using ngrok, which exposes local servers behind NATs and firewalls to the public internet over secure tunnels. For production usage, you should deploy your webhook code to the server of your choice. This can be your own hardware or a cloud-based service like AWS or Heroku.
To publish your webhook server, follow these steps:
-
Install ngrok on your machine to expose the web server you’ve just created on your local machine to the internet. On Windows, just double-click ngrok.zip to unzip it. On Linux and macOS, you can unzip ngrok from a terminal with the following command:
$ unzip /path/to/ngrok.zip
-
Make sure you’re logged in to your ngrok account. If you’re not sure, follow this step to connect your account to your local machine.
-
Double-check if your webhook server is up and running. In your terminal window, there should be a “[ChatBot.com] Webhook is listening” message.
-
Open up a new terminal window/tab and keep the previous one open. In the new terminal window, type:
$ ./ngrok http 3000
-
Now you should see a screen similar to the one below. The address in the Forwarding line states the public address of your webhook. In this case, it is
https://<unique_url>.eu.ngrok.io. Save this address for later.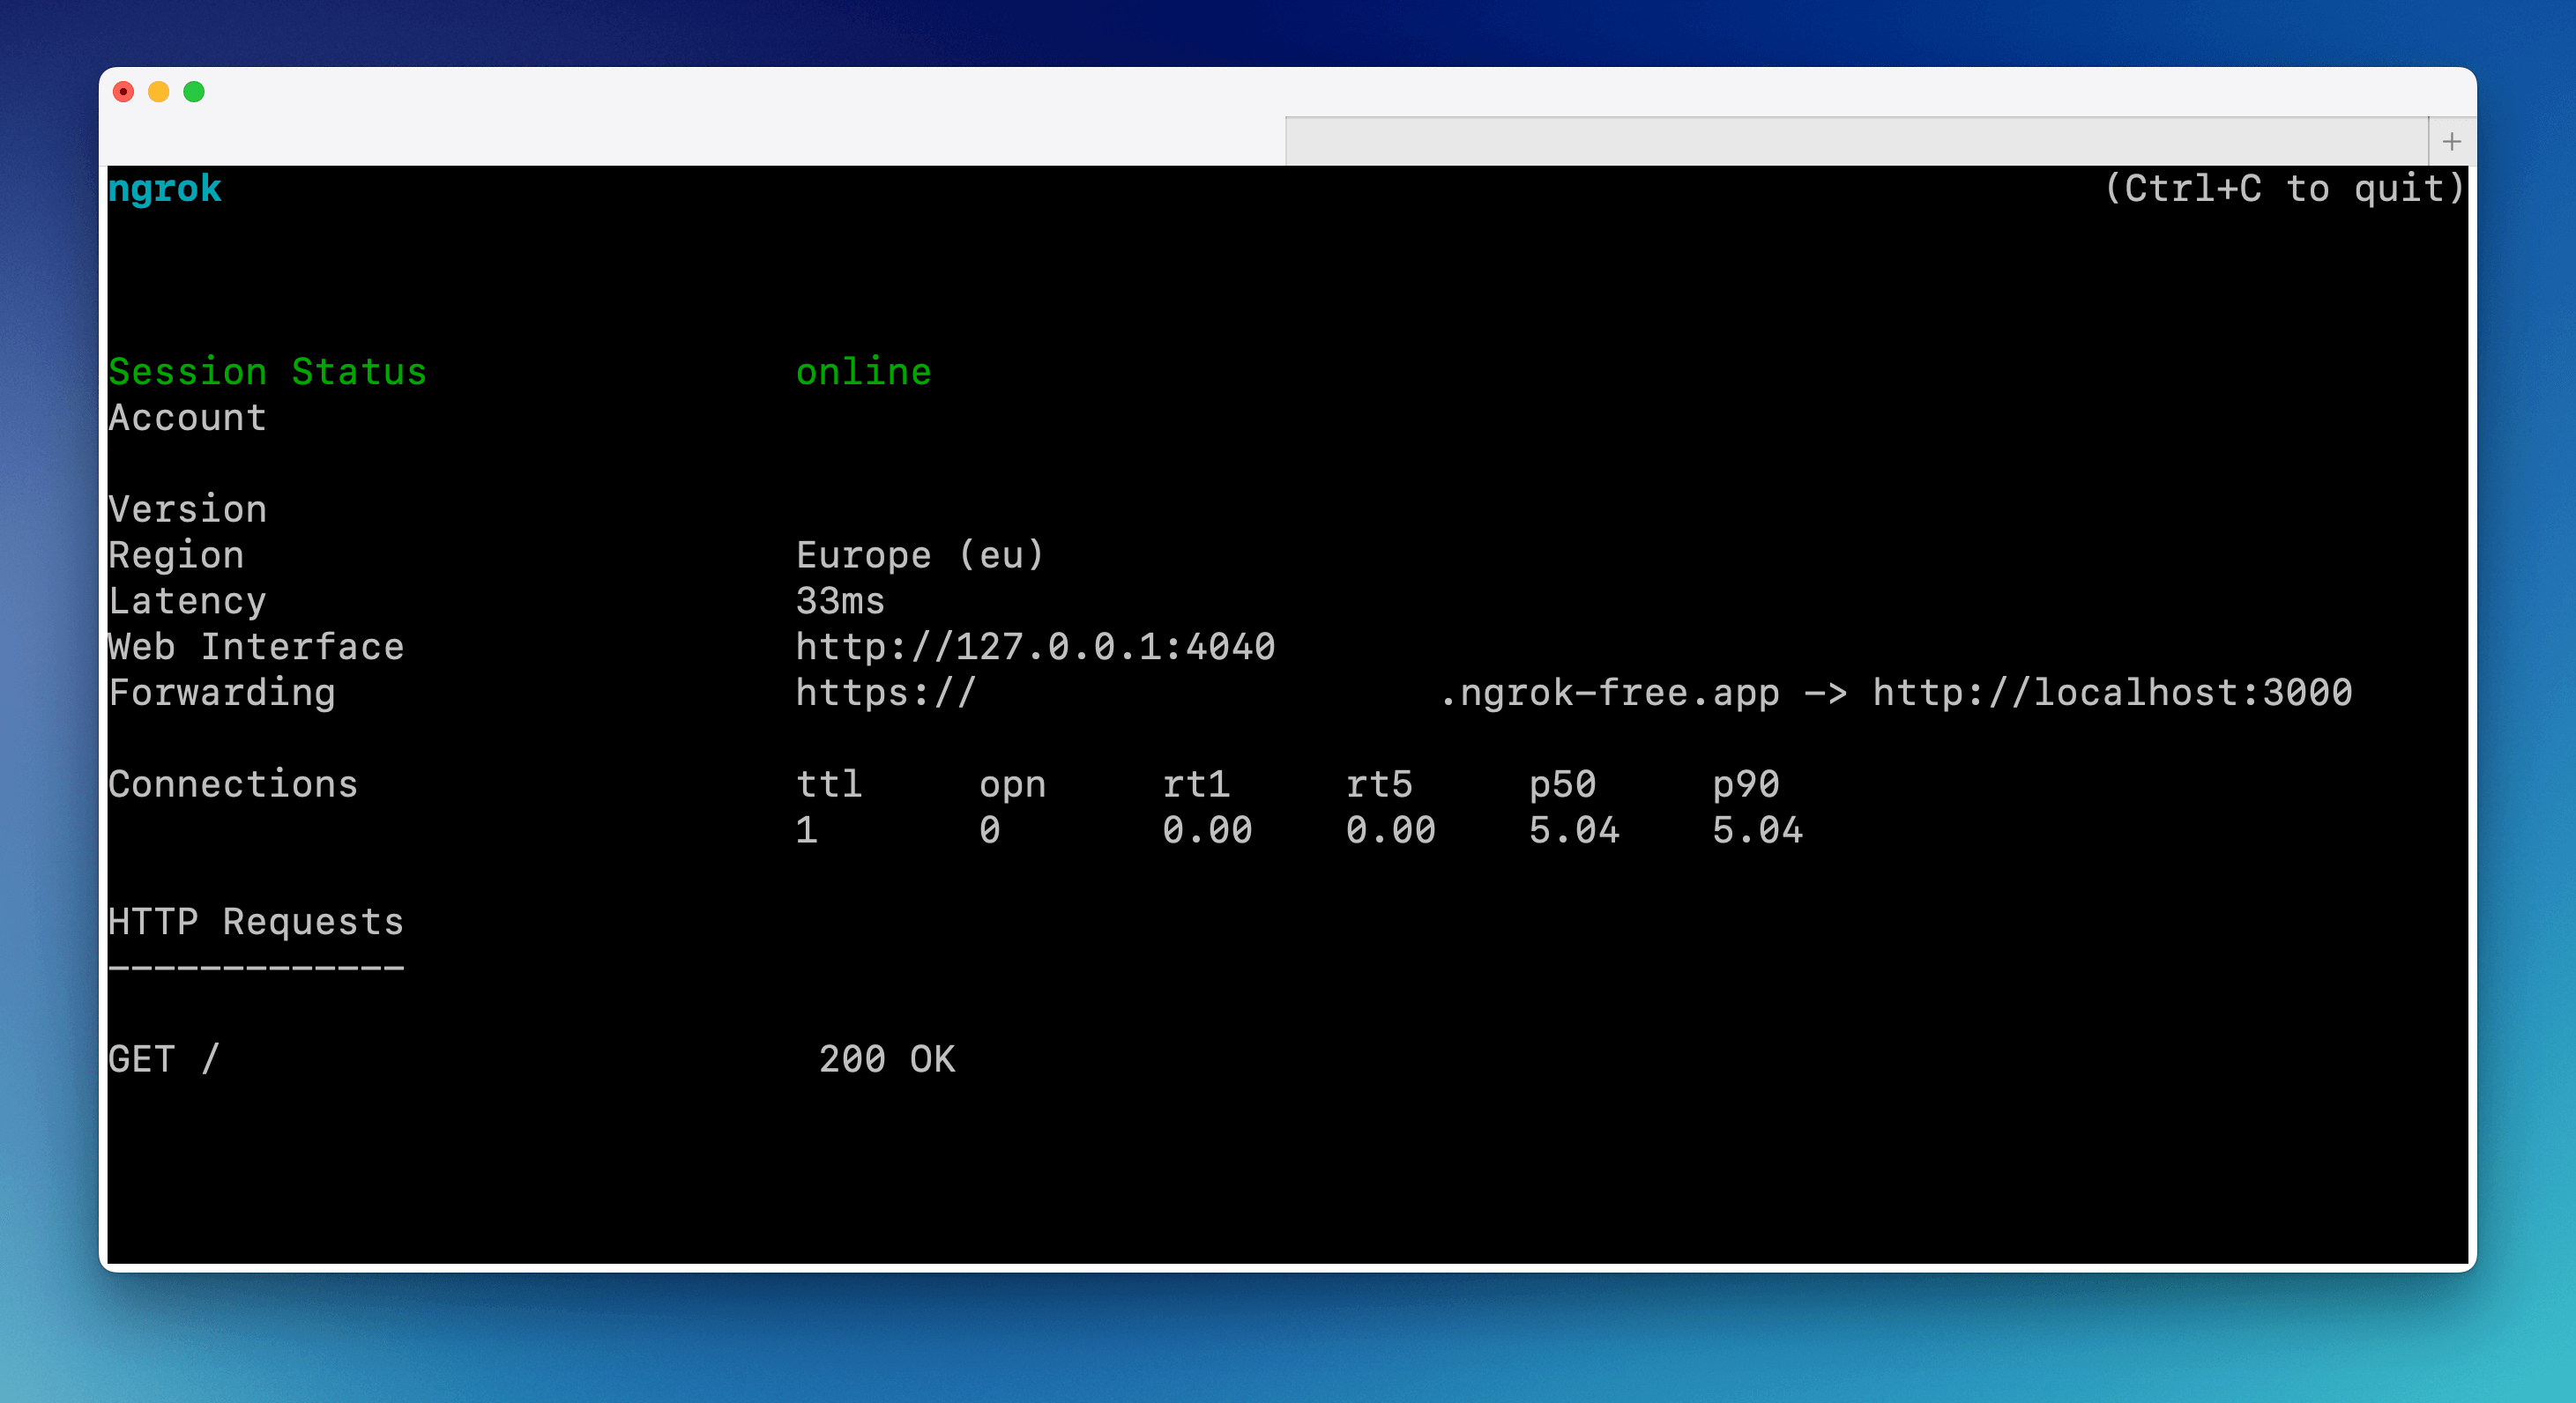
Step 6 | Add your webhook to ChatBot.com
-
Go to the Chatbots section and select your chatbot or create a new one.

-
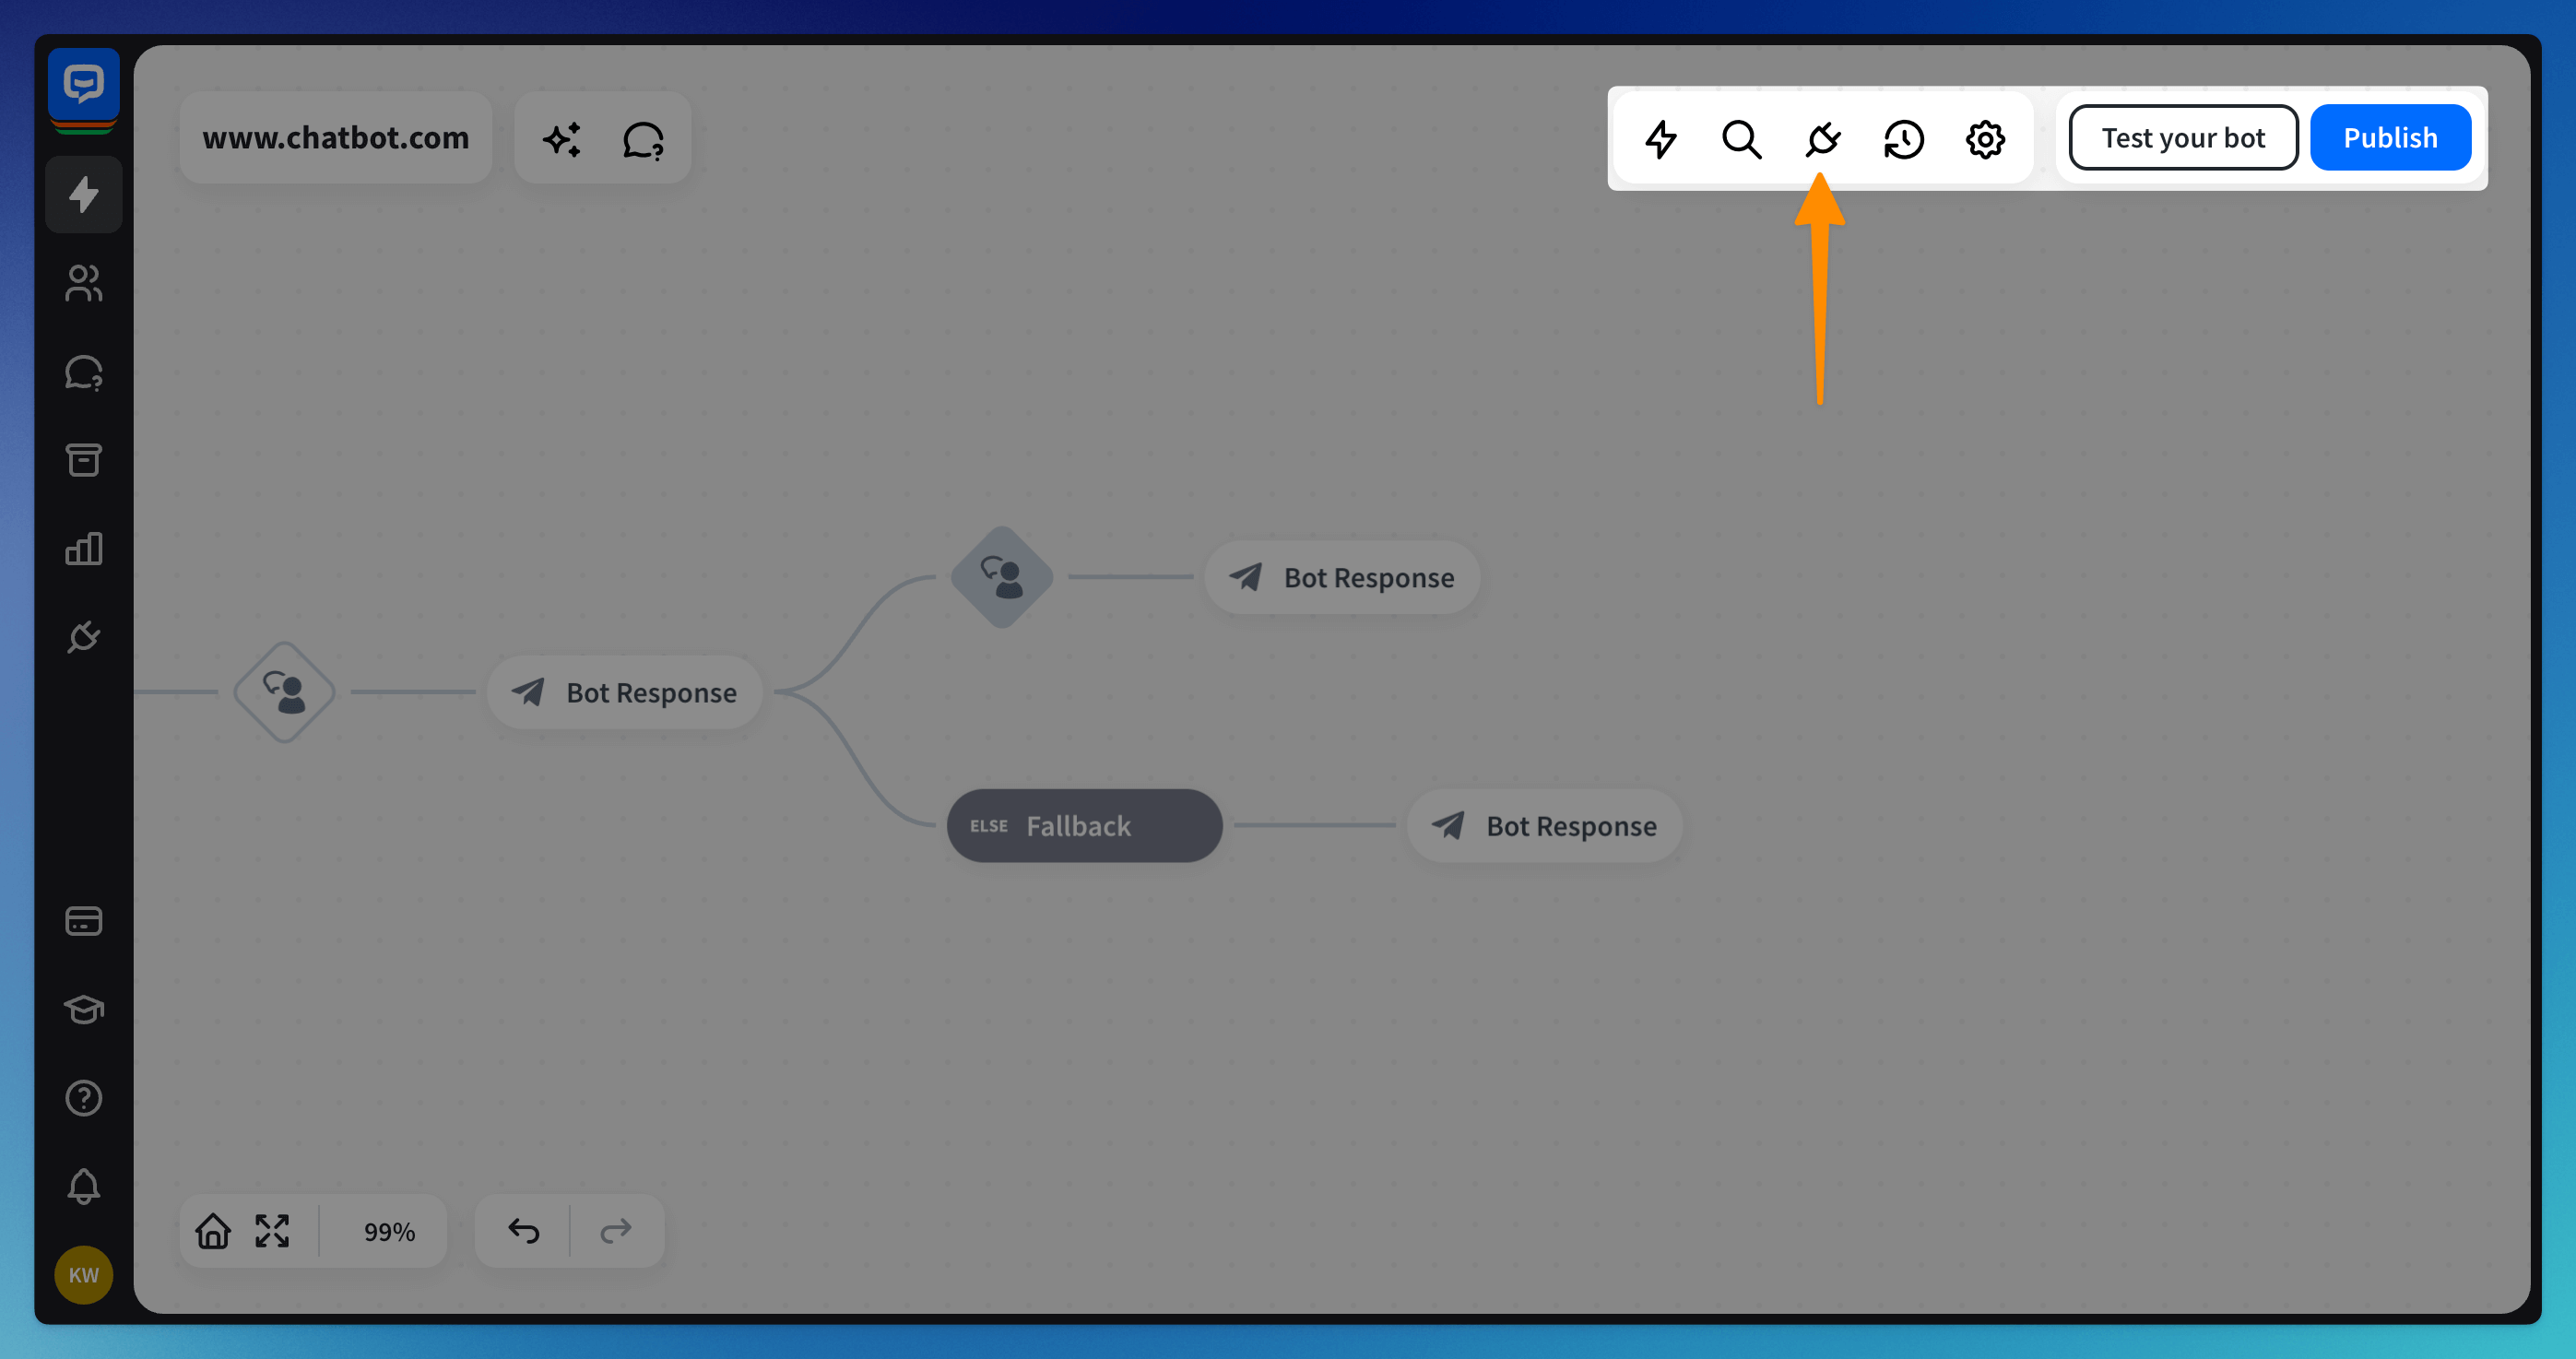
Click on the Integrations icon at the top right corner.
-
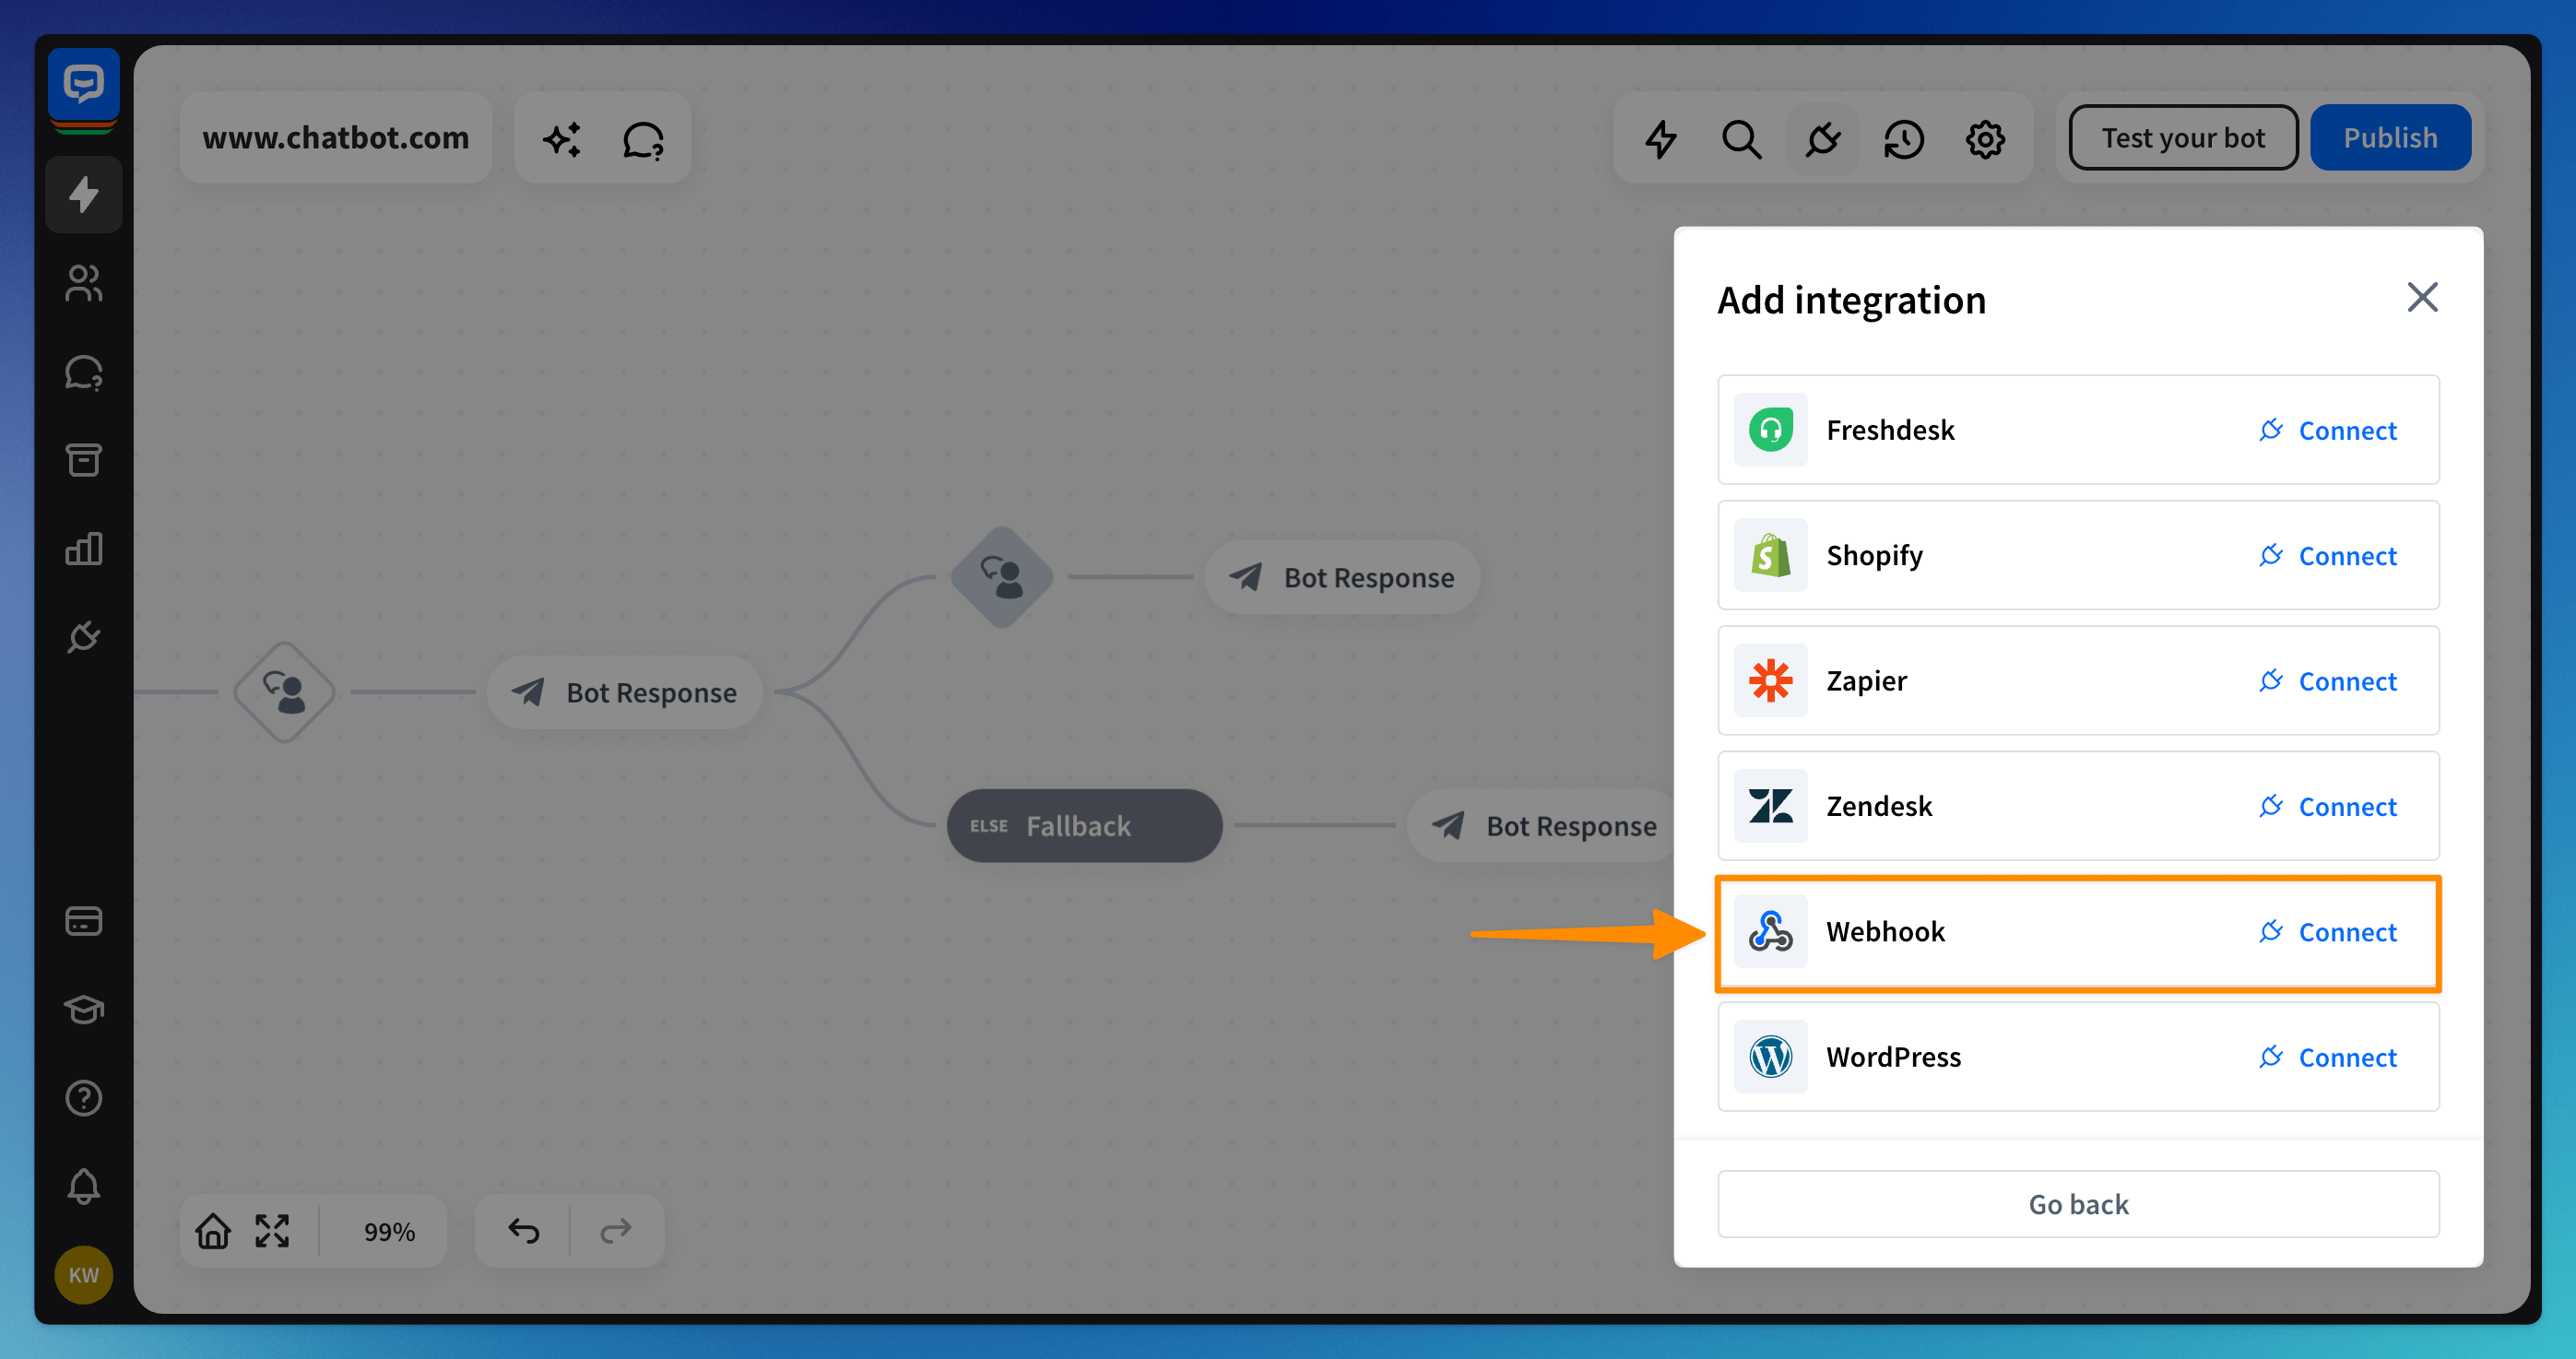
Select “Webhook” from the list. Then, confirm your selection by clicking on the “Create new webhook” button.
-
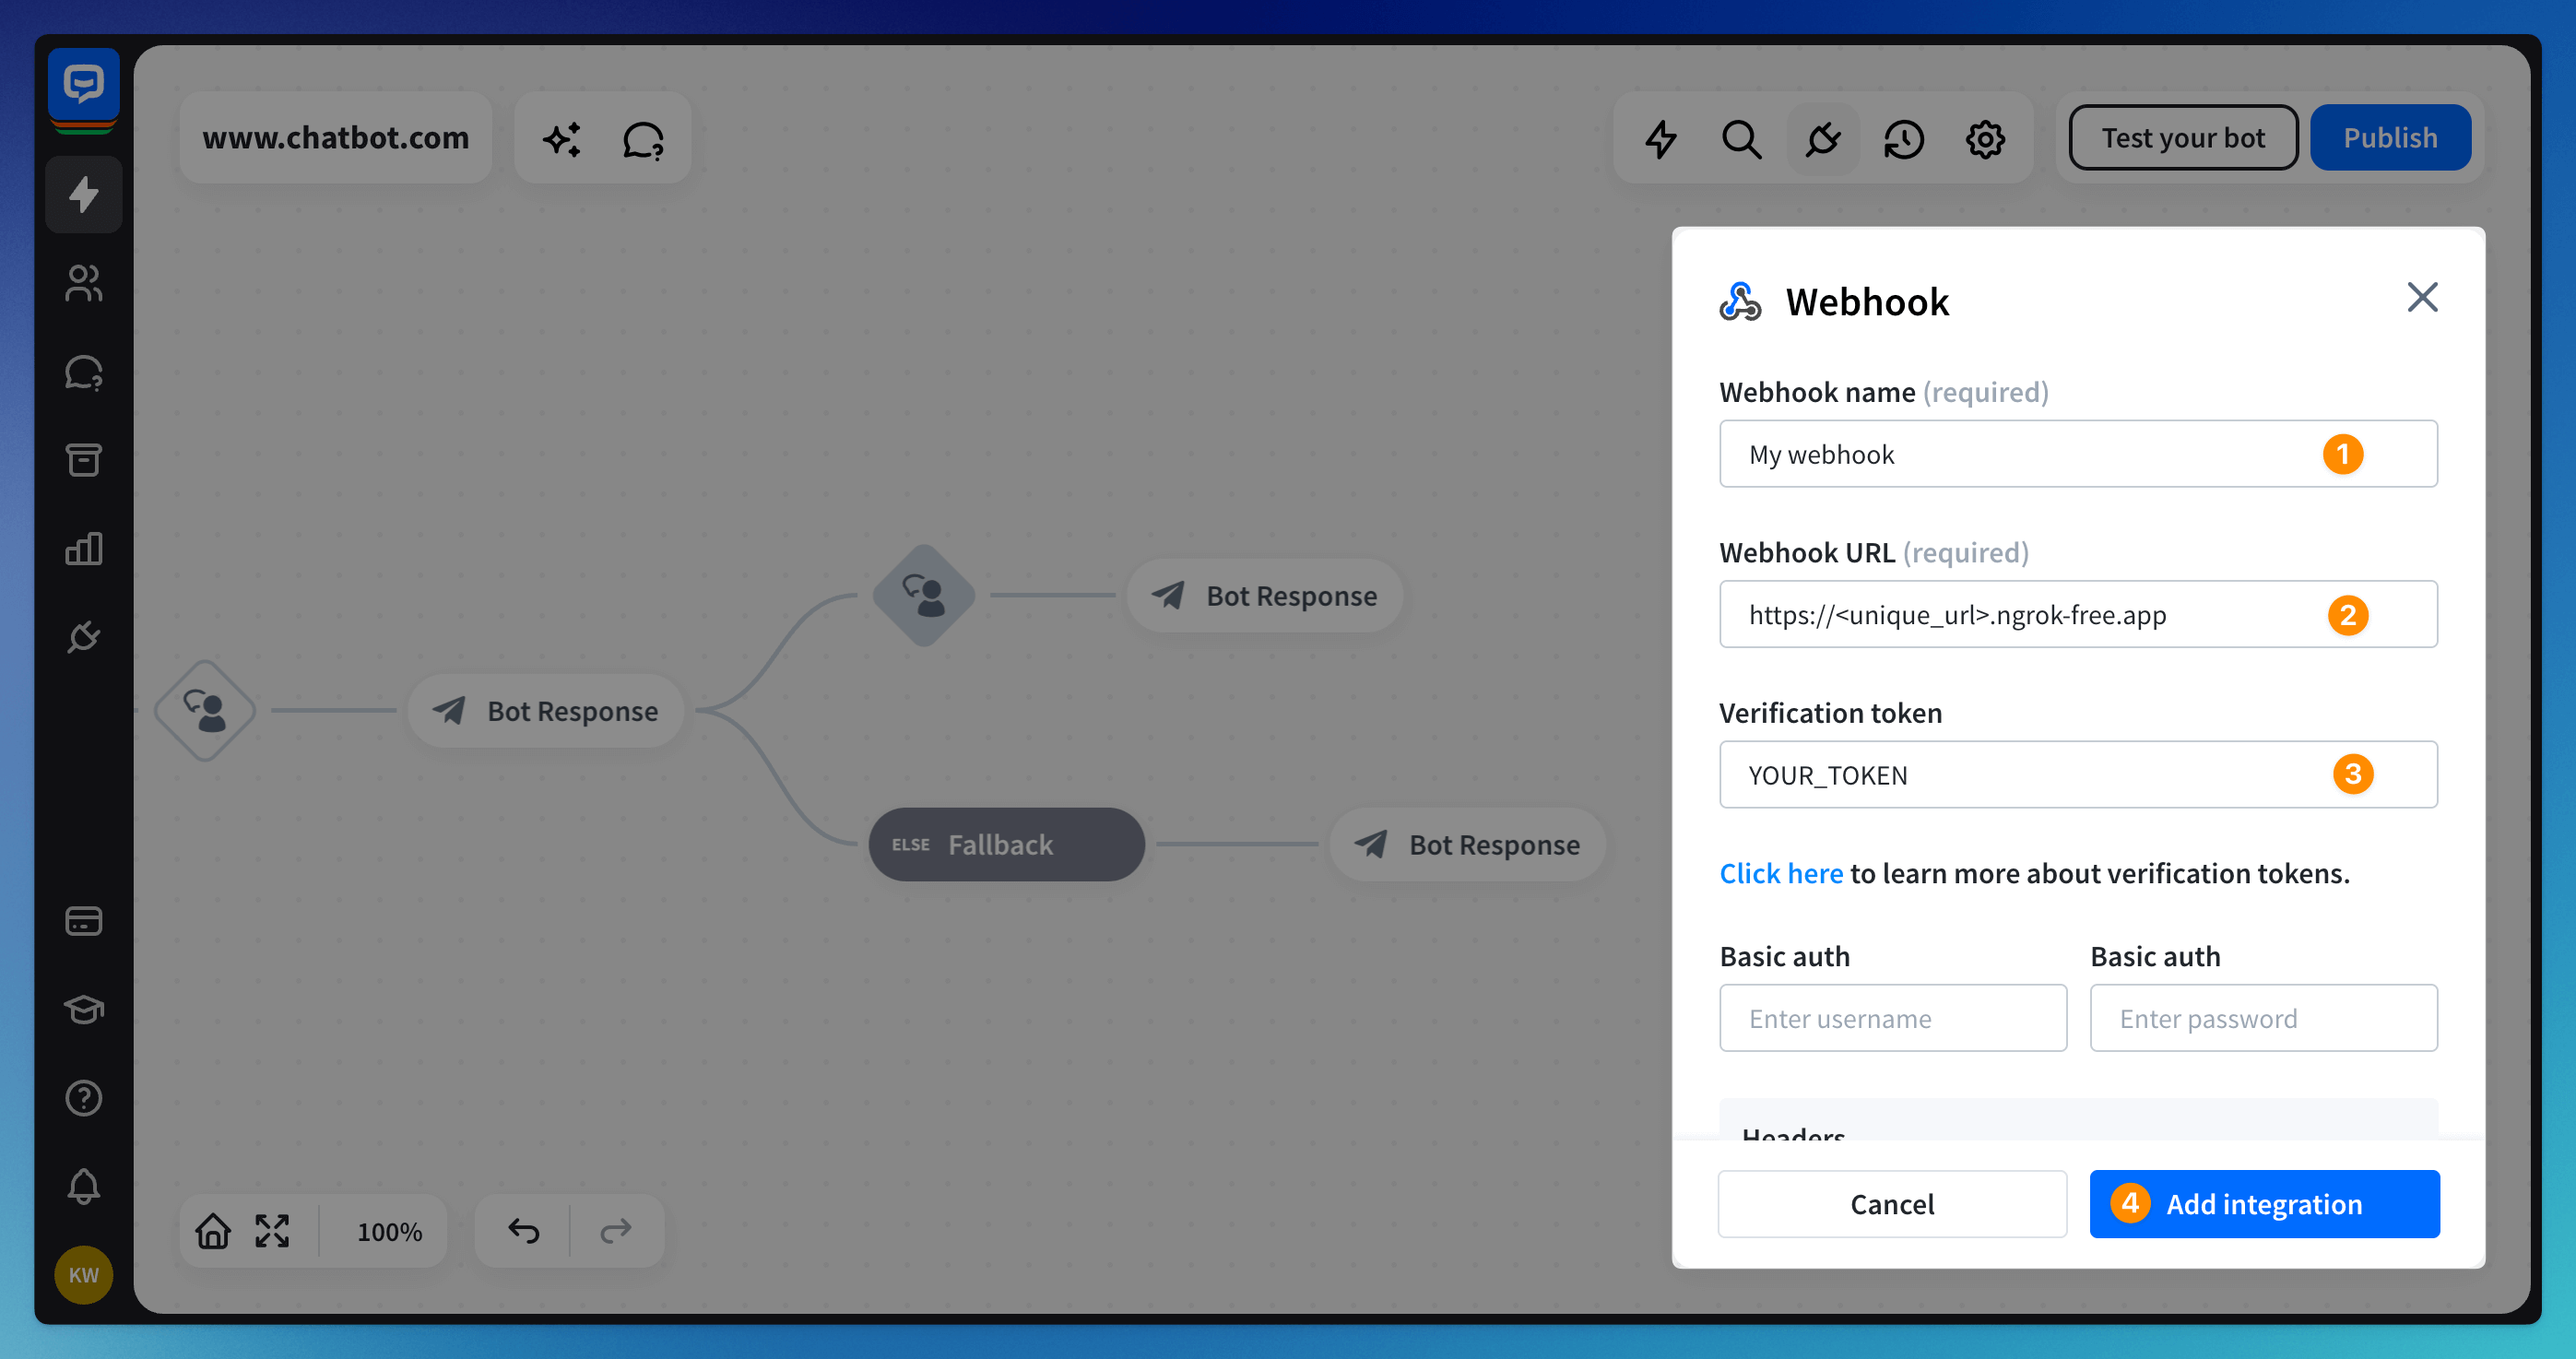
Insert your webhook name (1) and copy the ngrok public URL (2) mentioned in the previous steps. Make sure to set the verification token (3) to the same value as in your webhook code, then click on the “Add integration.” button (4)
-
You will get a confirmation message if the webhook was added successfully.
Step 7 | Adding webhook to your chatbot
Once the webhook is added, go back to your chatbot, and add a webhook action. Next, select your webhook from the list. Then click save to finish the configuration process.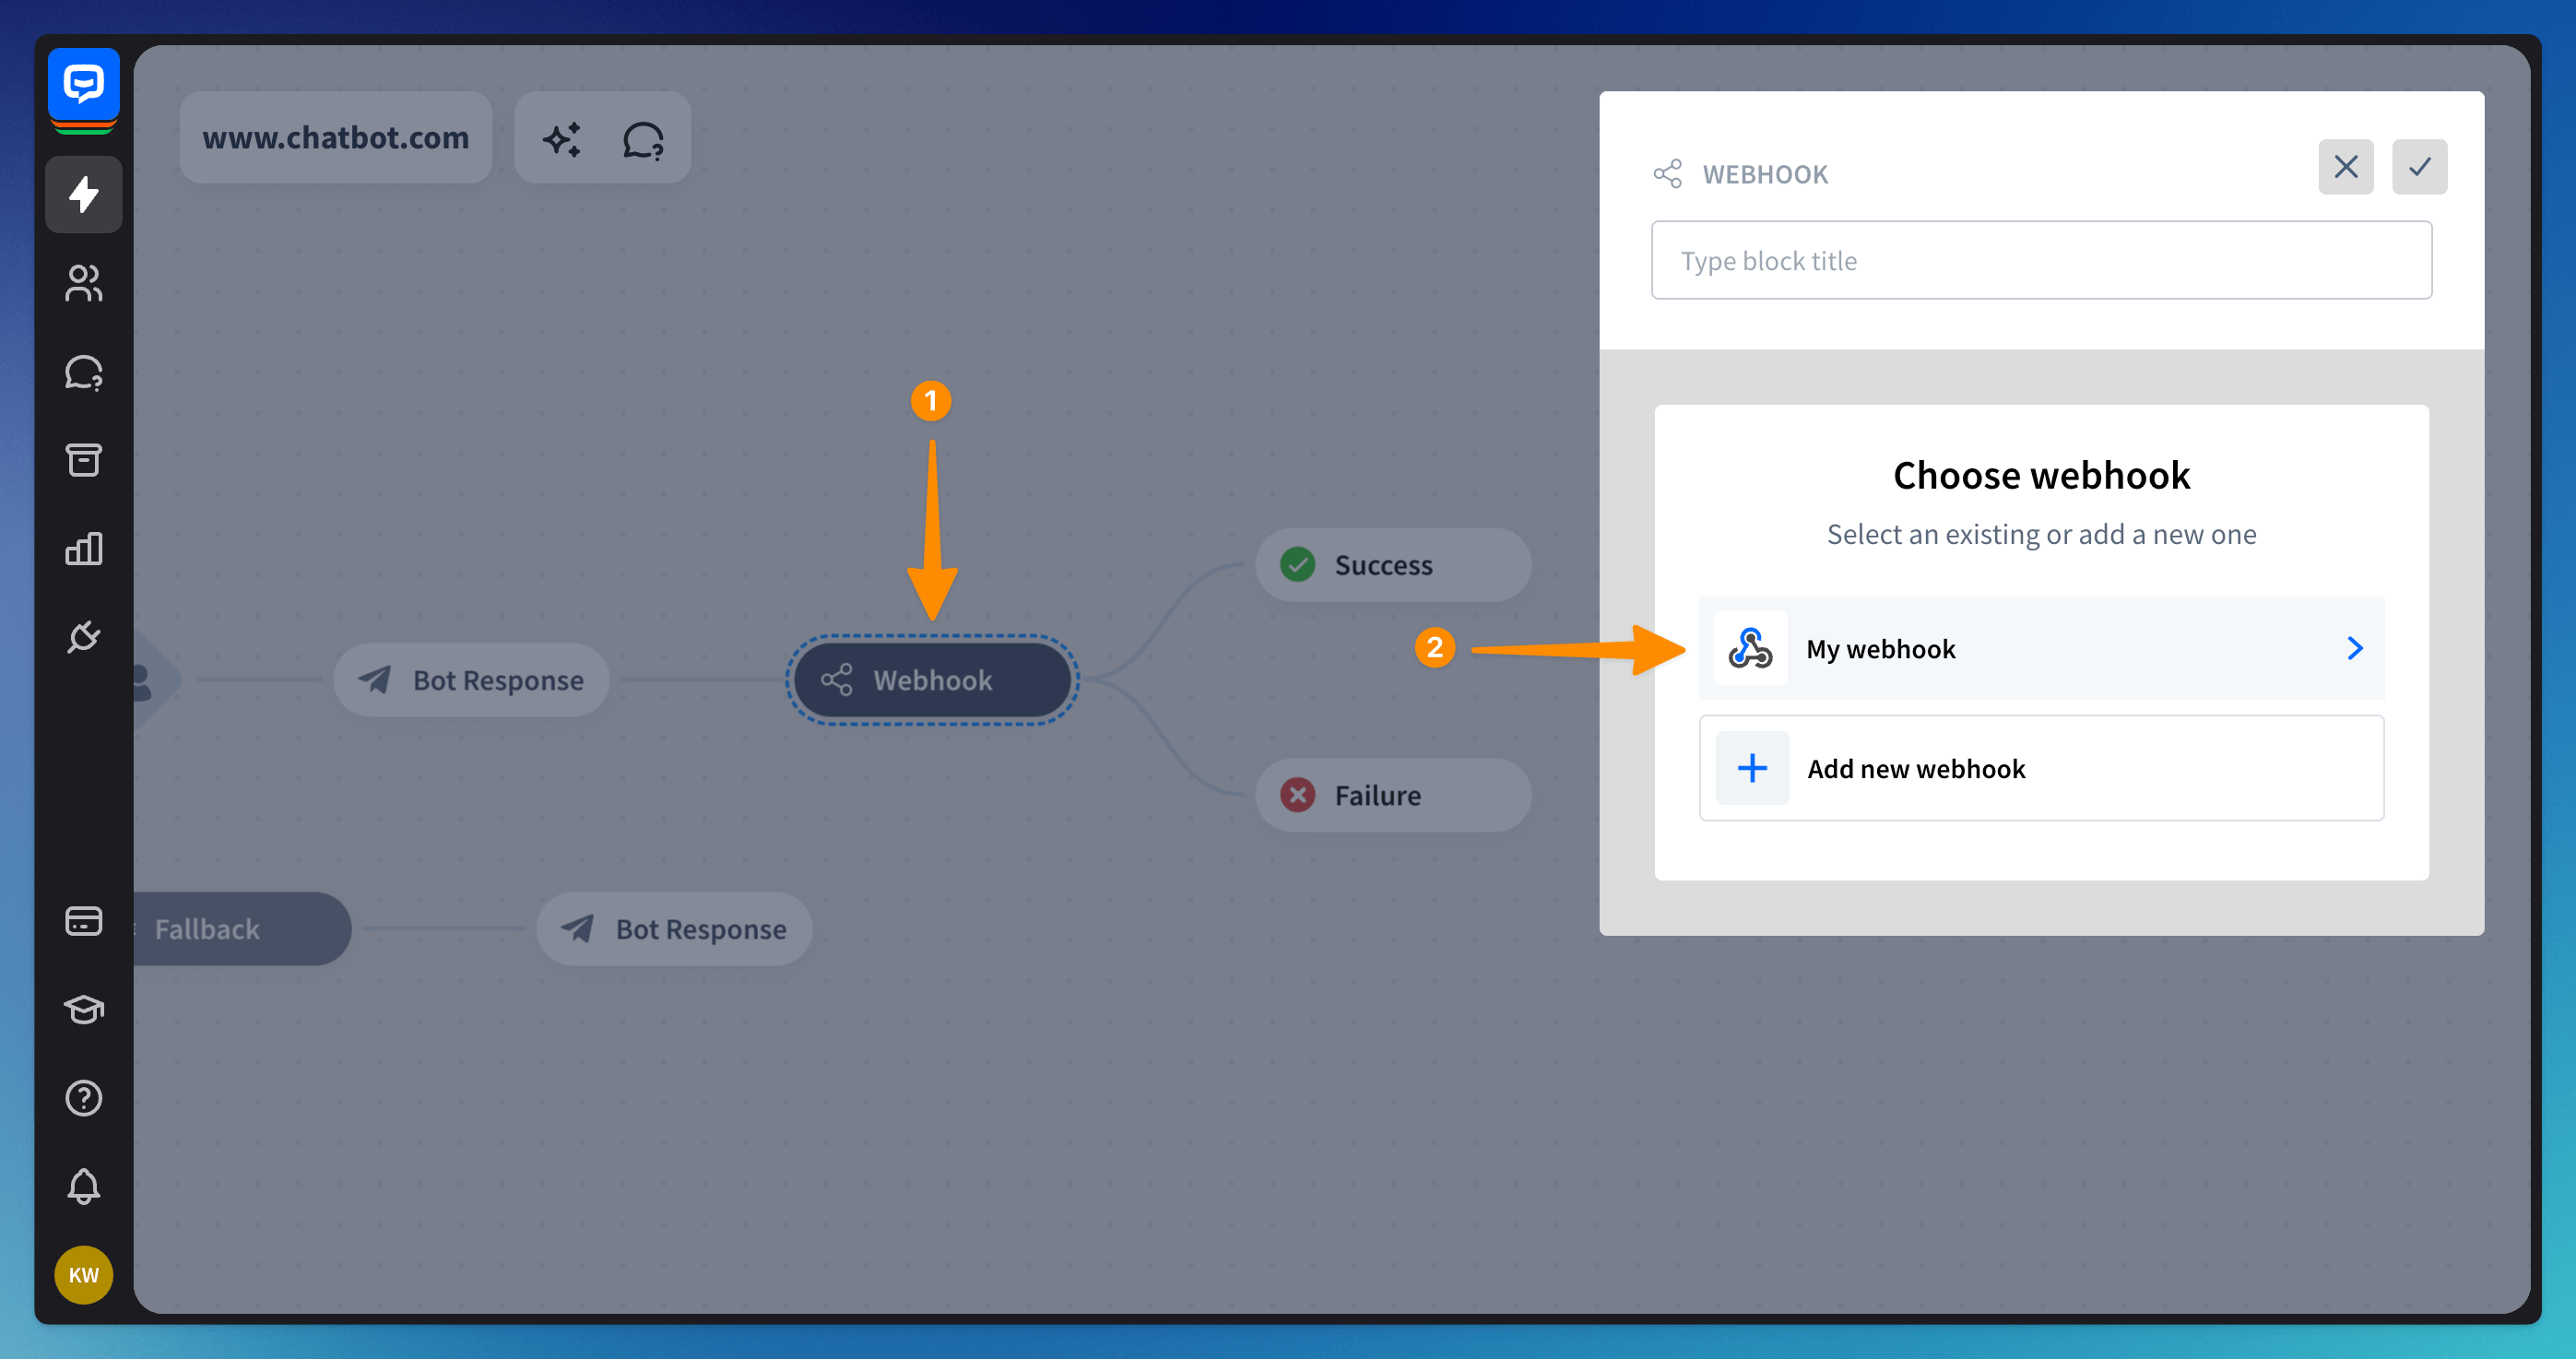
Step 8 | Test your webhook
Your webhook is ready to test. Use the Testing Tool to trigger your webhook interaction. A triggered interaction that has a webhook should be reflected in your terminal and should send a message in the chat as a response.
Advanced Usage
If you plan to continue using webhooks after this tutorial and customize them to your use case, visit our documentation for more information about advanced usage. You can find the documentation under this link.
Next steps
-
Check our ready-to-use examples on this page.
-
Customize messages returned from webhook with different message types described here.
-
Learn more about the verification request.
-
Troubleshoot popular errors with this article.
