Google Tag Manager lets you add ChatBot to your website in a few clicks.
How to create a Google Tag Manager container
You’ll need a GTM account and container to add tags that load the ChatBot widget on your website.
-
Sign in to your Google account. Go to the Google Tag Manager home and click the Create Account button on the right.
-
Enter the account and container name. Choose the target platform to web and click on the Continue button.
-
Read through the GTM Terms of Service, click Yes to accept them.
-
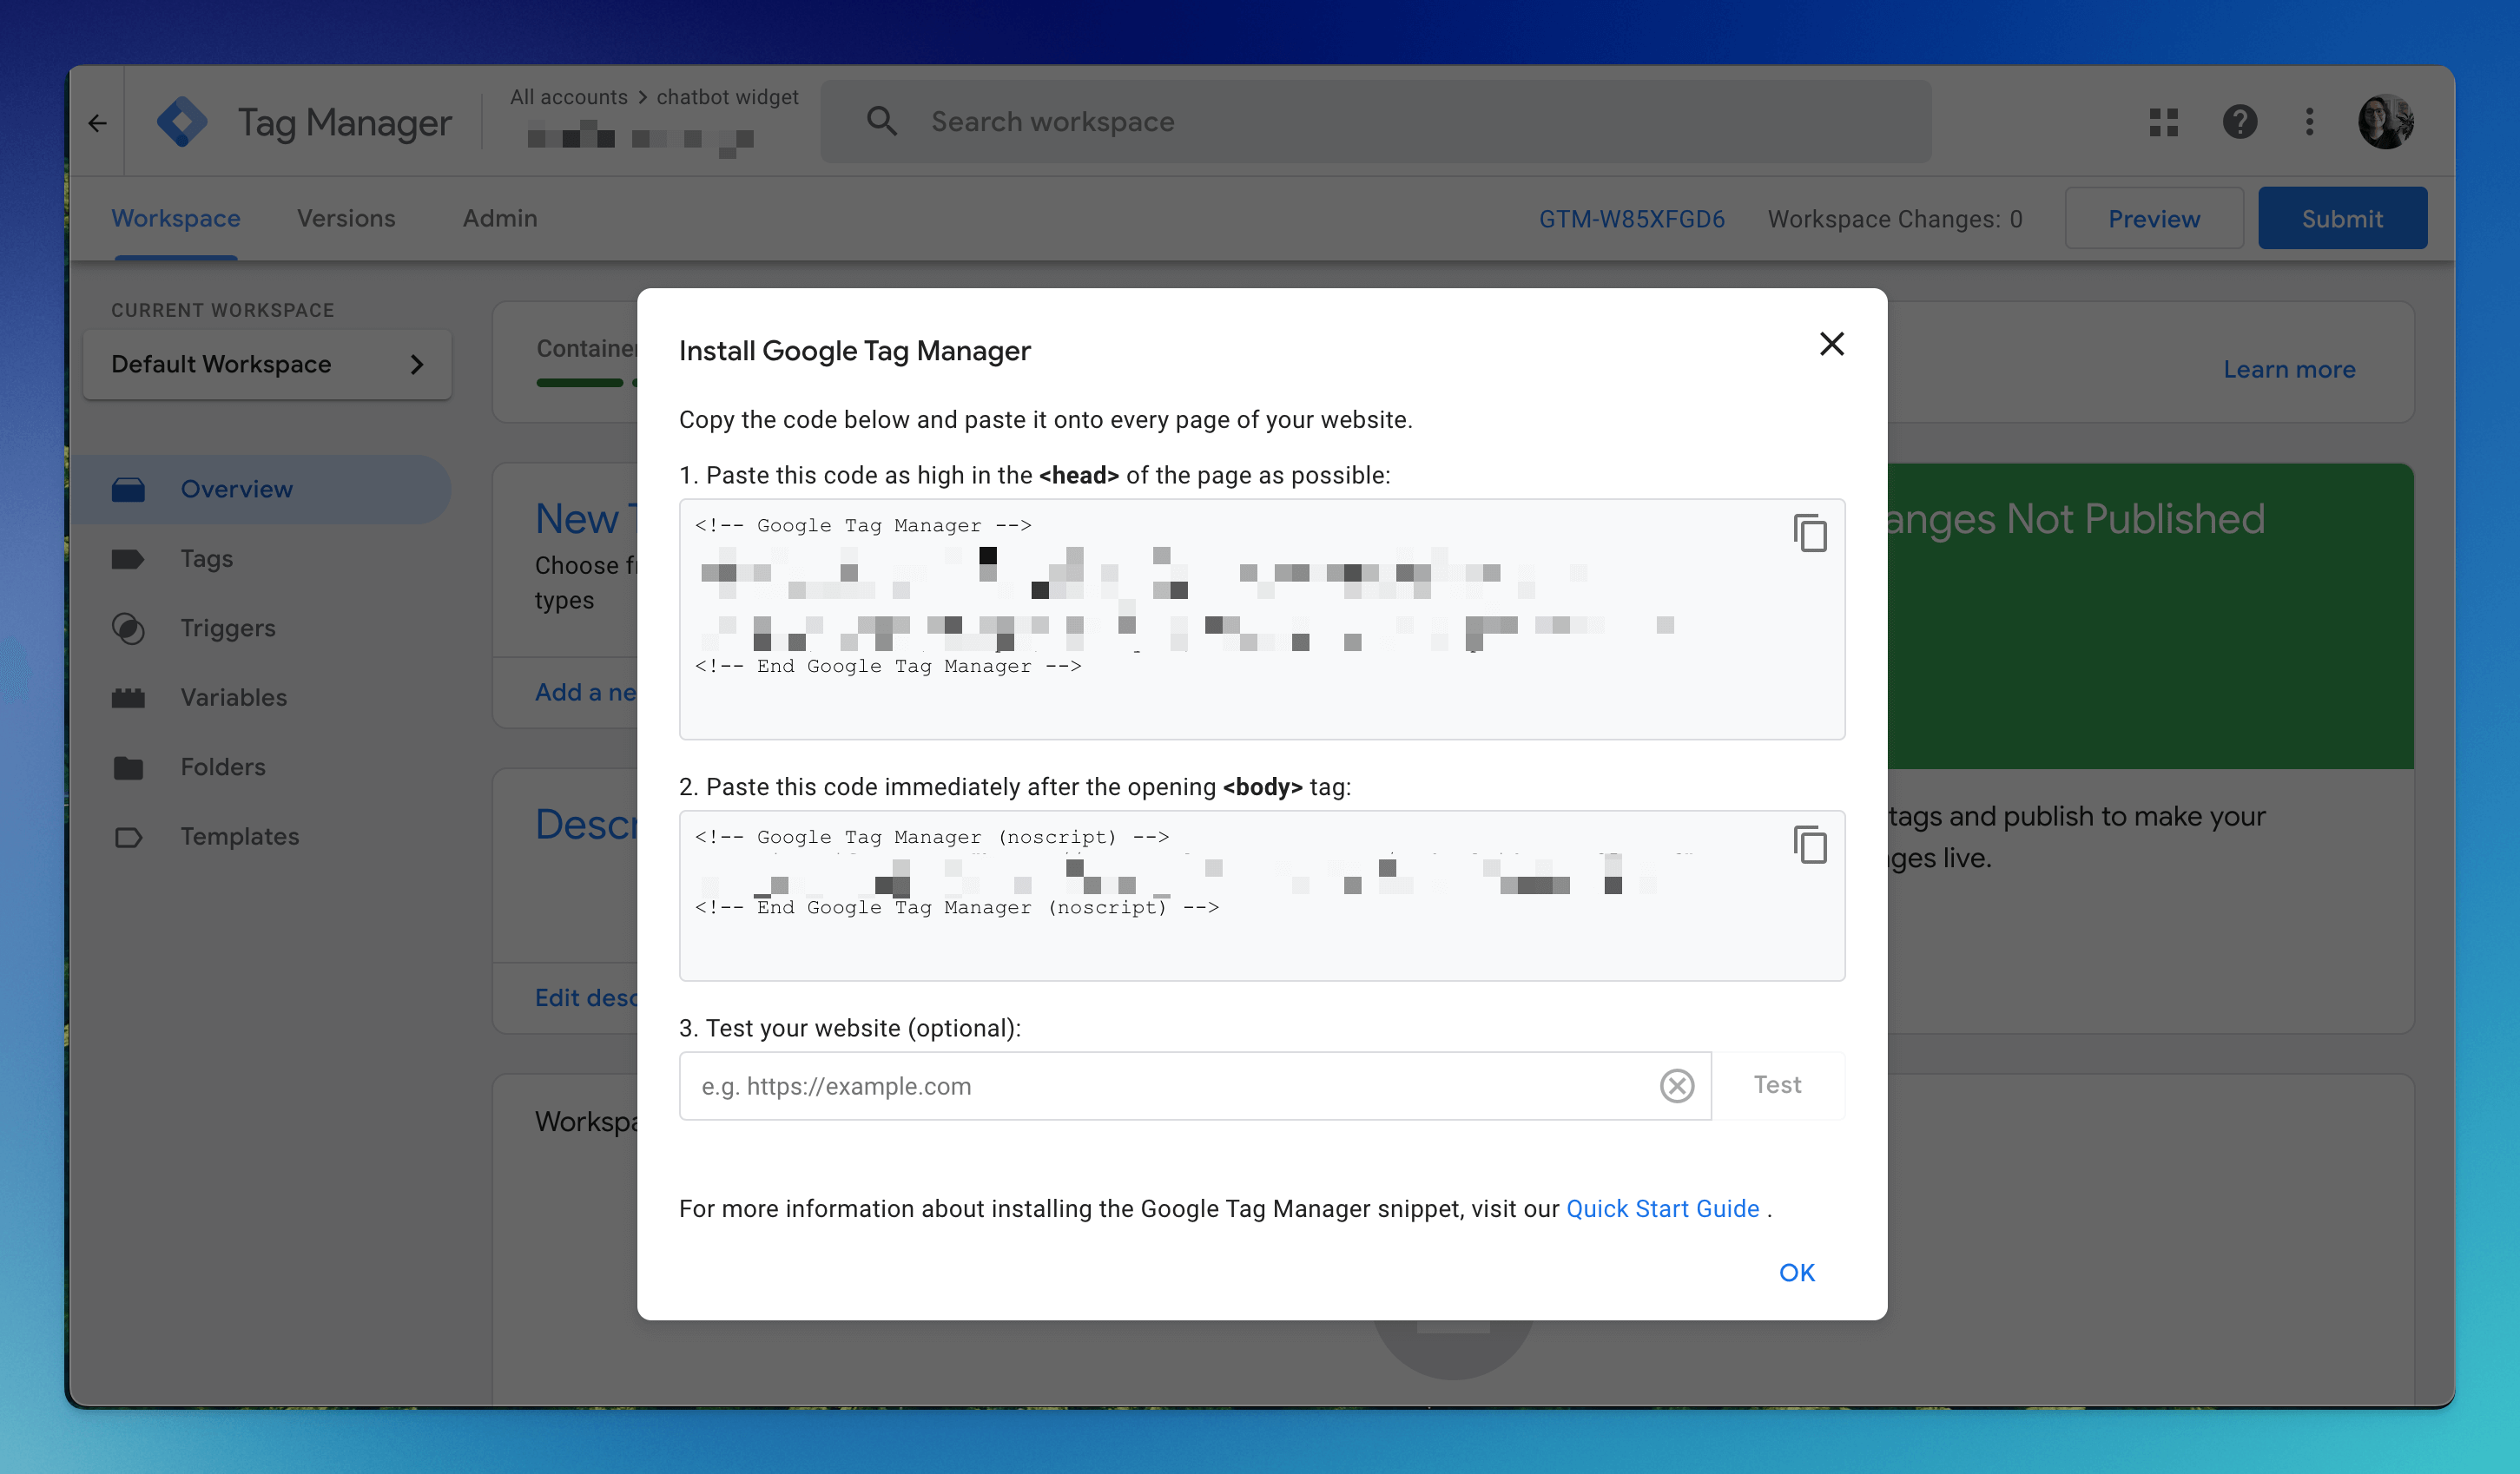
You’ll get a container with a code snippet. Copy the code and paste it into every site page in the recommended places. Click Ok to close the code snippet box.
How to add the ChatBot tag to your website
Once you’re logged into your account with the container, it’s time to add a new tag with the ChatBot tracking code inside it. To do so, follow these steps.
-
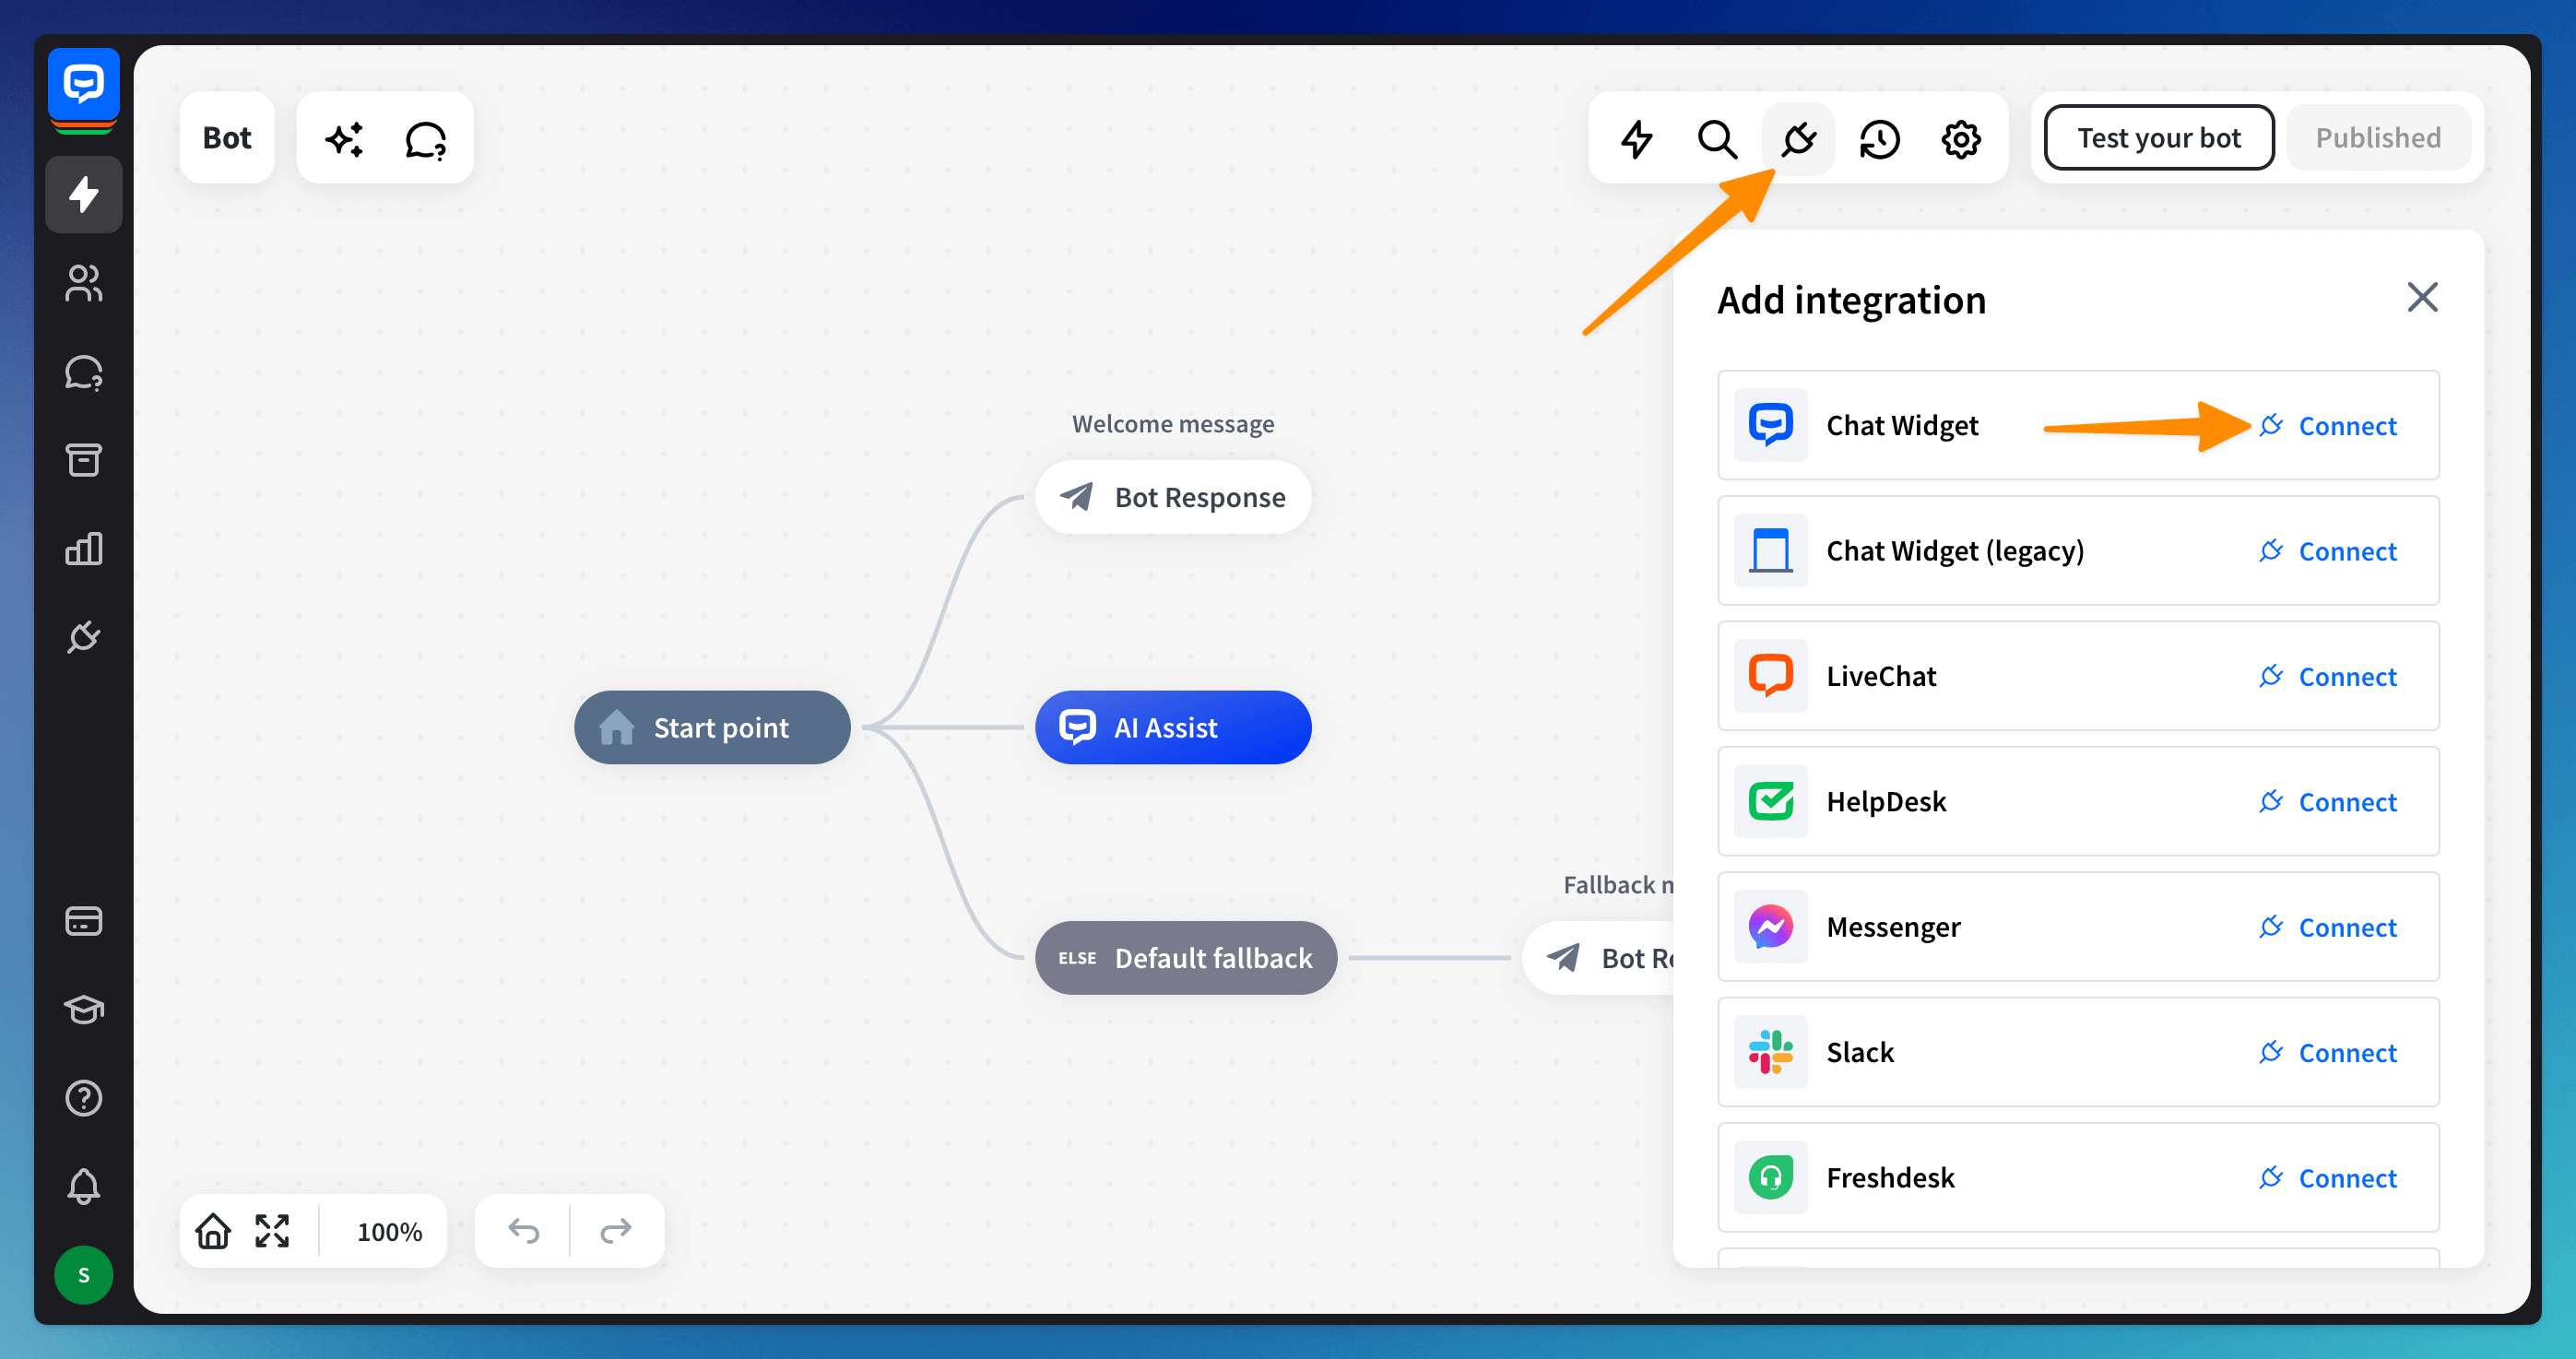
Open your bot and go to the Integrations icon. Click Connect next to the Chat Widget option.
-
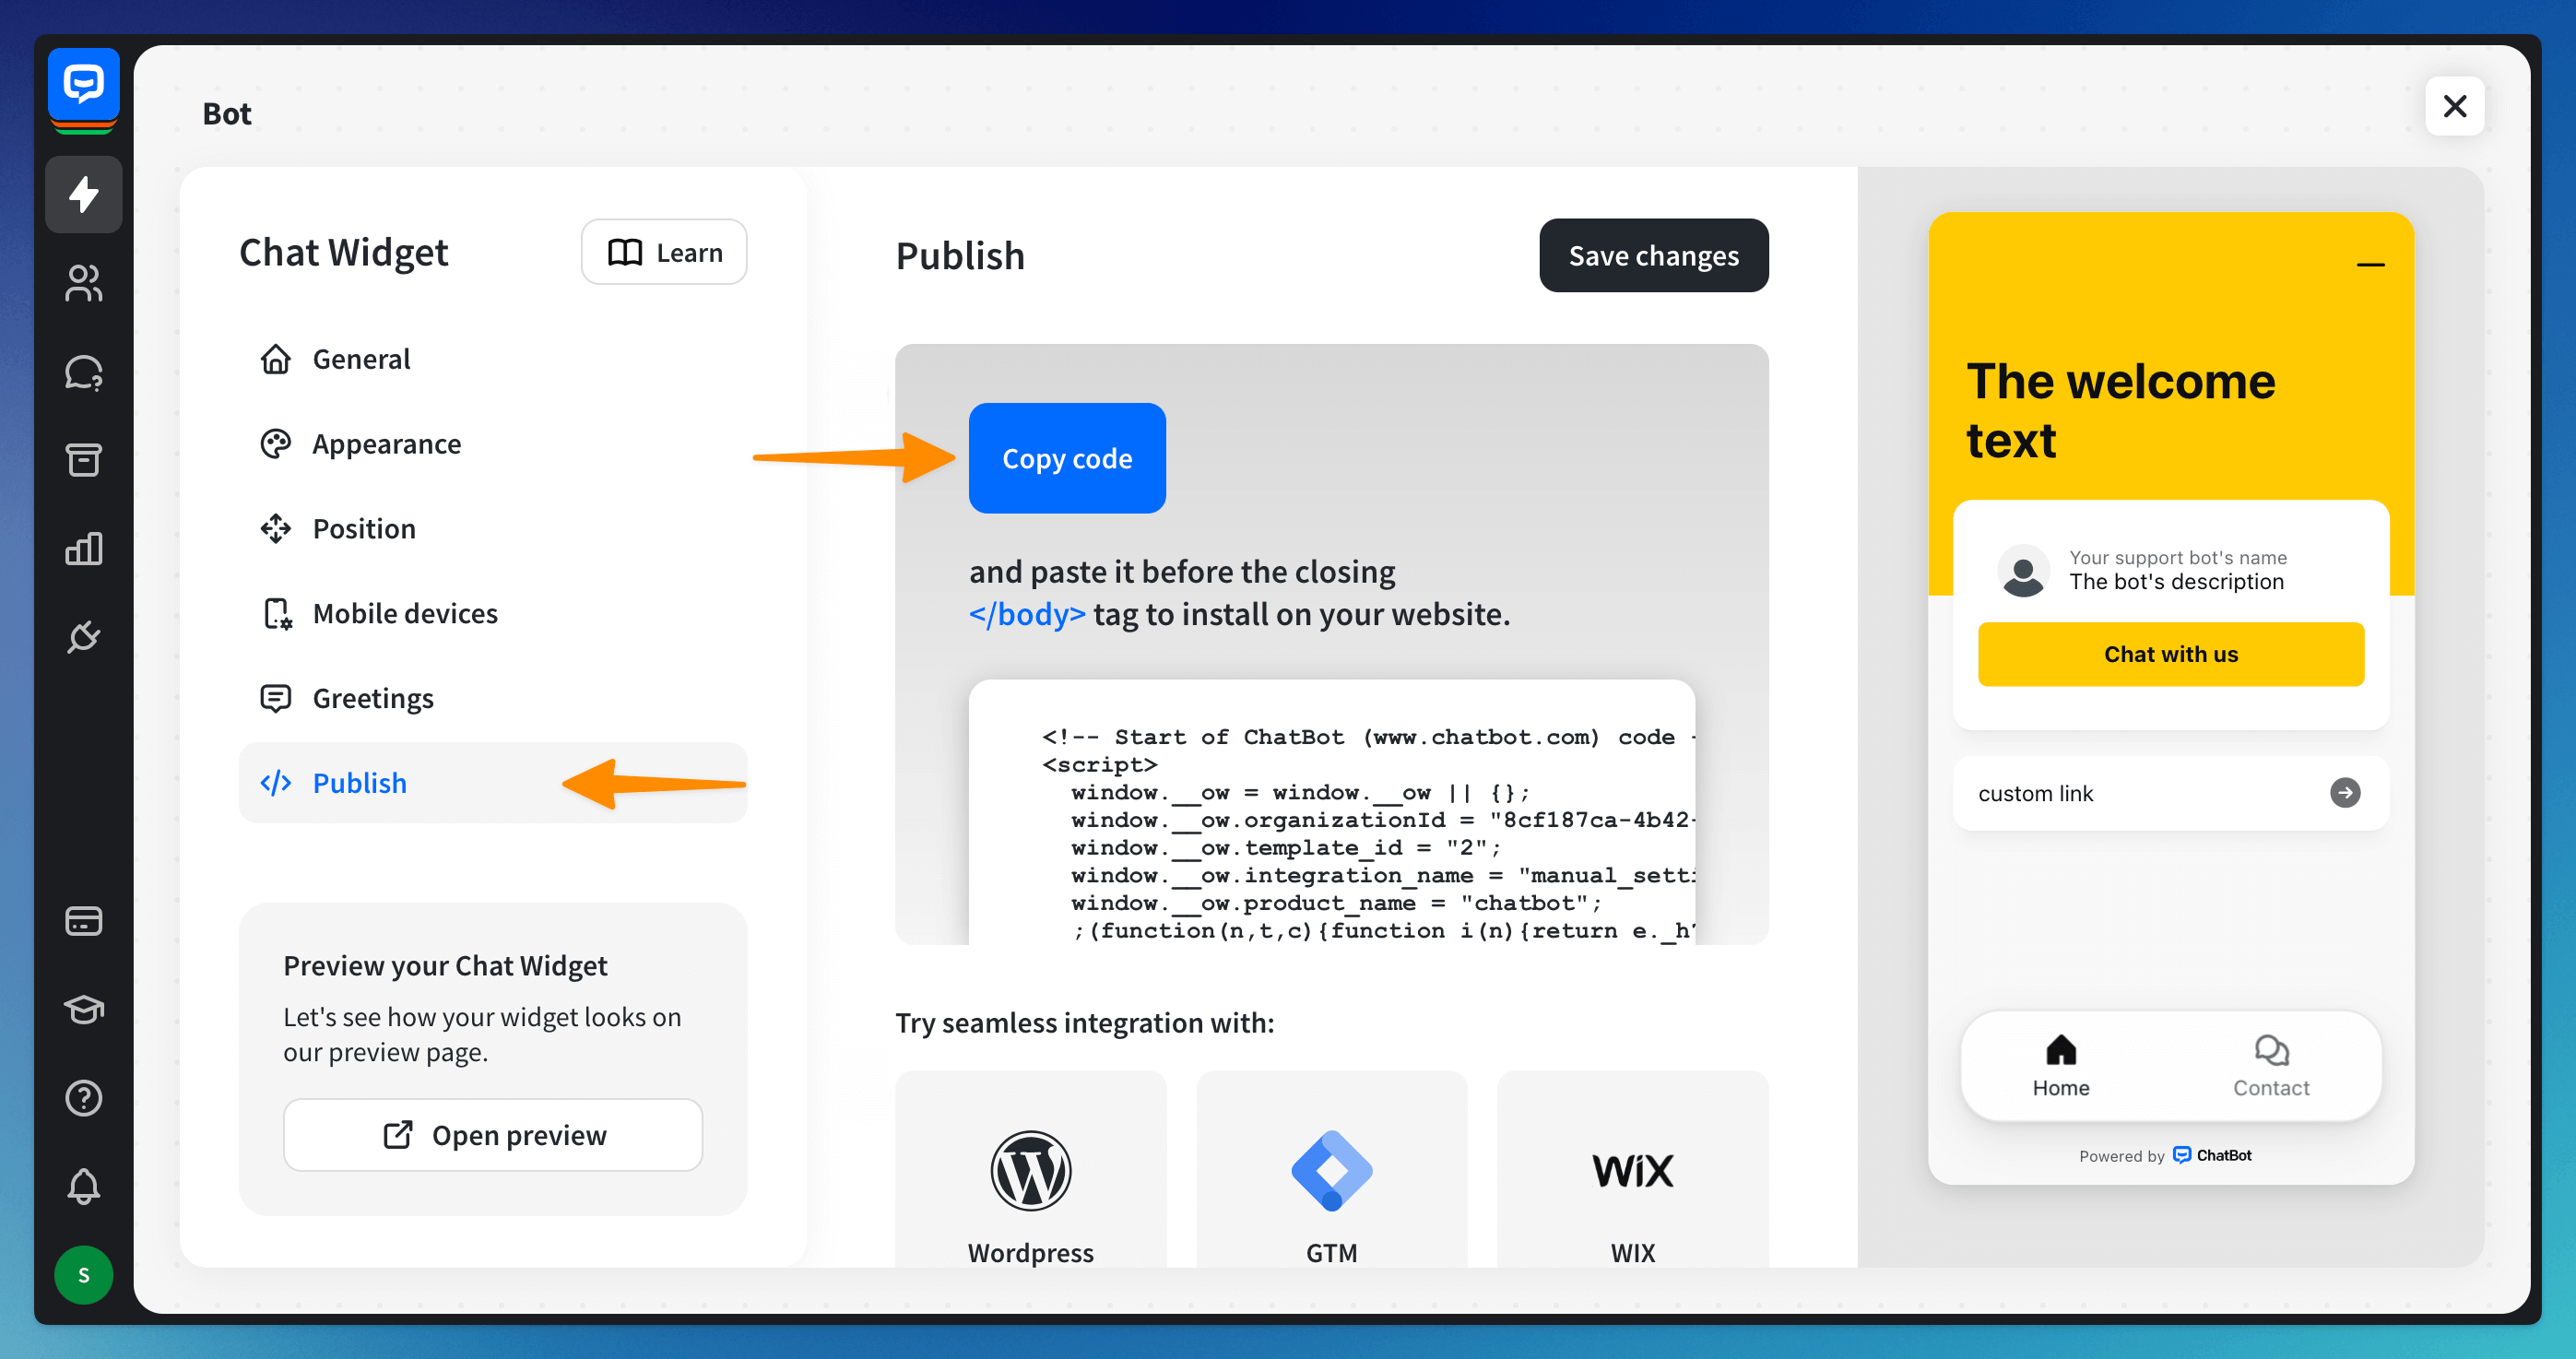
Go to the Publish section and copy the code.
-
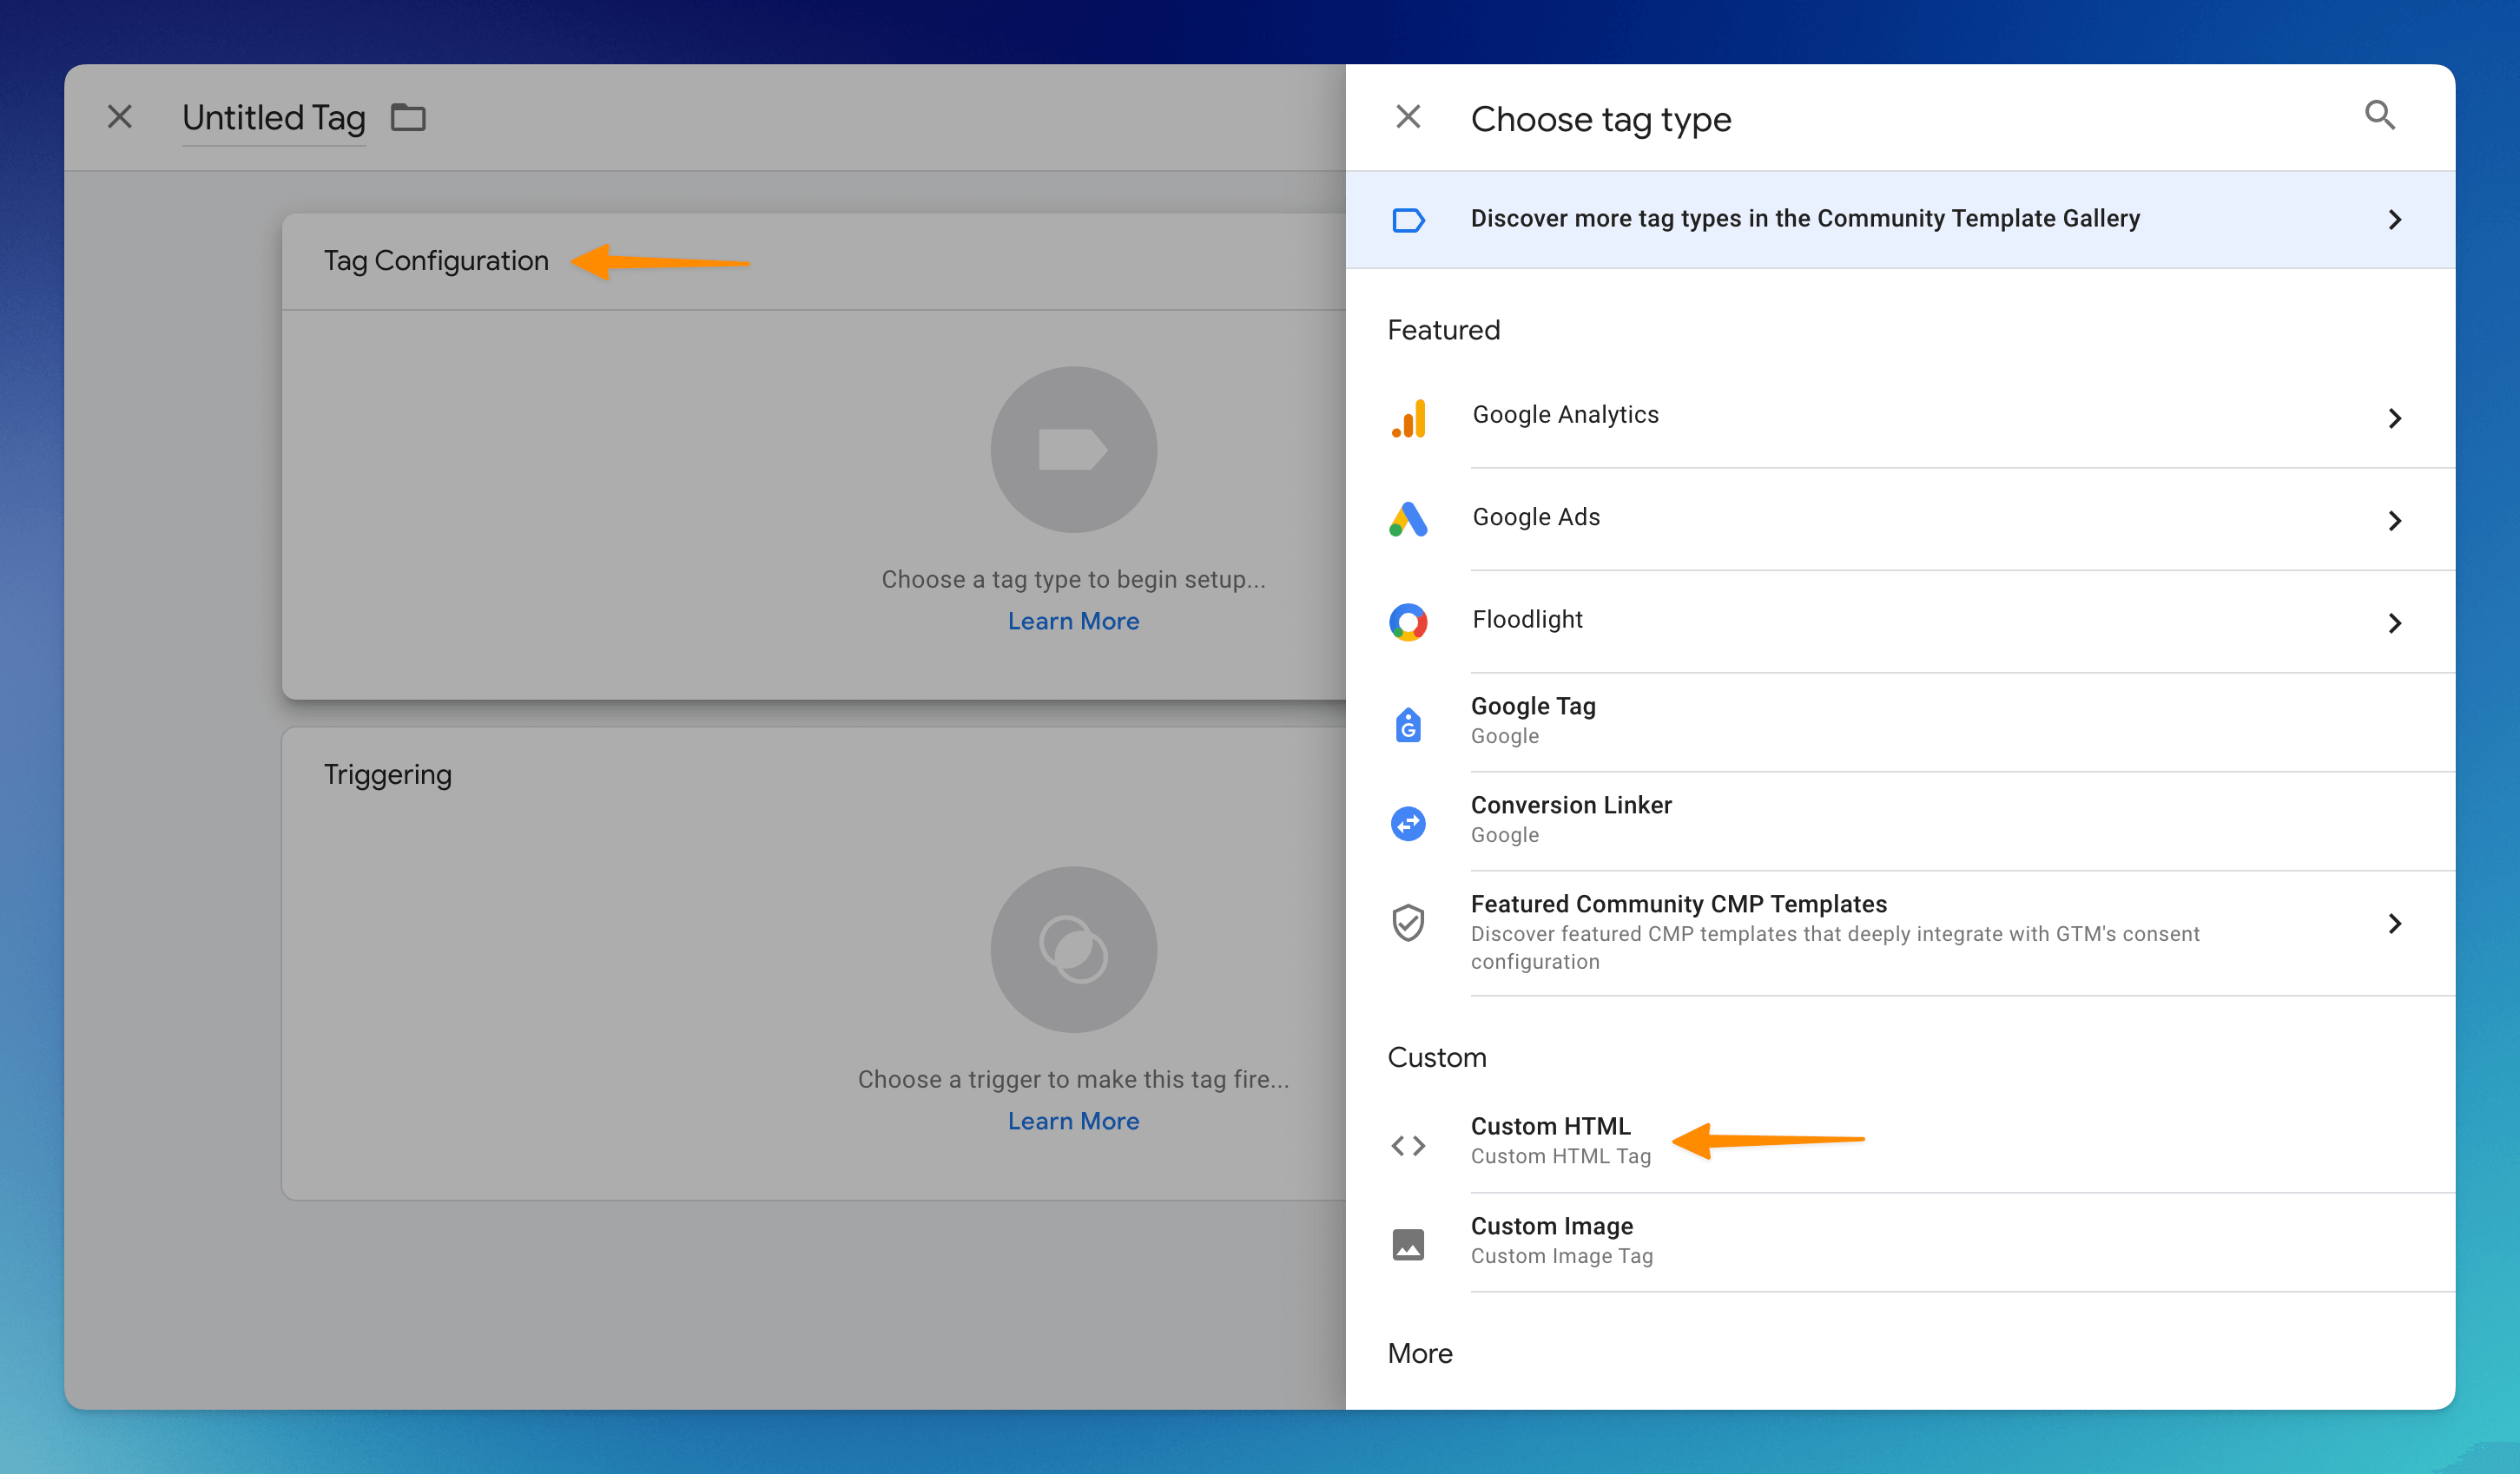
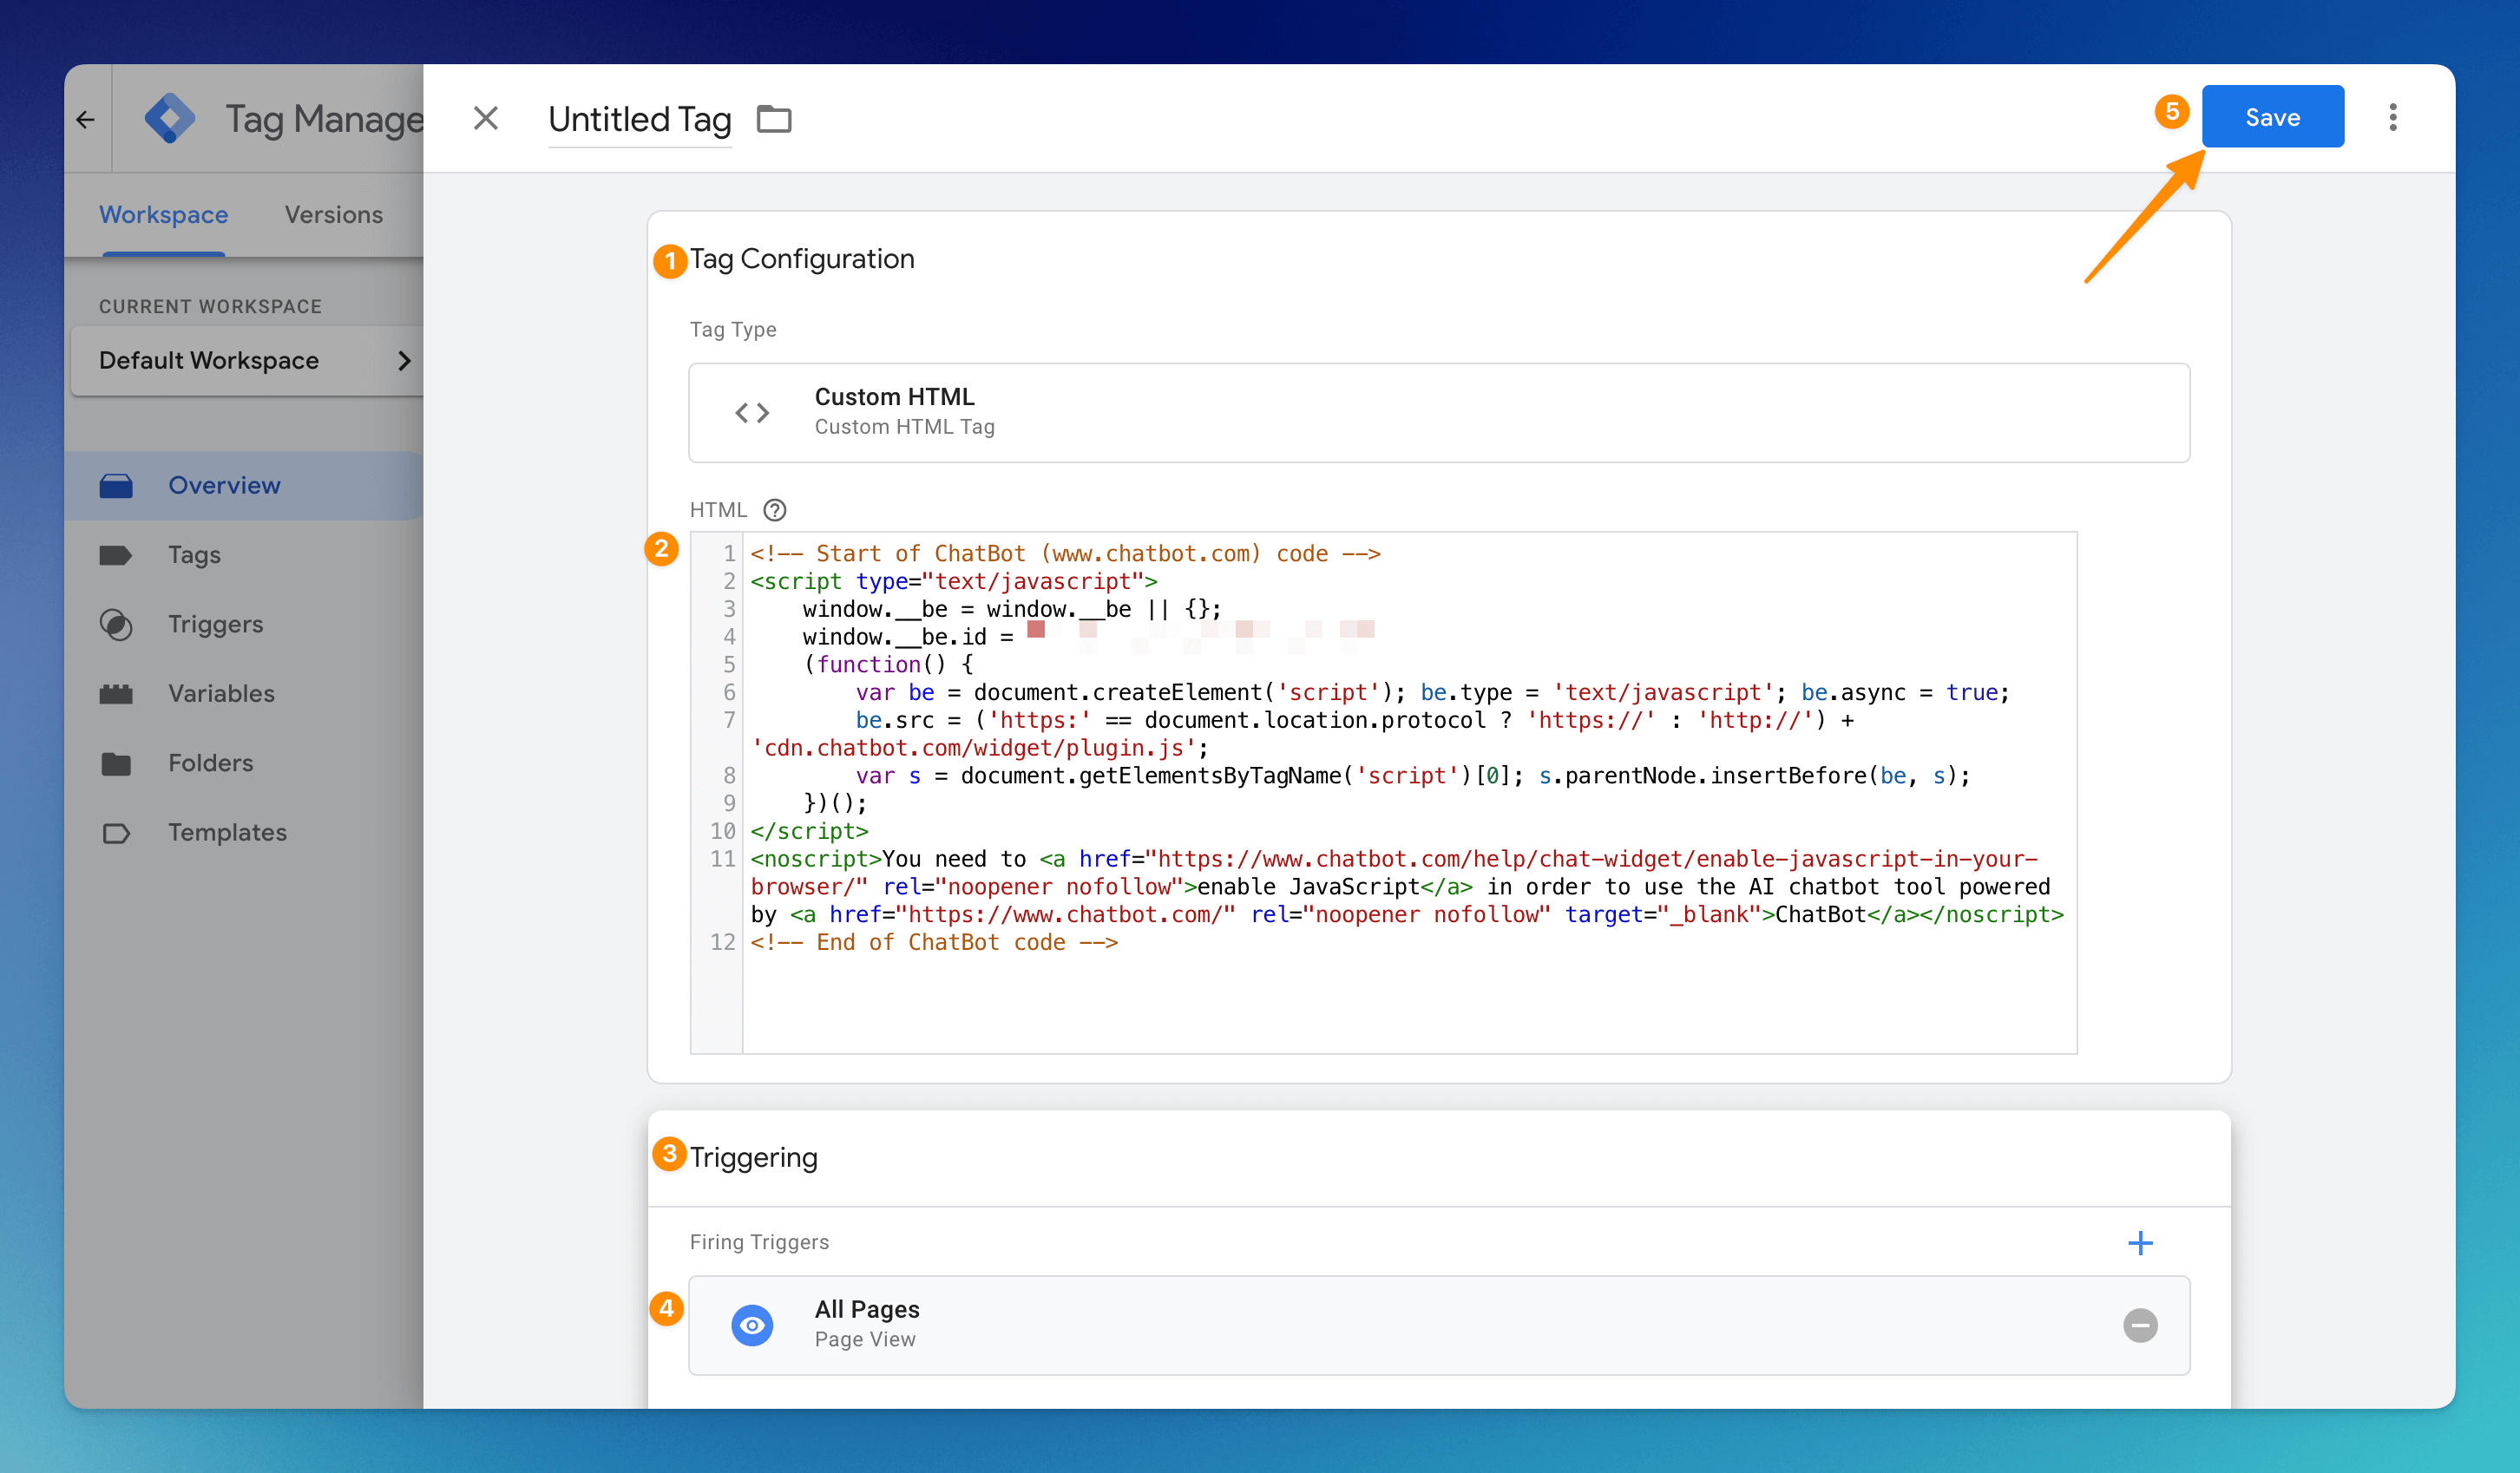
In the Google Tag Manager Home, click on the New Tag tile. Click on the Tag Configuration tile and select Custom HTML from the tags list.
-
Paste the ChatBot tracking code to the HTML field. Click on the Triggering tile and select All pages from the tags list. After you add the trigger, hit the Save button on the right.
-
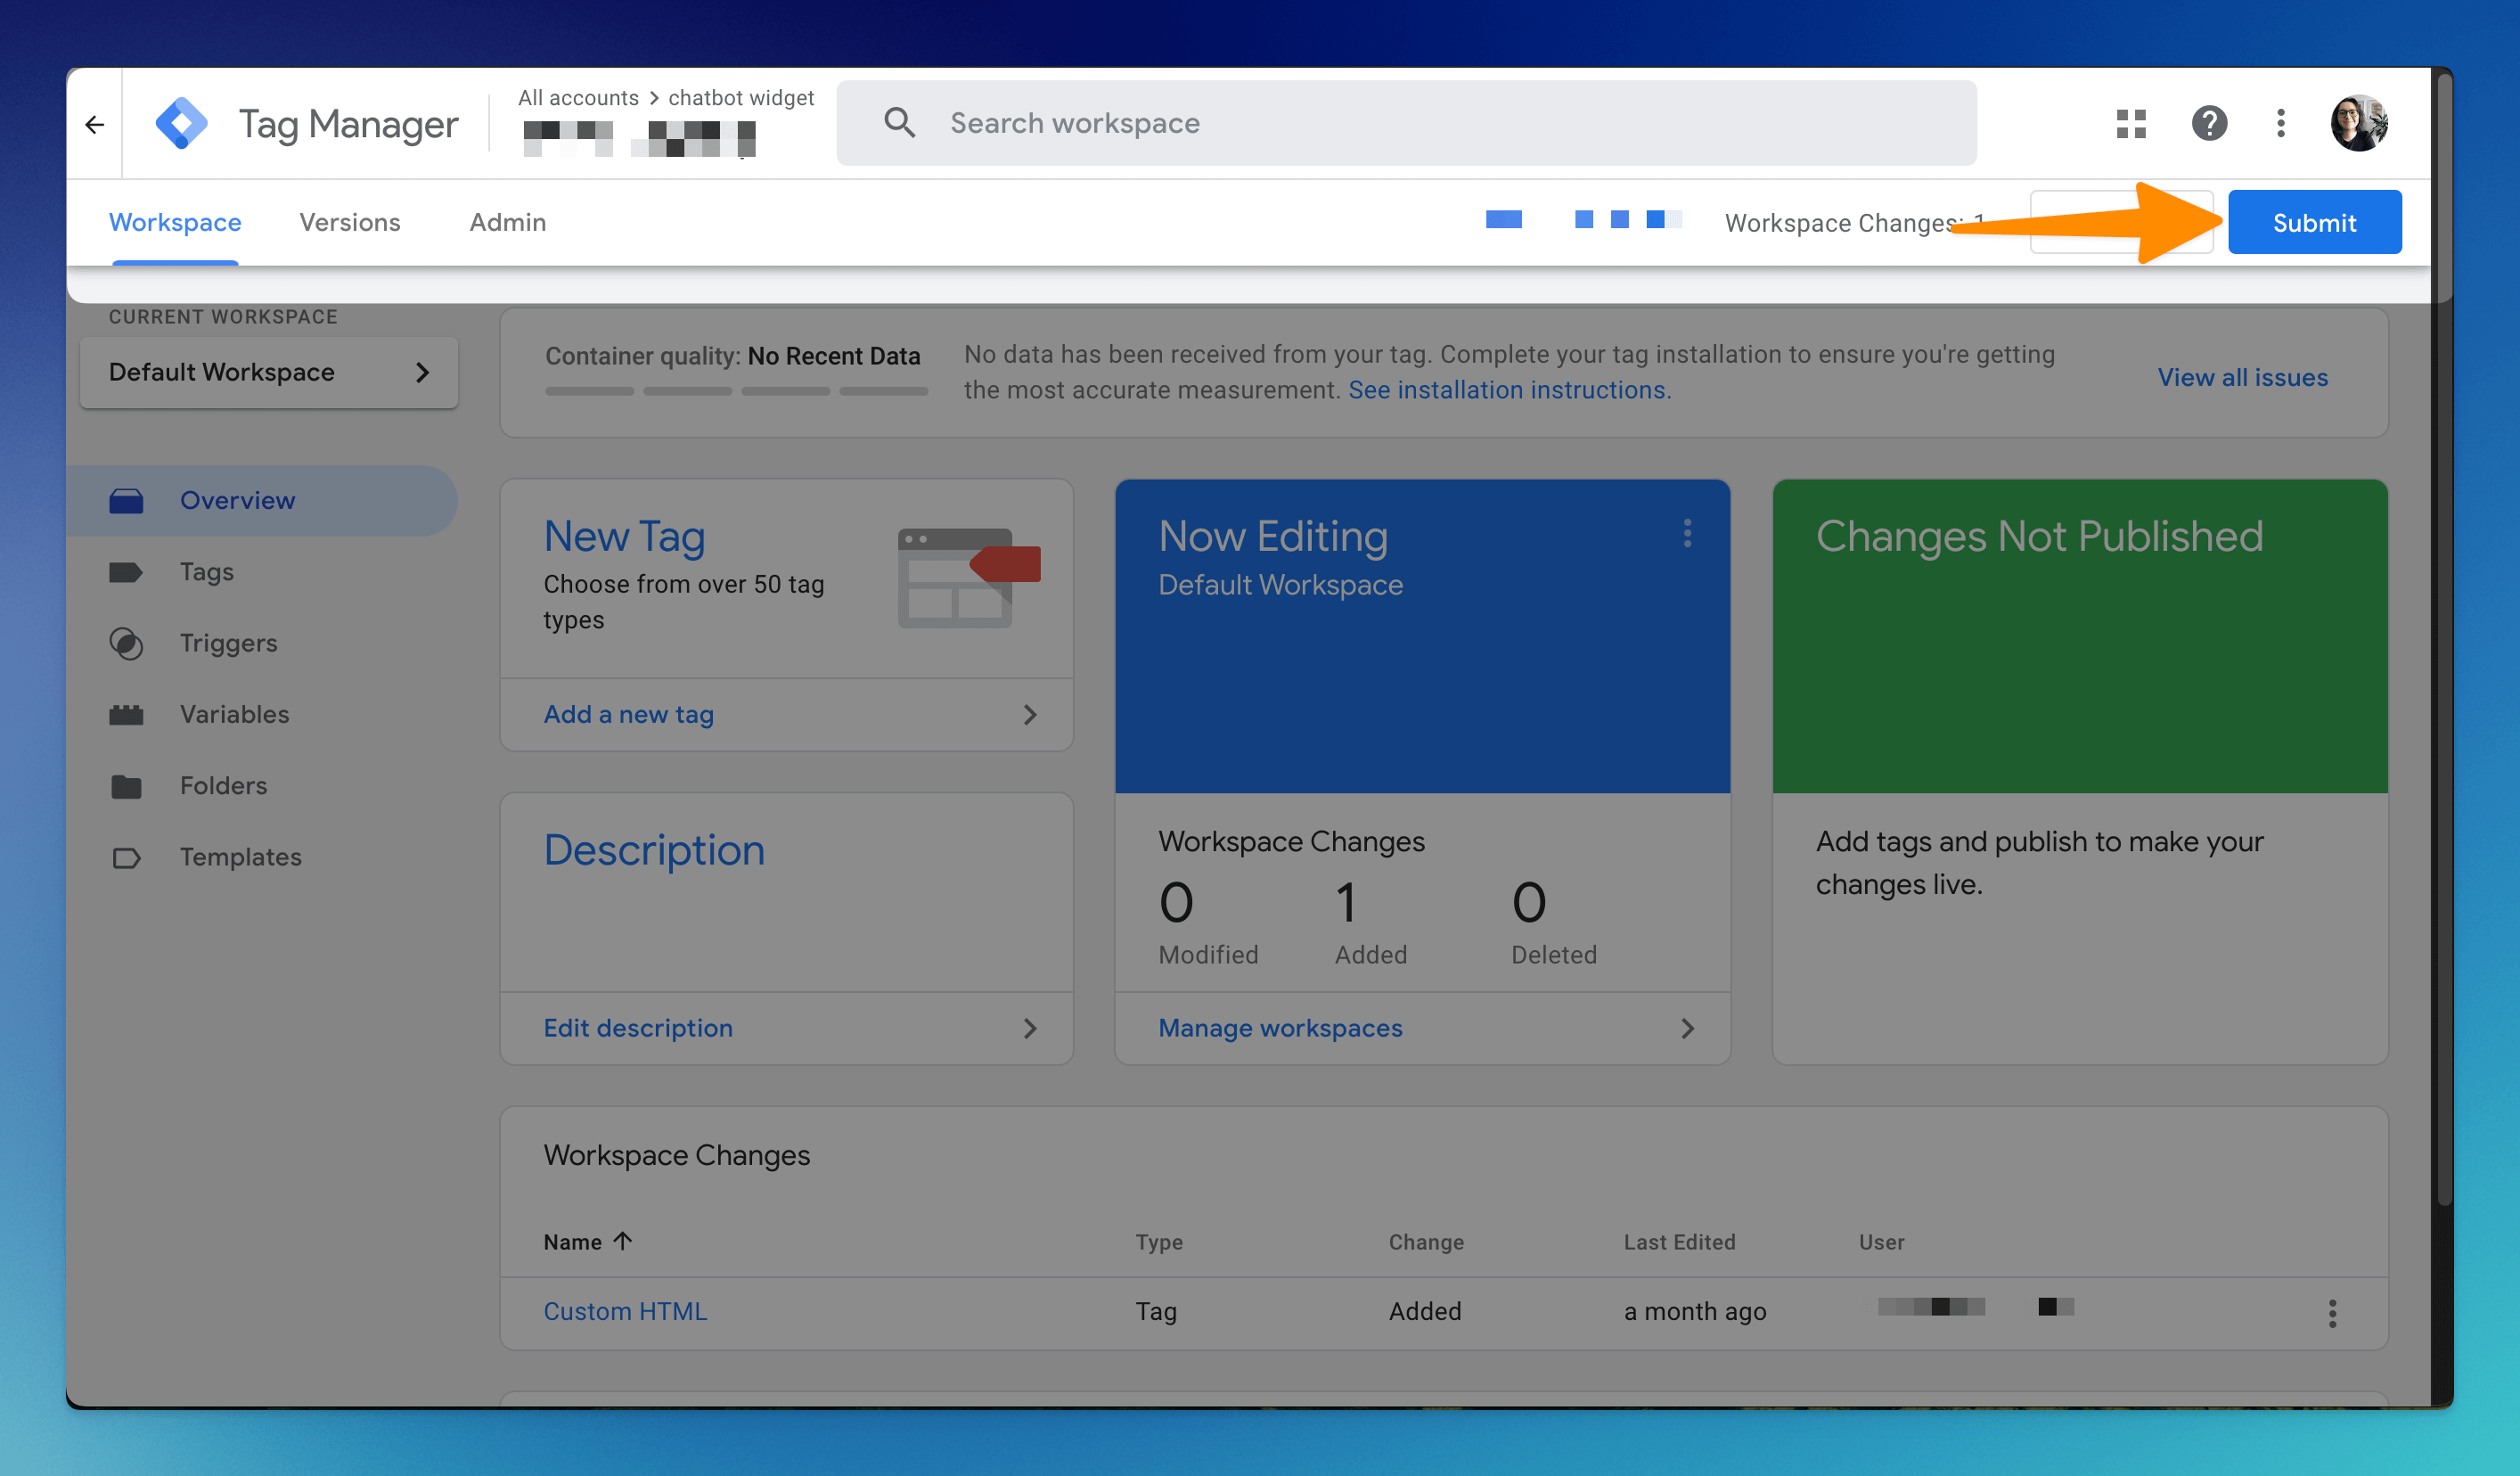
Name your tag and click Save. Once you’re back in GTM’s home, click the Submit button to apply the changes.
Read more:
