ChatBot allows you to adjust the Chat Widget’s appearance to your liking, e.g., to match your website design. Apply your brand colors and logos to deliver a consistent brand experience.
How to customize your widget
-
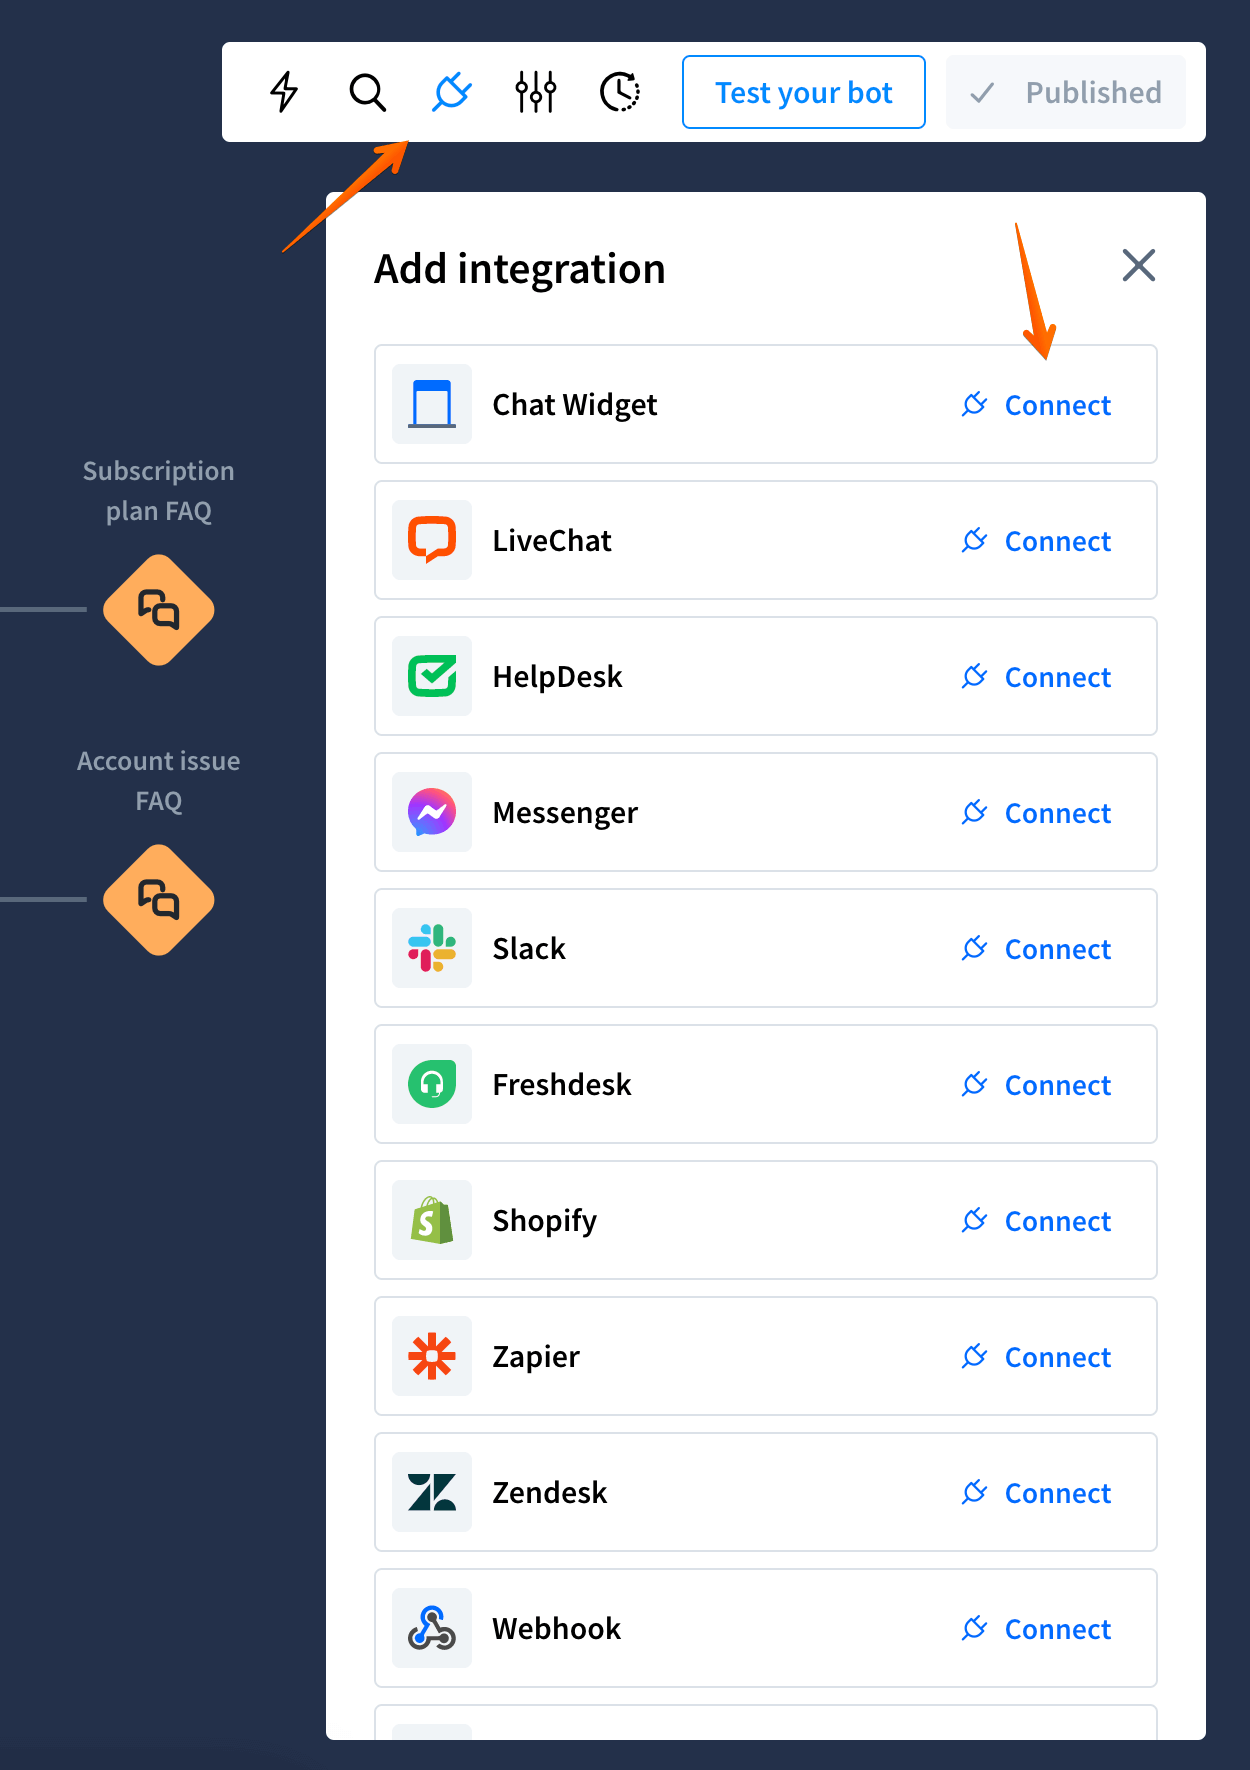
To customize your widget settings, open your selected story, navigate to the Integrations icon, and click Connect next to the Chat Widget option.
-
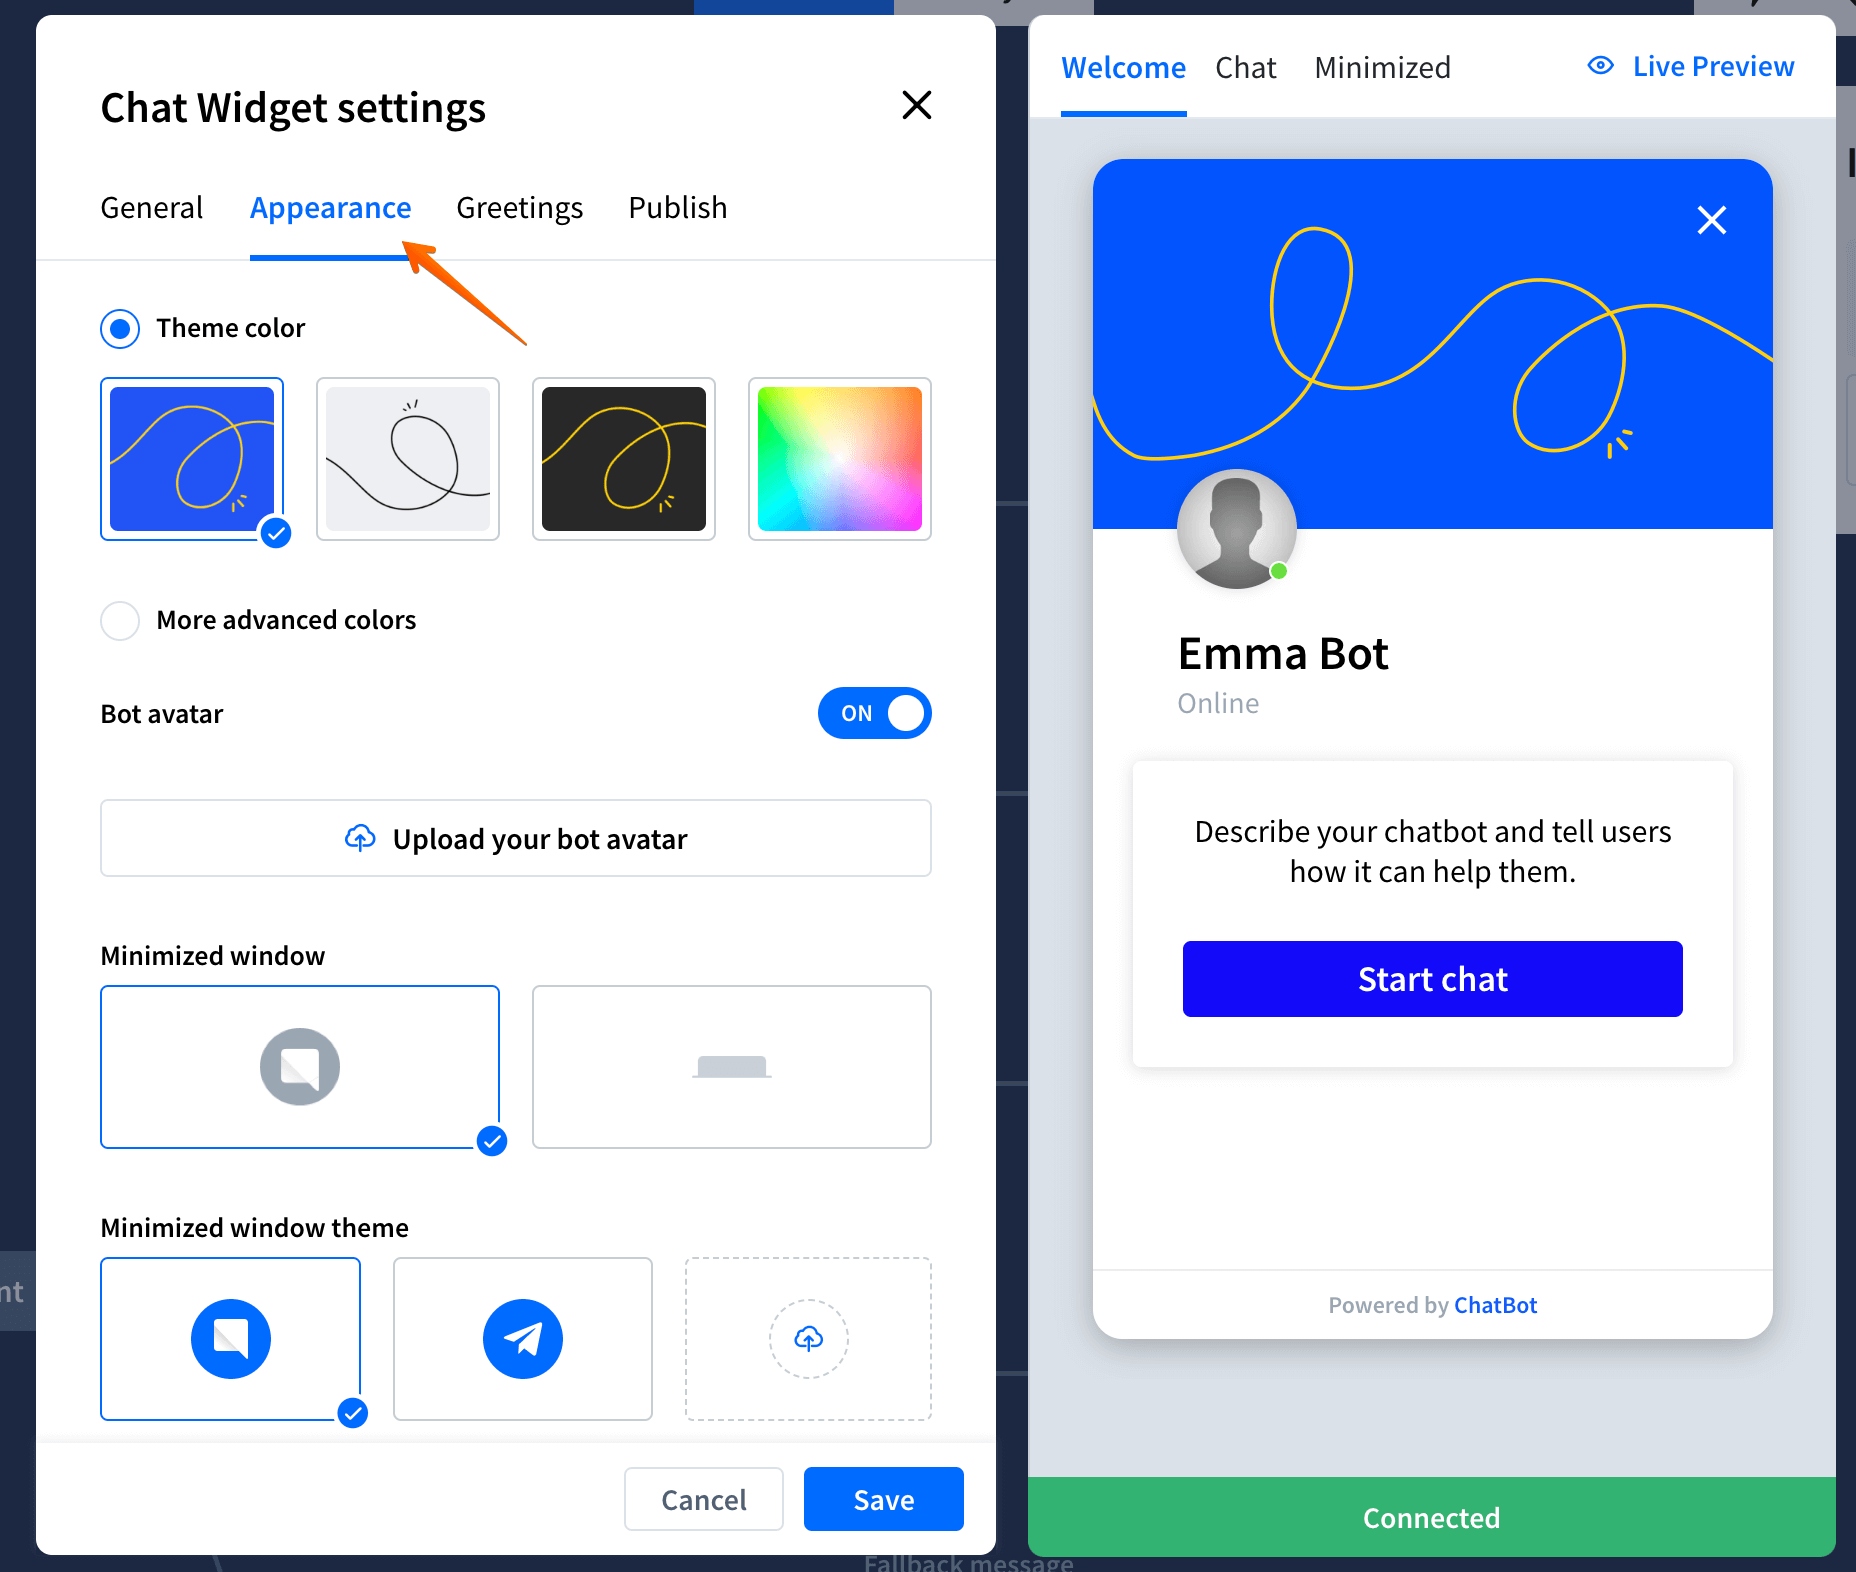
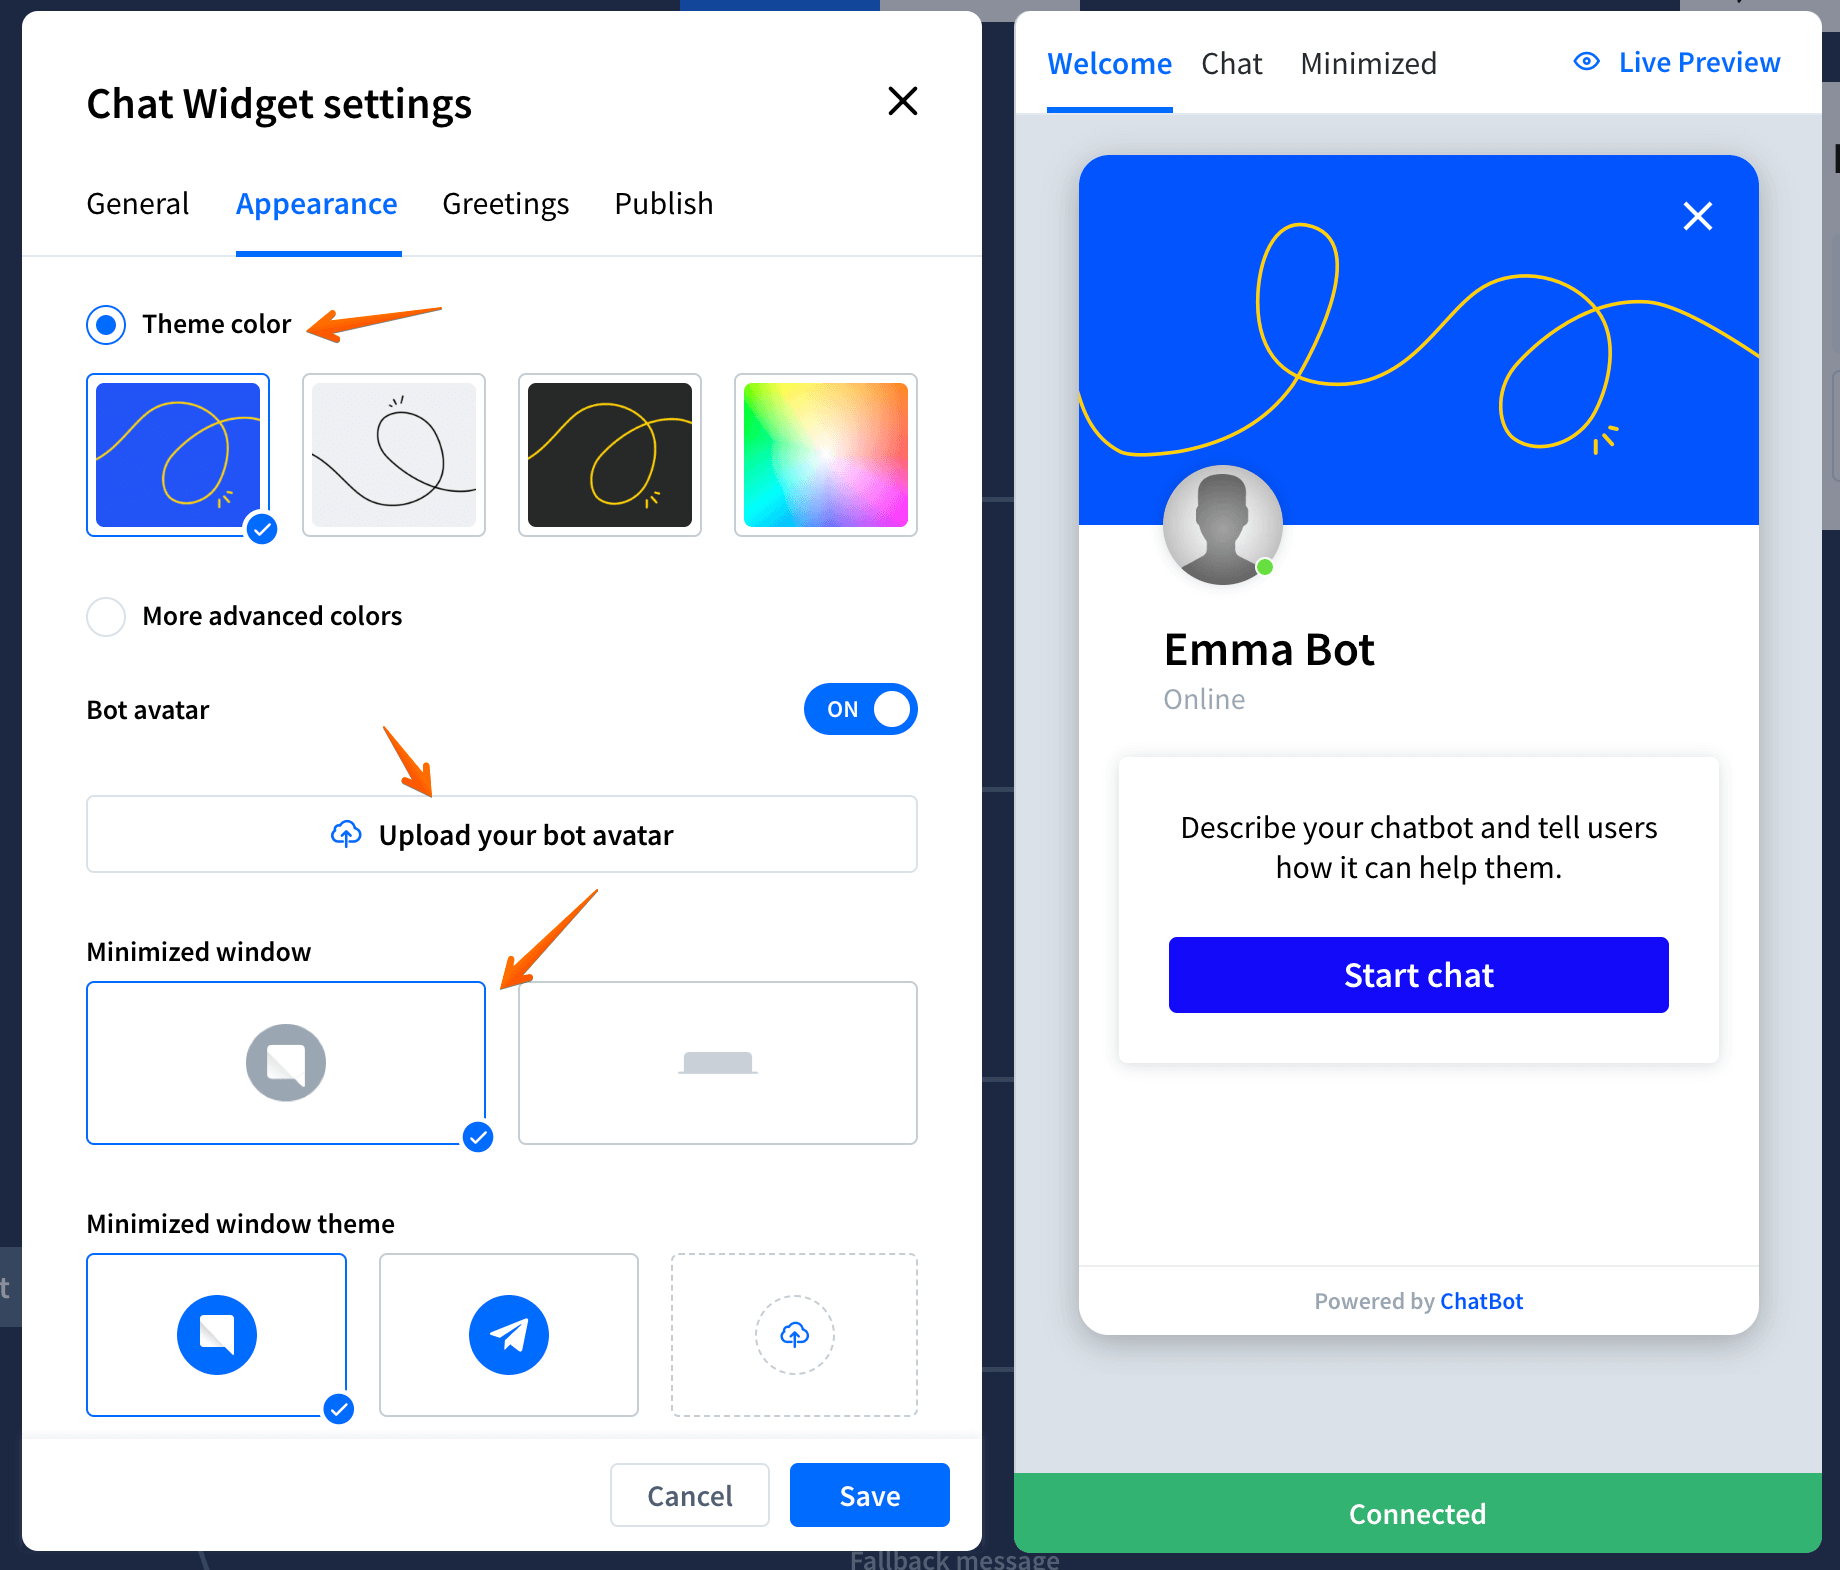
Click on Appearance.
-
Here, you can select the theme color, set up the minimized window theme, and your chatbot’s avatar.
-
Theme color - this option allows you to change the main widget theme color and the background image. You can choose from ready-to-use presets or configure your colors by selecting the More advanced colors option.
-
Minimized window - here, you can define how your minimized window should look. You can choose between the bubble and the bar widget.
-
Minimized window theme - choose the bubble icon or upload your image. If you’re using the bar option, you can customize the displayed text instead.
-
Bot avatar - enable/disable the bot’s avatar in the welcome screen. You can use the default avatar or upload your own by clicking the Upload your bot avatar button.
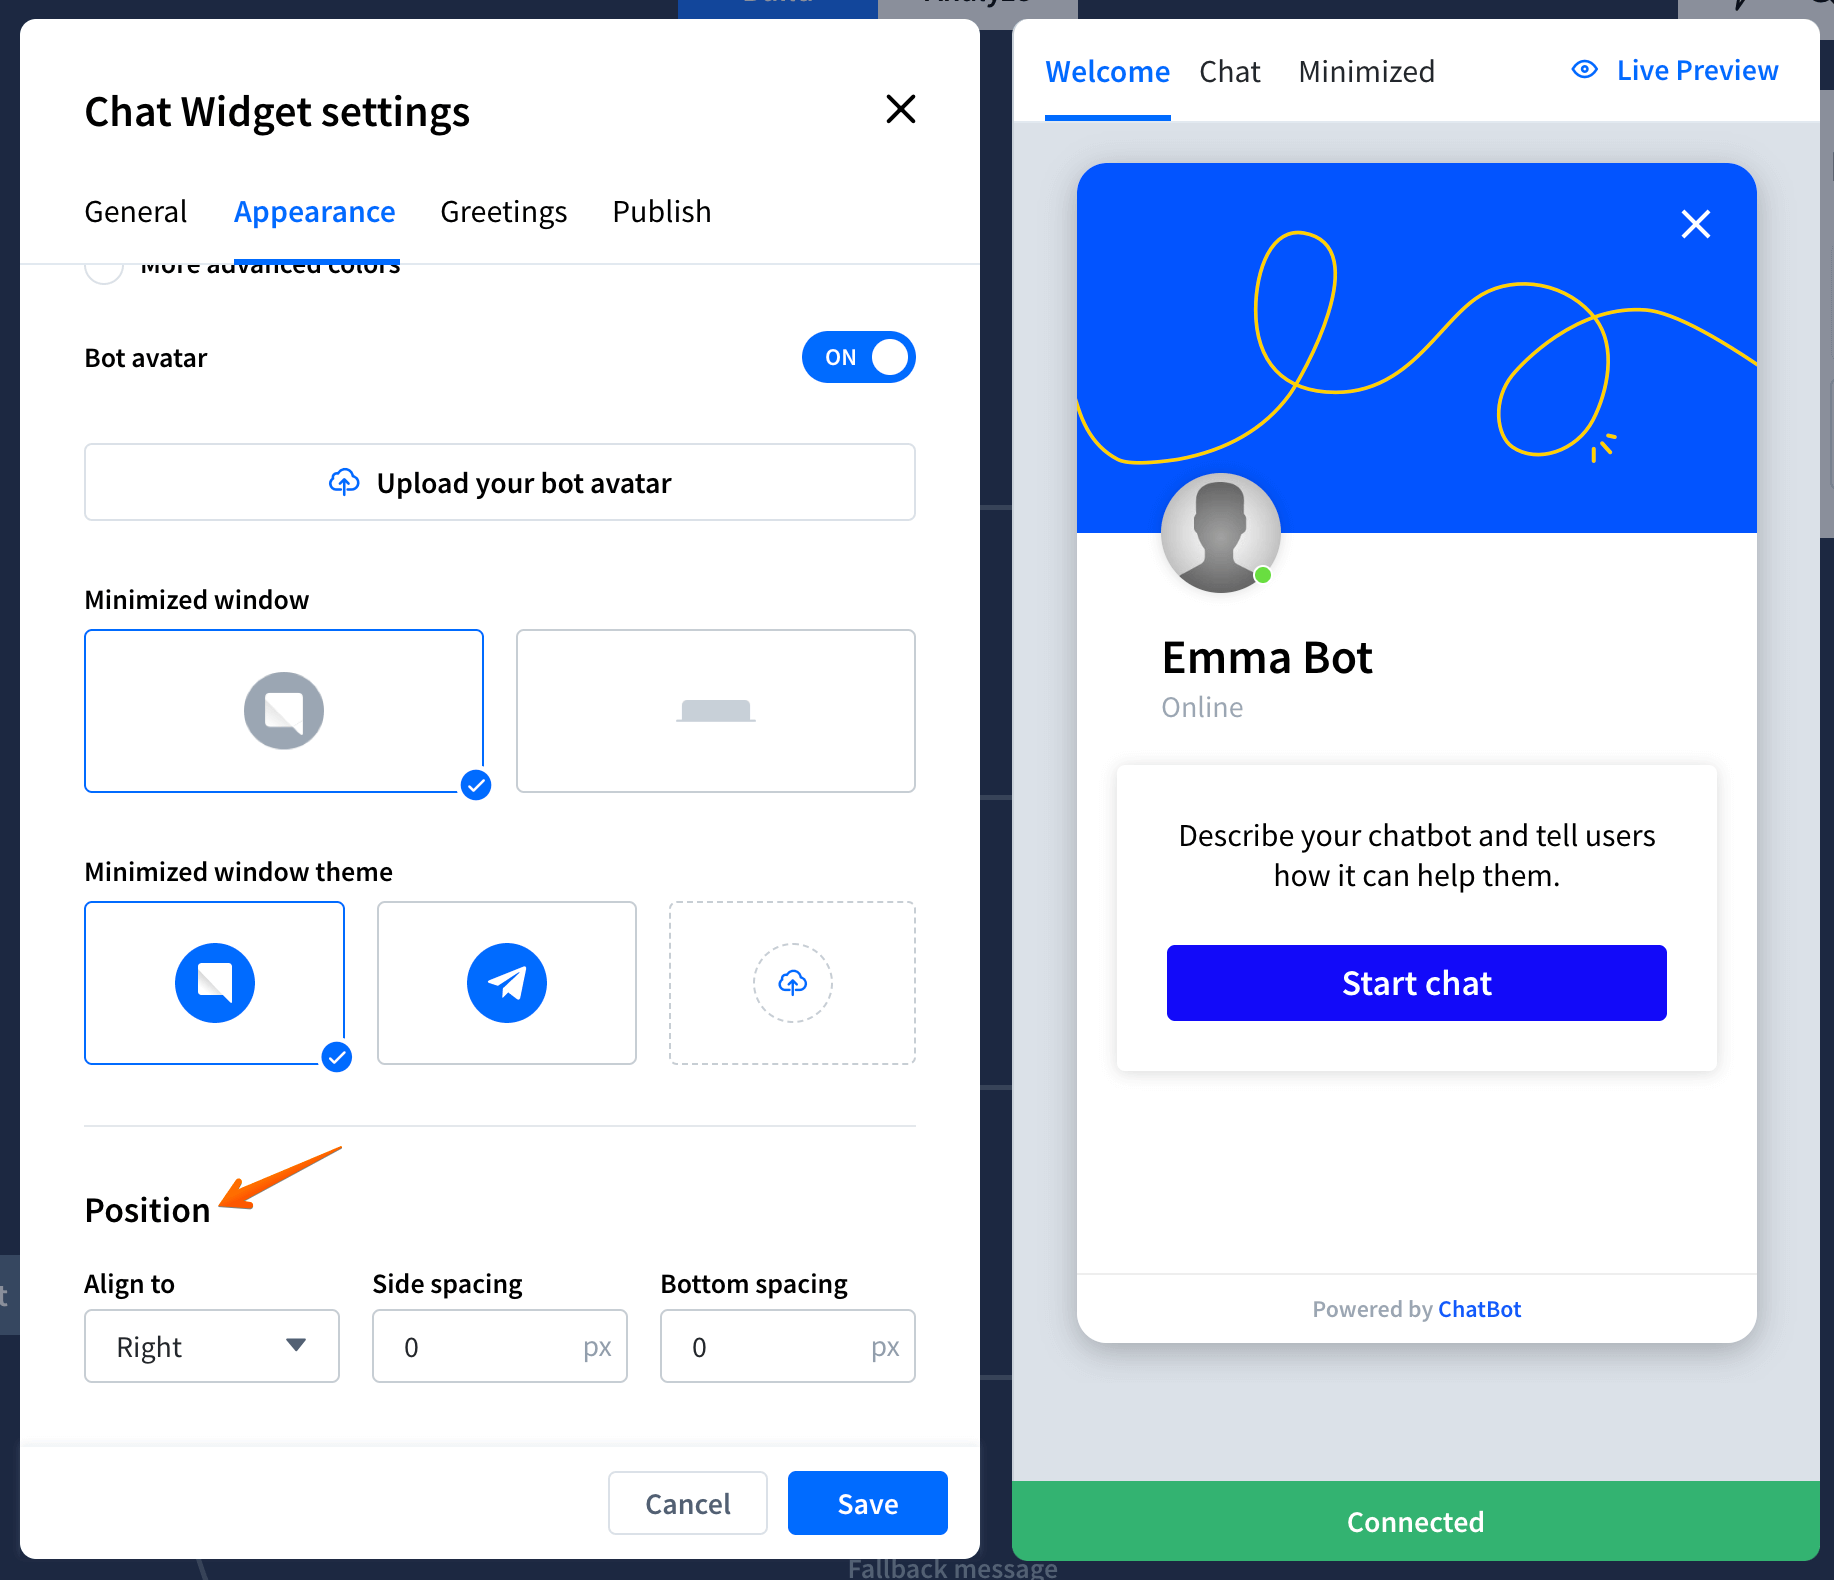
Customize the position of the Chat Widget
ChatBot lets you decide where the Chat Widget should appear on your website. You can choose between the left and right sides of the screen. It’s also possible to define the spacing between the Widget and the corresponding bottom and side edges.
Preview the Chat Widget
You can preview the changes applied to your Chat Widget in real-time on the right side of the configuration screen. Choose from one of the views to see the minimized chat, welcome screen, or ongoing Chat Widget view.
 Read more:
