New communication channels, such as Facebook Messenger, live chat widgets, WhatsApp are must have to run a modern business. But how to manage all of them when running a busy restaurant?
Chatbots are clever enough to chat with clients and process their queries. For example, chatbots can show appetizers and main courses but also collect orders and summarize them. Similarly, your bot assistants can manage the whole booking process. Tables can be chosen directly from the chat window without any human action.
To make it simpler we’ve prepared a template with the relevant code that can be easily implemented and customized. Let’s get started! 🚀
What can the Restaurant Template bot do
The restaurant bot covers main areas of daily customer support: takes reservations, food orders, and answers frequent questions. Users can type questions, as they would typically do when chatting with human agents or click a button to interact quicker.
To start the order process, users must select the Restaurant Menu option available from the menu. The interactive carousel shows the preview of the next steps with short descriptions. Users can decide if they want to start from ordering appetizers, first and main courses or desserts. When the order is complete, the chatbot shows the summary that must be confirmed. Here you can easily add ask question action to collect user data and voilà! 👏
Similarly, the Restaurant Bot can walk users through the table booking process, show the contact details and answer questions relevant to your business. If a topic isn’t supported, the bot encourages users to contact the support directly.
What did we use to create the Restaurant Template
To make the Restaurant Template work, we’ve used a few great ChatBot features.
Postback
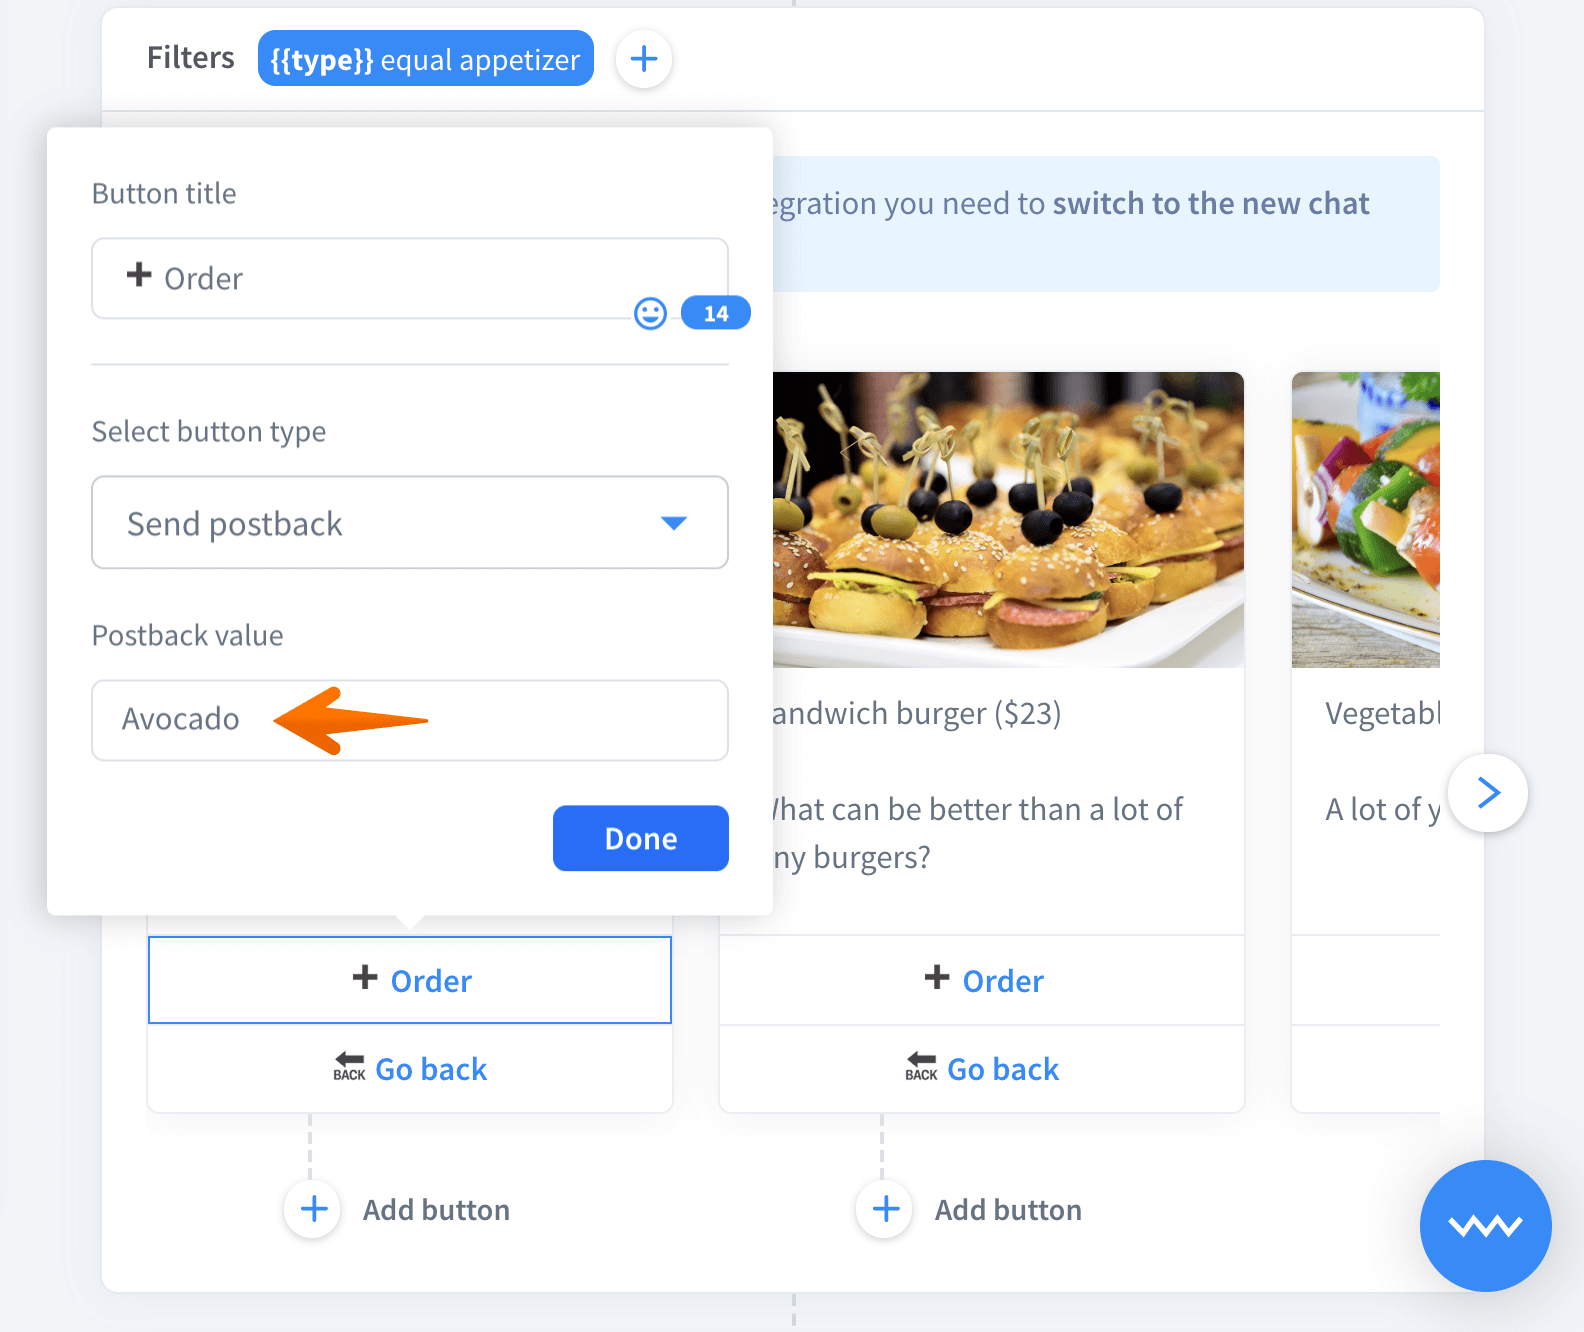
By default, when a button is clicked, the bot receives its title. To keep a nice and clean restaurant menu design, we’ve bypassed it by using the postback. Postback allows us to declare a hidden message that is handed to the chatbot over the title. Postbacks allow users to click the order button while the bot still knows that the avocado paste has been selected.
Entities

We’ve taught the bot our restaurant menu adding them to our new productName entity. This user entity recognizes the message passed through webhook and saves it as a parameter that can be used within our webhook.
That’s not all! System entities such as sys.any, sys.numer and sys.email helped us efficiently collect users data, such as productQuantity so we can process them.
Filters
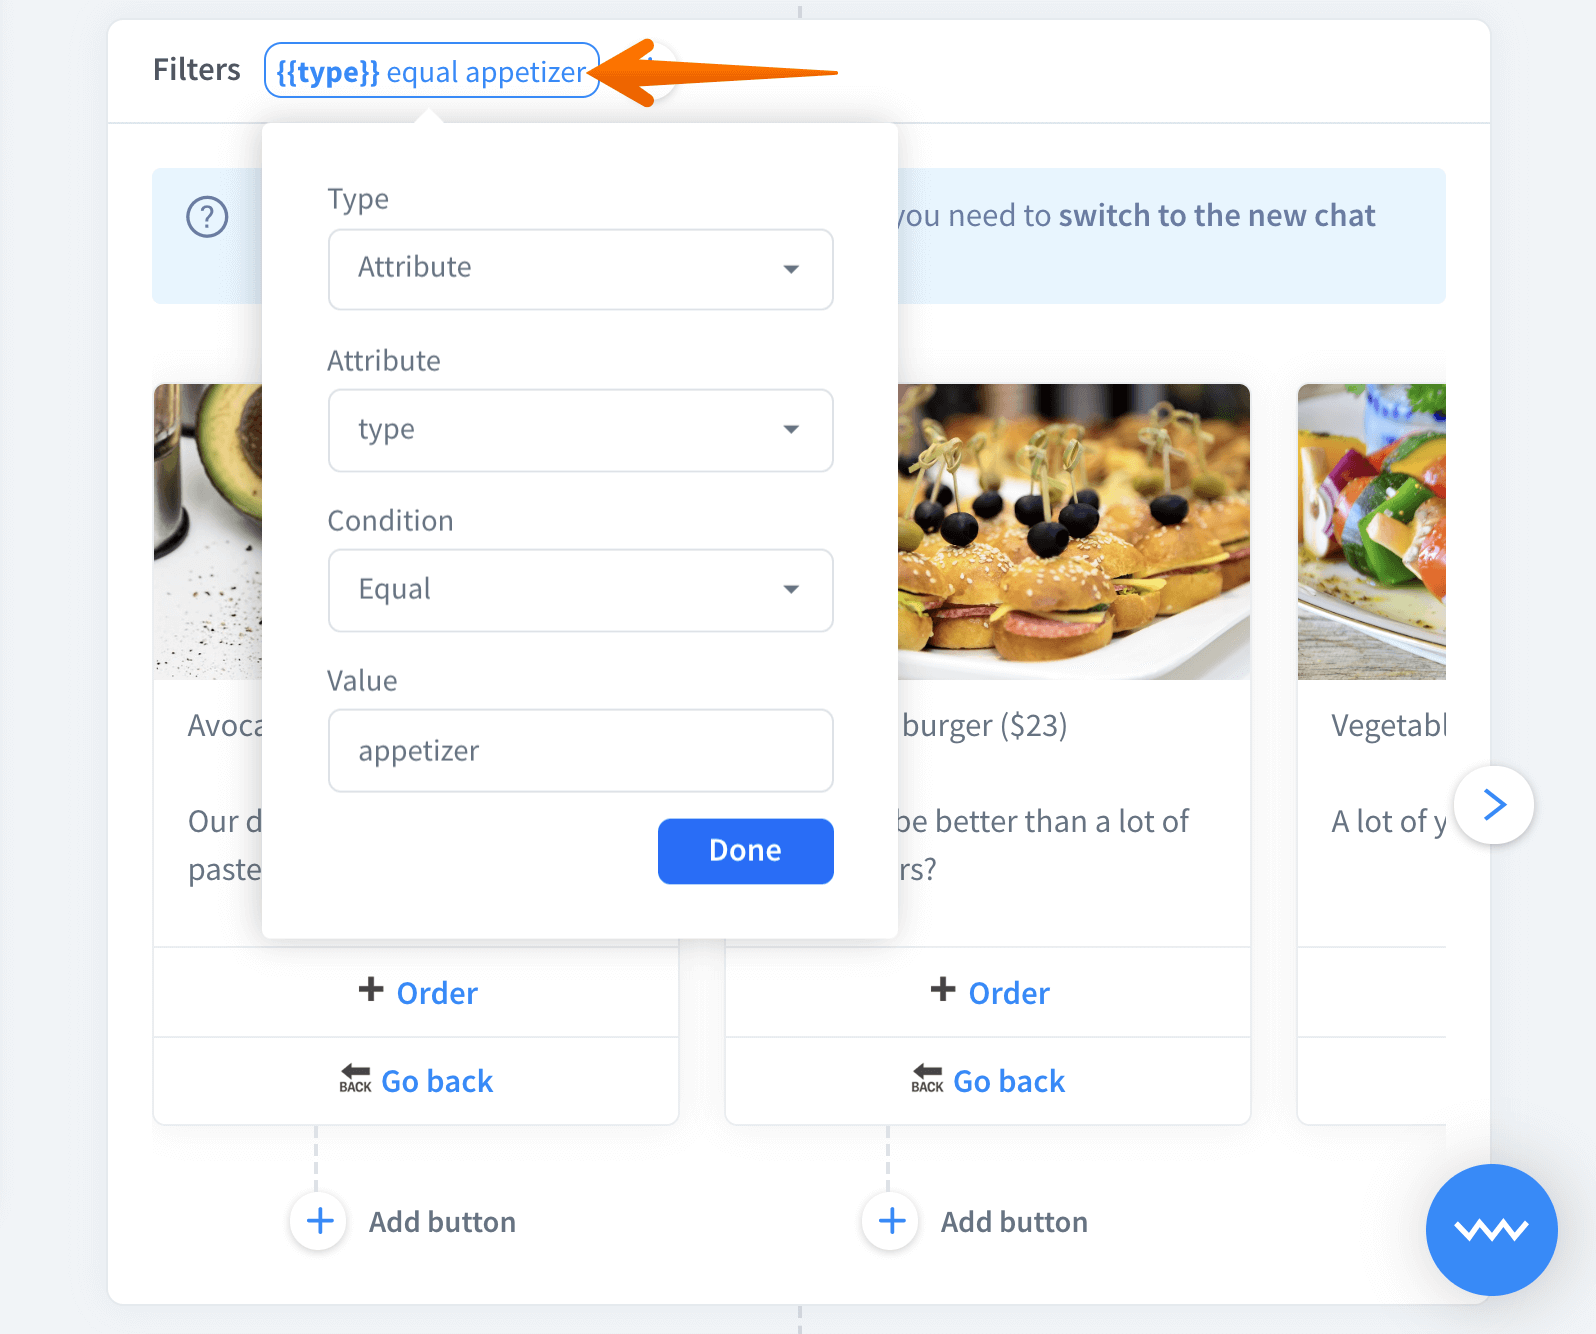
Another handy feature that can save us time is filters. Filters add rules to bot actions and responses that decide under what conditions they can be triggered. Instead of adding many interactions we can have one that routes the chats based on users decisions.
Webhooks
Here is where the magic happens and the order is handed to the backend. Follow the steps below to setup your webhook and replace the one in the template, when you’re ready.
Import template
Click here to go to your dashboard and start using the Restaurant template now.
How the back-end works
To add the product to your order, display current status and start the process again, we’ve prepared a simple backend. The full code is available here.
This example was written in Javascript and requires Node.js, but you can rewrite this code to any other server-side language you want. It’s effortless to use, but if you don’t trust me, check it yourself 😀 .
What we’ve used:
-
Express.js - to simplify and clarify parsing the ongoing webhook request.
-
Firebase Functions - to deploy our code to a public HTTPS server.
-
Firebase Realtime Database - to store the order based on user session.
We’ve split our backend functionality into three different parts:
-
Add to order - to accept orders.
-
Order summary - to show the order summary.
-
Start again - to remove the order and start the order process again.
Let’s go through our webhook code.
'use strict';

const TOKEN = 'YOUR_TOKEN'; // put your authorization token here

const express = require('express');
const { Router } = require('express');
const router = new Router();
const app = express();
const functions = require('firebase-functions');
const firebase = require('firebase-admin');

firebase.initializeApp({
    credential: firebase.credential.applicationDefault(),
    databaseURL: 'YOUR_DATABASE_URL' // put url to your firebase database here
});
In the opening part, we load all the required packages. Then you will see the transformOrderToText function which is used to transform the order to the text message.
Ok! Now is the part to handle ChatBot webhook verification request. This part is described here, however, in short, it is a bilateral verification of the webhook.
router
    .route('/')
    .get((req, res) => {
        if (req.query.token !== TOKEN) {
            return res.sendStatus(401);
        }

        return res.end(req.query.challenge);
    });
The next part is the most exciting one - a part to handle requests incoming from the ongoing chat.
router
    .route('/')
    .post((req, res, next) => {
        const action = req.body.result.interaction.action;

        if (['add-product', 'order-summary', 'start-again'].includes(action)) {
            req.url = '/' + action;
            return next();
        }

        res.json();
    });
For the readability of our code, we direct our incoming request to the appropriate part of the code. We used an action that can be defined in the interaction. Thanks to that, we split our bot functionalities into three dedicated actions: add-to-order, order-summary and start-again.
When our backend receives a request, we check if the action we defined earlier in the interaction is the one we expect - if so, we direct our request to the appropriate part of our code.
-
Add to order. This part is used to add a product to our order, which will be stored in the Firebase Realtime Database.
At the start, we save attributes collected in the story to the
productNameandproductQuantityvariables. If we manage to collect them, we create an object that stores a single product of our order.After that, we open the transaction to our database, and we store our order using sessionId, which we receive with the incoming request. Then we have 100% certainty that if you do the webhook again later in the story, sessionId will get the same throughout the entire chat.
If we manage to open the transaction to the database, we first check if the order already contains anything:
-
if not, we need to create an empty order and add the first product;
-
if, however, we’ve already ordered something, we need to either increment product quantity or add the product separately.
At the very end, we return the current status of our order and save it back to the database.
In the next part of our code, we return our current order status to the form of response. We return an array of responses back to the bot. Click here to check what other responses you can return from the webhook.
-
-
Order summary. This action is similar to the end part of our previous function. At the start, we open the transaction to the database and collect our order and then we return the right answer to the bot.
-
Add to order. Here we only open the connection to our database and we return an empty array to save it to our database and clear our current order.
And that’s all! 🎉
