Automatically collect and save yes and no responses.
The system Yes - No entity can help your chatbot confirm the user replies, approve purchases, etc. You can then save the user query as an attribute and reuse it later in a chatbot.
Entity name | Description | Query | Returned data |
Yes - No | Matches yes and no synonyms | yes, fine, sure, good, true, right, certainly, no, no way, never, none | yes, no |
How to use the Yes - No entity
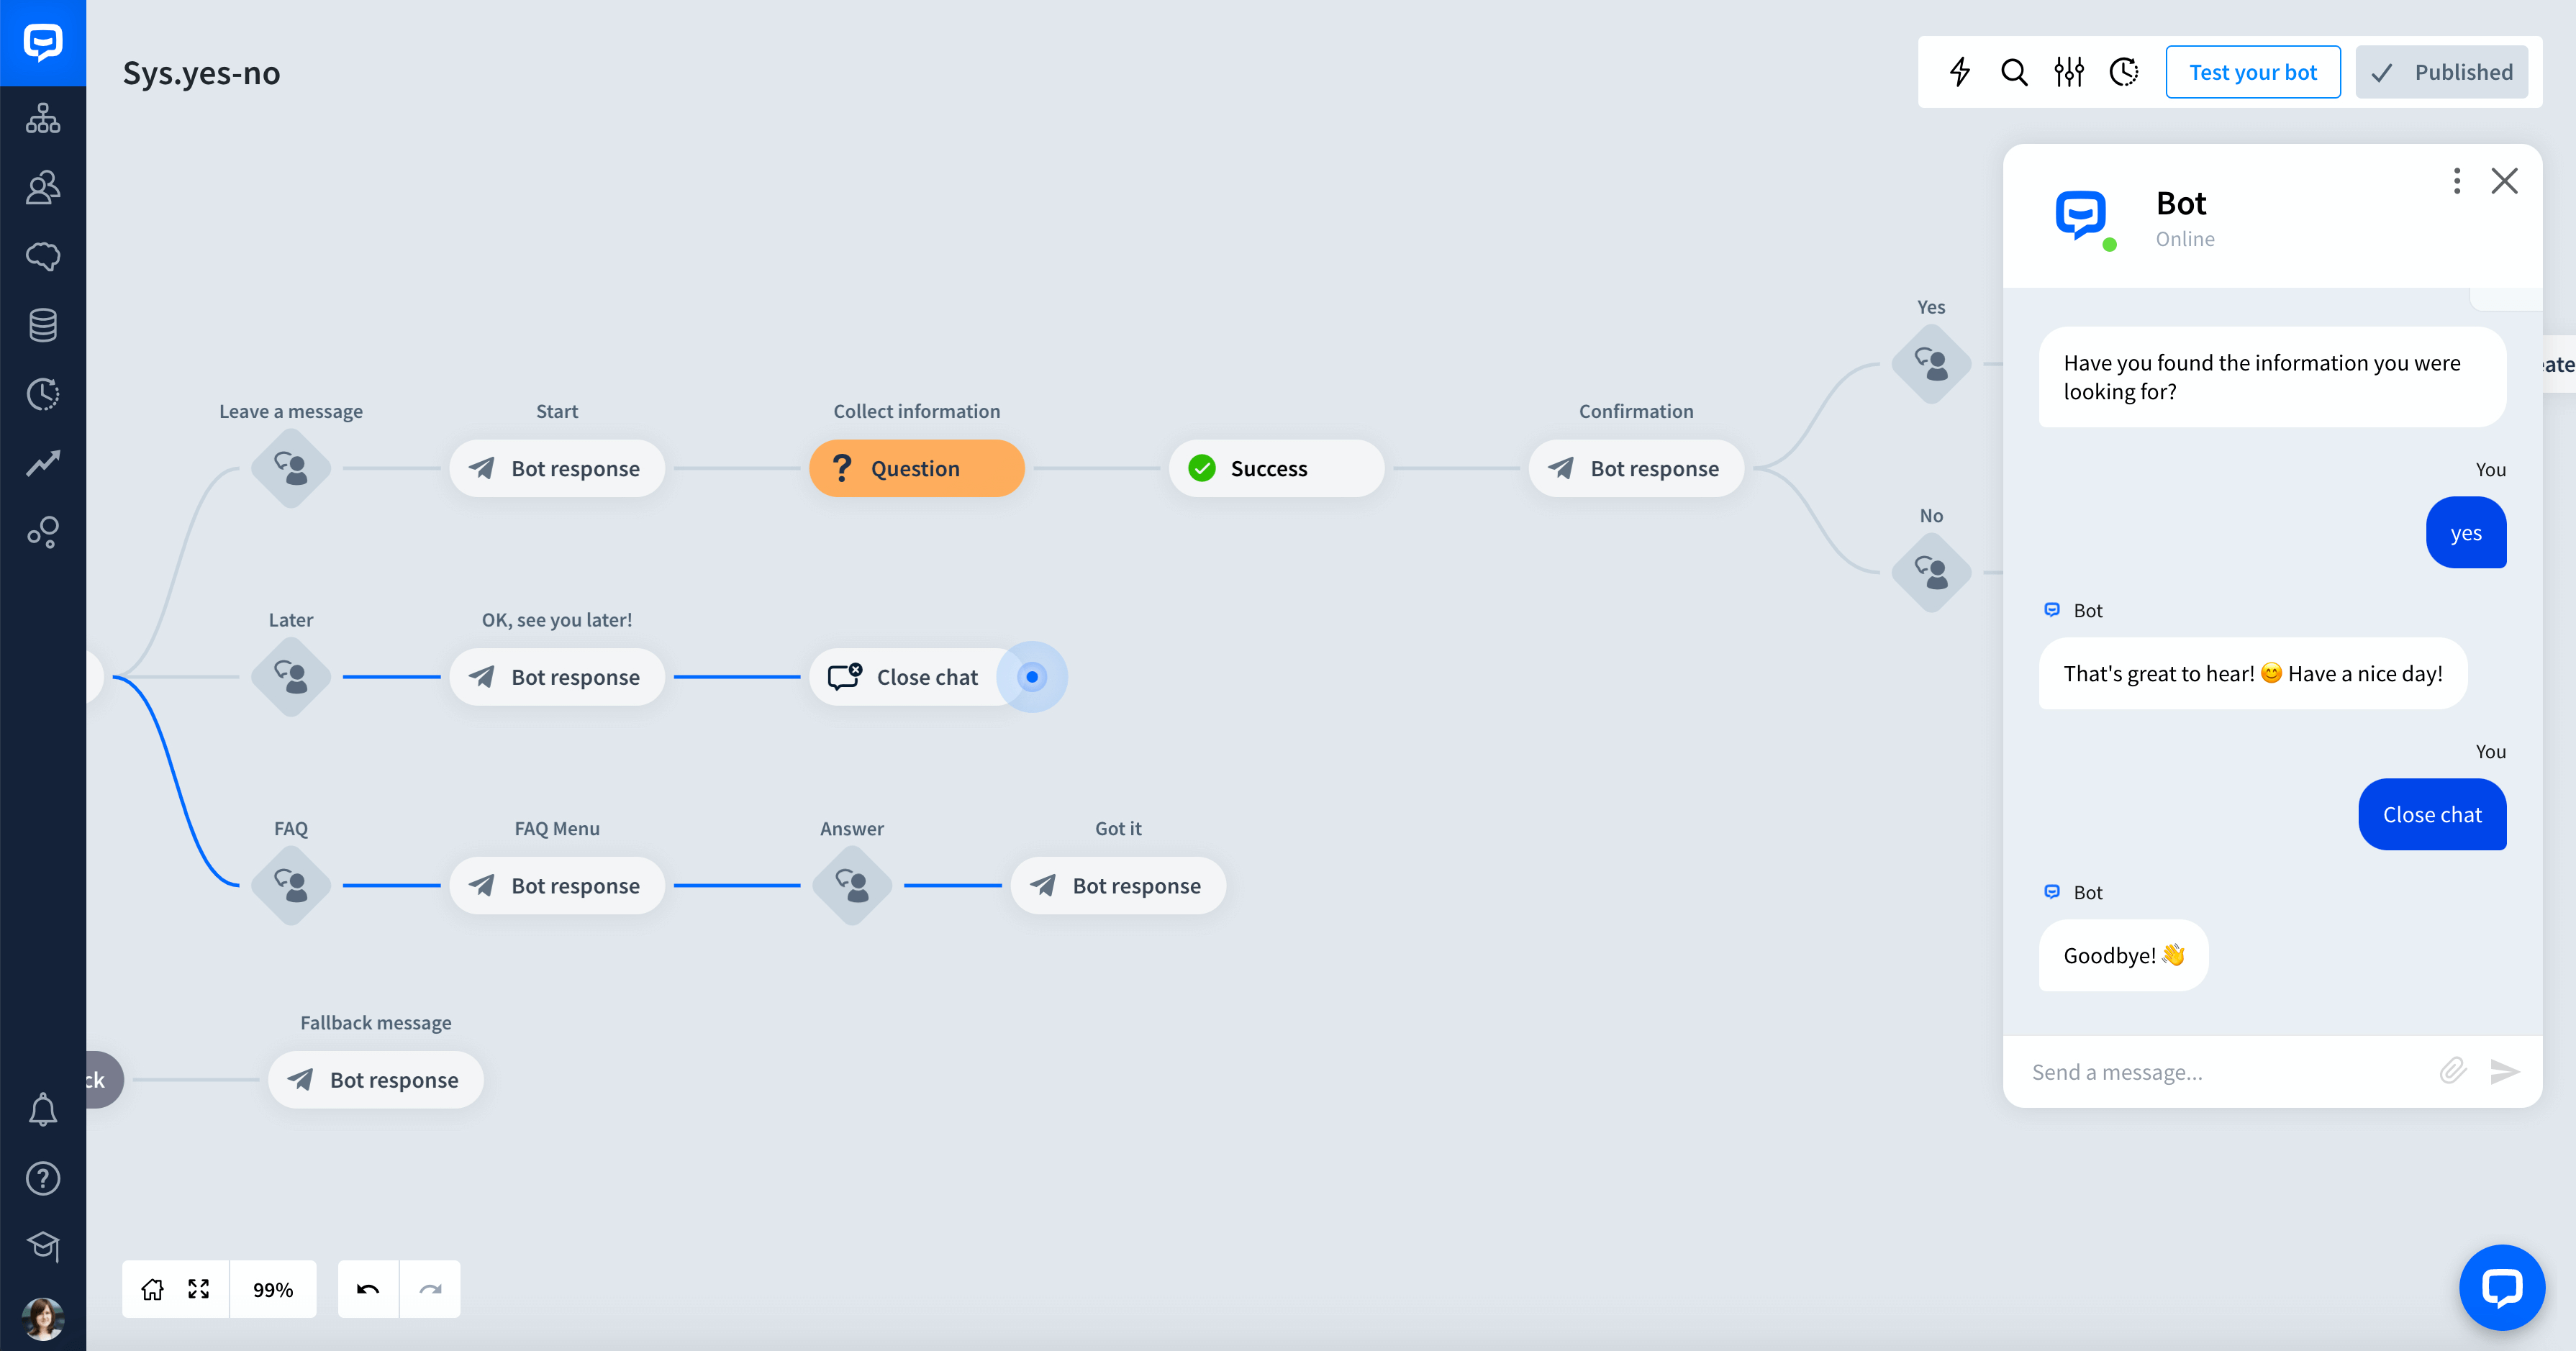
Let’s say you want to ask the user whether they want to continue a conversation with your bot. The system Yes - No entity can help you collect the user’s answer.
-
Open the chatbot you want to use to connect with users.
-
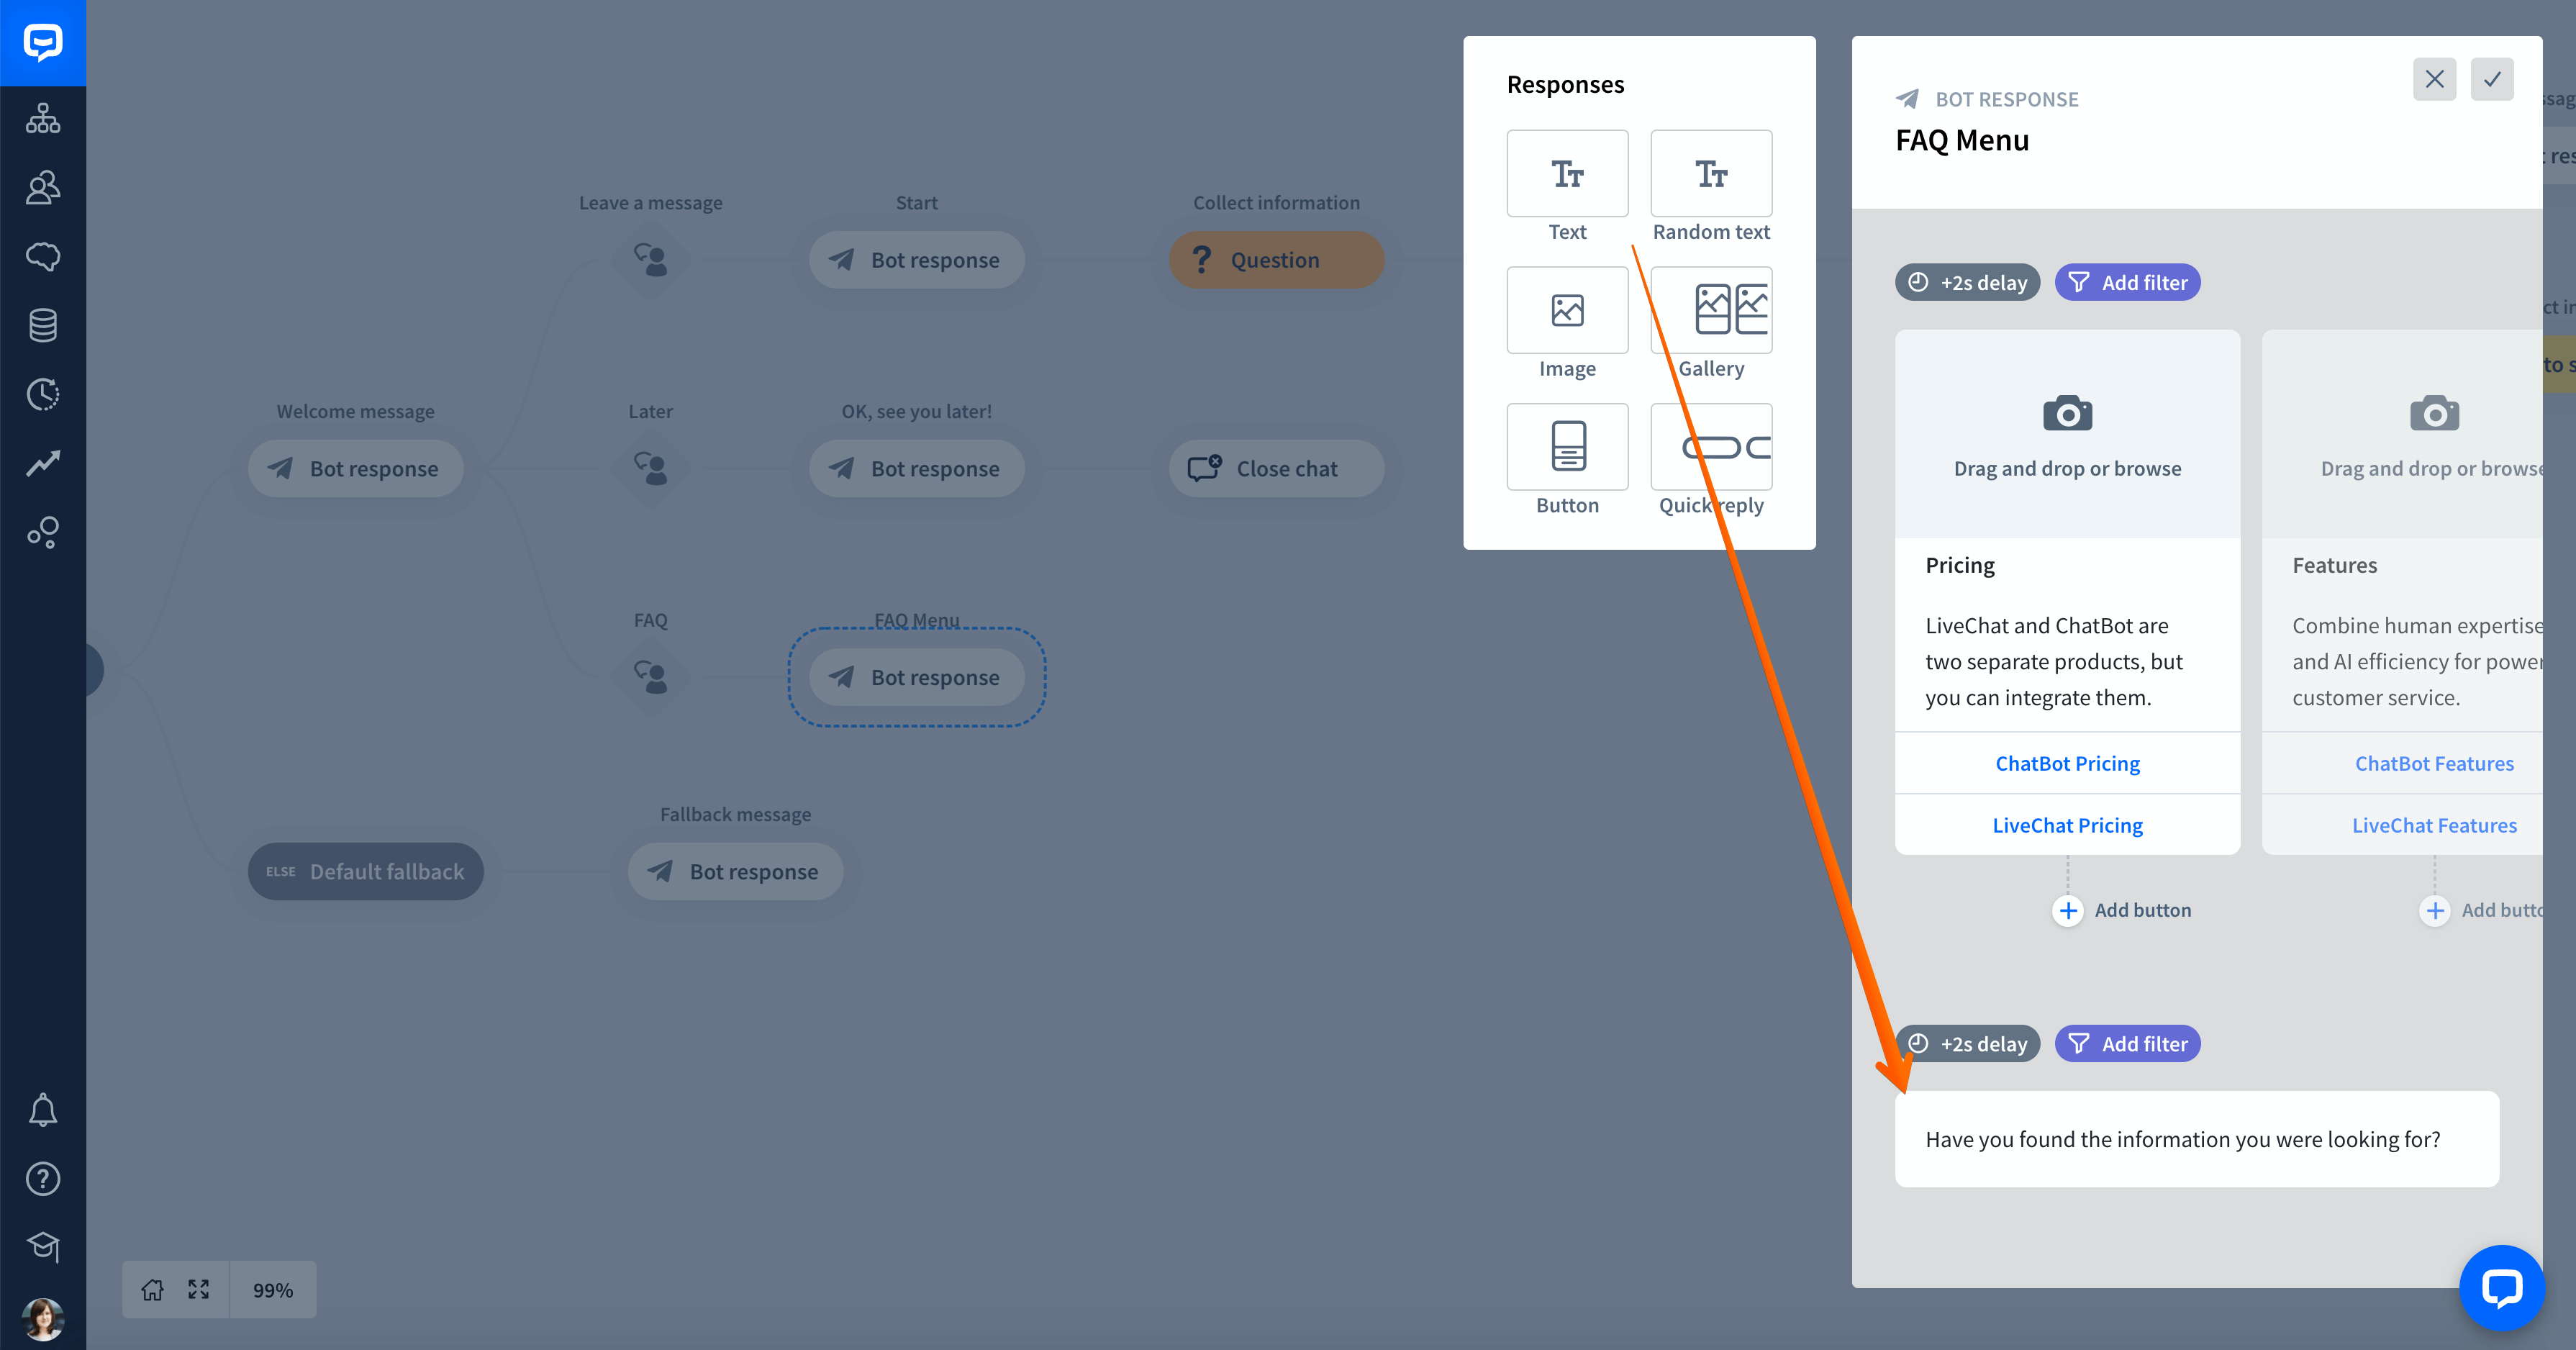
Add a Bot response in the place where you want to ask the user whether they need more help.
-
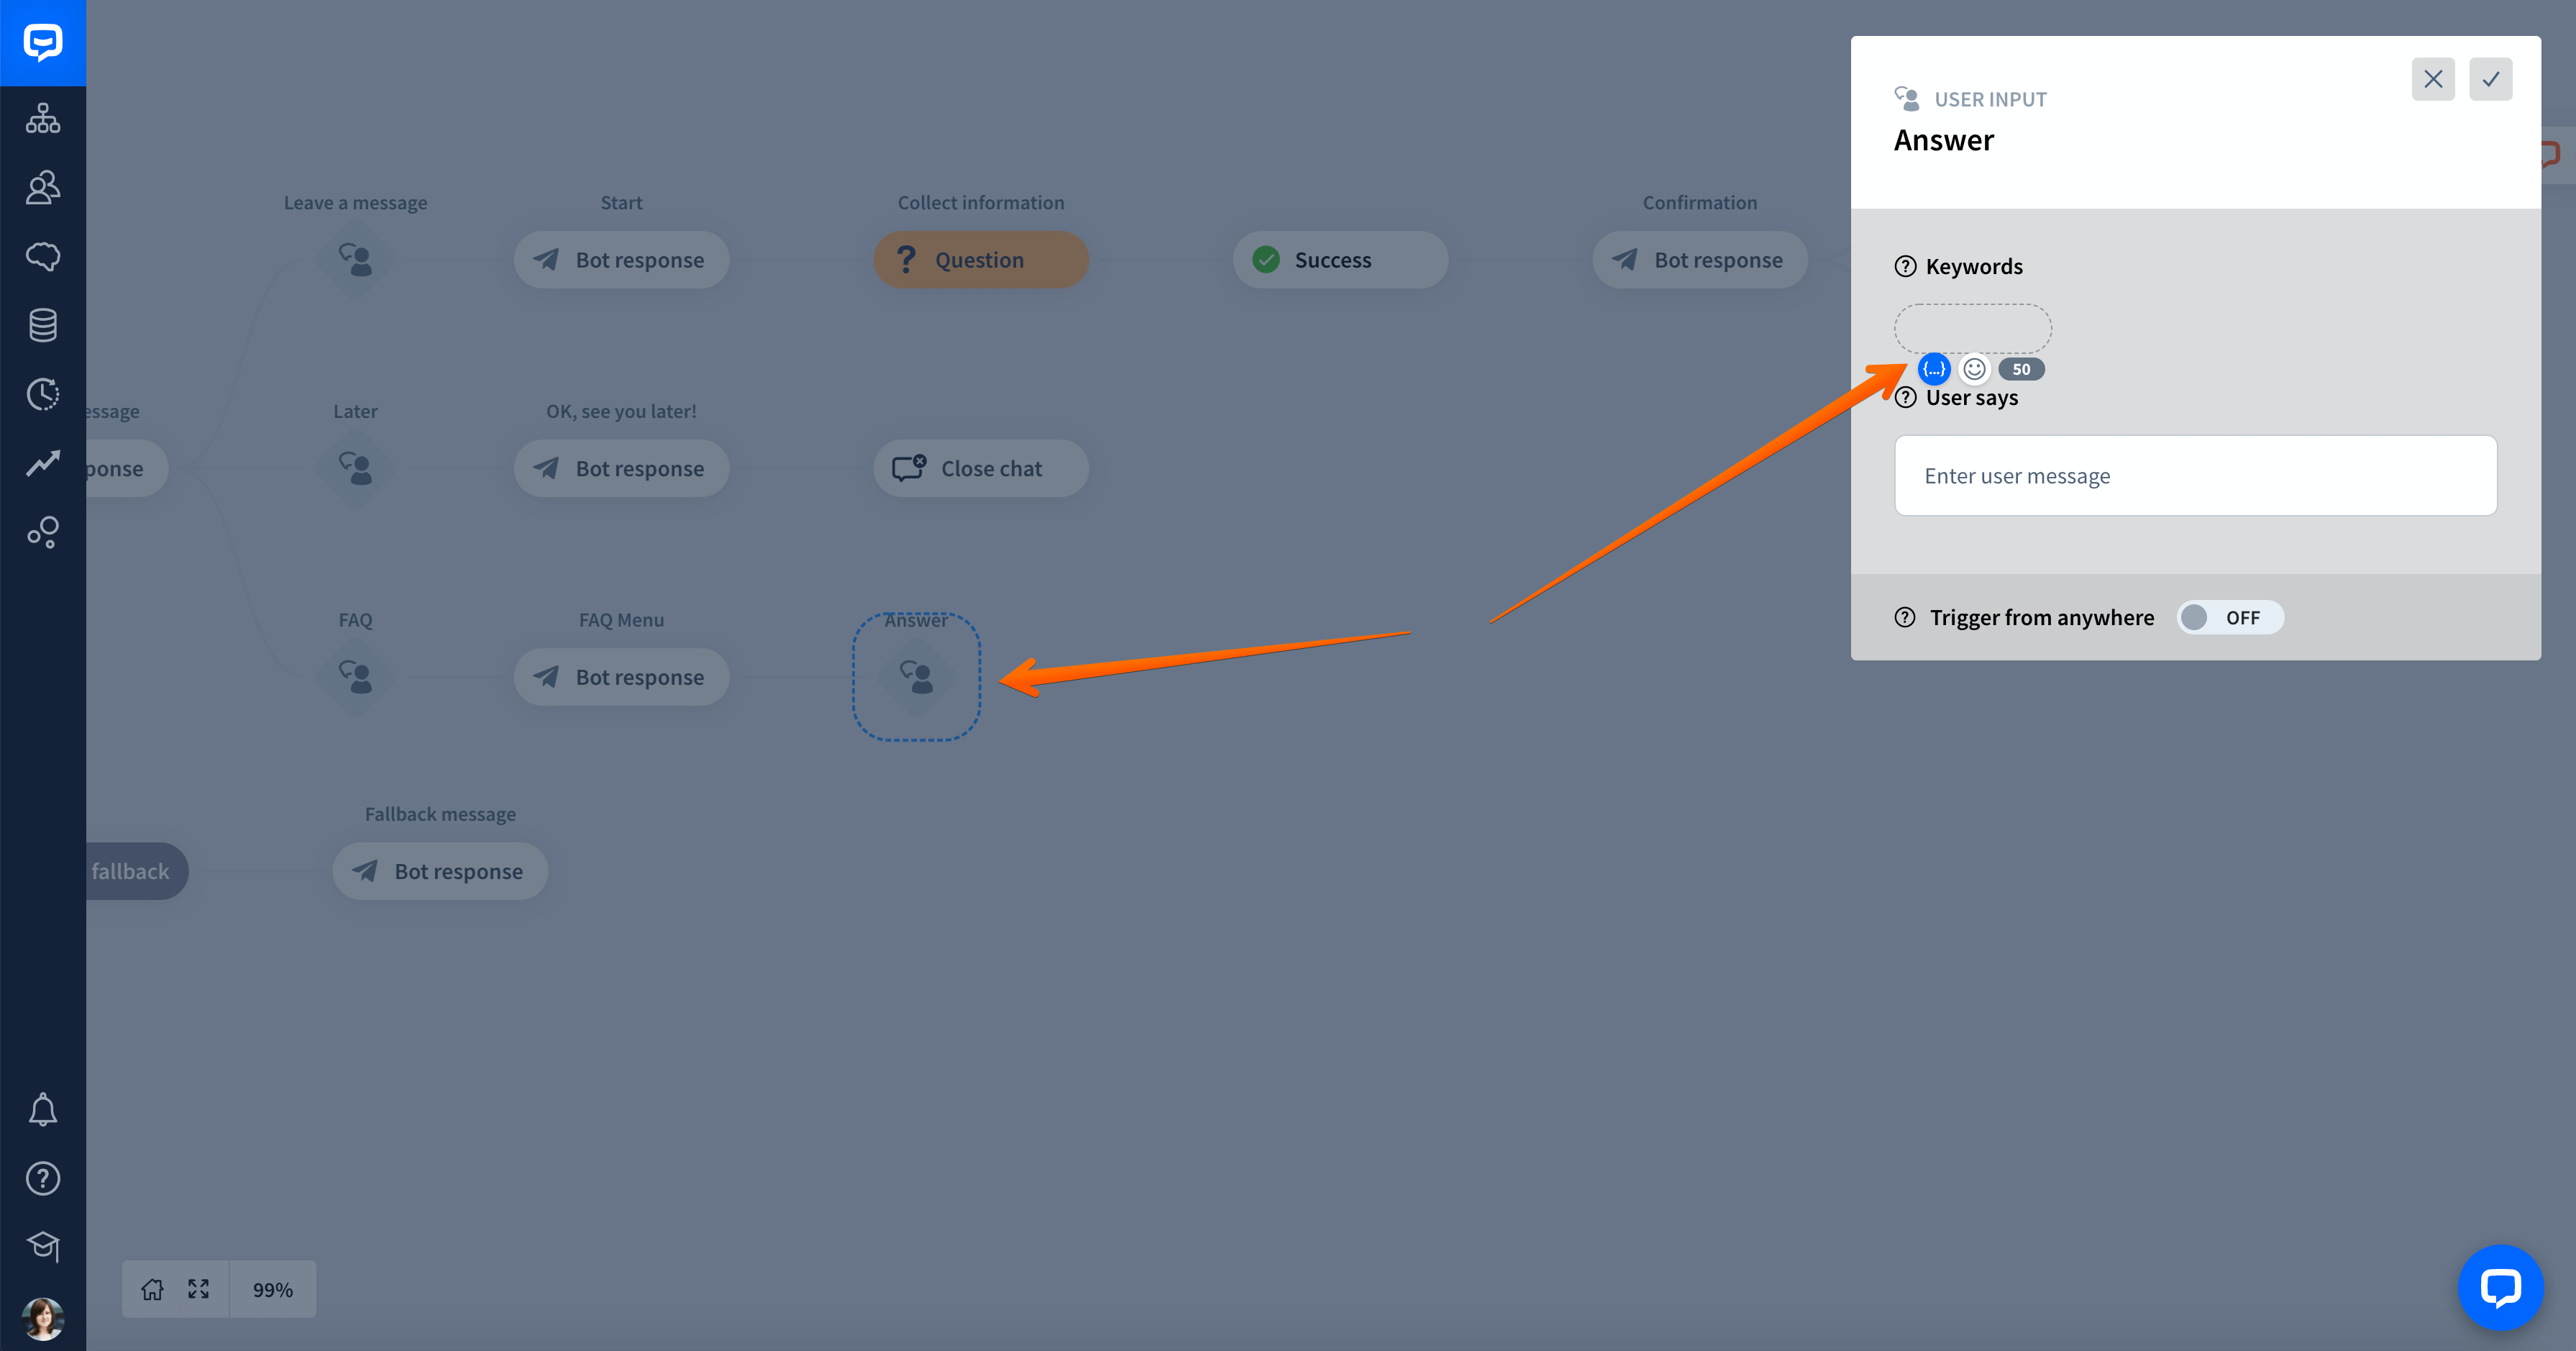
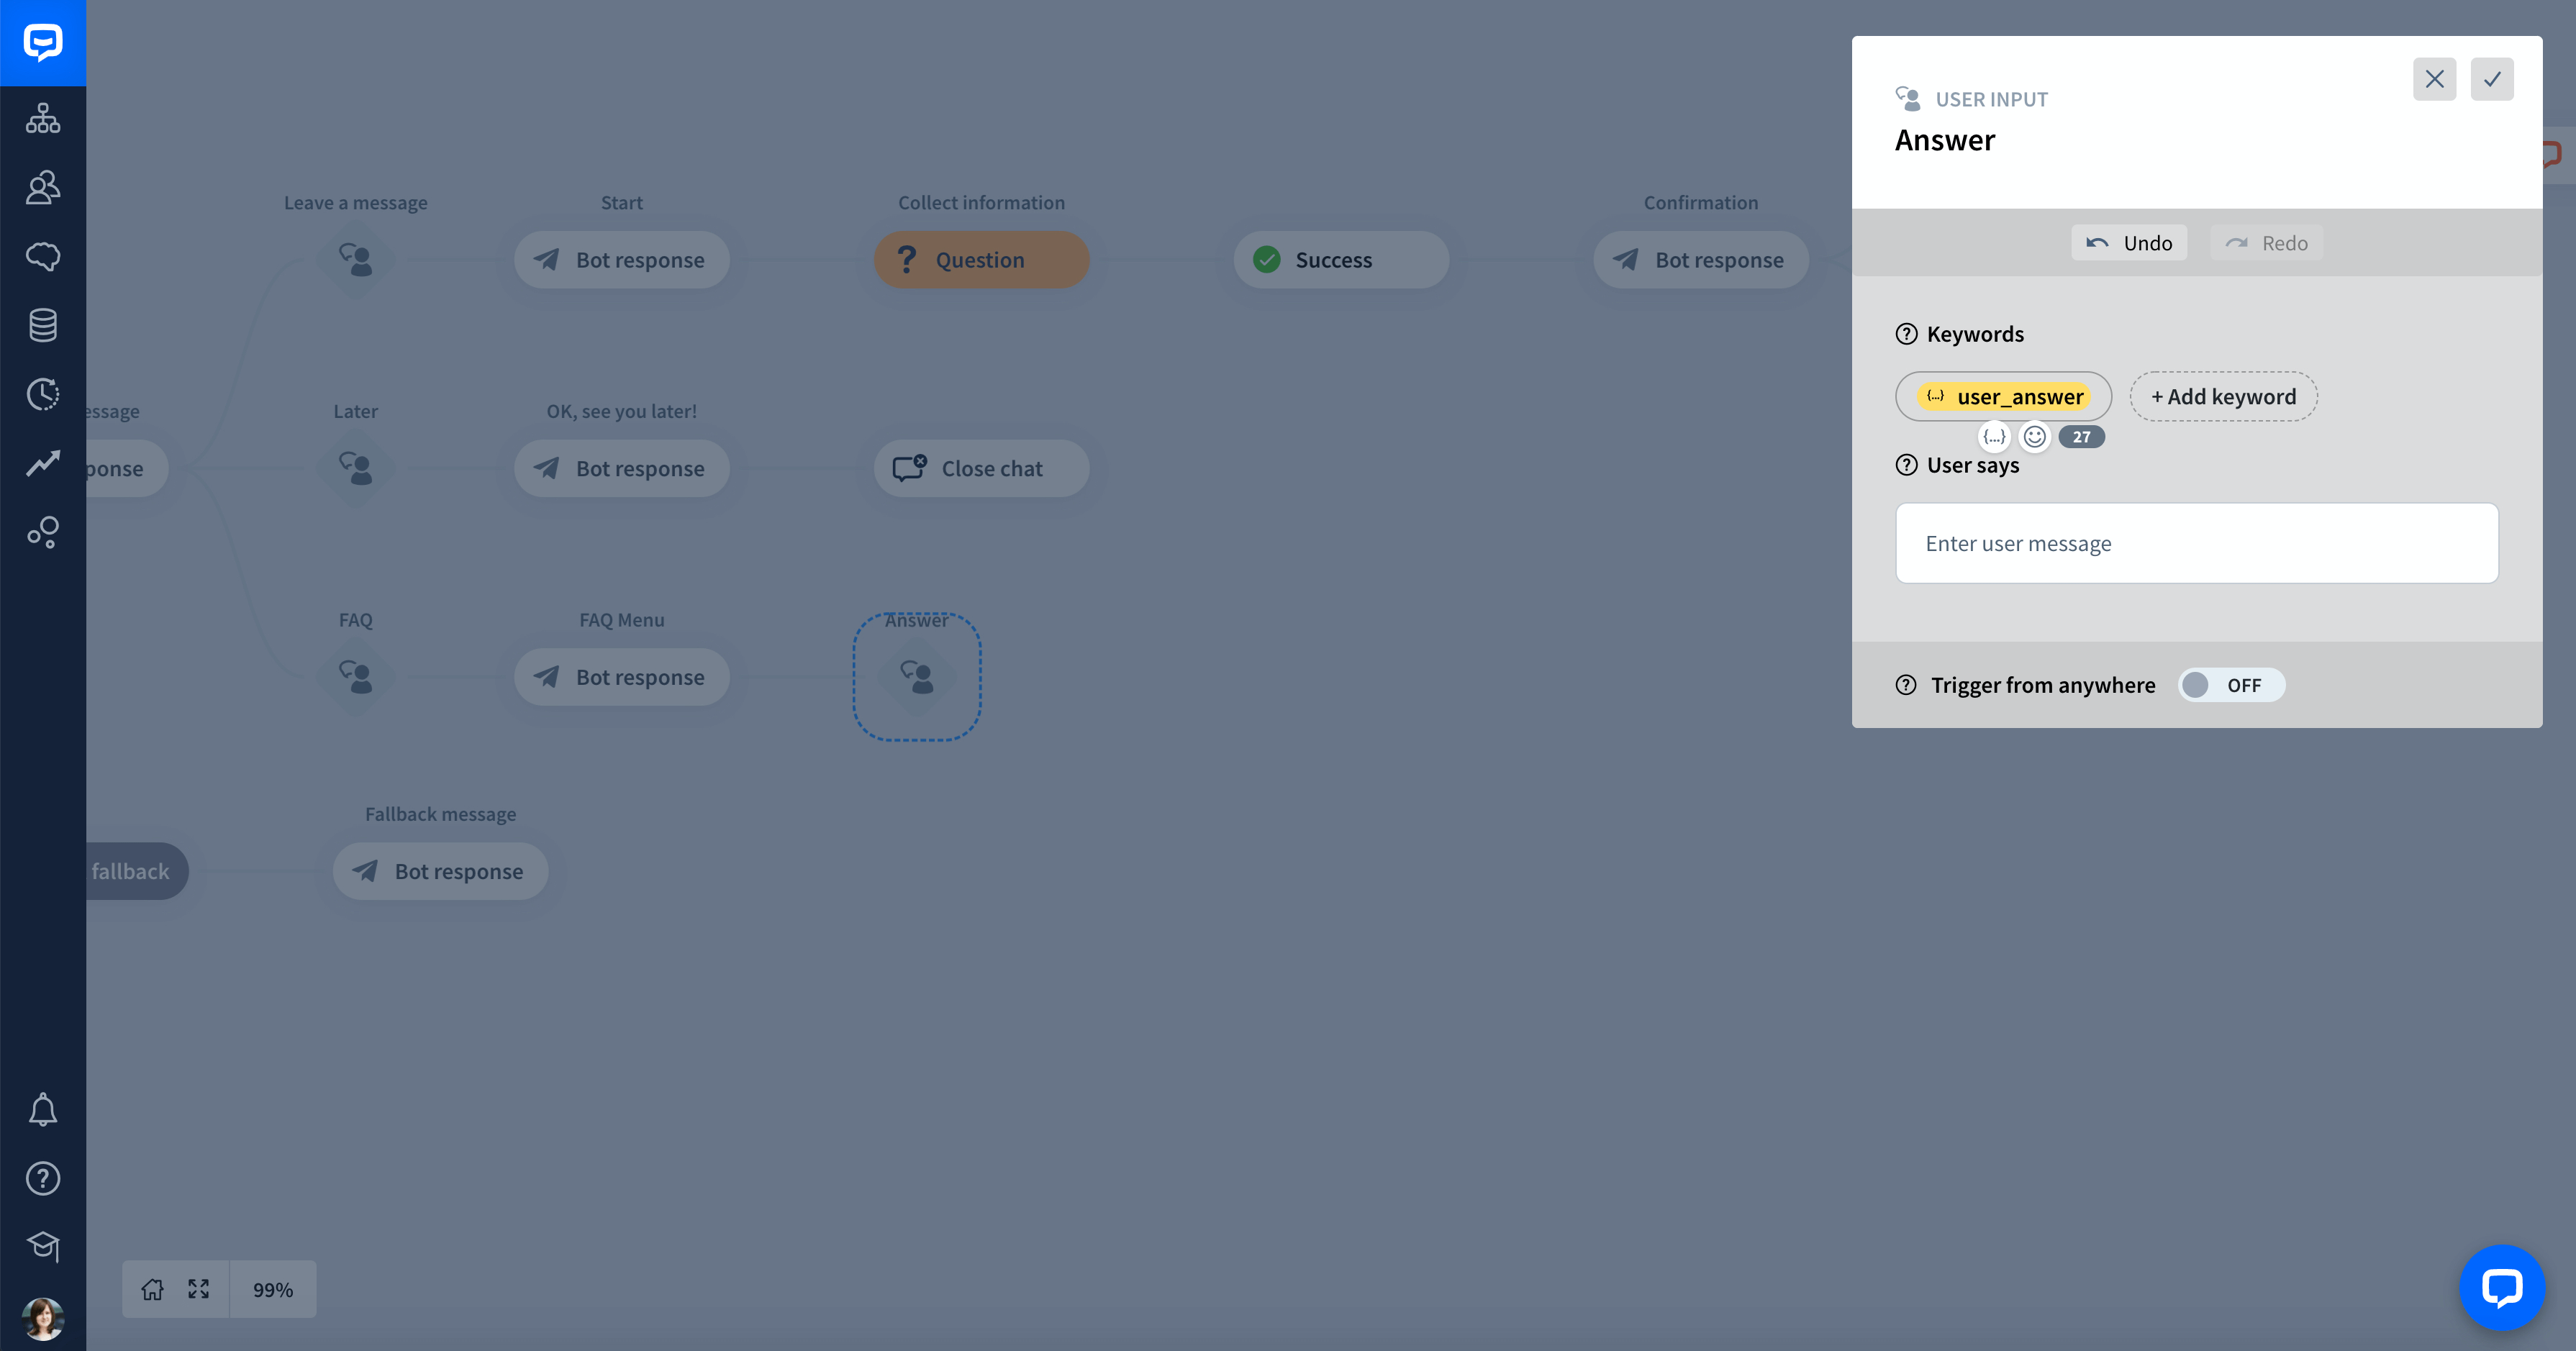
Once you add your question, you can collect the user’s answer. To do so, add the User input block after the Bot response. Let’s name it Answer.
-
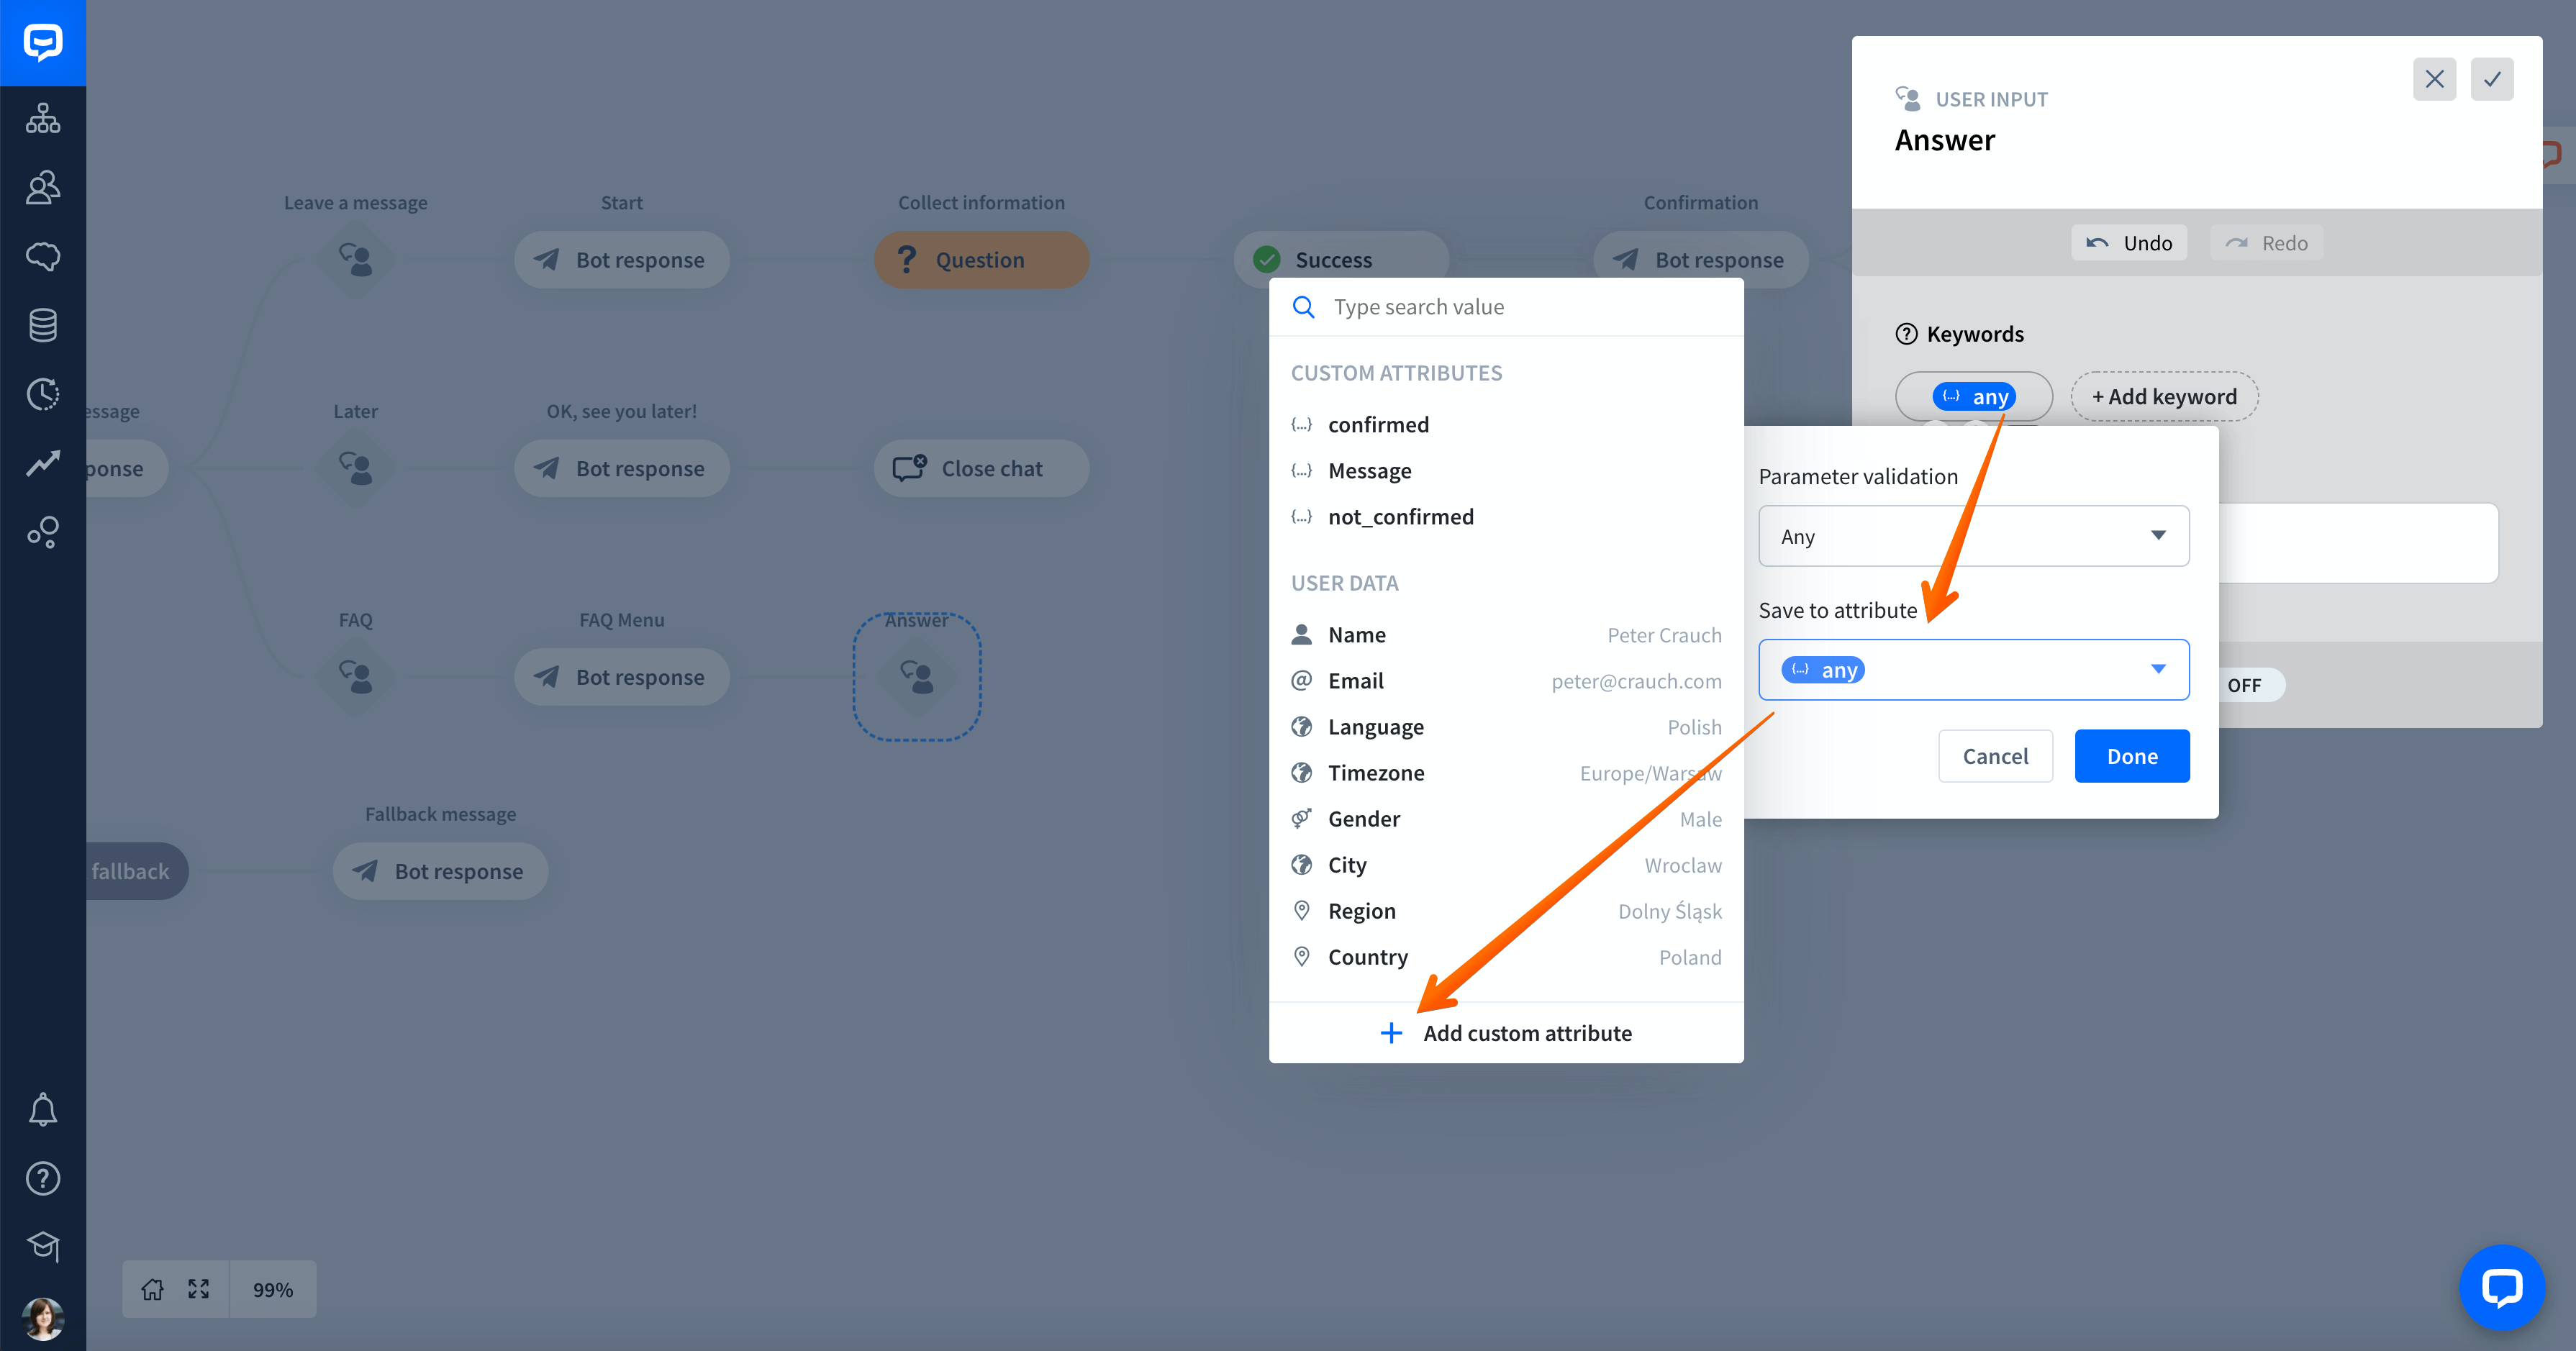
Open the User input you added. Select the Keywords section in the User input block and type double curly brackets {{ or click on the curly brackets symbol. Then, click on Save to attribute in the window that appears.
-
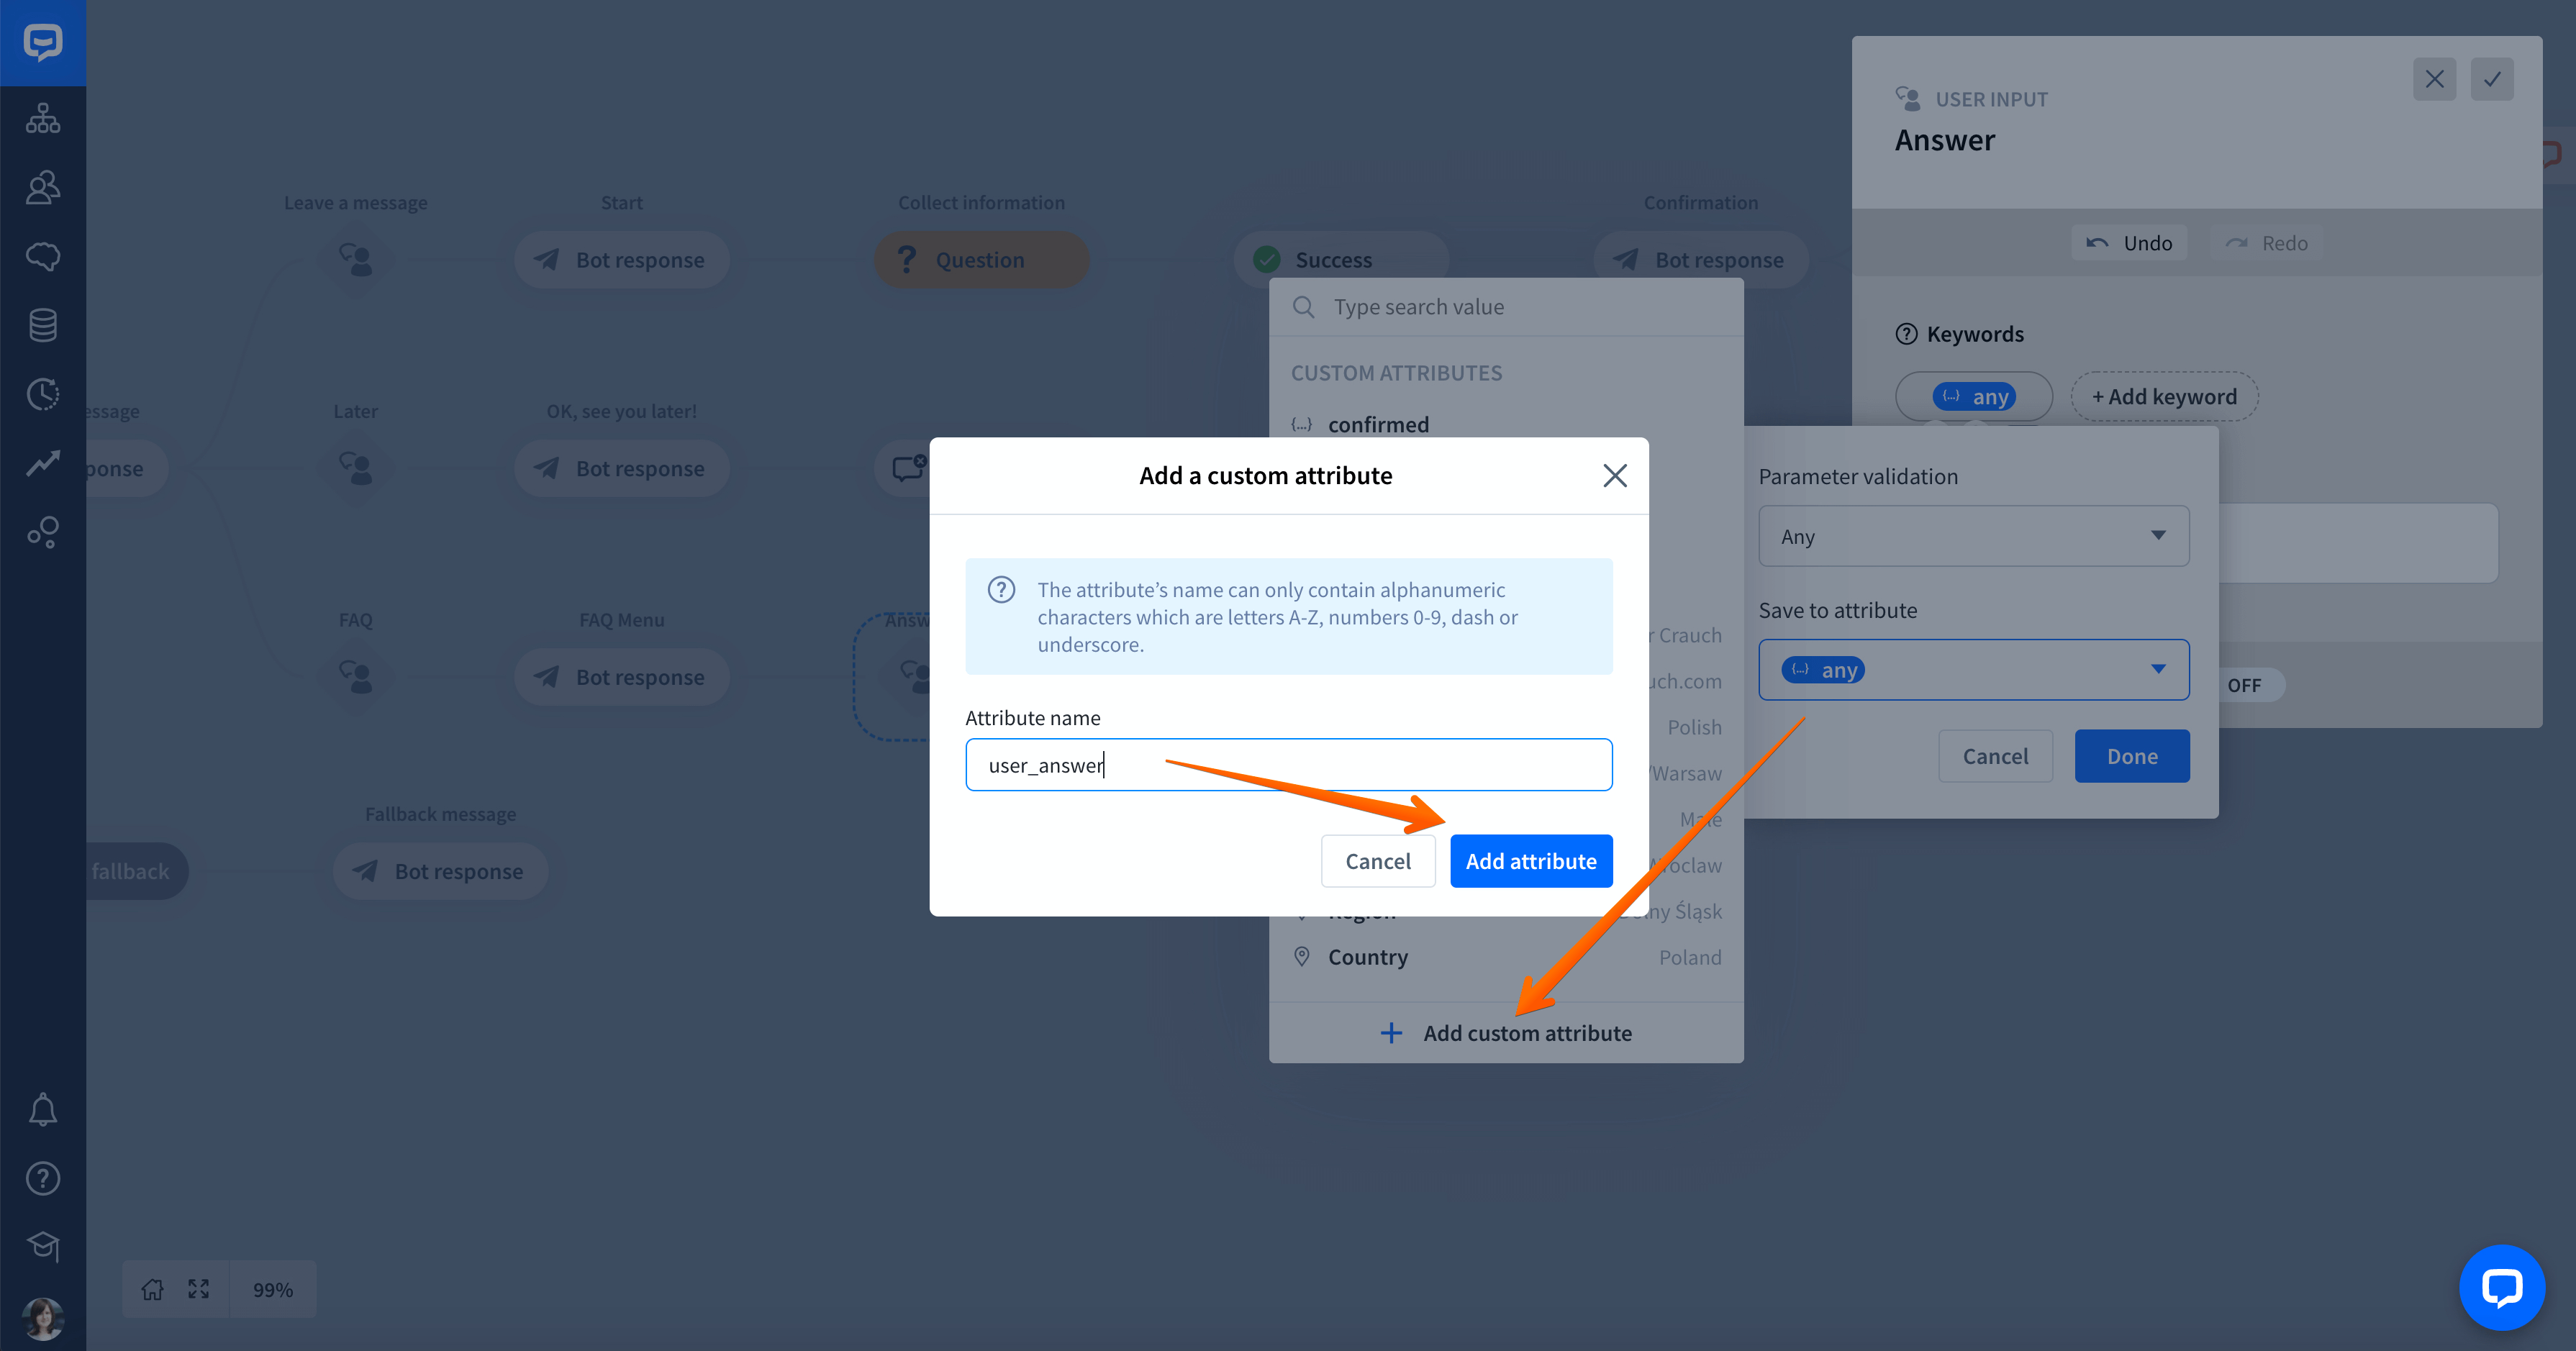
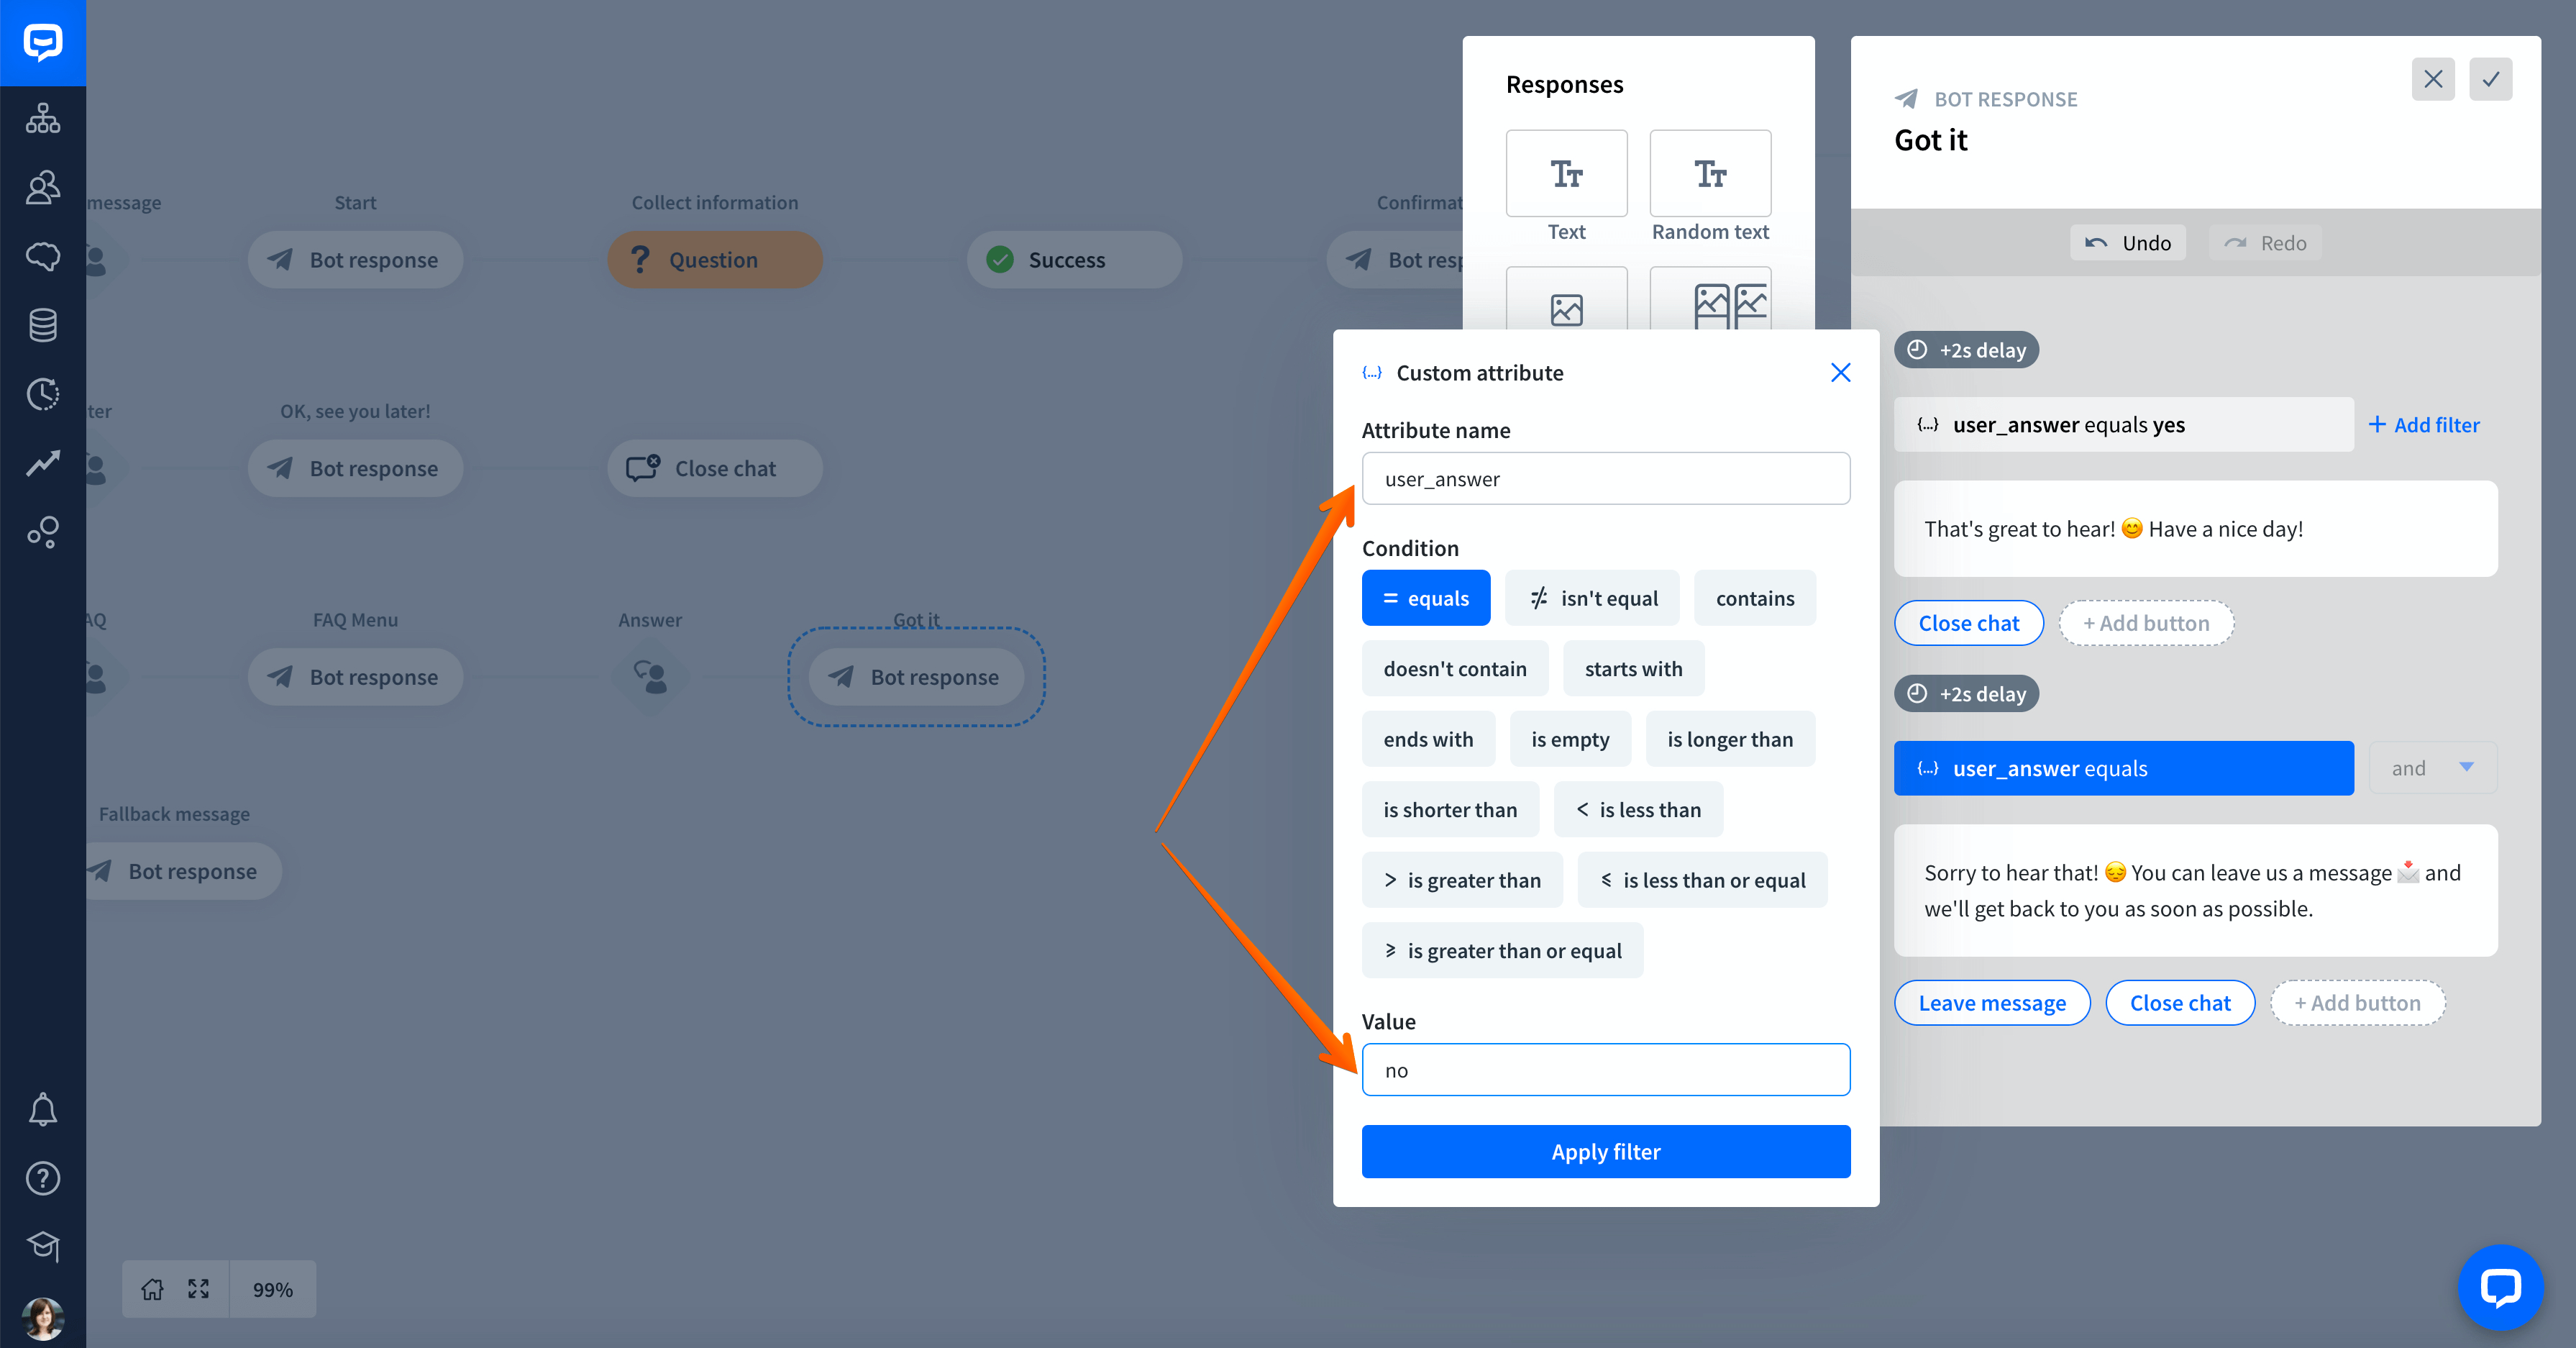
Next, select Add custom attribute and set the attribute’s name to user_answer. To save it, click on Add attribute.
-
Click on the user_answer attribute and select Yes - No from the Parameter validation list. Then, click Done.
-
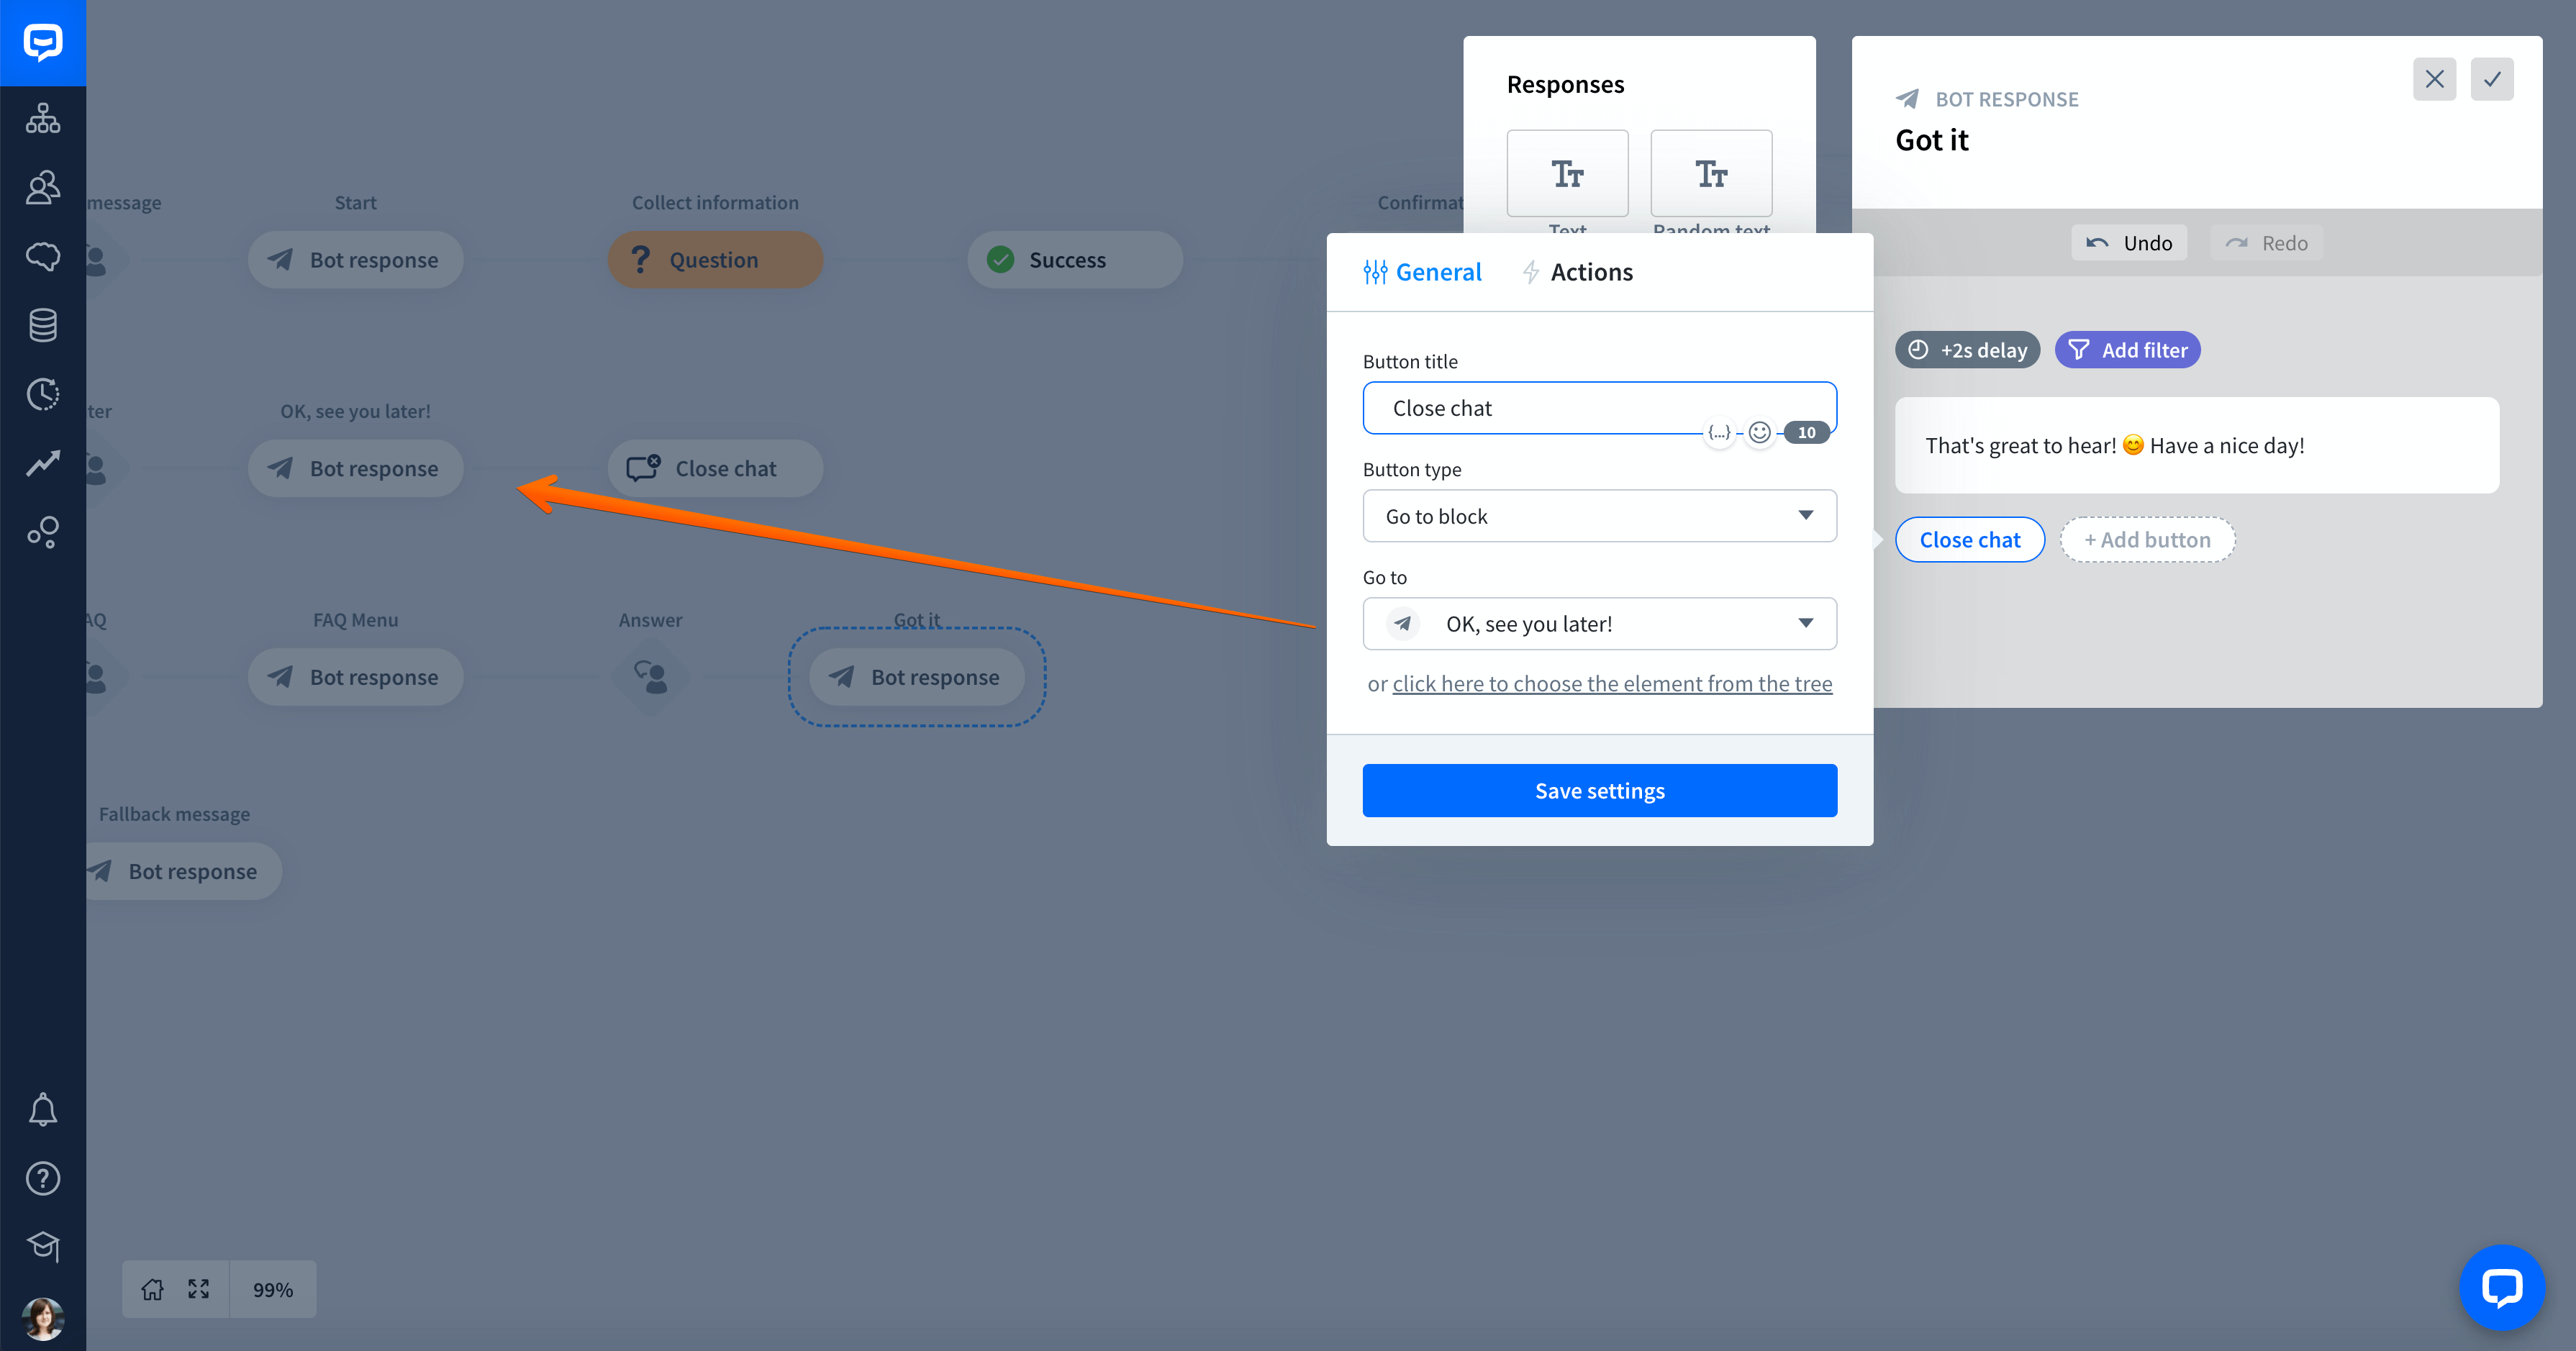
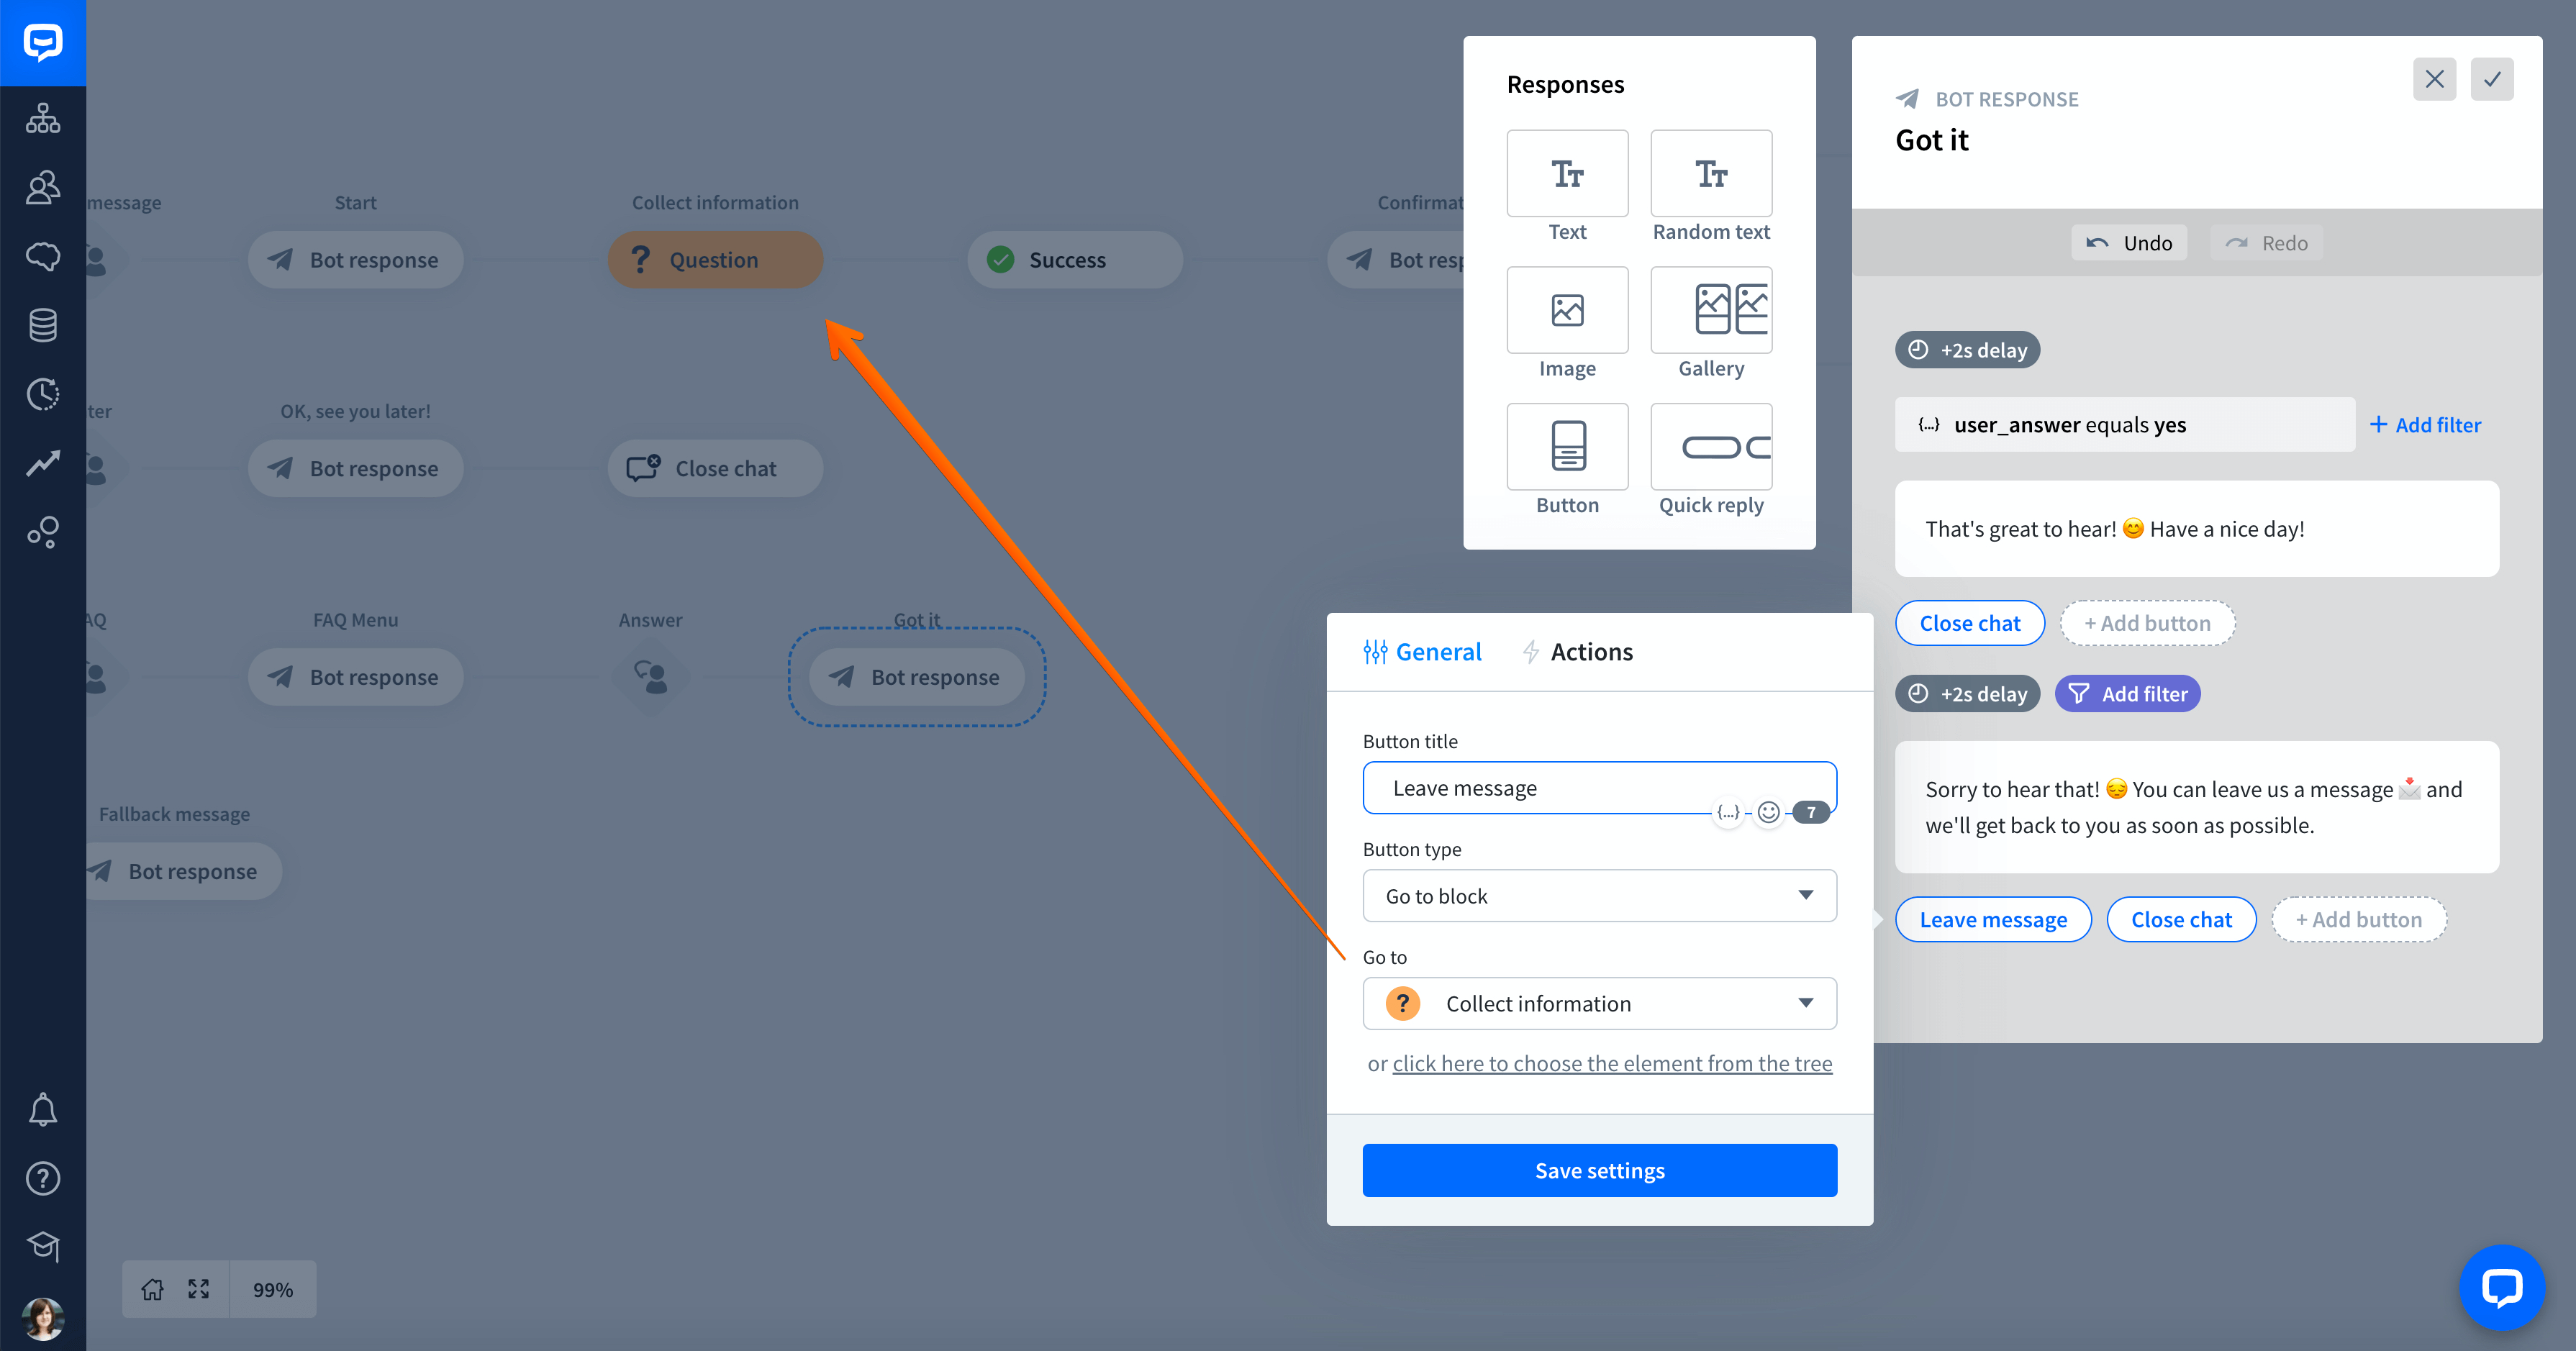
Add a new Bot response after the User input. Select Quick replies to create different reactions for yes and no answers.
-
First, let’s add a response for the yes answer and connect the Close chat button with the corresponding action in the chatbot.
-
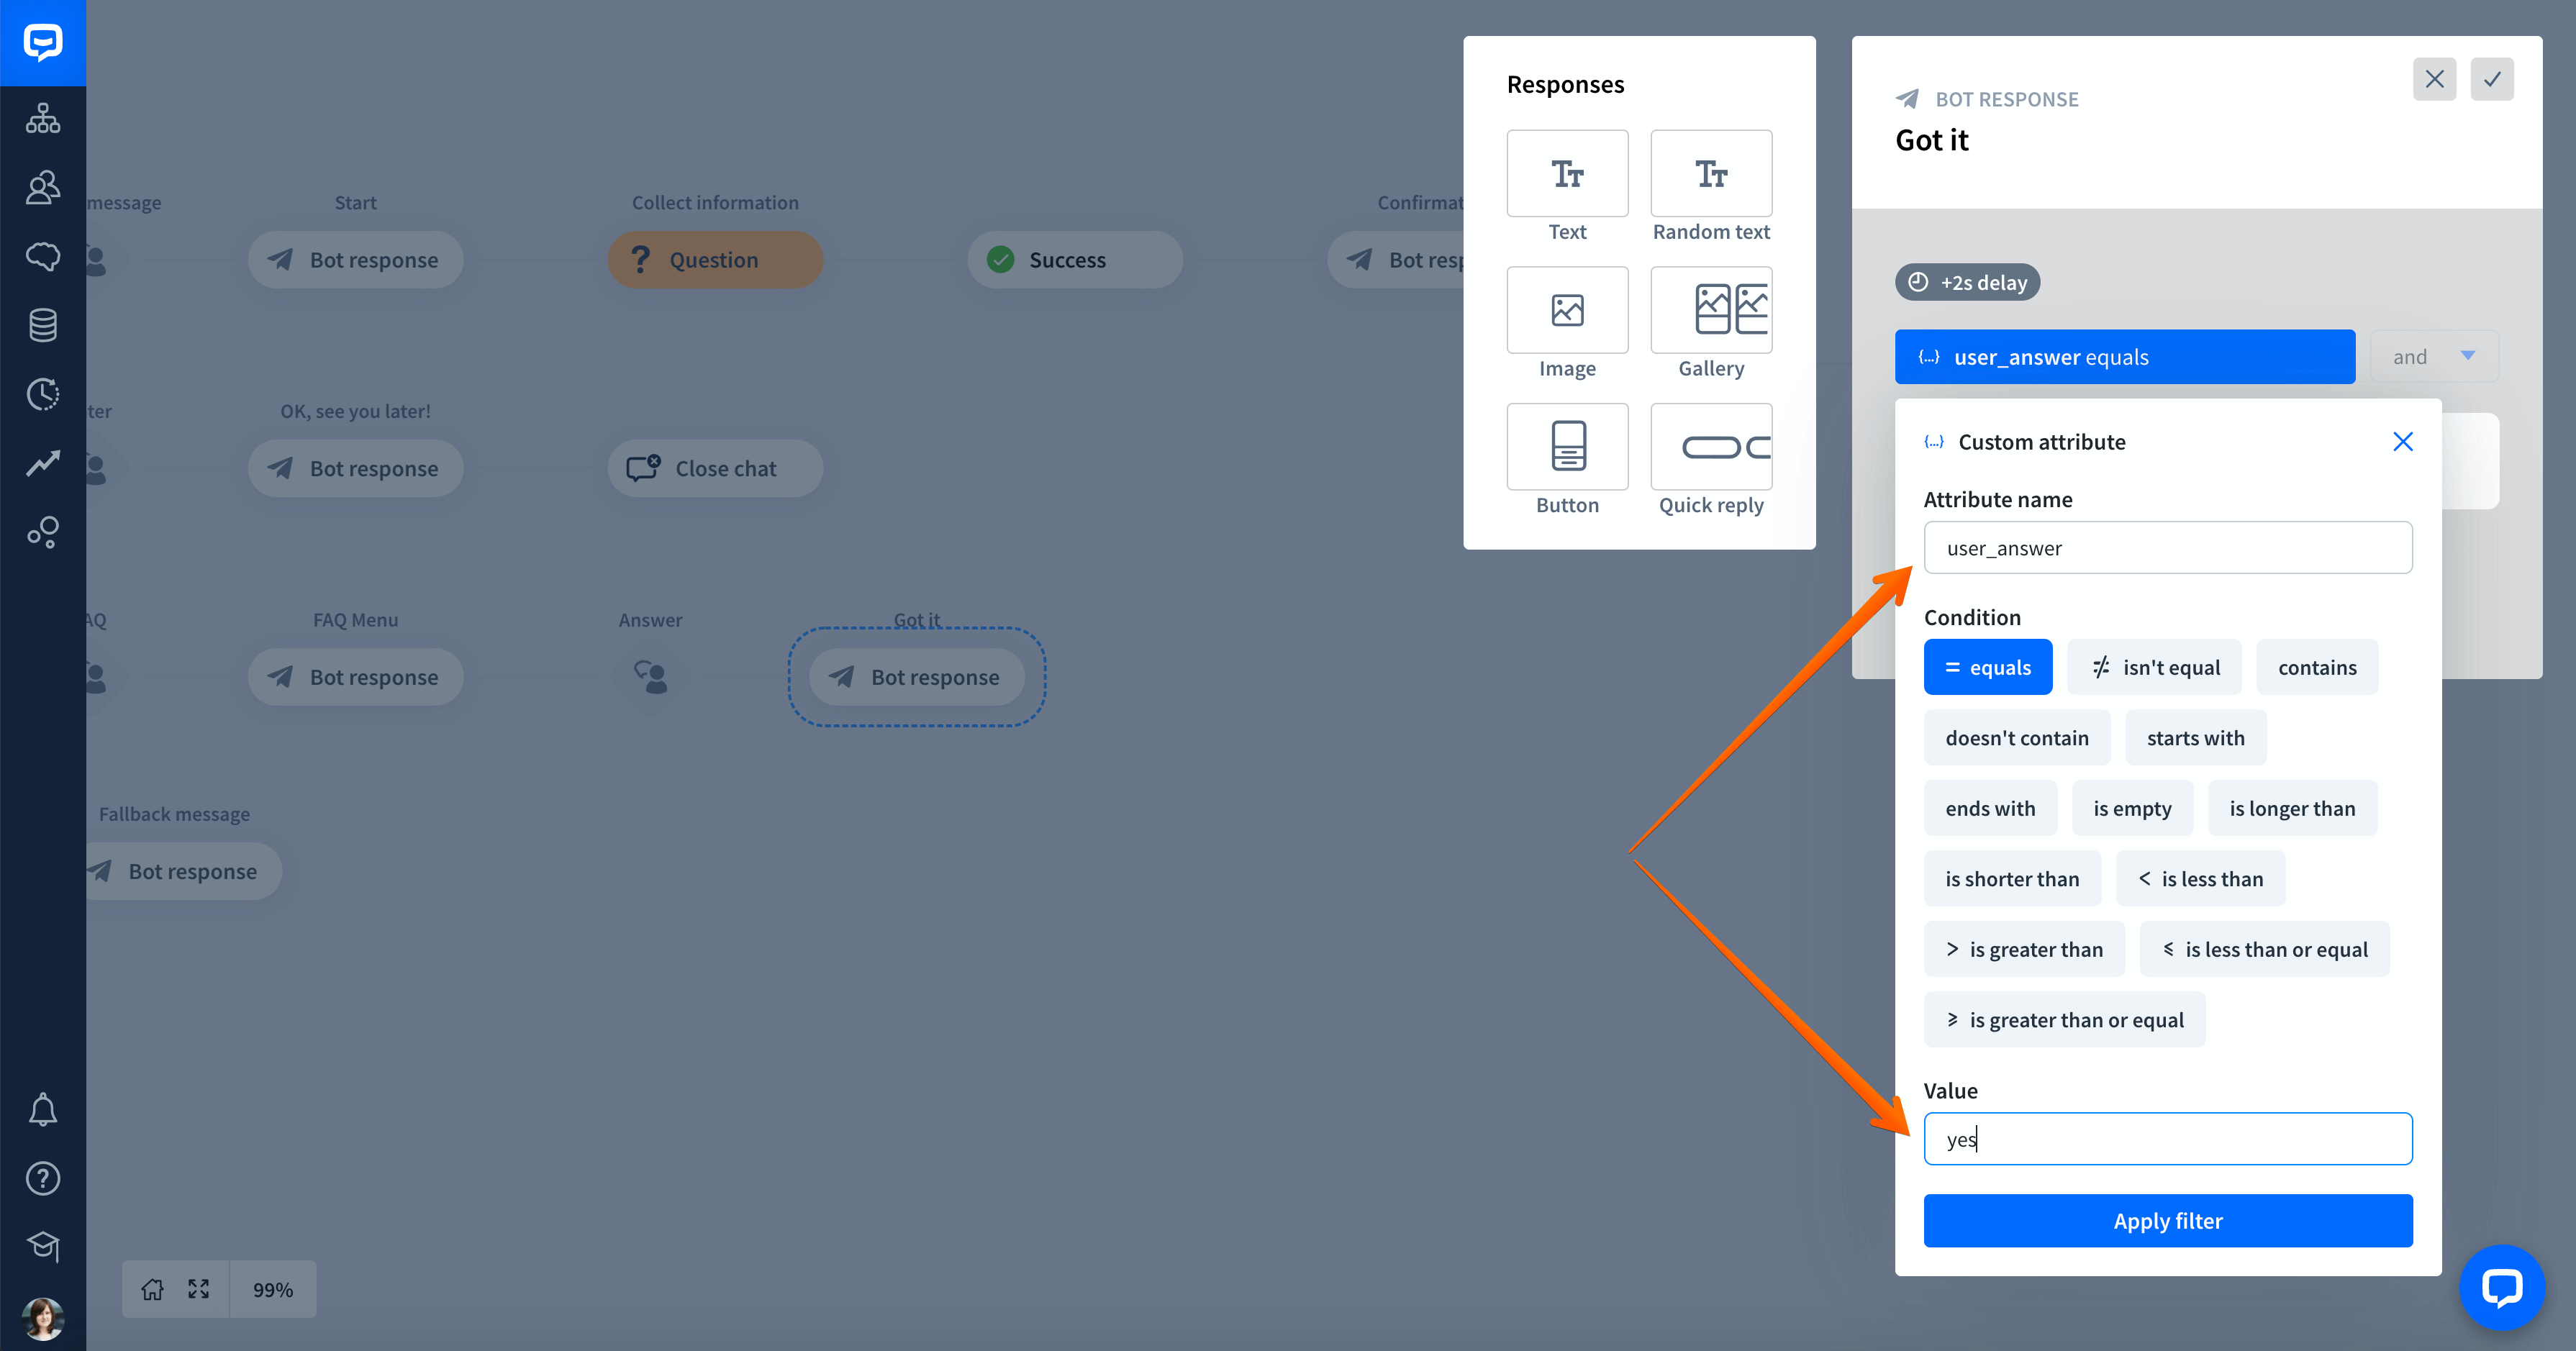
To display a message only to the users who provide the yes answer, select Add filter. In the window that appears, select the user_answer attribute. Then, set up the Condition as =equals and Value to yes. This way, your chatbot will show this message only if the user types or selects yes.
-
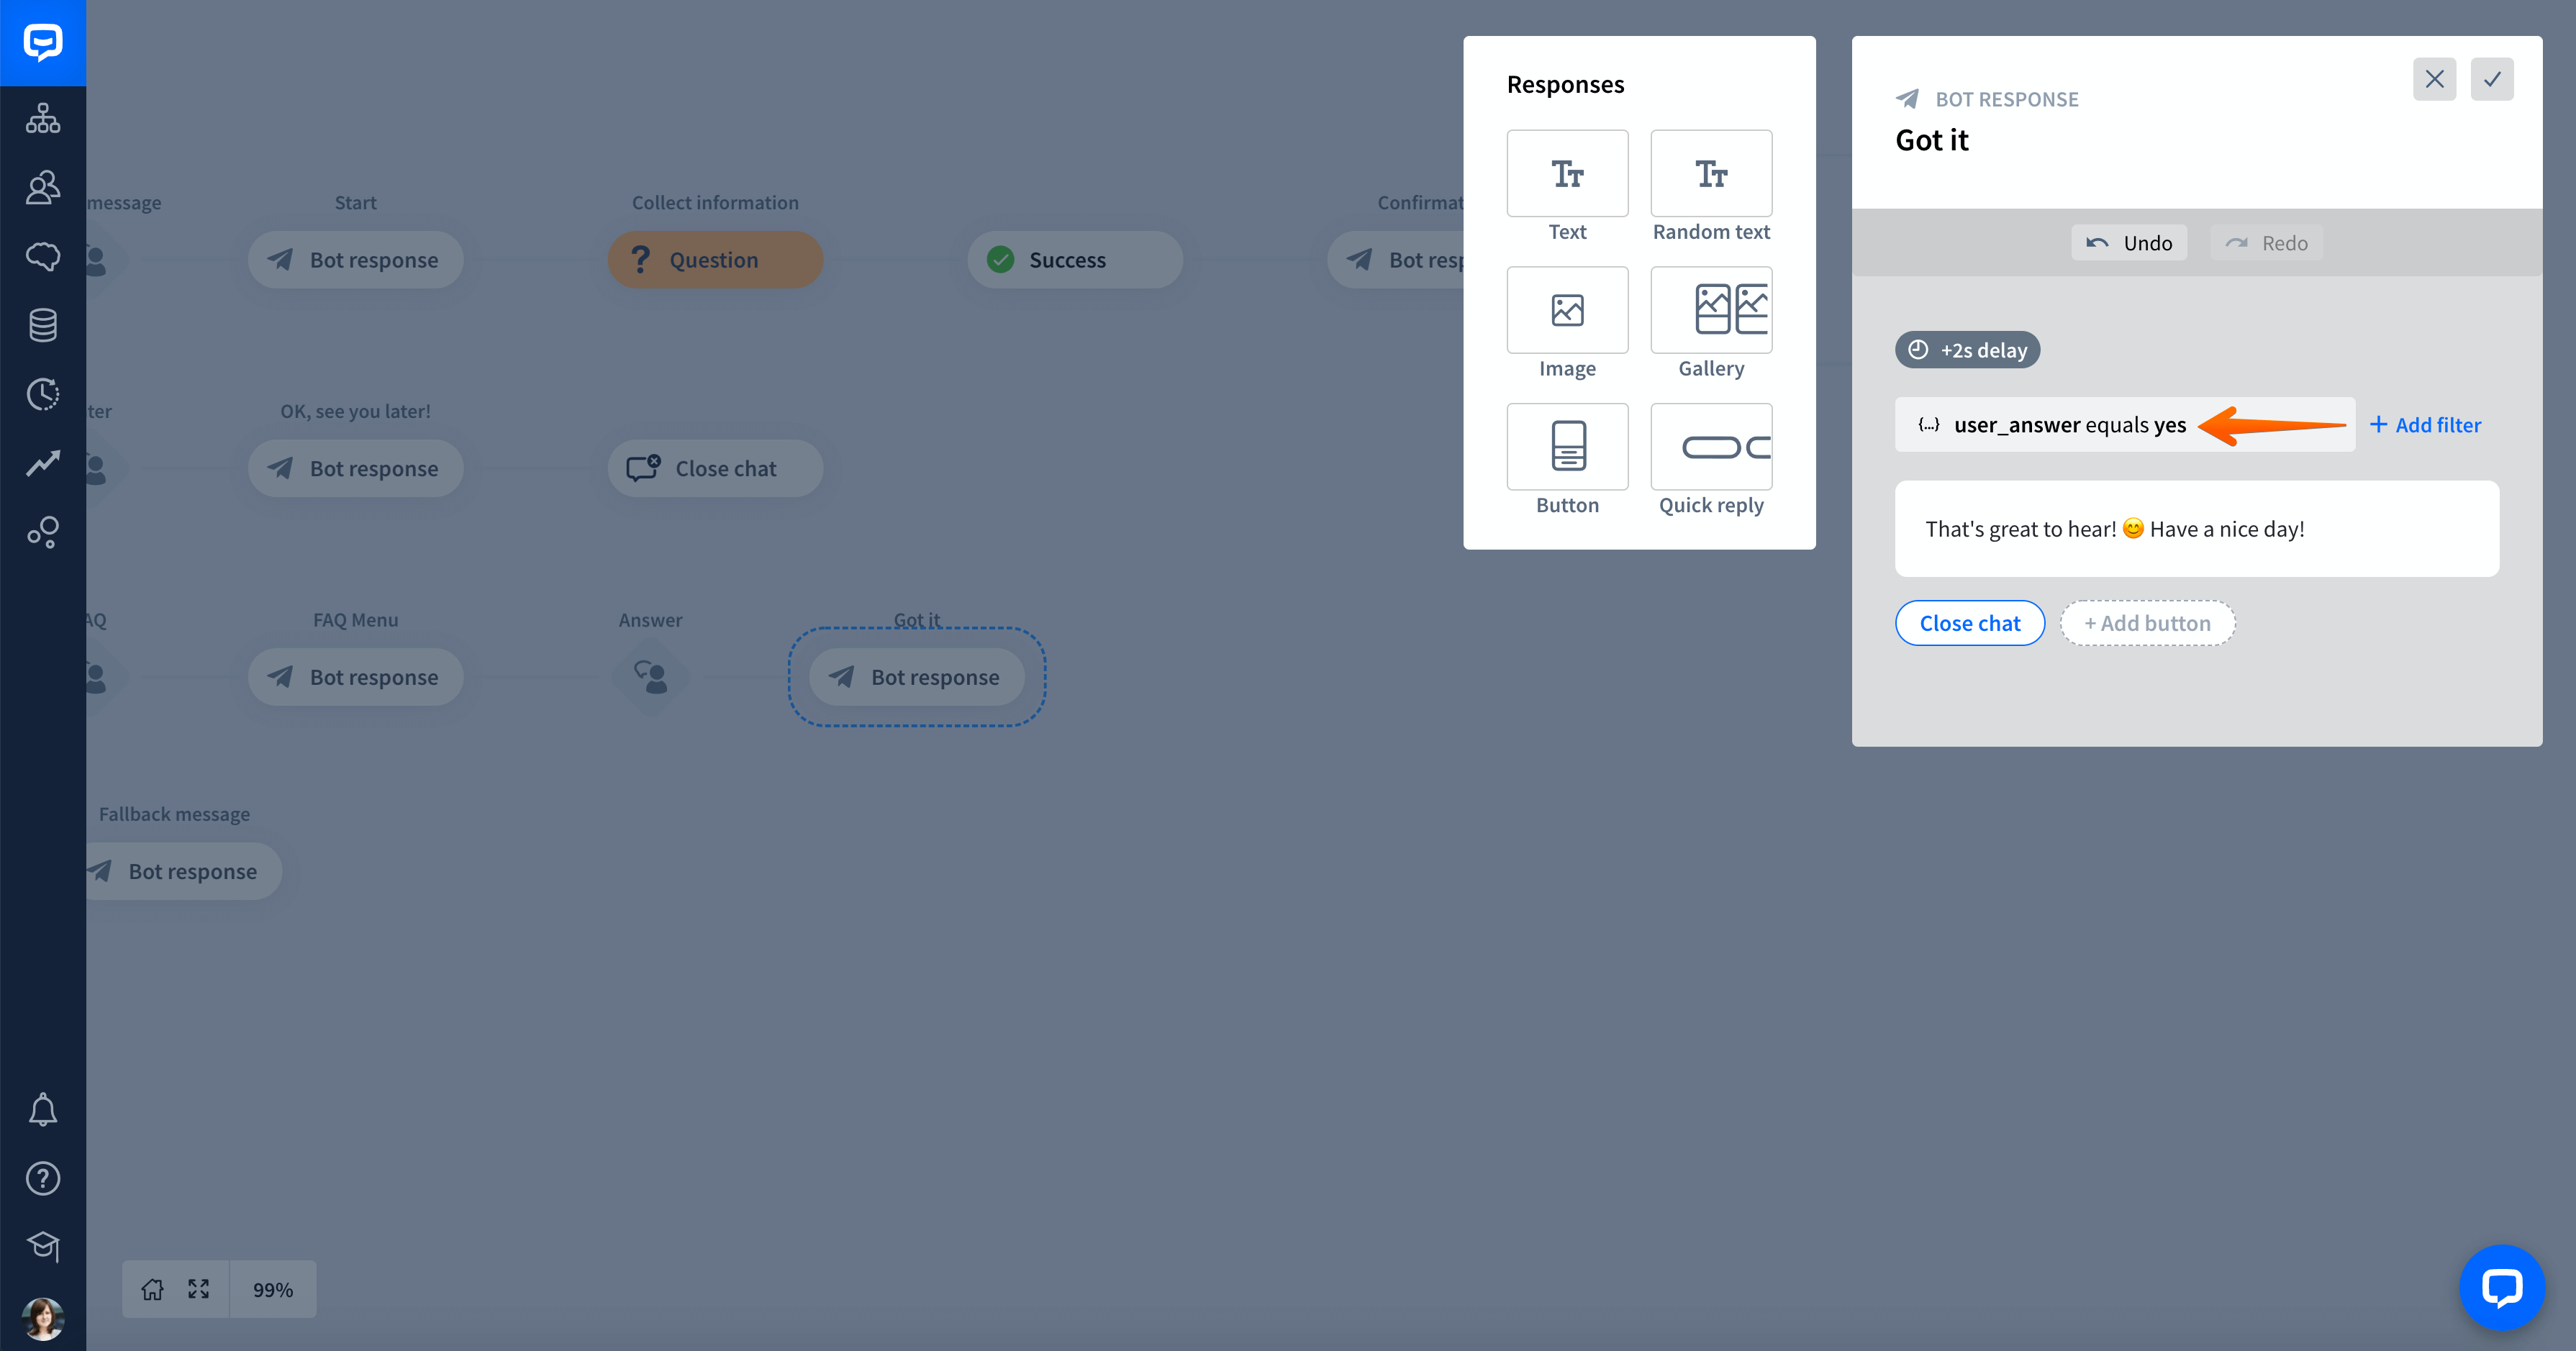
Apply the filter and save your changes.
-
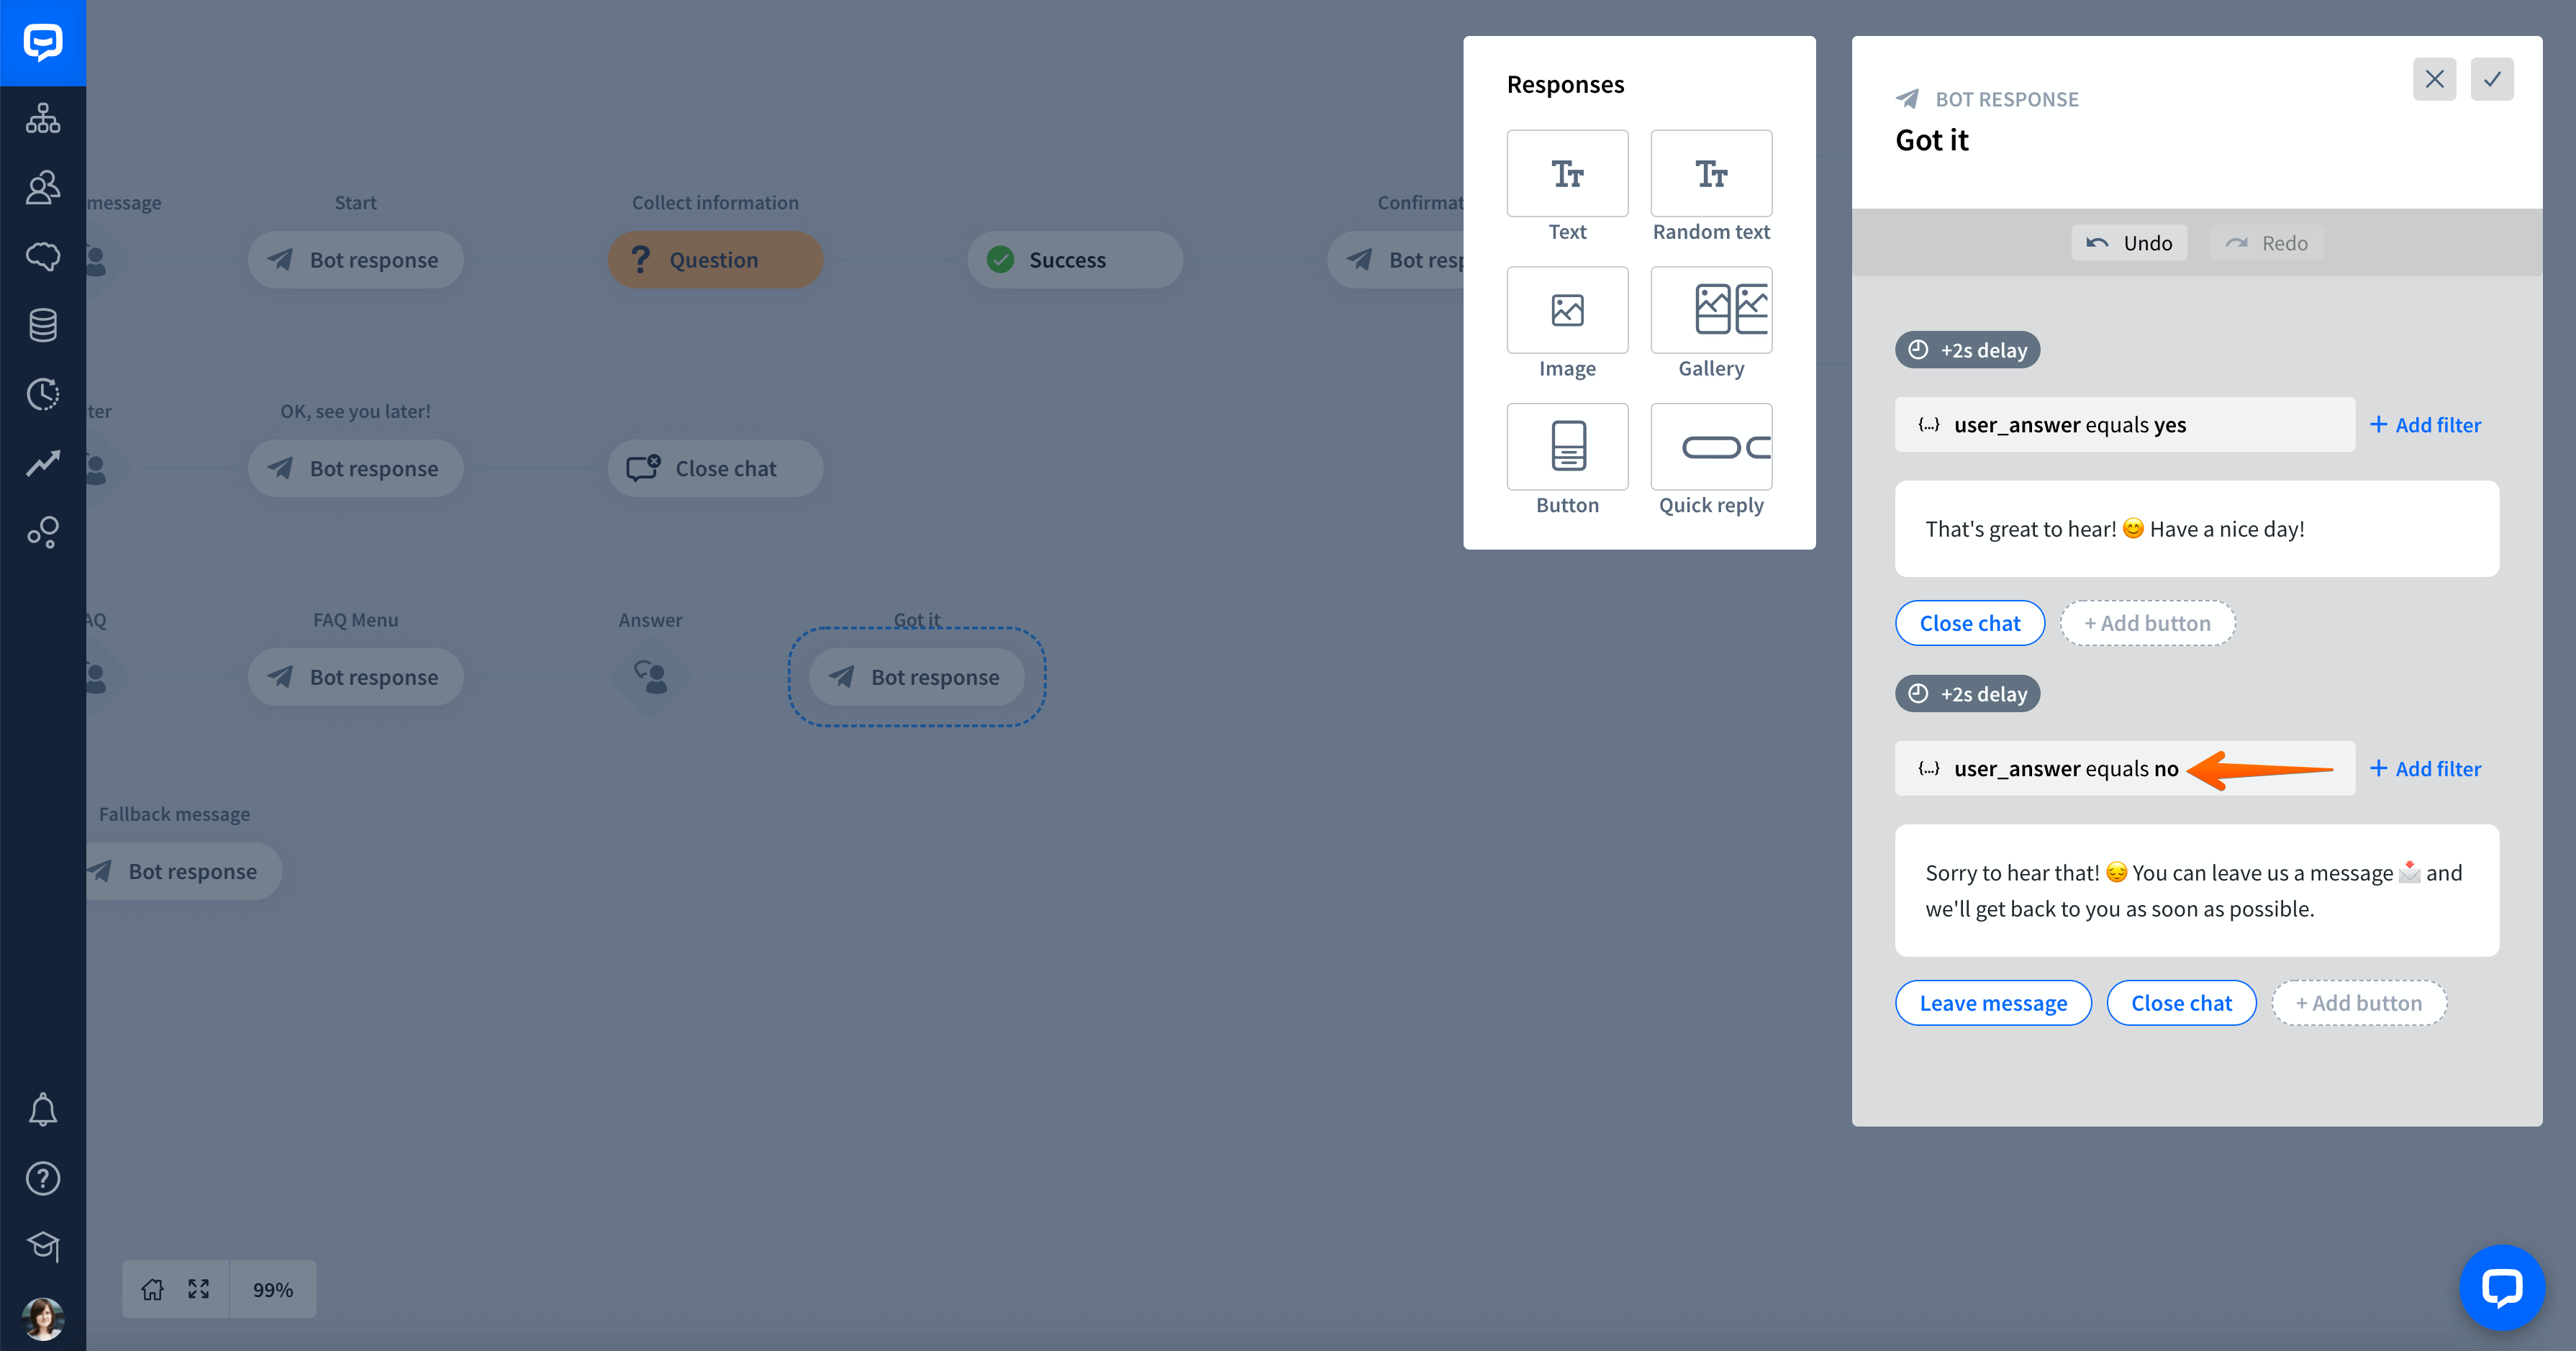
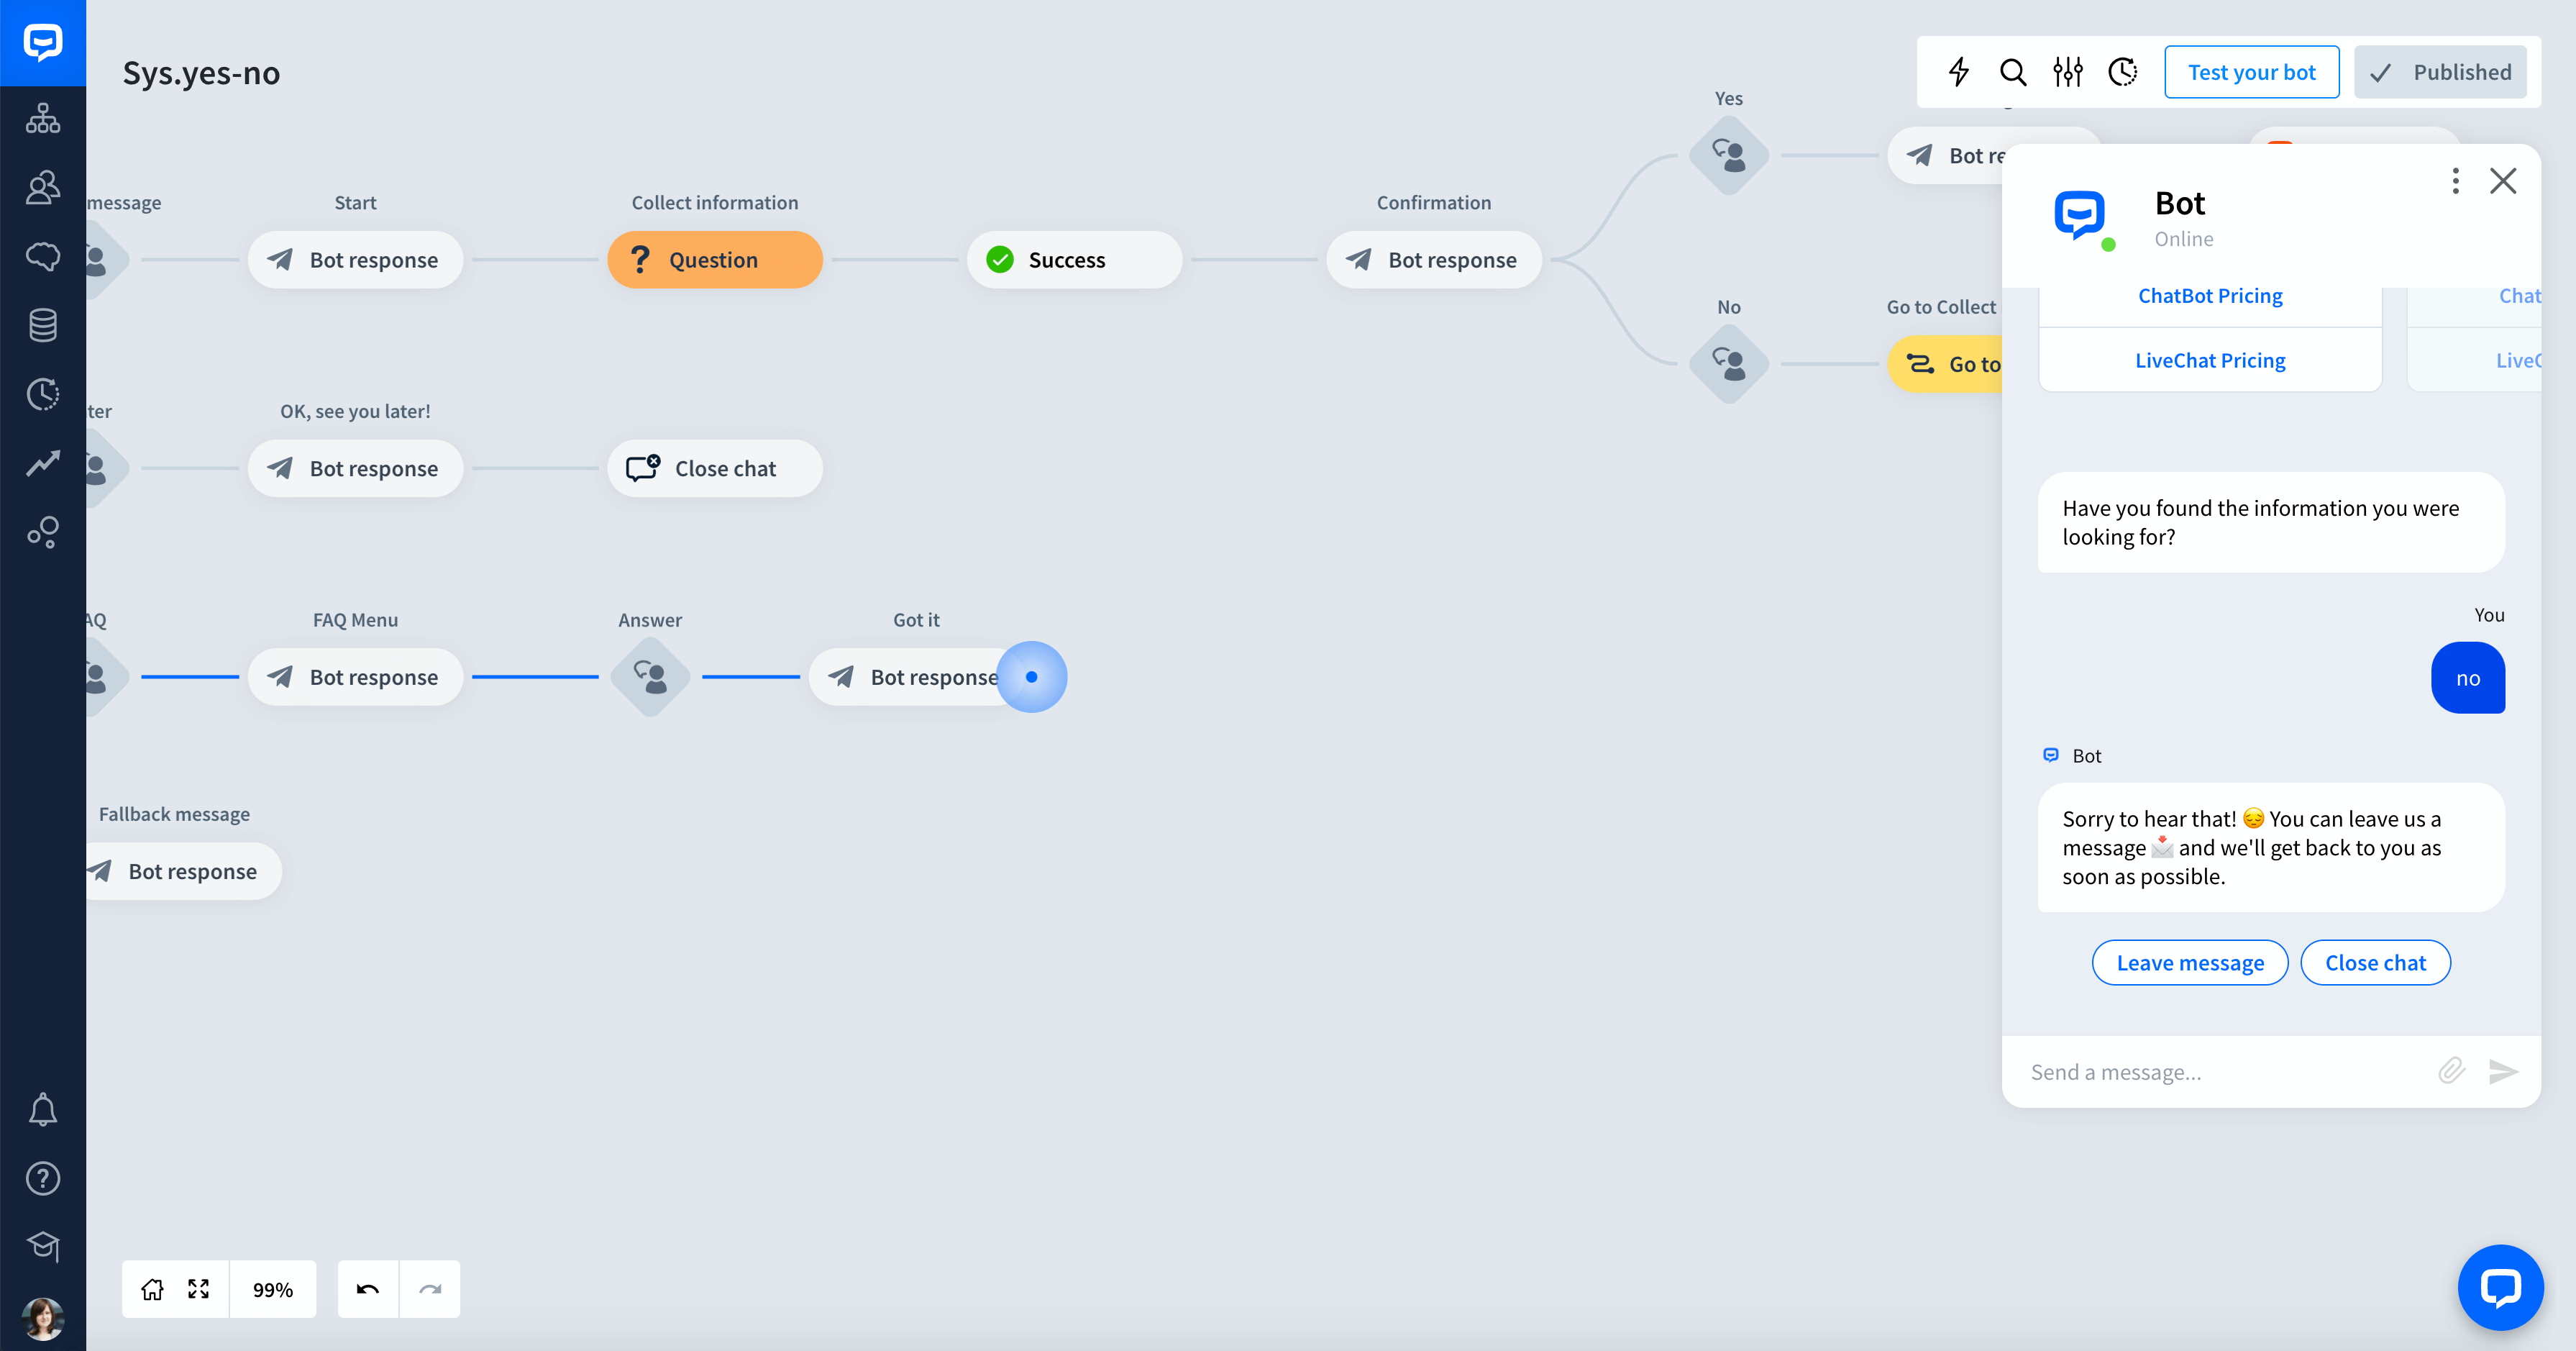
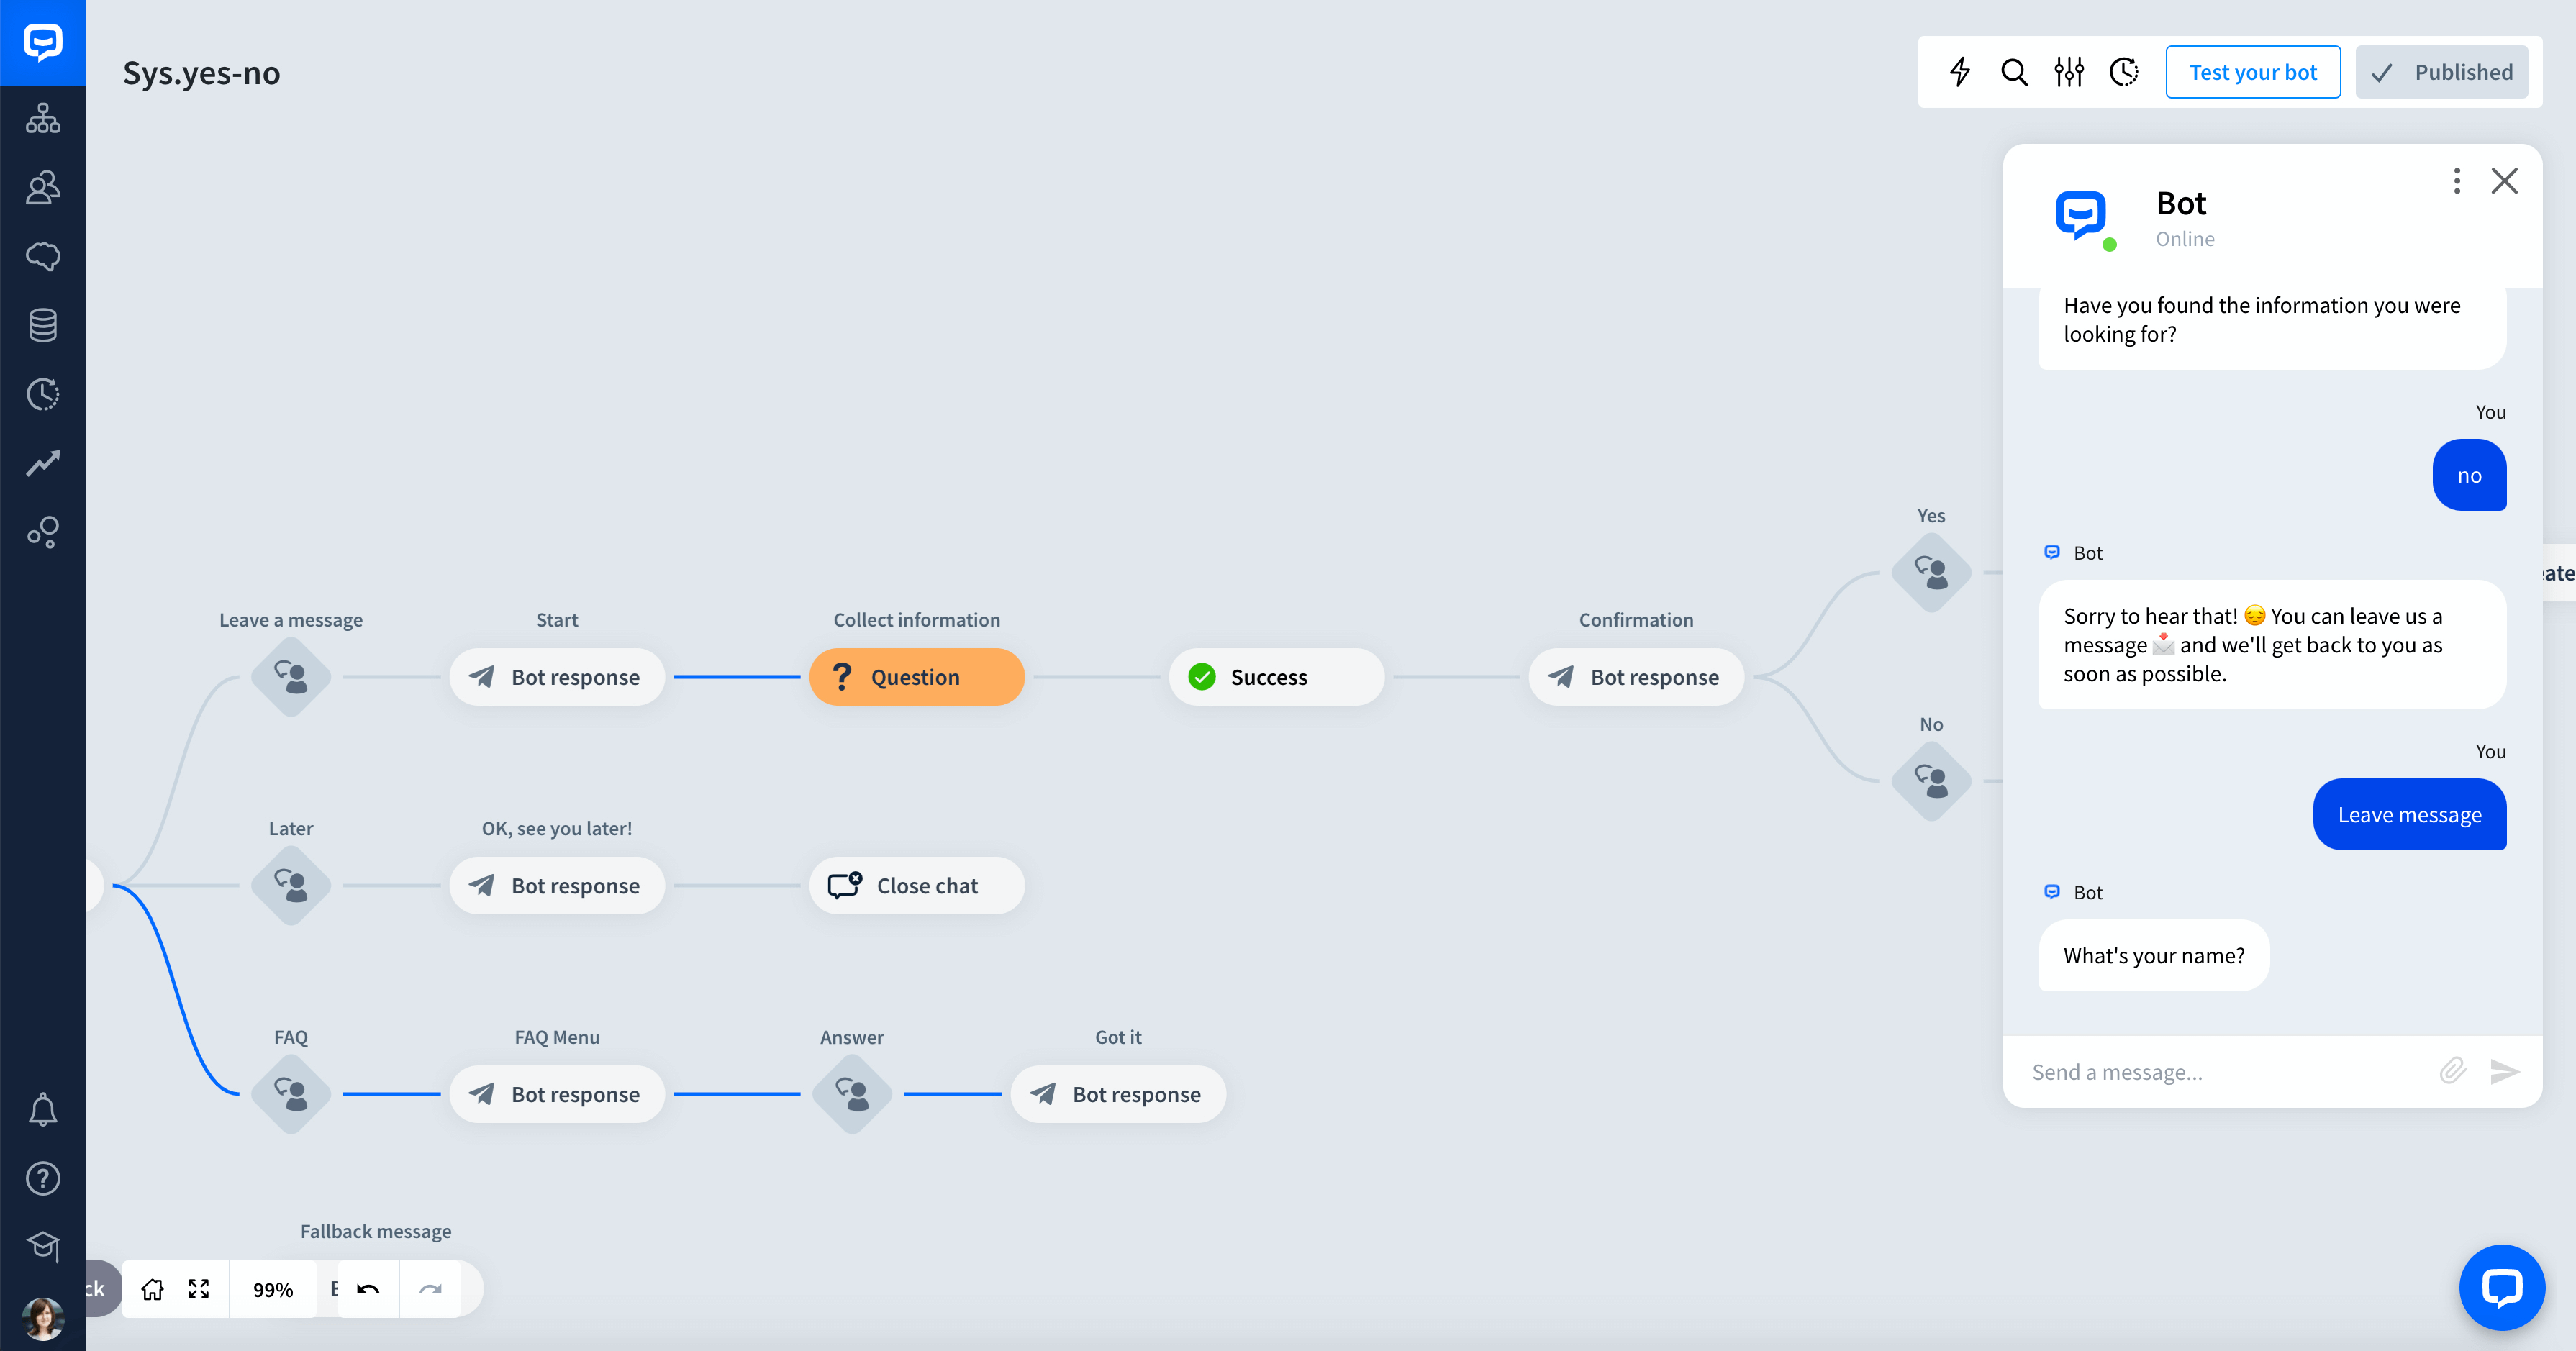
Next, add a response for a no answer and connect the Close chat and Leave message buttons with the corresponding actions in the chatbot.
-
To display a message only to the users who answered no, select Add filter.
-
In the window that appears, select the user_answer attribute. Then, set up the condition as =equals and the Value to no. This way, your chatbot will show this message only if the user types or selects no.
-
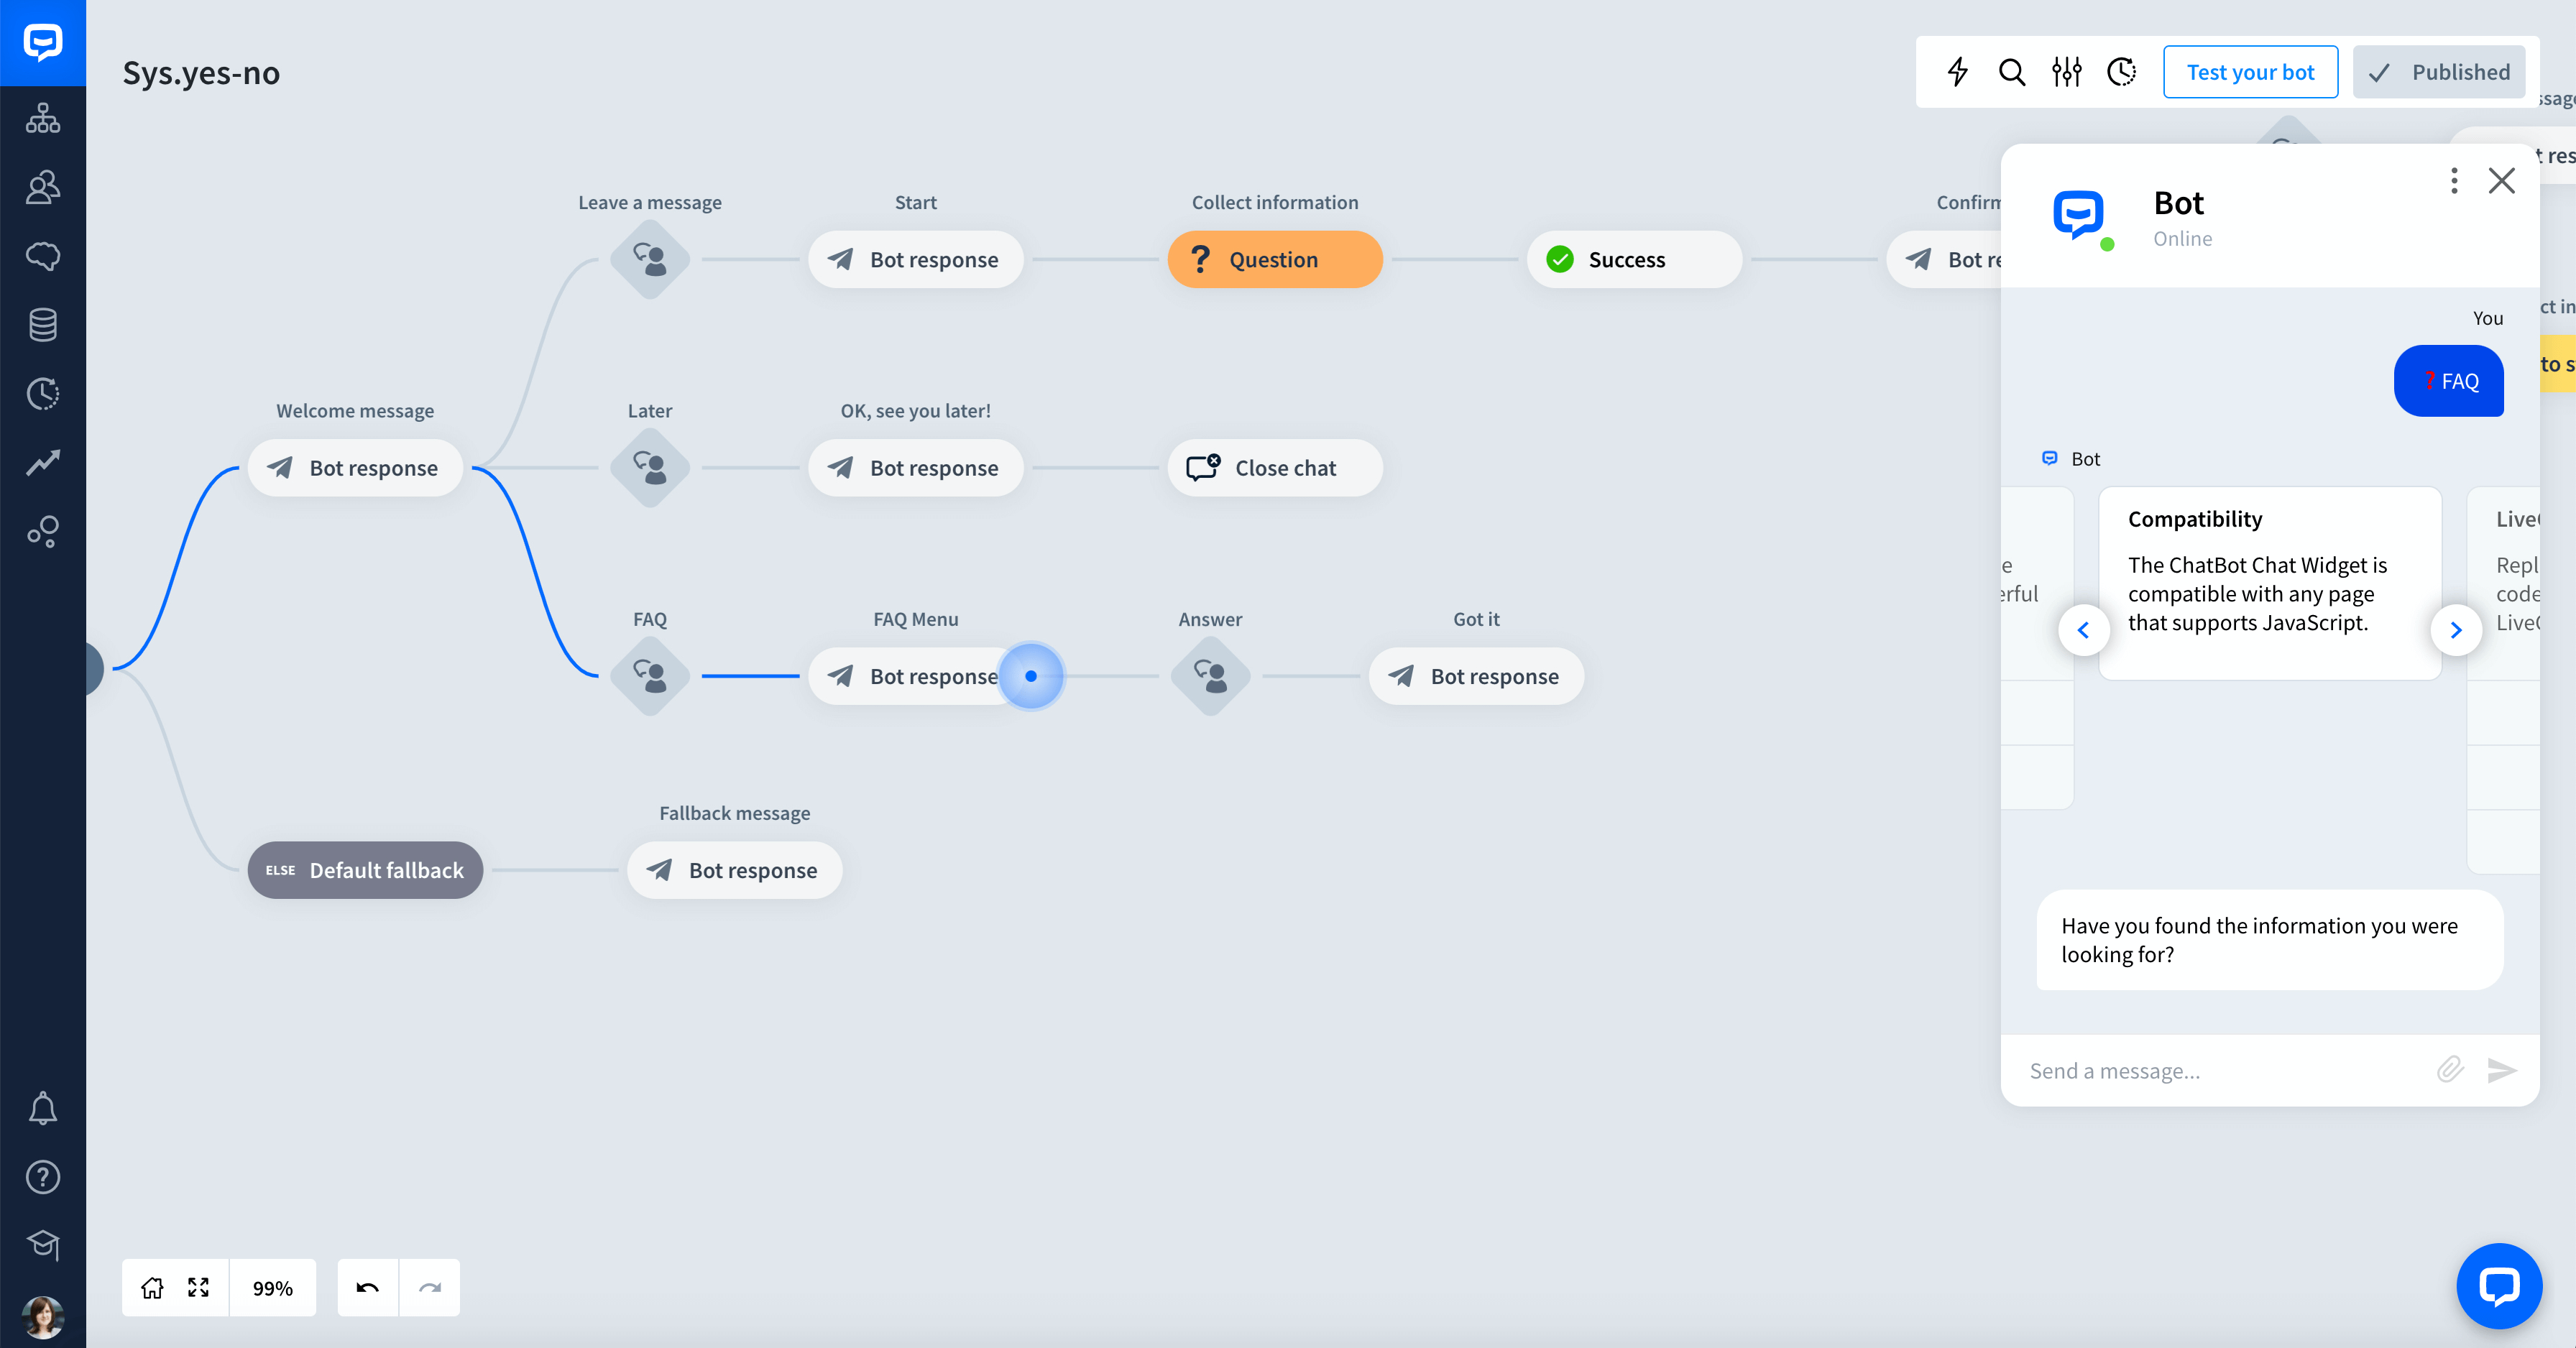
Save all of your work. Now, test the chatbot using our Testing tool First, test the yes flow and use different synonyms.
-
Finally, you can test the instance where the user types no or its synonyms.
Read more:
