Recognize yes and no answers without creating endless User says lists.
There’re many ways users can confirm or negate information. We’ve pulled them all together and created Yes and No entities that you can reuse in your chatbots. Thanks to that, you don’t need to predict how your users might express yes or no.
The system Yes and No entities can help your chatbot recognize the correct answer. You can then save the collected data as an attribute and reuse in an ongoing chat or pass it to your web services.
Entity name | Description | Query | Returned data |
Yes | Matches yes synonyms | yes, fine, sure, good, true, right, certainly | yes |
No | Matches no synonyms | no, no way, never, none | no |
How to use the Yes and No entities
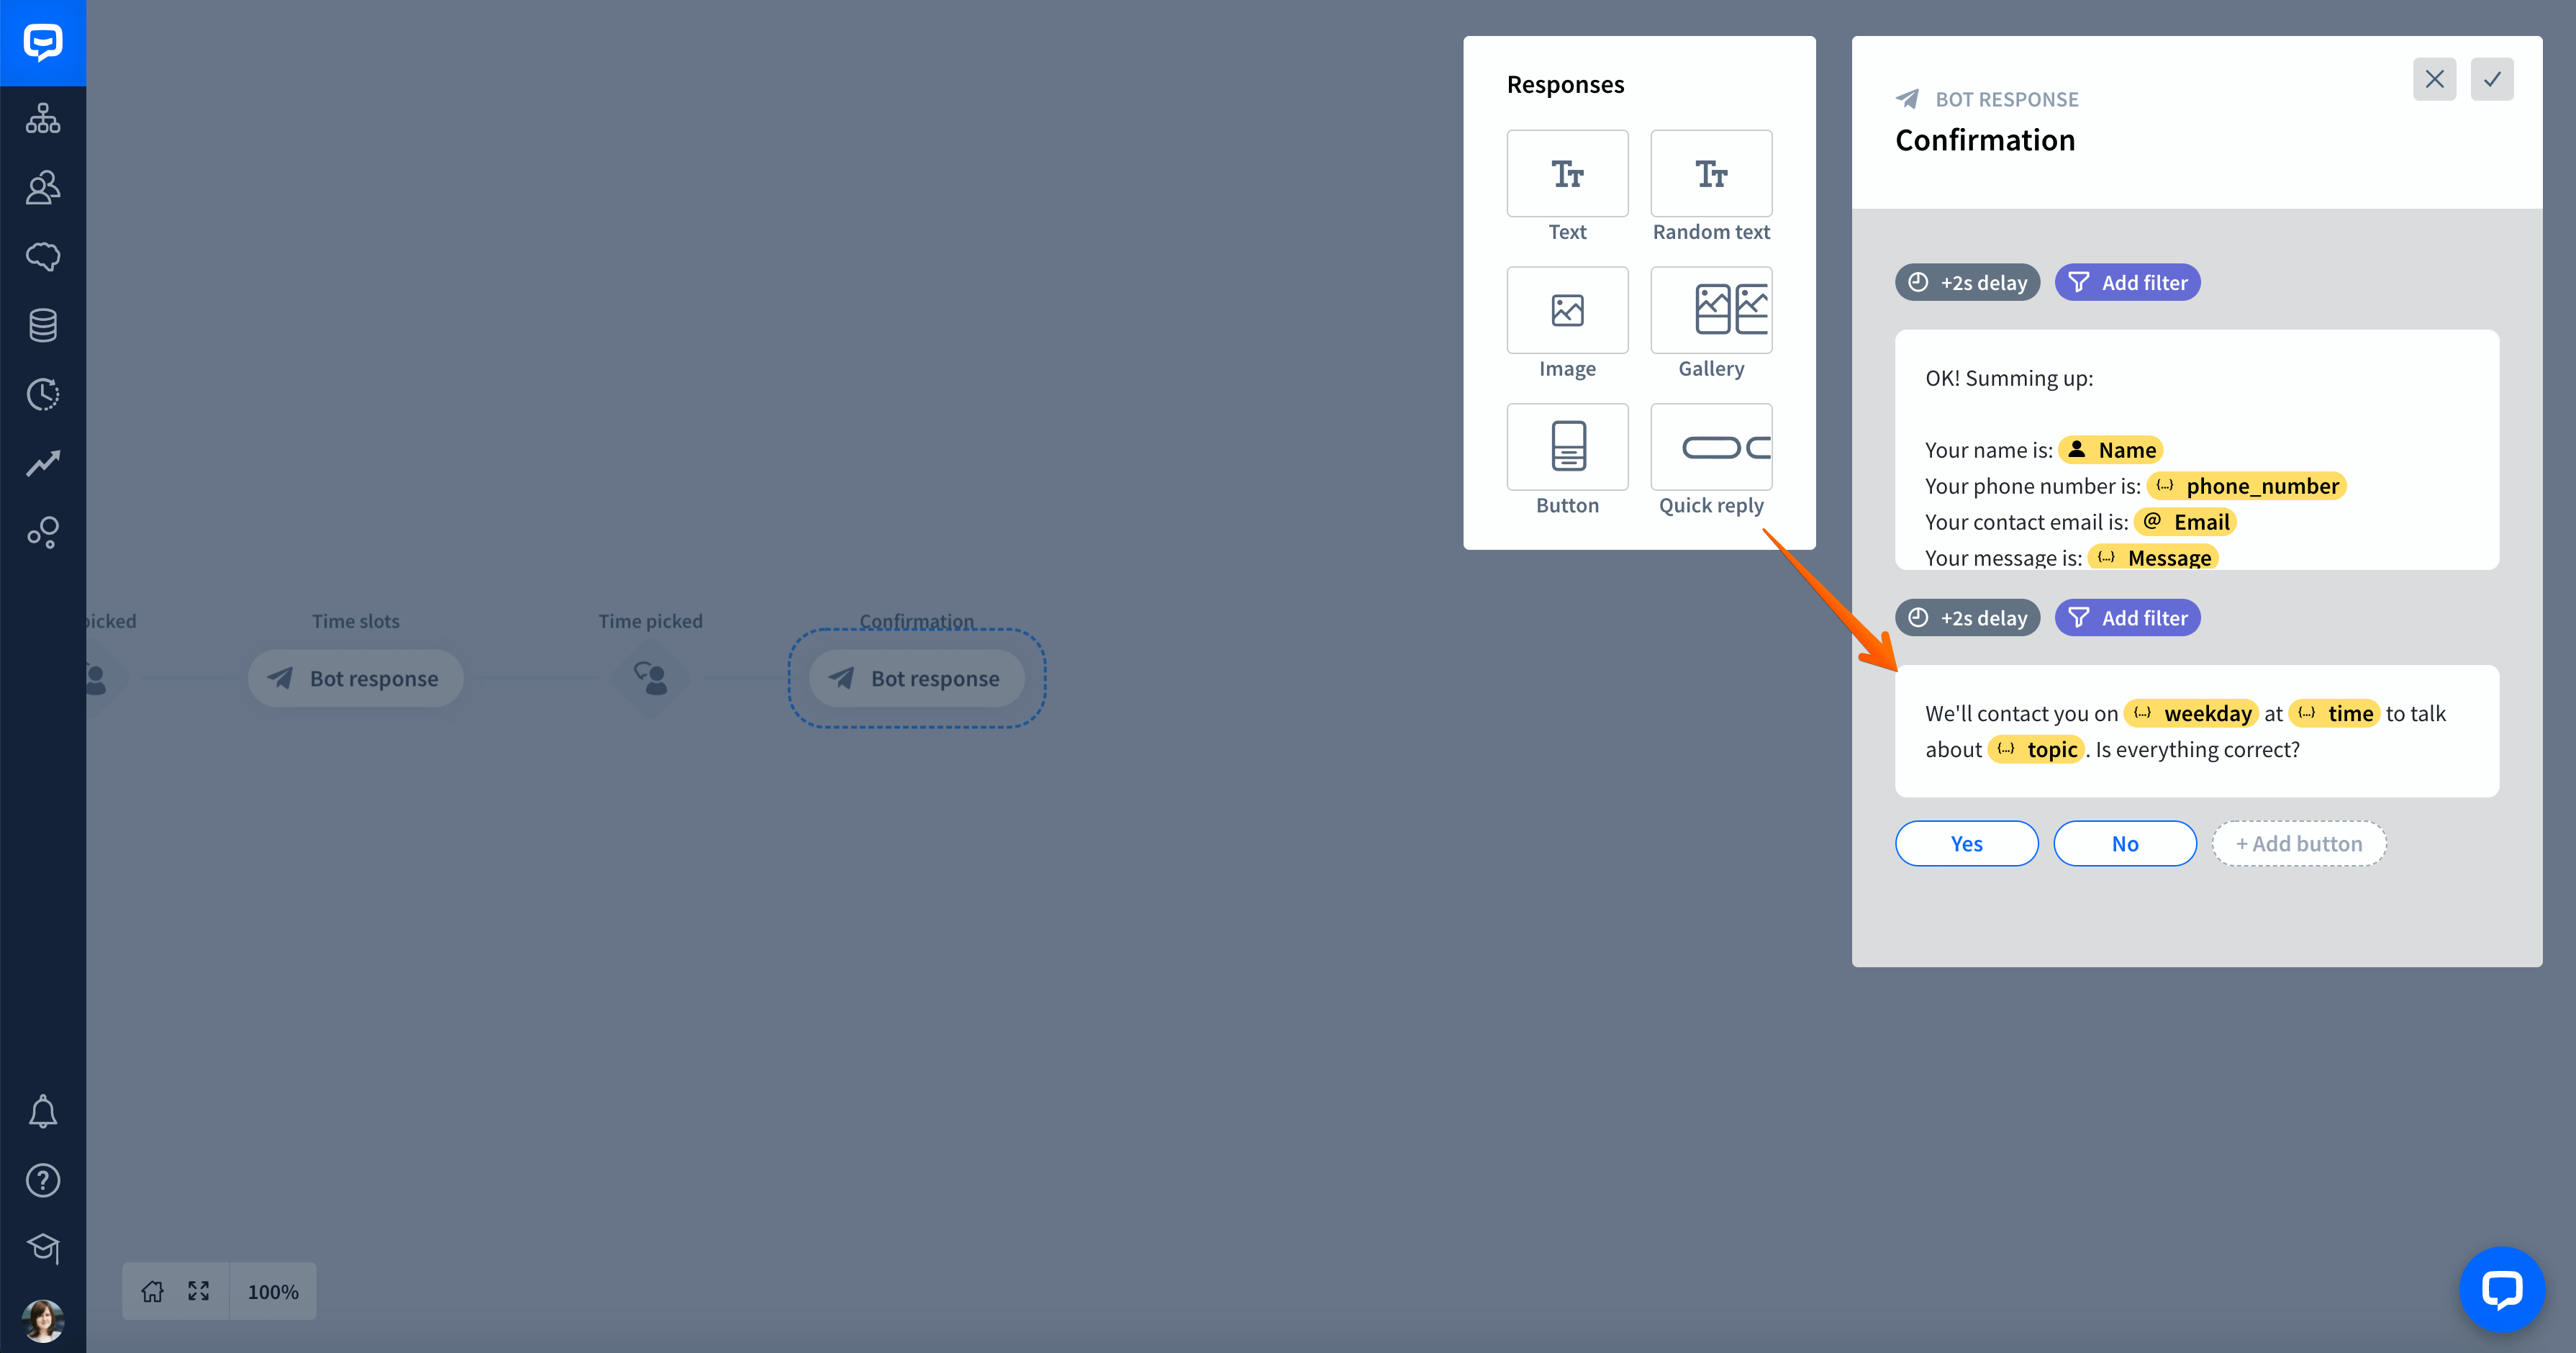
Let’s create an example chatbot that allows the user to schedule a call. You can use the Yes and No entity to confirm the user information.
-
Open a chatbot you want to use to book calls with your users.
-
Add a Bot response to your chatbot after the interaction where you collected information from the user. Name it as Confirmation.

-
Add a Quick reply and ask the user to confirm the collected information before scheduling a call.
-
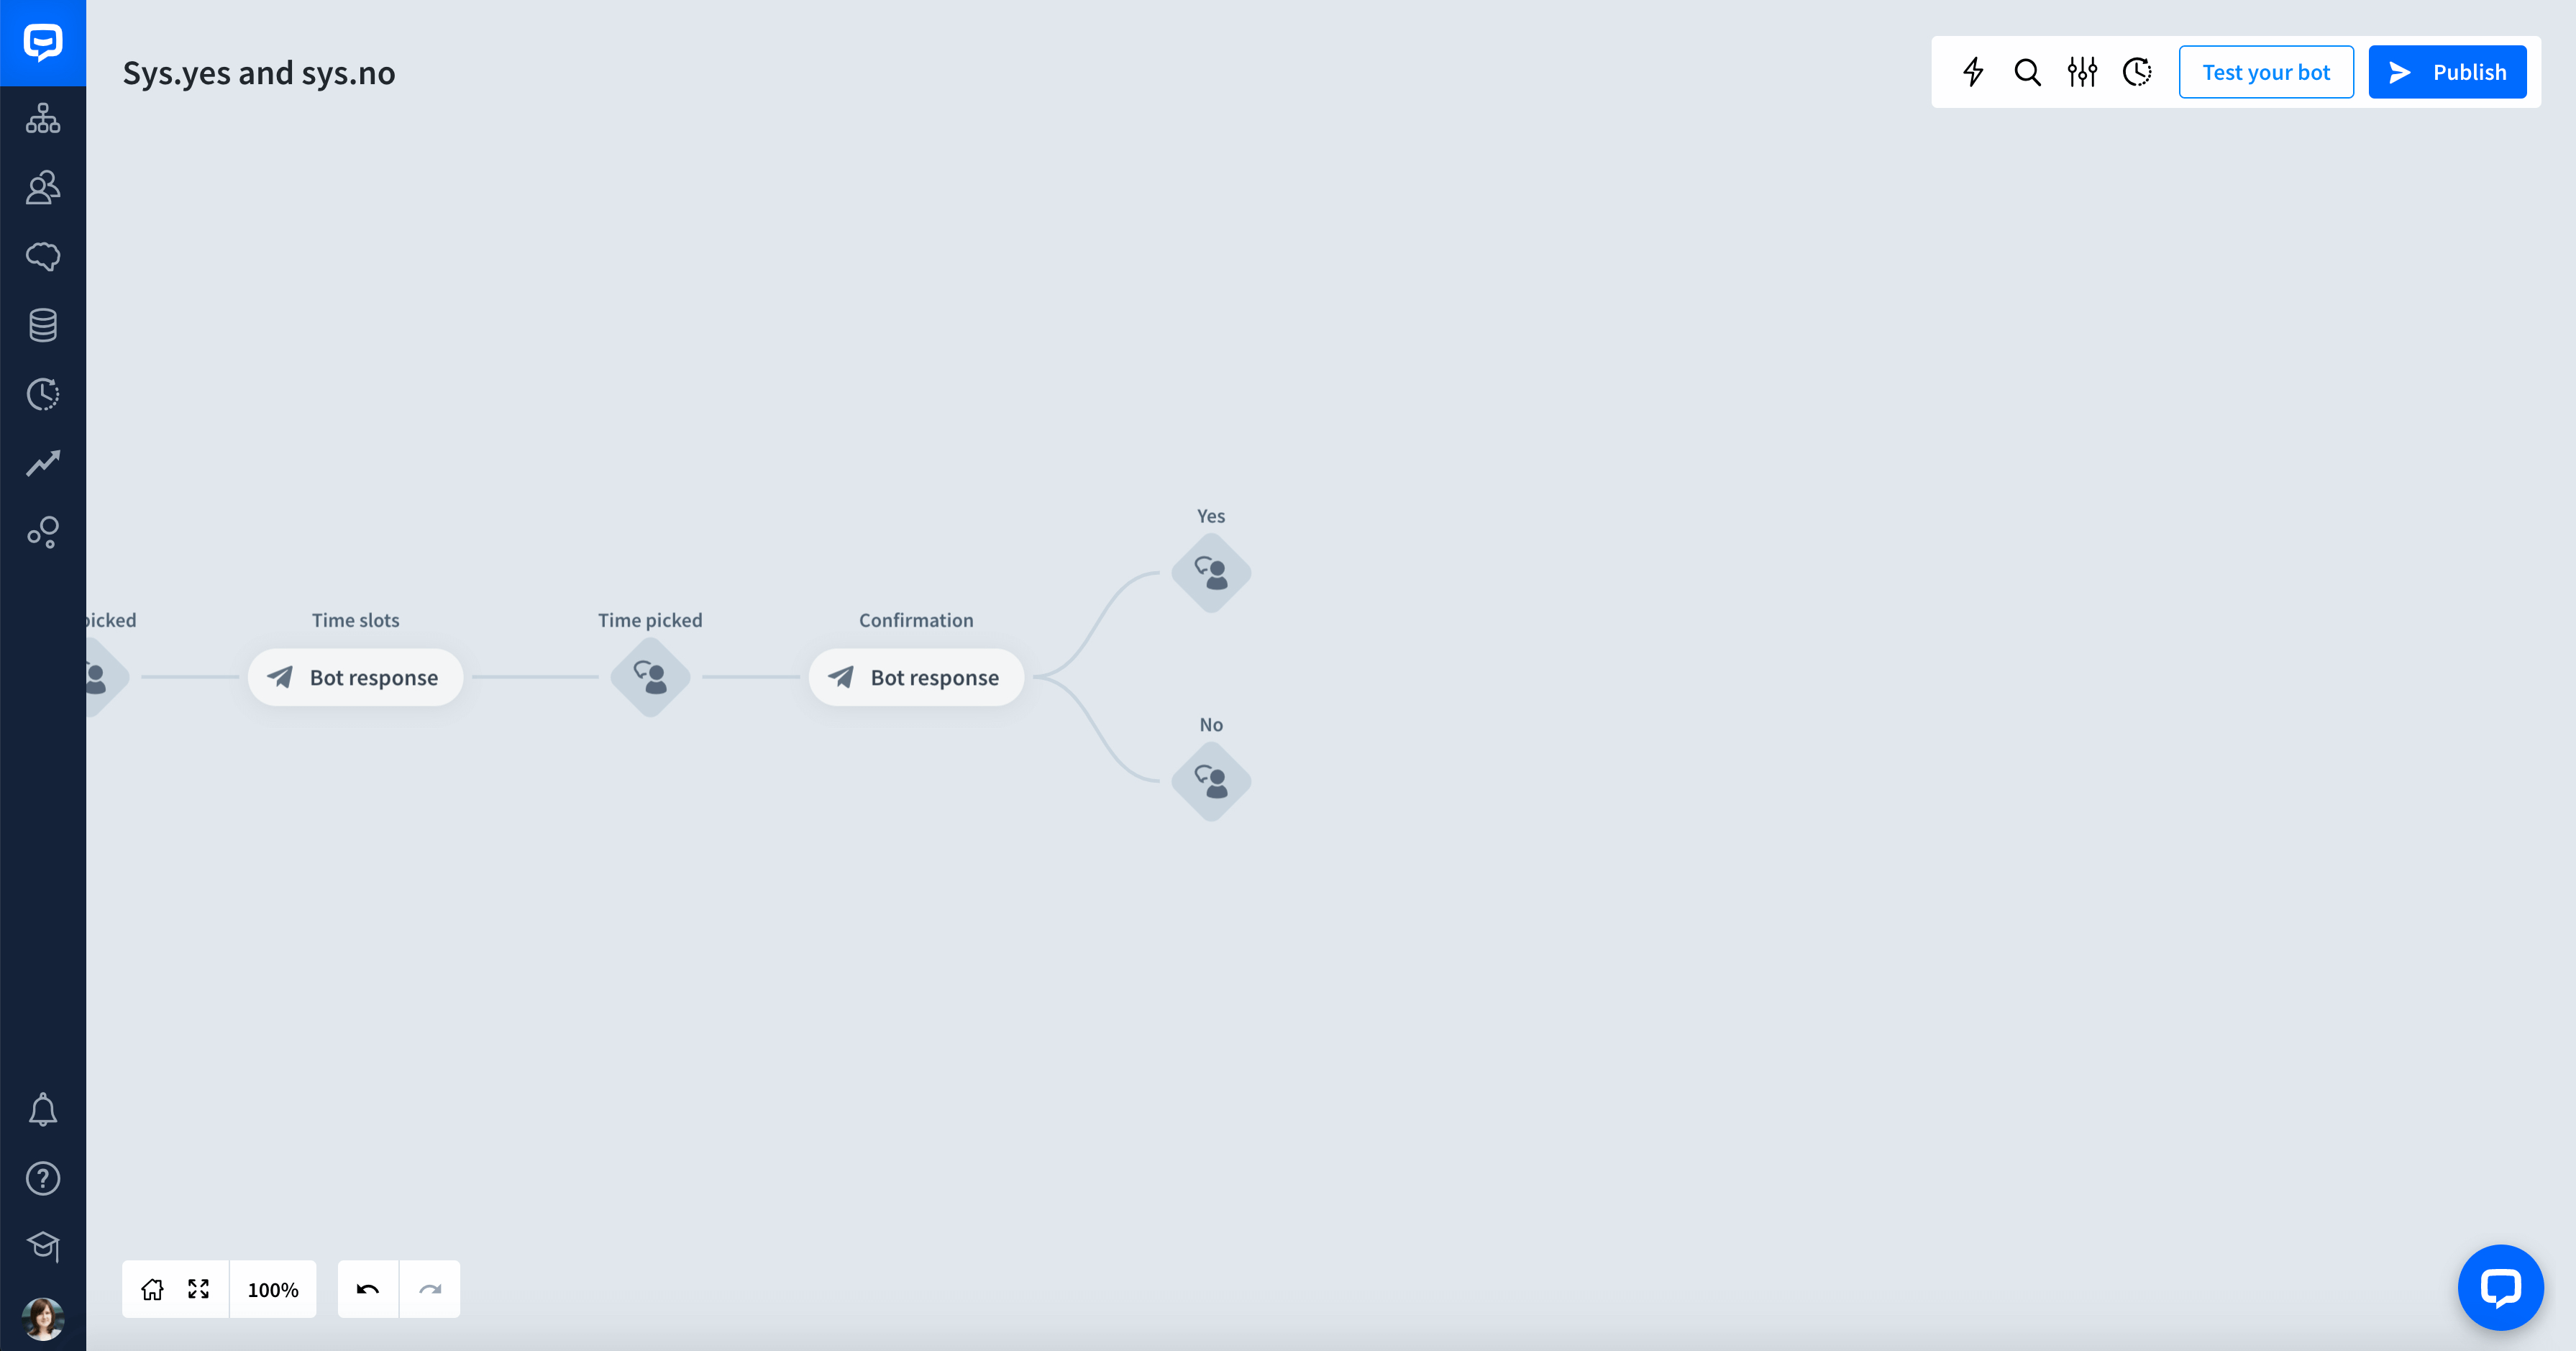
Now, add two User inputs after the Bot response. Name them as Yes and No.
-
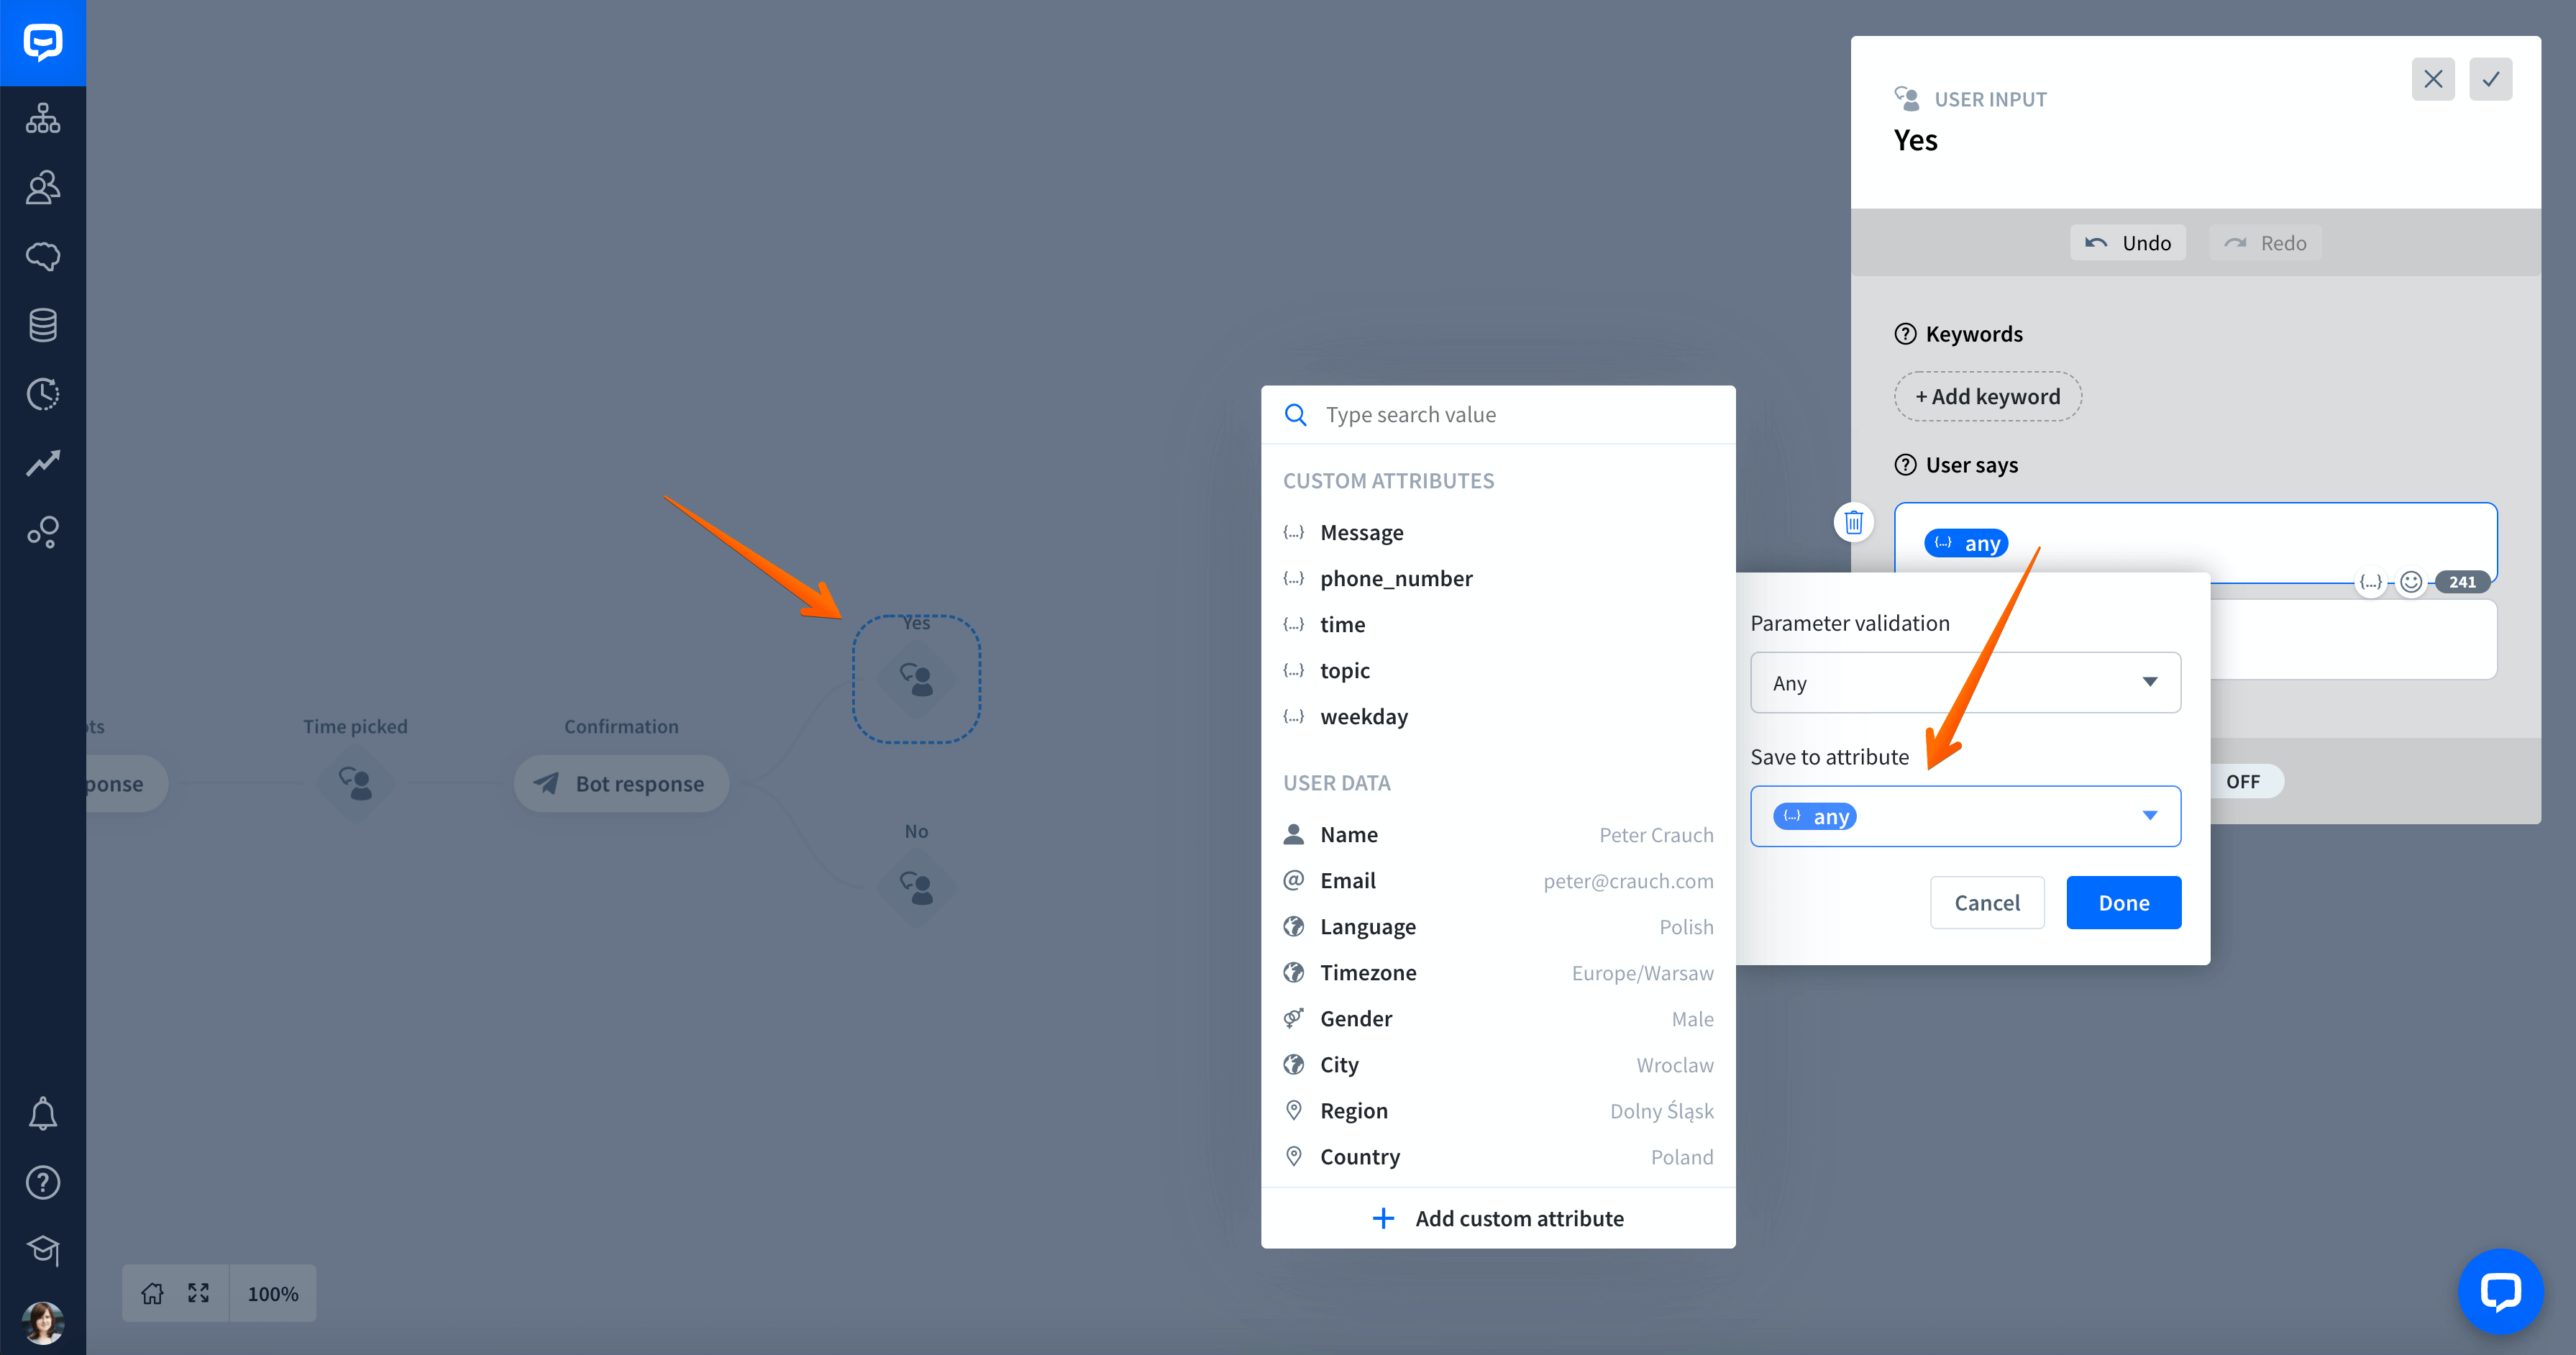
Click on the Yes User input block to open the edit window. In the User says section, type double curly brackets {{ and click on the Save to attribute field.
-
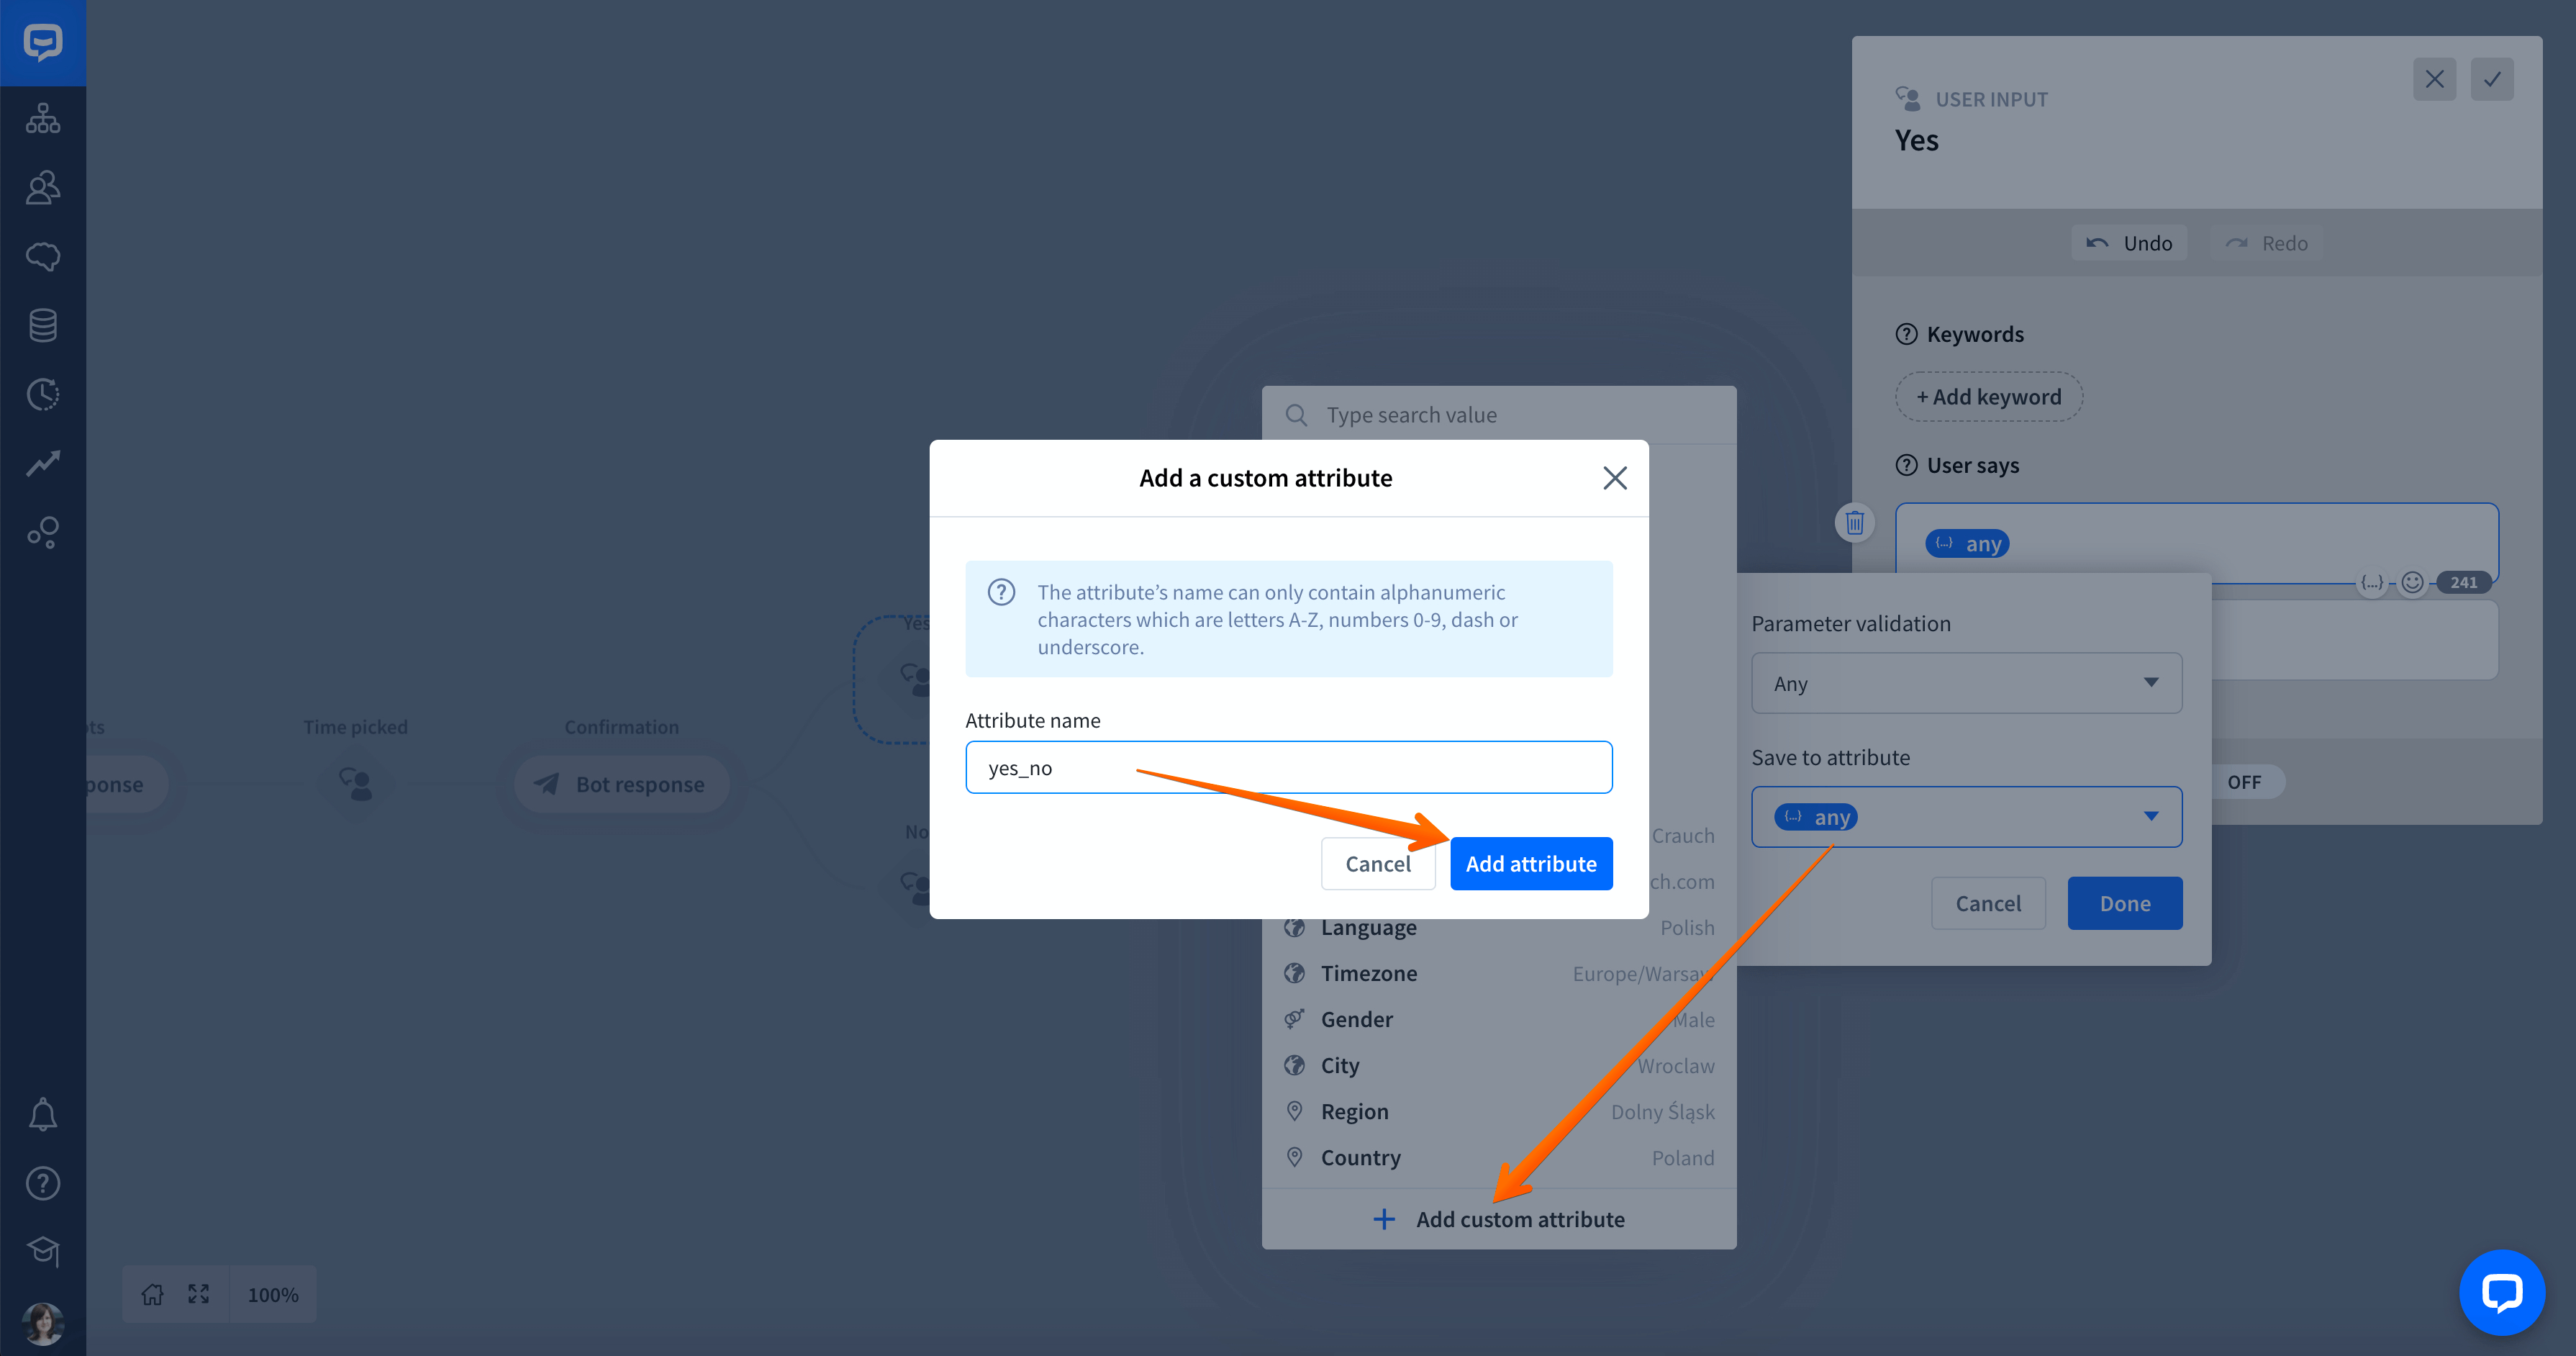
Next, select the Add custom attribute, and set the attribute’s name to, for example, yes_no. To save it, click Add attribute.
-
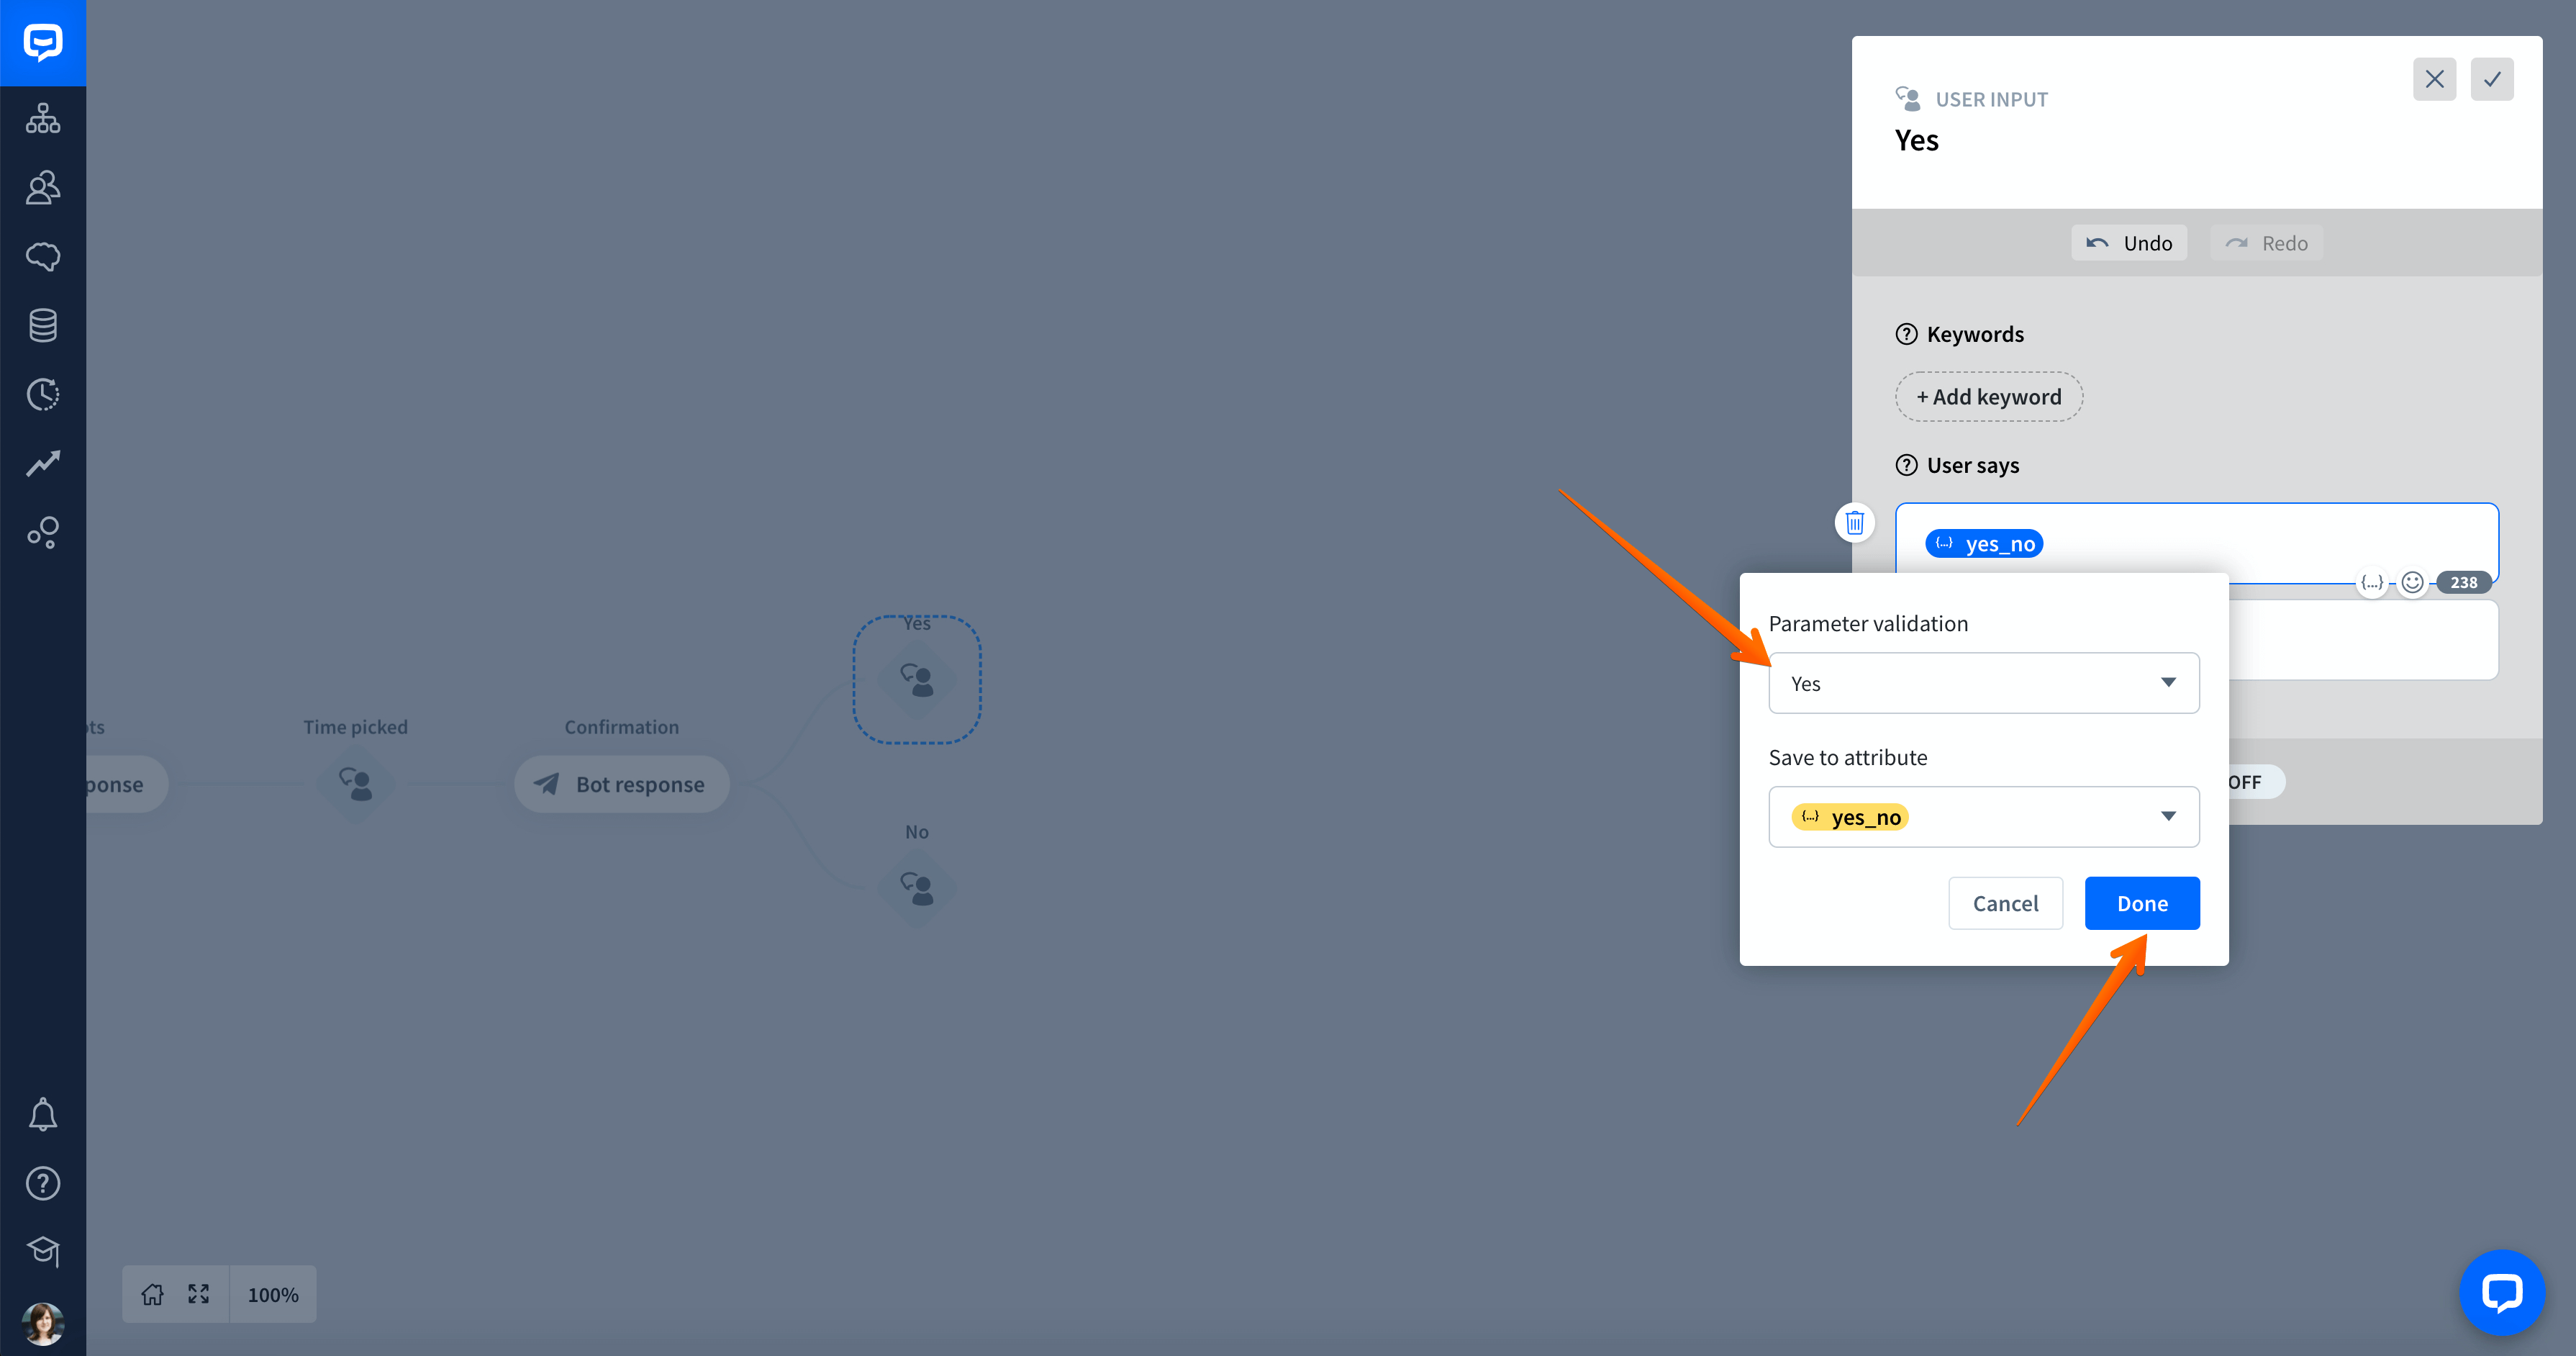
Click on the {{yes_no}} attribute and select Yes from the Parameter validation list. Then, click Done.
-
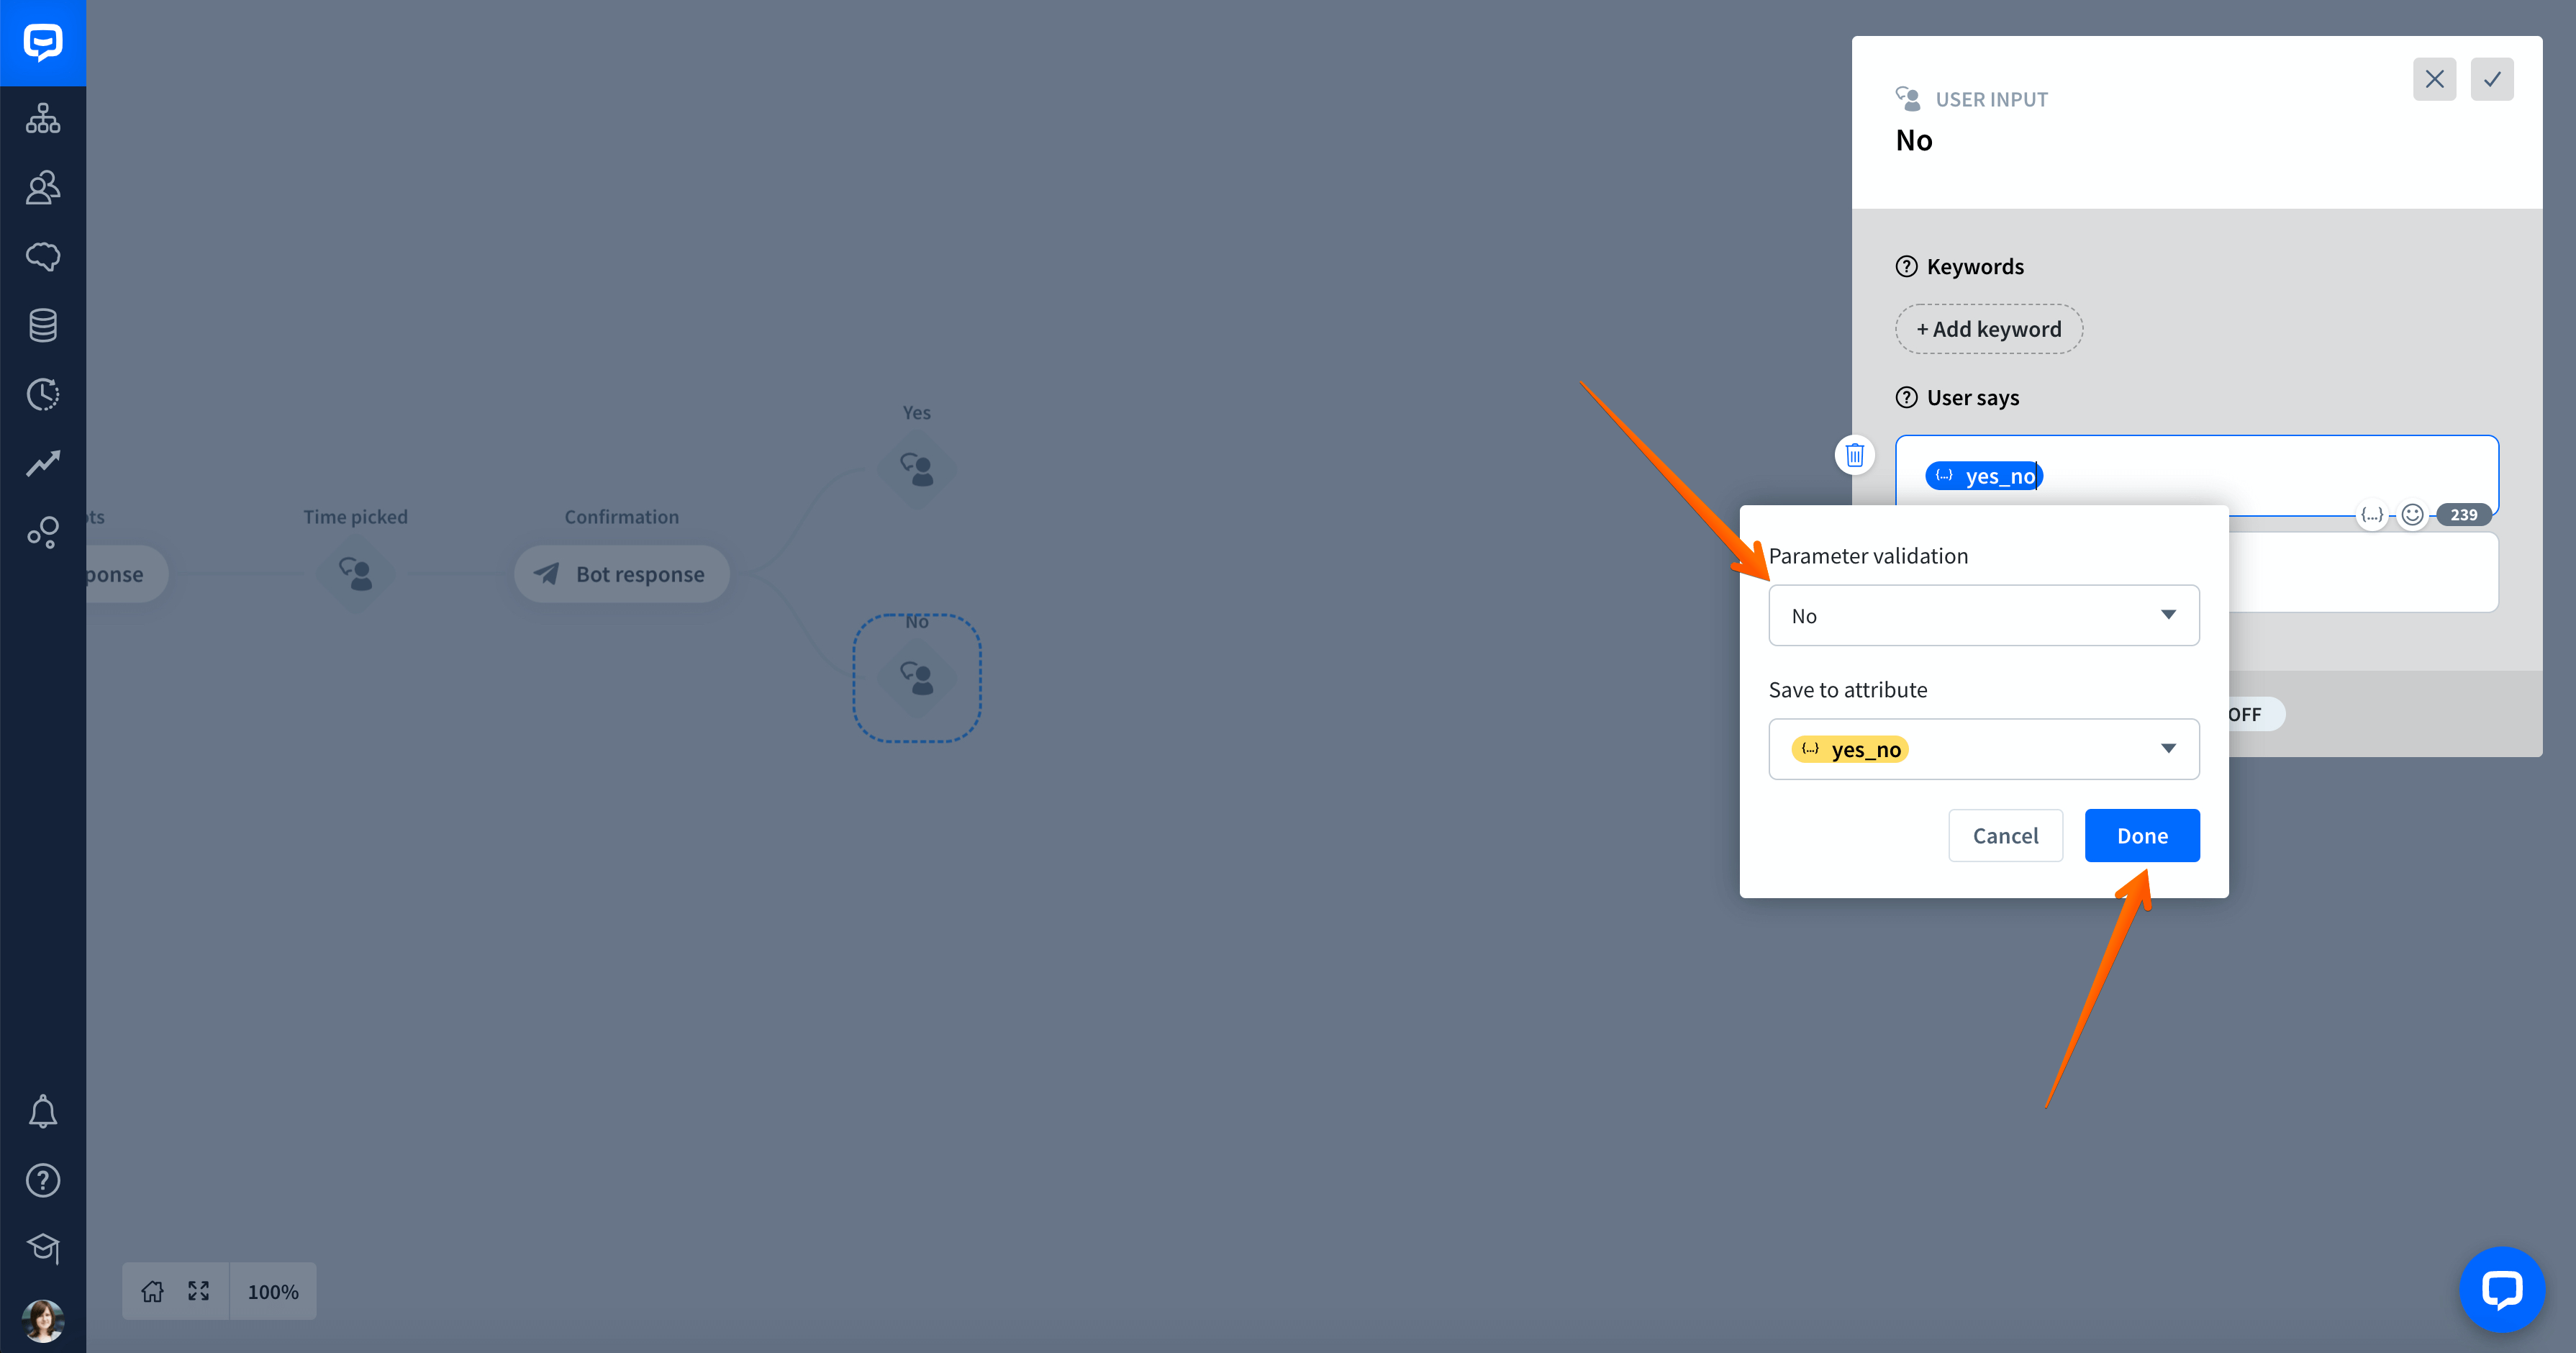
Similarly, you can do it for the No User input, but select No in the Parameter validation field.
-
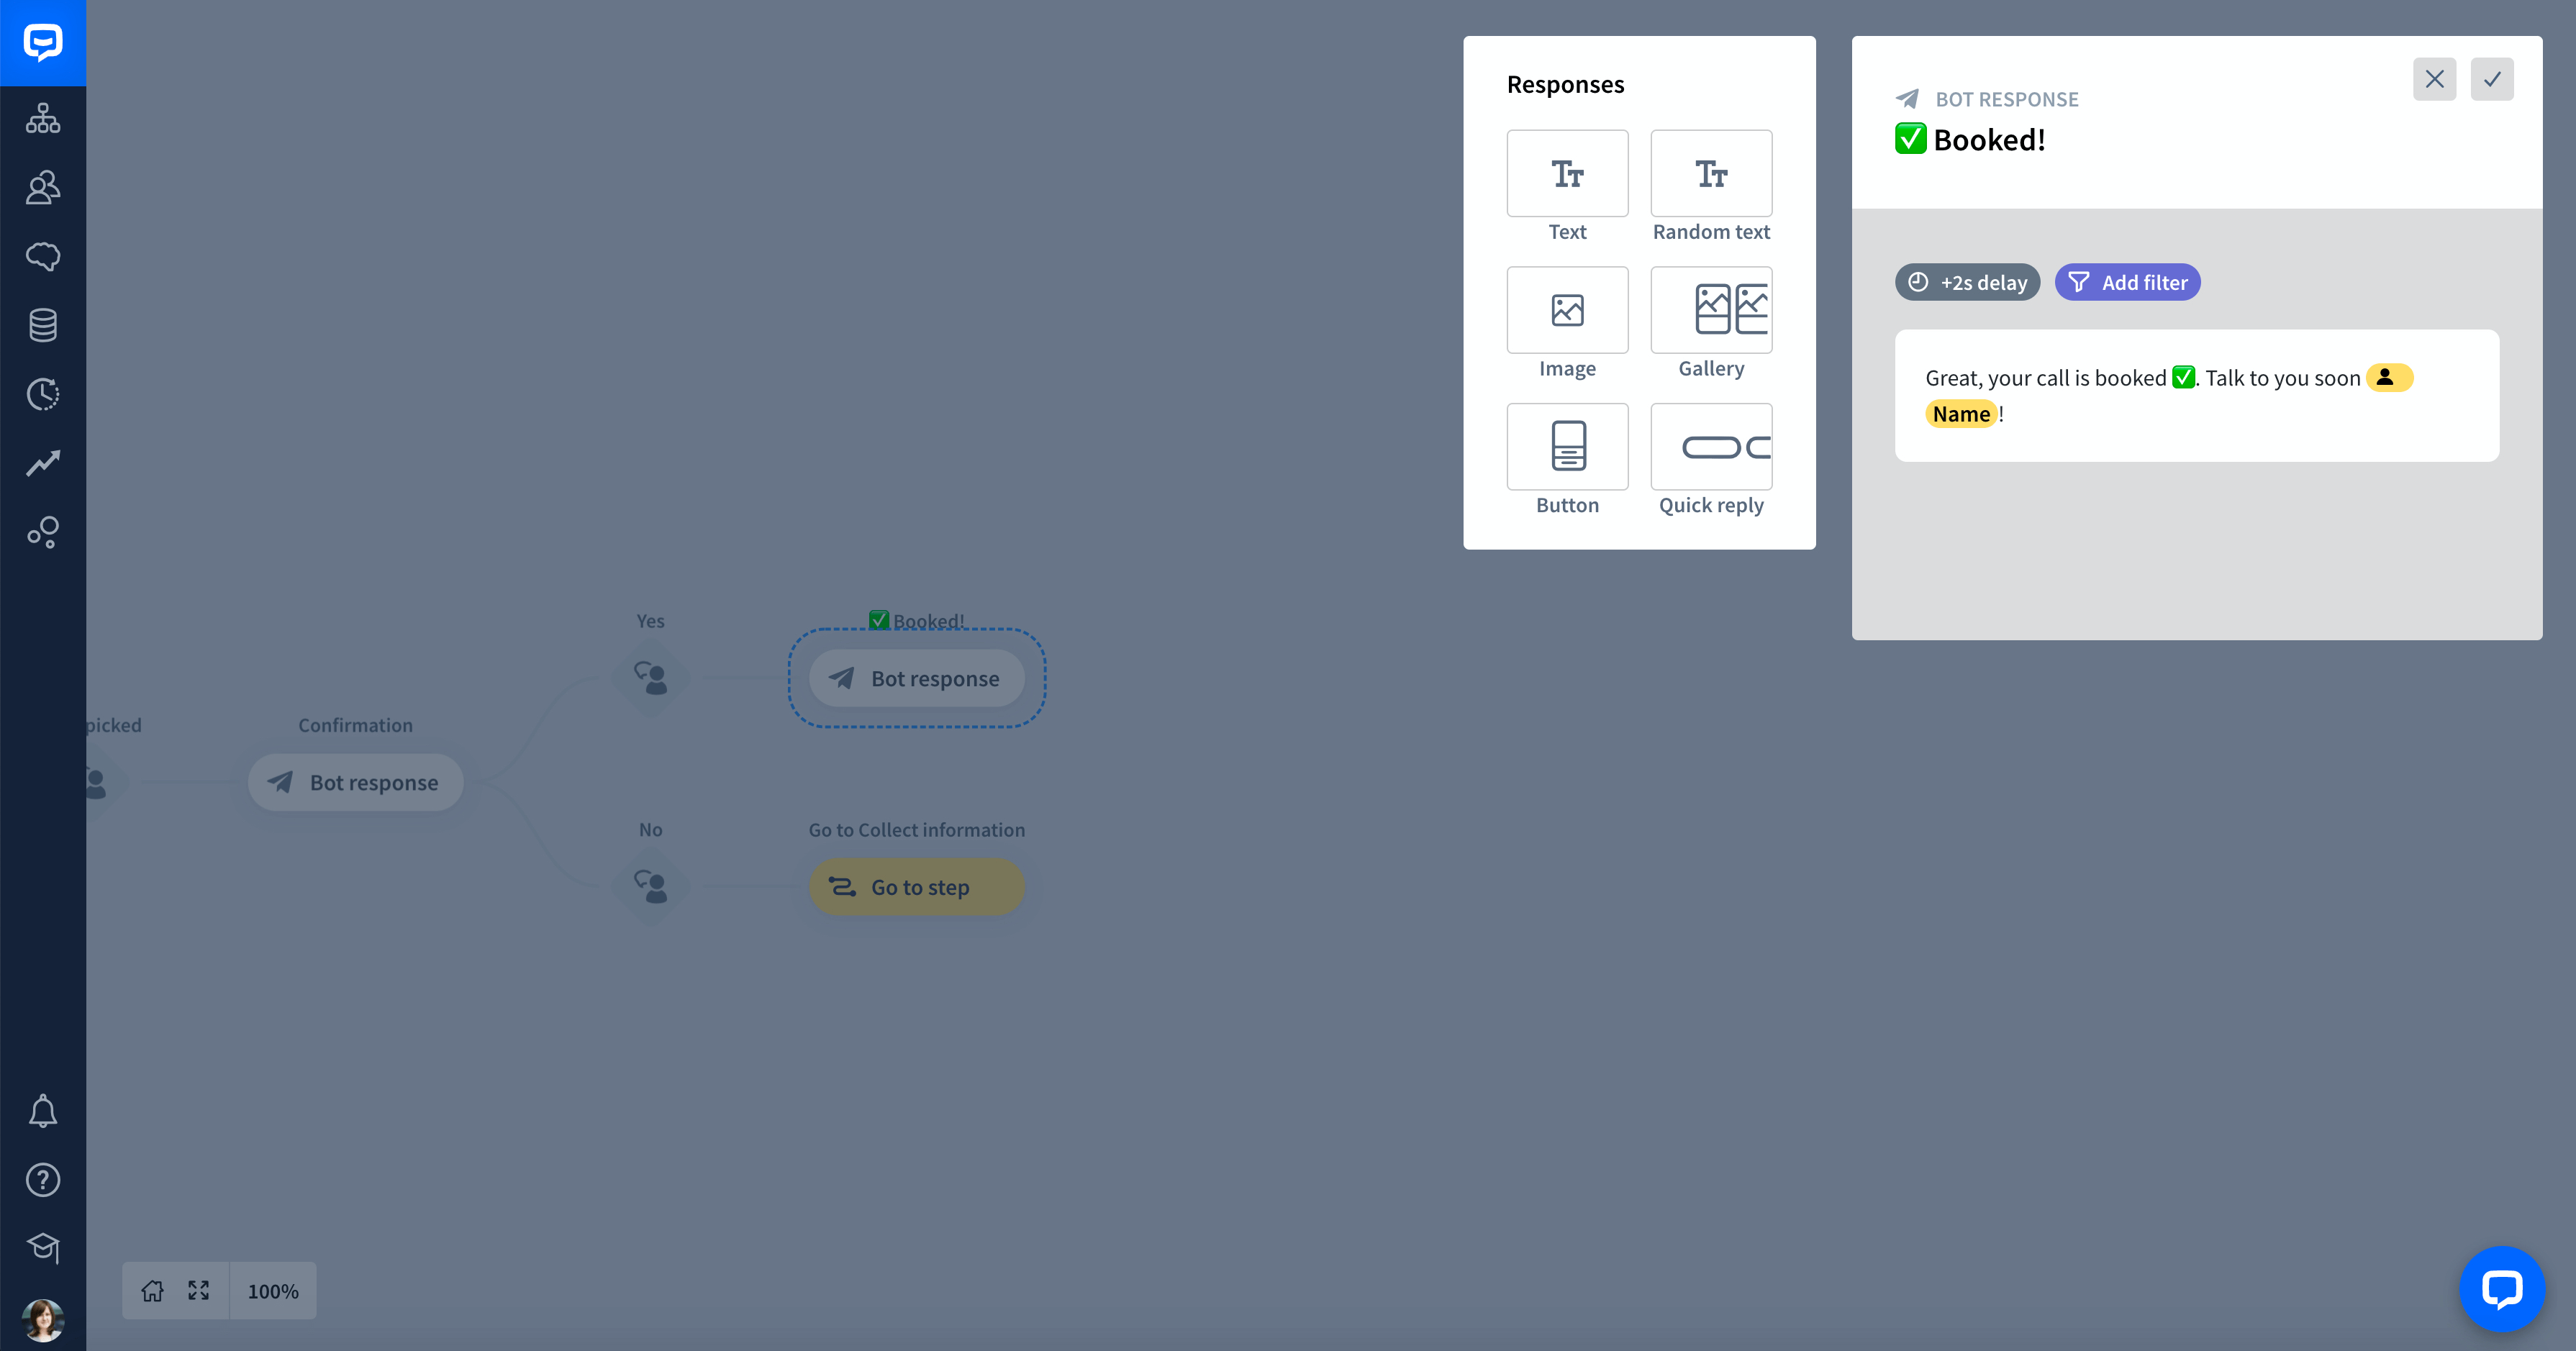
Now, assign responses or actions to our new interactions. The Yes query should redirect the user to the response with the booking confirmation.
-
The No query means that the user wants to make some corrections before scheduling a call. Use the Go to step action to collect information again in the Question block.

-
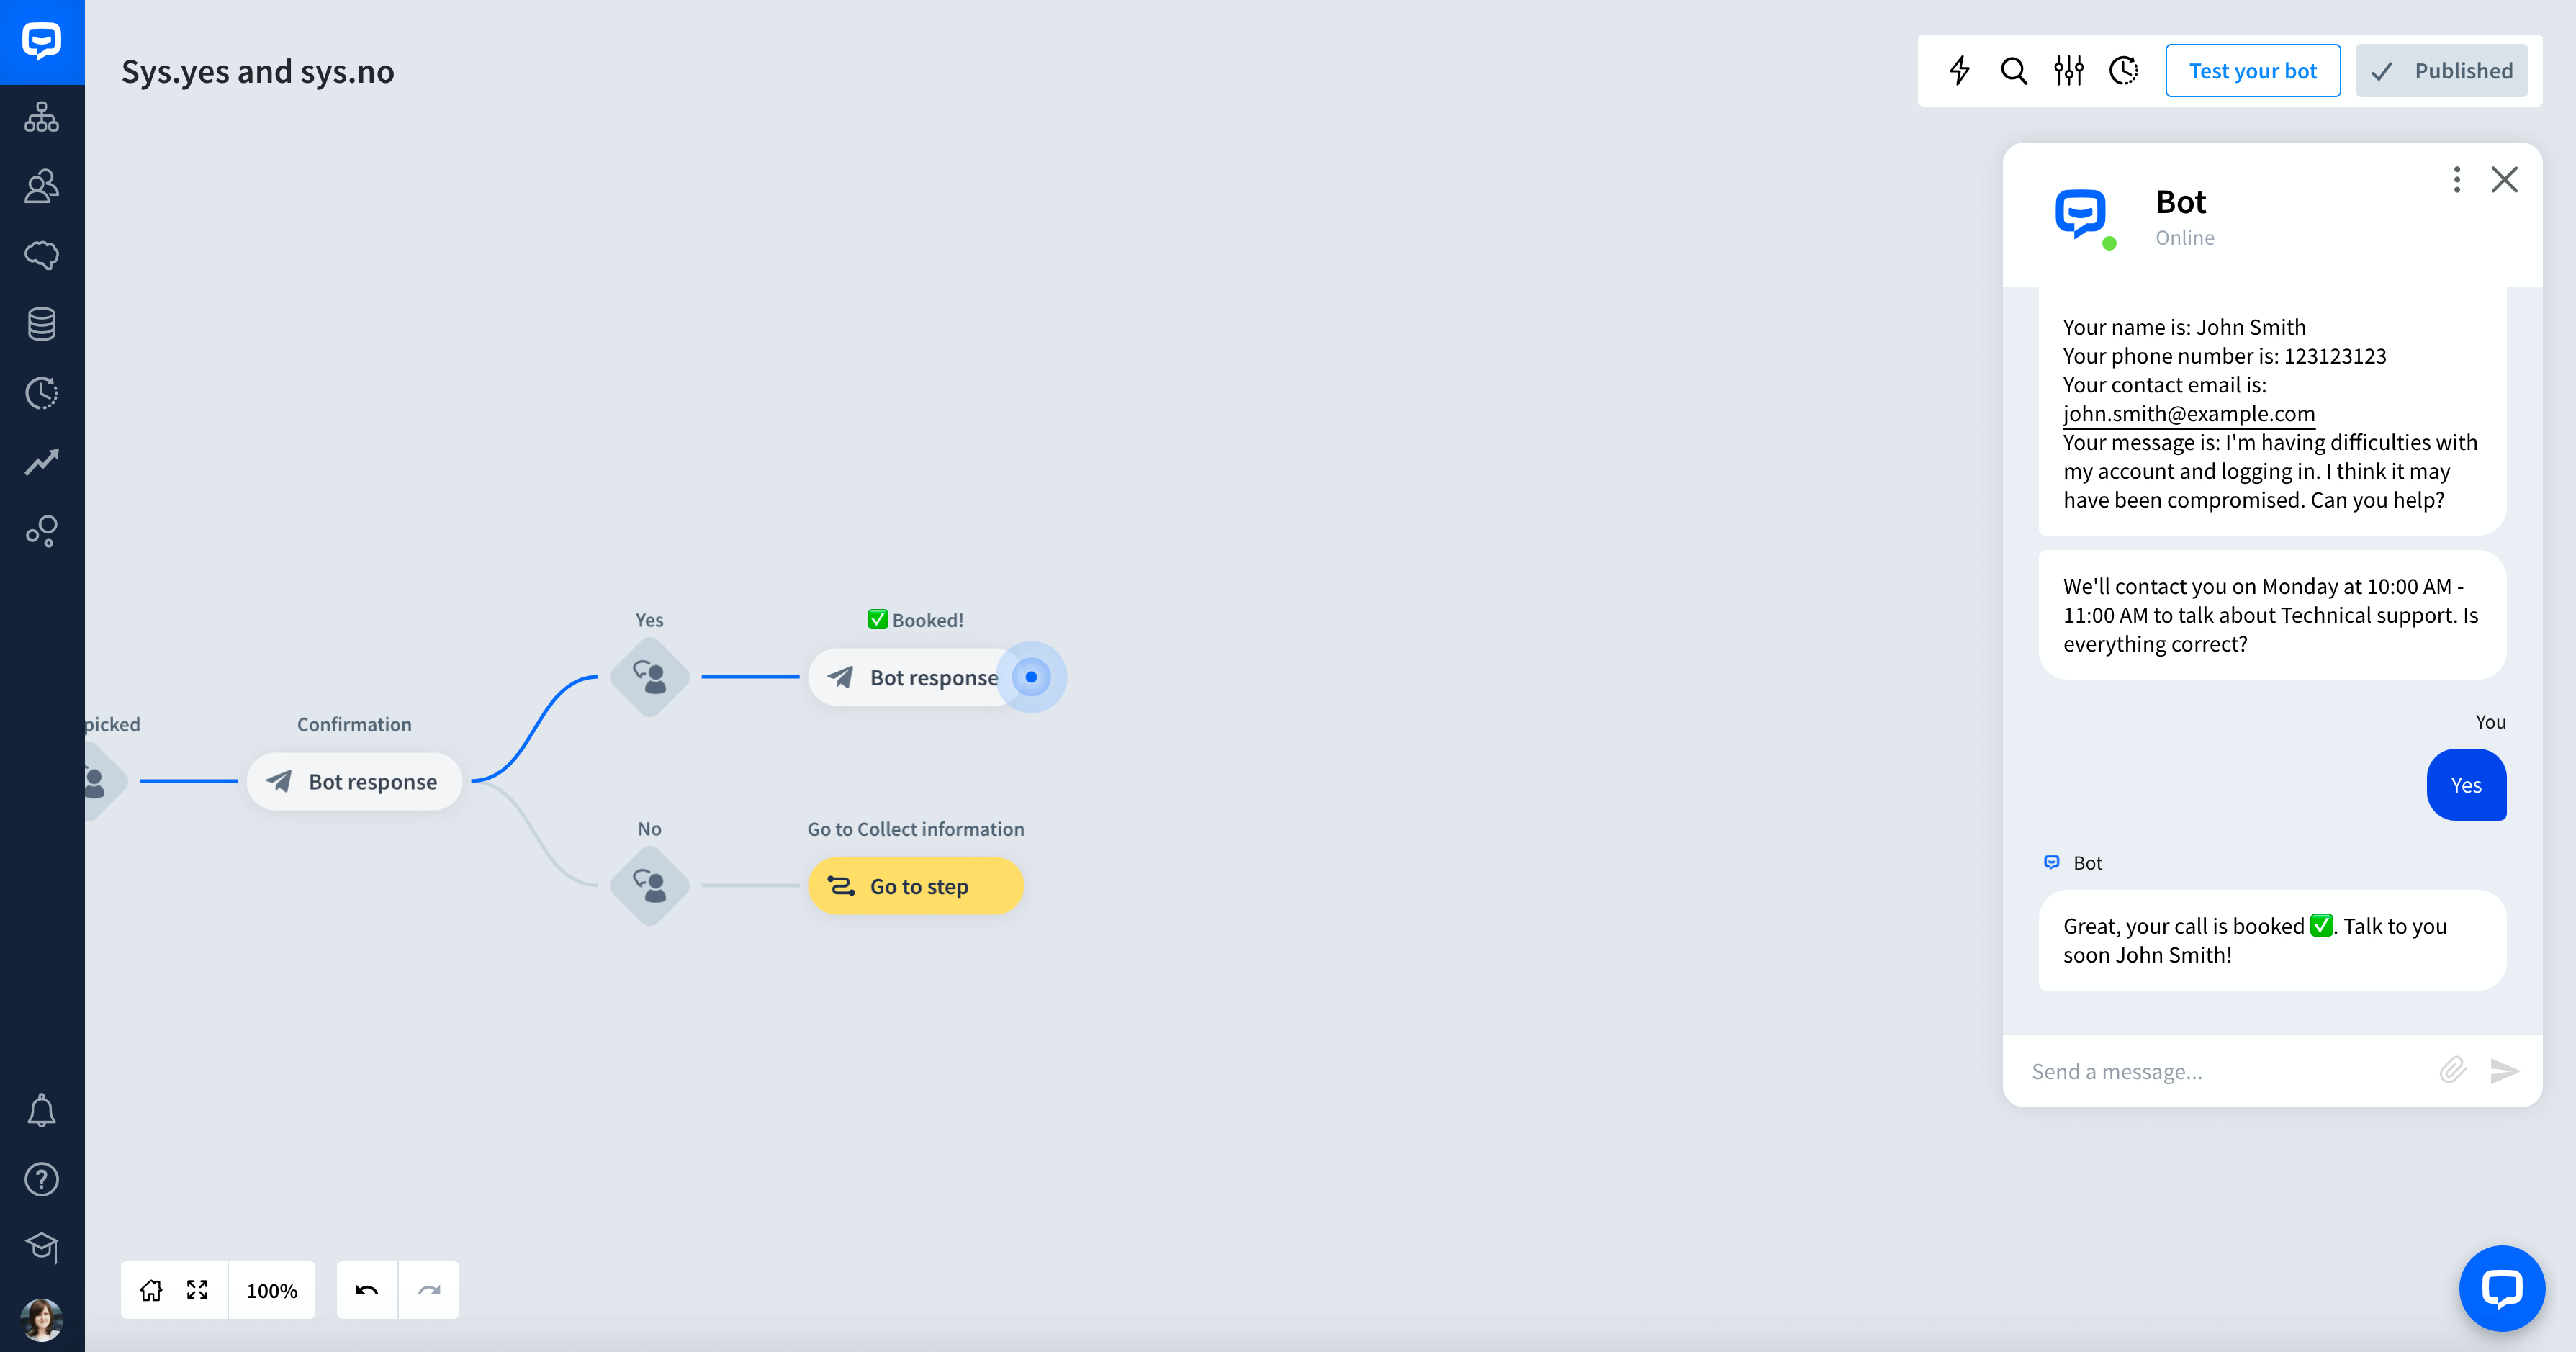
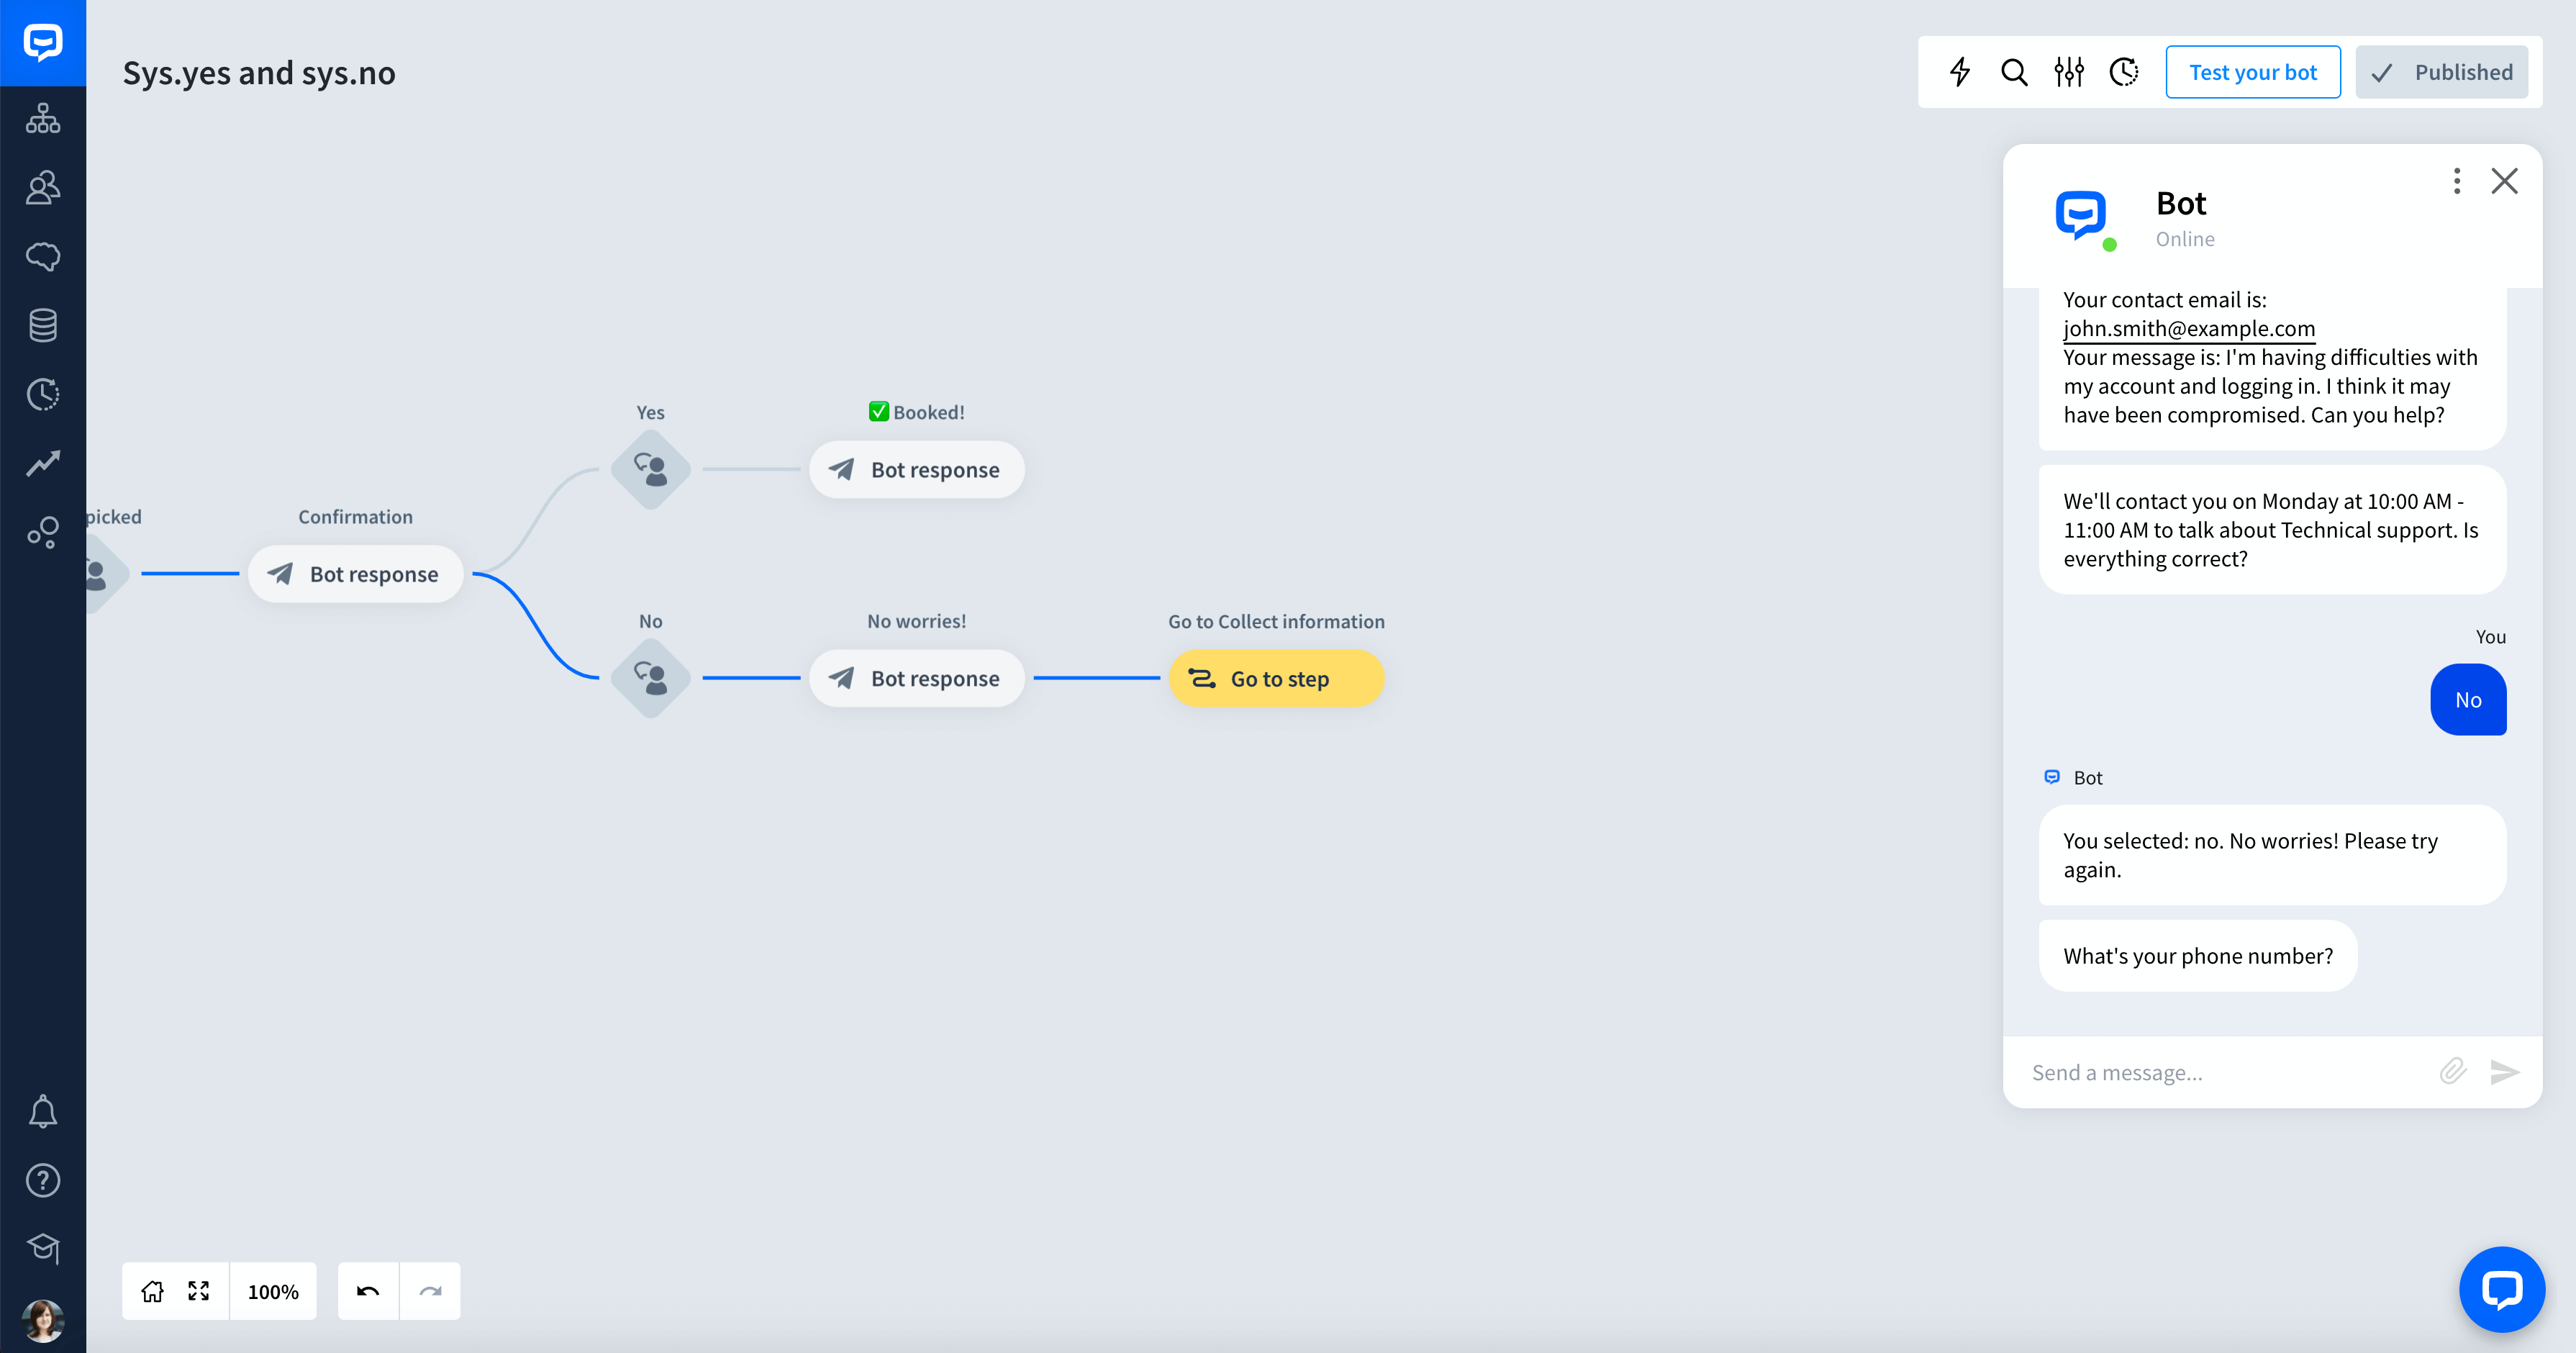
Save all your work and test the chatbot. It doesn’t matter whether you press a button or type your answer. Also, ChatBot will process both uppercase and lowercase letters.
-
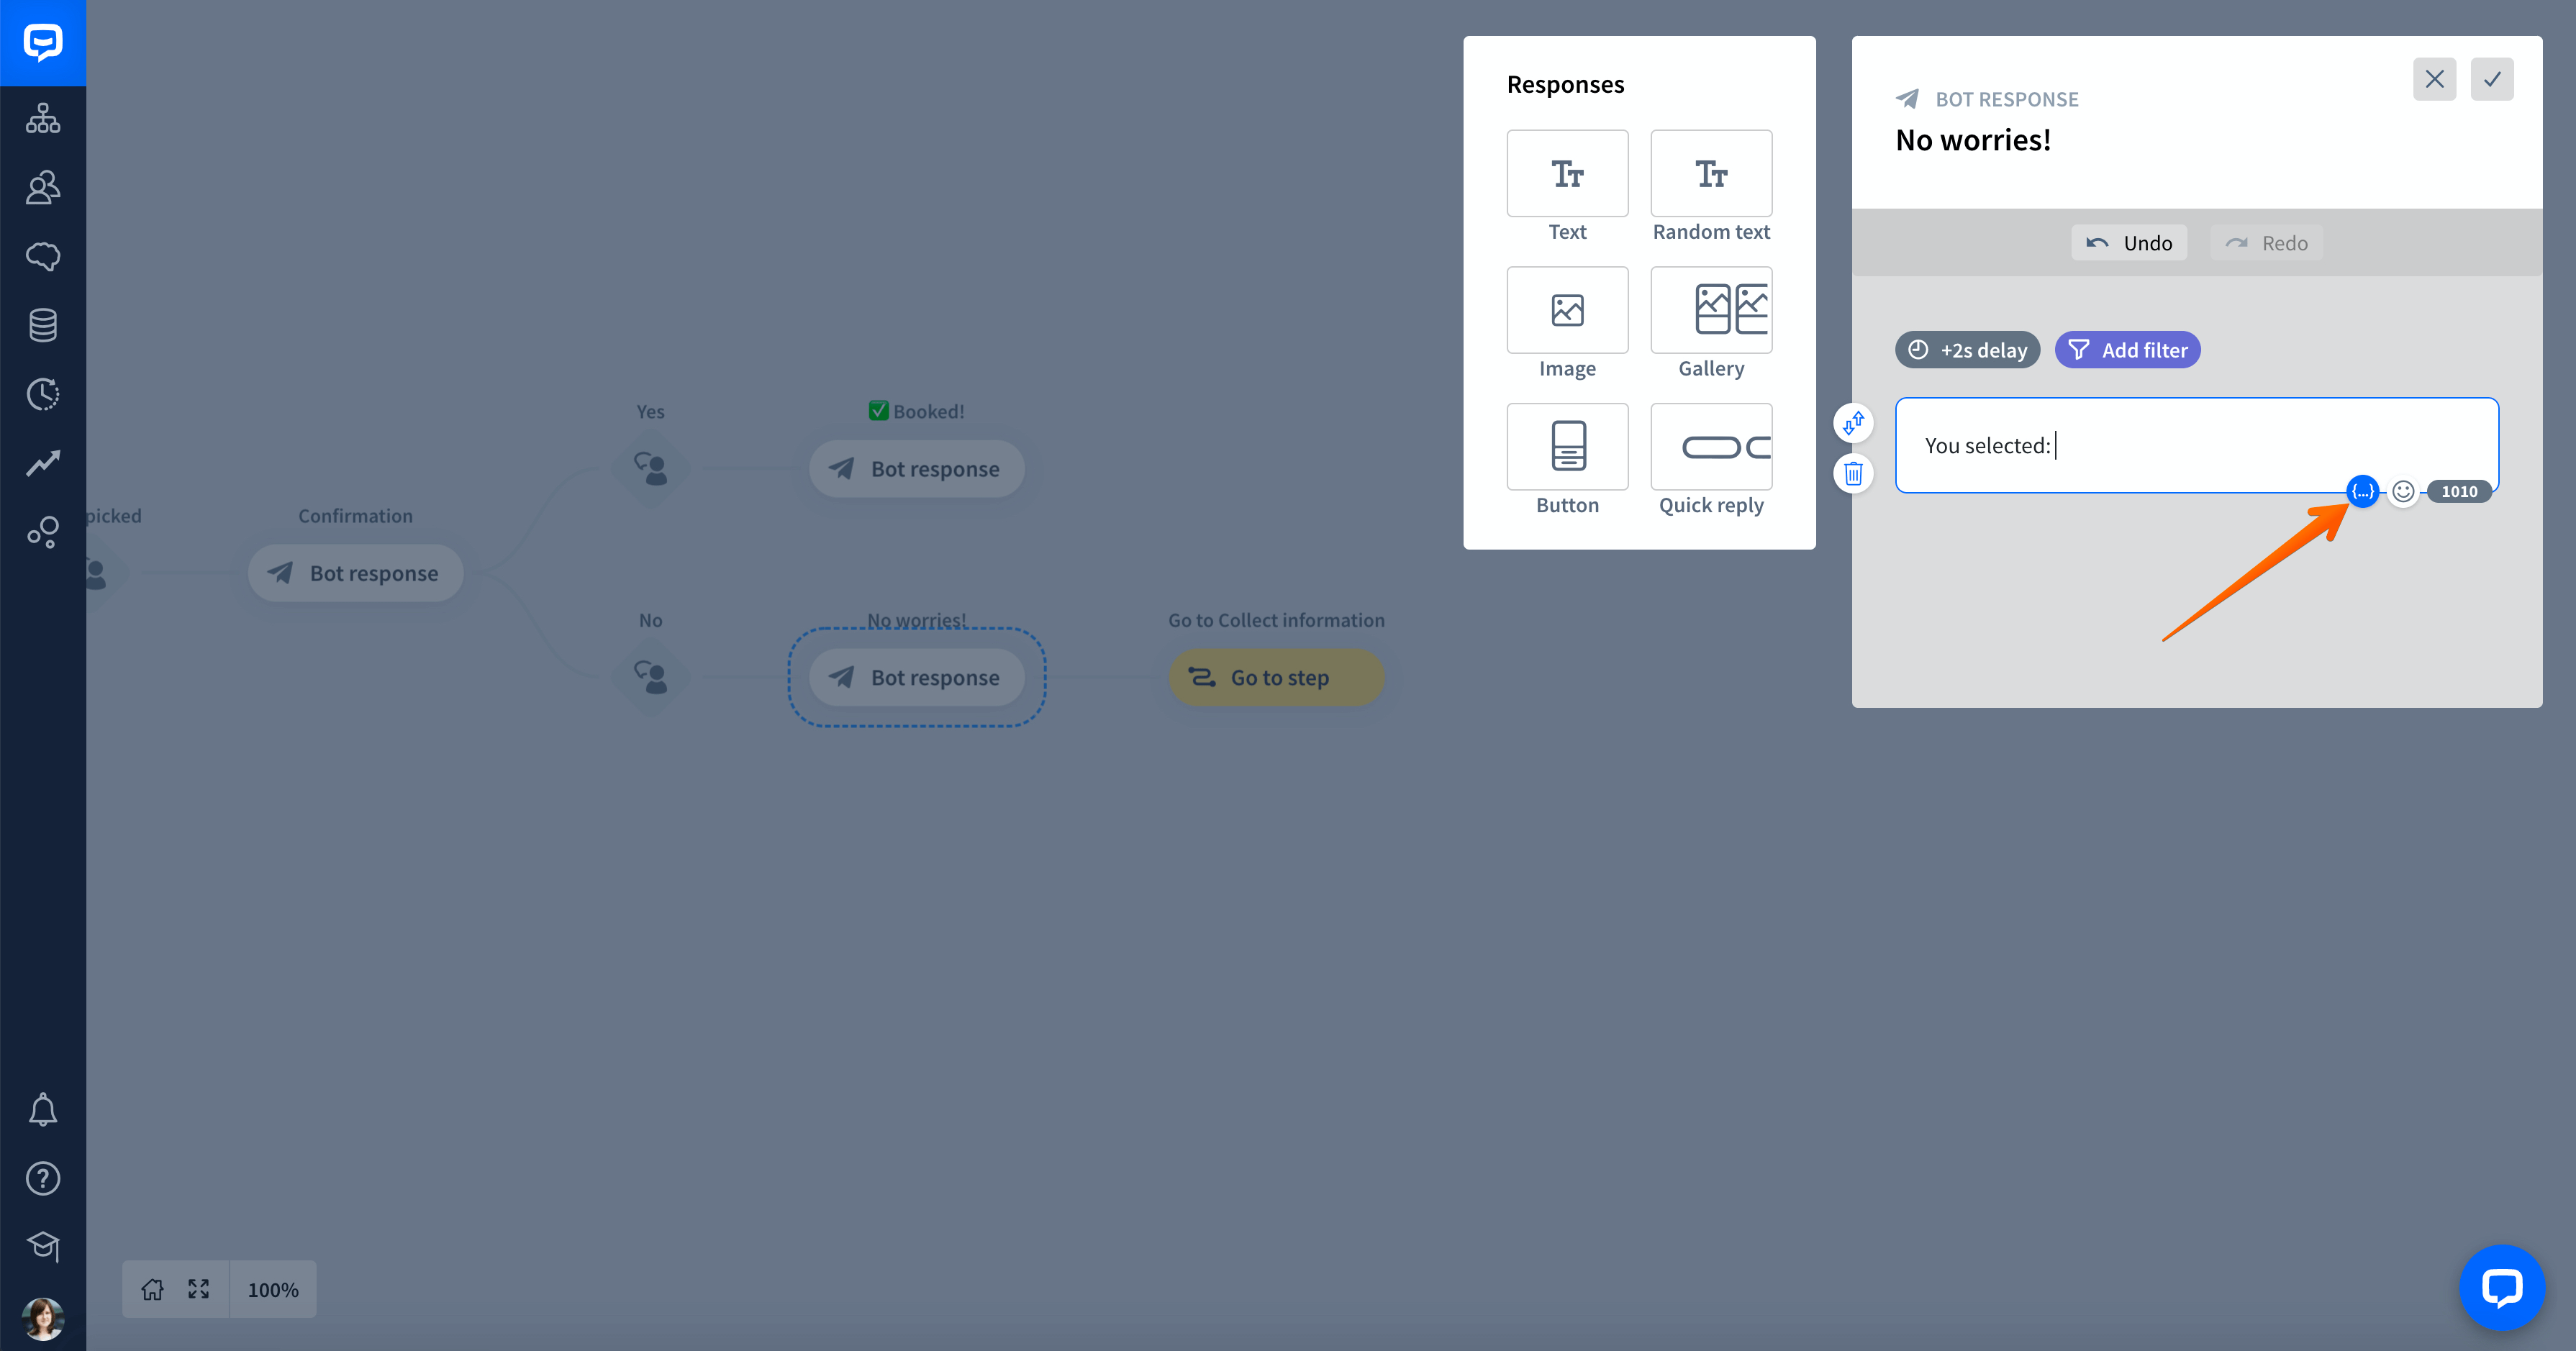
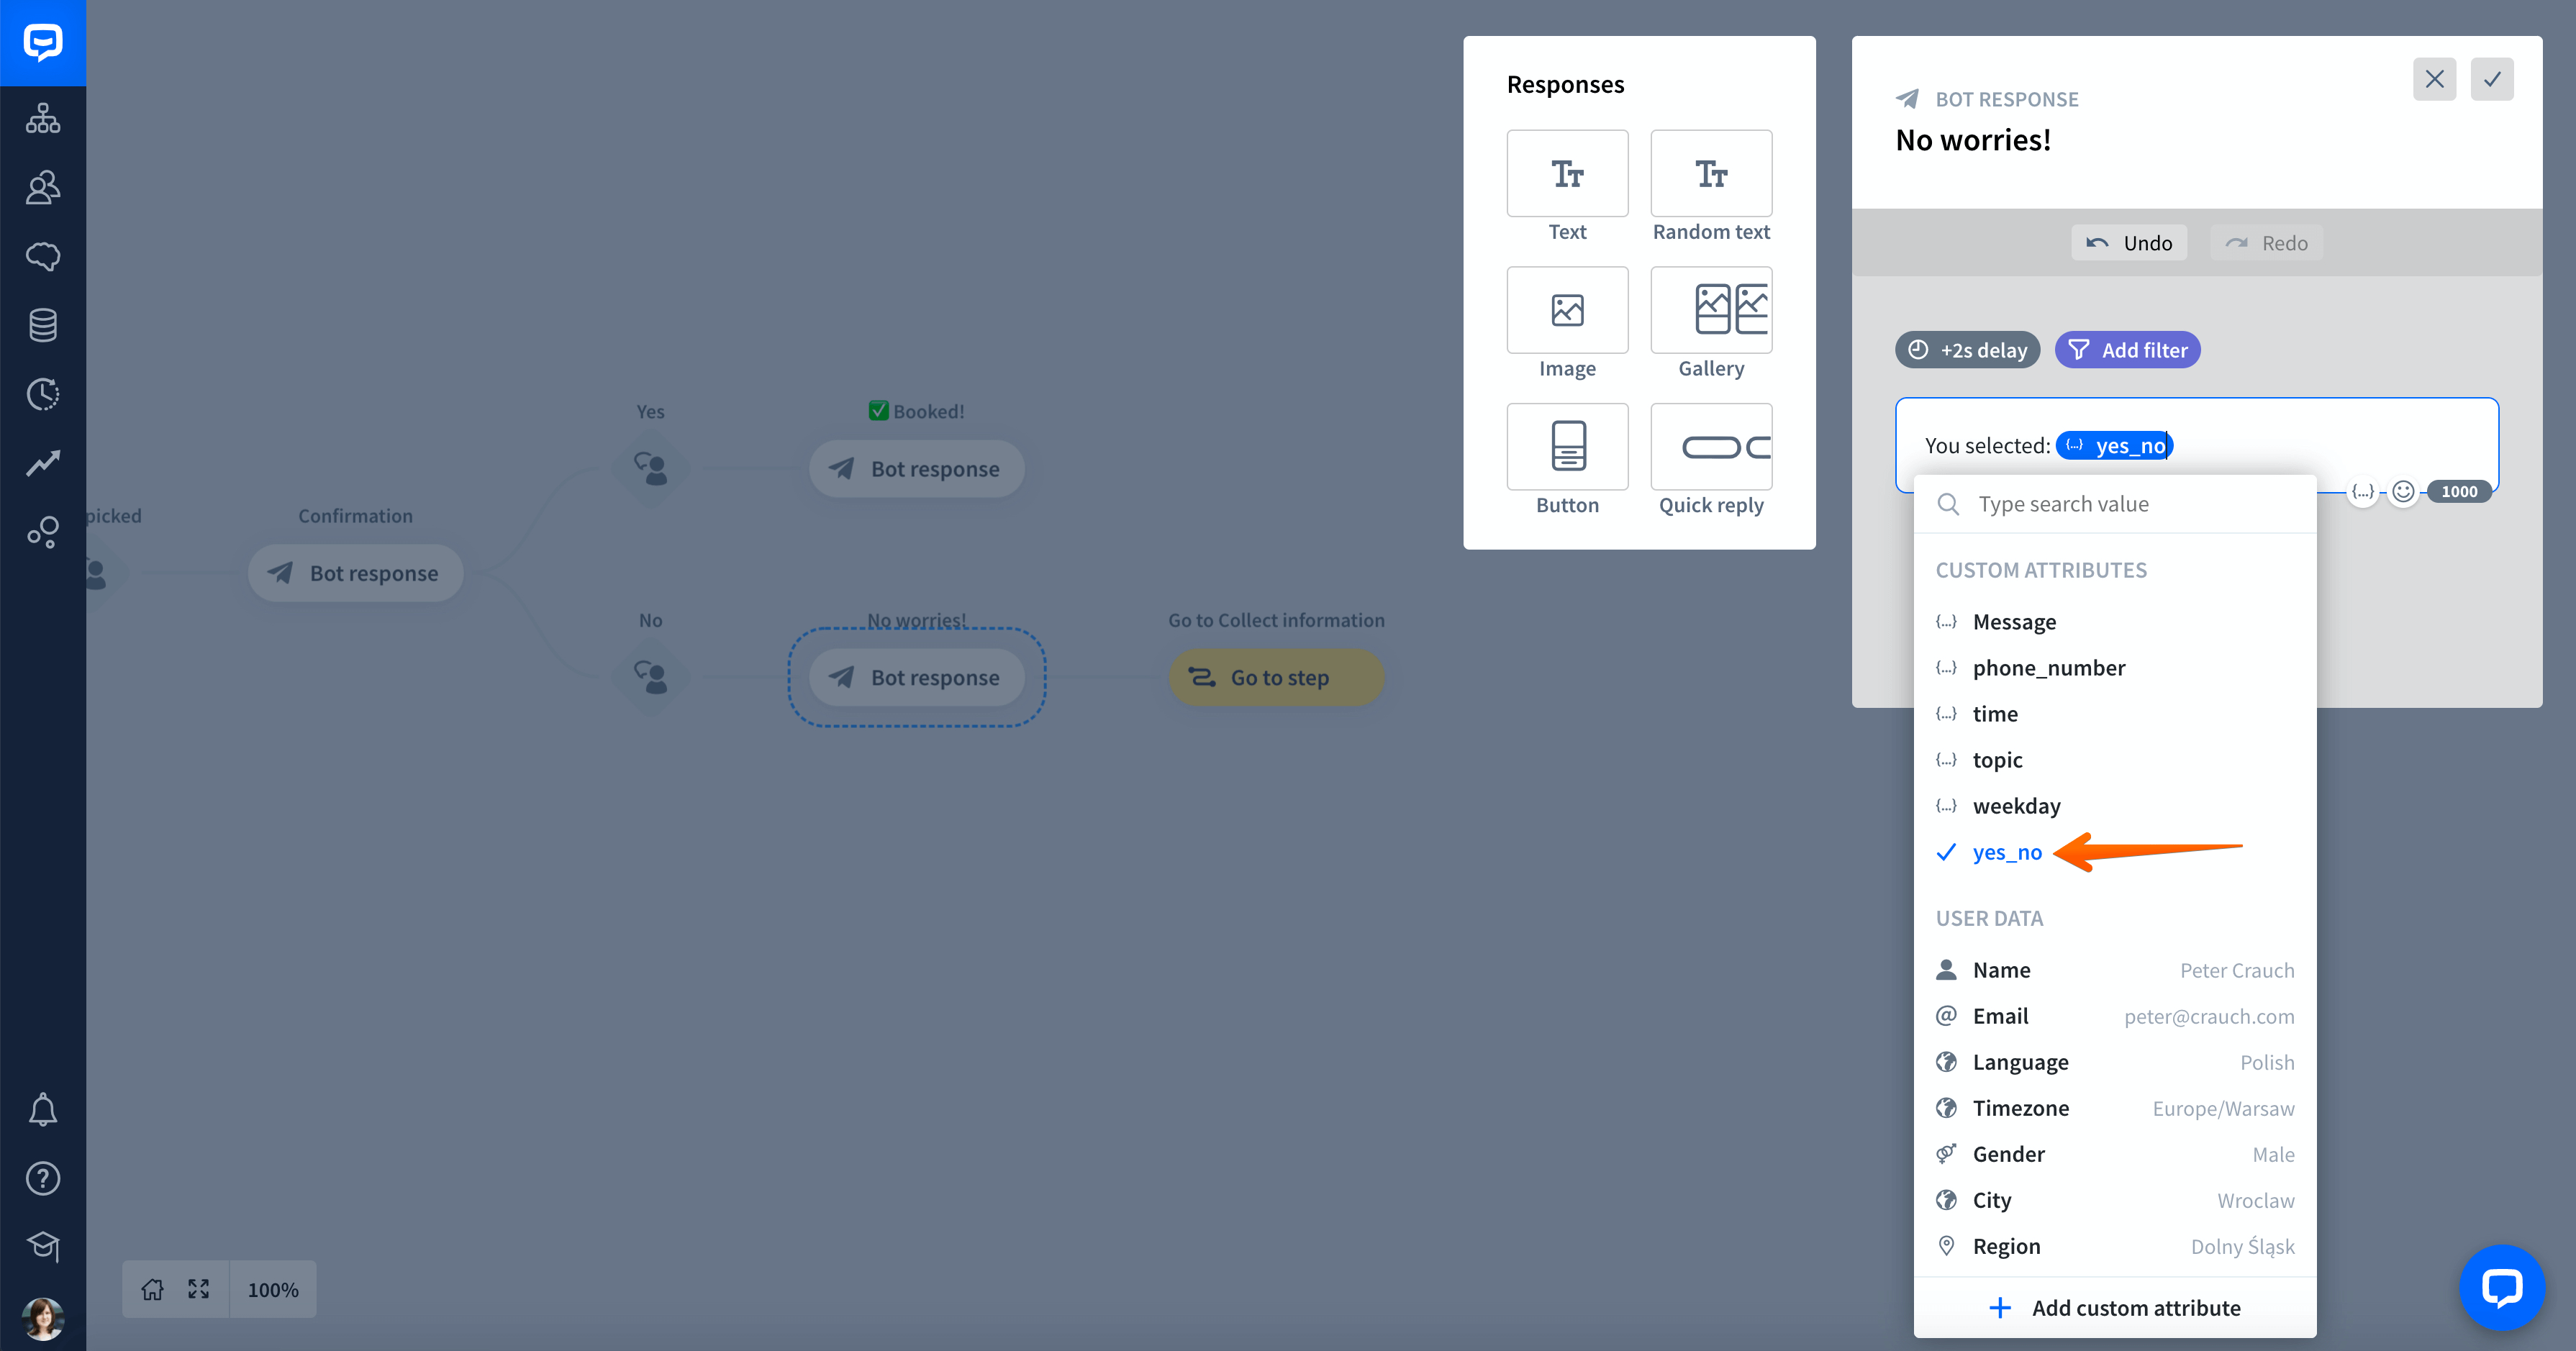
You can reuse the collected yes_no attribute in your Bot responses later in the chatbot. Add a Bot response before the Go to step action. Then, add a Text response. Once again, type double curly brackets {{ or click on the curly brackets symbol to view the available attributes.
-
Select yes_no from the list of custom attributes.

-
Save all the changes and test the chatbot once again.
Read more:
