Collect customer emails and pass them to your database.
The system email entity lets you validate the email address provided by the user on chat.
How does it work?
The email entity must contain @ and end with .xyz (e.g., abc@def.xyz). When the user enters their email, the chatbot compares it with the email entity and checks whether it has the correct format.
-
If the format of an email entered by the user is correct, the chatbot can save it as an attribute.
-
If the format of an email is wrong, the chatbot can ask the user to correct it.
Thanks to the email entity, your chatbot can confirm data, send delivery tracking codes, or enable the user to set up their account. Once collected, you can pass the gathered data to external services and use it to stay in touch with your audience.
How to use email entity
Imagine you use a chatbot to collect leads. You can use the email entity to capture customer emails.
-
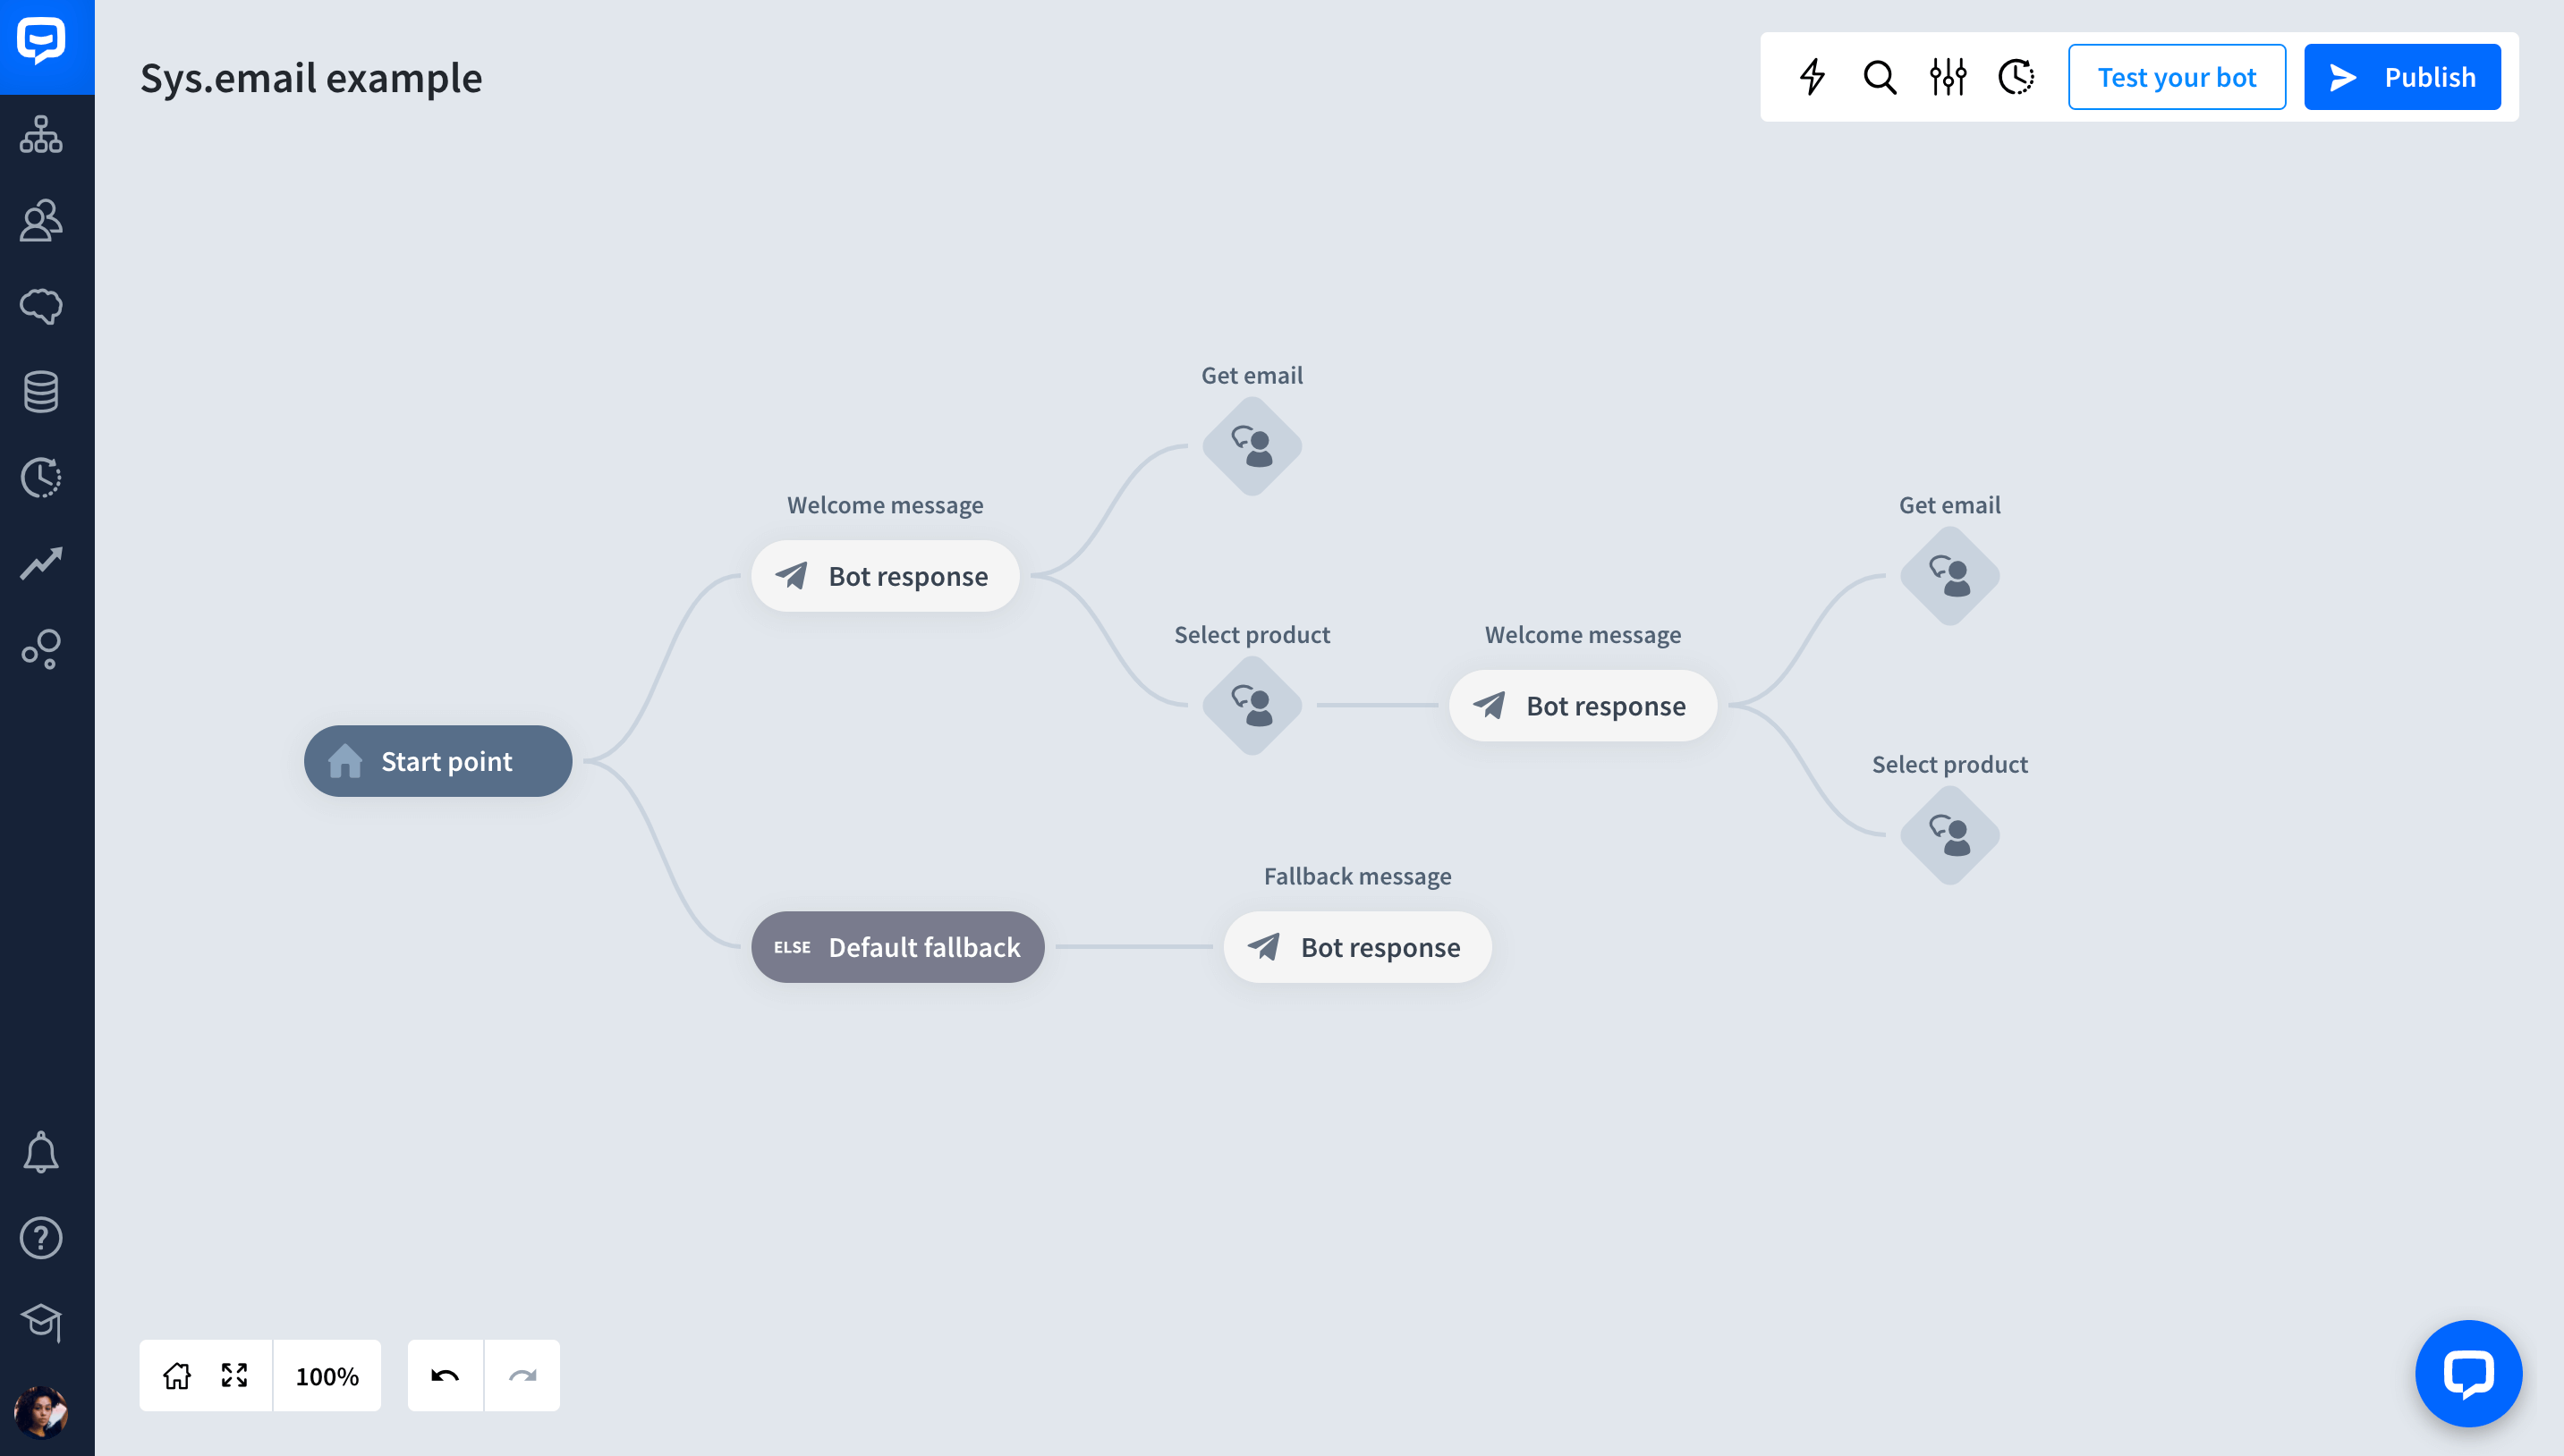
Open a Story you will use to collect email addresses from your users.
-
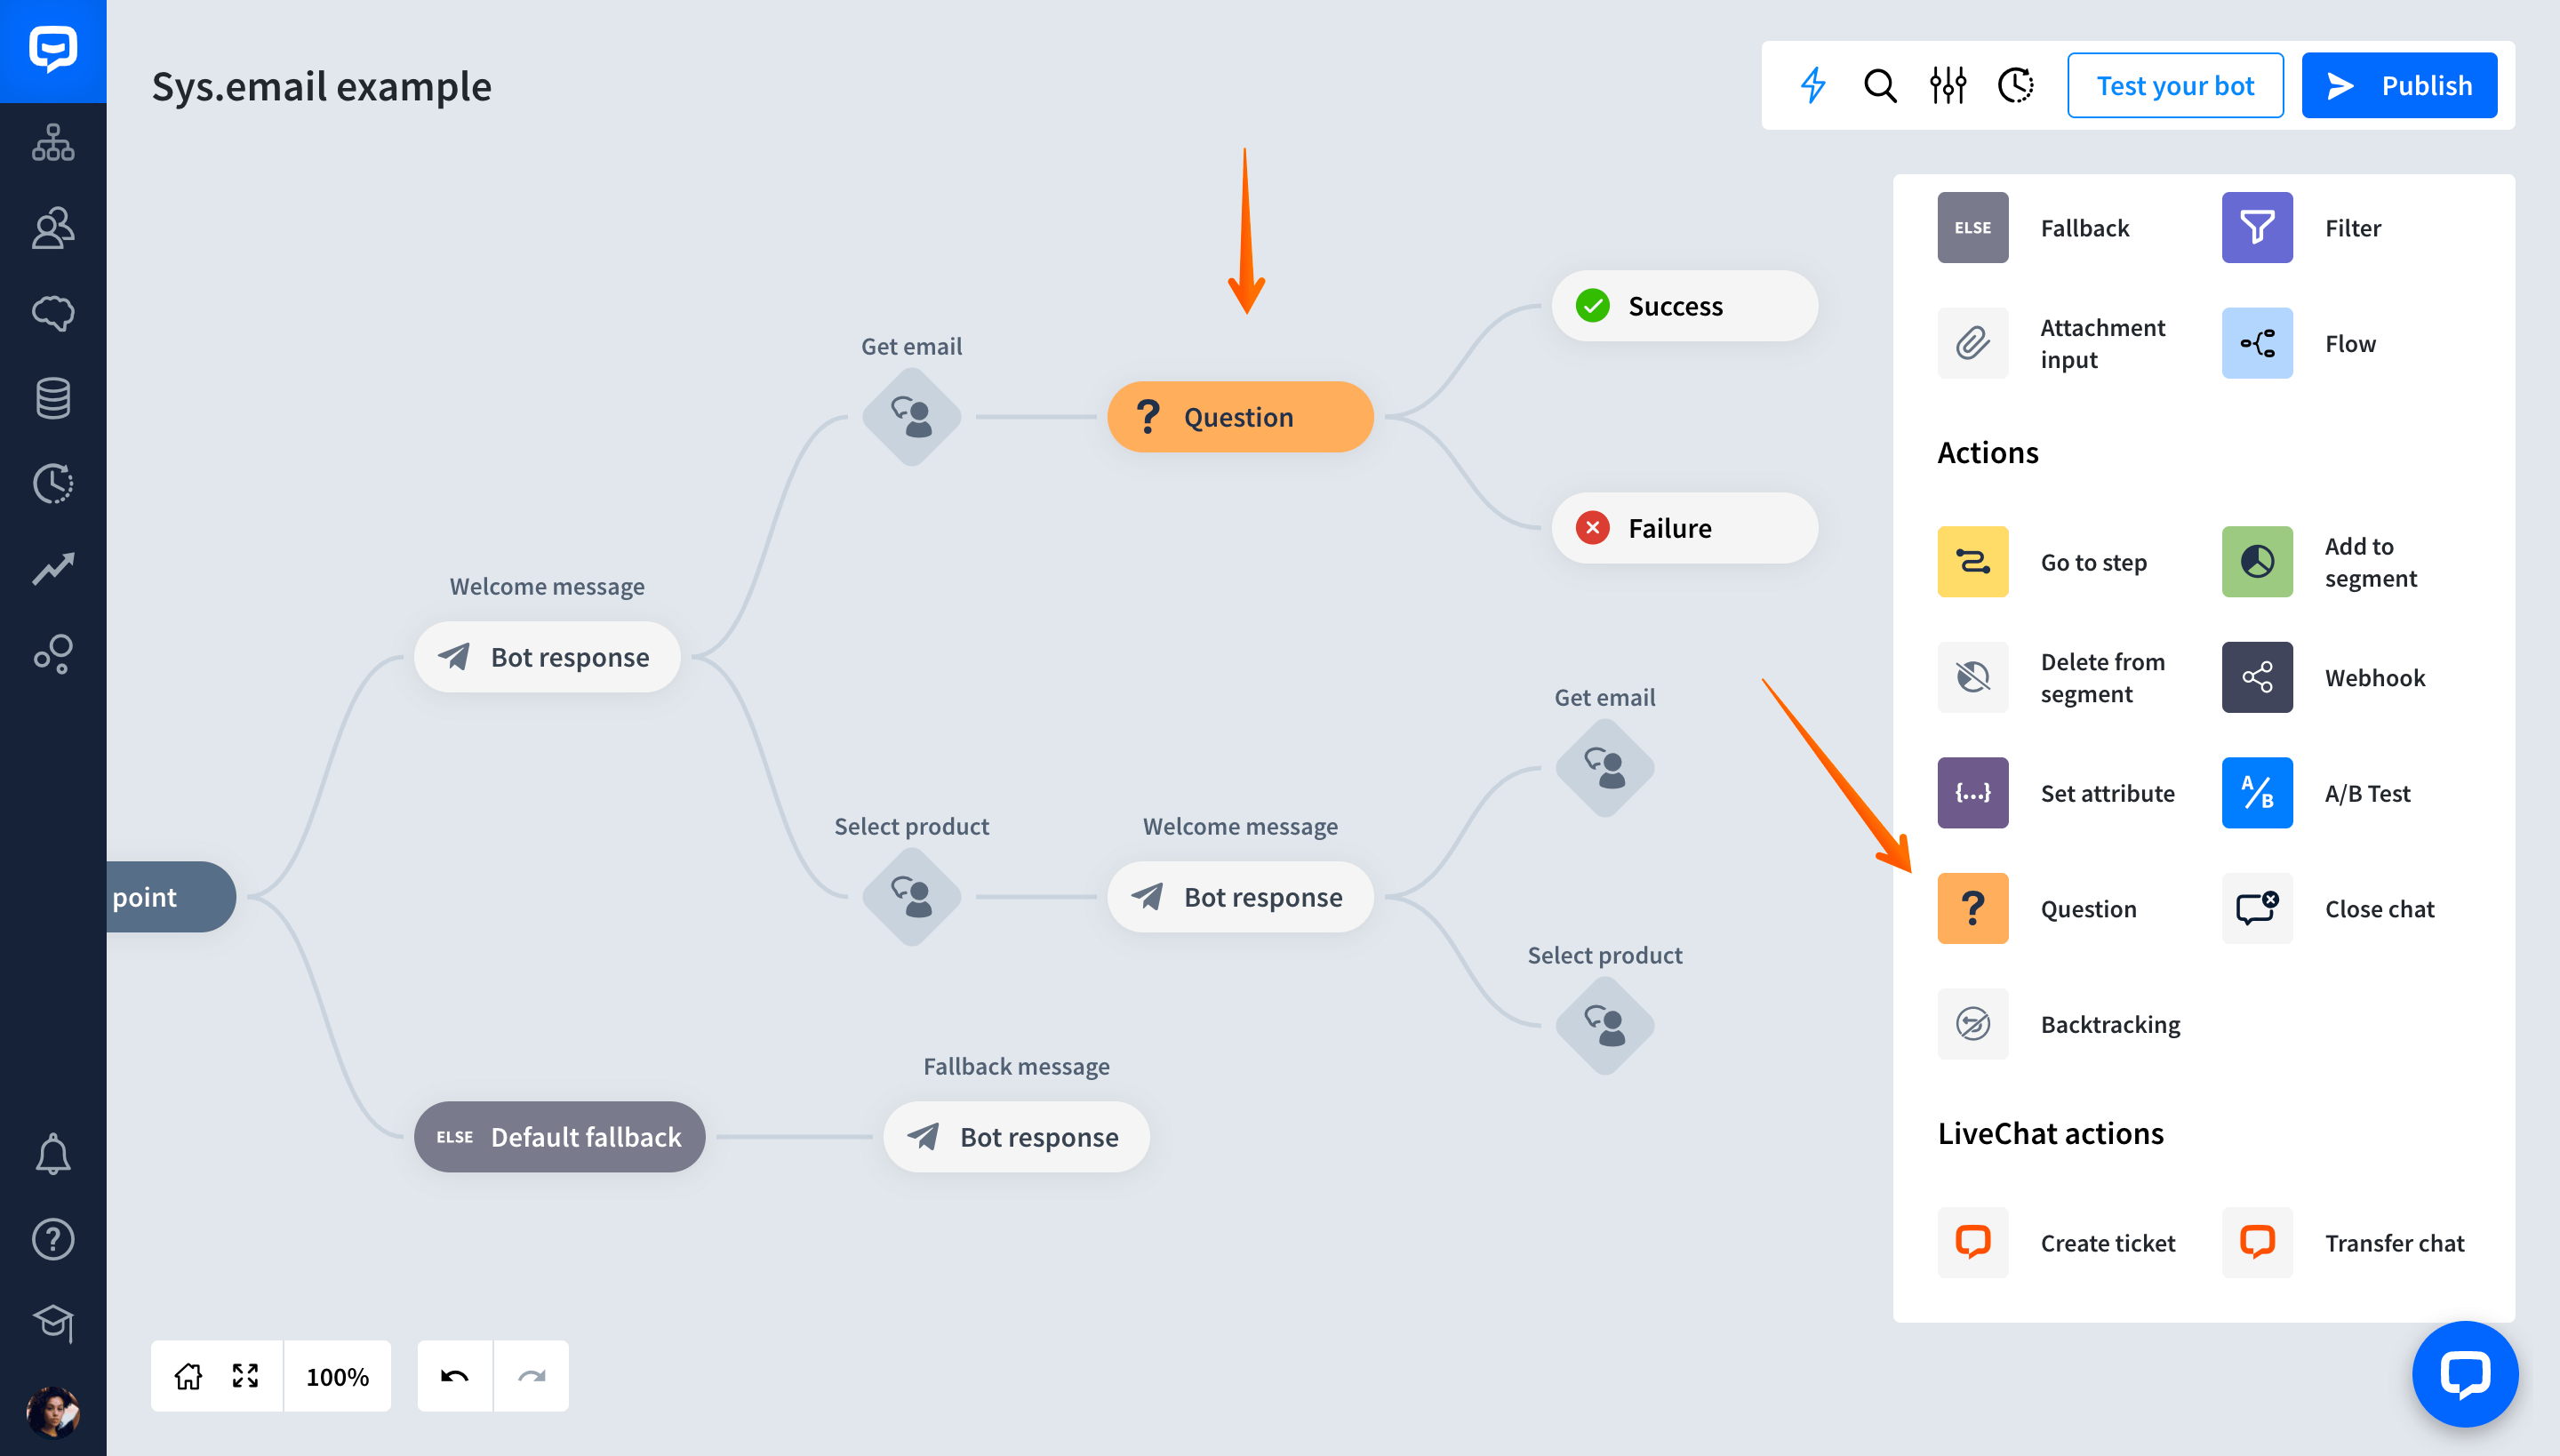
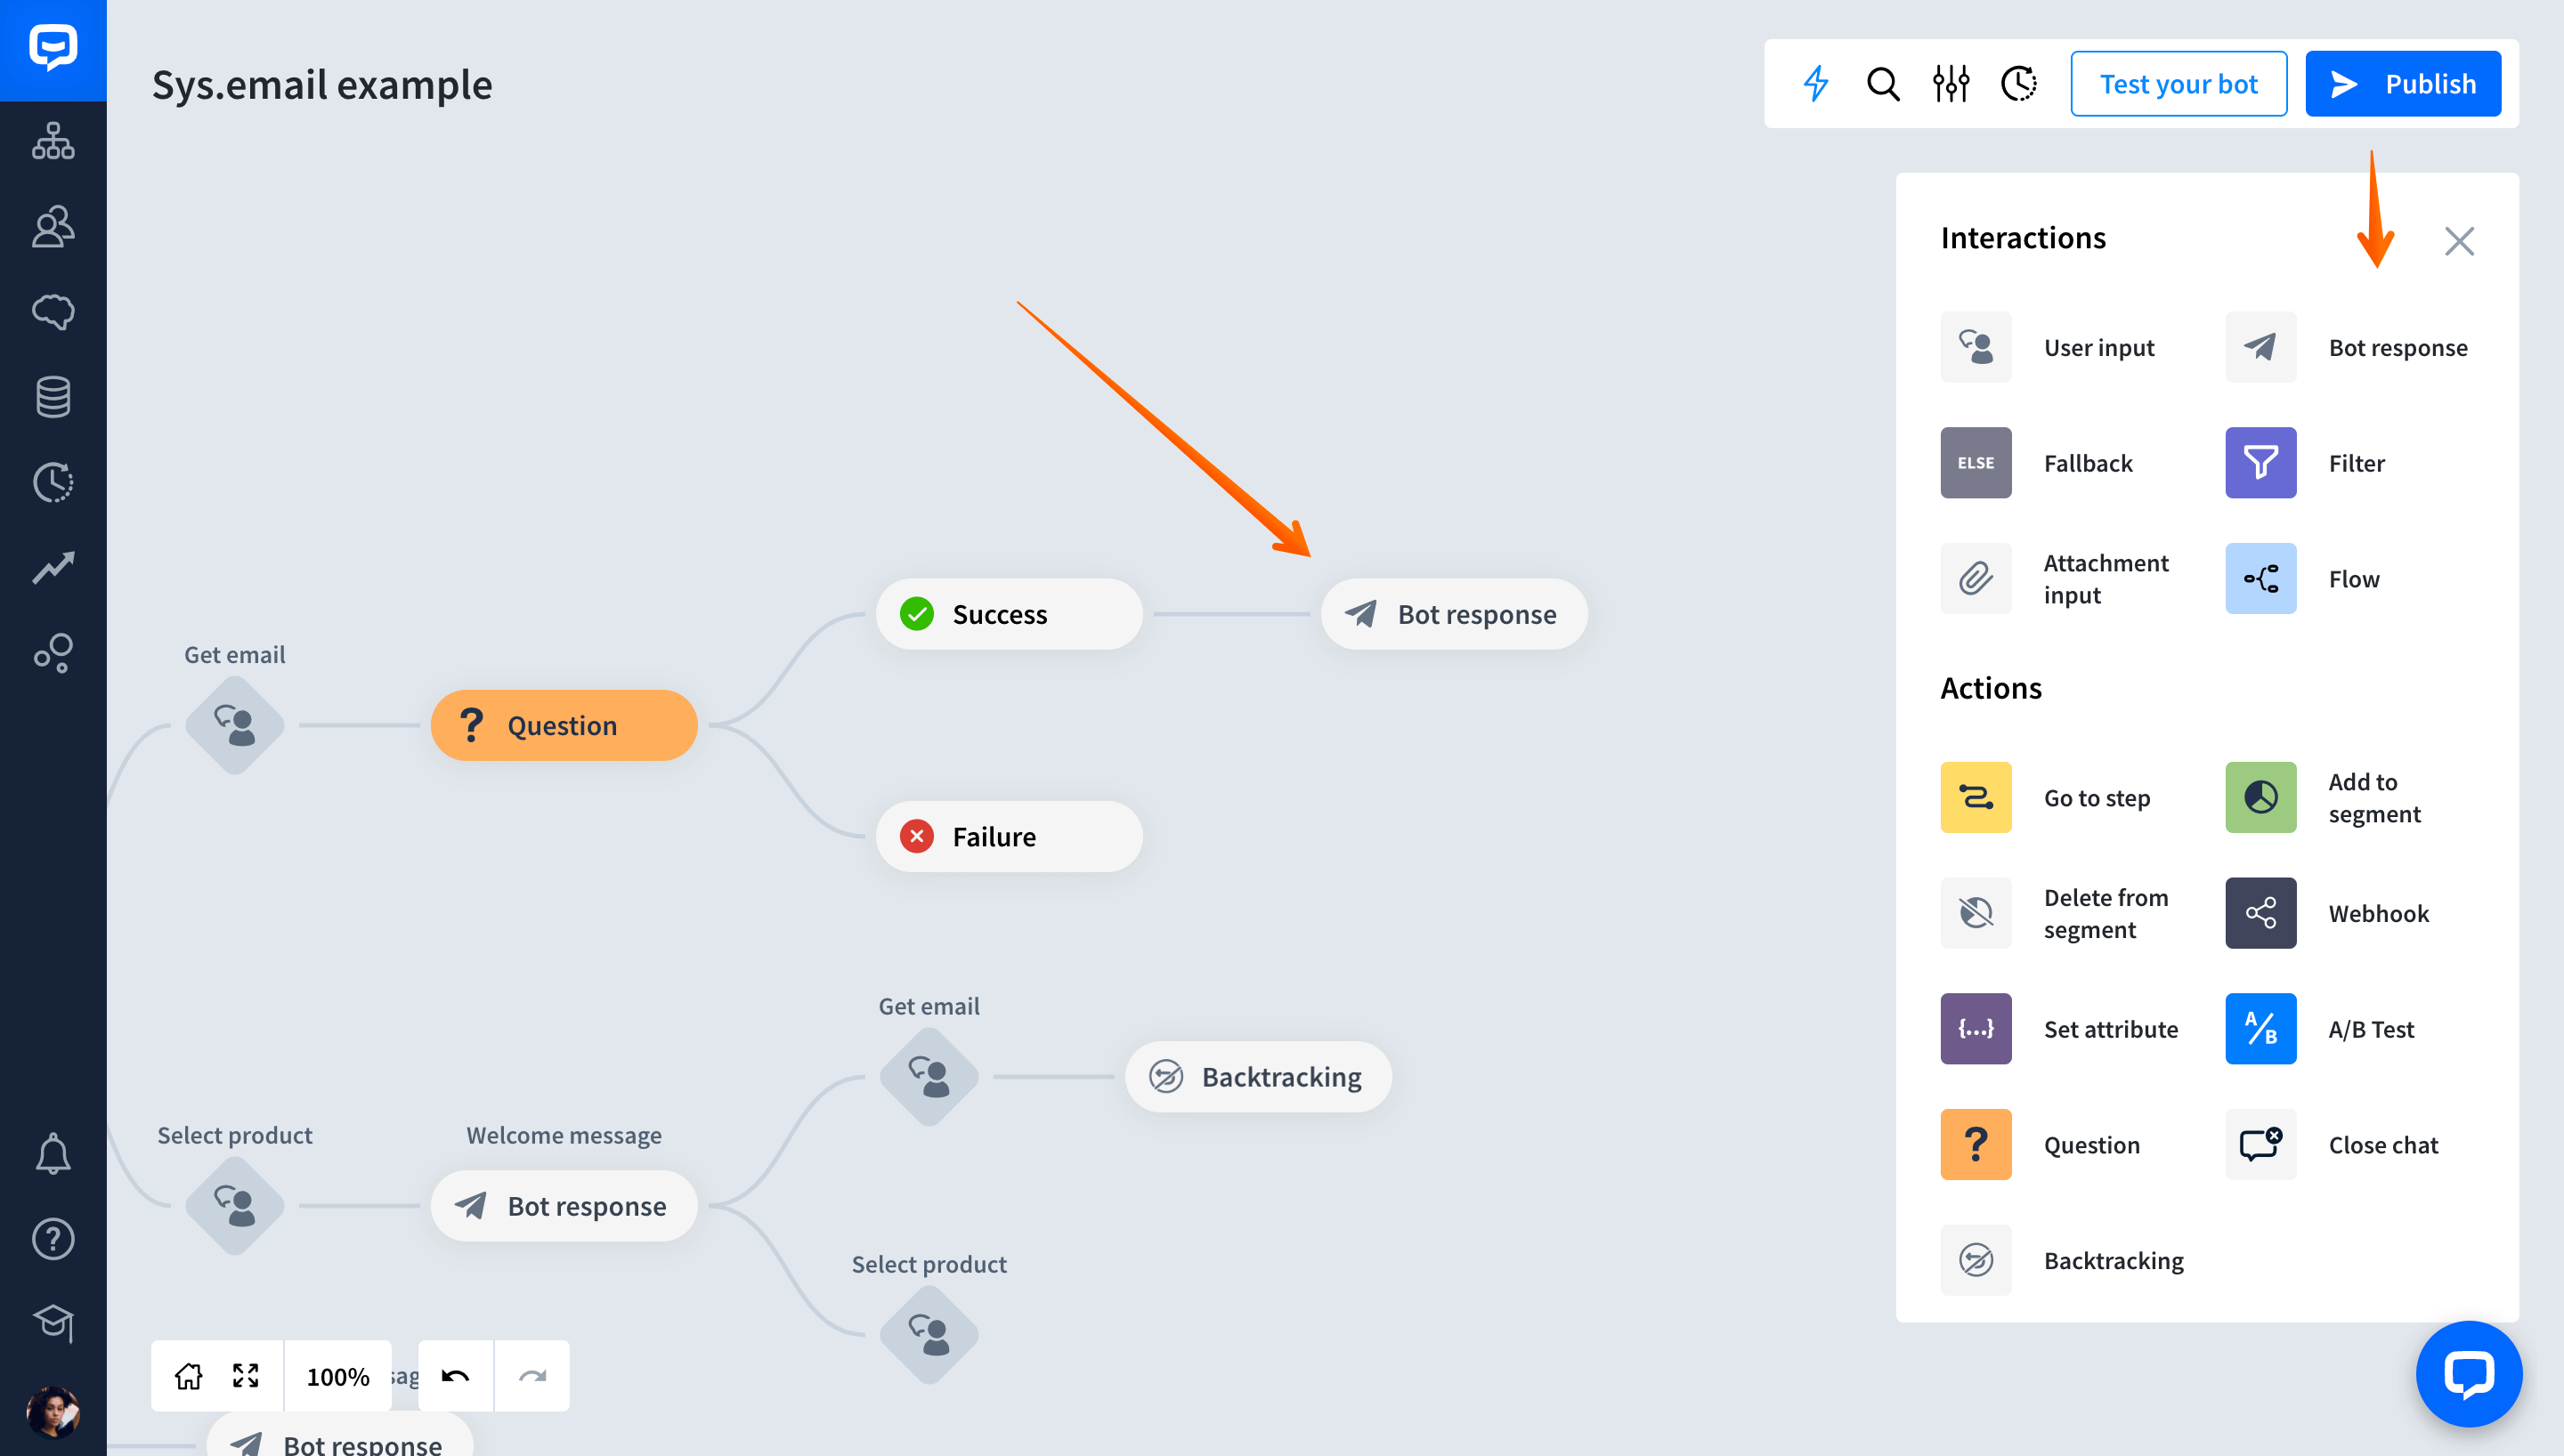
Select a Question block from the Actions and Interactions menu and add it to your Story in a place where you want to ask the user about their email.
-
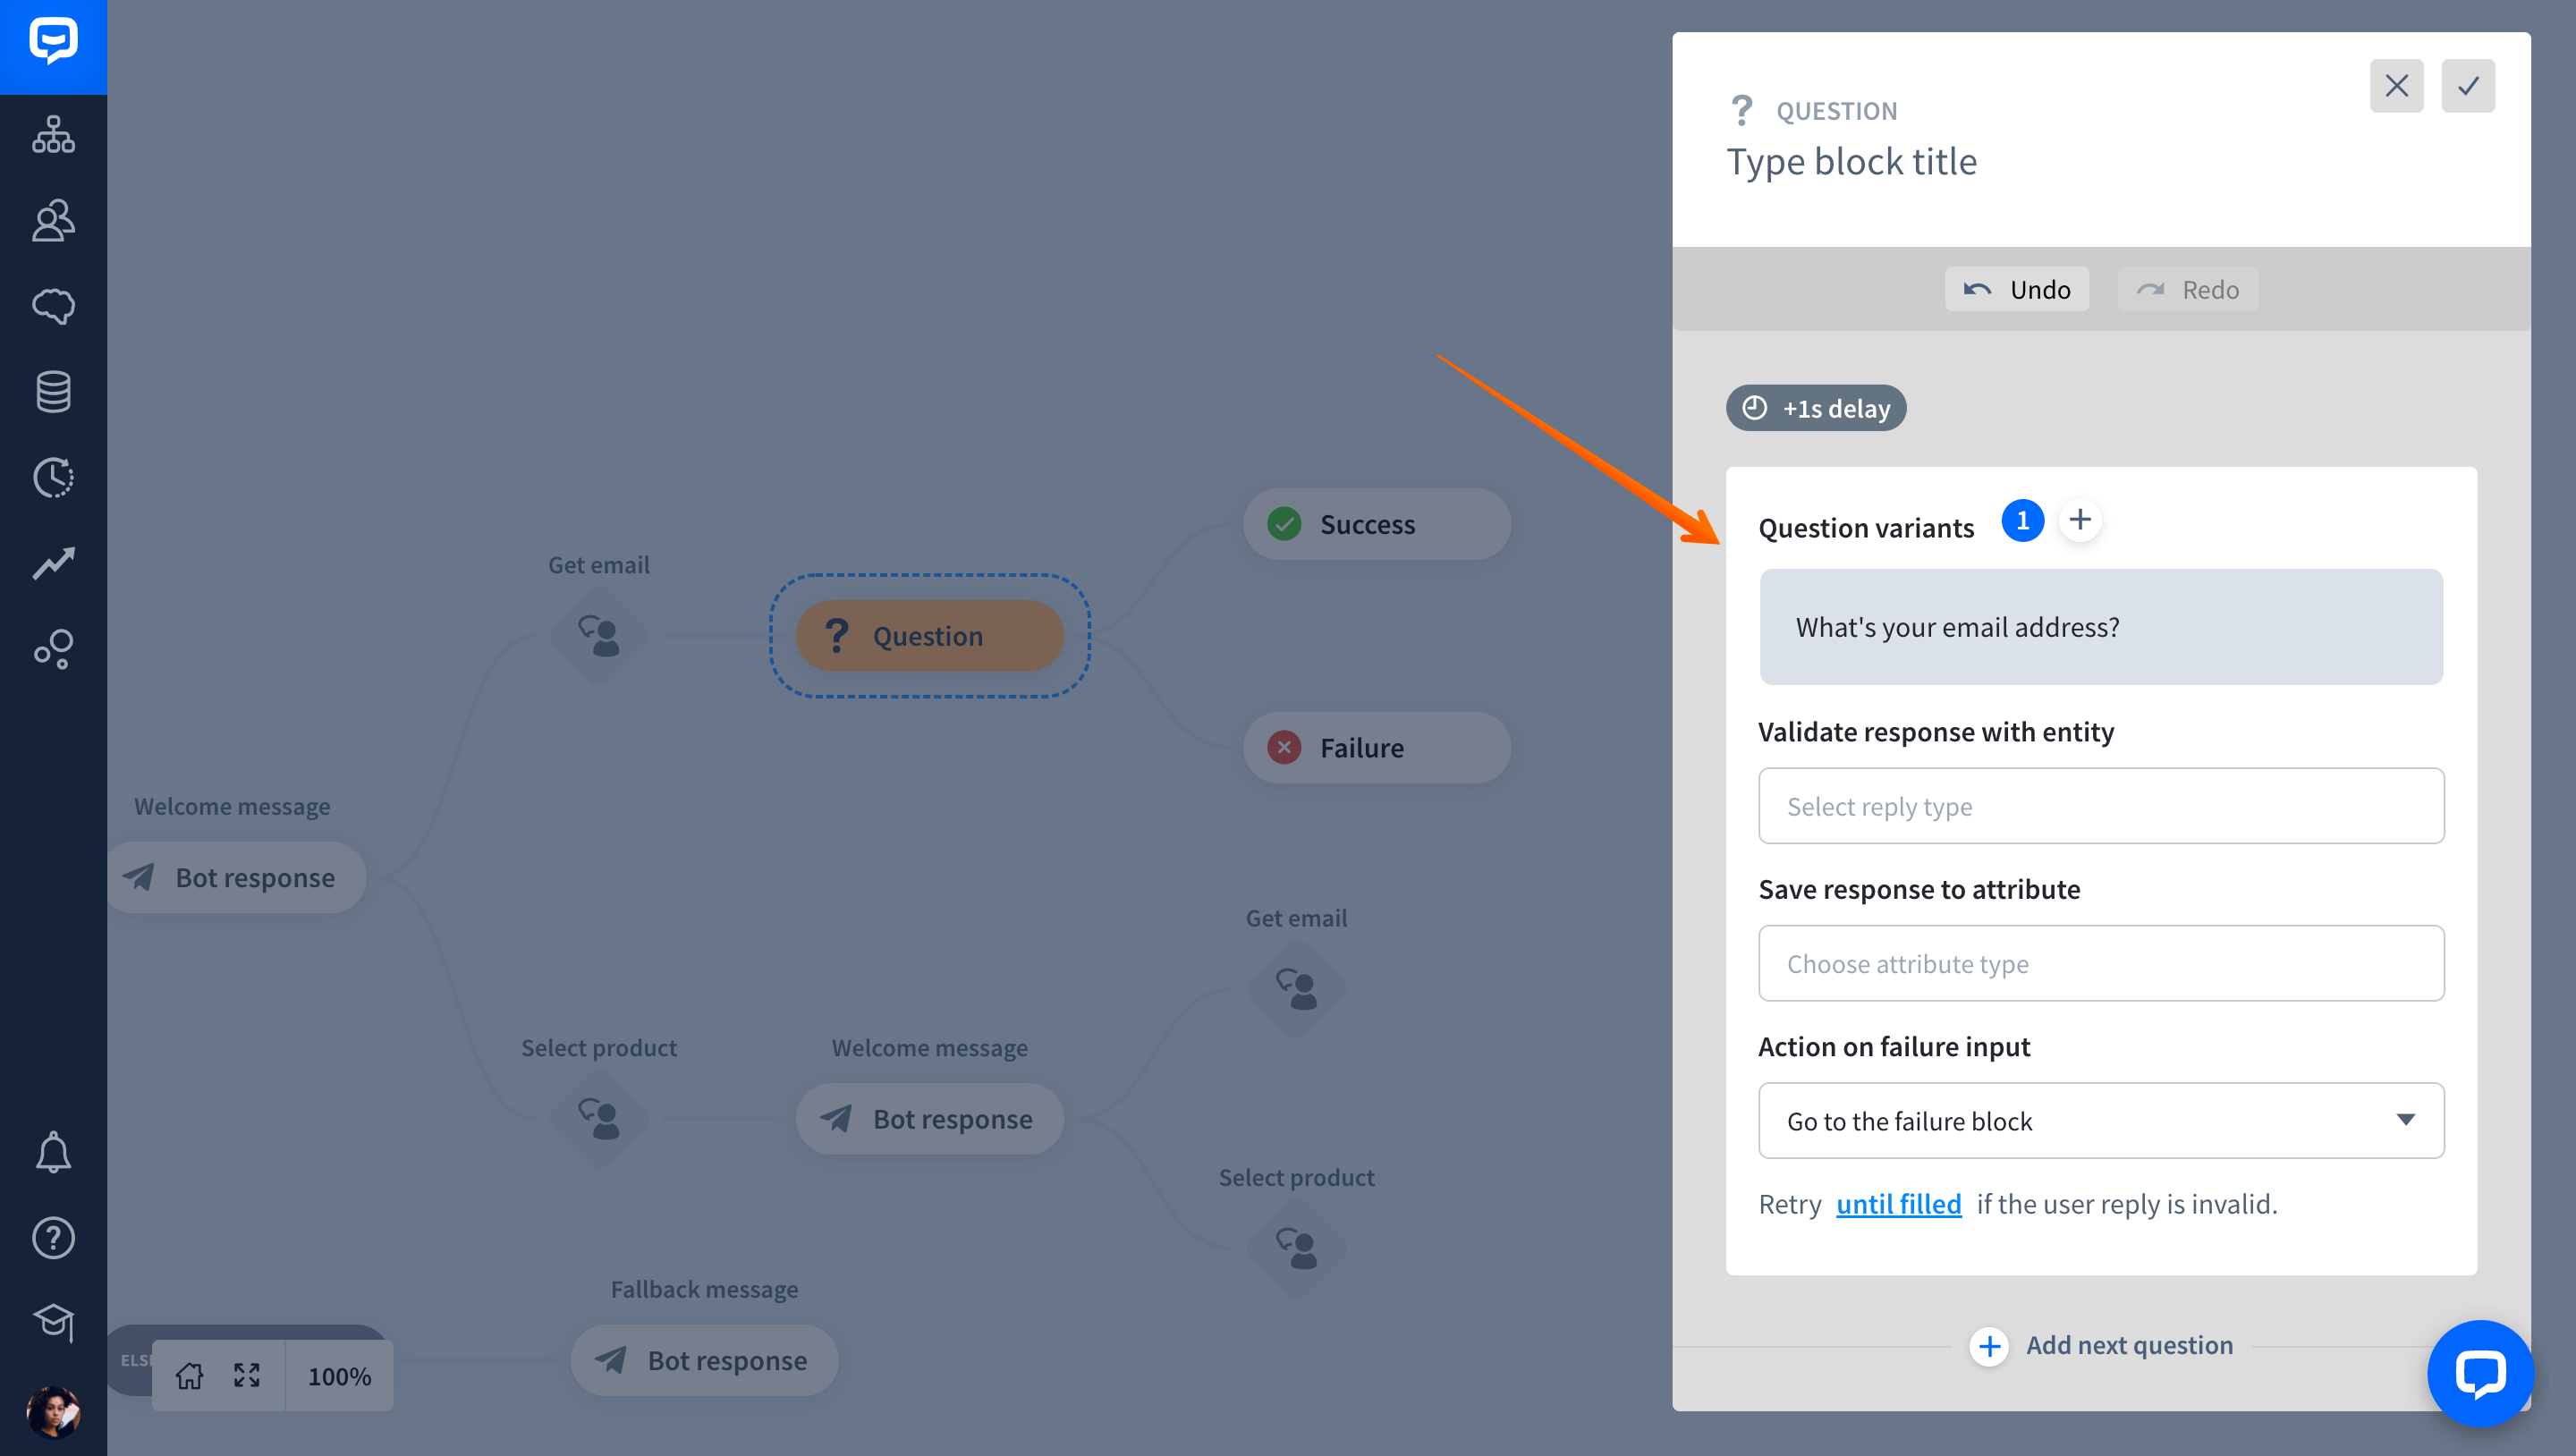
Open the Question action. In the Questions variants field, ask the user for their email. You can provide more question alternatives if needed.
-
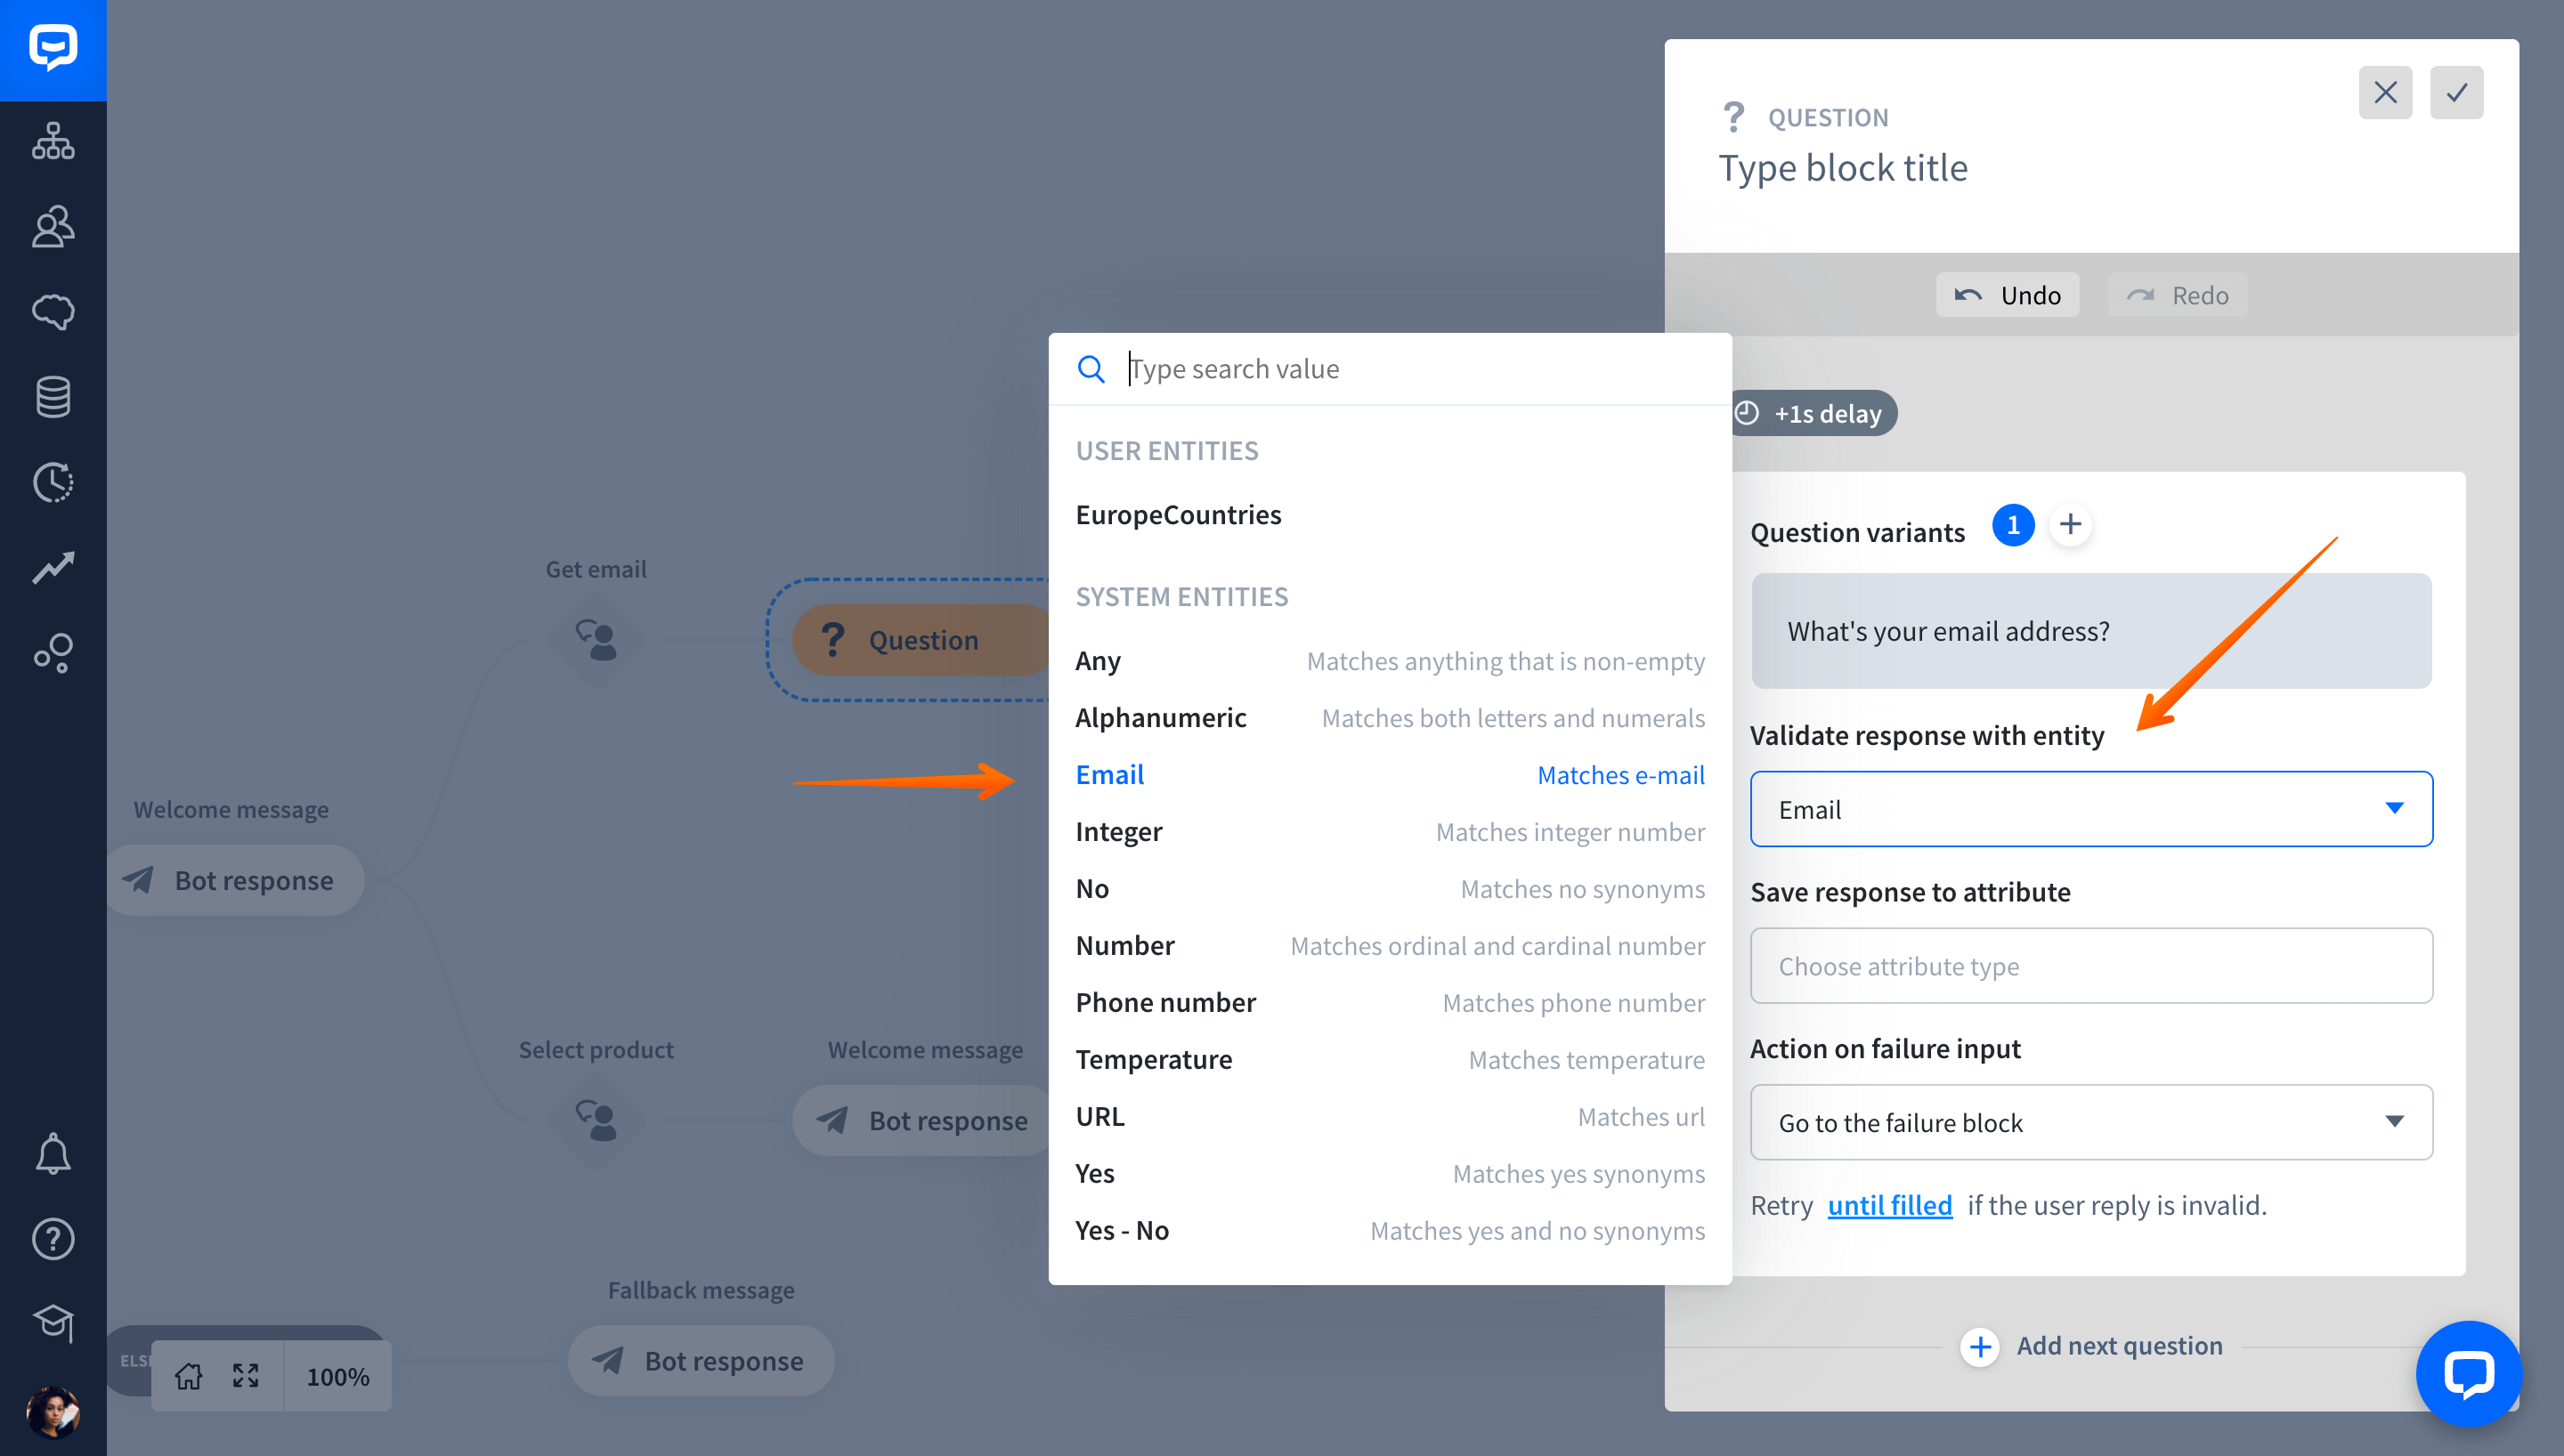
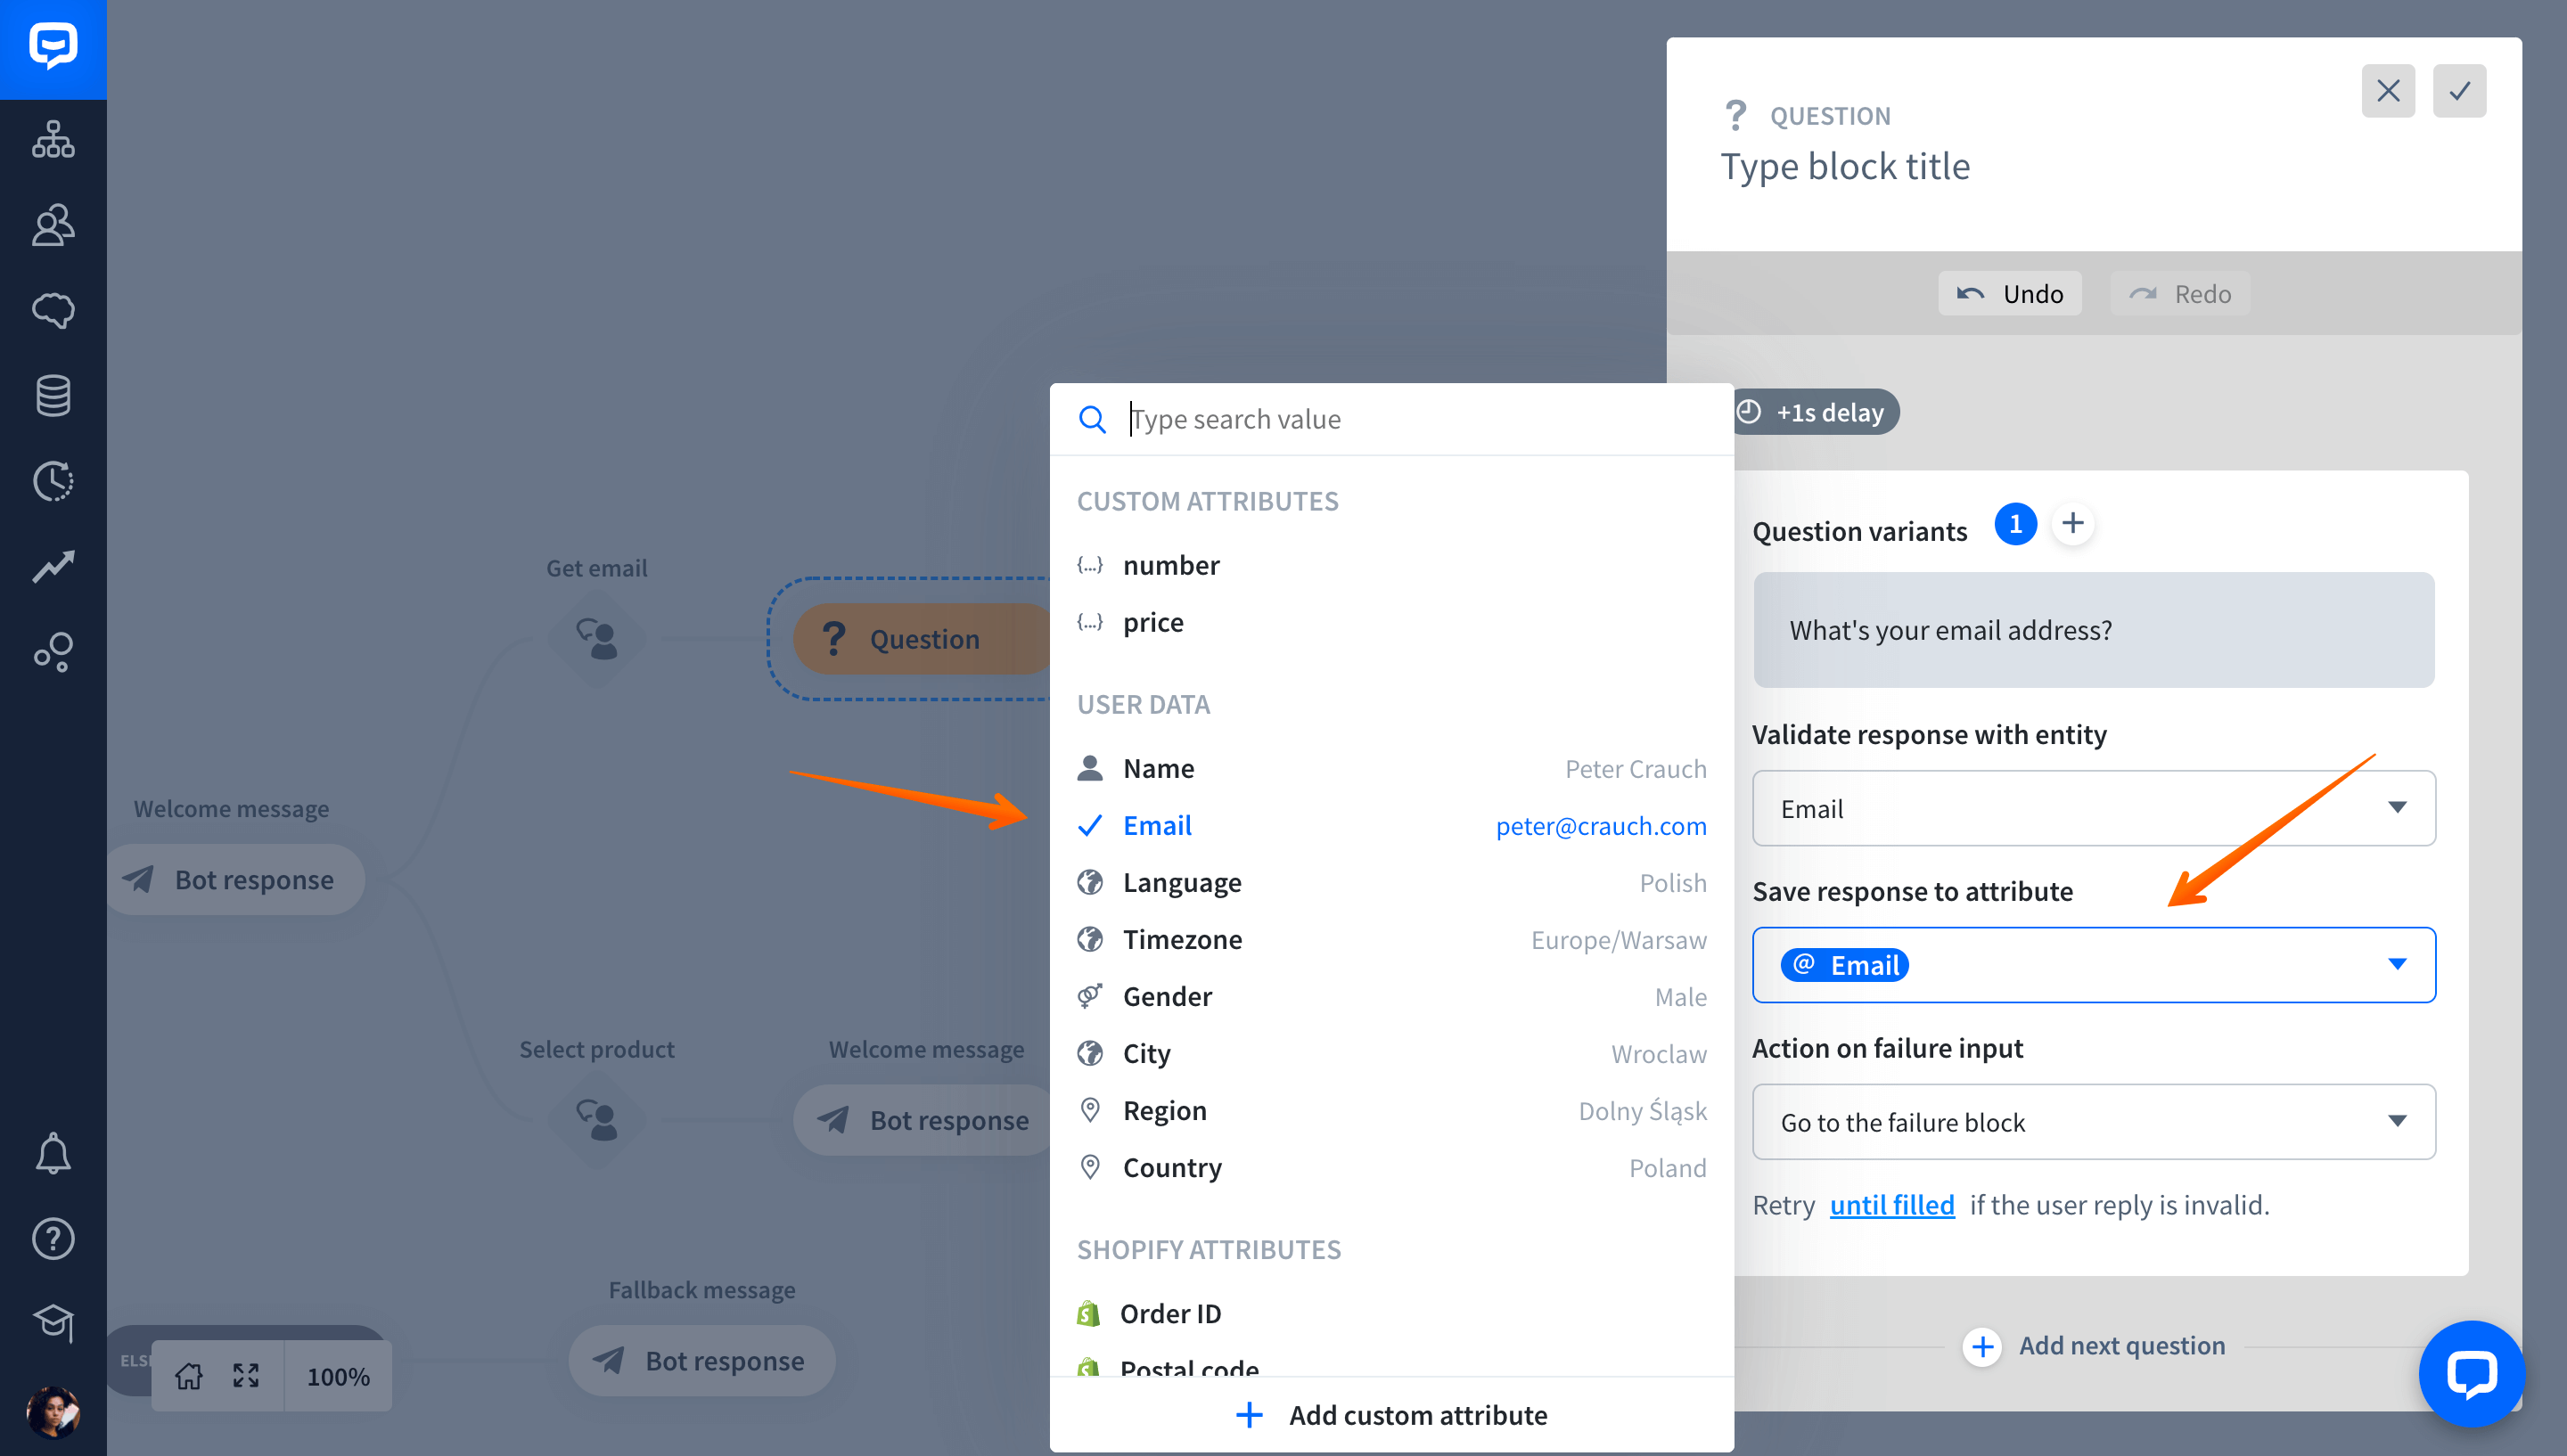
Now, verify the user response. In the Validate response with entity field, select a system Email entity.
-
Once the user reply is validated, the chatbot can save the provided data into an attribute. To do so, select the Email attribute in the Save response to attribute field.
-
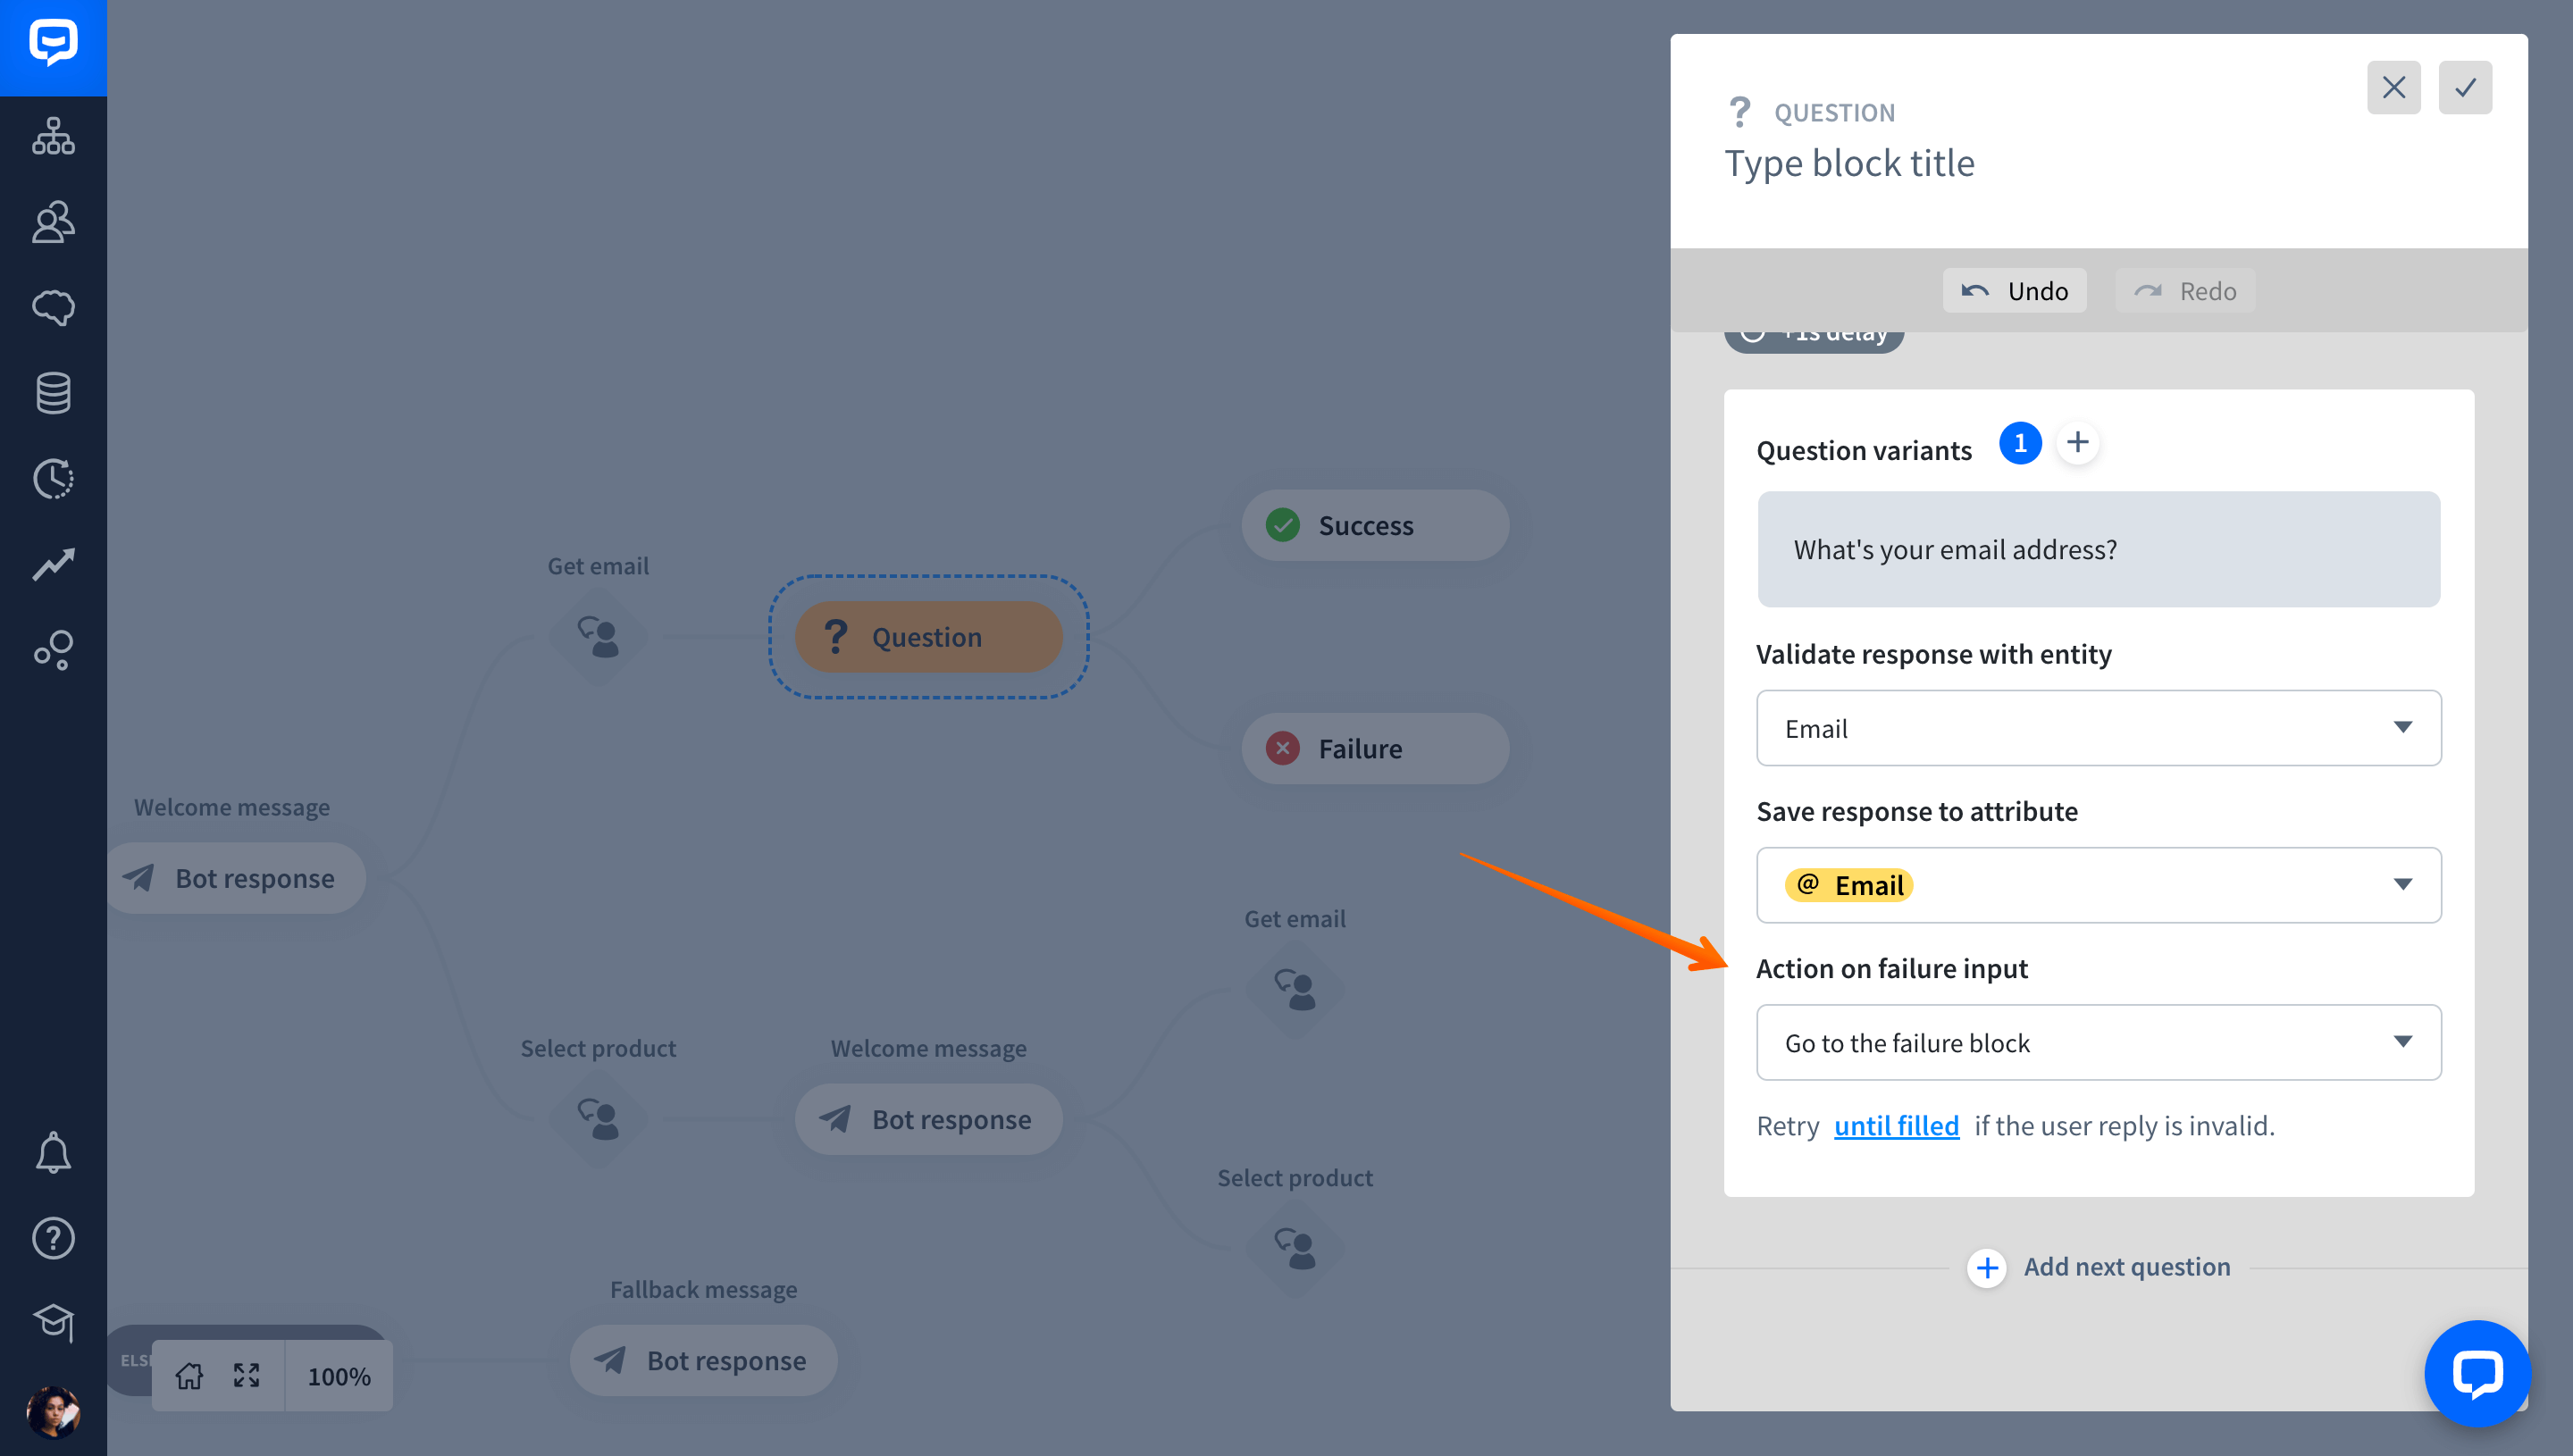
Now, you need to decide what should happen if the user provides the wrong format of an email.
-
You can also use a collected email address later in the conversation, for instance, to ensure data accuracy. To do so, add a Bot response after the Success block.
-
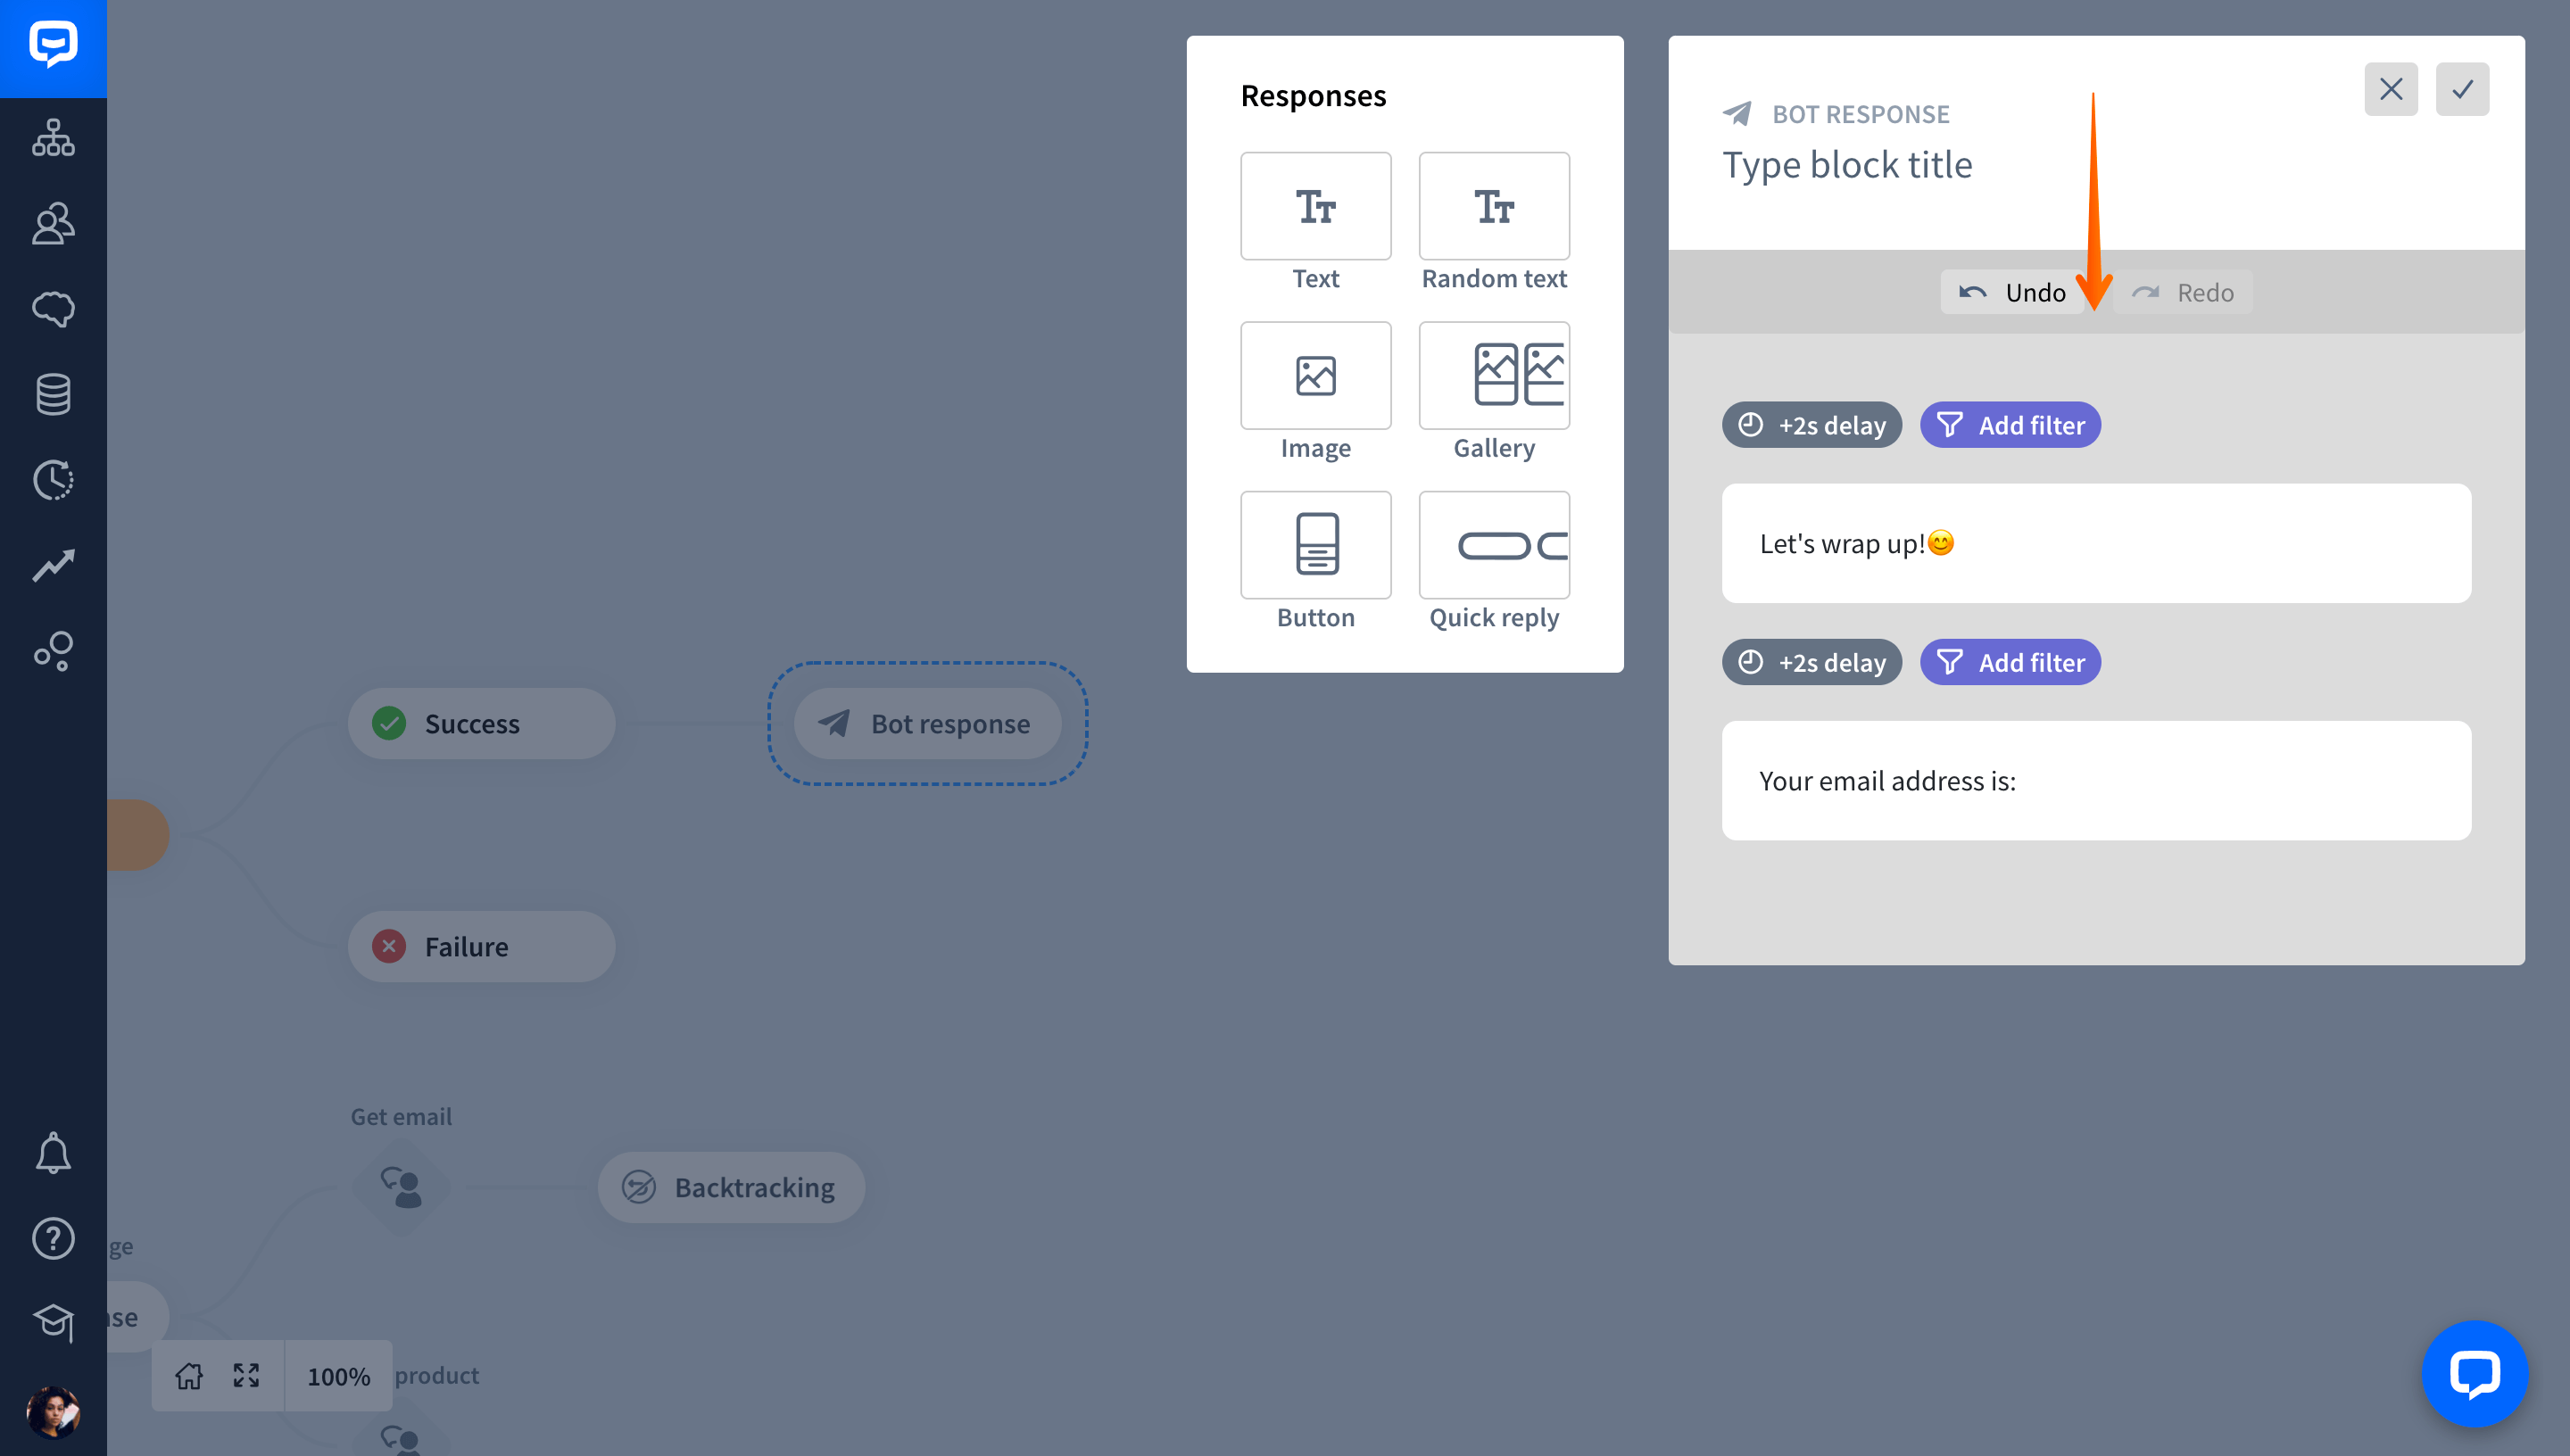
Open the Bot response and ask the user to confirm their email address.
-
Select the curly brackets icon and add the Email attribute from the list. This way, the chatbot will display the user’s email address in a conversation.

-
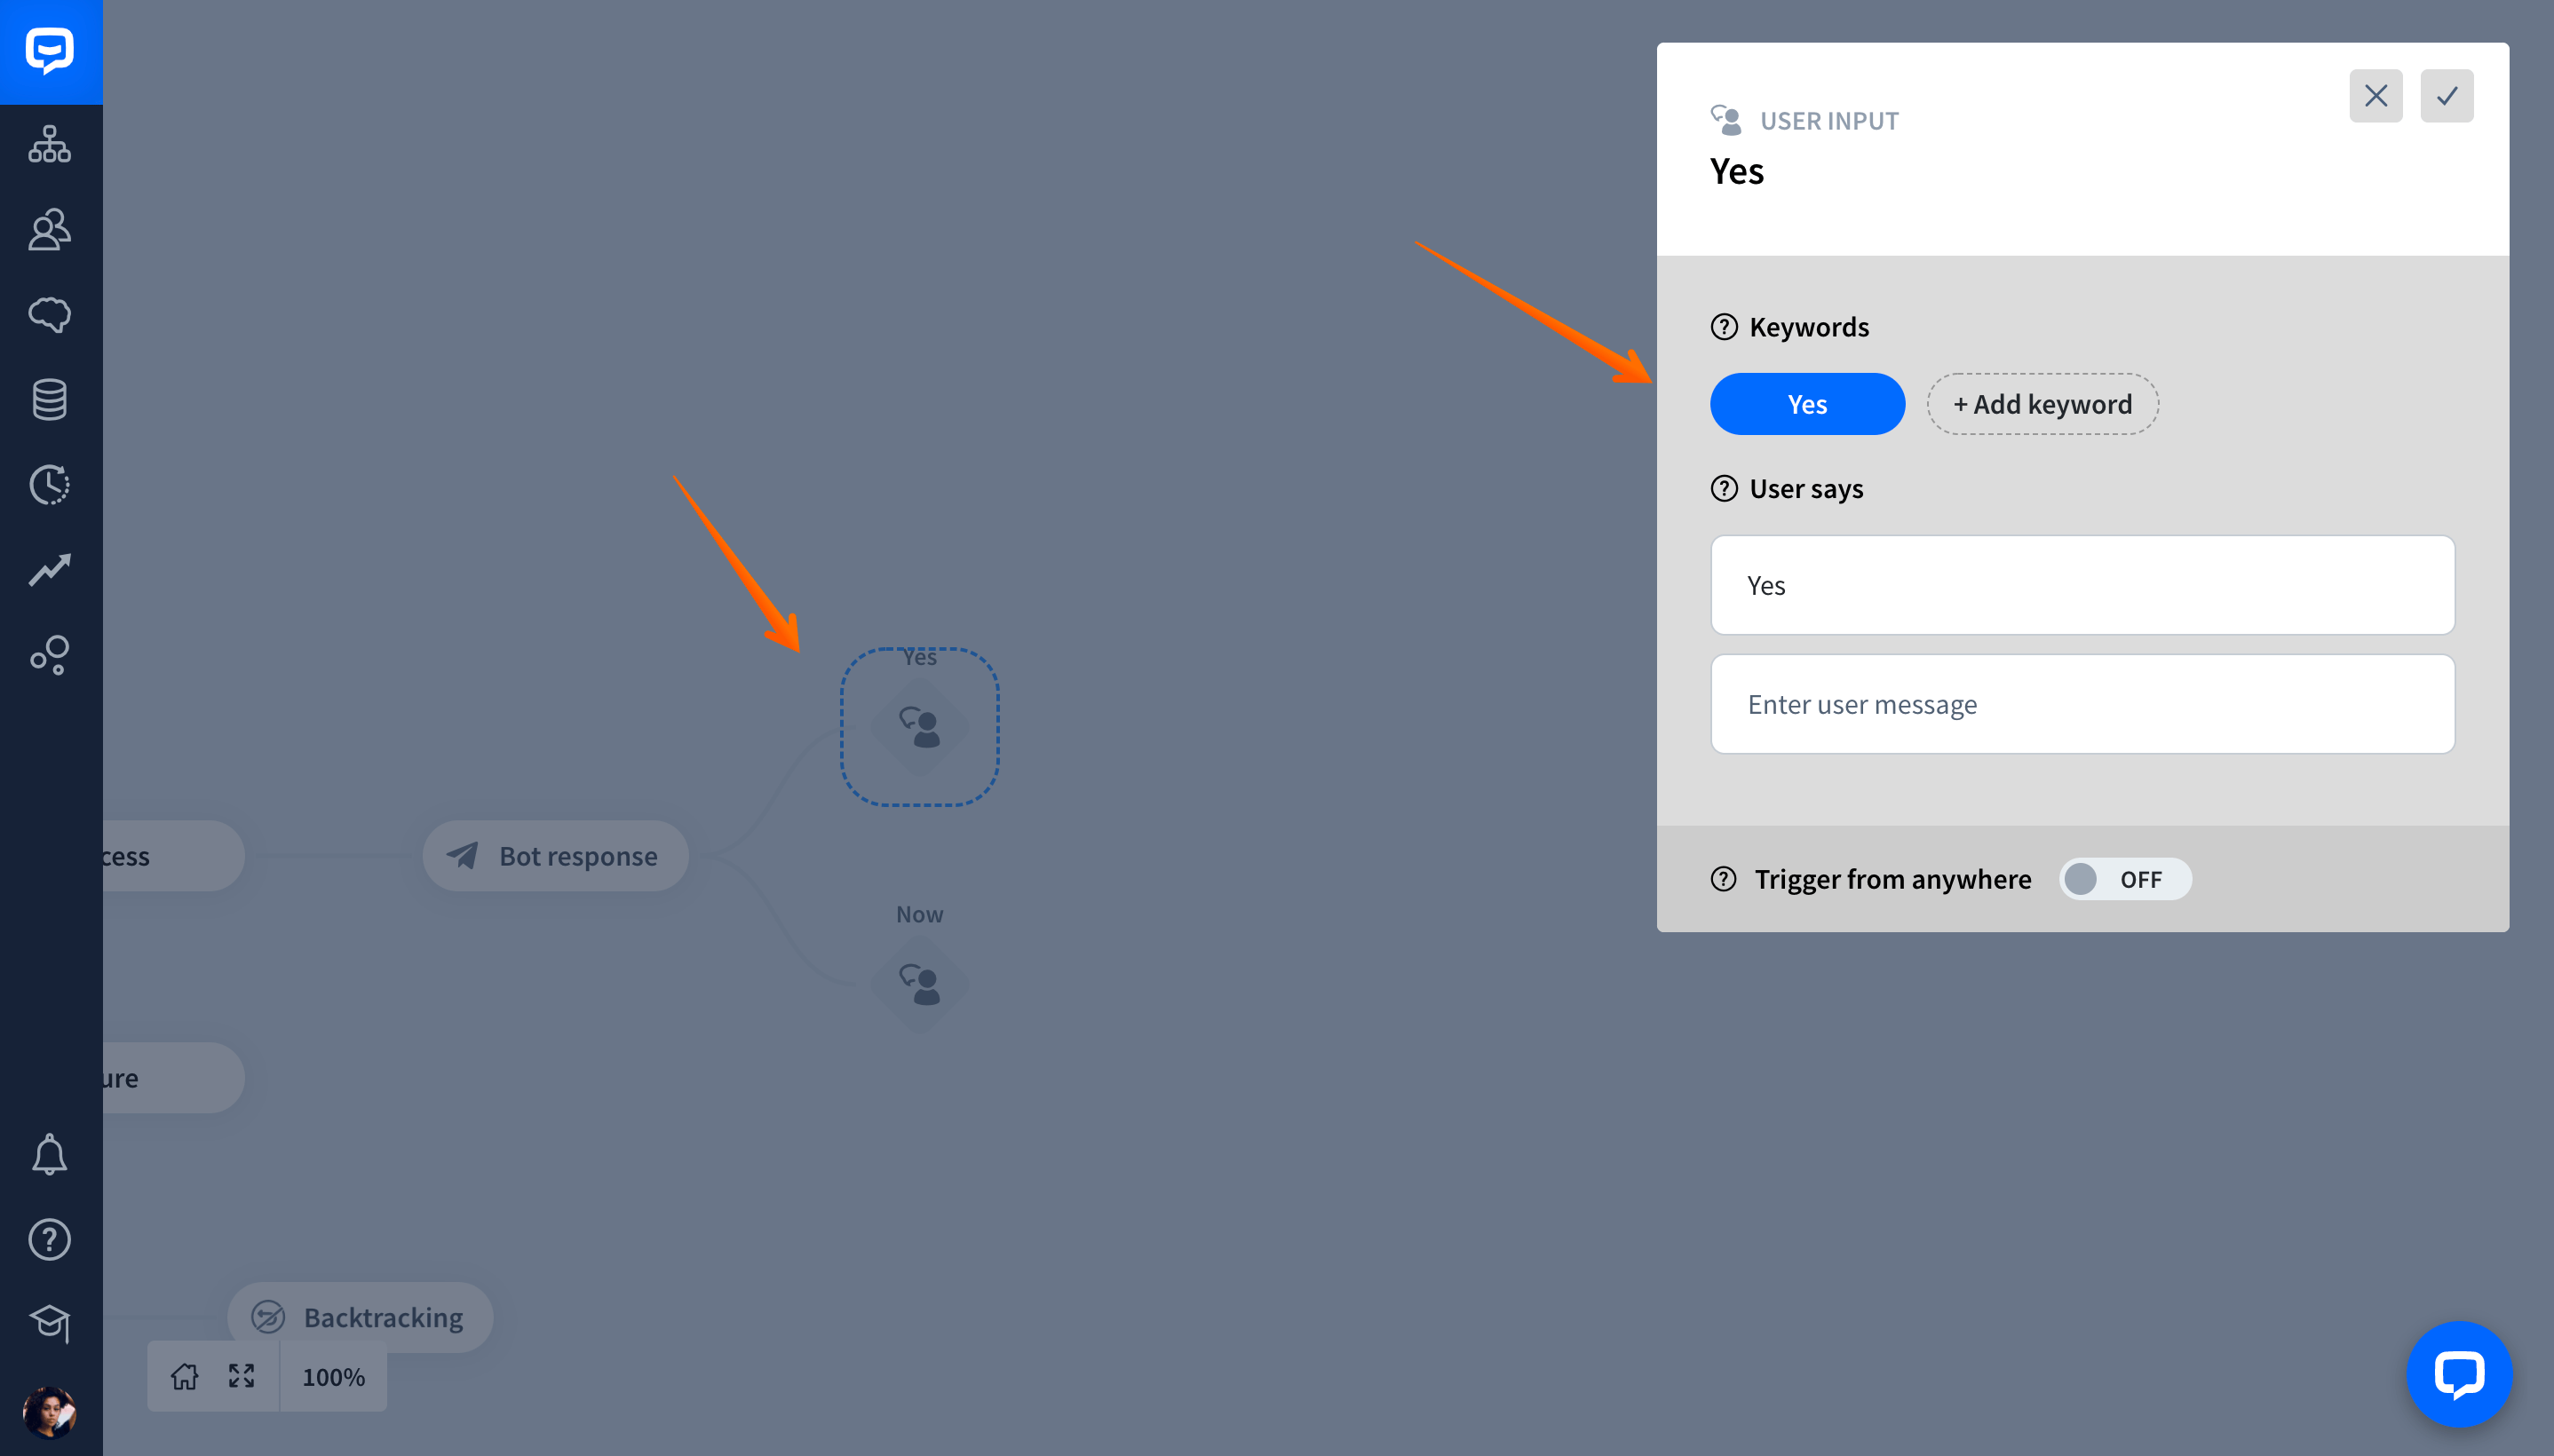
You can now add the User input block after the Bot response to let the user confirm their email. Then, continue your Story the way you want.
-
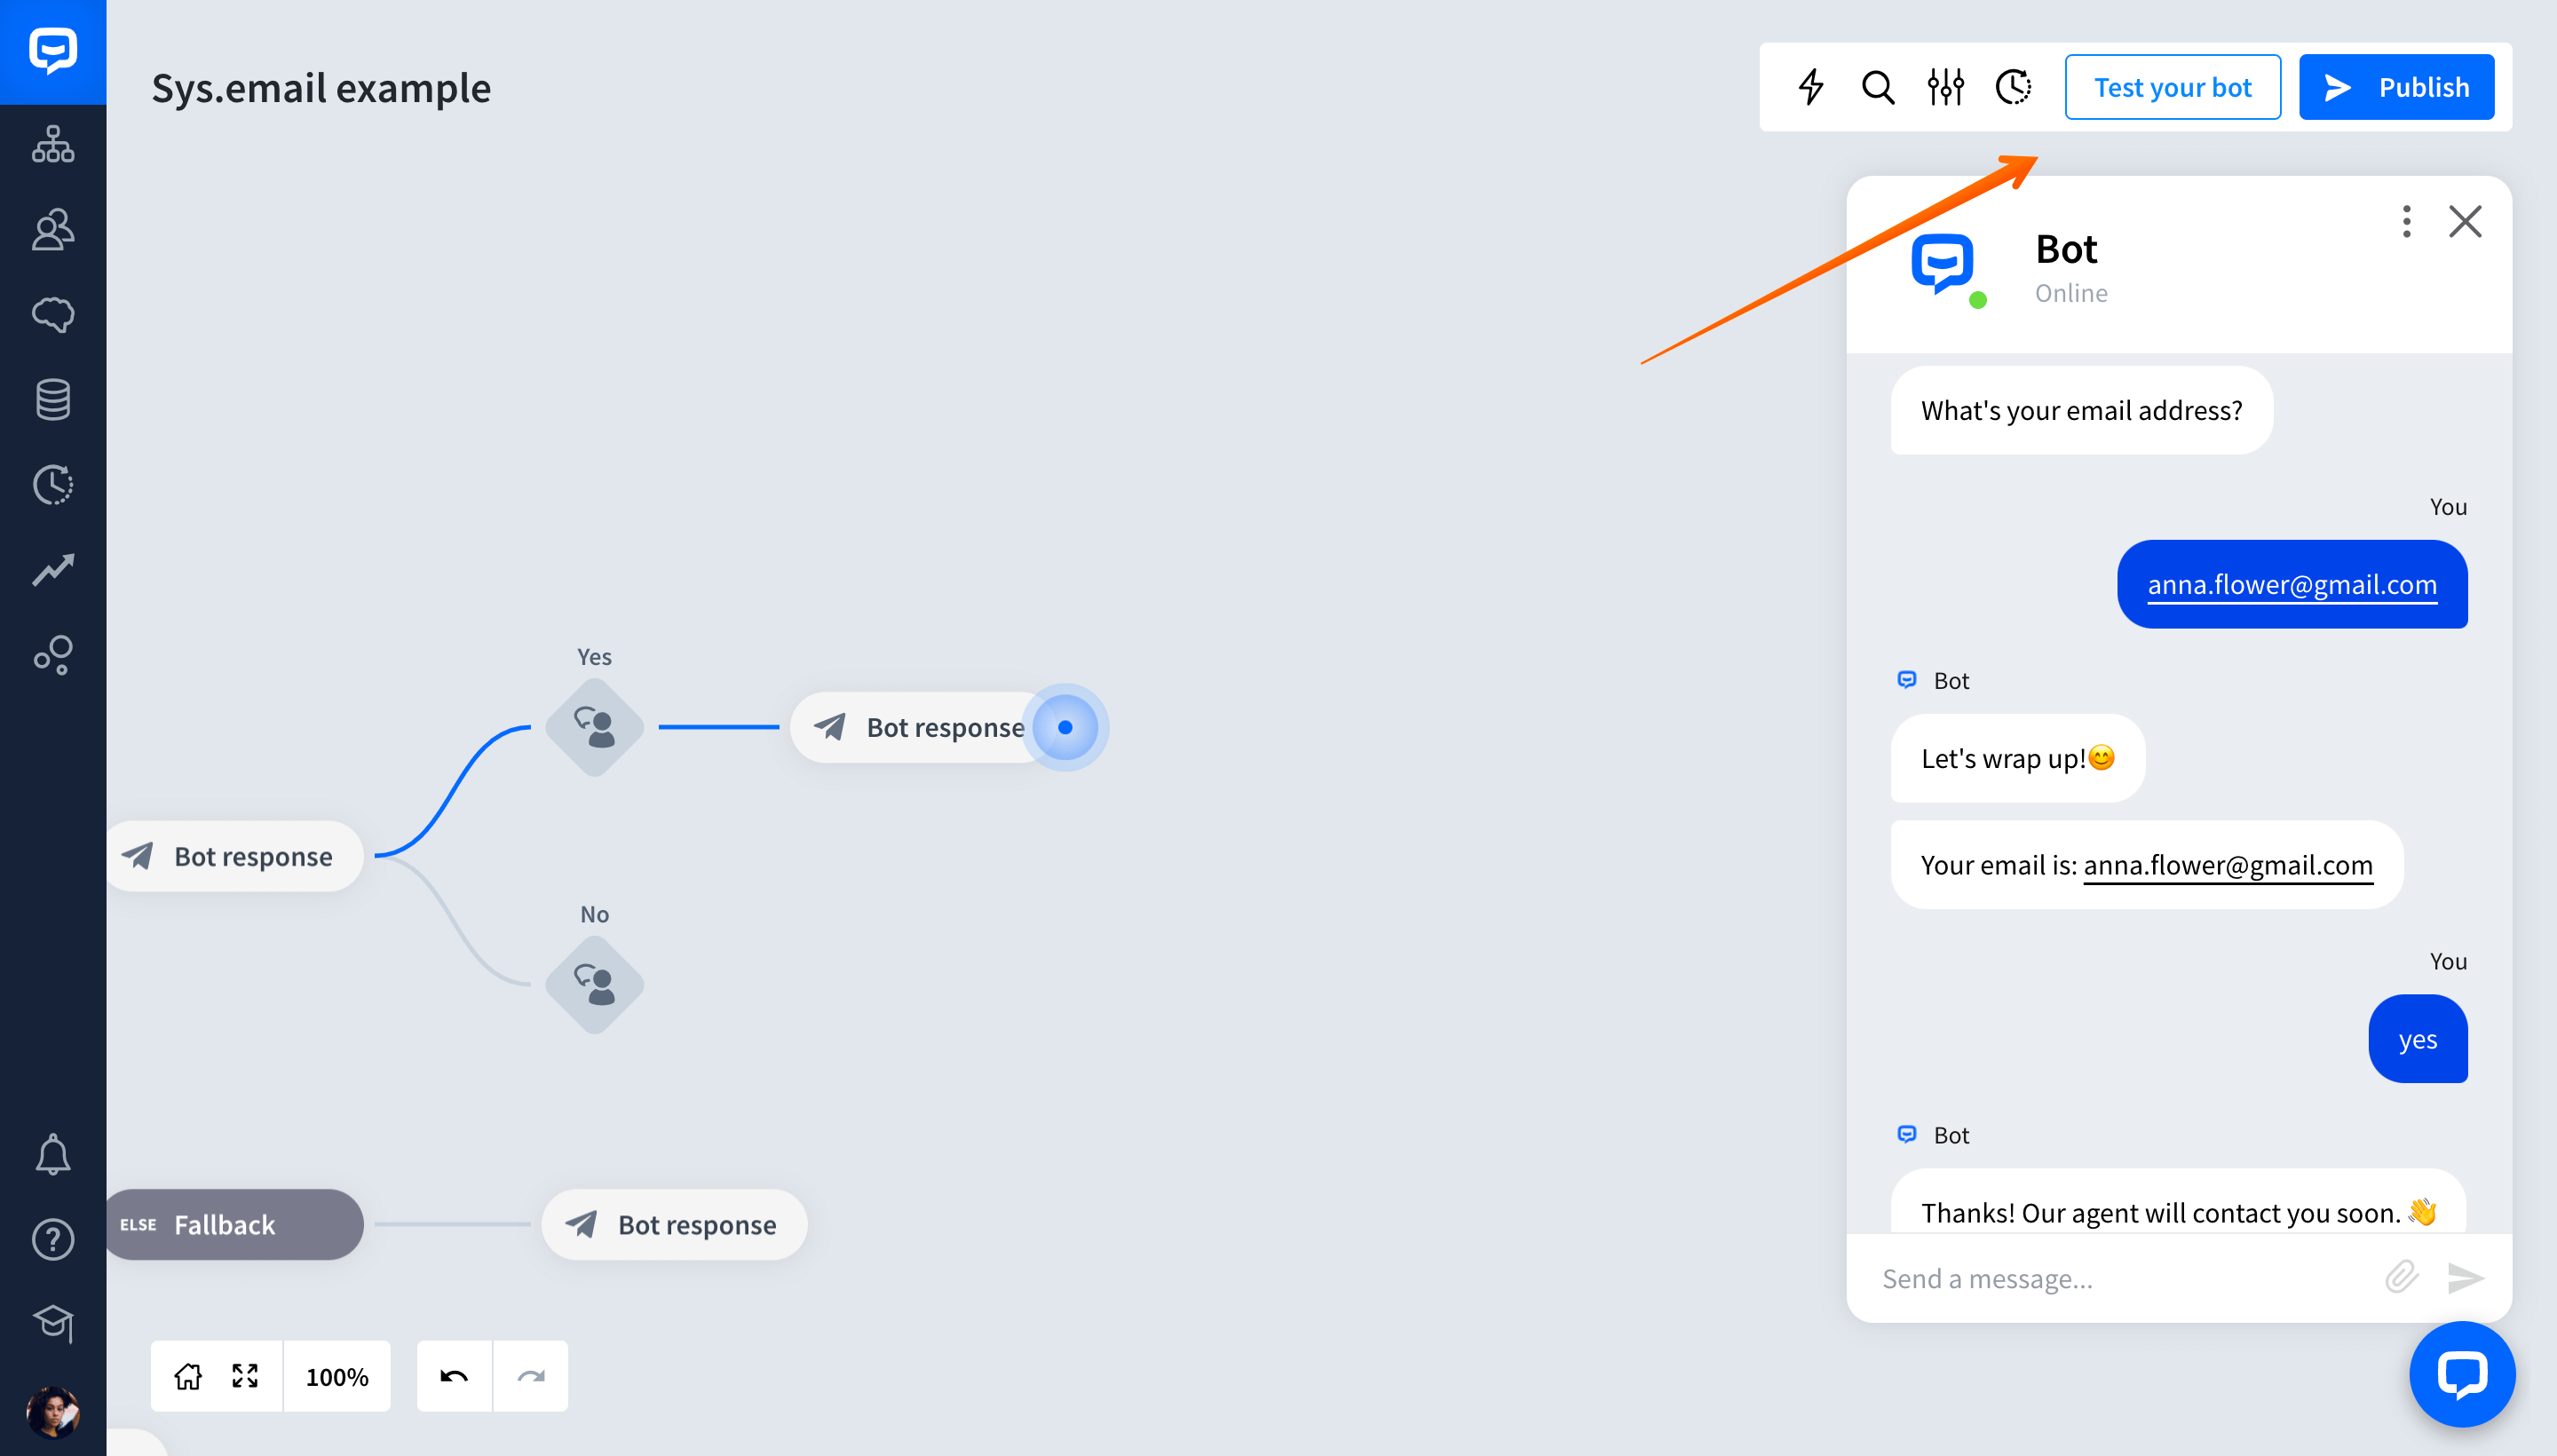
Finally, open the Testing tool and check whether your chatbot works as intended.
Read more:
